> ## Documentation Index
> Fetch the complete documentation index at: https://help.fieldpulse.com/llms.txt
> Use this file to discover all available pages before exploring further.
# Geofences in Pulse Fleet Tracking
> Draw virtual boundaries around job sites and offices to auto-log vehicle arrivals and departures, trigger alerts, and pull location history.
# Overview
Geofences let you set virtual boundaries around locations like job sites, customer addresses, or your office. When a vehicle enters or exits a geofence, it's automatically logged and you can set up alerts and run reports to see the full history.
***
# Accessing Pulse Fleet Tracking
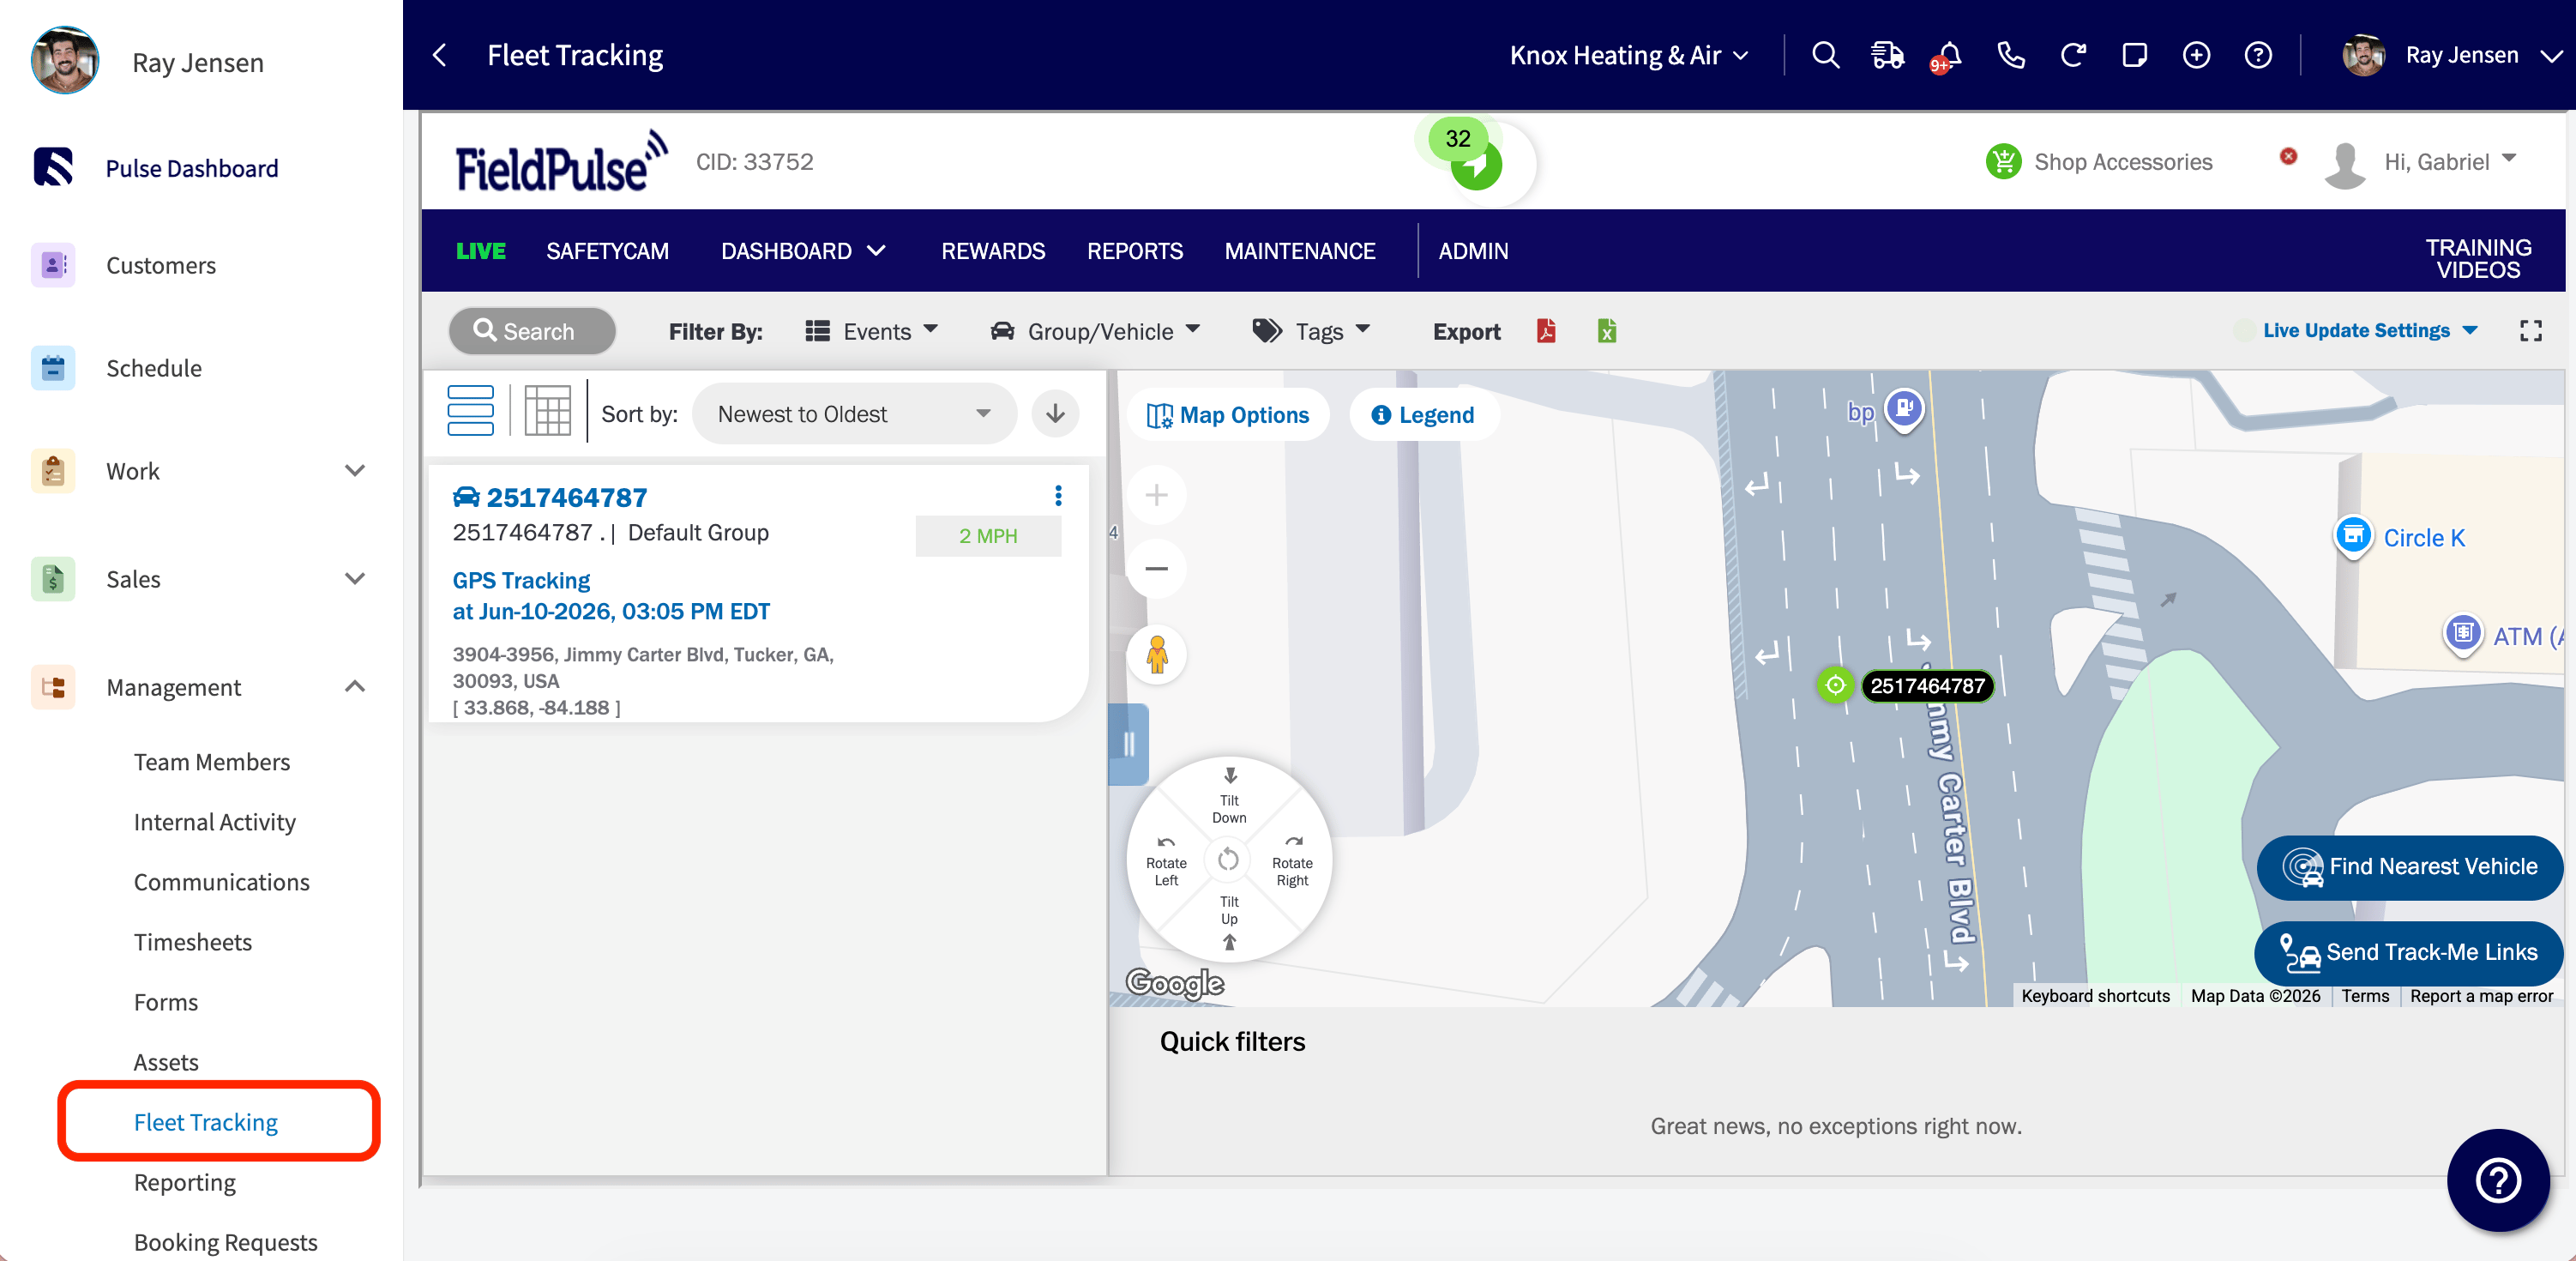
From the left-side navigation in FieldPulse, select *Fleet Tracking* under *Management*. This opens your Pulse Fleet Tracking account.
 ***
# Creating a Geofence
## Step 1
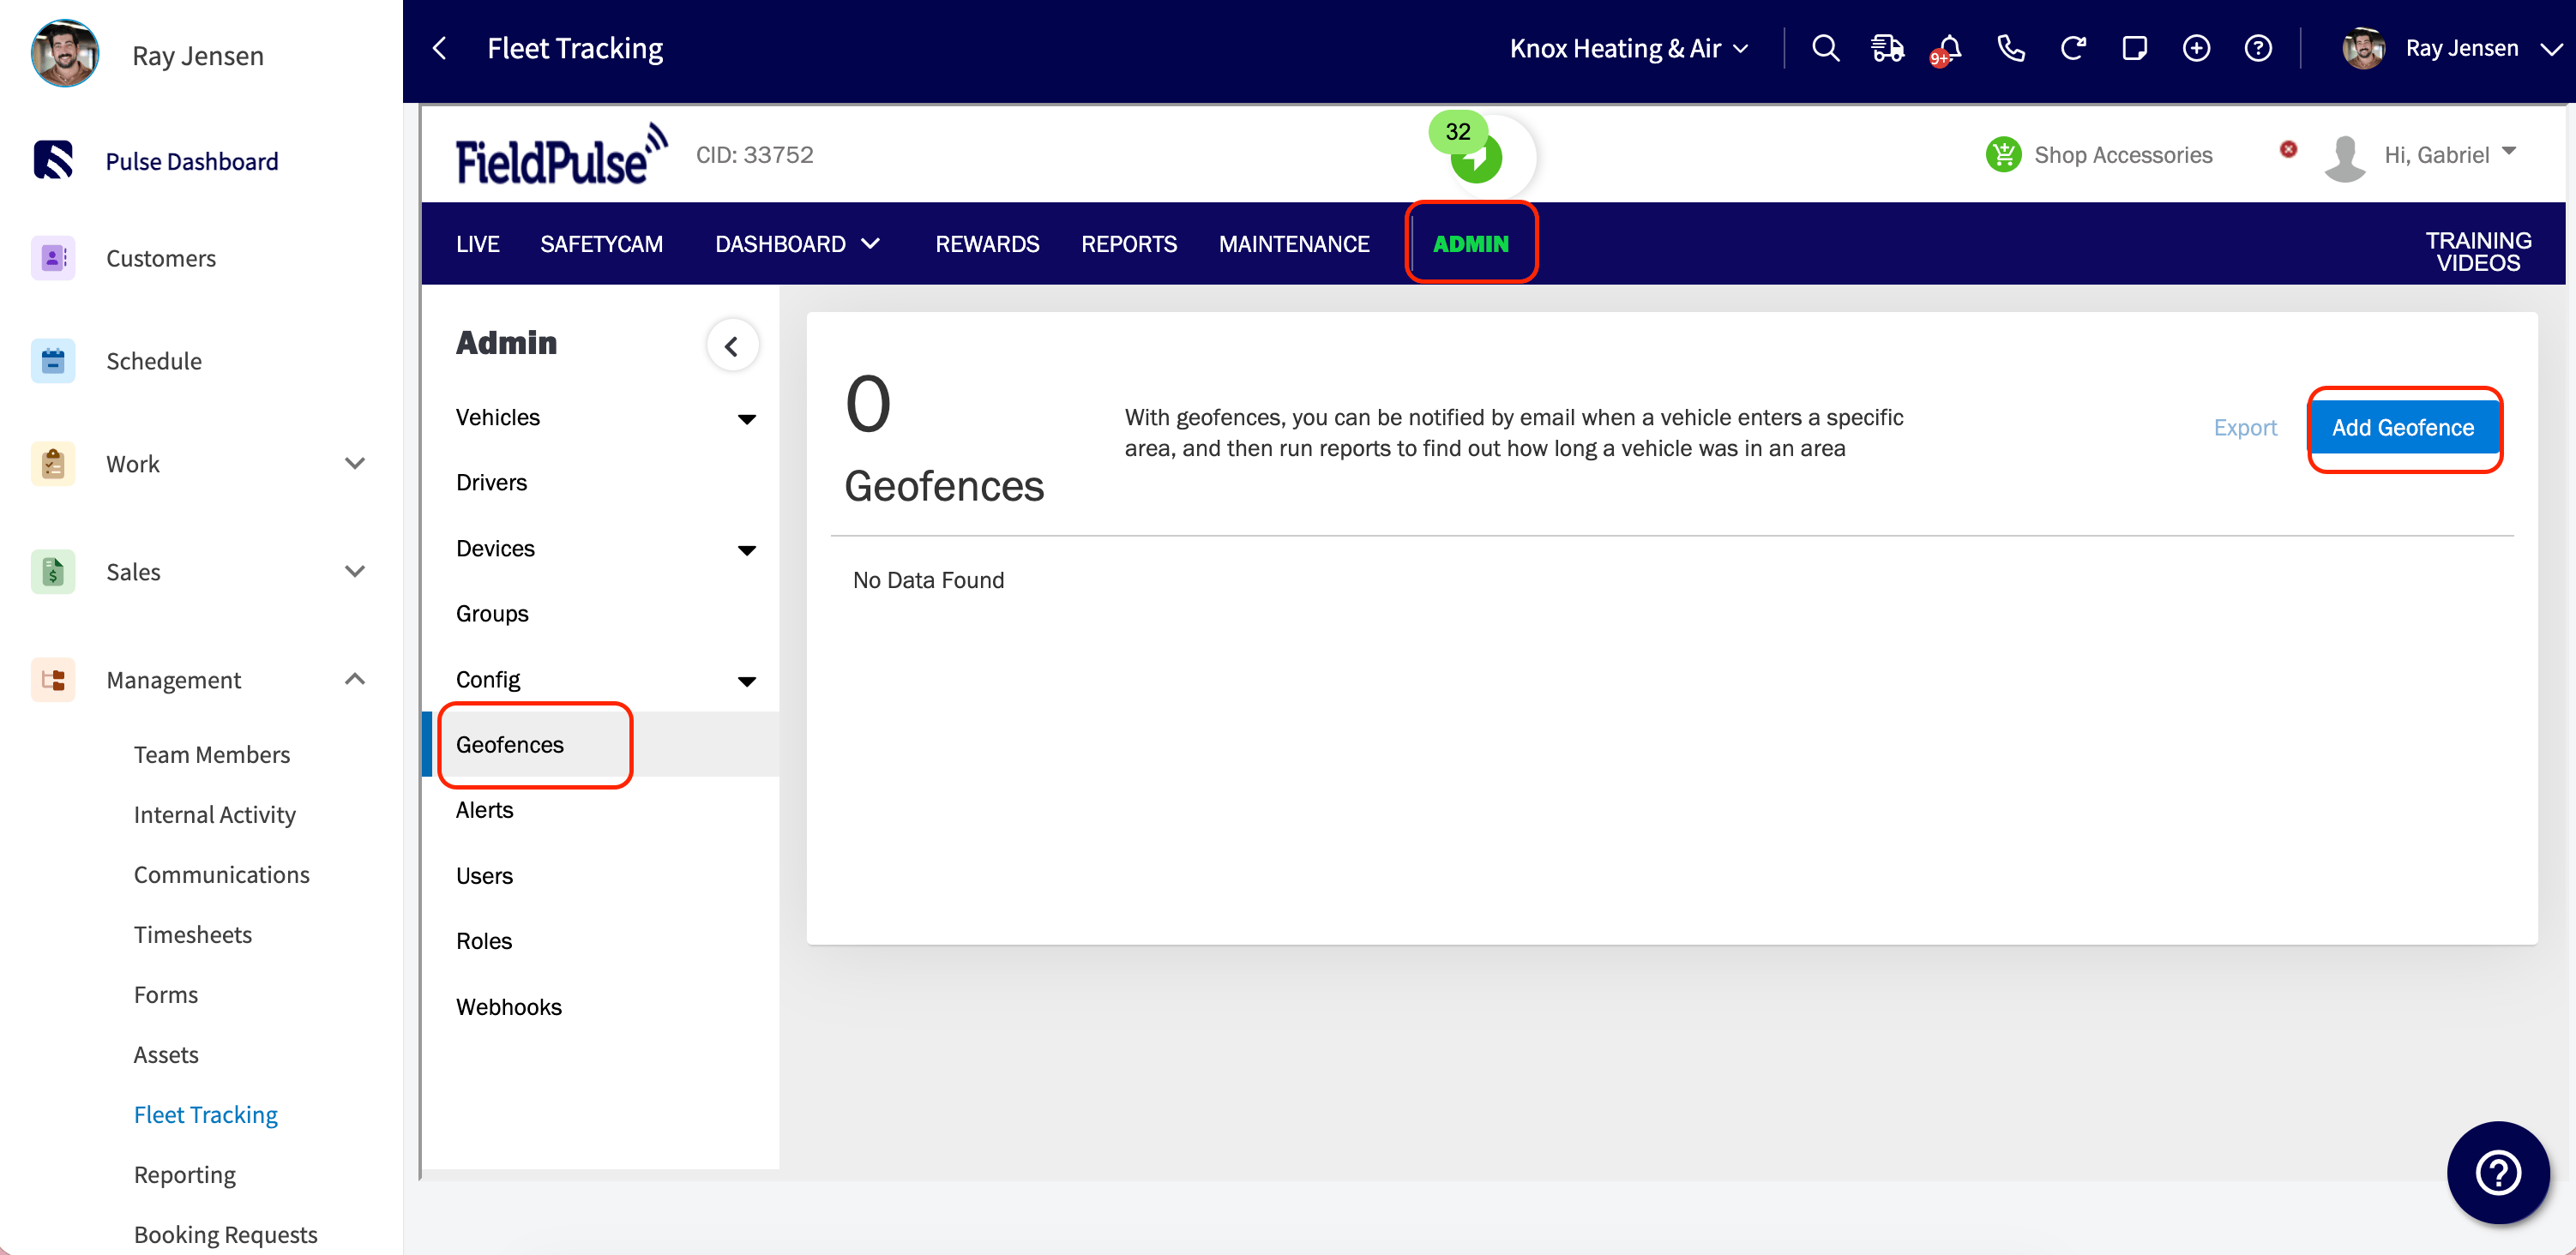
Navigate to *Admin* > *Geofences* and click *Add Geofence*.
***
# Creating a Geofence
## Step 1
Navigate to *Admin* > *Geofences* and click *Add Geofence*.
 ## Step 2
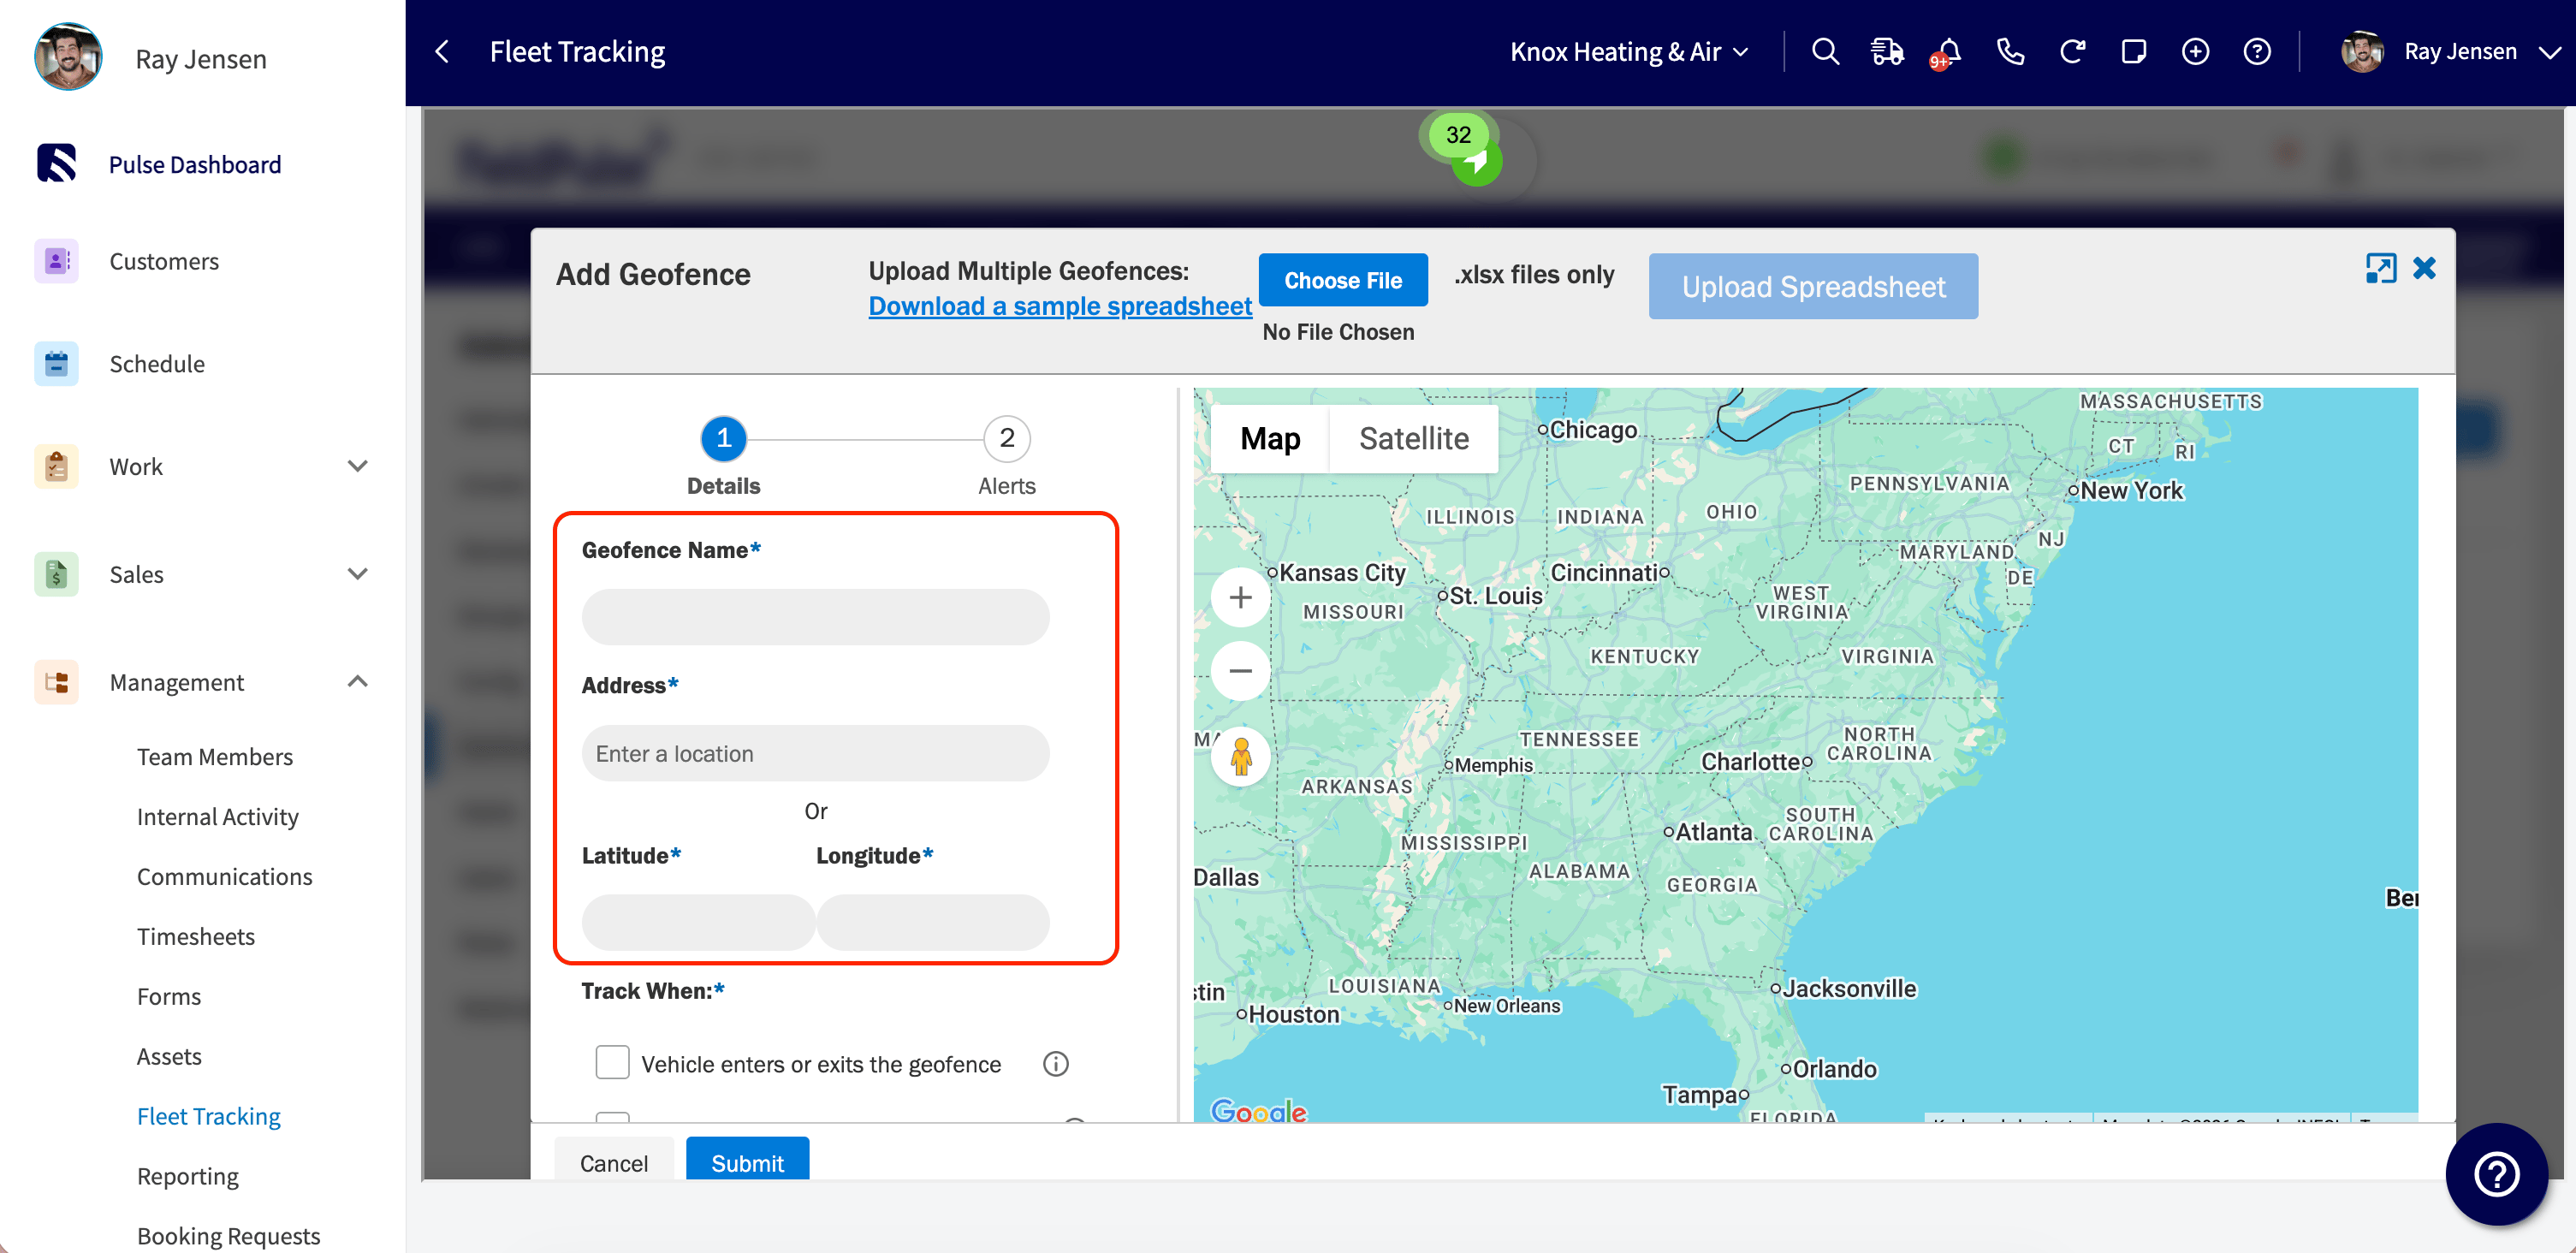
Enter a name and address for the geofence. You can use a street address or latitude/longitude coordinates.
## Step 2
Enter a name and address for the geofence. You can use a street address or latitude/longitude coordinates.
 ## Step 3
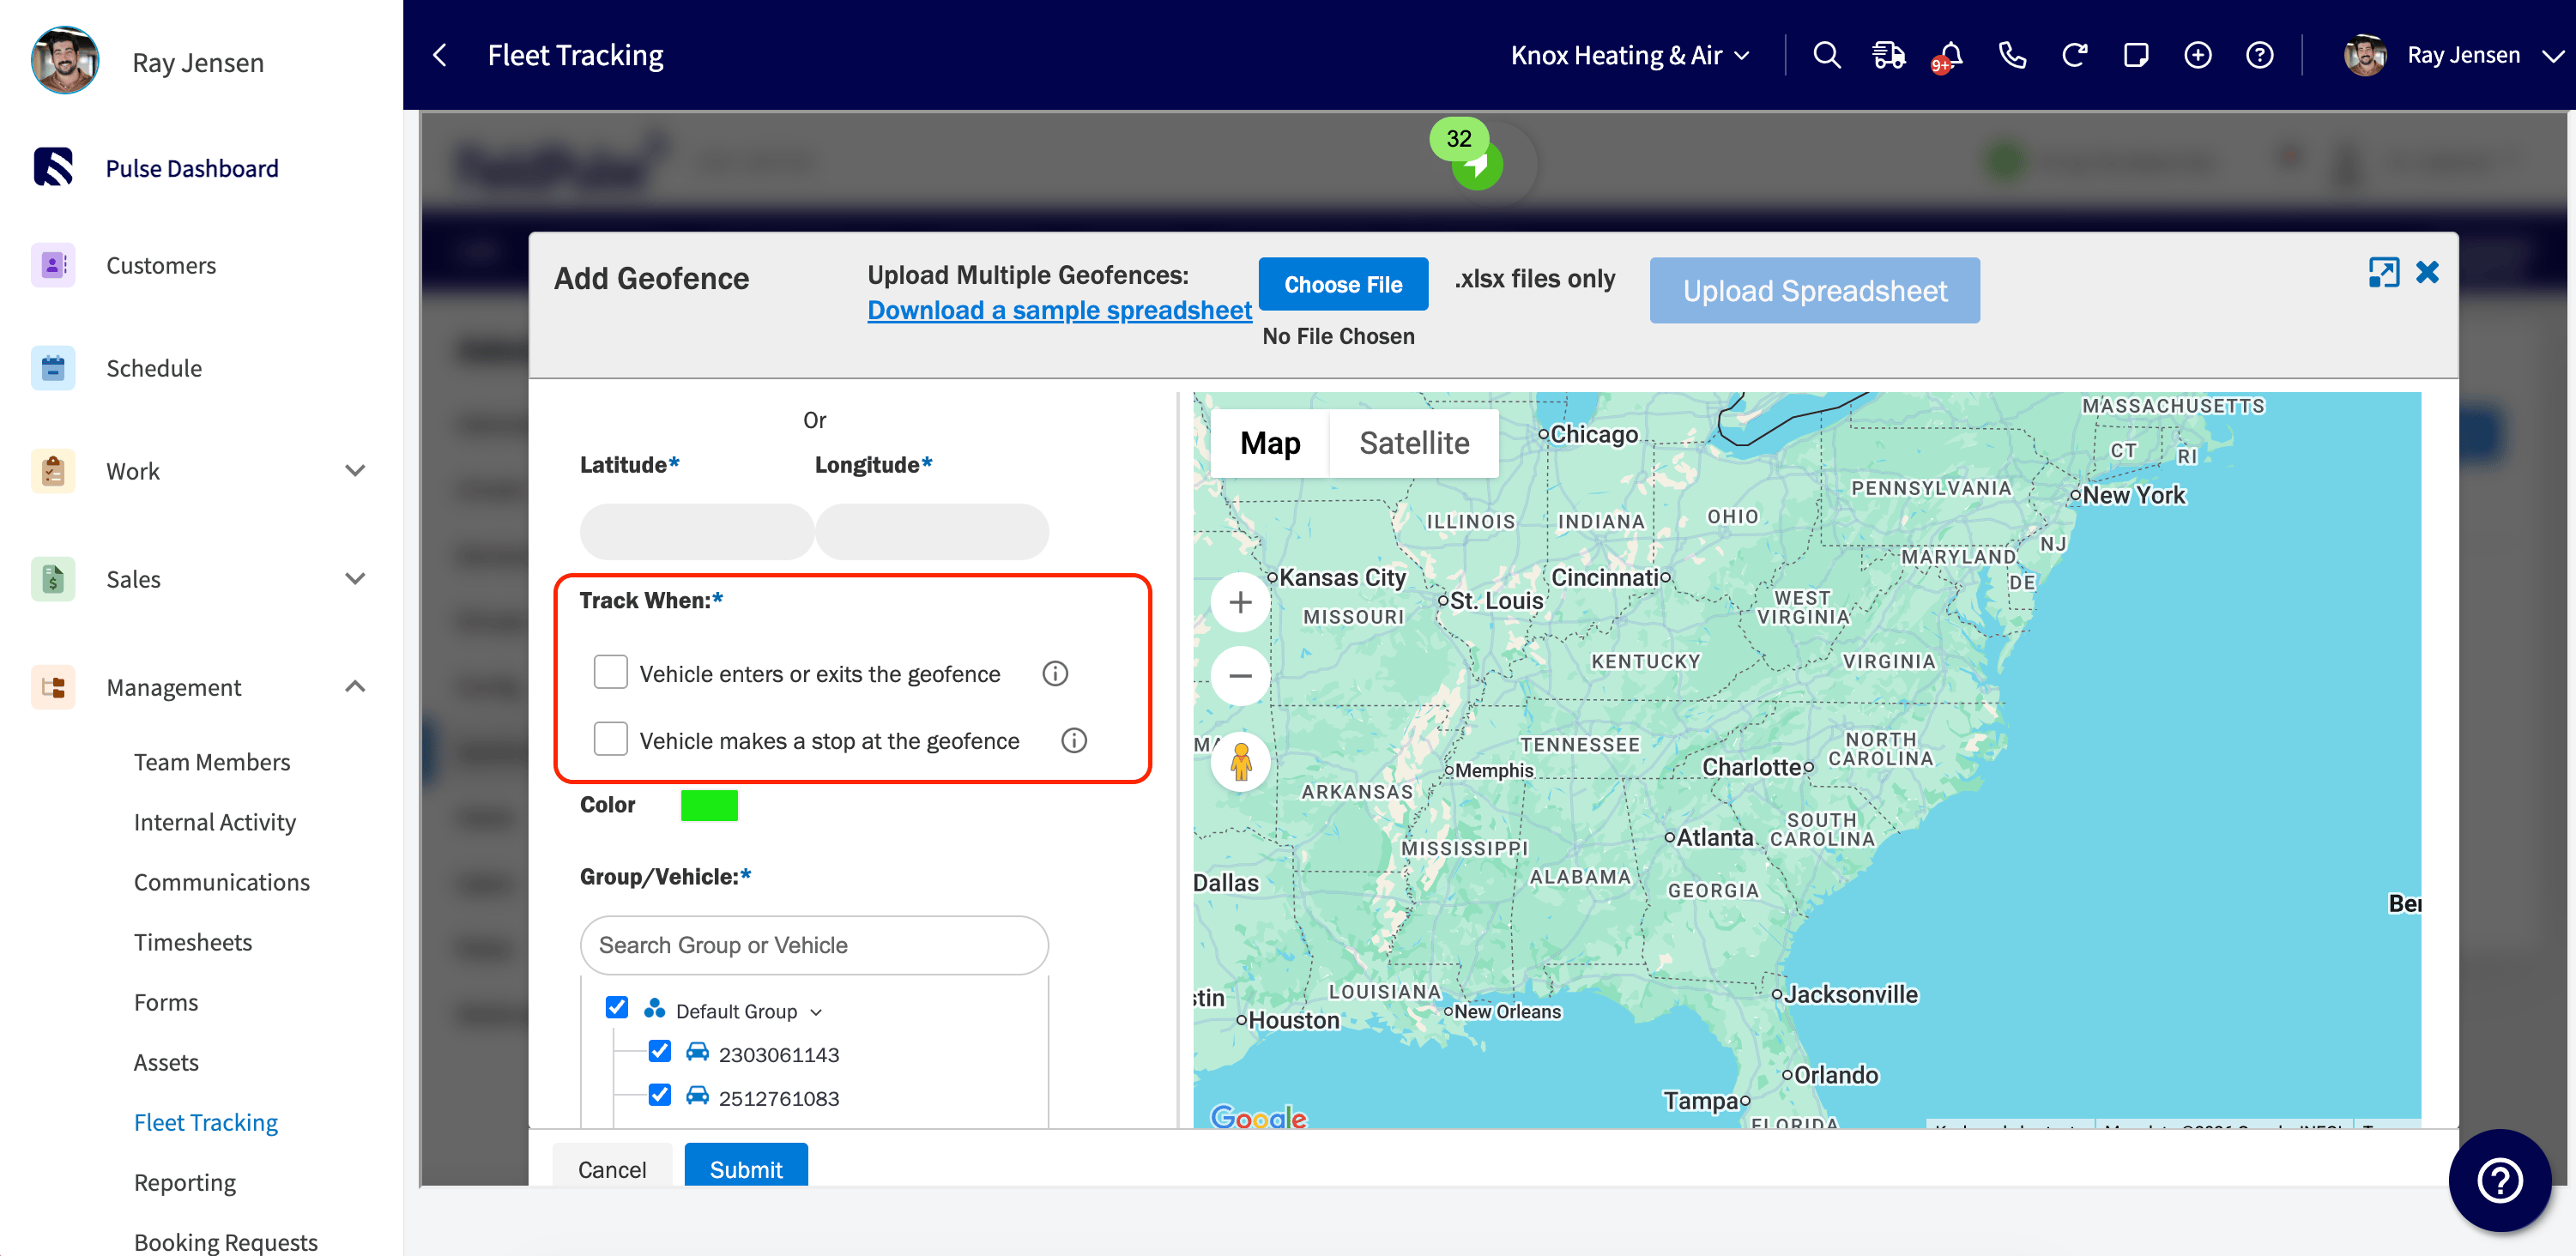
Under *Track When*, select how the geofence should trigger:
* **Vehicle enters/exits a geofence**: Logs entry and exit events. Set the boundary as a circle or polygon.
* **Vehicle makes a stop at the geofence**: Logs when a vehicle stops at the location. Best for known addresses like home, office, or customer sites. Default radius is 50 meters.
## Step 3
Under *Track When*, select how the geofence should trigger:
* **Vehicle enters/exits a geofence**: Logs entry and exit events. Set the boundary as a circle or polygon.
* **Vehicle makes a stop at the geofence**: Logs when a vehicle stops at the location. Best for known addresses like home, office, or customer sites. Default radius is 50 meters.
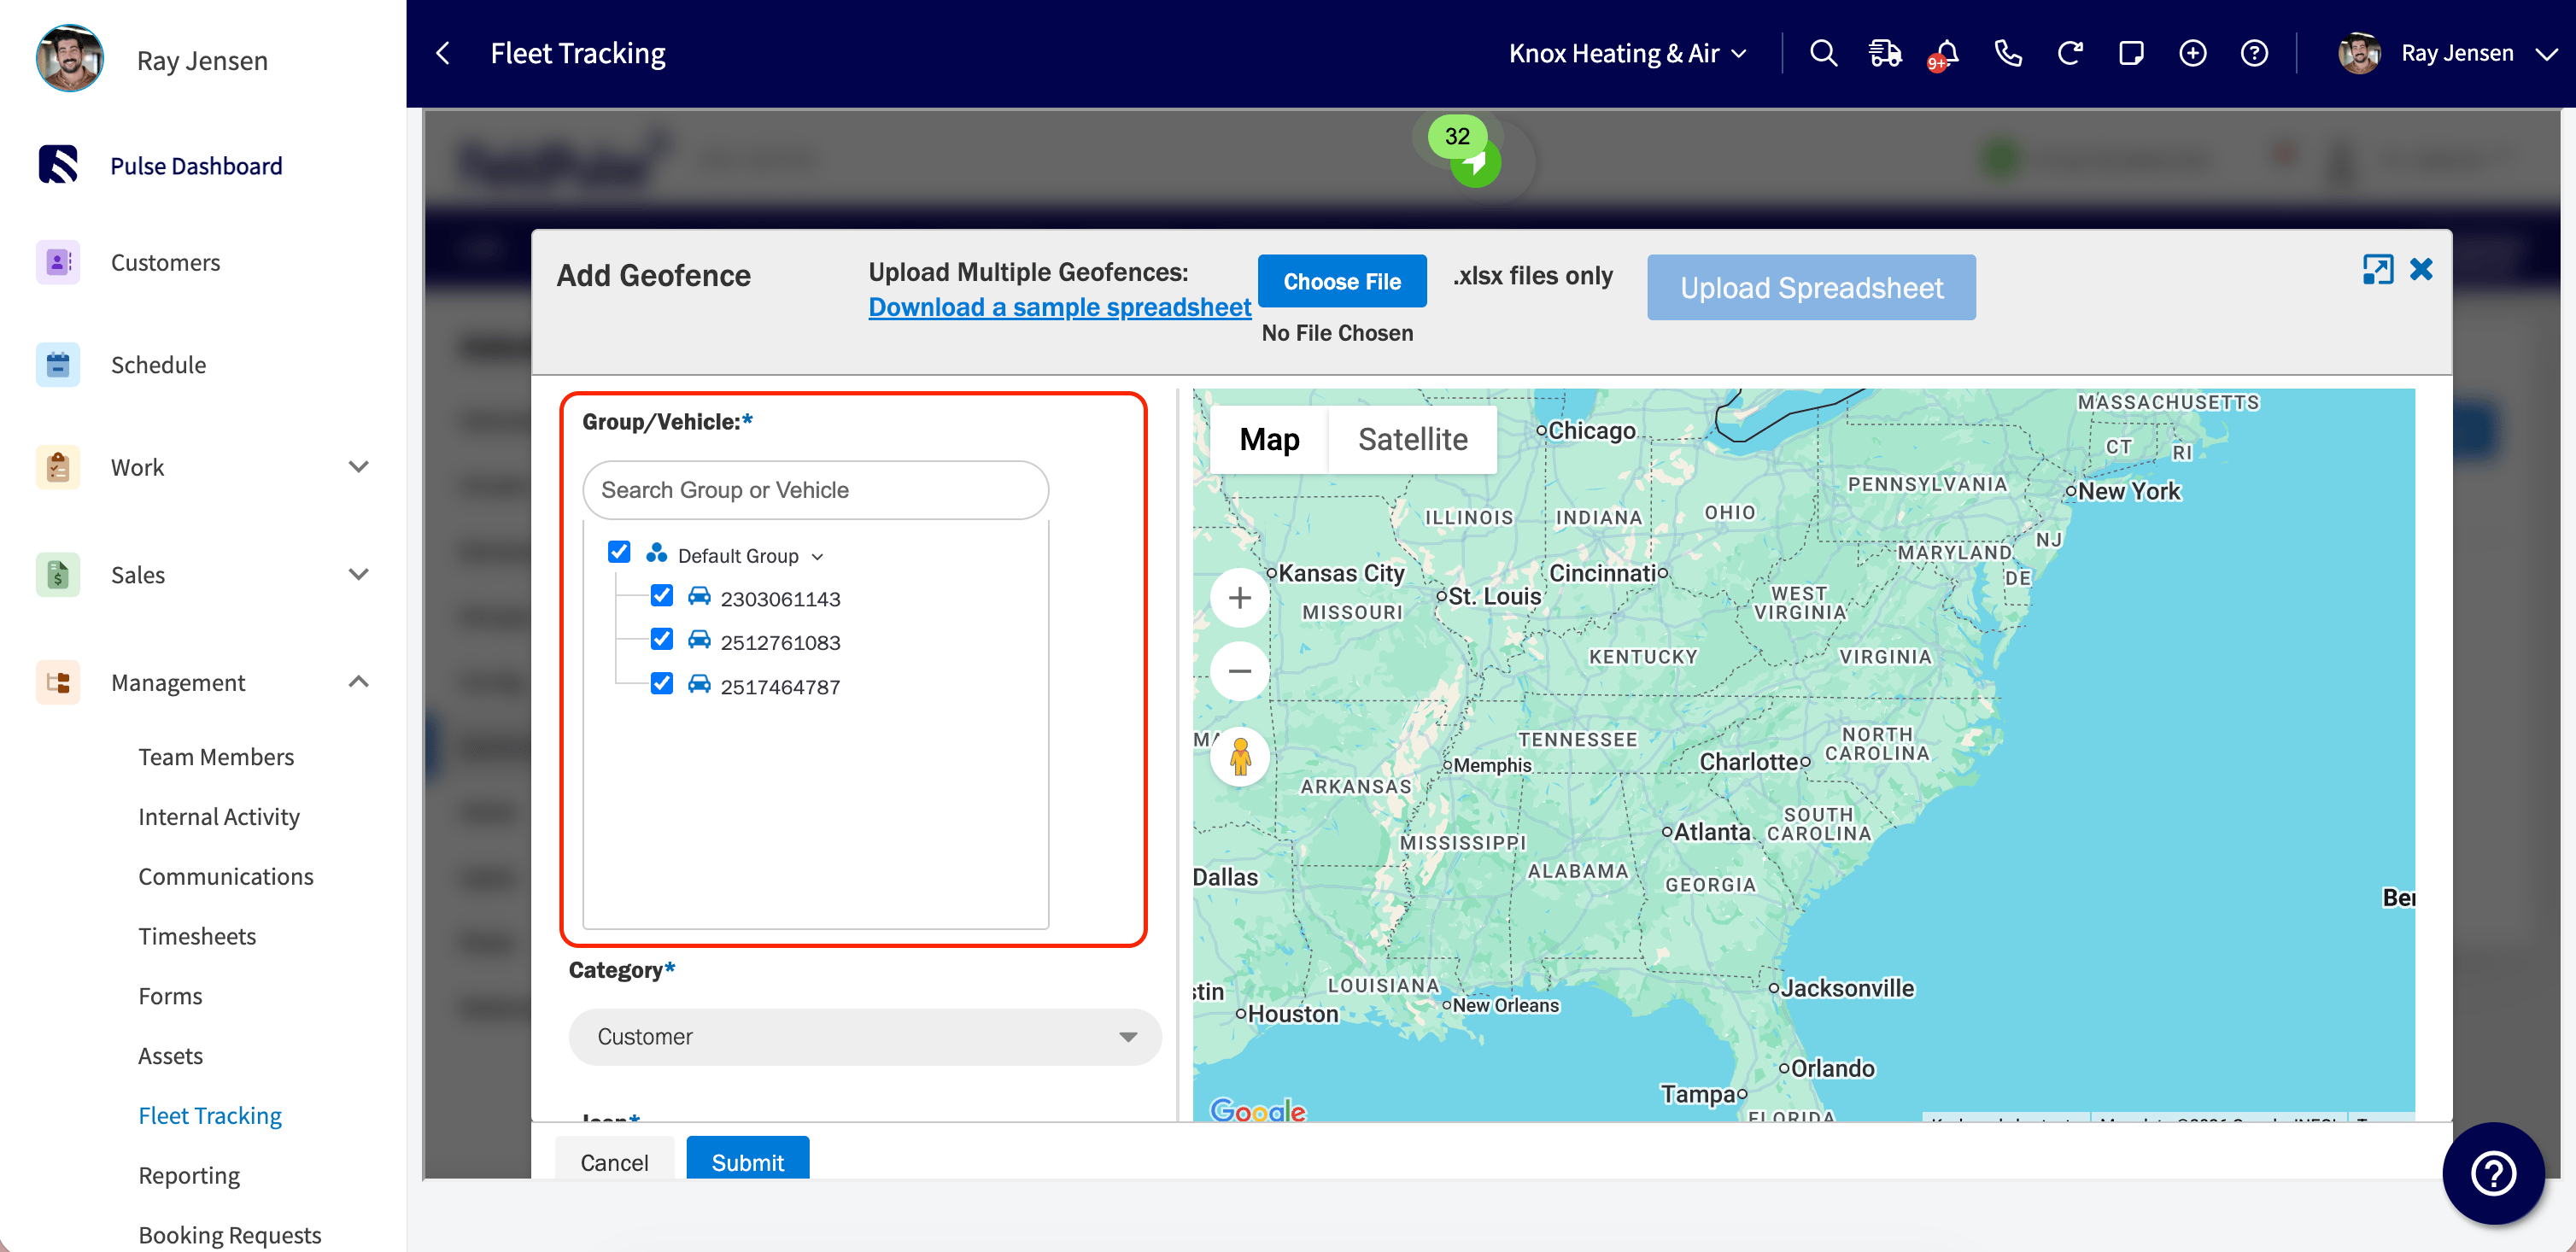
 ## Step 4
Choose the Group or individual Vehicles to monitor with this geofence.
## Step 4
Choose the Group or individual Vehicles to monitor with this geofence.
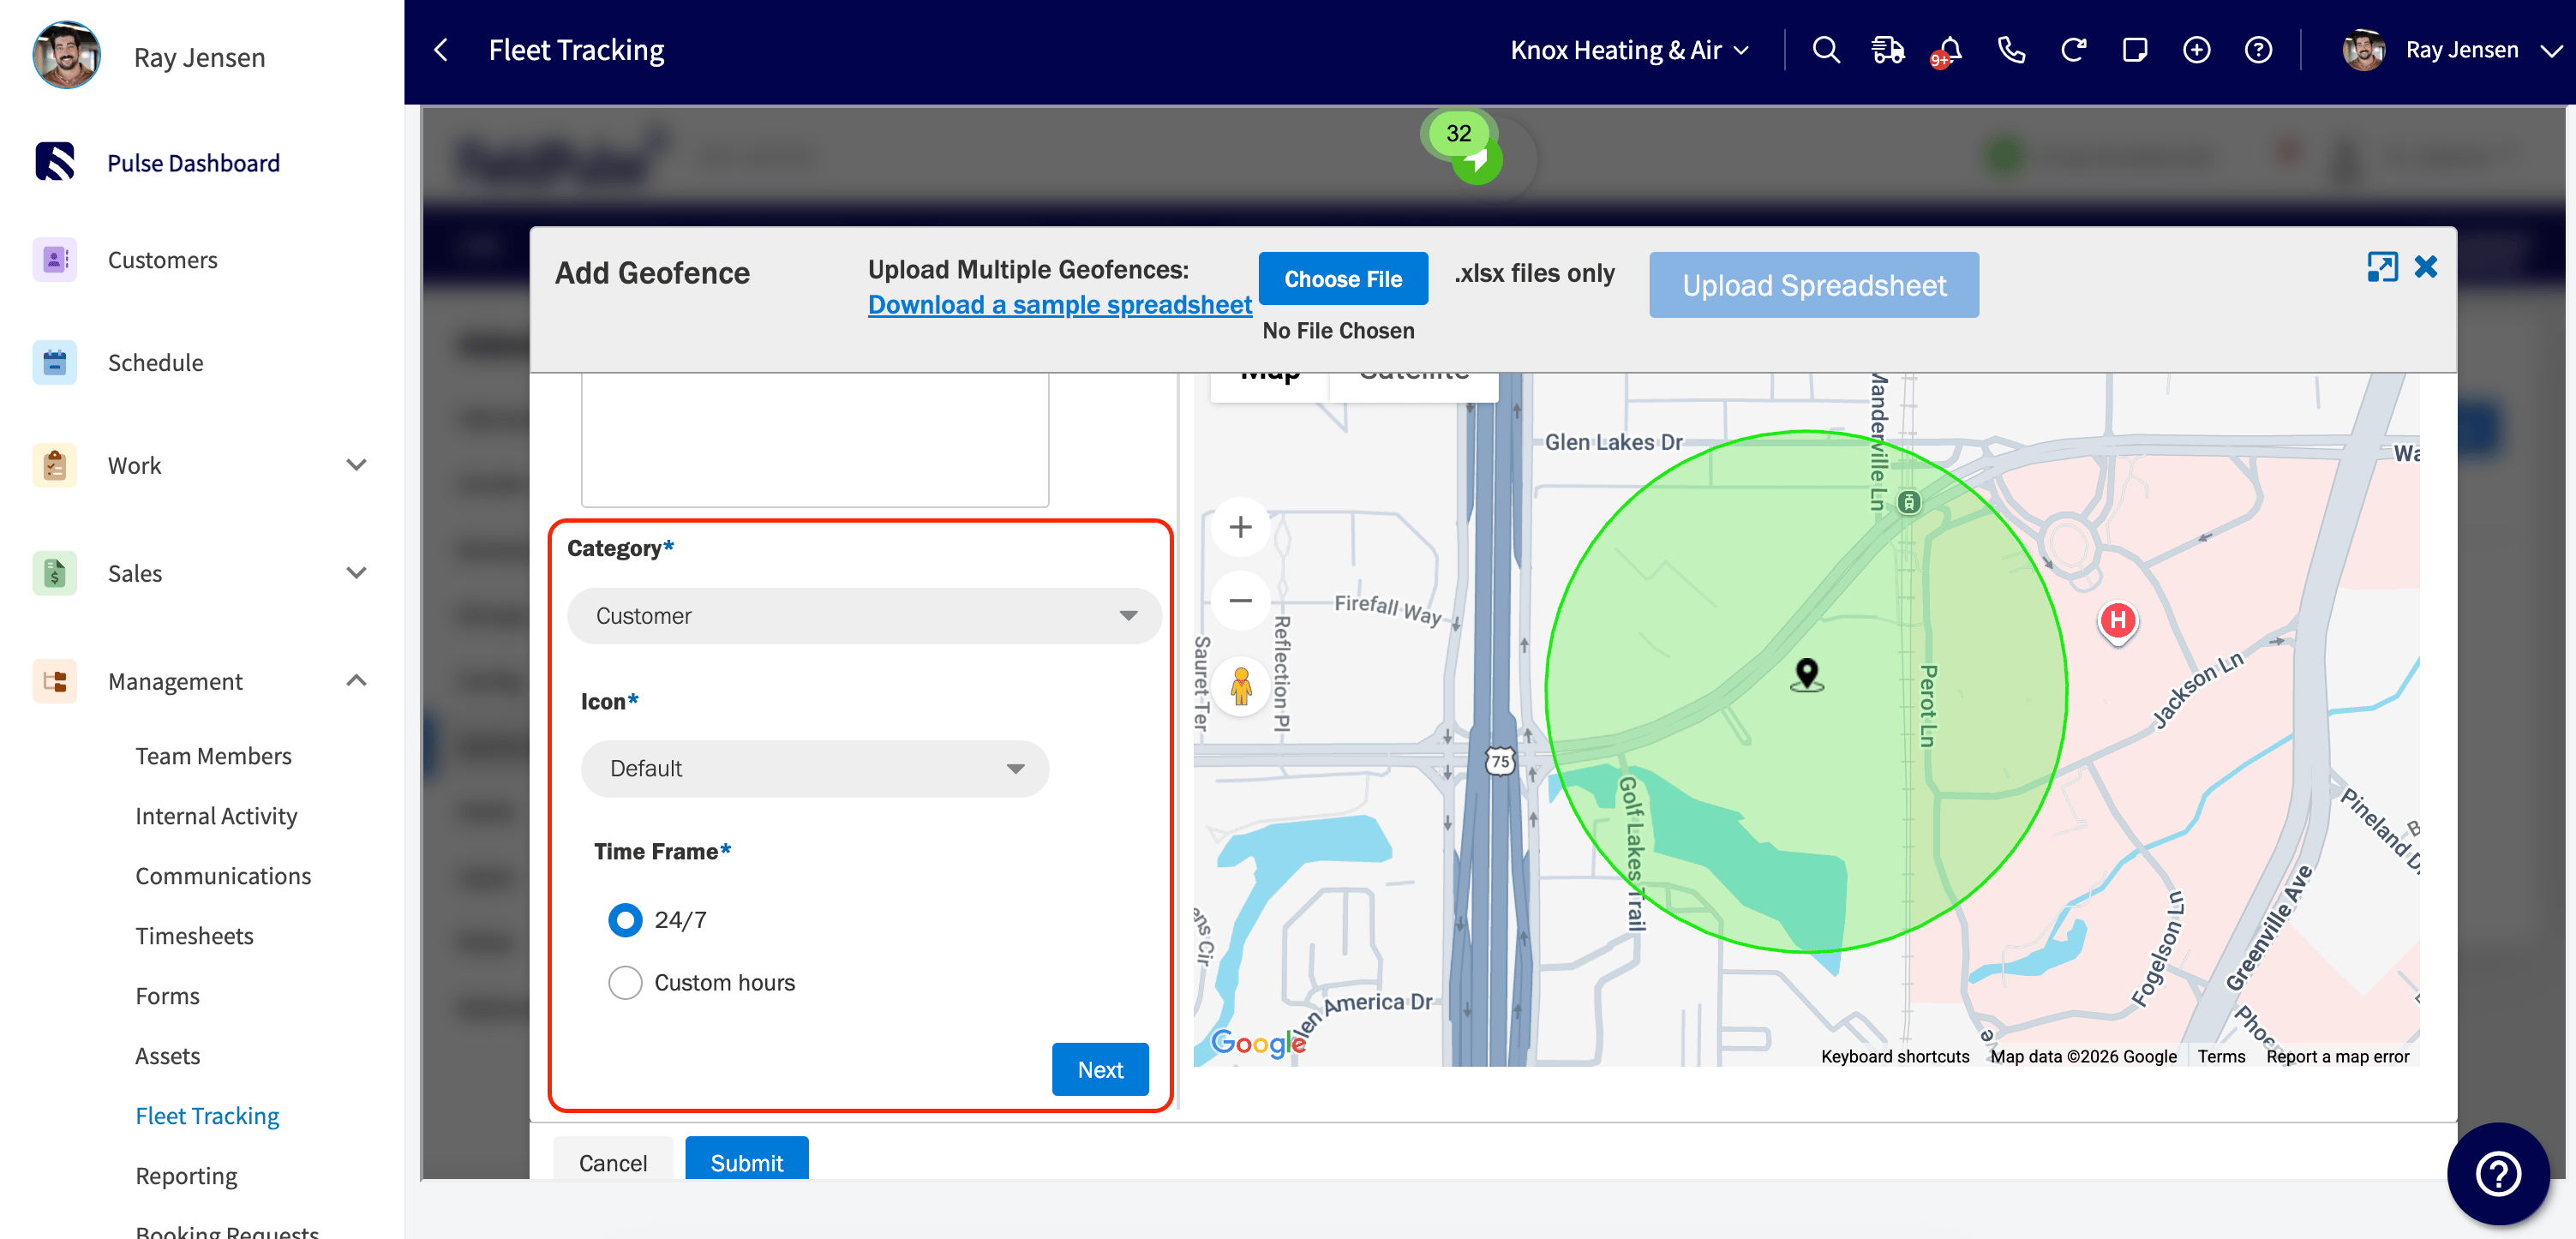
 ## Step 5
Choose the category, icon, and when the geofence should be active. This can be 24/7 or Custom Hours to limit it to specific days and times.
## Step 5
Choose the category, icon, and when the geofence should be active. This can be 24/7 or Custom Hours to limit it to specific days and times.
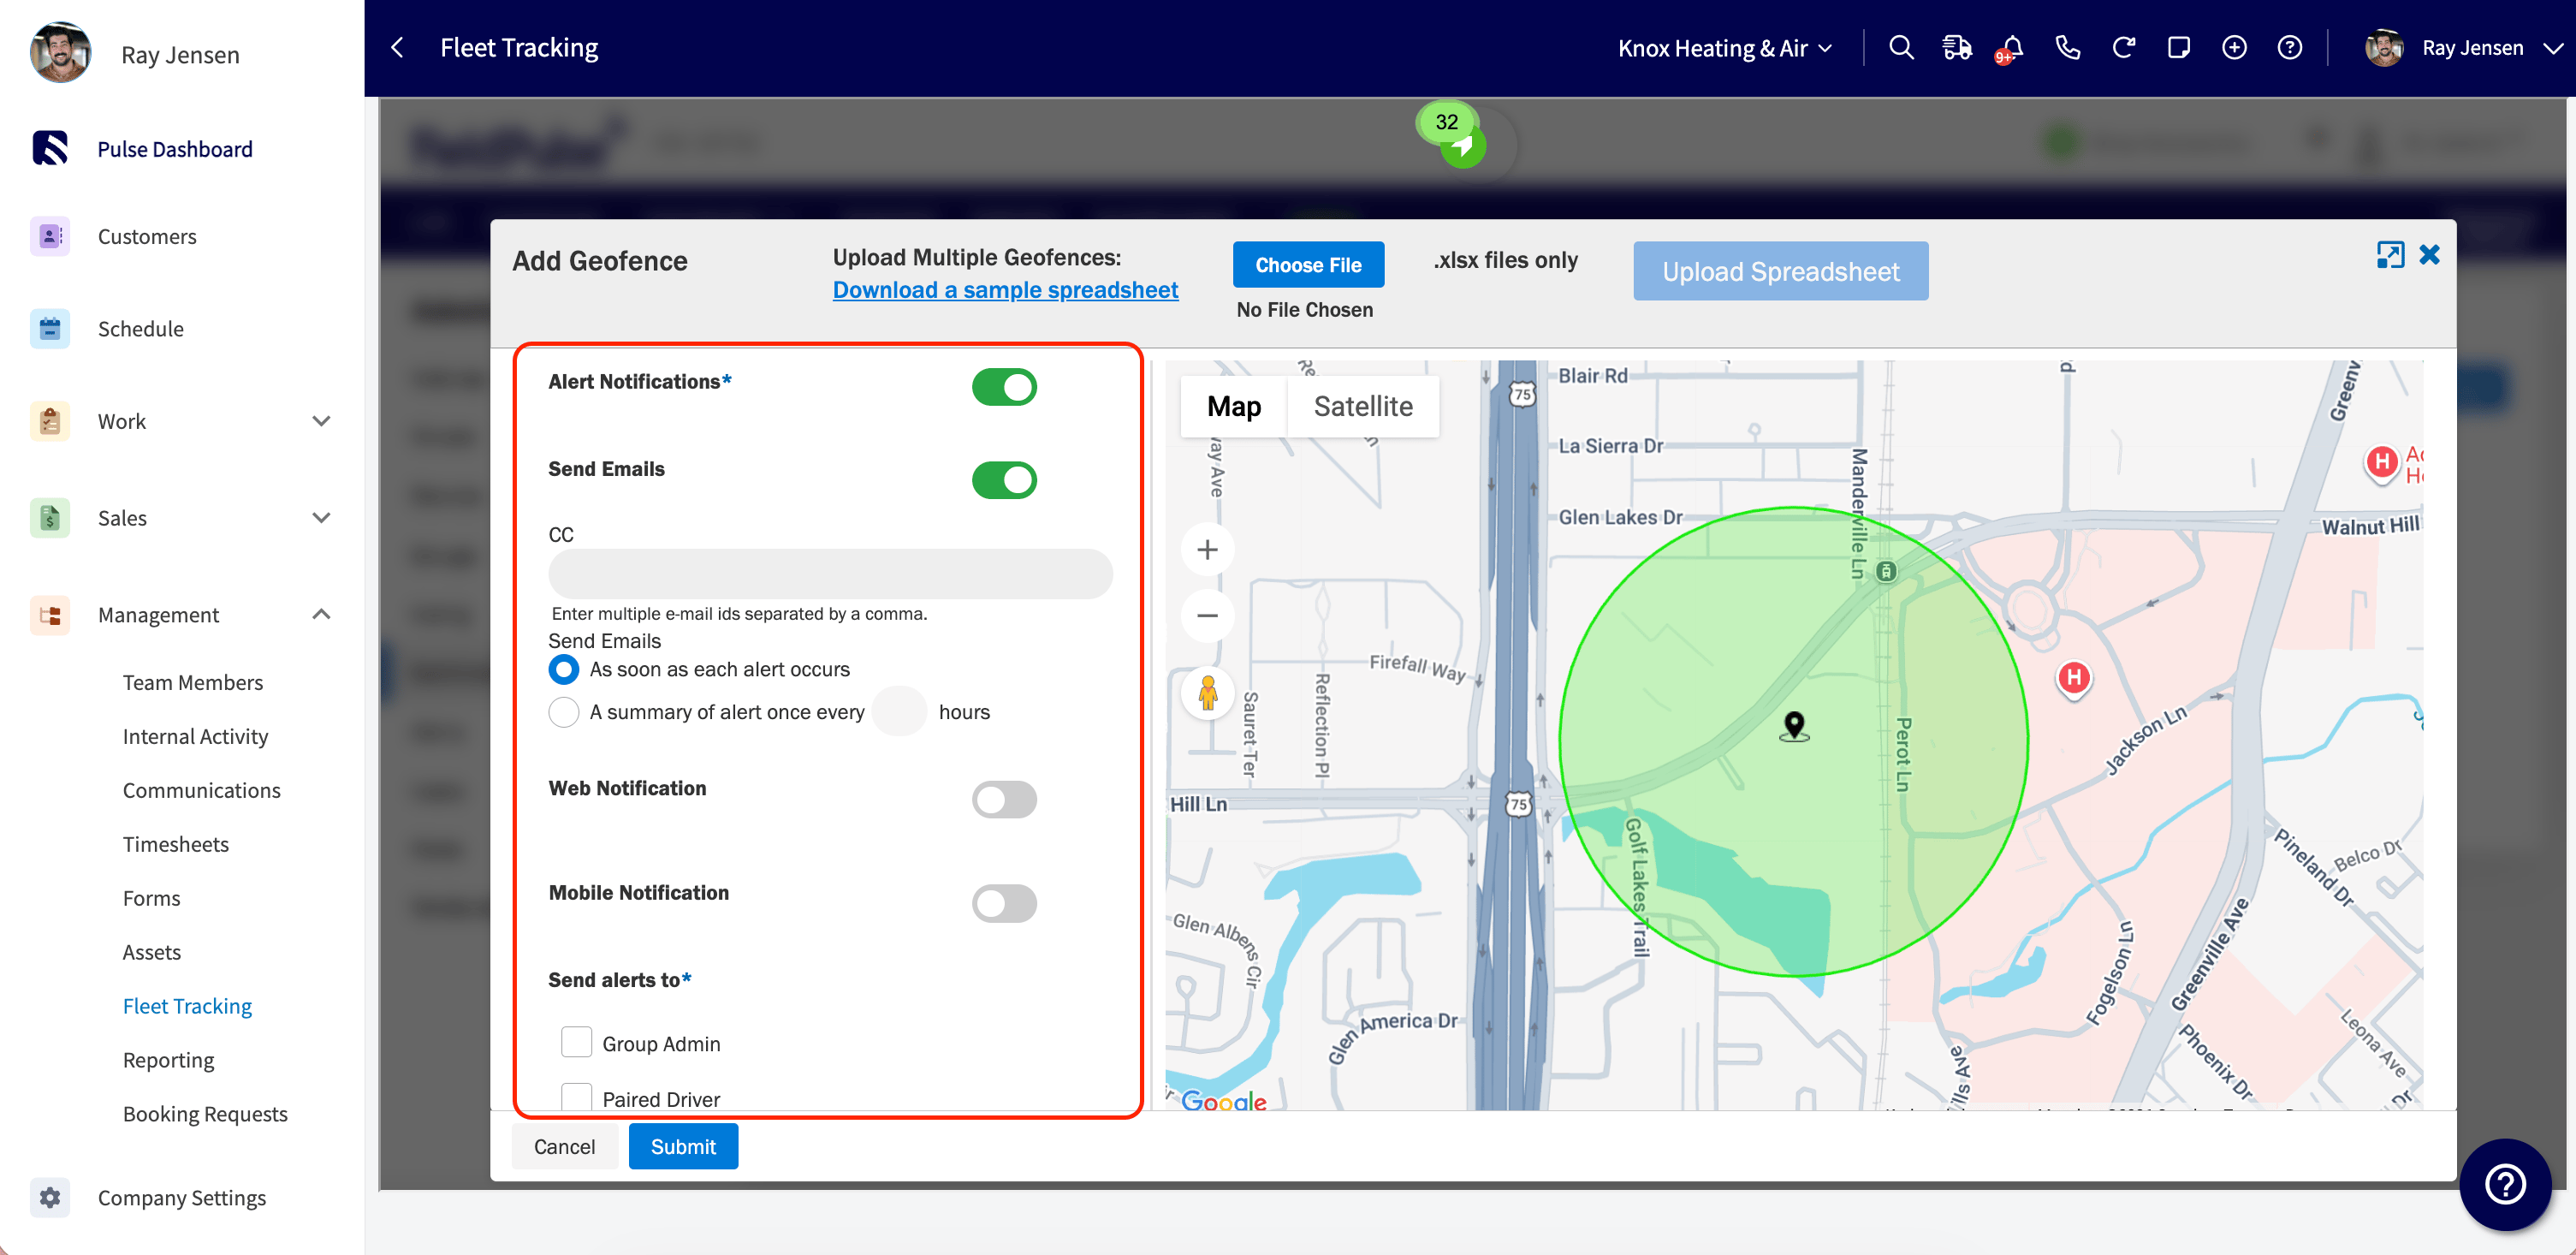
 ## Step 6
Click *next* to configure alerts. Toggle Alert Notifications on and add any additional recipients in the CC field. You can choose alert frequency like instant or a summary every X hours. Under *Send Alerts To*, select who receives them: Group Admins, Paired Driver, or both.
## Step 6
Click *next* to configure alerts. Toggle Alert Notifications on and add any additional recipients in the CC field. You can choose alert frequency like instant or a summary every X hours. Under *Send Alerts To*, select who receives them: Group Admins, Paired Driver, or both.
 Click *Submit* to create the geofence.
***
# Running a Geofence Report
The Geofence Report shows entry/exit history for your vehicles, including timestamps and how long each vehicle spent inside a geofence.
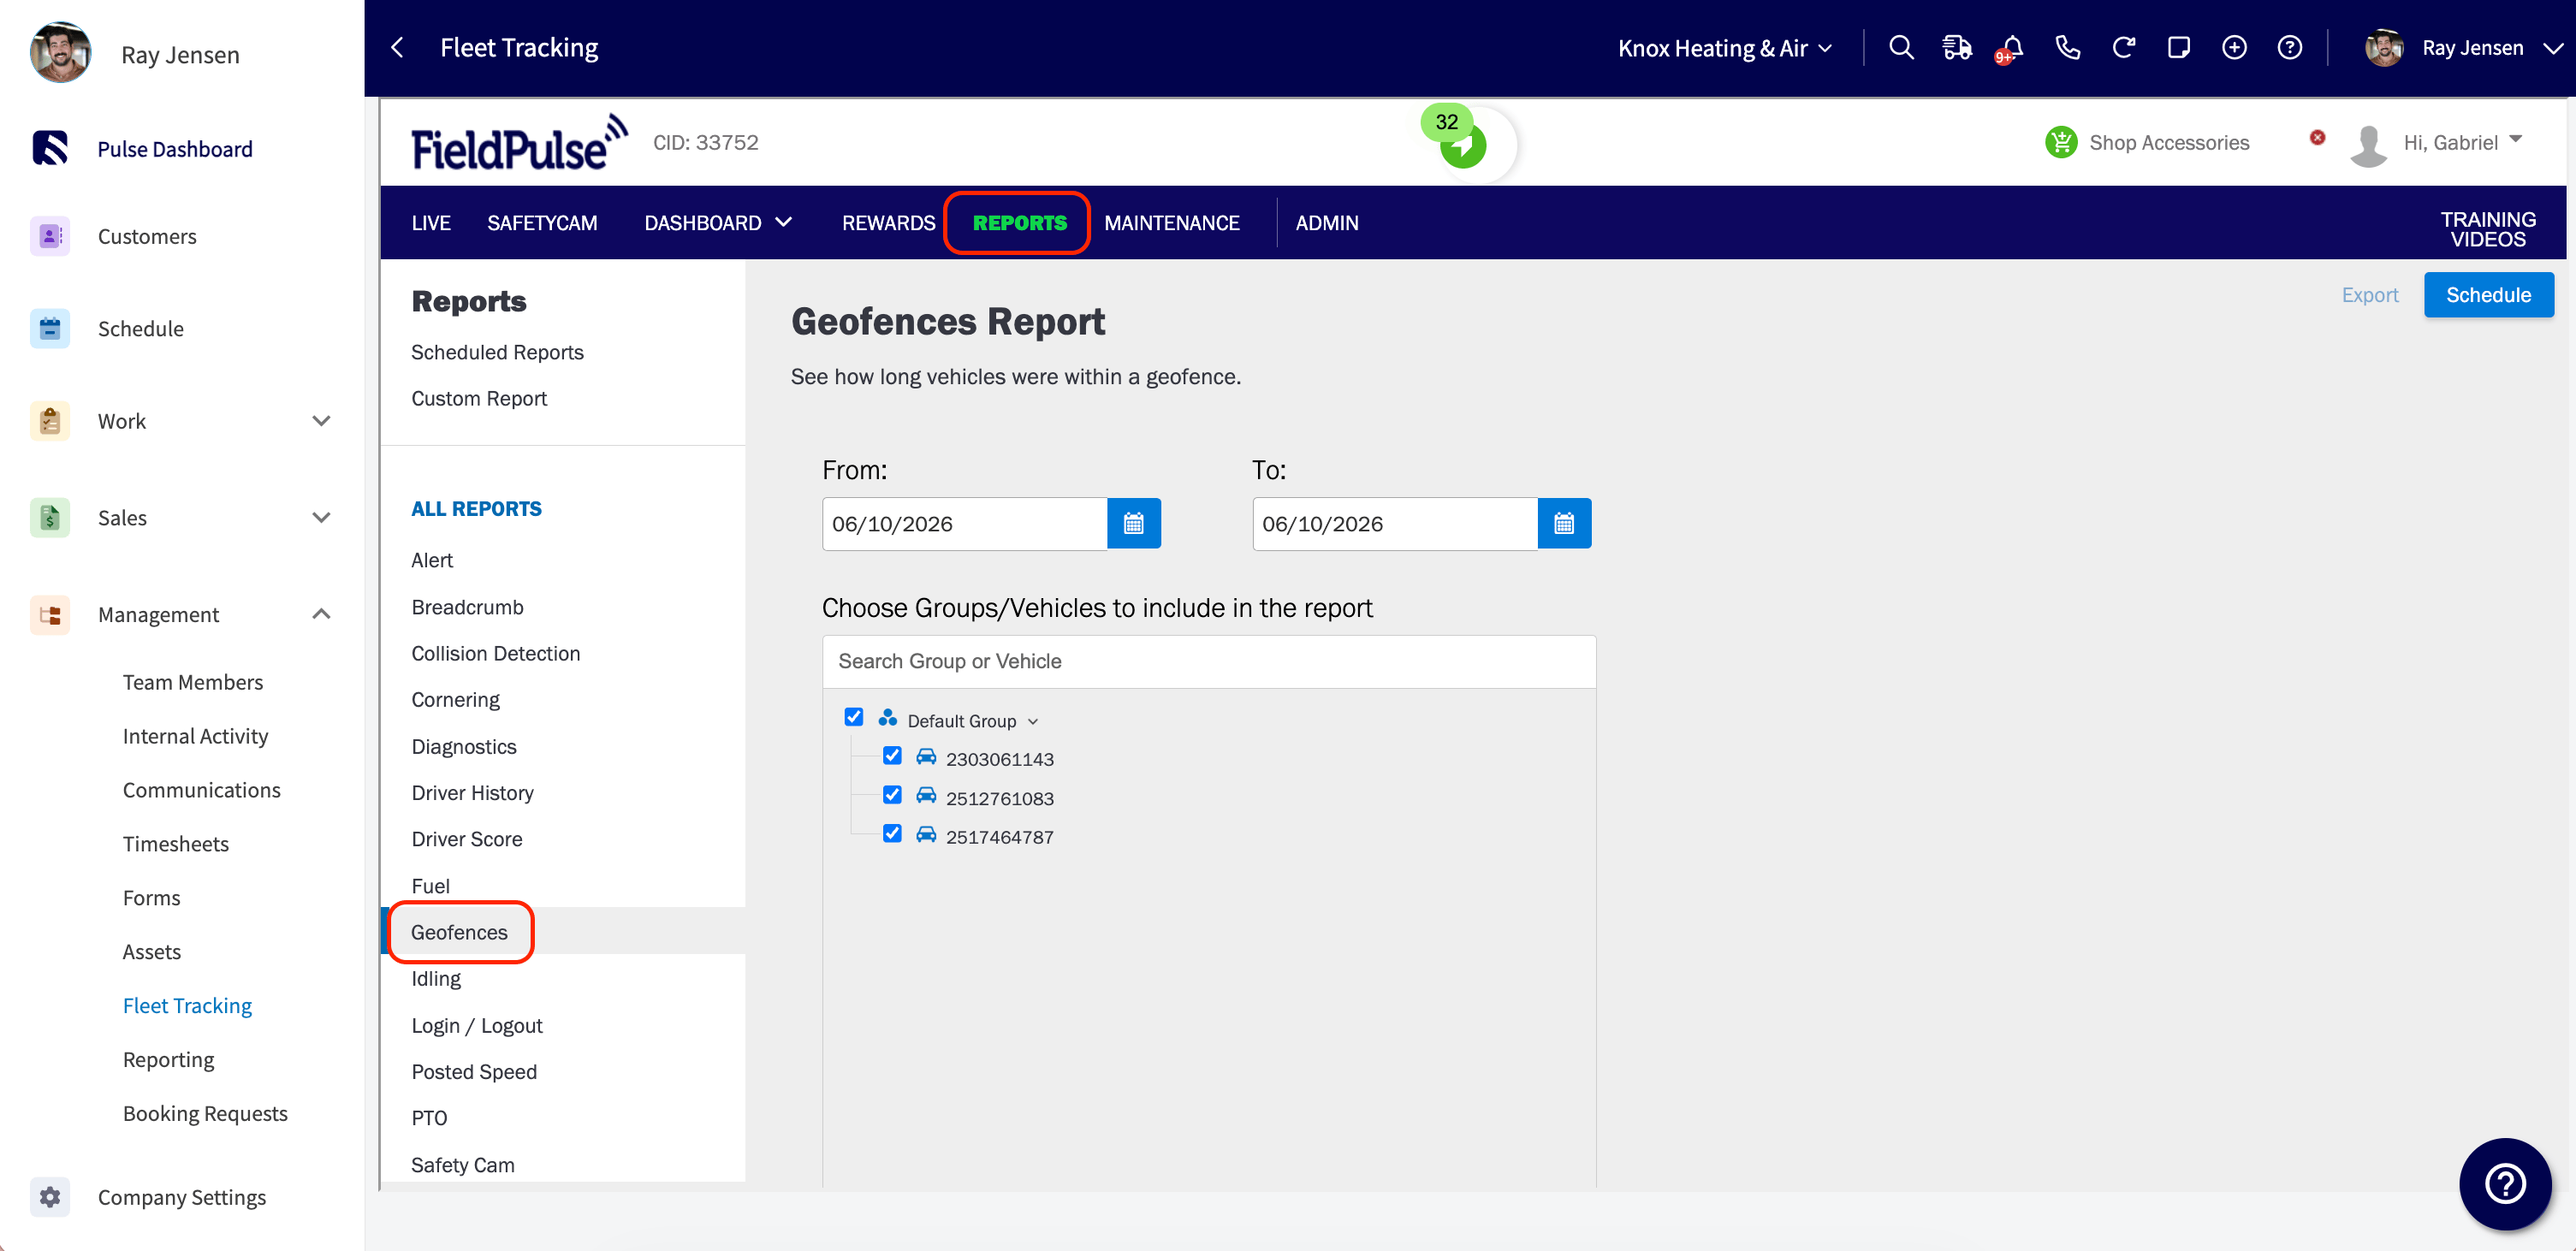
## Step 1
Navigate to *Reports* > *Geofences*.
Click *Submit* to create the geofence.
***
# Running a Geofence Report
The Geofence Report shows entry/exit history for your vehicles, including timestamps and how long each vehicle spent inside a geofence.
## Step 1
Navigate to *Reports* > *Geofences*.
 ## Step 2
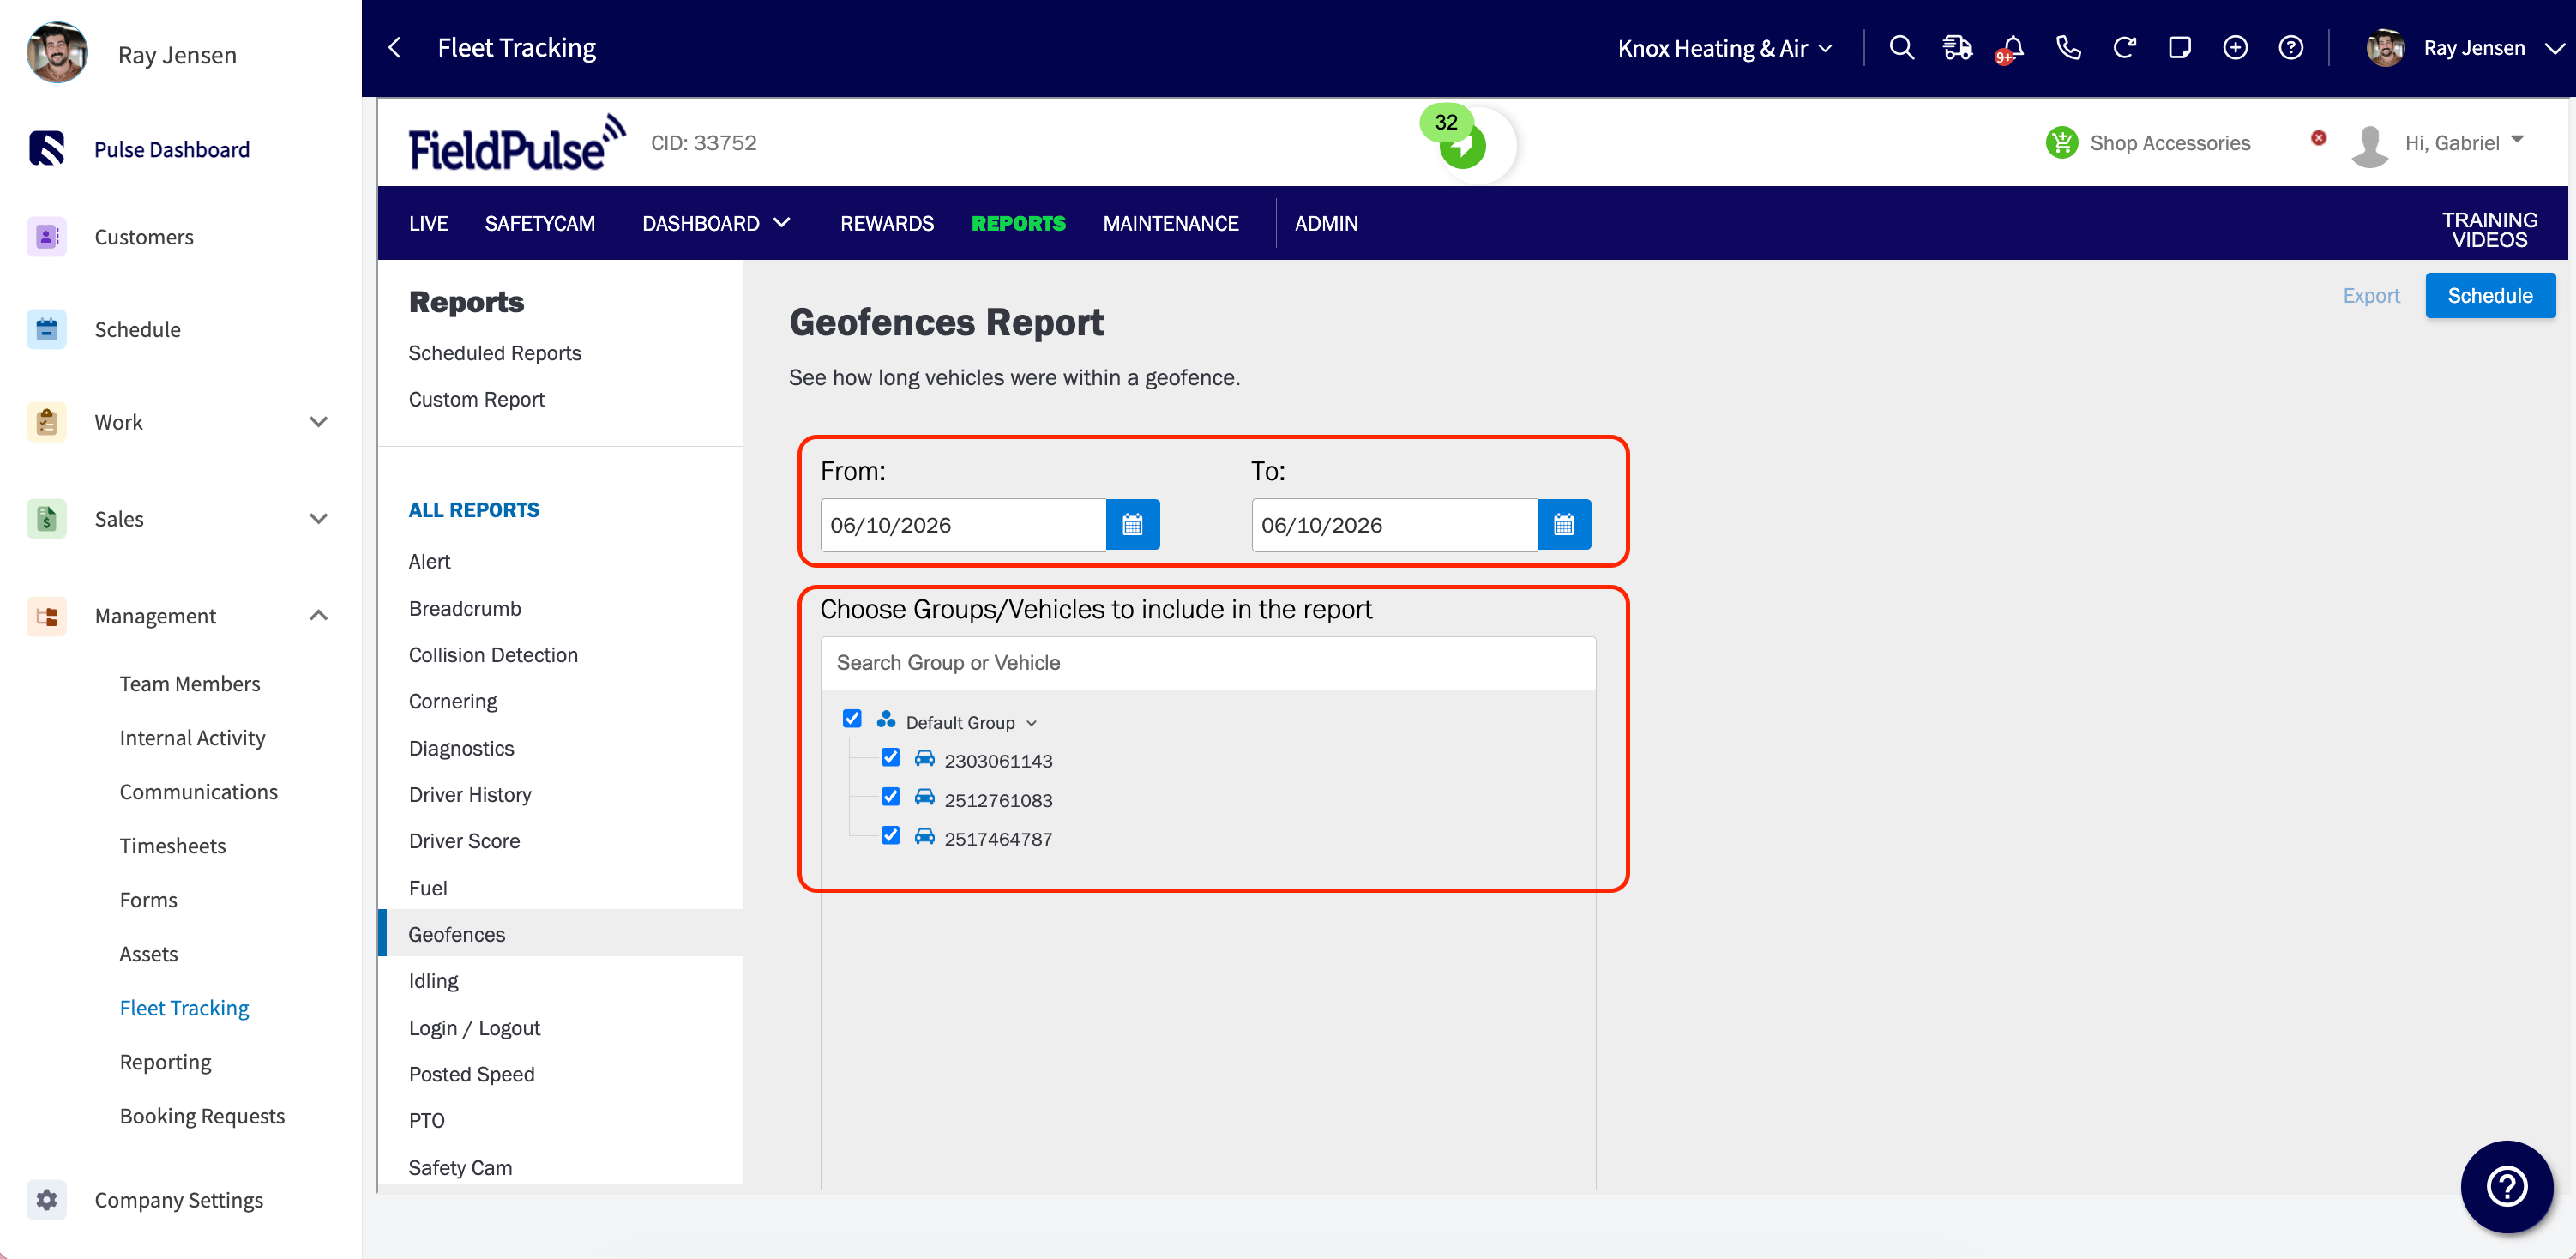
Use the date picker to select your reporting period. Date ranges must be 93 days or less. Then select the groups or vehicles and the geofences you want to include in the report.
## Step 2
Use the date picker to select your reporting period. Date ranges must be 93 days or less. Then select the groups or vehicles and the geofences you want to include in the report.
 ## Step 3
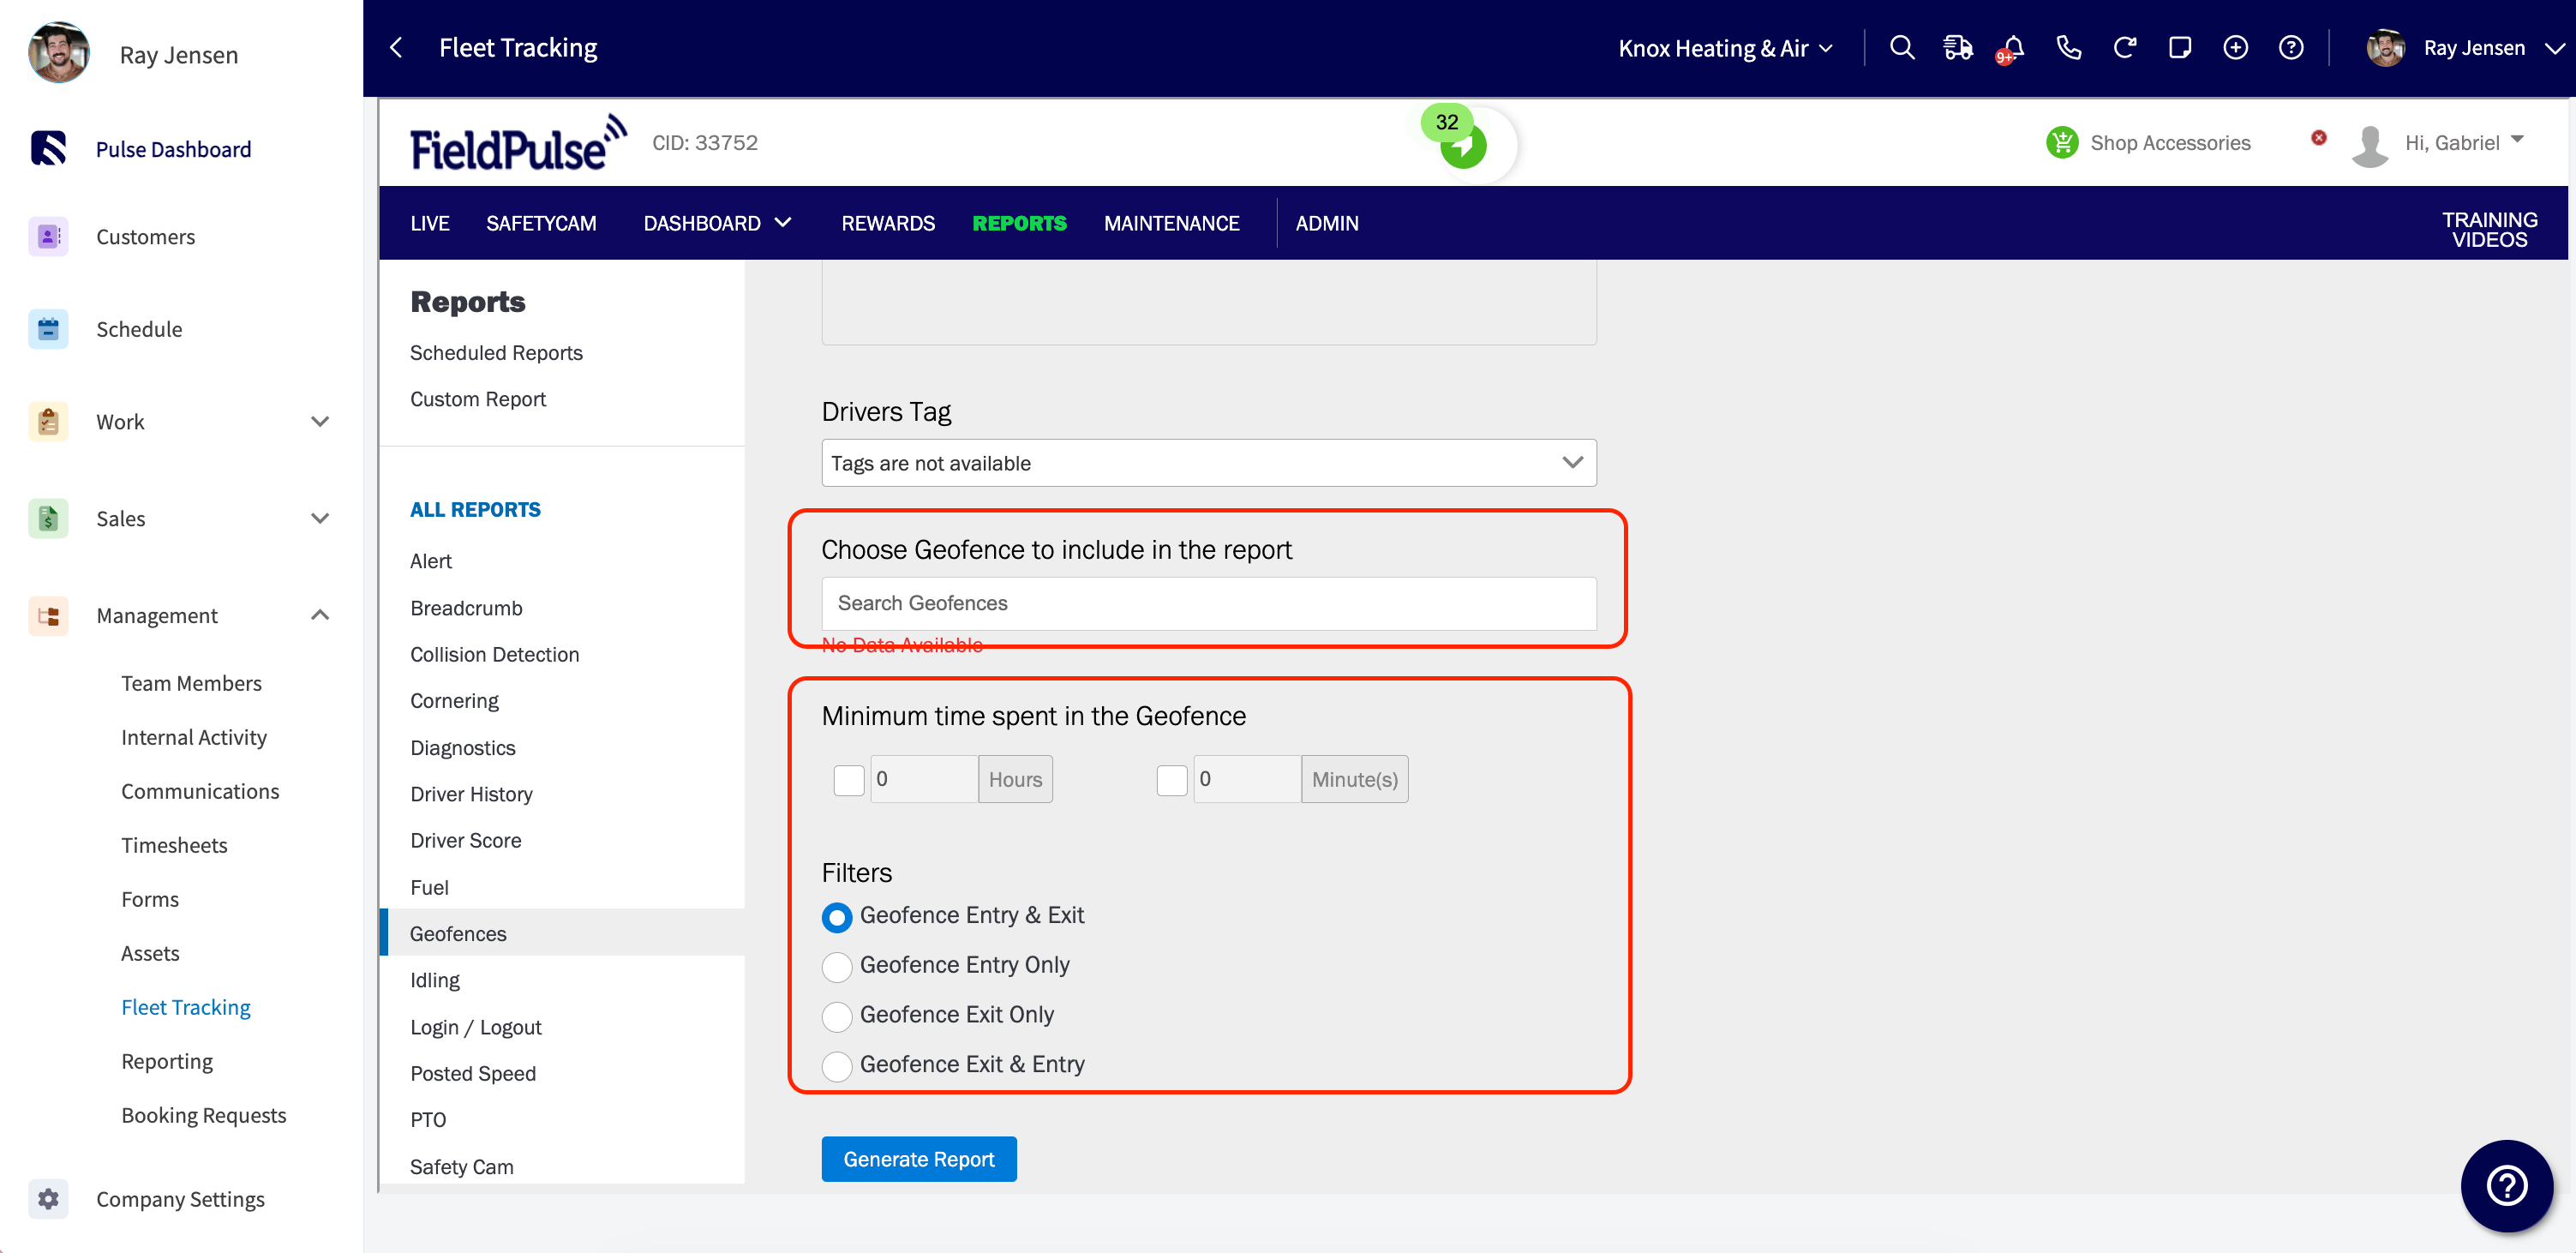
Choose the Geofence you want to include in the report. Select which event types to include-
* Geofence Entry & Exit
* Geofence Entry Only
* Geofence Exit Only
* Geofence Exit and Entry
Optionally, set a minimum time spent in the Geofence to filter out brief stops.
## Step 3
Choose the Geofence you want to include in the report. Select which event types to include-
* Geofence Entry & Exit
* Geofence Entry Only
* Geofence Exit Only
* Geofence Exit and Entry
Optionally, set a minimum time spent in the Geofence to filter out brief stops.
 Click Generate Report. To save it, click Export to download as a PDF or XLSX file.
**Quick Tip:** This report can be scheduled to run automatically and delivered to your inbox on a regular basis.
***
**Have additional questions?**
*Contact us at [support@fieldpulse.com](mailto:support@fieldpulse.com) or use the chat feature in the bottom right corner of your screen.*
Click Generate Report. To save it, click Export to download as a PDF or XLSX file.
**Quick Tip:** This report can be scheduled to run automatically and delivered to your inbox on a regular basis.
***
**Have additional questions?**
*Contact us at [support@fieldpulse.com](mailto:support@fieldpulse.com) or use the chat feature in the bottom right corner of your screen.*