> ## Documentation Index
> Fetch the complete documentation index at: https://help.fieldpulse.com/llms.txt
> Use this file to discover all available pages before exploring further.
# Sync: QuickBooks Desktop
> Set up the QuickBooks Desktop connection step by step, from requesting access to turning on the integration.
### Reminder:
## FieldPulse only integrates with QuickBooks Desktop 2024 and newer
## 1. Request access to sync with QuickBooks
To connect to QuickBooks Desktop, request access by contacting us at [support@fieldpulse.com](mailto:support@fieldpulse.com), or use the chat feature in the bottom right corner of your screen. We will schedule a call with you to initiate the sync.
## 2. Turn on the integration in *Company Settings.*
Once FieldPulse has enabled you to connect to QuickBooks, go to *Company Settings*. Find the *Features & Plugins* tab and navigate until you find the QuickBooks Desktop tile.
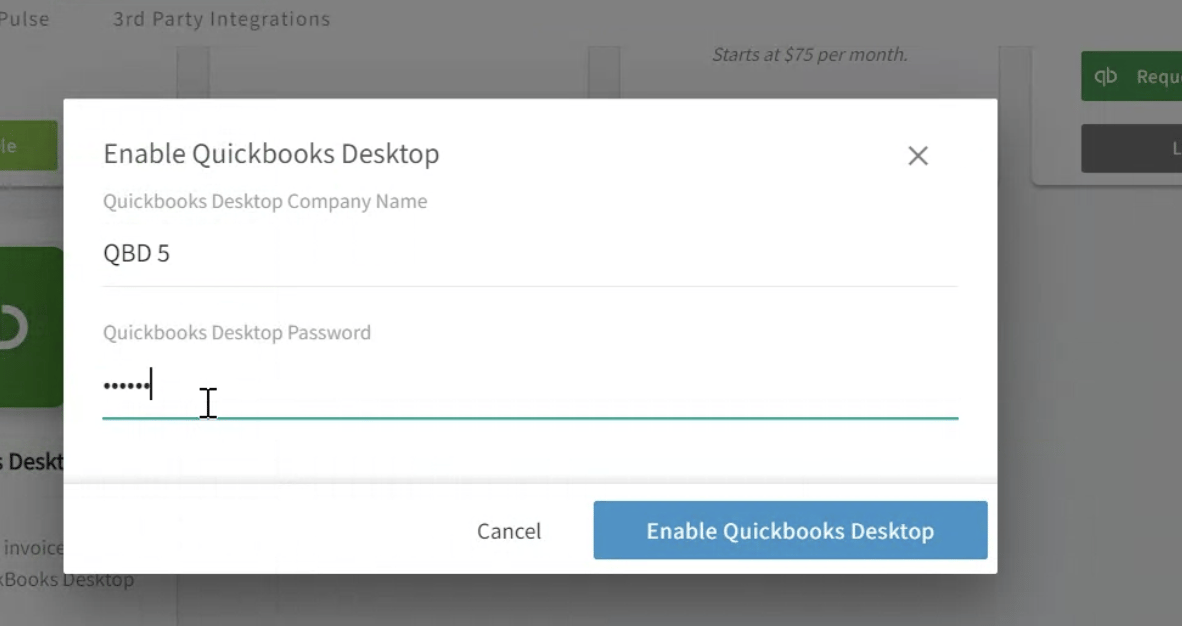
## 3. Enter your company name and create a password
FieldPulse will then download a file to your device.
 ## 4. Selecting Sync Type and Date Range
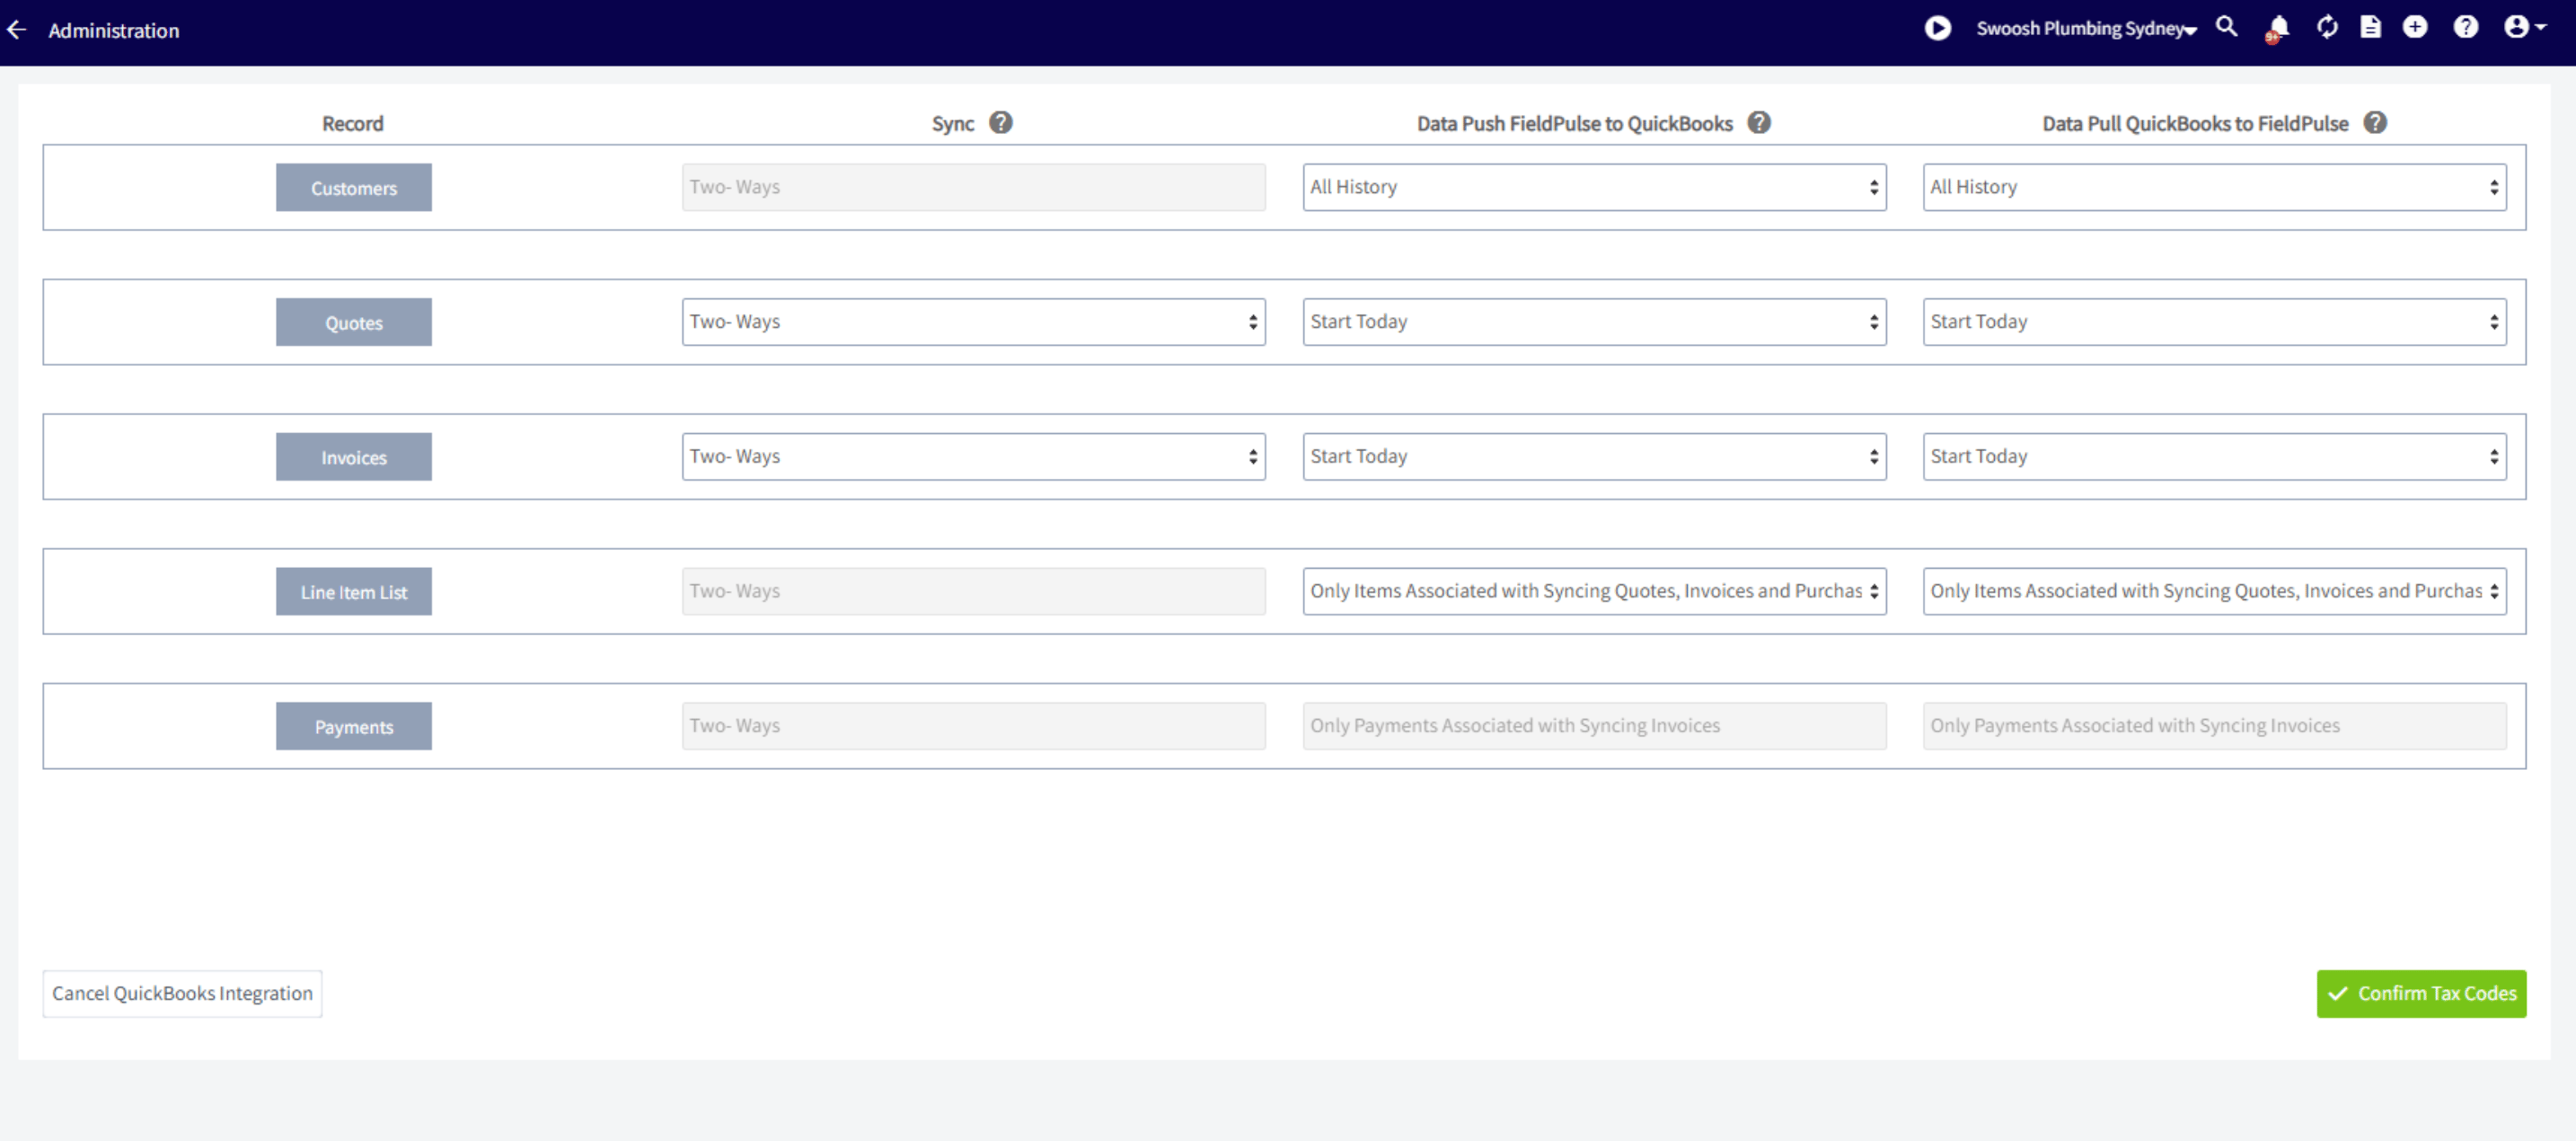
Opt between one-way sync (FieldPulse to QuickBooks) or two-way sync for estimates and invoices. Set a specific date or period for data exchange.
## 4. Selecting Sync Type and Date Range
Opt between one-way sync (FieldPulse to QuickBooks) or two-way sync for estimates and invoices. Set a specific date or period for data exchange.
 ## 5. Download and start the QuickBooks Web Connector
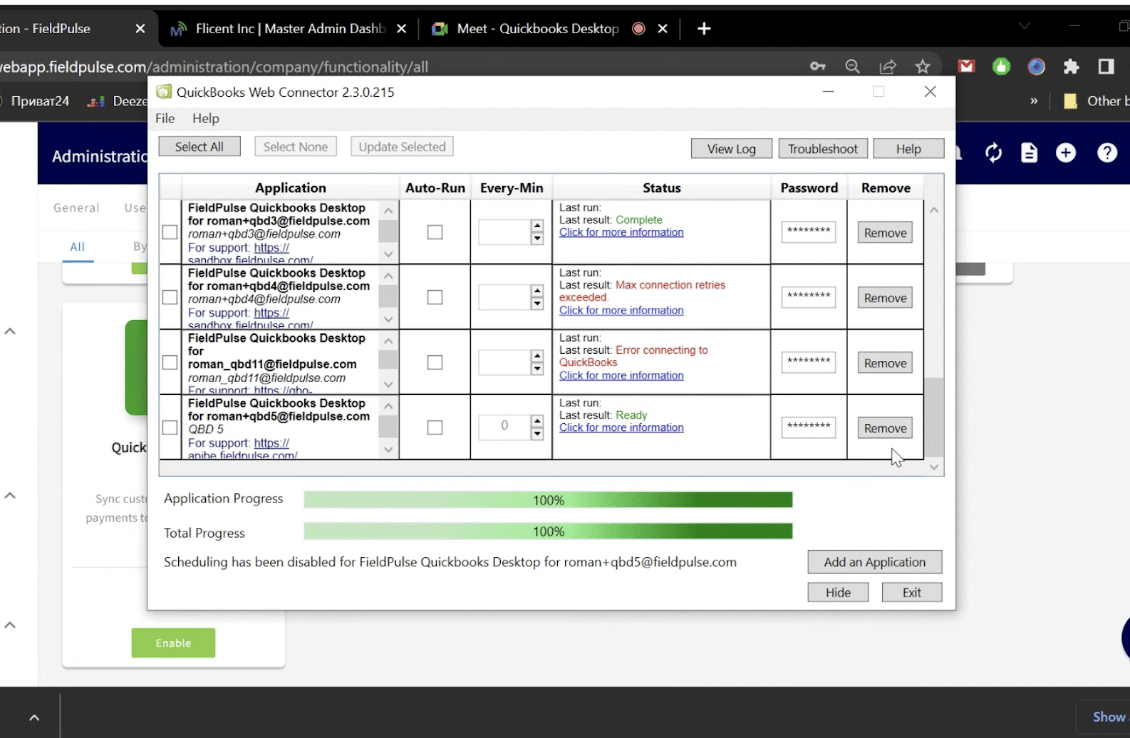
Select Add an Application, then select the file downloaded from FieldPulse.
## 5. Download and start the QuickBooks Web Connector
Select Add an Application, then select the file downloaded from FieldPulse.
 ## 6. Set the sync to auto-run every 1 minute
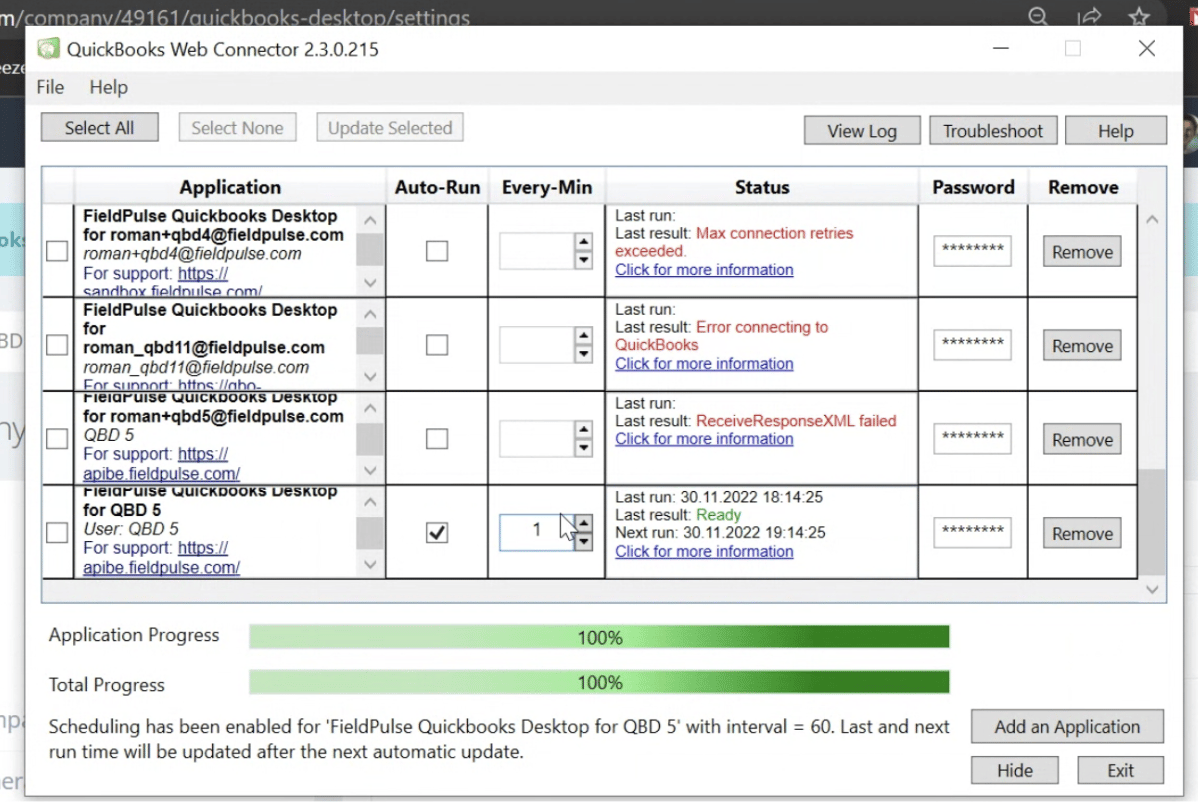
Press *Update Selected* after making these changes. The sync will now begin
## 6. Set the sync to auto-run every 1 minute
Press *Update Selected* after making these changes. The sync will now begin
 **Note: You must keep the connector on and open at all times for the sync to continue.**
*(Your device's sleep mode must be disabled so the connection is constantly running.)*
***
**Have additional questions?**
*Contact us at [support@fieldpulse.com](mailto:support@fieldpulse.com) or use the chat feature in the bottom right corner of your screen.*
**Note: You must keep the connector on and open at all times for the sync to continue.**
*(Your device's sleep mode must be disabled so the connection is constantly running.)*
***
**Have additional questions?**
*Contact us at [support@fieldpulse.com](mailto:support@fieldpulse.com) or use the chat feature in the bottom right corner of your screen.*