> ## Documentation Index
> Fetch the complete documentation index at: https://help.fieldpulse.com/llms.txt
> Use this file to discover all available pages before exploring further.
# Sync: QuickBooks Online
> Connect FieldPulse to QuickBooks Online and turn on the integration in Company Settings so customers, invoices, and payments sync both ways.
## 1. Request access to sync with QuickBooks
To connect to QuickBooks Online, you will first need to request access by contacting us at [support@fieldpulse.com](mailto:support@fieldpulse.com) or using the chat feature in the bottom right corner of your screen.
## 2. Turn on the integration in *Company Settings.*
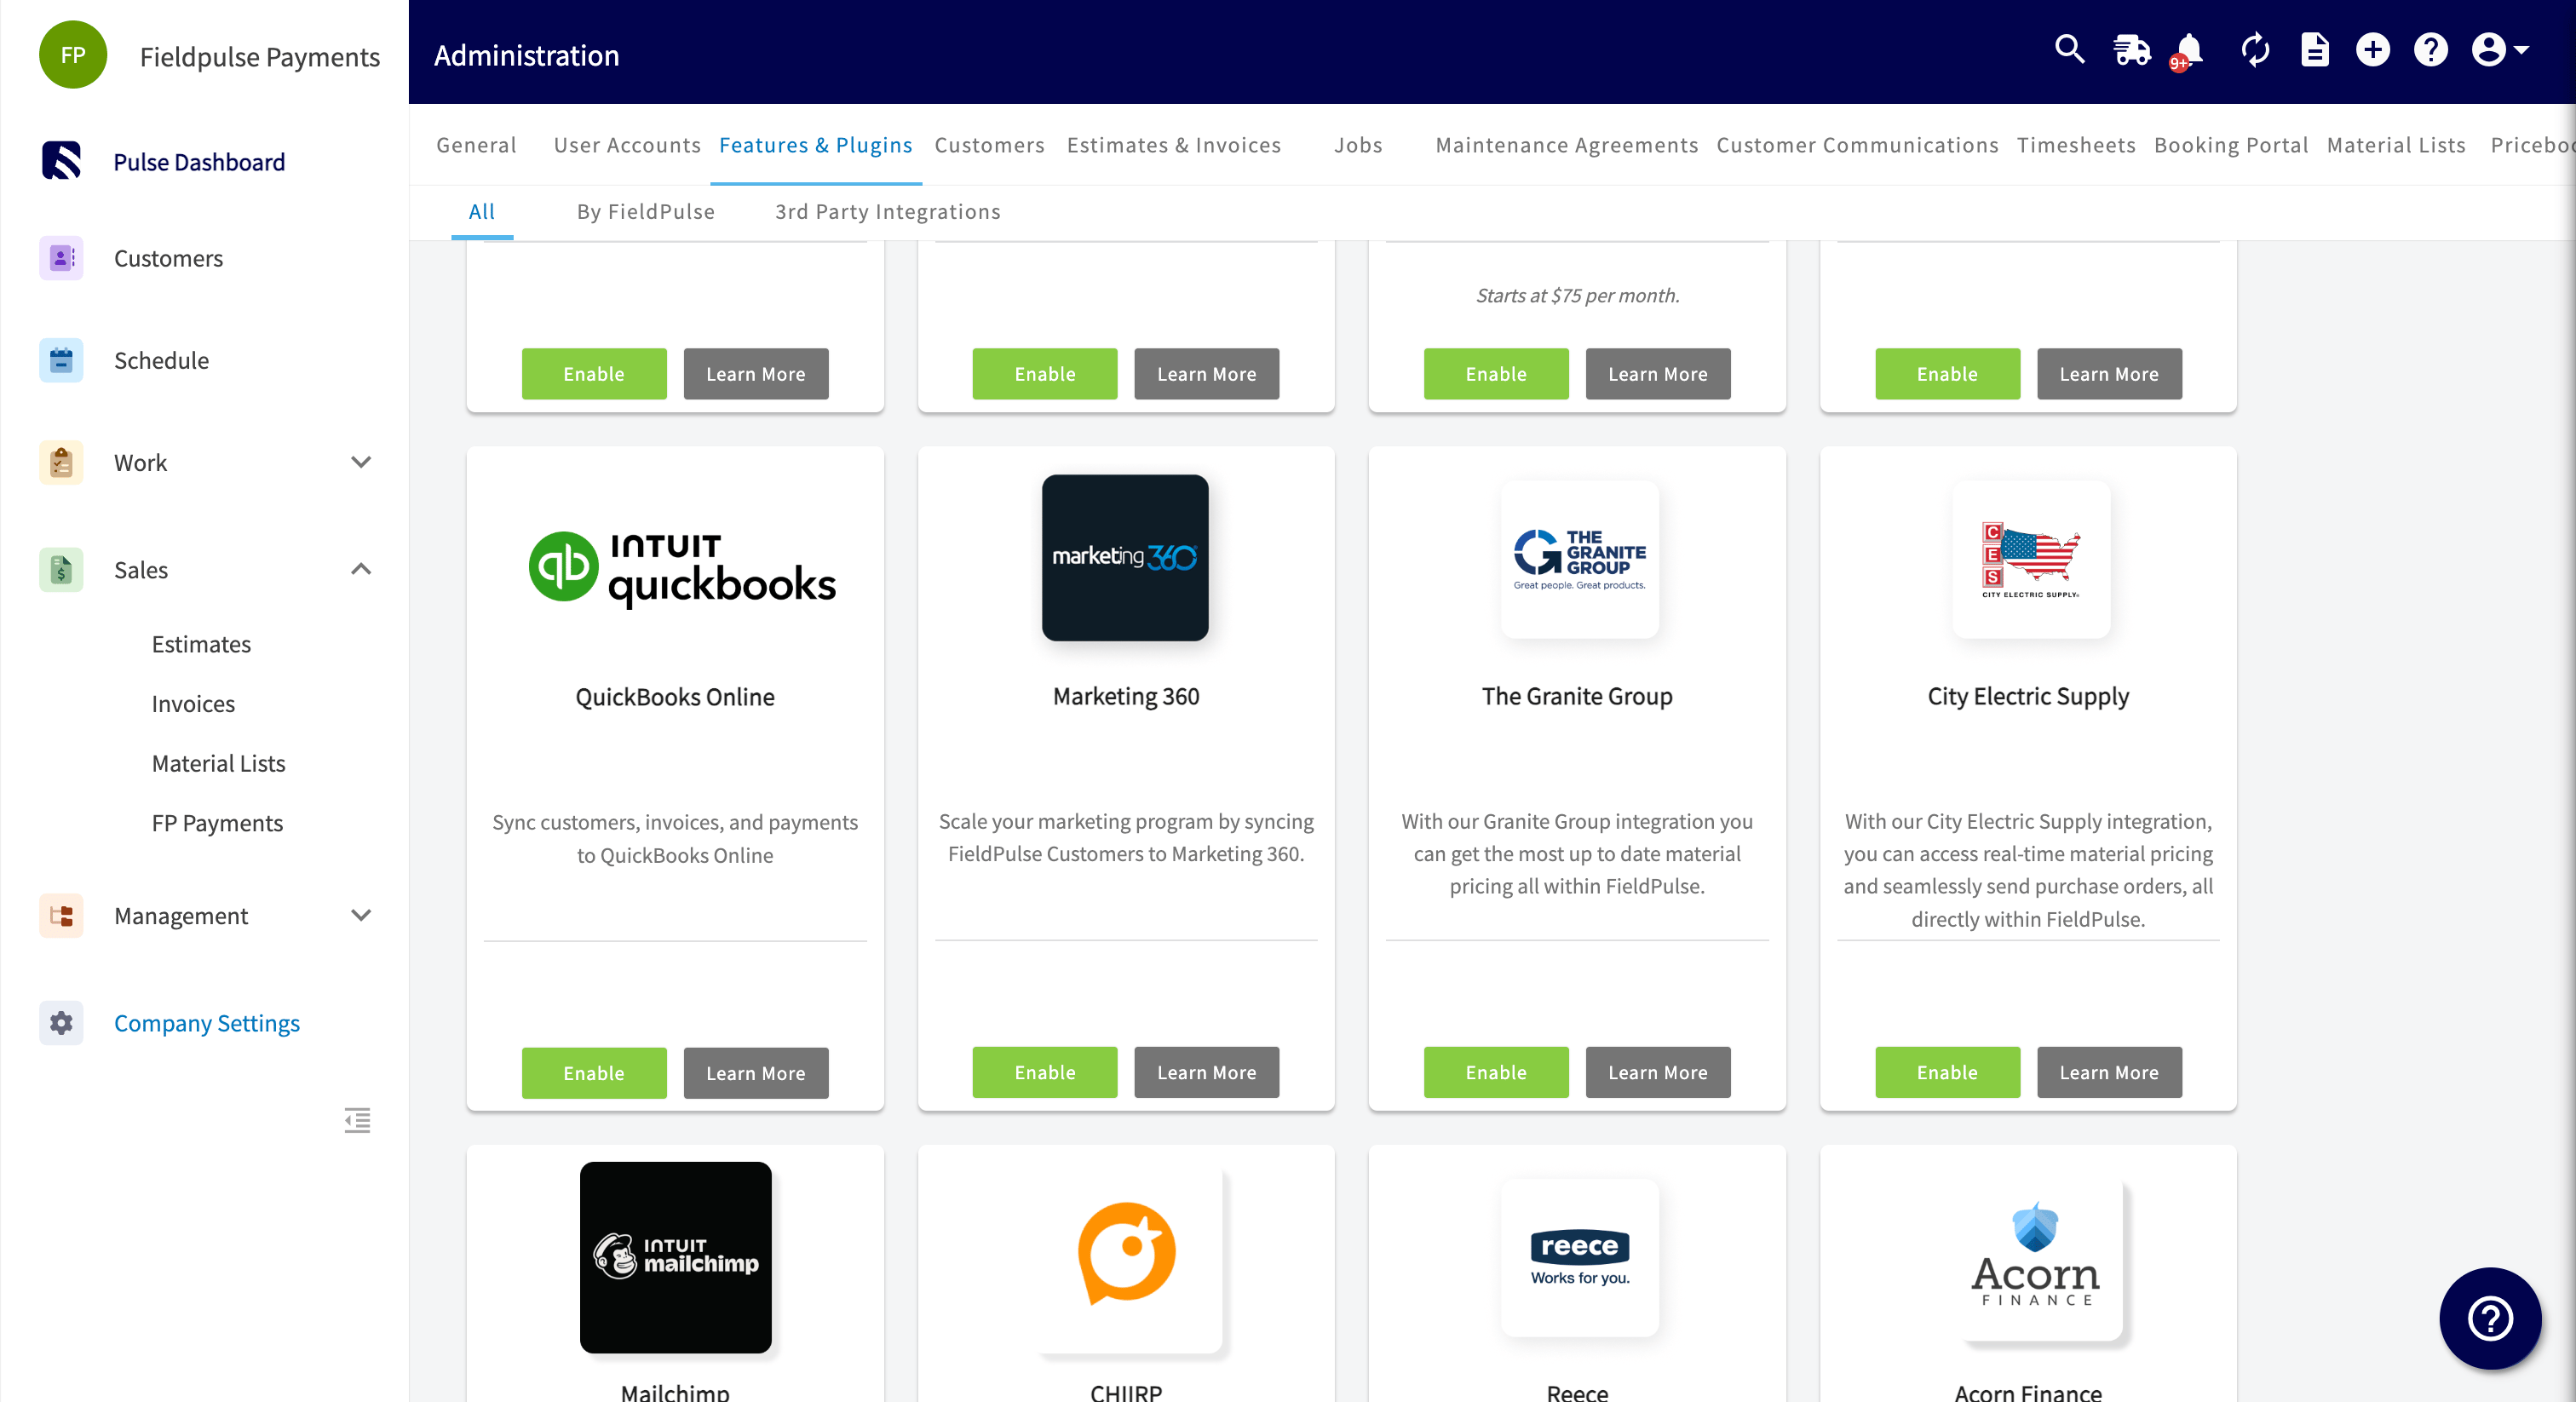
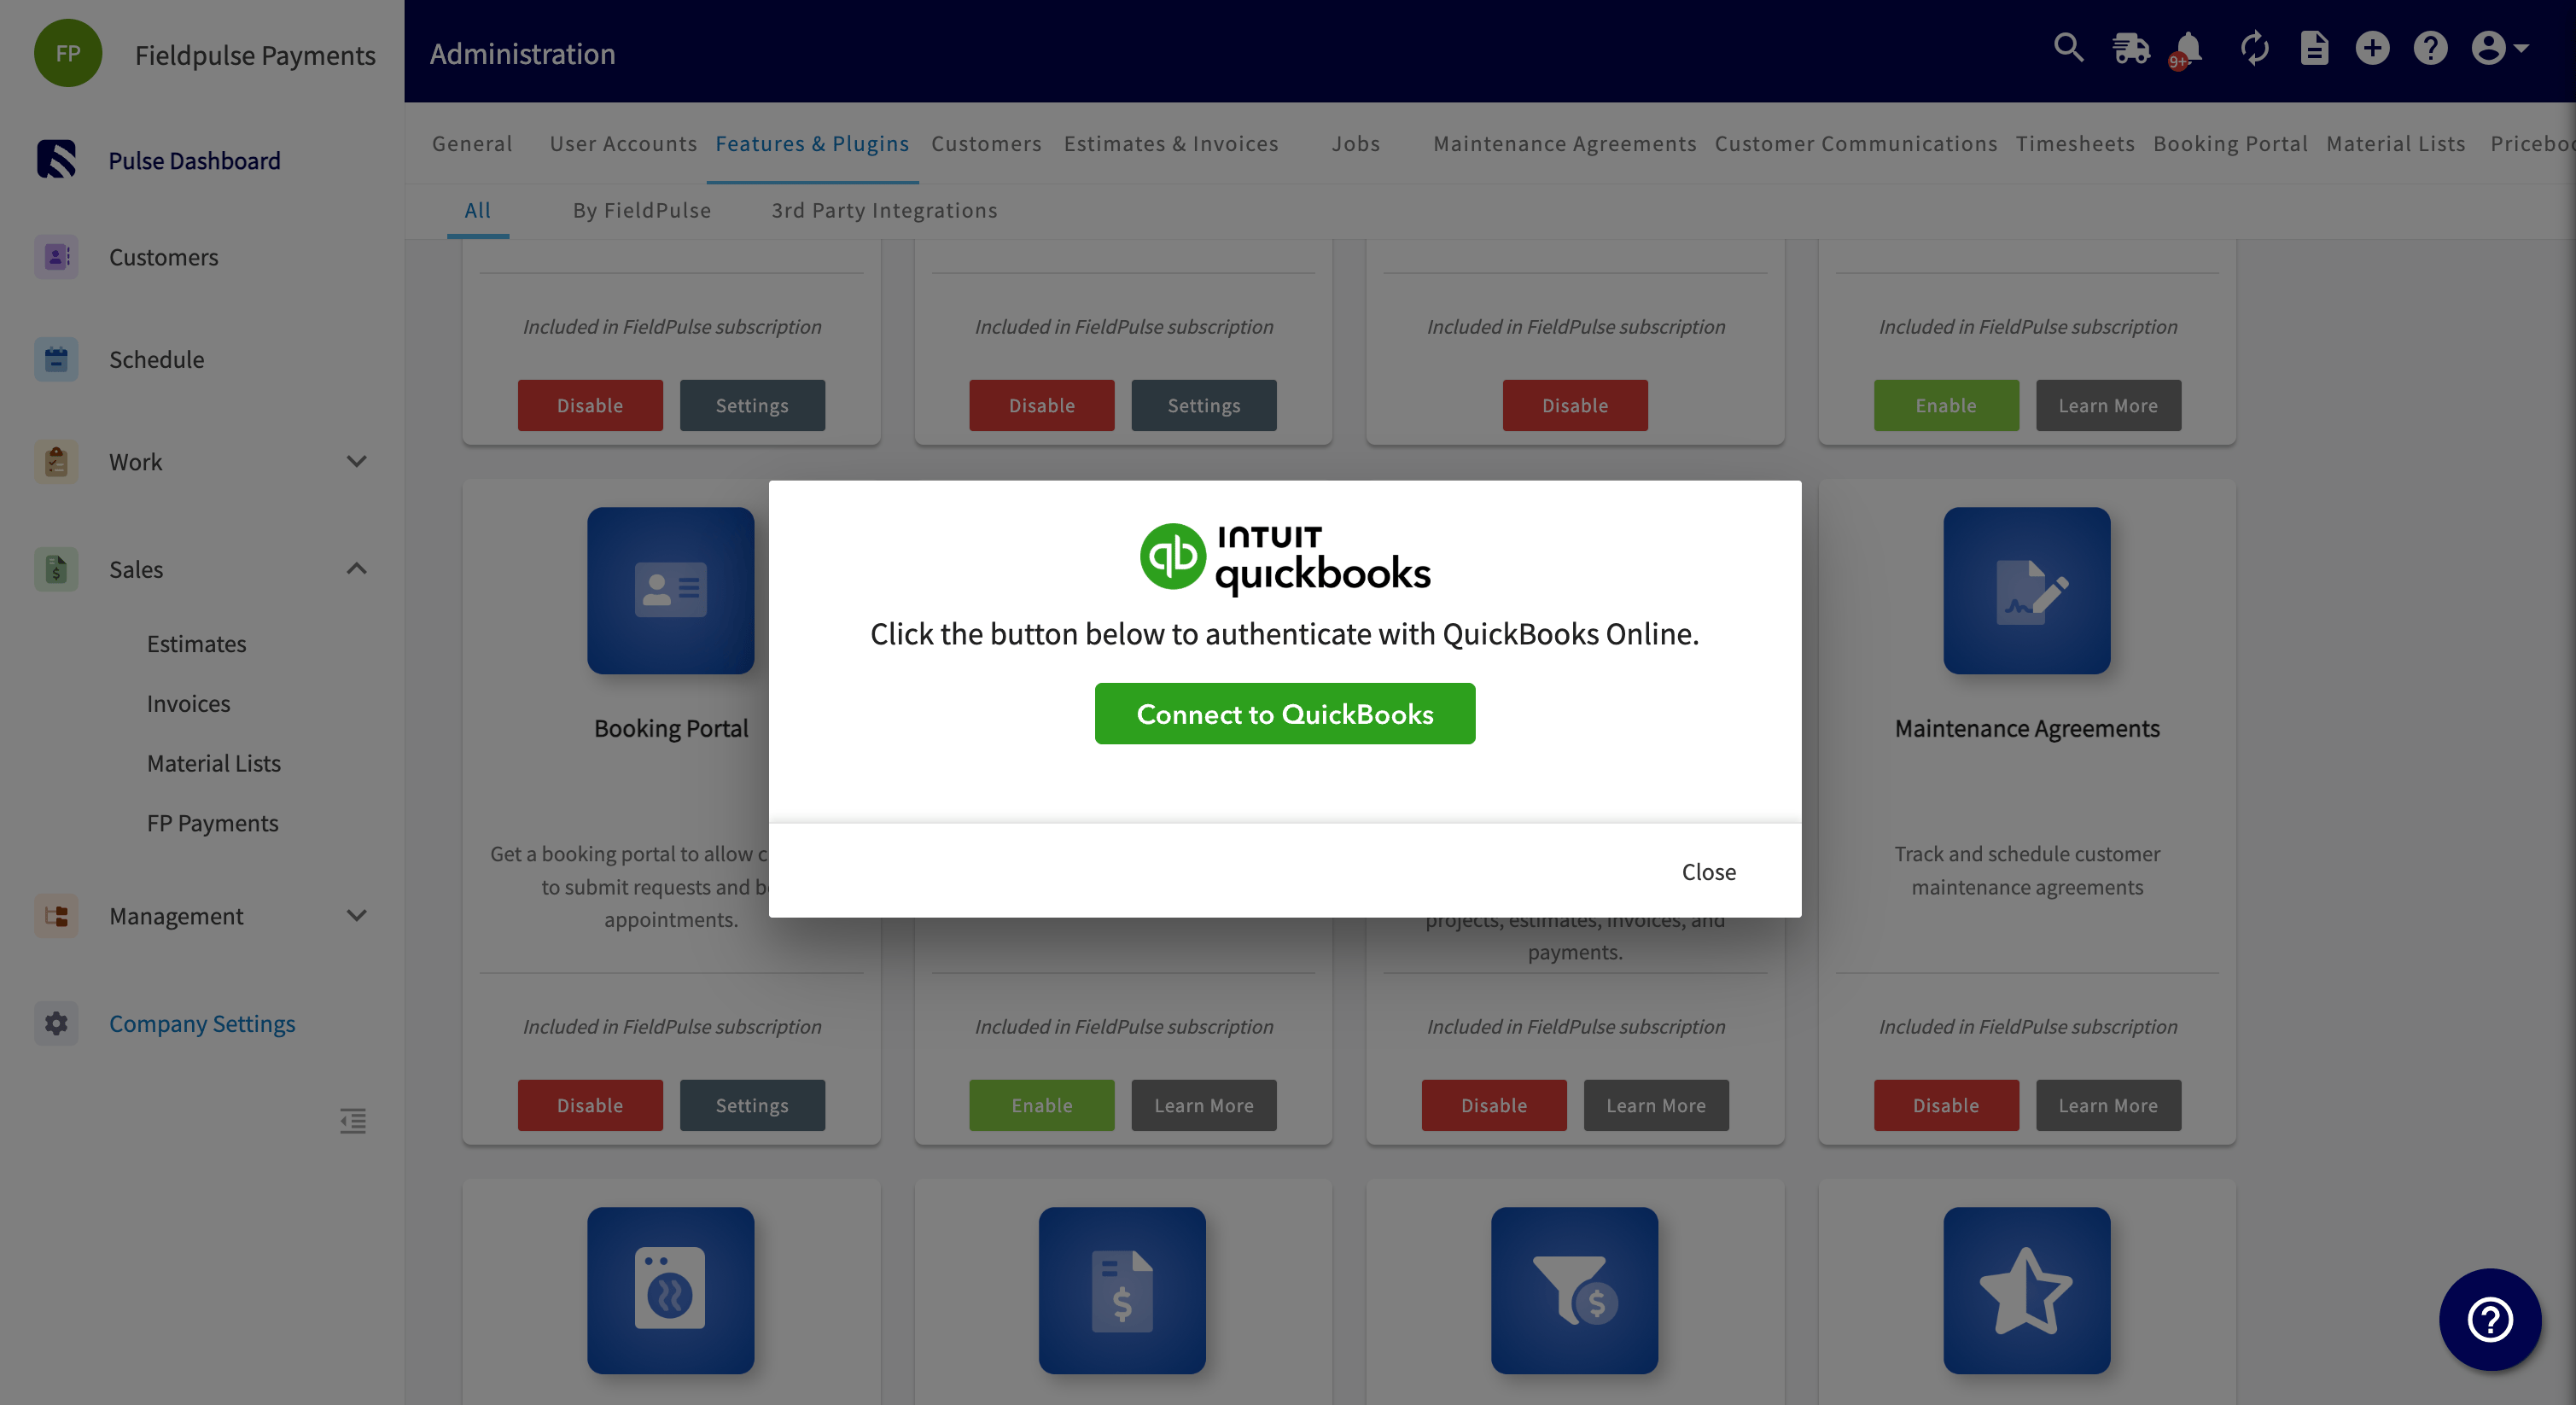
Once FieldPulse has enabled you to connect to QuickBooks, go to *Company Settings*. Find the *Features & Plugins* tab and navigate until you find the QuickBooks Online tile. Click *Connect to QuickBooks*.
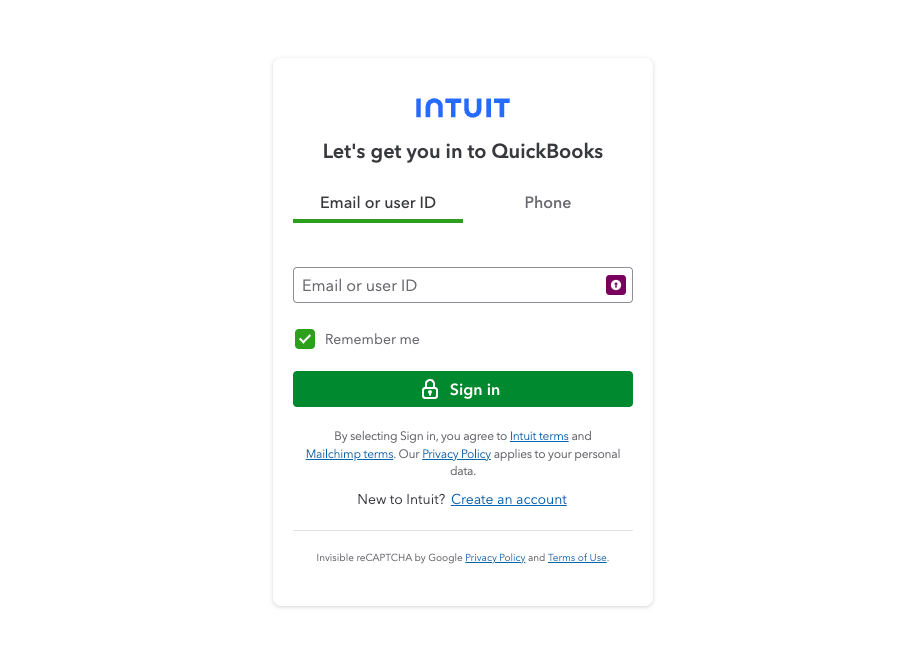
 ## 3. Enter your login information for your QuickBooks Online account and follow any on-screen instructions
 ## 4. Select the time period and all the entities you would like to sync between FieldPulse and QuickBooks
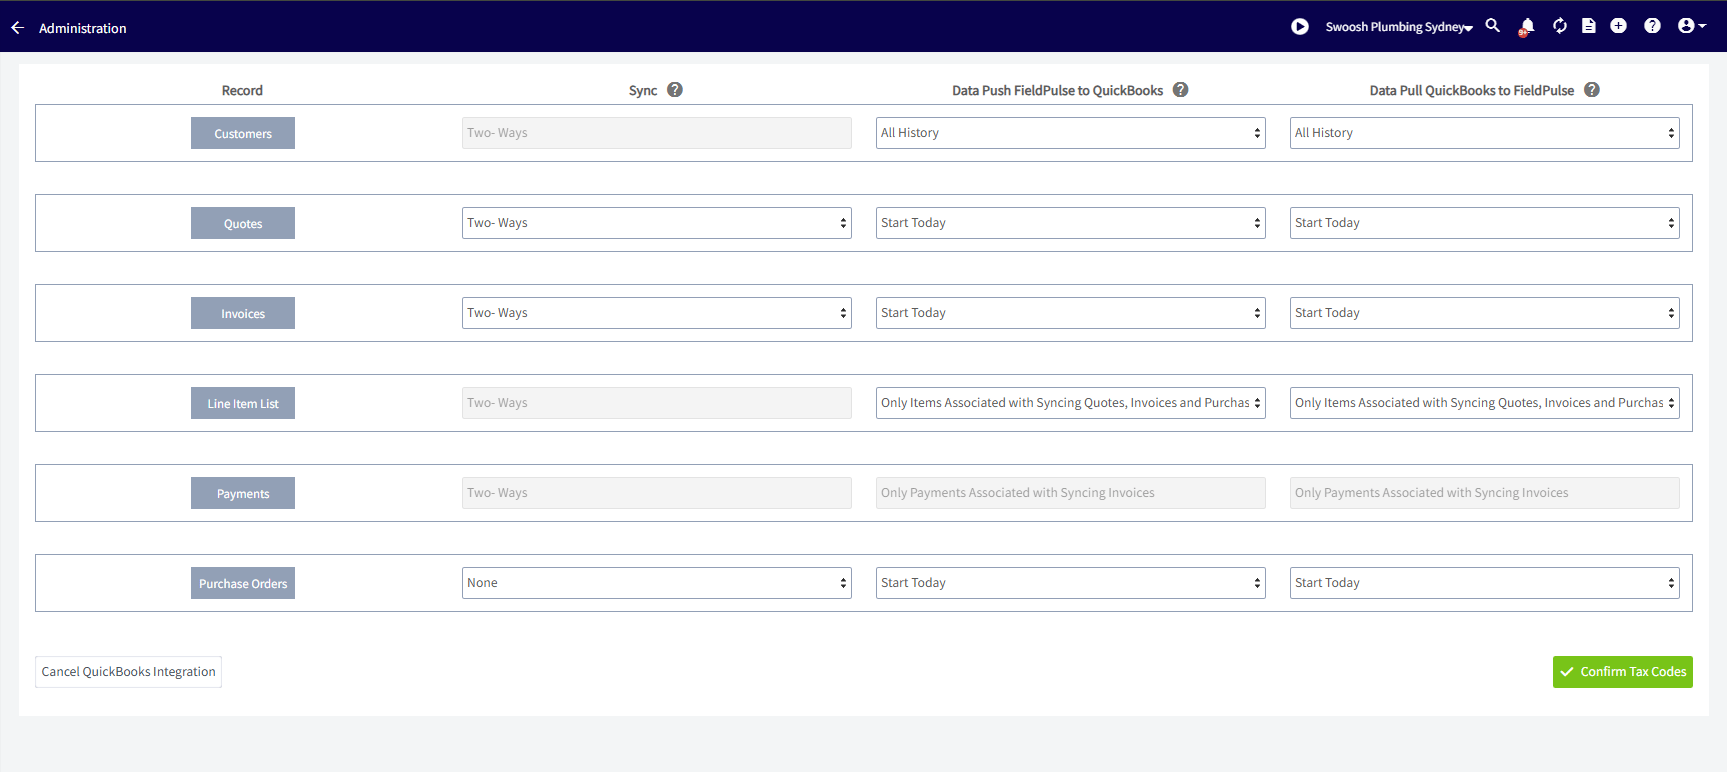 *(**Note:** In order to sync invoices, your customers, line items, and payments must also sync)*
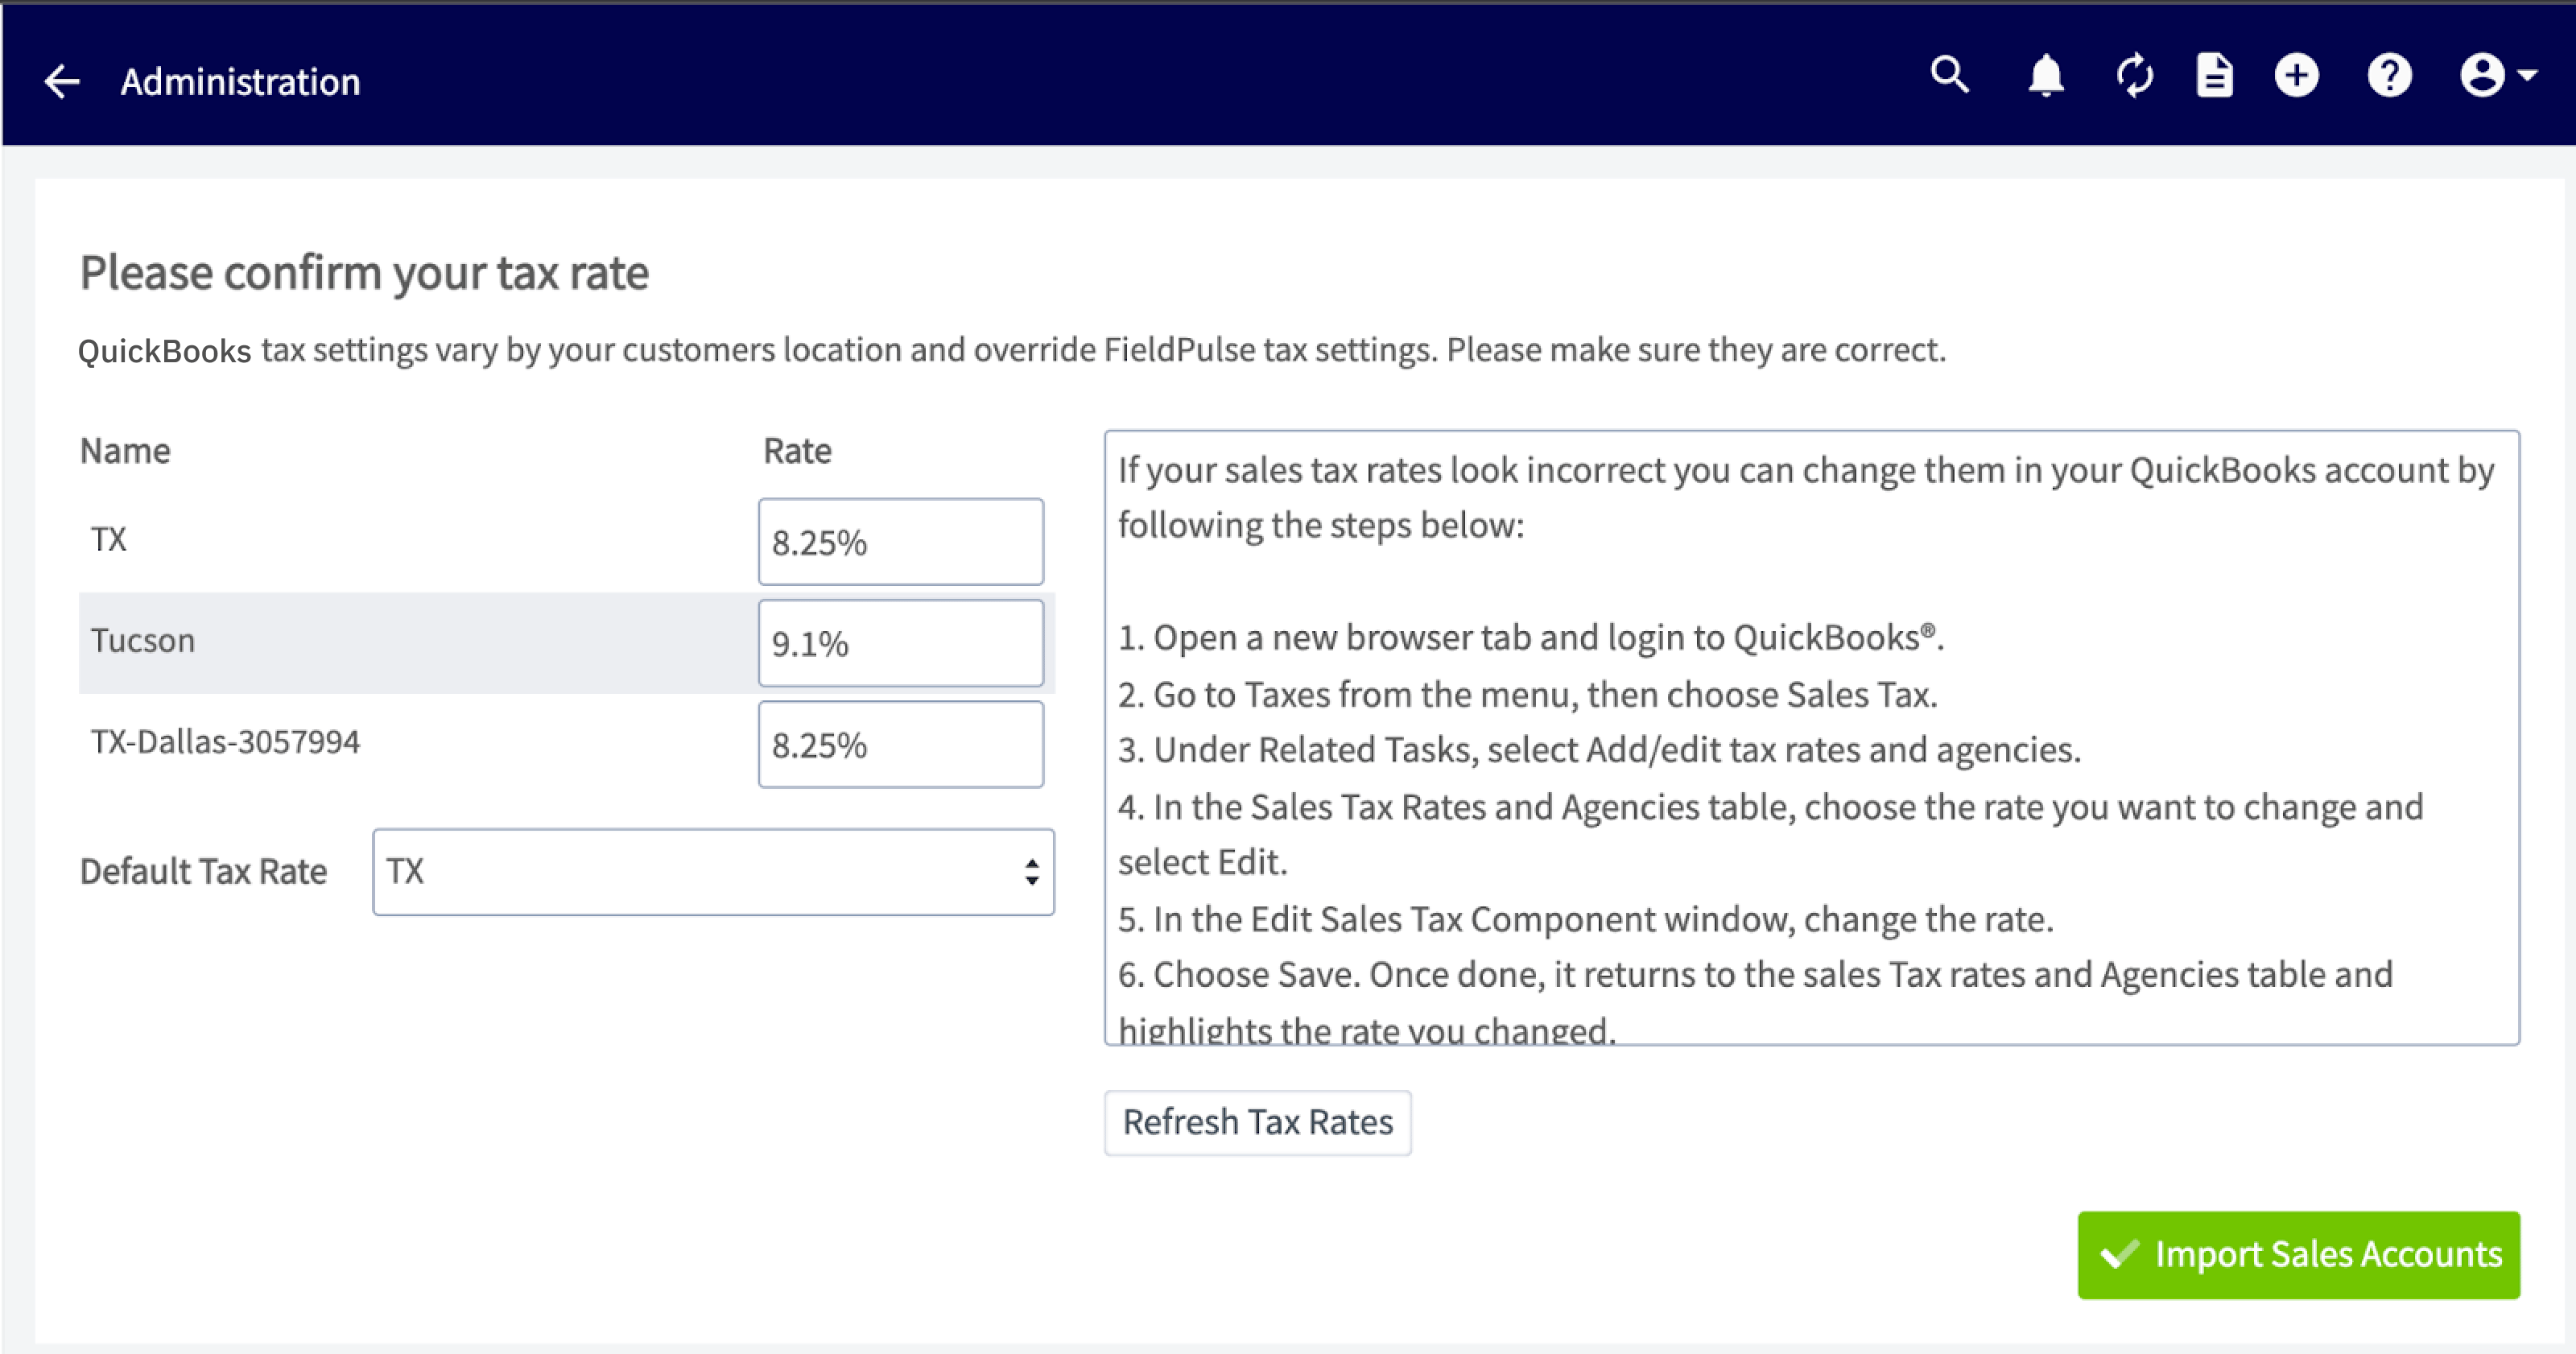
## 5. Next you will be prompted to select your default tax rate from a list of tax rates FieldPulse gets from QuickBooks
*(**Note:** In order to sync invoices, your customers, line items, and payments must also sync)*
## 5. Next you will be prompted to select your default tax rate from a list of tax rates FieldPulse gets from QuickBooks
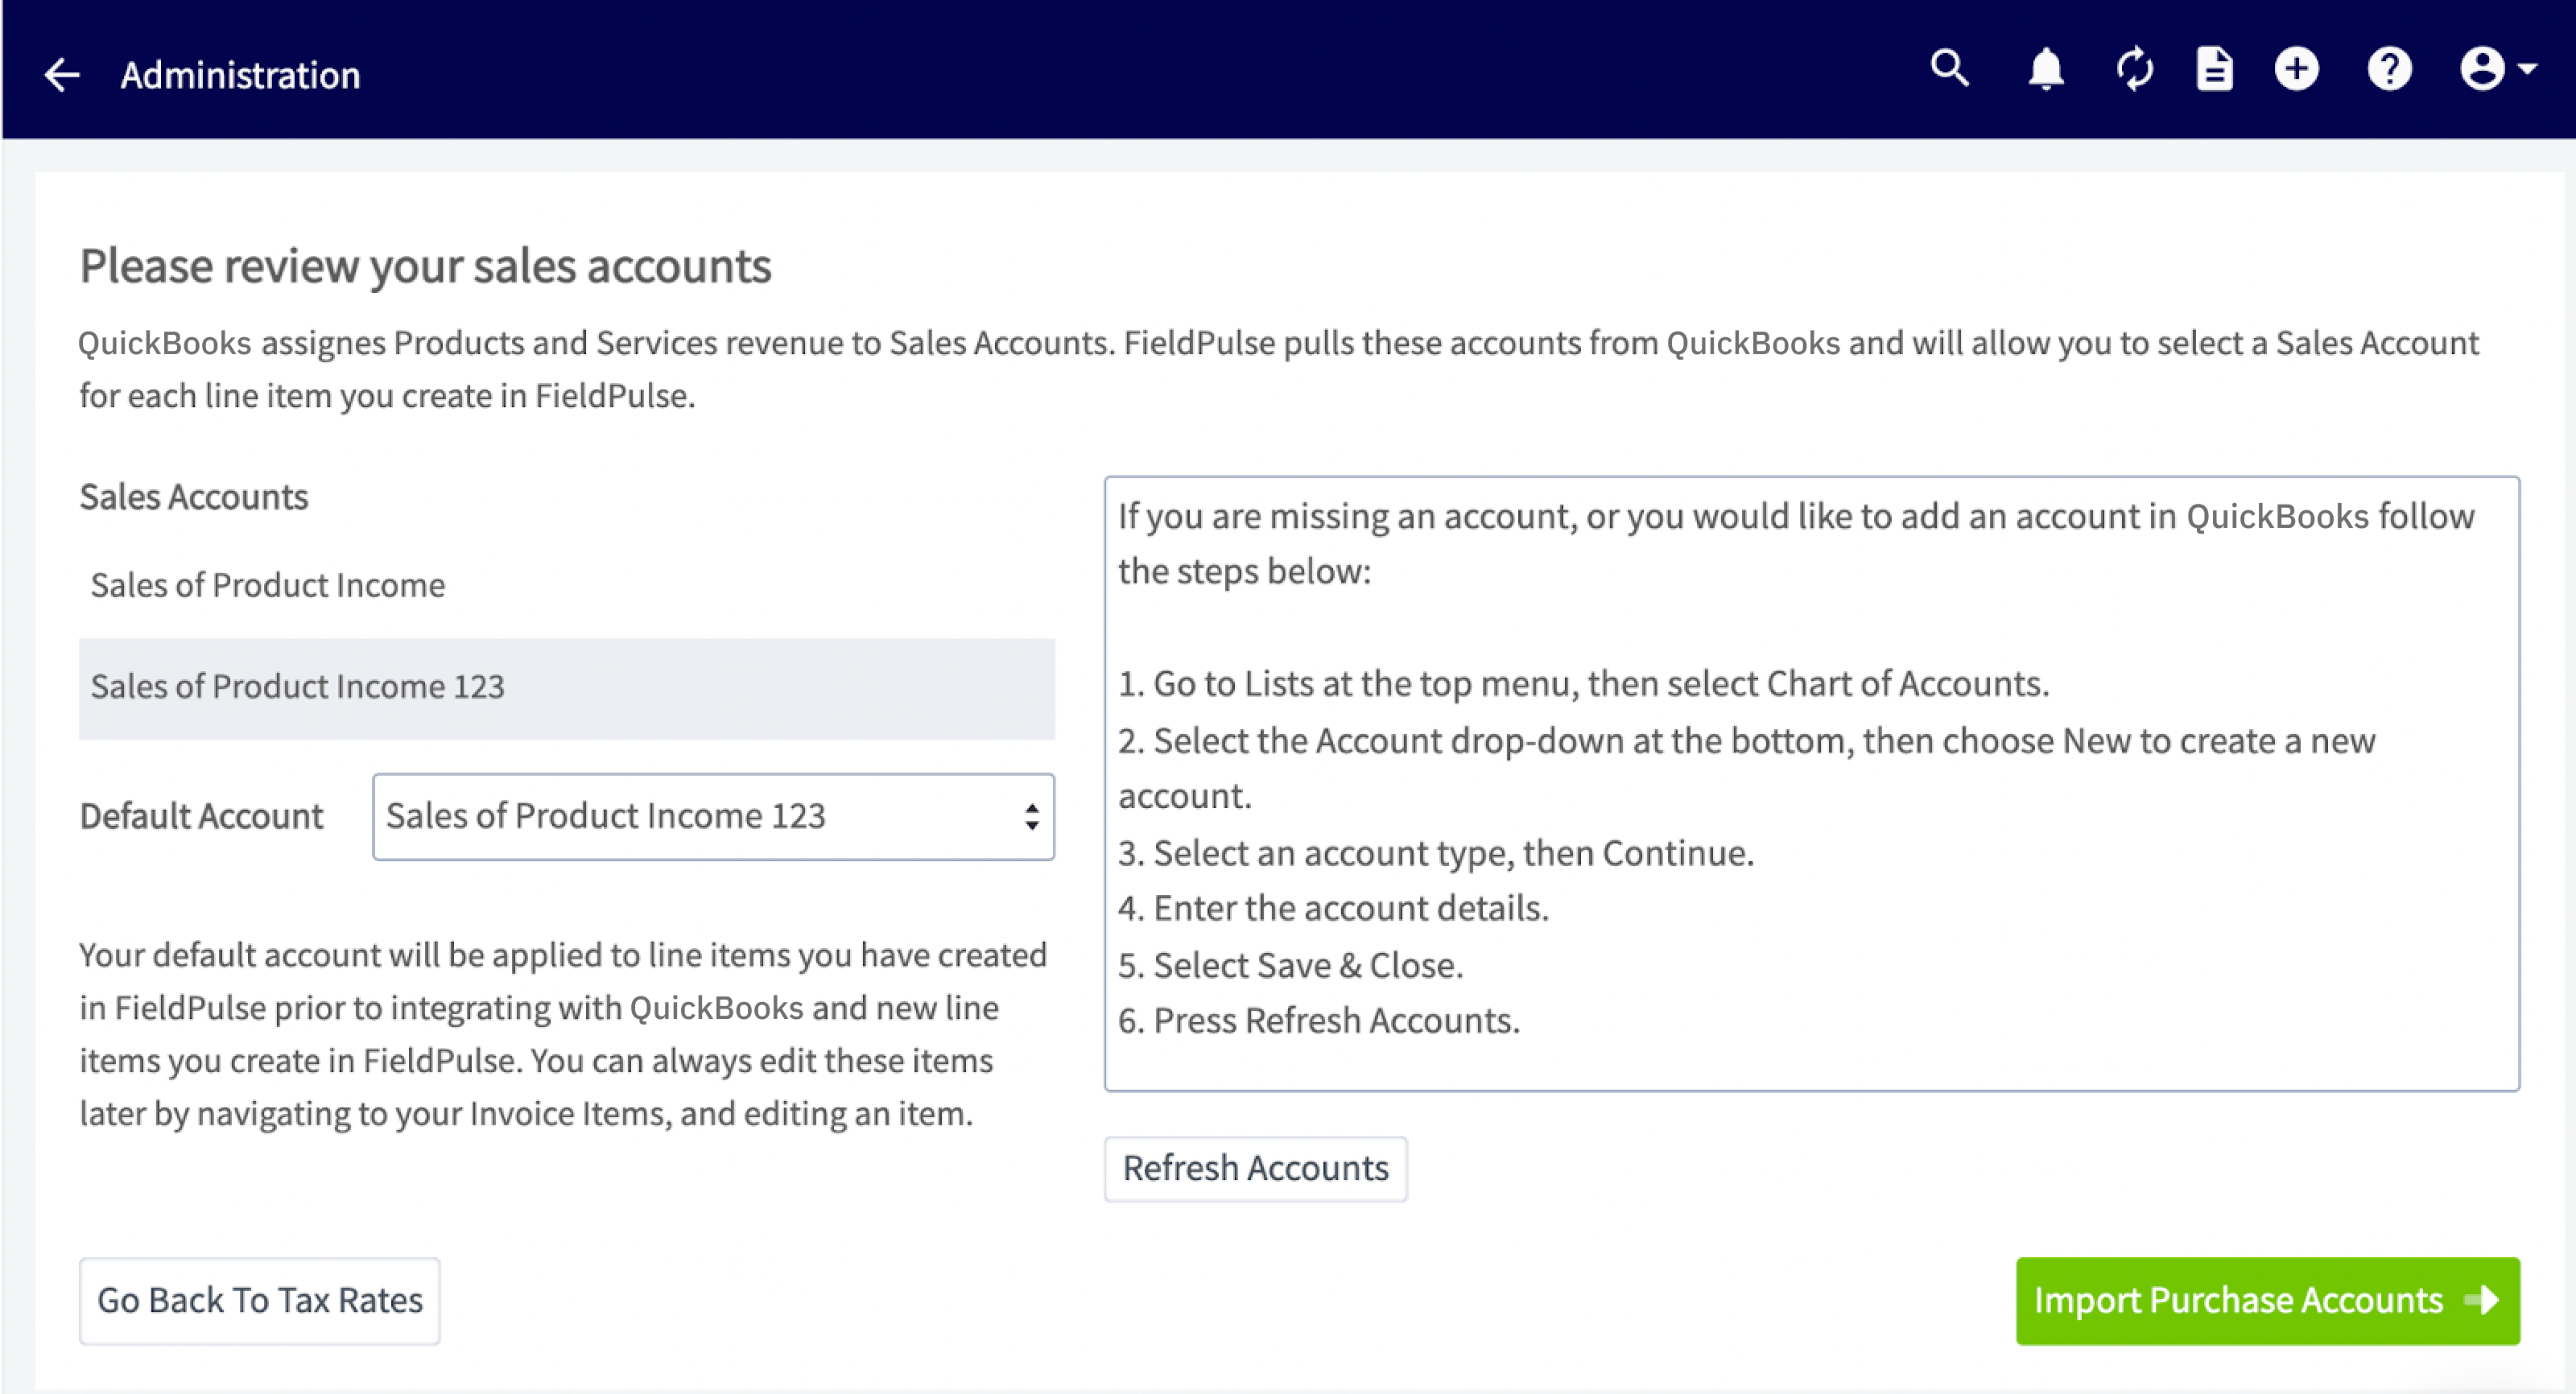
 ## 6. Next you will select your default sales account (this refers to items you sell)
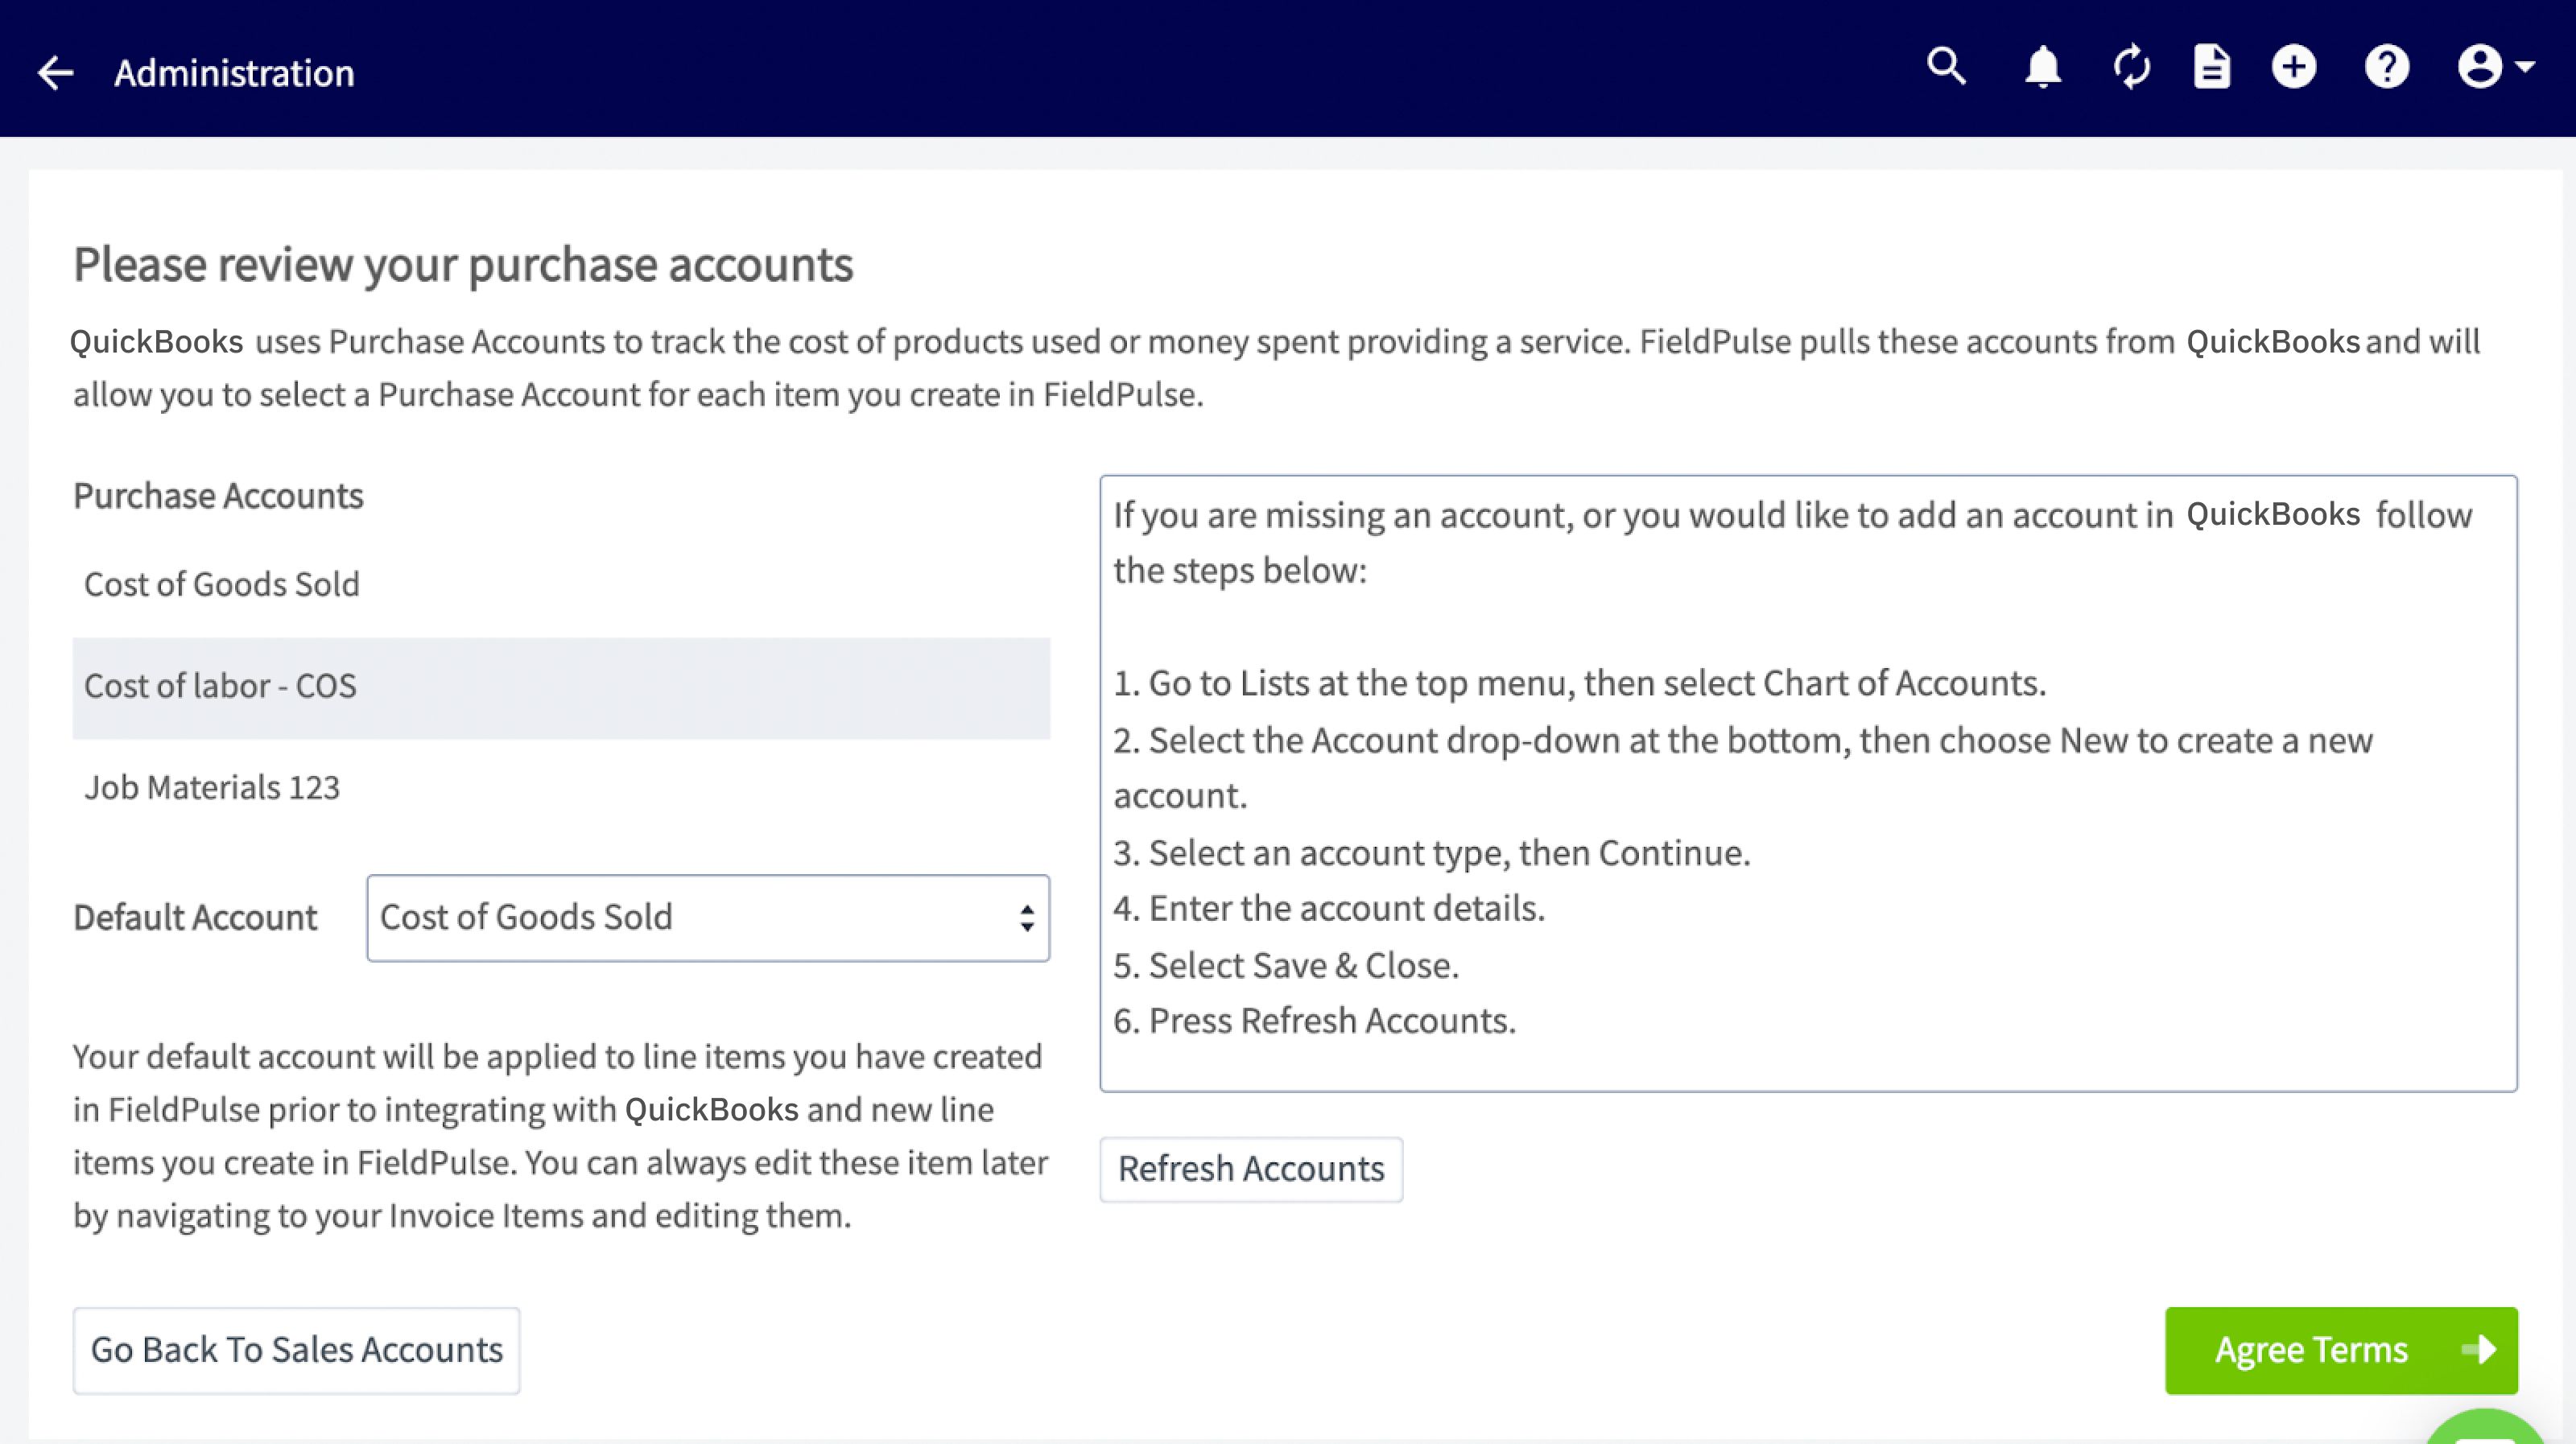
 ## 7. Next you will select your default purchase account (this refers to items you purchase)
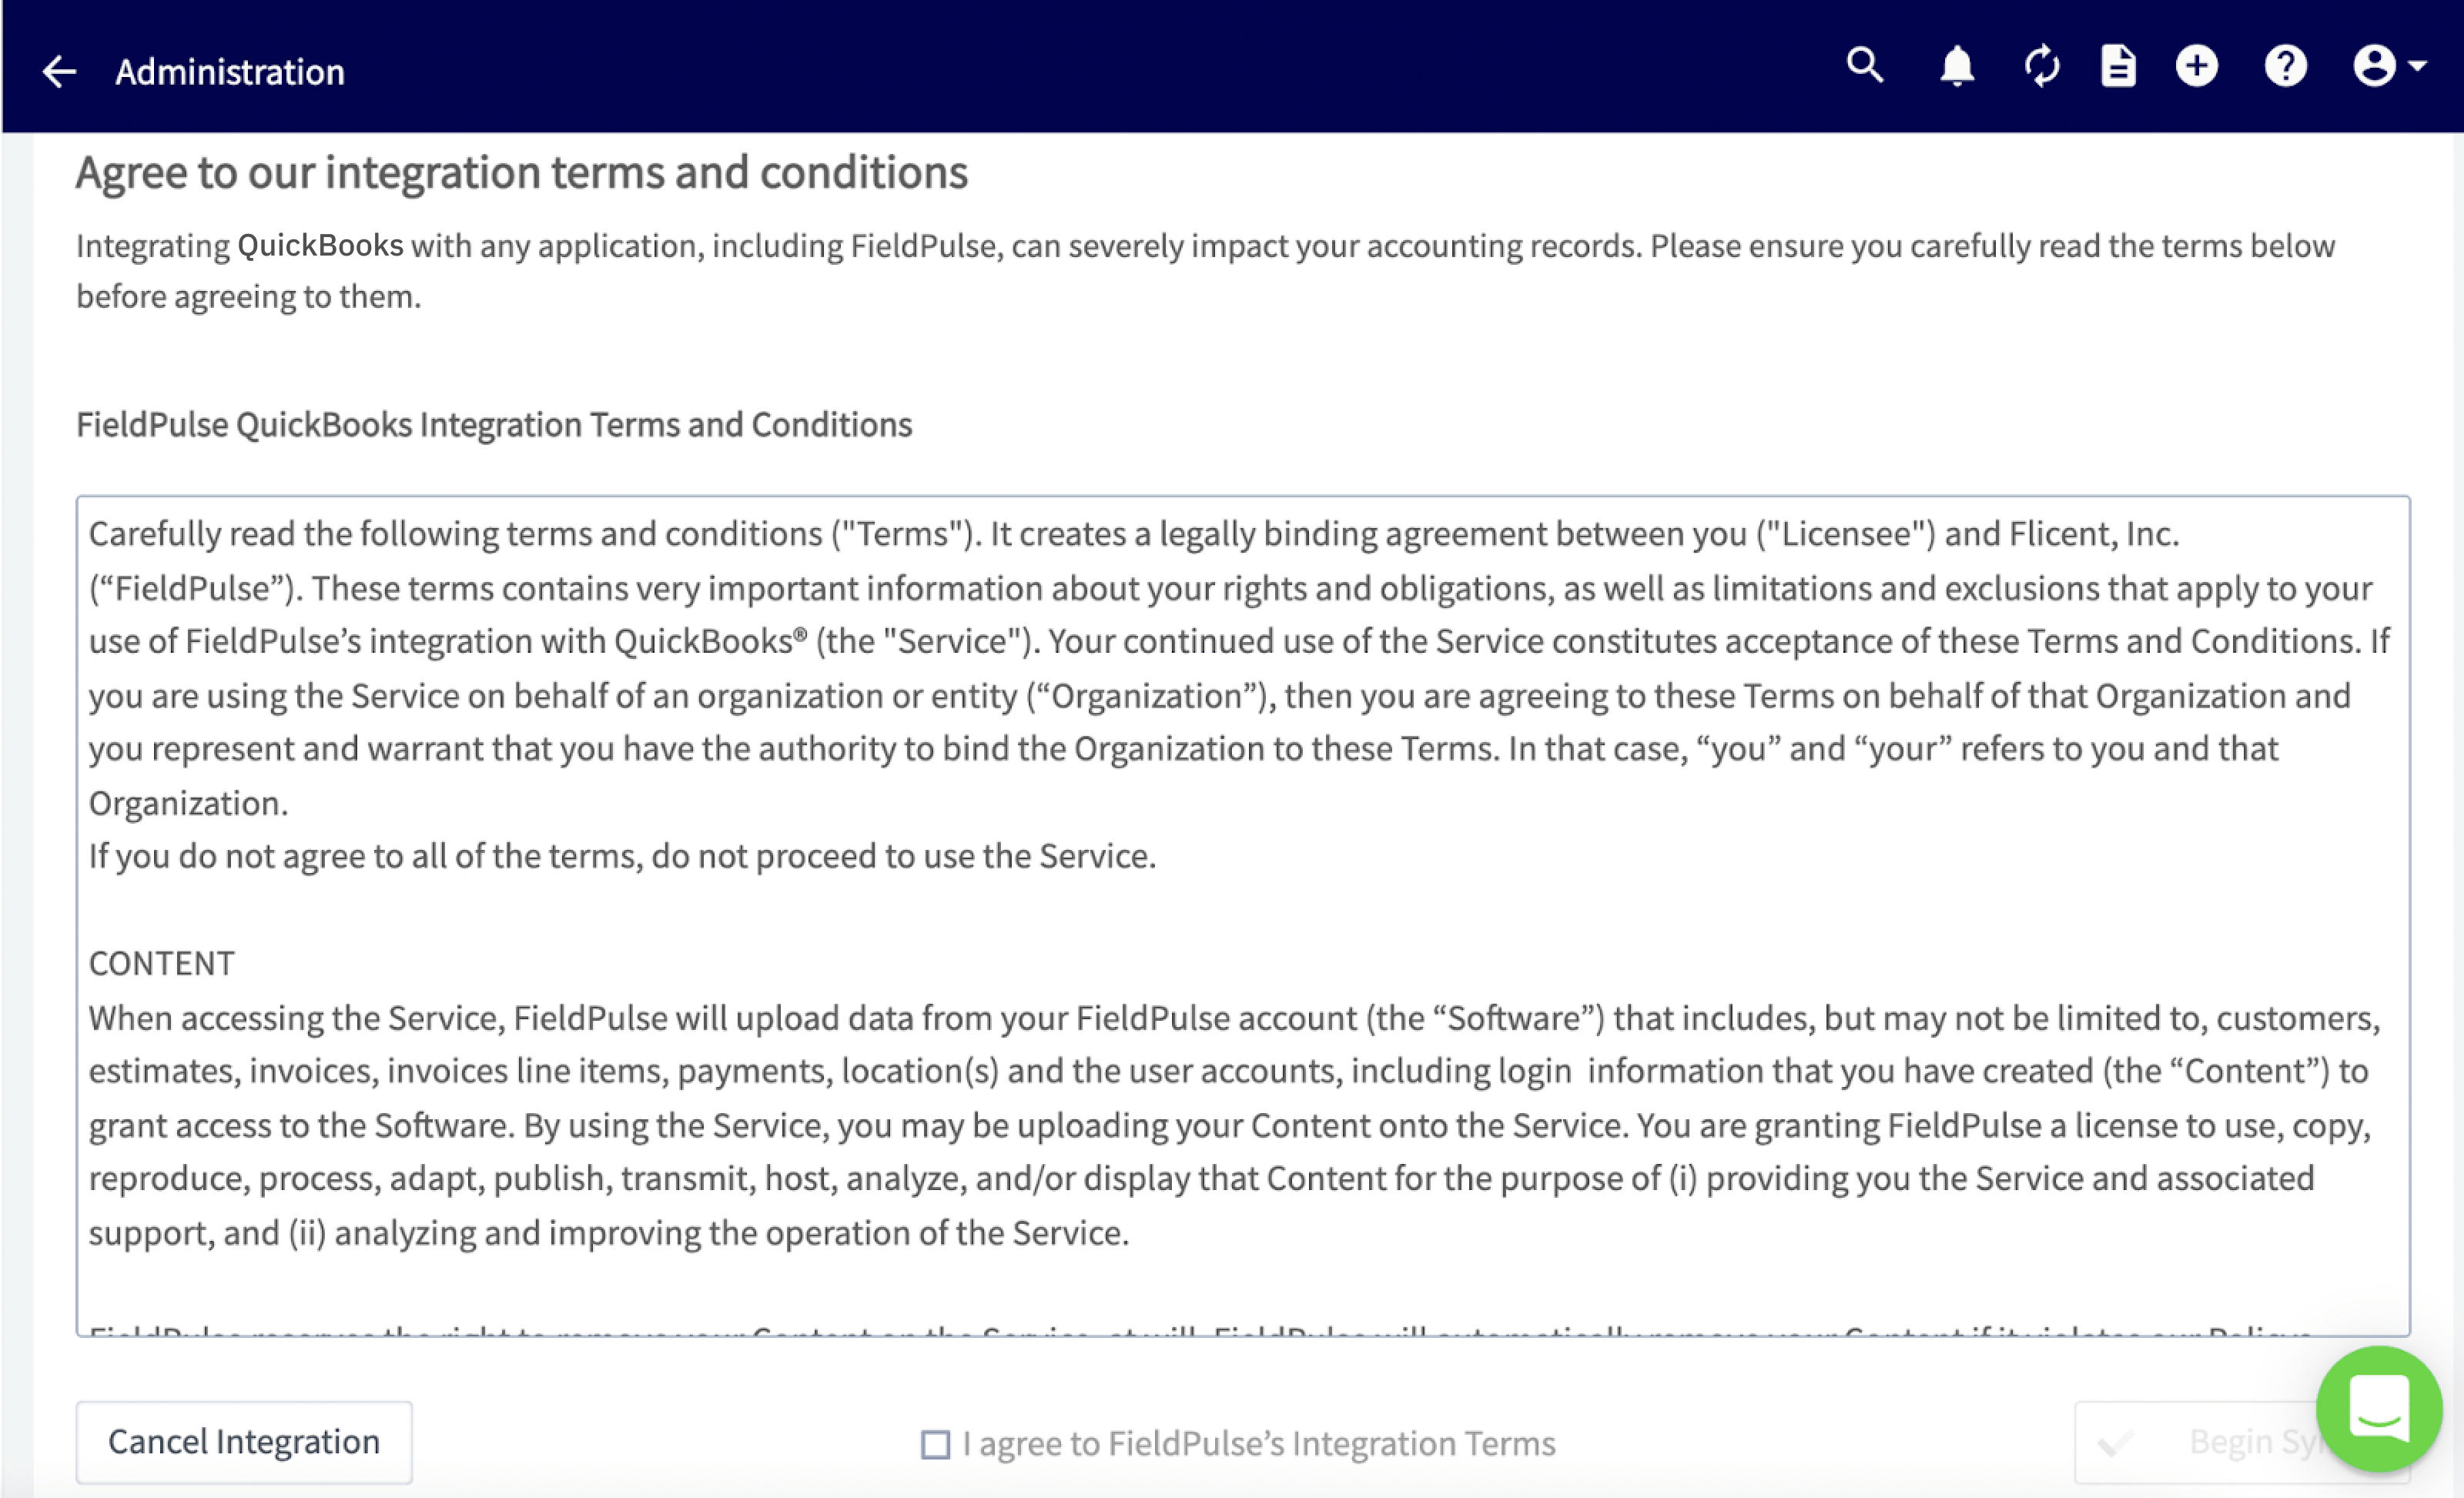
 ## 8. Agree to the QuickBooks Integration Terms & Conditions
 ## 9. Finally you will reach this page, which shows that the syncing process has started. You should begin see these items populate in your FieldPulse account
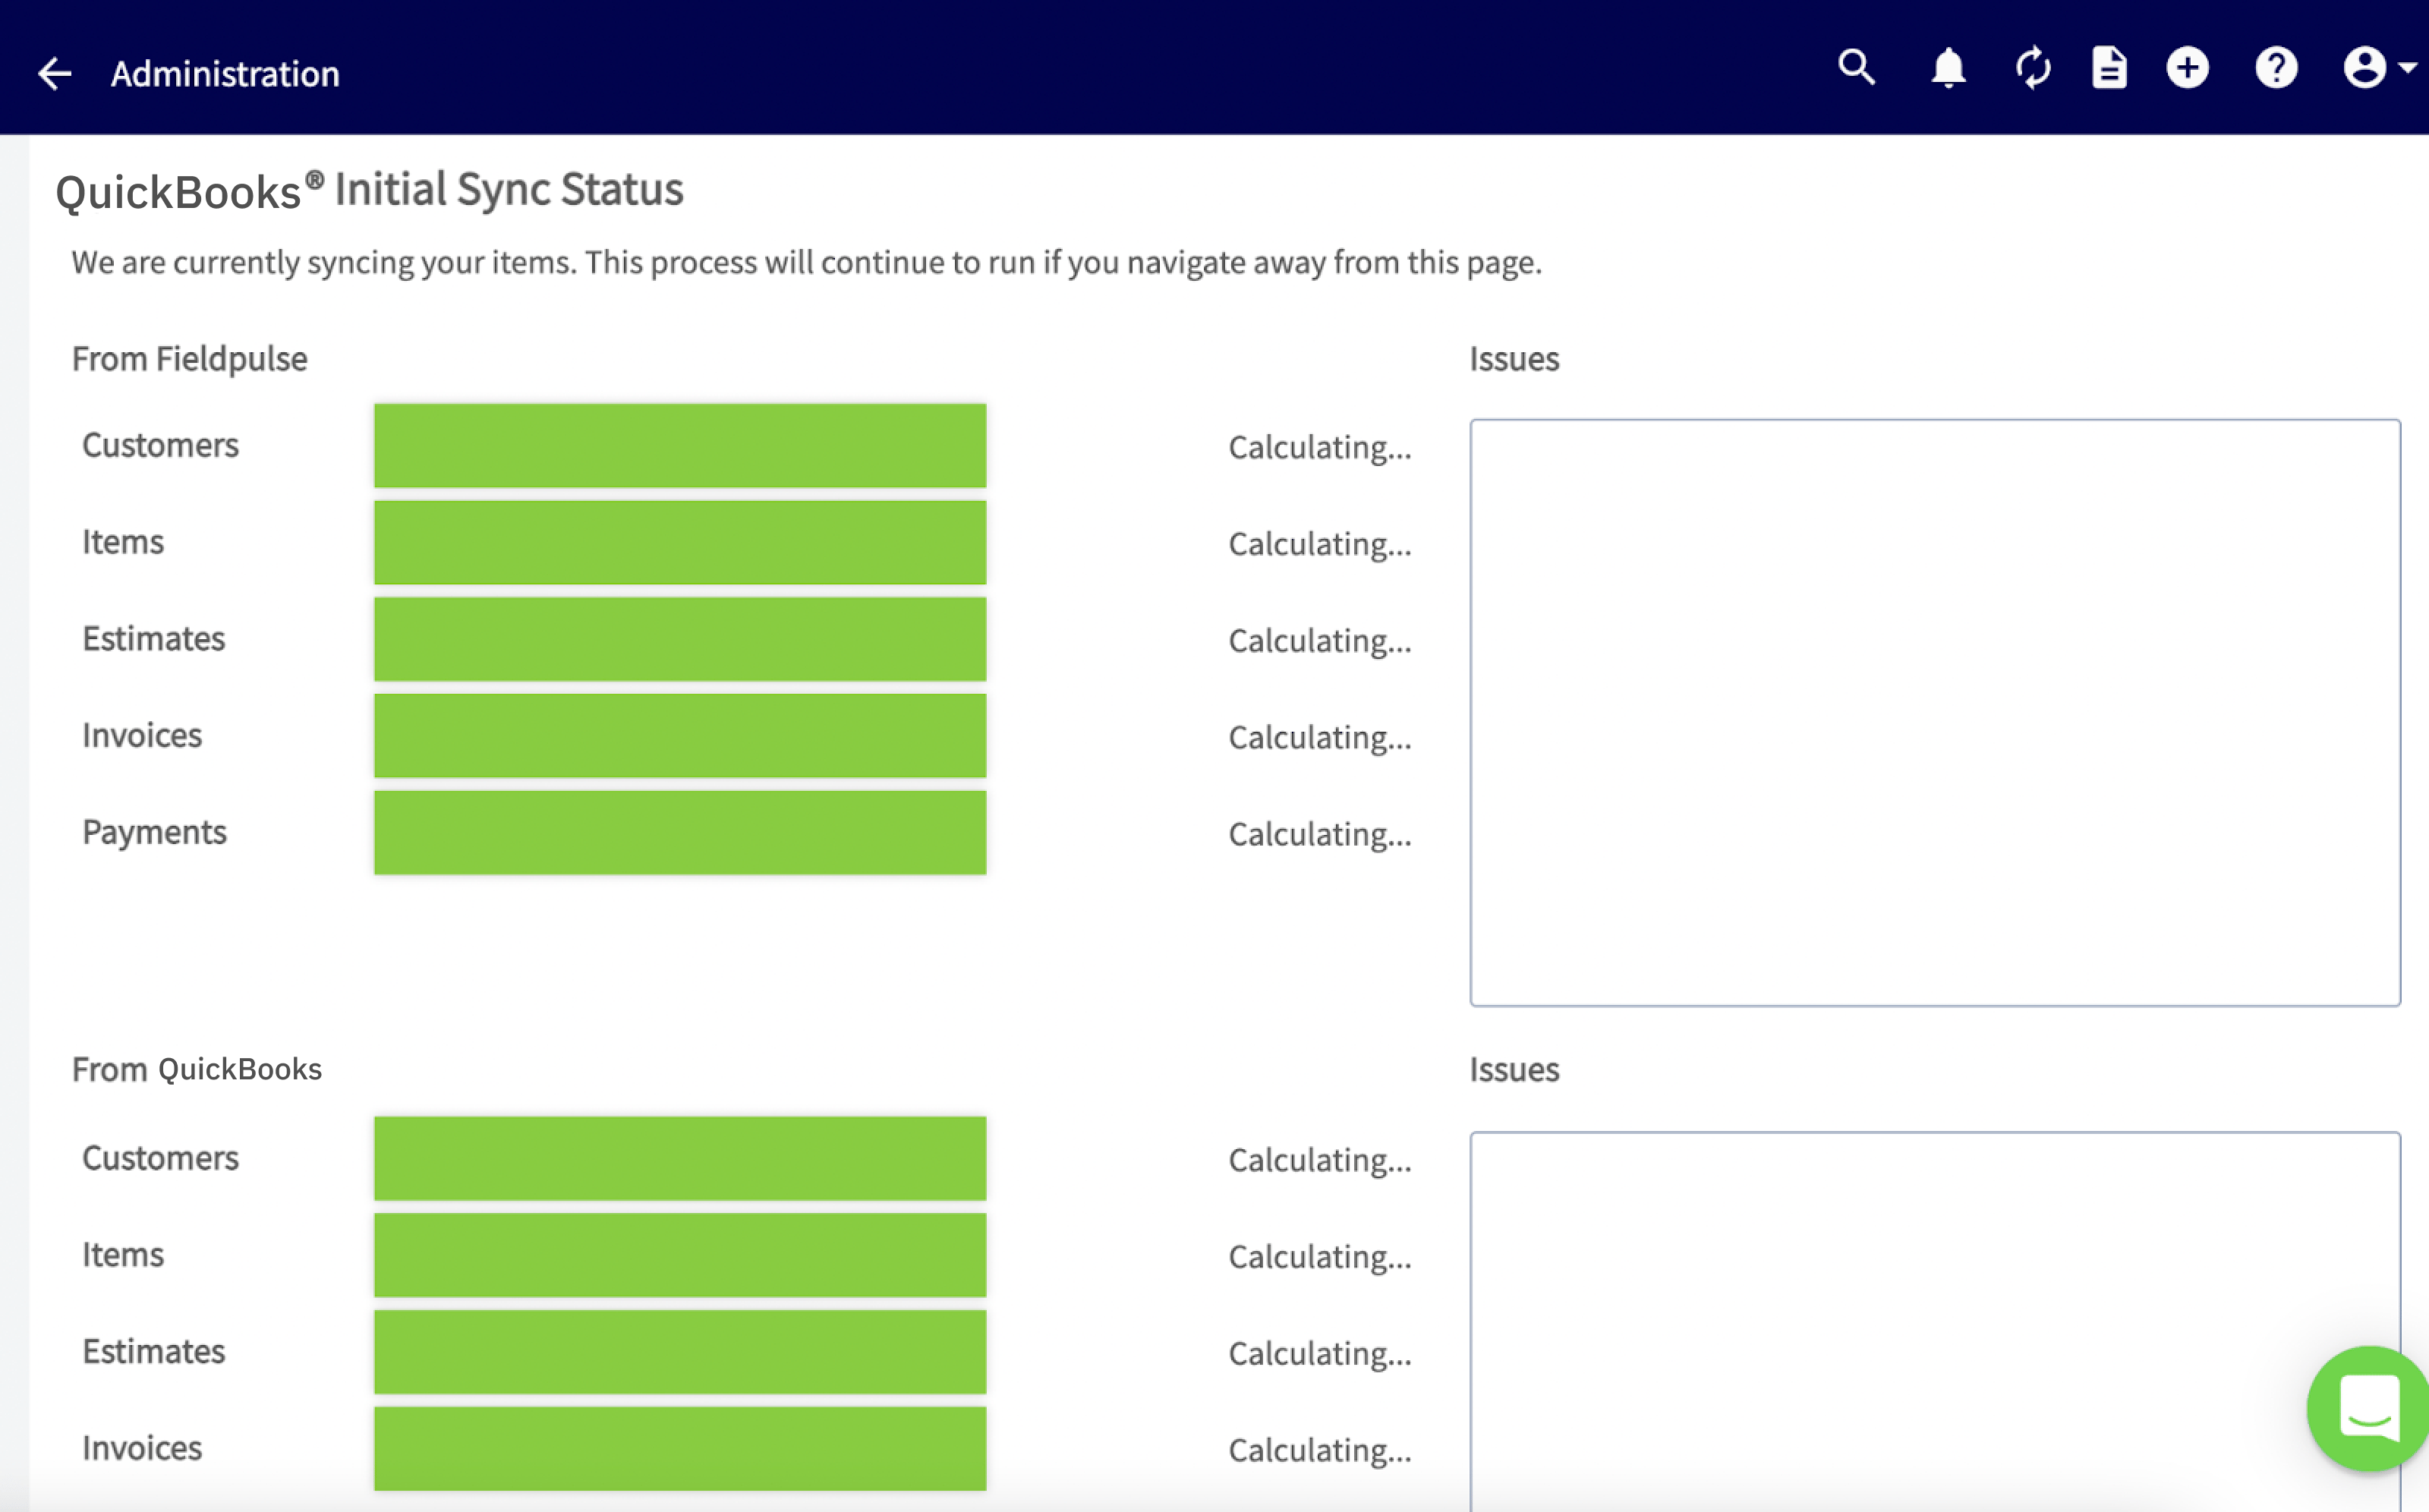 *(**Note:** If you have a large number of items coming over, please be patient. This can take some time. You can exit out of this page and operate as normal and check back on the status at any time.)*
***
**Have additional questions?**
*Contact us at [support@fieldpulse.com](mailto:support@fieldpulse.com) or use the chat feature in the bottom right corner of your screen.*
*(**Note:** If you have a large number of items coming over, please be patient. This can take some time. You can exit out of this page and operate as normal and check back on the status at any time.)*
***
**Have additional questions?**
*Contact us at [support@fieldpulse.com](mailto:support@fieldpulse.com) or use the chat feature in the bottom right corner of your screen.*