> ## Documentation Index
> Fetch the complete documentation index at: https://help.fieldpulse.com/llms.txt
> Use this file to discover all available pages before exploring further.
# How to Sync With QuickBooks Online
> Connect FieldPulse to QuickBooks Online — request access, turn on the integration in Company Settings, and choose the time period and records to sync.
Who uses this: Admins connect the integration — the connecting account must be active and have admin permissions in QuickBooks Online. Availability: Requires the customer's own QuickBooks Online subscription (Essentials, Plus, or Advanced) and is available in the United States, Canada, and Australia.
[Syncing with QuickBooks Online](https://www.fieldpulse.com/company/partners/quickbooks) is a two-part task: you request access from the FieldPulse team, then turn on the integration in Company Settings and choose what to bring over. Once the connection is live, your [customers](https://www.fieldpulse.com/features/customer-management), [invoices](https://www.fieldpulse.com/features/estimates-and-invoices), and [payments](https://www.fieldpulse.com/features/fieldpulse-payments) sync both ways.
## Overview
The QuickBooks Online connection is gated — you request access first, and the FieldPulse team enables the connection for your account. After that, you connect from the QuickBooks Online tile in Company Settings and select the time period and records to sync. Complete the preparation in [Setting Up QuickBooks Online Before Syncing](/integrations/accounting/quickbooks-online/pre-sync) first.
## Before you begin
* Finish the preparation steps in [Setting Up QuickBooks Online Before Syncing](/integrations/accounting/quickbooks-online/pre-sync), including turning off *Automatically apply credits* in QuickBooks Online.
* Make sure the QuickBooks Online account you connect with is active and has admin permissions.
## Request access and connect
1. **Request access.** [Contact the FieldPulse team](https://www.fieldpulse.com/company/contact-us) through in-app chat or at [support@fieldpulse.com](mailto:support@fieldpulse.com) to request access to the QuickBooks Online sync. The team enables the connection for your account.
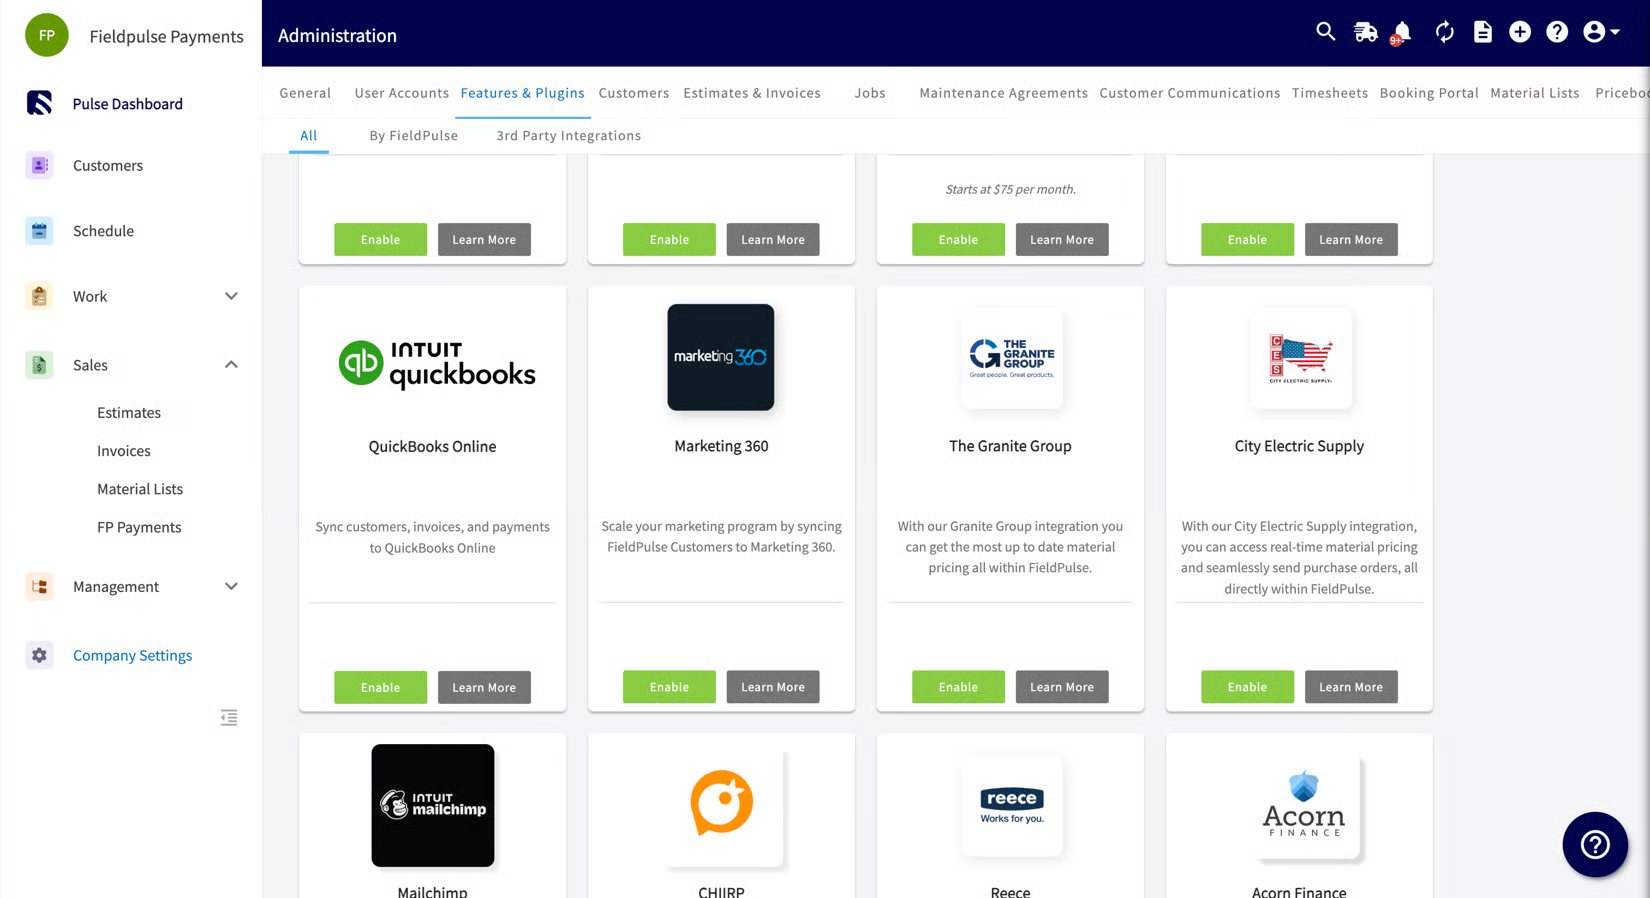
2. **Open the integration tile.** Once access is enabled, go to **Company Settings** and select the **Features & Plugins** tab. Scroll to the **QuickBooks Online** tile.
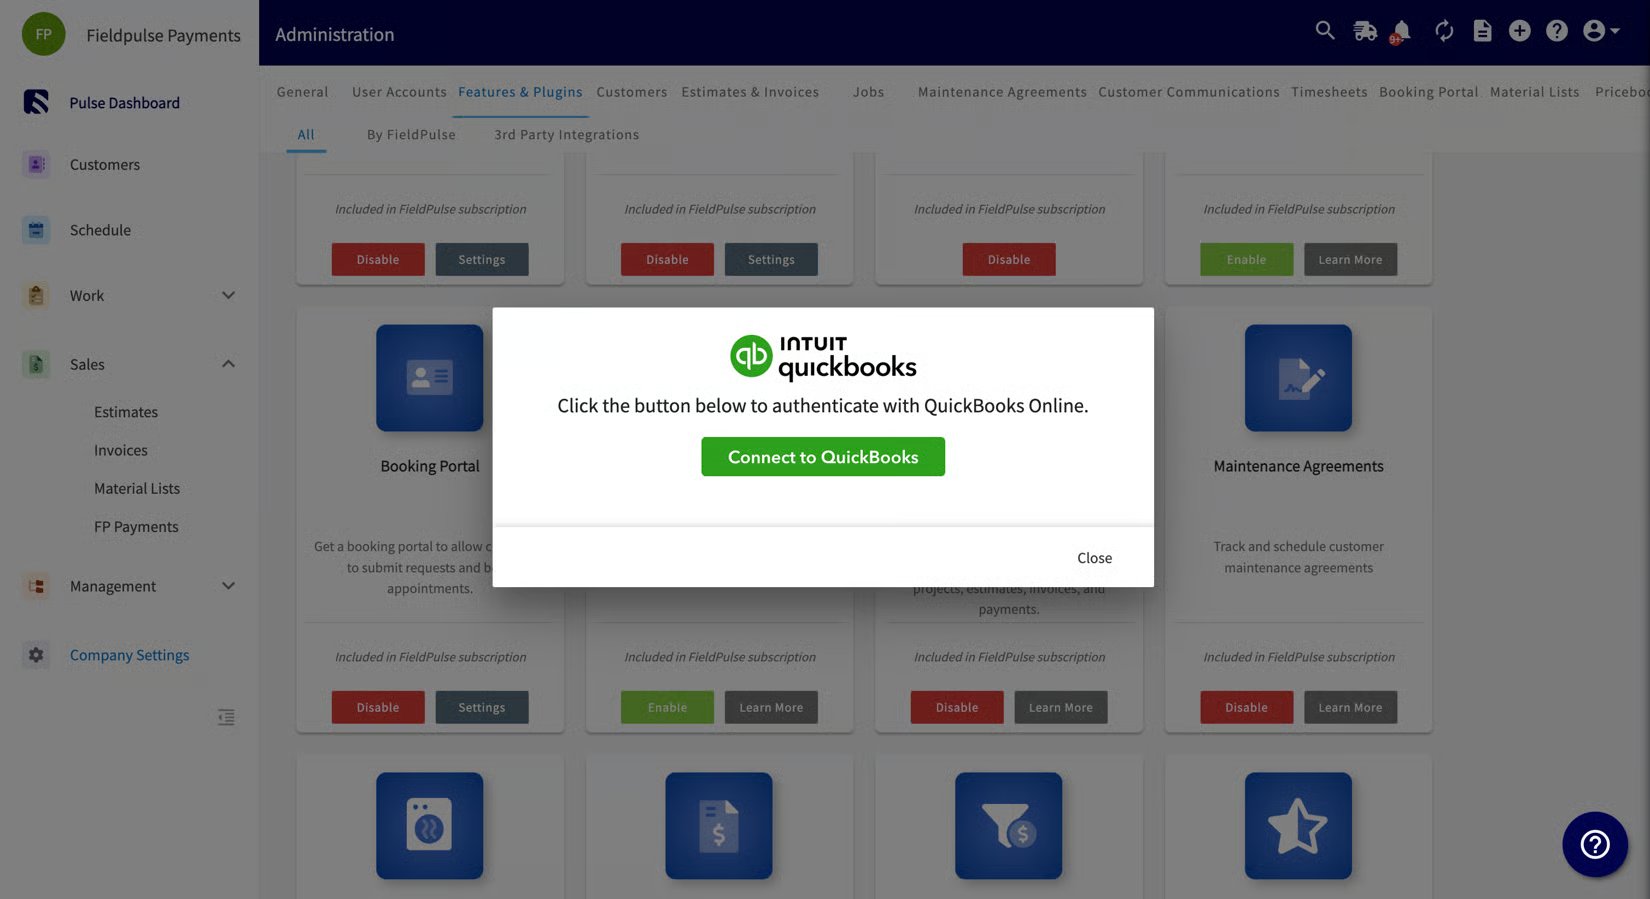
 3. **Connect**. Select **Connect to QuickBooks** and sign in to your QuickBooks Online account when prompted to authorize the connection.
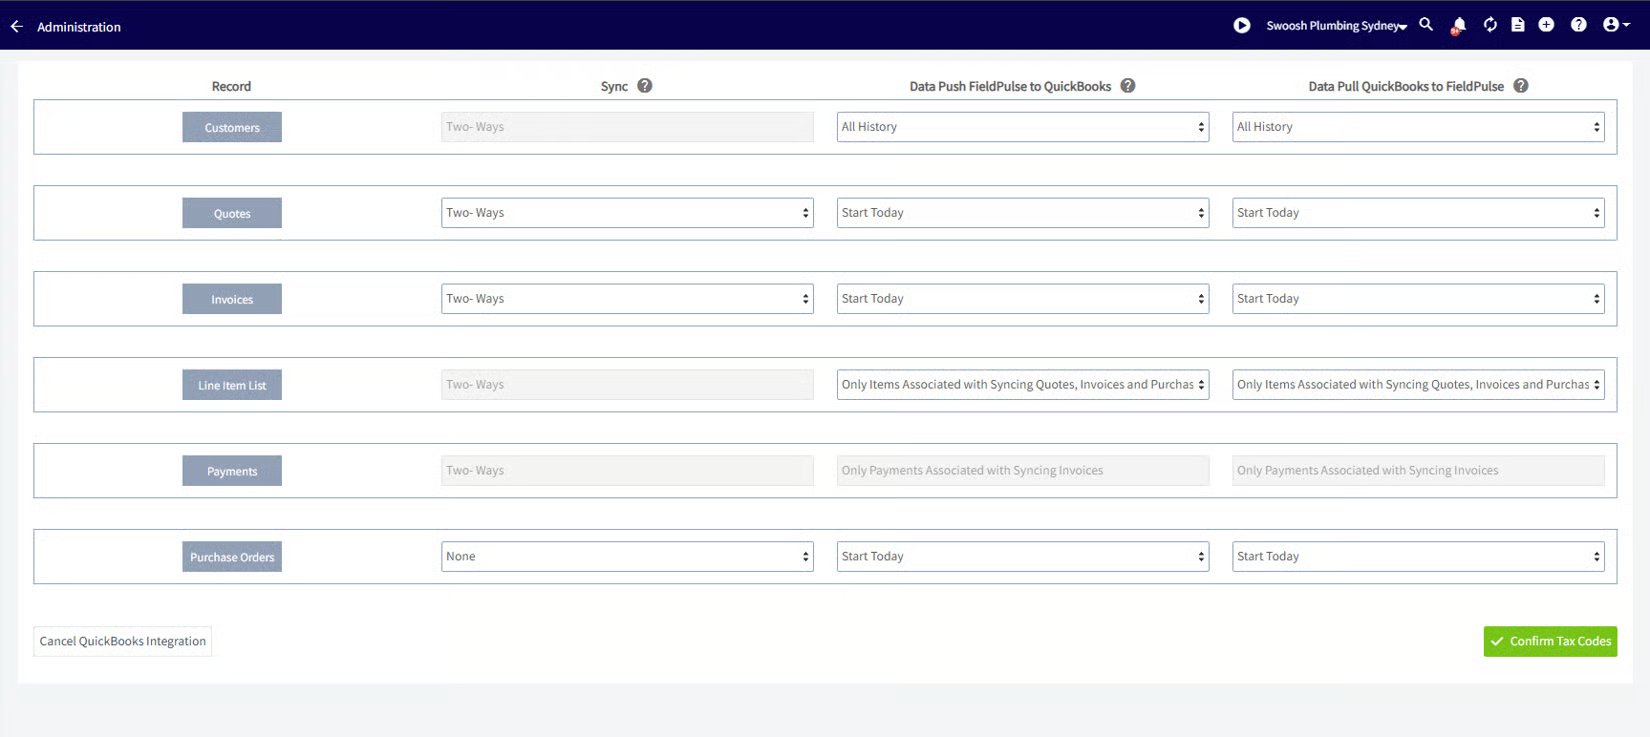
 4. **Choose the time period and records.** Select the time period and all the entities you want to sync between FieldPulse and QuickBooks Online. To sync invoices, you must also sync customers, line items, and payments.
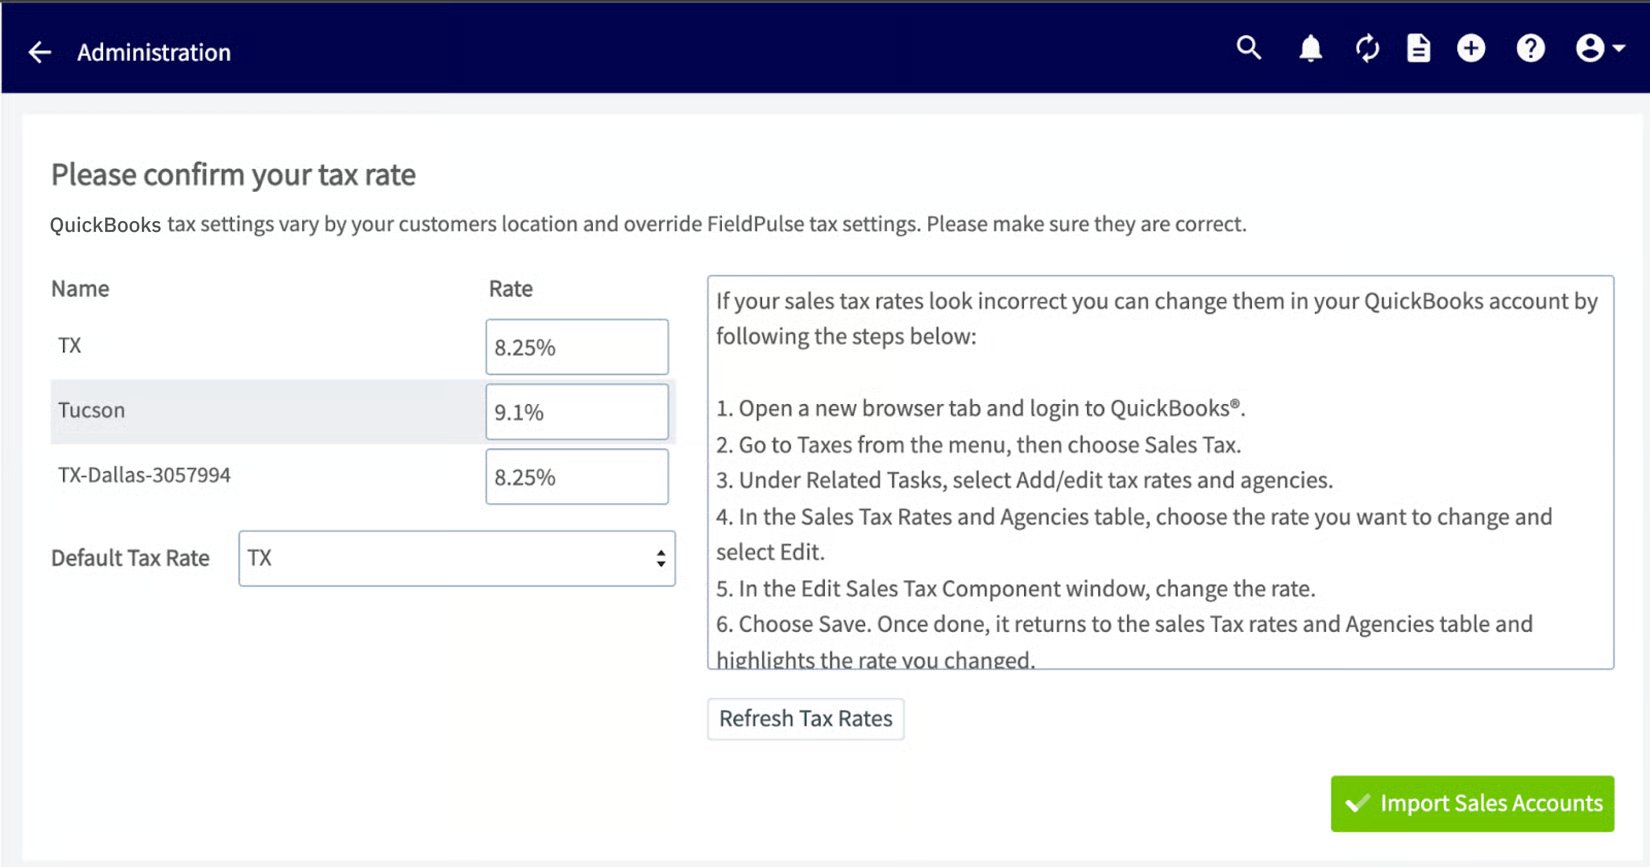
 5. **Select your default tax rate, sales account, and purchase account.** Choose the default tax rate from the list QuickBooks Online provides, along with the default sales account (for items you sell) and default purchase account (for items you buy).
 6. **Agree** to the QuickBooks Integration Terms & Conditions.
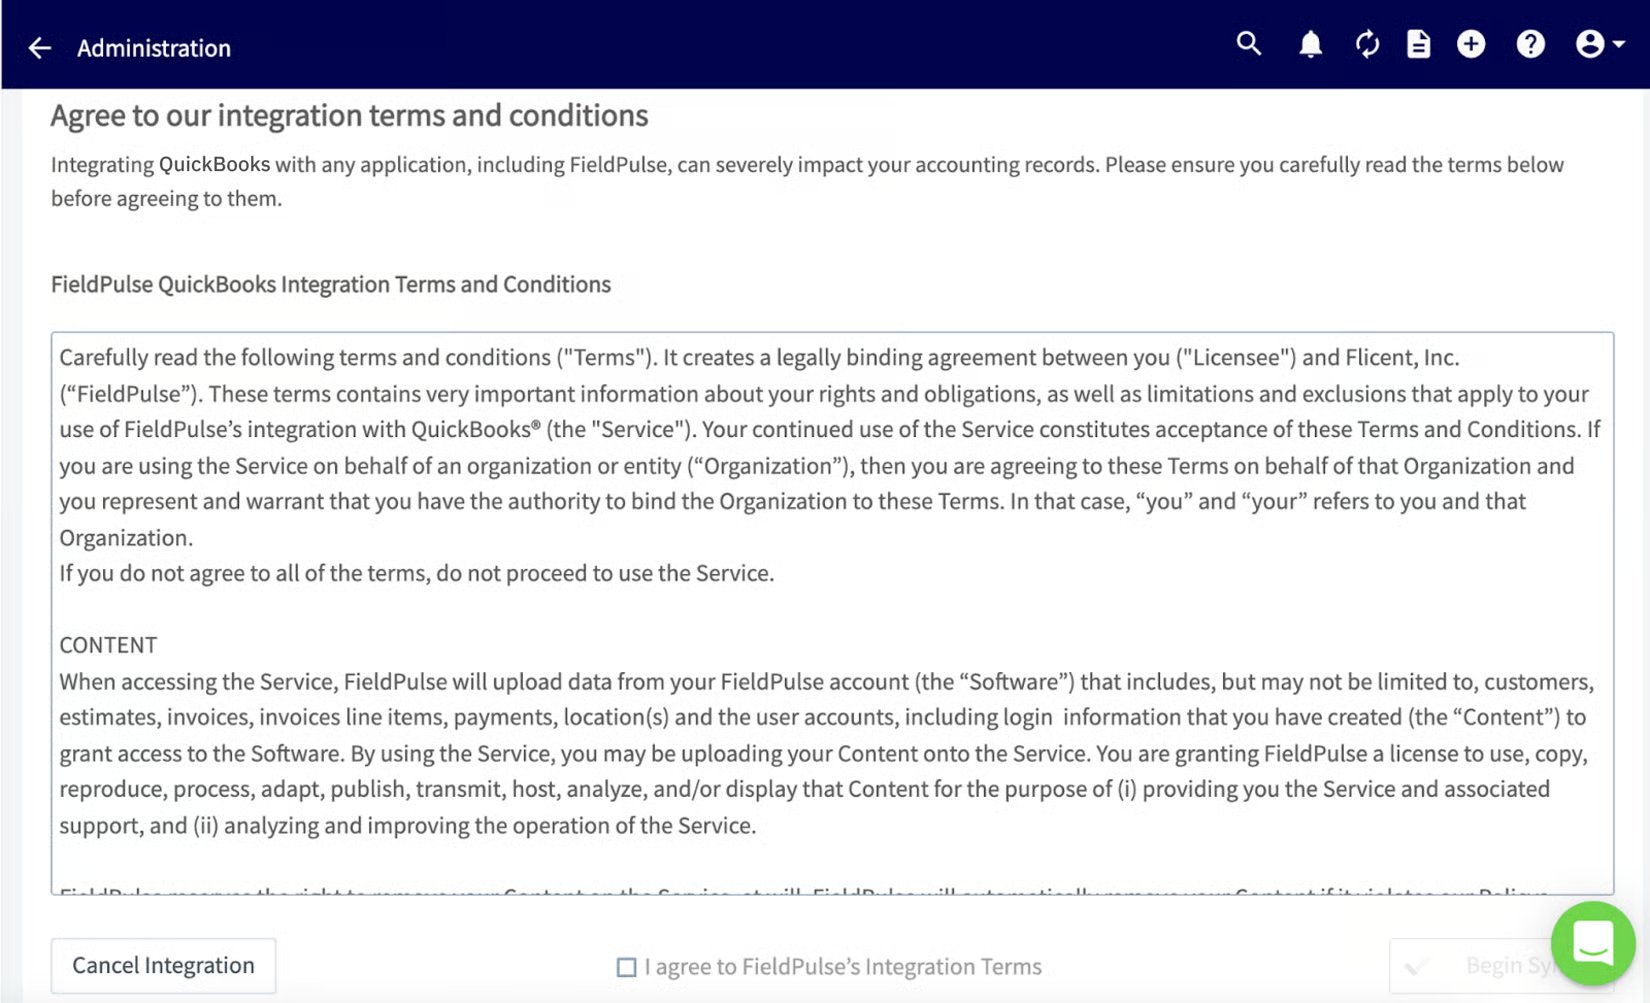 7. **Start the sync.** Confirm your selections to start the sync. A confirmation page shows that syncing has started, and records begin populating in your FieldPulse account.
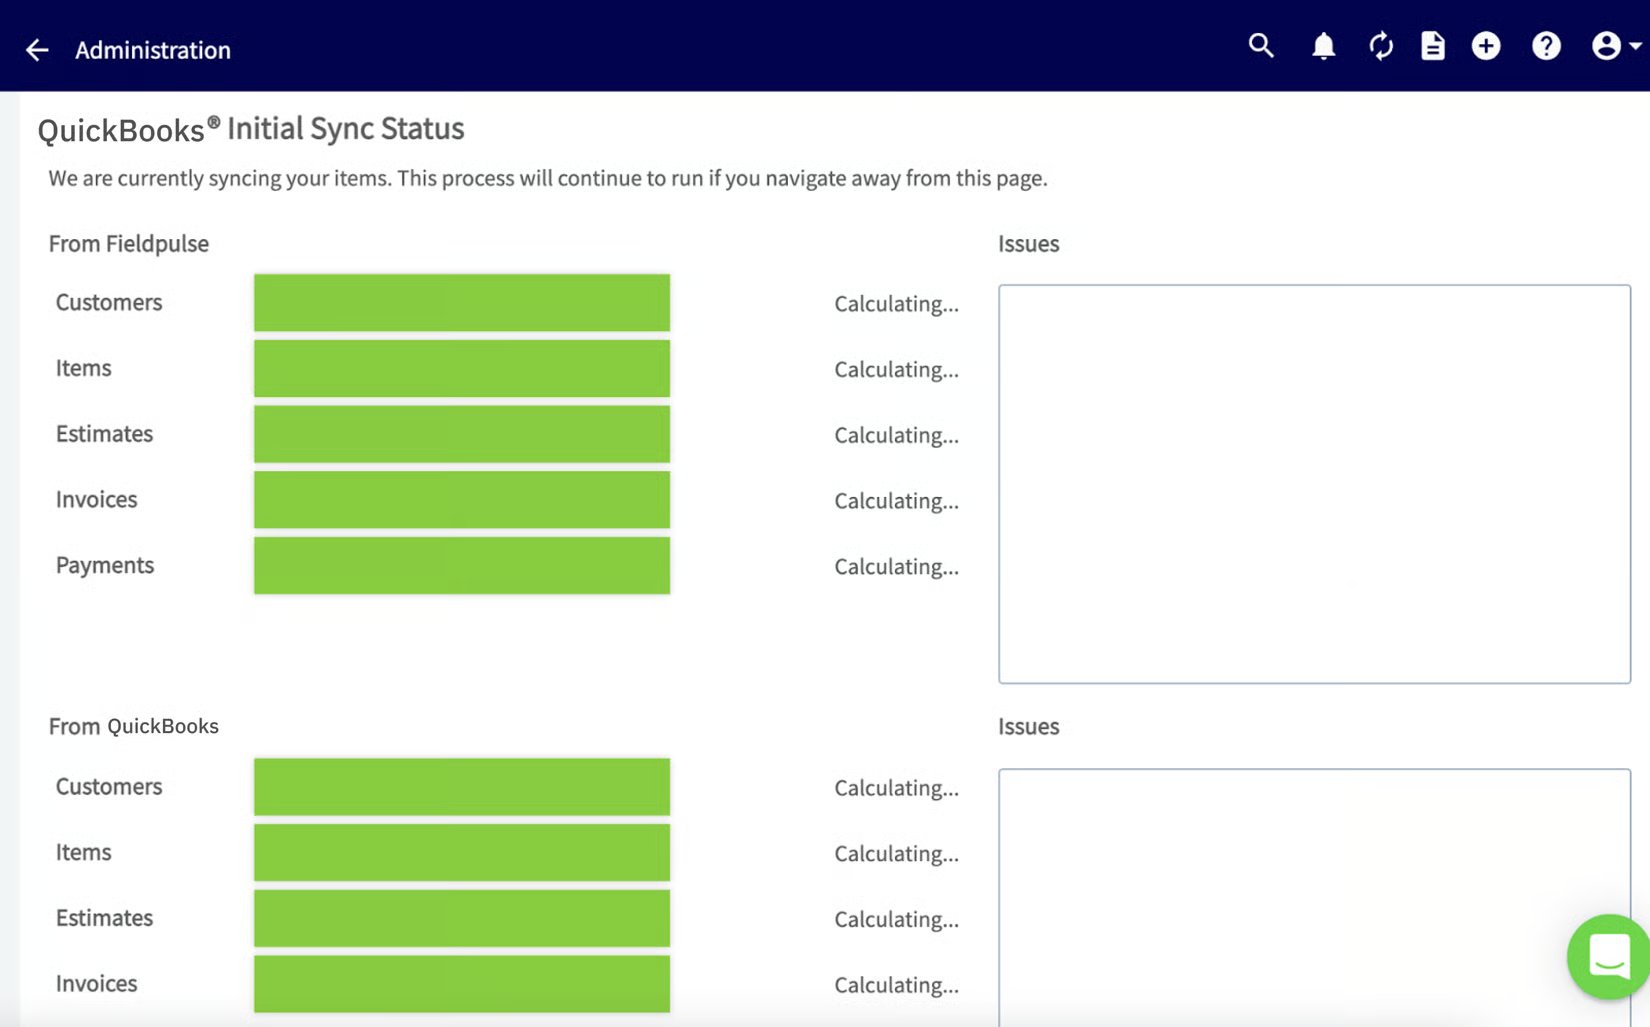 A large data set can take a while to sync. You can leave the confirmation page and keep working — check the sync status at any time.
## How long the sync takes
The initial sync time depends on how much data comes over from QuickBooks Online.
| **Quantity of Data Points** | **Sync Timeframe** |
| --------------------------- | ------------------ |
| 0–5,000 | 24–48 hours |
| 5,000–10,000 | 48–72 hours |
| 10,000–20,000 | 1 week |
| 20,000–50,000 | 2 weeks |
## Related articles
* [QuickBooks Online Overview](/integrations/accounting/quickbooks-online/overview)
* [Setting Up QuickBooks Online Before Syncing](/integrations/accounting/quickbooks-online/pre-sync)
* [How to Manage QuickBooks Online After Syncing](/integrations/accounting/quickbooks-online/post-sync)
* [Troubleshooting QuickBooks Online Sync Errors](/integrations/accounting/quickbooks-online/sync-errors)
Your sync is working when the confirmation page shows the process has started and your QuickBooks Online records begin appearing in [FieldPulse](https://www.fieldpulse.com/) — then move on to [How to Manage QuickBooks Online After Syncing](/integrations/accounting/quickbooks-online/post-sync) to set your defaults and check for any records that didn't come over.
## Related topics
- [QuickBooks Online Overview](/integrations/accounting/quickbooks-online/overview.md)
- [QuickBooks Online](/integrations/accounting/quickbooks-online/index.md)
- [How to Sync Timesheets With QuickBooks Online](/integrations/accounting/quickbooks-online/timesheets.md)
- [How to Sync Purchase Orders With QuickBooks Online](/integrations/accounting/quickbooks-online/purchase-orders.md)
A large data set can take a while to sync. You can leave the confirmation page and keep working — check the sync status at any time.
## How long the sync takes
The initial sync time depends on how much data comes over from QuickBooks Online.
| **Quantity of Data Points** | **Sync Timeframe** |
| --------------------------- | ------------------ |
| 0–5,000 | 24–48 hours |
| 5,000–10,000 | 48–72 hours |
| 10,000–20,000 | 1 week |
| 20,000–50,000 | 2 weeks |
## Related articles
* [QuickBooks Online Overview](/integrations/accounting/quickbooks-online/overview)
* [Setting Up QuickBooks Online Before Syncing](/integrations/accounting/quickbooks-online/pre-sync)
* [How to Manage QuickBooks Online After Syncing](/integrations/accounting/quickbooks-online/post-sync)
* [Troubleshooting QuickBooks Online Sync Errors](/integrations/accounting/quickbooks-online/sync-errors)
Your sync is working when the confirmation page shows the process has started and your QuickBooks Online records begin appearing in [FieldPulse](https://www.fieldpulse.com/) — then move on to [How to Manage QuickBooks Online After Syncing](/integrations/accounting/quickbooks-online/post-sync) to set your defaults and check for any records that didn't come over.
## Related topics
- [QuickBooks Online Overview](/integrations/accounting/quickbooks-online/overview.md)
- [QuickBooks Online](/integrations/accounting/quickbooks-online/index.md)
- [How to Sync Timesheets With QuickBooks Online](/integrations/accounting/quickbooks-online/timesheets.md)
- [How to Sync Purchase Orders With QuickBooks Online](/integrations/accounting/quickbooks-online/purchase-orders.md)