> ## Documentation Index
> Fetch the complete documentation index at: https://help.fieldpulse.com/llms.txt
> Use this file to discover all available pages before exploring further.
# Setting Up the Mailchimp Integration
> Connect Mailchimp to build email campaigns from your FieldPulse customer list, with customer details syncing to a Mailchimp audience automatically.
> **Who uses this:** Admins can enable it. **Availability:** Requires a Mailchimp account. The Mailchimp free plan allows only one audience.
The Mailchimp integration connects your FieldPulse customer list to Mailchimp so you can build, send, and track email campaigns to your customers without exporting and re-importing lists by hand. When you [create or edit a customer in FieldPulse](https://www.fieldpulse.com/features/customer-management), their details sync to your Mailchimp audience automatically.
## Overview
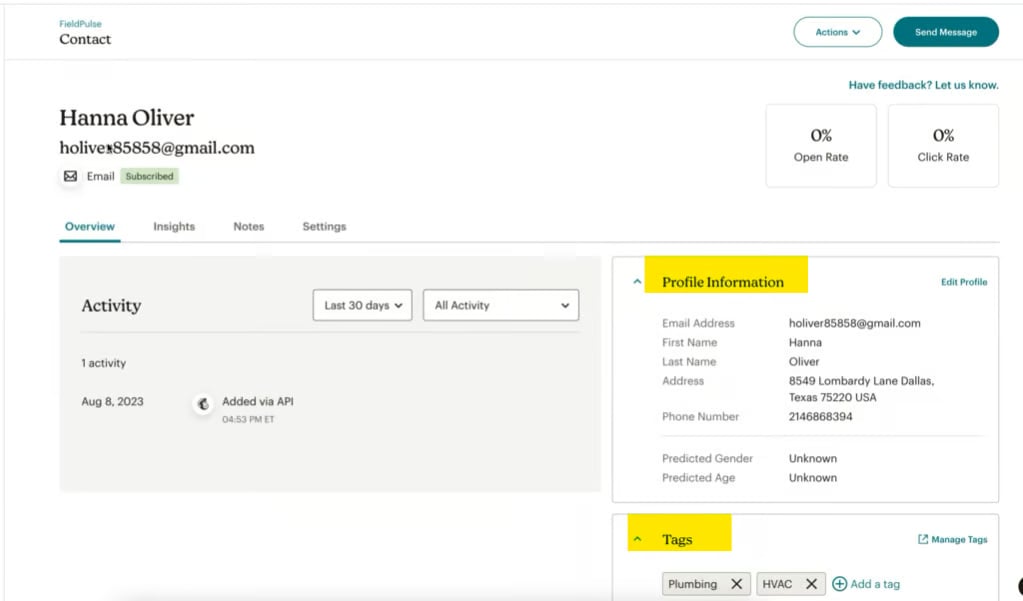
Mailchimp is an email marketing platform for creating, sending, and tracking email campaigns. Connected to FieldPulse, it pulls customer details from your FieldPulse list into a Mailchimp audience. The sync is one-way — FieldPulse to Mailchimp — and runs whenever you create or edit a customer. These fields sync:
* Customer First and Last Name
* Email
* Address
* Phone Number
* Tags
## Before you begin
* You need a **Mailchimp account** and a **Mailchimp API key**. In Mailchimp, go to **Account Settings** > **Extras** > **API Keys** to create one.
* Create a **new Mailchimp audience for FieldPulse**. See Mailchimp's guide on [creating an audience](https://mailchimp.com/help/create-audience/).
* The **Mailchimp free plan allows only one audience**. If you already have another audience, you will need to upgrade your Mailchimp plan to add the FieldPulse one — see [Mailchimp pricing](https://mailchimp.com/pricing/marketing/).
## Connect Mailchimp
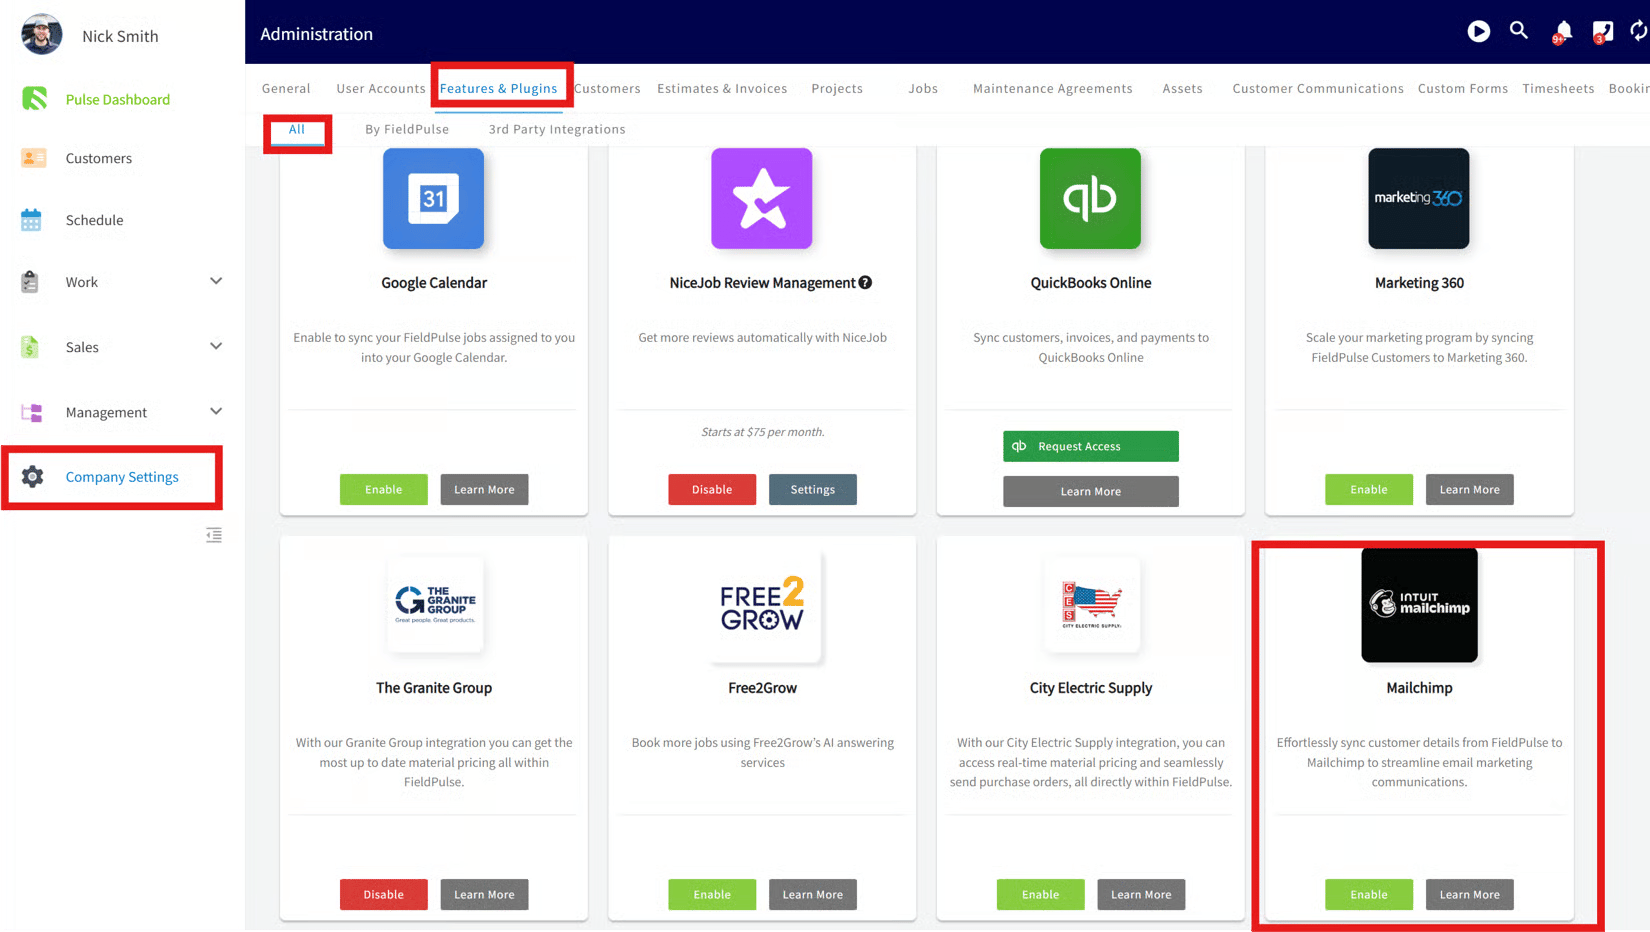
1. In FieldPulse, go to **Company Settings** > **Features & Plugins**.
2. Scroll to the bottom, locate the **Mailchimp** tile, and select **Enable**.
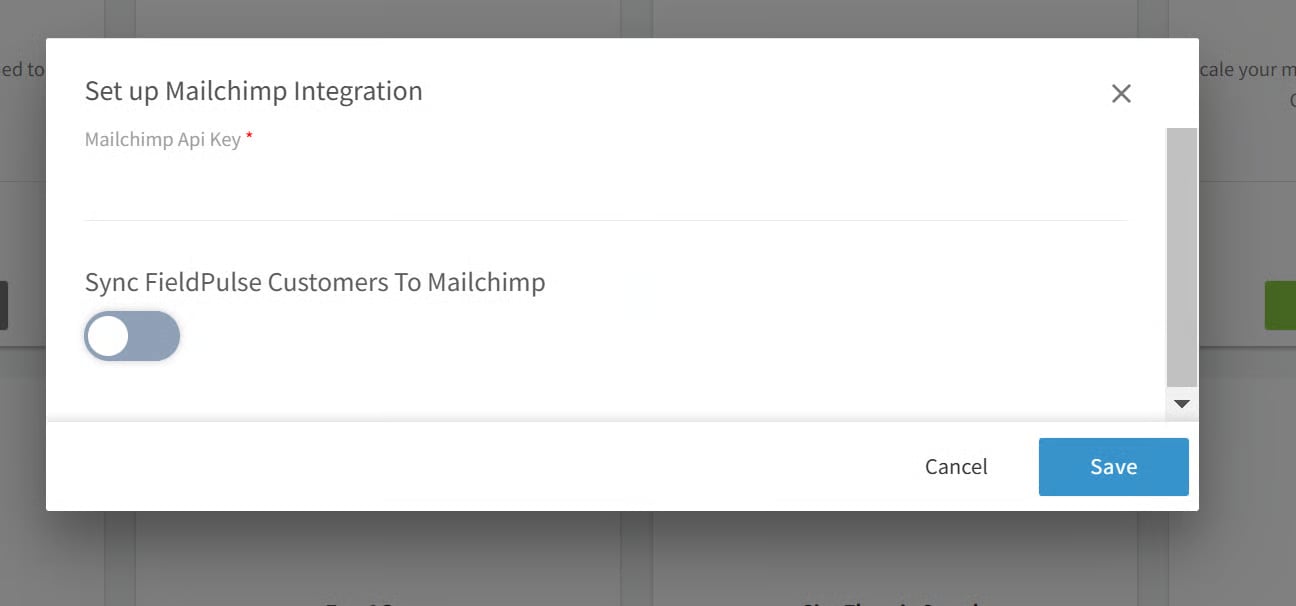
 3. Enter your **Mailchimp API key**.
4. Optionally, toggle **Customer Sync** on to activate the sync.
3. Enter your **Mailchimp API key**.
4. Optionally, toggle **Customer Sync** on to activate the sync.
 Once enabled, creating or editing a customer in FieldPulse updates their details in your Mailchimp audience.
 ## Related articles
* [Customer Communications Overview](/customers/communications/overview)
* [How to Tag and Sort Customers](/customers/managing-customers/tagging-sorting)
Your setup is working when the Mailchimp tile shows as enabled and a customer you create or edit in FieldPulse appears in your Mailchimp audience.
## Related topics
- [Marketing & Lead Gen](/integrations/marketing/index.md)
- [Setting Up the CHIIRP Integration](/integrations/marketing/chiirp.md)
- [Setting Up the Signpost Integration](/integrations/marketing/signpost.md)
- [Setting Up The Seal Integration](/integrations/partner-apps/the-seal.md)
## Related articles
* [Customer Communications Overview](/customers/communications/overview)
* [How to Tag and Sort Customers](/customers/managing-customers/tagging-sorting)
Your setup is working when the Mailchimp tile shows as enabled and a customer you create or edit in FieldPulse appears in your Mailchimp audience.
## Related topics
- [Marketing & Lead Gen](/integrations/marketing/index.md)
- [Setting Up the CHIIRP Integration](/integrations/marketing/chiirp.md)
- [Setting Up the Signpost Integration](/integrations/marketing/signpost.md)
- [Setting Up The Seal Integration](/integrations/partner-apps/the-seal.md)