> ## Documentation Index
> Fetch the complete documentation index at: https://help.fieldpulse.com/llms.txt
> Use this file to discover all available pages before exploring further.
# Creating a Customer
> Add a customer profile so you can book jobs, send estimates, and bill invoices for them, with every note, file, and record kept in one place.
# Overview
FieldPulse offers a simple Customer Relationship Management system that makes storing and finding related customer information easy. You can create and edit customer profiles to store detailed customer information, notes, and related records such as: *Jobs, Estimates, Invoices, and Files*. A customer profile is required in order to create a job, estimate or invoice for a customer. To track the lifecycle of a customer, FieldPulse allows you to indicate whether a customer is a current customer, lead, opportunity, or lost customer.
***
# On Web: Admin Experience
## Creating a Customer Profile
Customers can be created in different ways, but the most common method is via the *Customers* tab in the menu on the left-hand side of your screen. You then click the *Create Customer* button to begin creating a customer. You can also create customers while creating new jobs, estimates, or invoices.
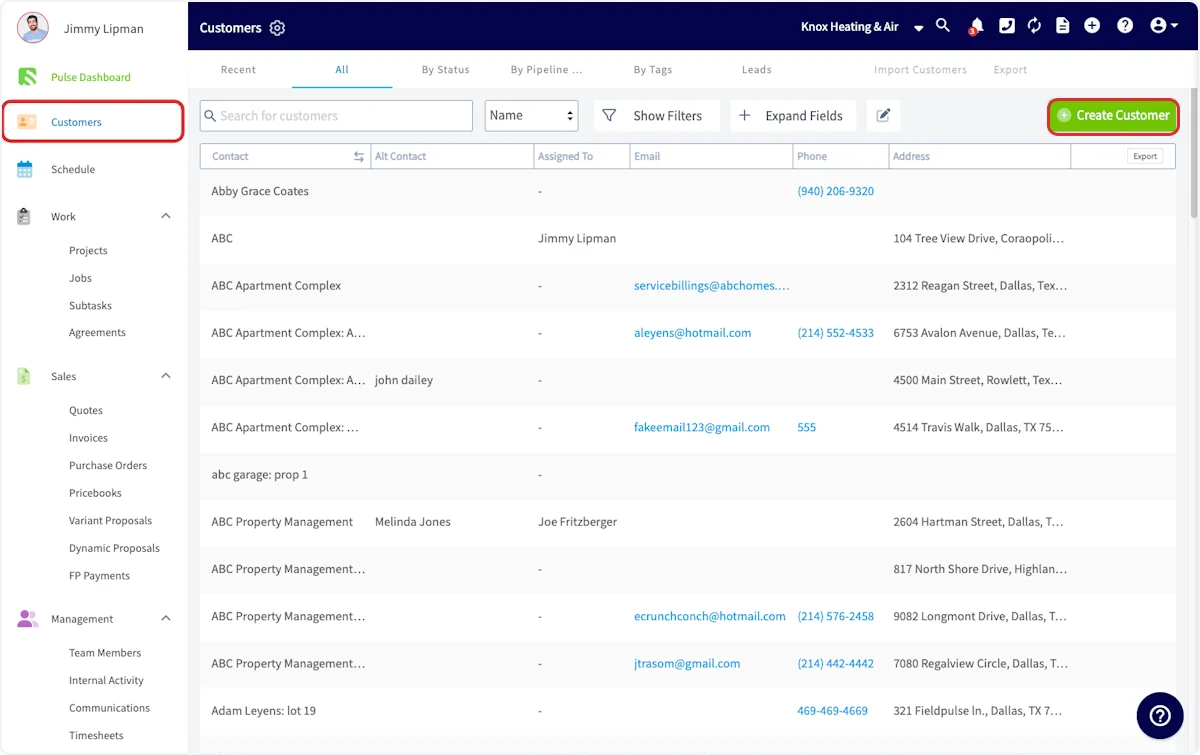 Begin by completing the general information section of the customer record:
* **Status:** select and update the status of your customer as your relationship progresses.
* **Account Type:** select whether your customer is residential or commercial.
* **Assigned To:** select a team member to assign the customer to.
* **Lead Source:** select the lead source (if applicable) for this customer. You can always adjust the lead sources in *Company Settings*. To learn more about lead sources, [the lead sources guide](/using-fieldpulse/customers/tracking-lead-sources).
* **Pipeline Status:** select and update the status as your relationship progresses. Use the FieldPulse provided pipeline statuses or customize your own in *Company Settings*. To learn more about customizing statuses, [the custom sales pipeline guide](/using-fieldpulse/customers/custom-sales-pipeline).
* **Tax Exempt:** toggle on or off to ensure tax is appropriately charged on estimates and invoices.
Begin by completing the general information section of the customer record:
* **Status:** select and update the status of your customer as your relationship progresses.
* **Account Type:** select whether your customer is residential or commercial.
* **Assigned To:** select a team member to assign the customer to.
* **Lead Source:** select the lead source (if applicable) for this customer. You can always adjust the lead sources in *Company Settings*. To learn more about lead sources, [the lead sources guide](/using-fieldpulse/customers/tracking-lead-sources).
* **Pipeline Status:** select and update the status as your relationship progresses. Use the FieldPulse provided pipeline statuses or customize your own in *Company Settings*. To learn more about customizing statuses, [the custom sales pipeline guide](/using-fieldpulse/customers/custom-sales-pipeline).
* **Tax Exempt:** toggle on or off to ensure tax is appropriately charged on estimates and invoices.
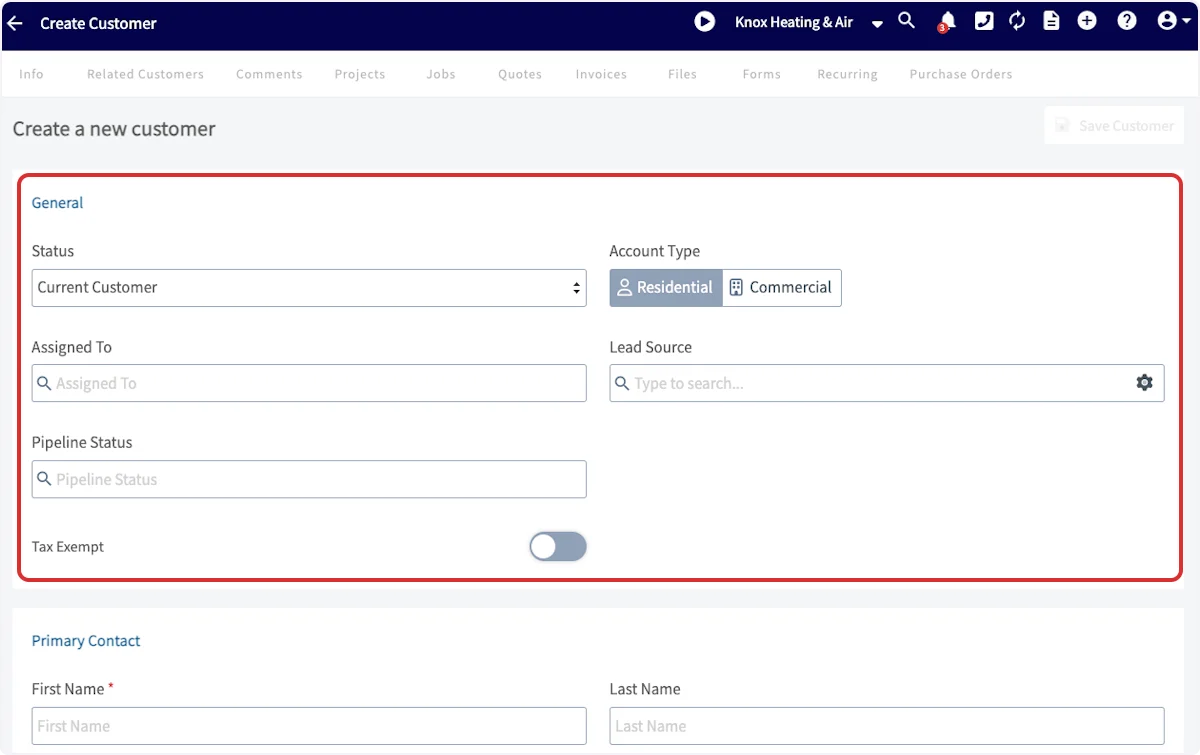 Next, include the primary contact details. We highly recommend including both a first and last name, as well as an email and phone number. If your contact has multiple emails and phone numbers, select *Alternate Email* or *Alternate Phone* to include them. If your customer has multiple contacts, select *Additional Contact* to add another contact.
Note: When entering an email, make sure the domain is lowercase.
Next, include the primary contact details. We highly recommend including both a first and last name, as well as an email and phone number. If your contact has multiple emails and phone numbers, select *Alternate Email* or *Alternate Phone* to include them. If your customer has multiple contacts, select *Additional Contact* to add another contact.
Note: When entering an email, make sure the domain is lowercase.
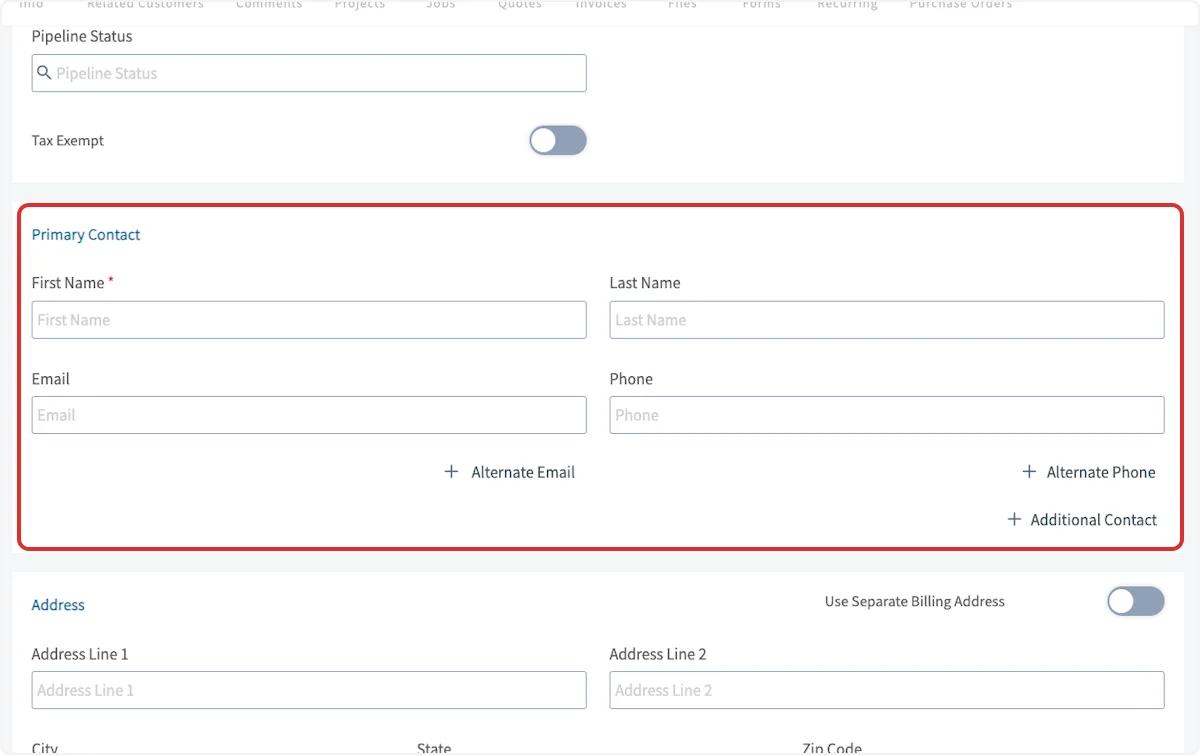 Next, add your customer's address. You can also enter GPS coordinates directly into *Address Line 1* if you don't have a street address.
Toggle on *Use Separate Billing Address* if their service address is not the same as their billing address. If your customer has multiple locations, select *Additional Location* to add another address. You can name your additional locations to keep them organized.
Next, add your customer's address. You can also enter GPS coordinates directly into *Address Line 1* if you don't have a street address.
Toggle on *Use Separate Billing Address* if their service address is not the same as their billing address. If your customer has multiple locations, select *Additional Location* to add another address. You can name your additional locations to keep them organized.
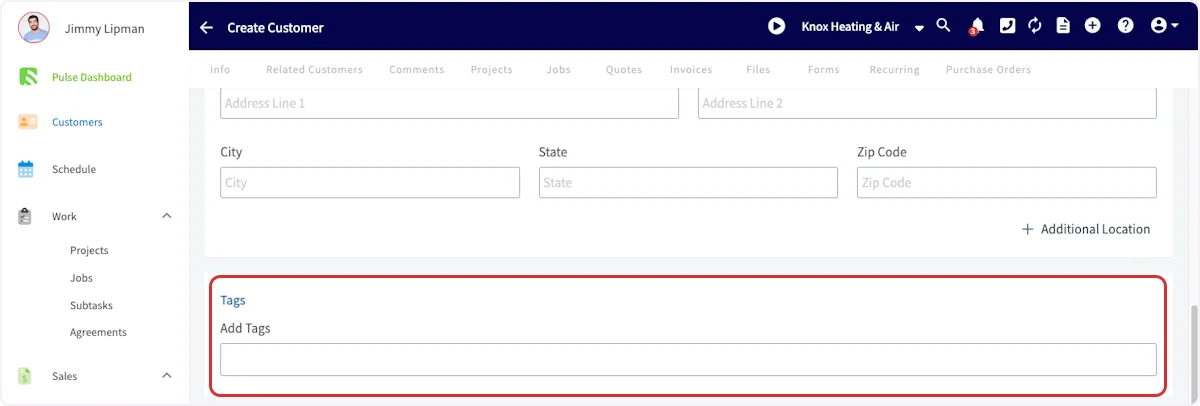
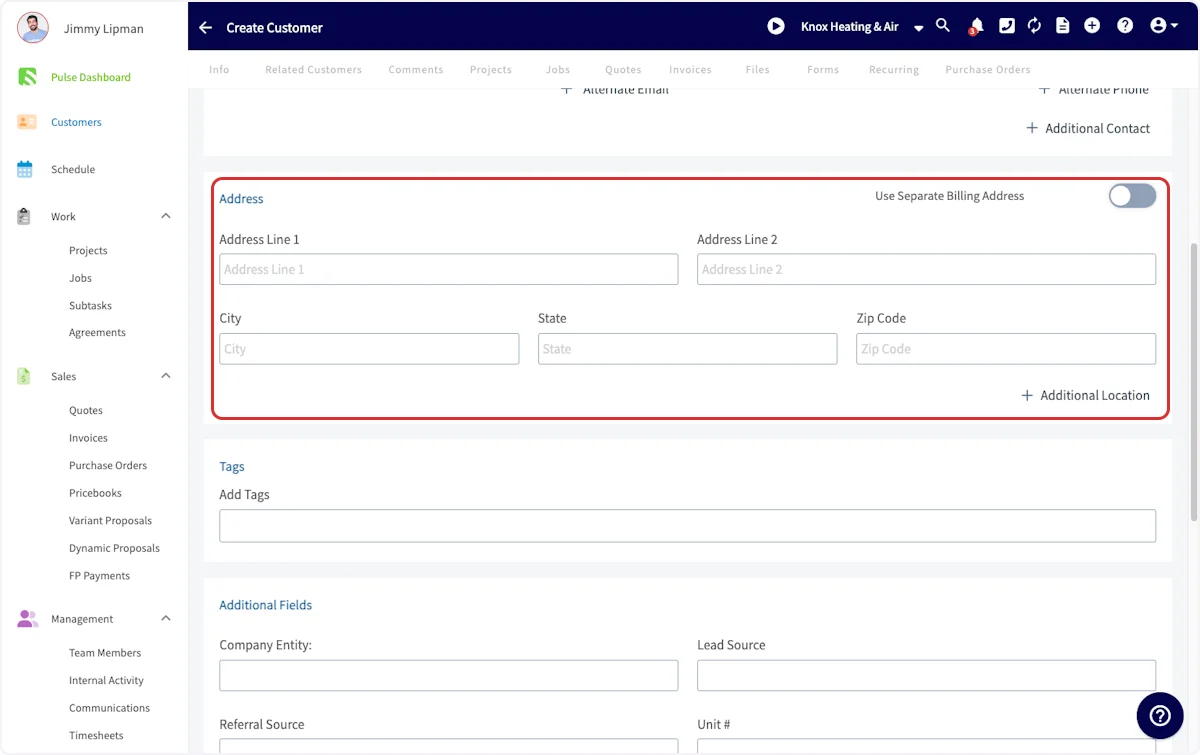 To easily sort your customers, consider using tags. Type a tag in and press enter to save it. To learn more about tags, read the [Custom Tags article](/using-fieldpulse/customers/custom-tags-for-customers).
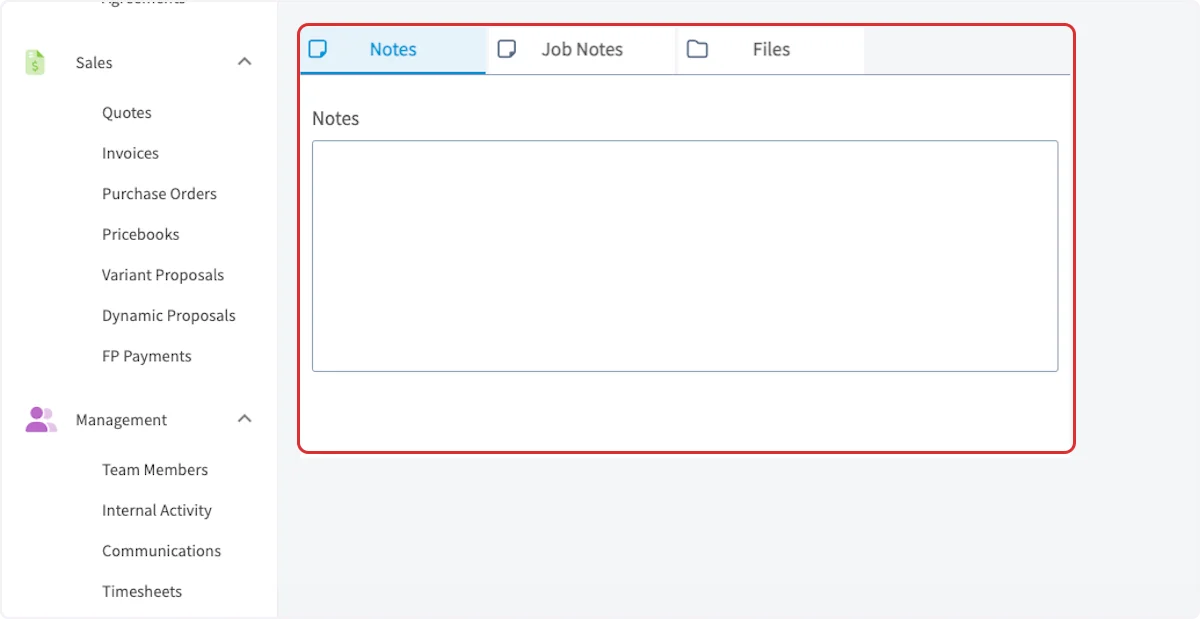
 Lastly, the bottom of the record allows space to include notes or files. Like the rest of the customer record, these can be edited at any time. *Notes* are internal and **will not** be viewed by your customer.
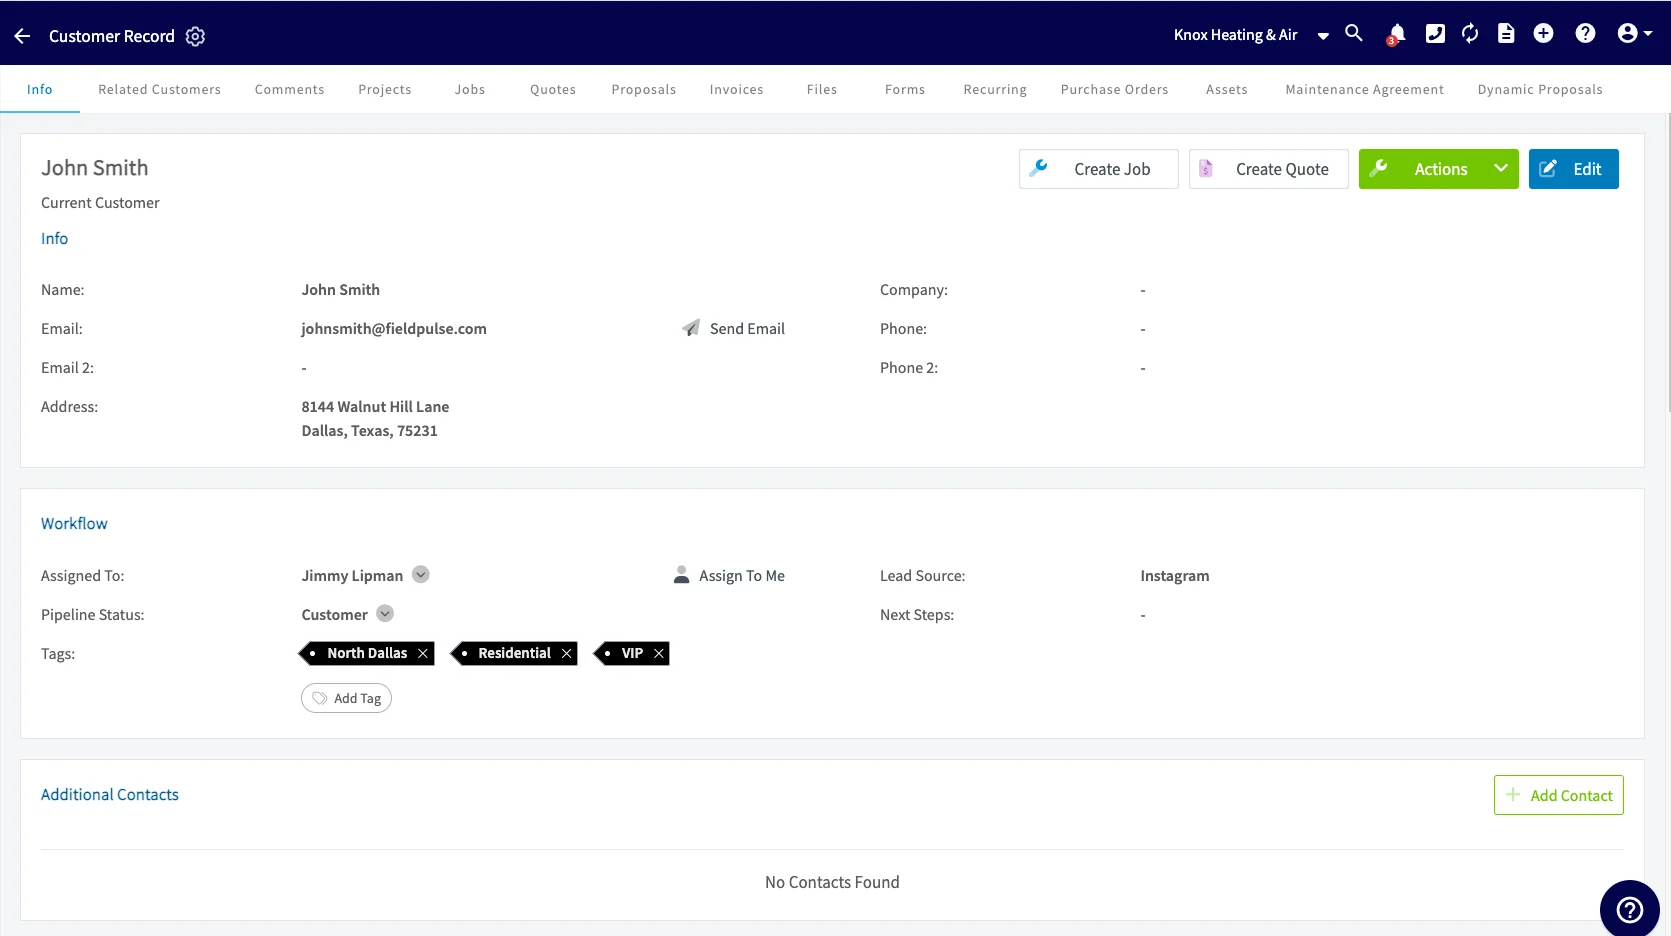
 Once the customer profile has been created, you can select *Edit* to edit the customer profile or click *Actions* to perform actions to the customer profile. From the customer profile, you can add notes or comments, attach files, create jobs, create estimates or invoices using the menu at the top of the record.
 ***
# On Mobile: Field Experience
There are several ways to create a customer in the mobile app:
1. You can create a customer from the *Pulse Dashboard*
2. You can create a customer from the *Customers* tab in the bottom menu
3. You can create a customer from the *Full Menu* tab
## **Method 1: From the Pulse Dashboard**
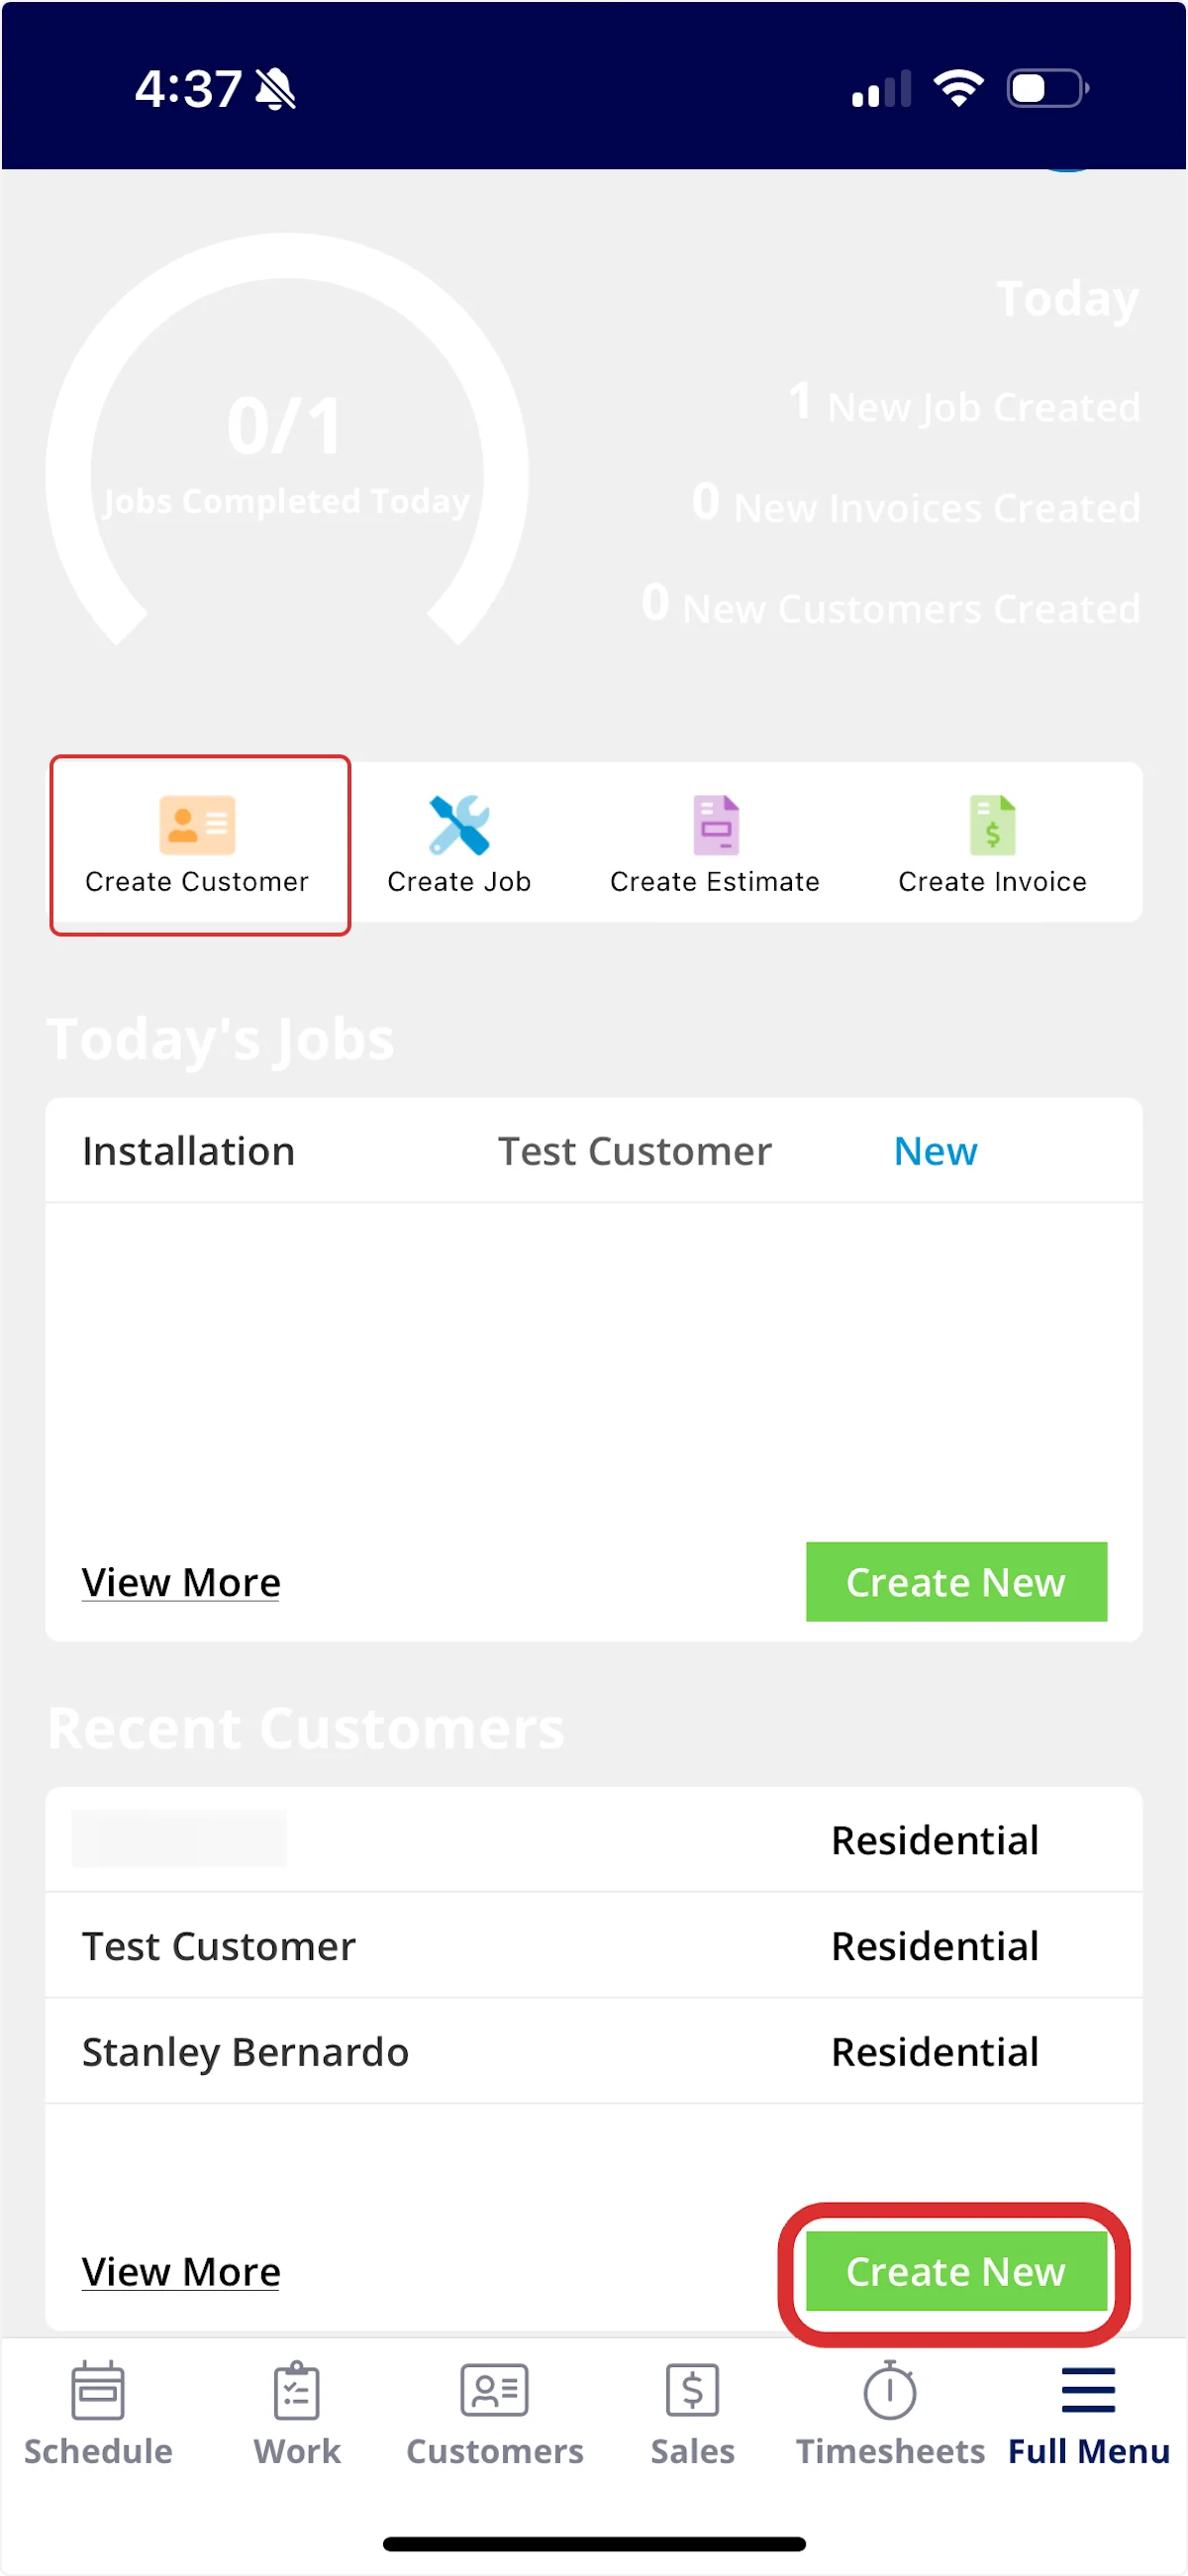
To create a new customer from the *Pulse Dashboard*, select *Create Customer* or *Create New* under Recent Customers.
***
# On Mobile: Field Experience
There are several ways to create a customer in the mobile app:
1. You can create a customer from the *Pulse Dashboard*
2. You can create a customer from the *Customers* tab in the bottom menu
3. You can create a customer from the *Full Menu* tab
## **Method 1: From the Pulse Dashboard**
To create a new customer from the *Pulse Dashboard*, select *Create Customer* or *Create New* under Recent Customers.
 ## **Method 2: From the Customers Tab**
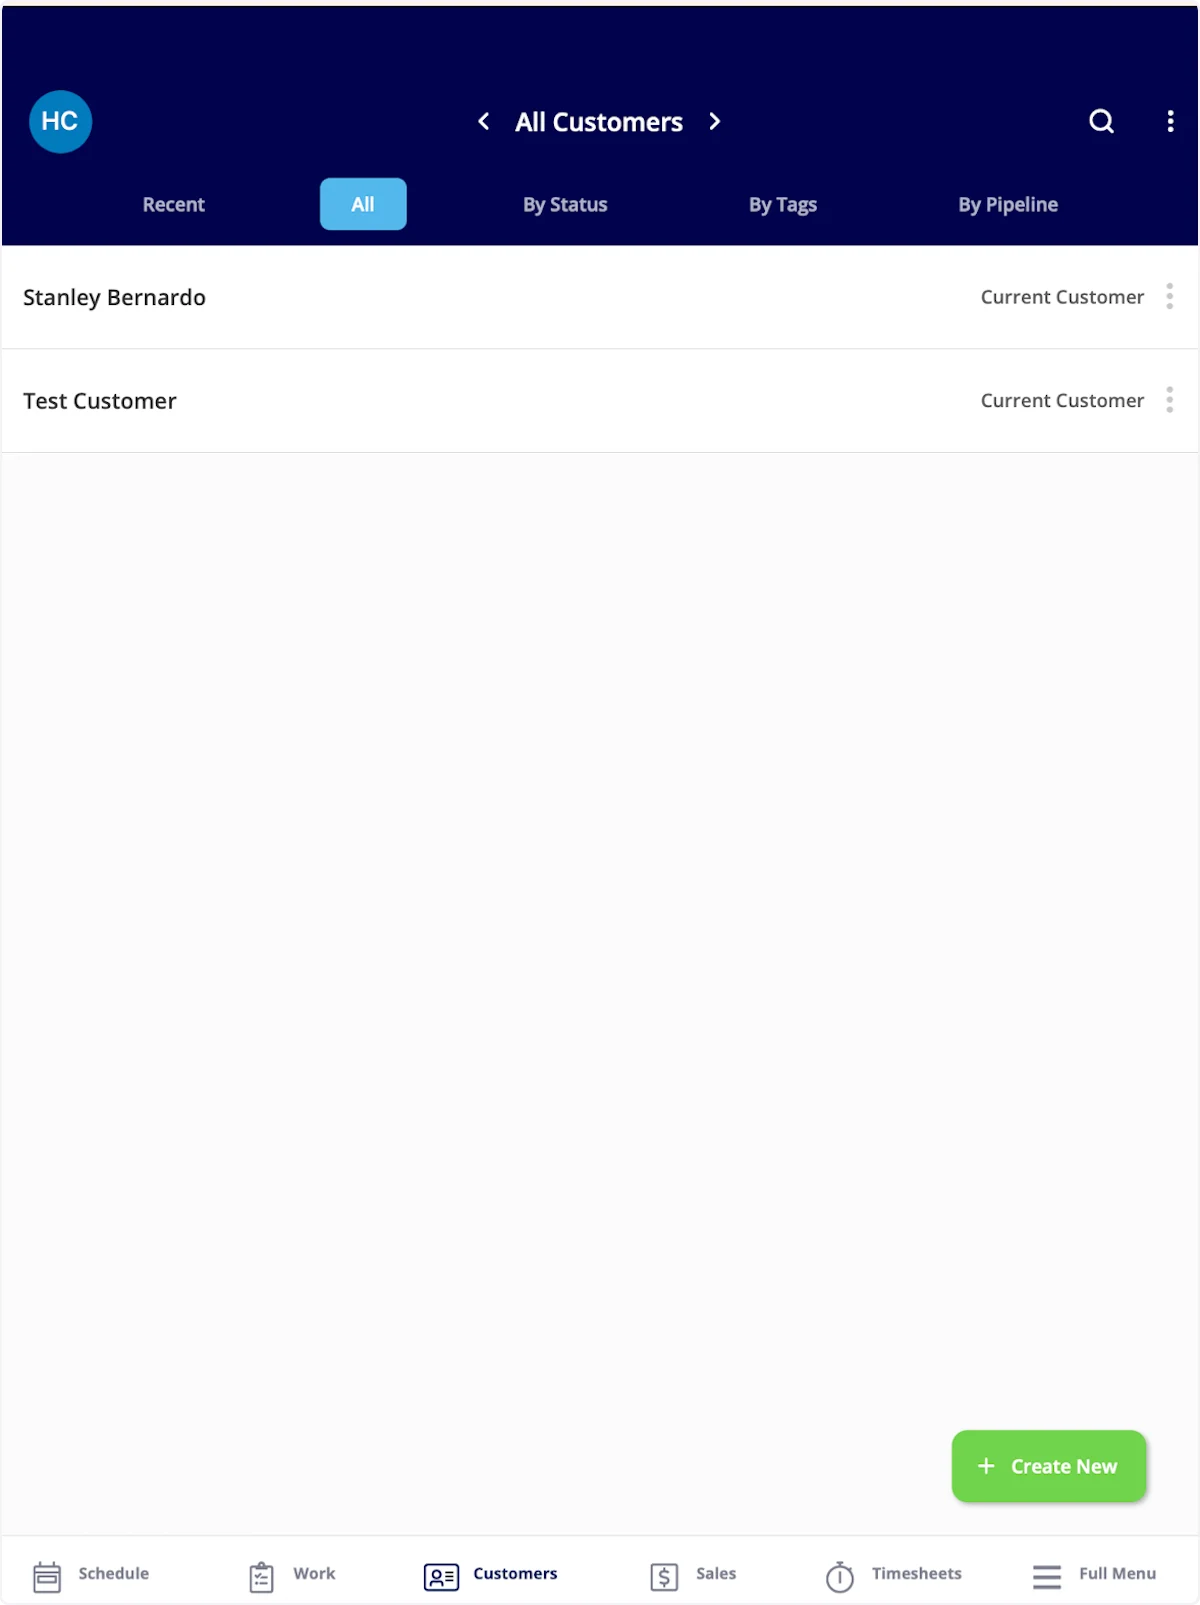
To create a new customer from the *Customers* tab, select *Customers* from the menu at the bottom of the screen. Then click *Create New*.
## **Method 2: From the Customers Tab**
To create a new customer from the *Customers* tab, select *Customers* from the menu at the bottom of the screen. Then click *Create New*.
 ## **Method 3: From the Full Menu**
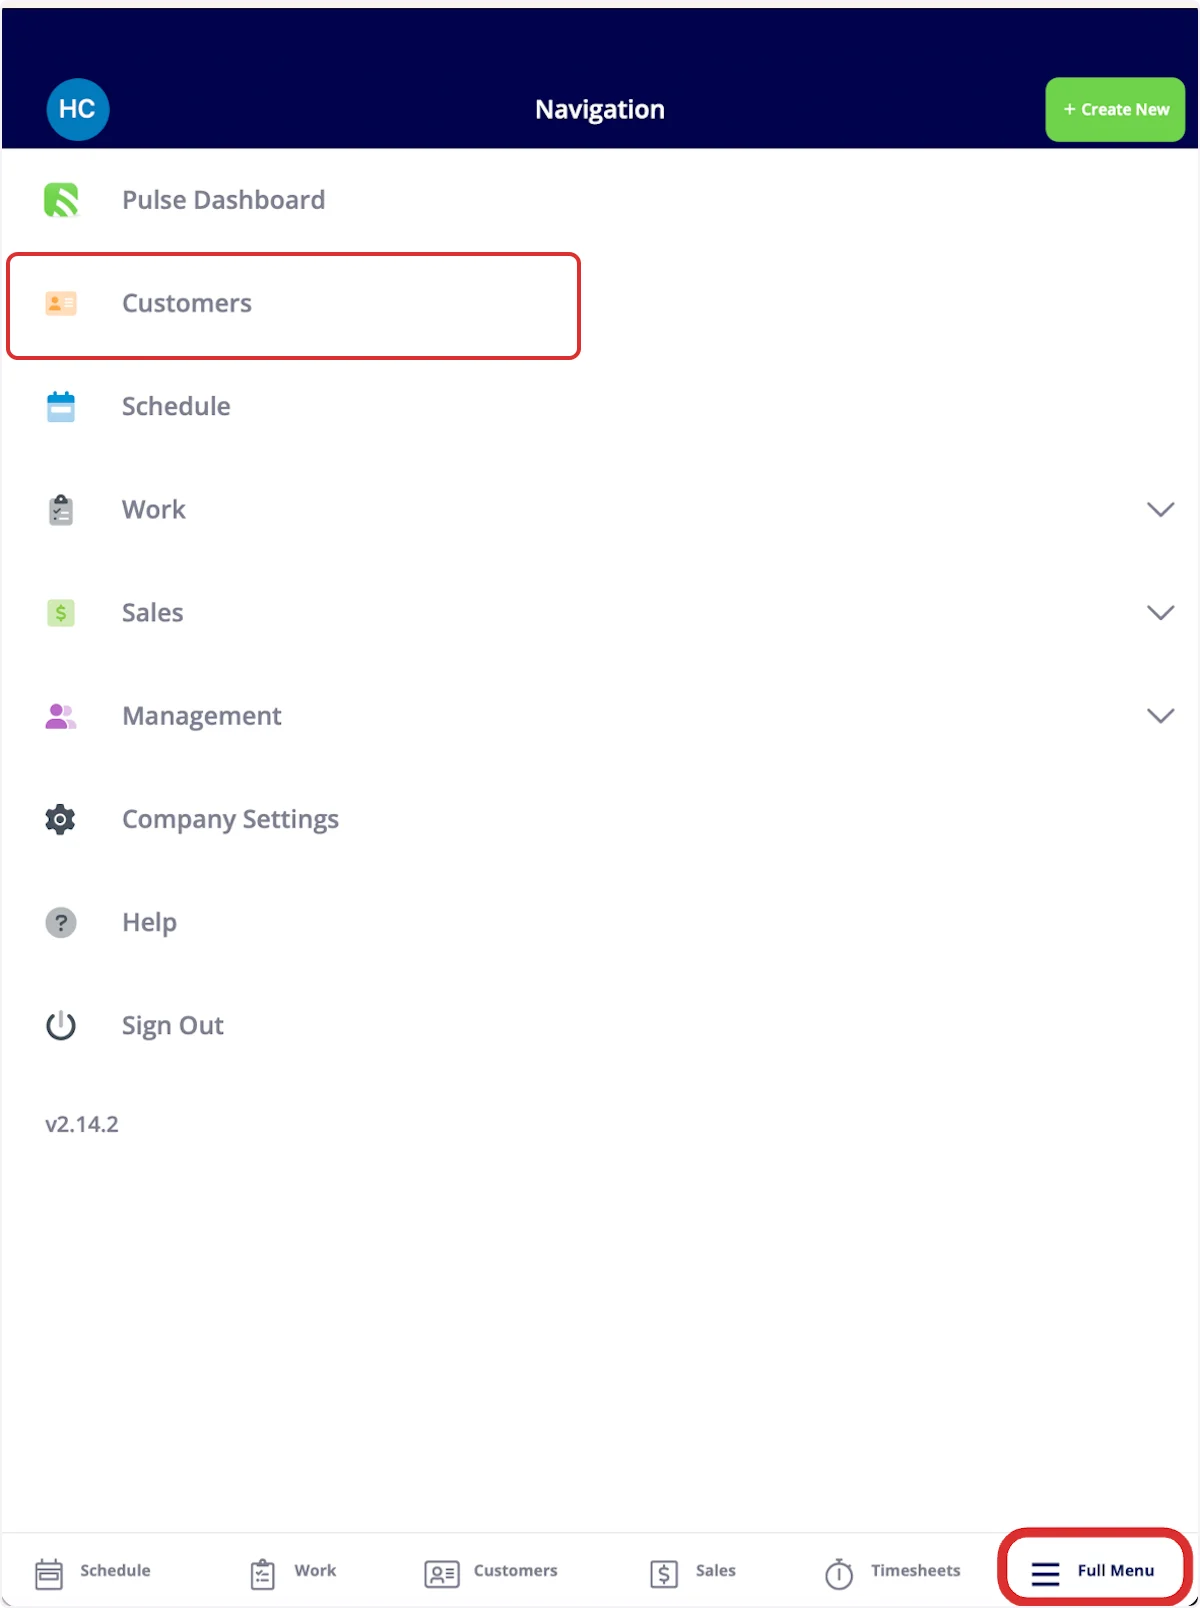
To create a new customer from the full menu, select *Full Menu* from the menu at the bottom of the screen and then click *Customers*.
## **Method 3: From the Full Menu**
To create a new customer from the full menu, select *Full Menu* from the menu at the bottom of the screen and then click *Customers*.
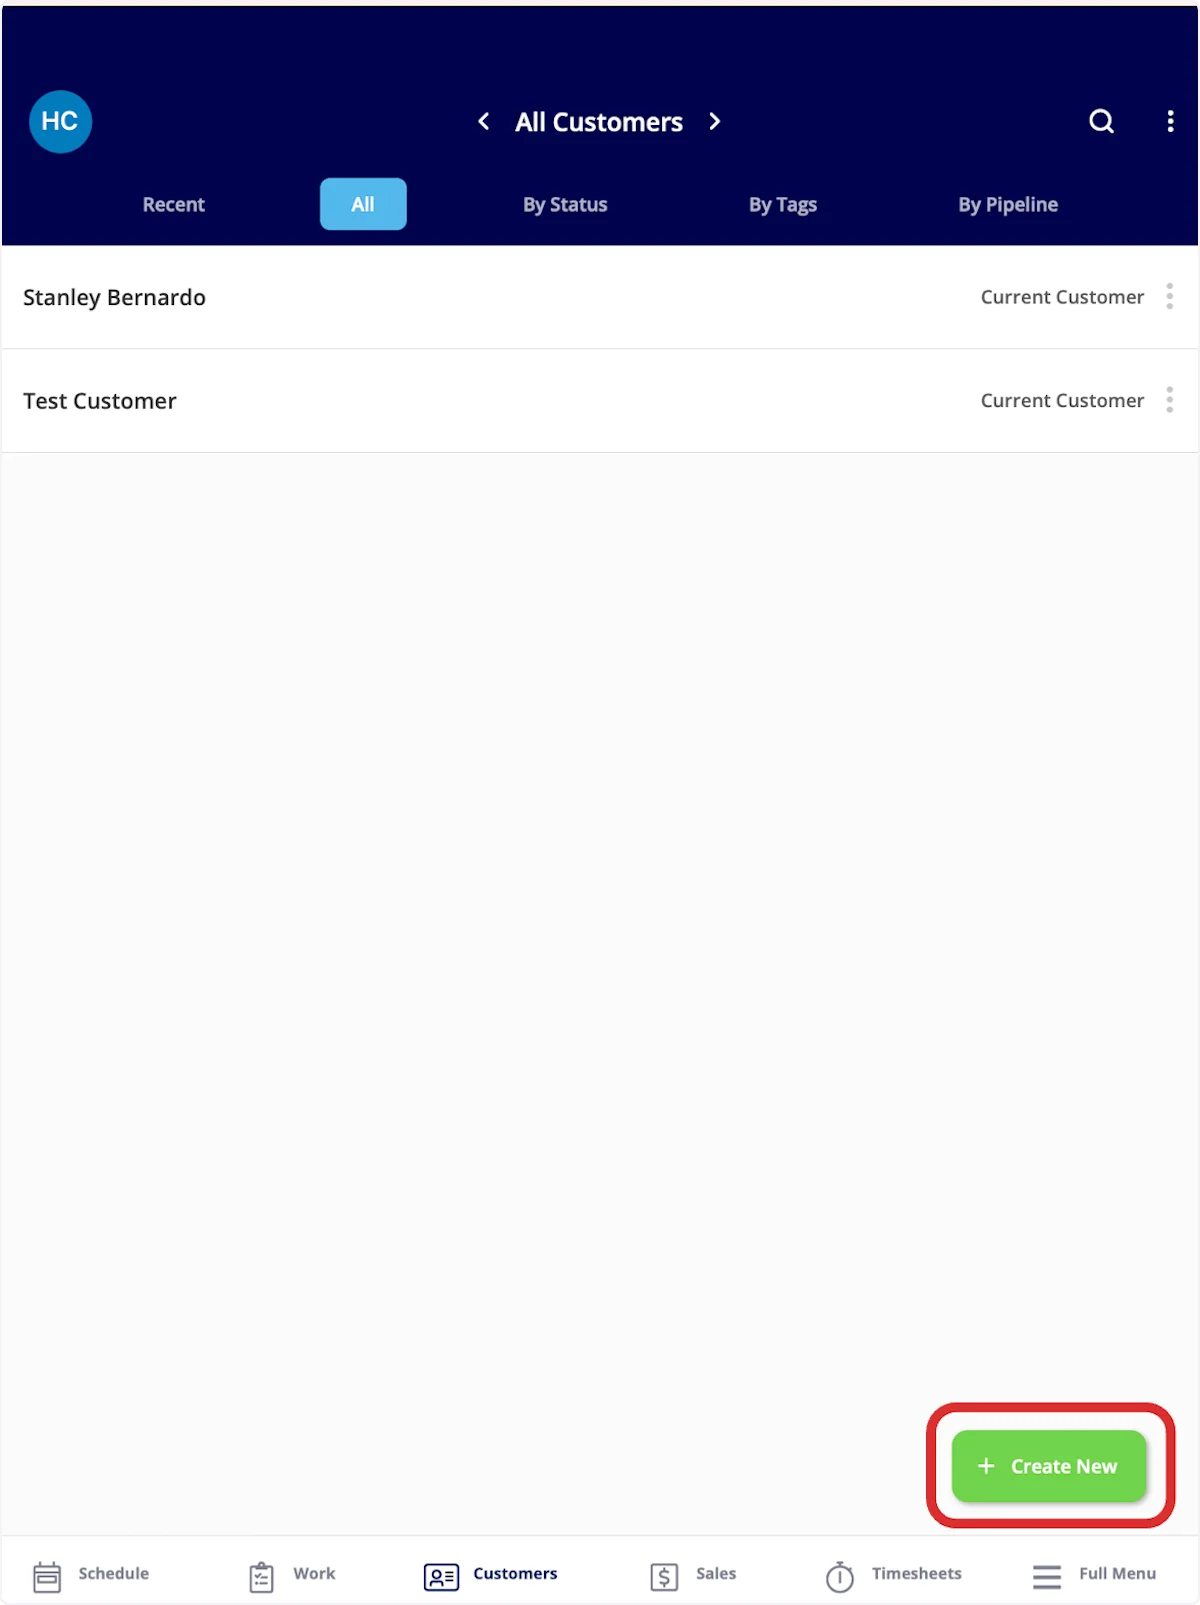
 Then click *Create New*.
 ## **Adding Customer Details**
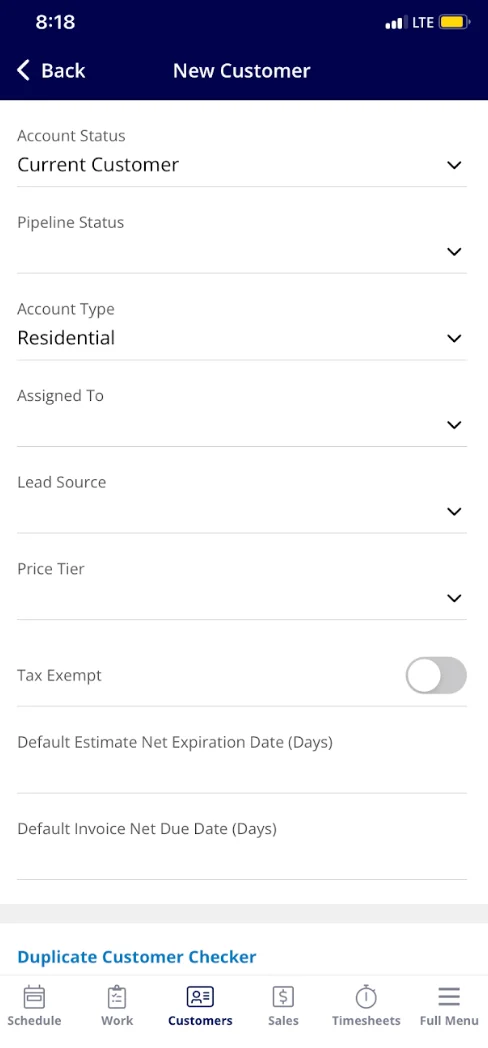
From here, you can begin to fill out the Account Status, Pipeline Status, Account Type, if you'd like to assign this customer to a specific team member, Lead Source and Primary contact information. Once you are finished entering the information, click *Save* in the top right corner.
## **Adding Customer Details**
From here, you can begin to fill out the Account Status, Pipeline Status, Account Type, if you'd like to assign this customer to a specific team member, Lead Source and Primary contact information. Once you are finished entering the information, click *Save* in the top right corner.
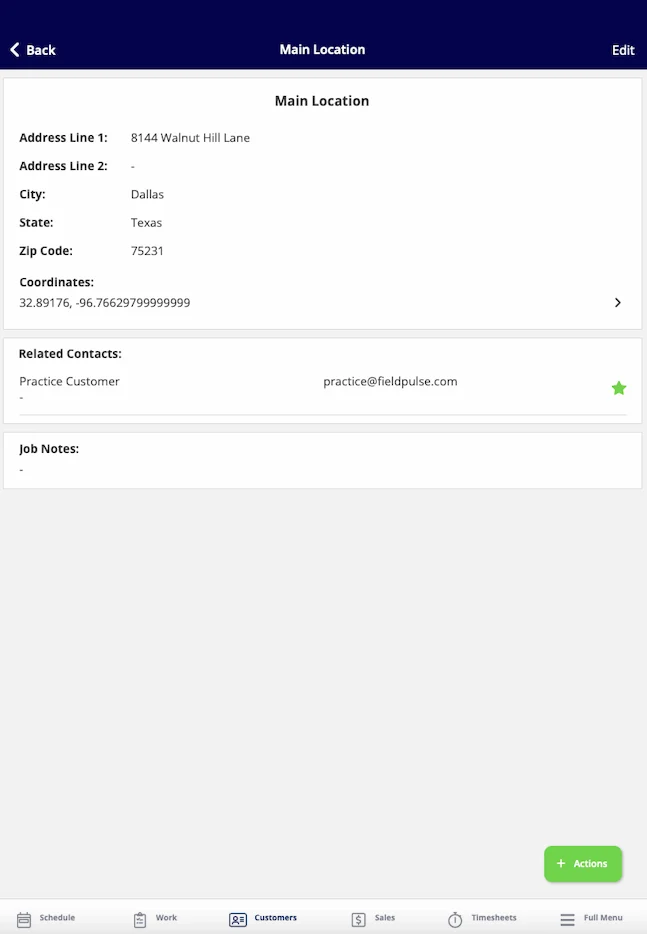
 You can enter GPS coordinates in *Address Line 1* on the mobile app. FieldPulse will display the GPS coordinates associated with your customer's address — tap the coordinates to open them in your preferred maps app.
 ***
# Video Tutorials
## Web App
## Mobile
***
# FAQs
**Is a unique customer ID assigned to each customer?**
Yes. The ID isn't shown on the customer record itself, but you can find it in three places:
1. **In the URL.** Open a customer record in the web app — the customer ID appears in the browser address bar.
***
# Video Tutorials
## Web App
## Mobile
***
# FAQs
**Is a unique customer ID assigned to each customer?**
Yes. The ID isn't shown on the customer record itself, but you can find it in three places:
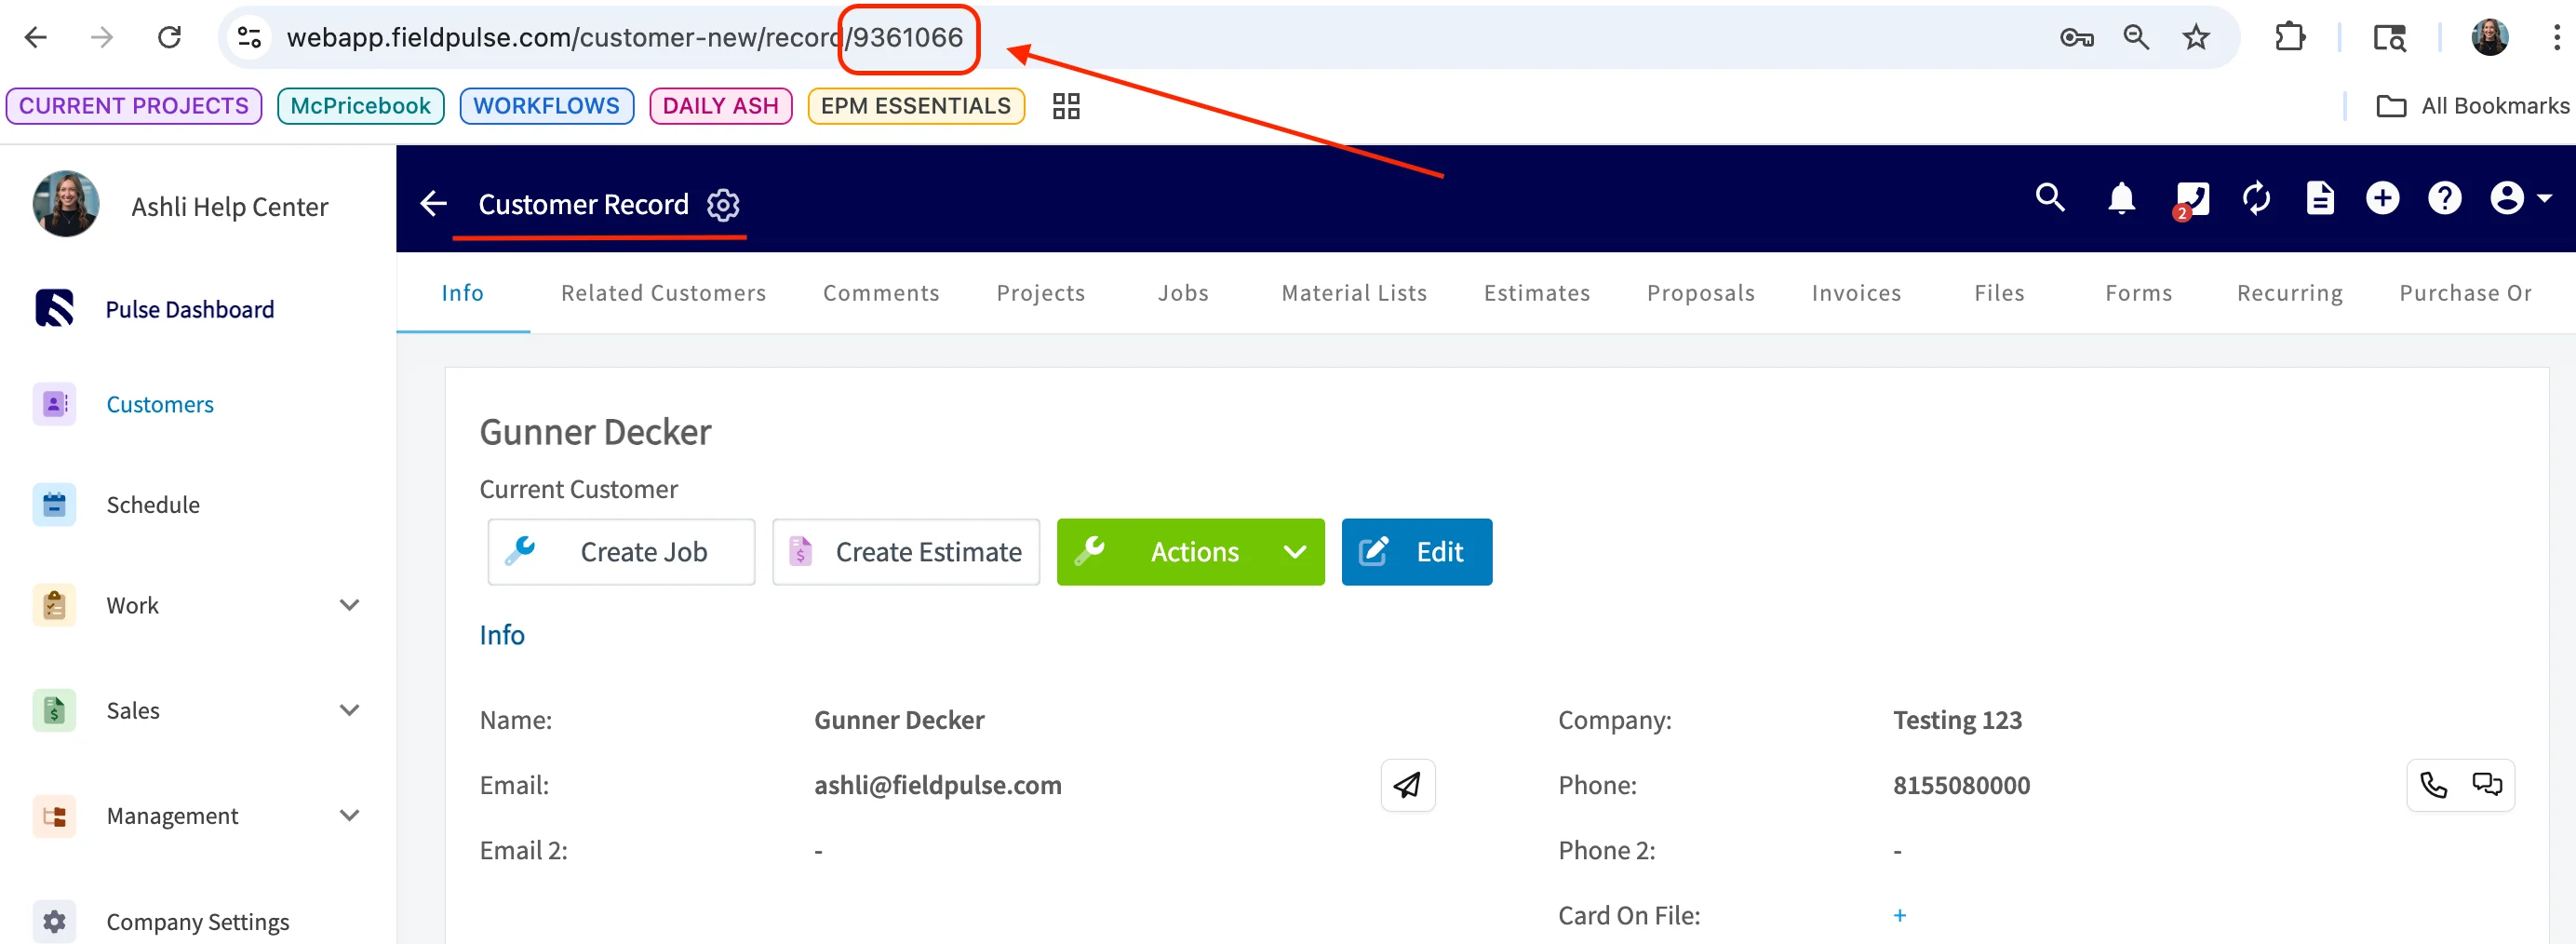
1. **In the URL.** Open a customer record in the web app — the customer ID appears in the browser address bar.
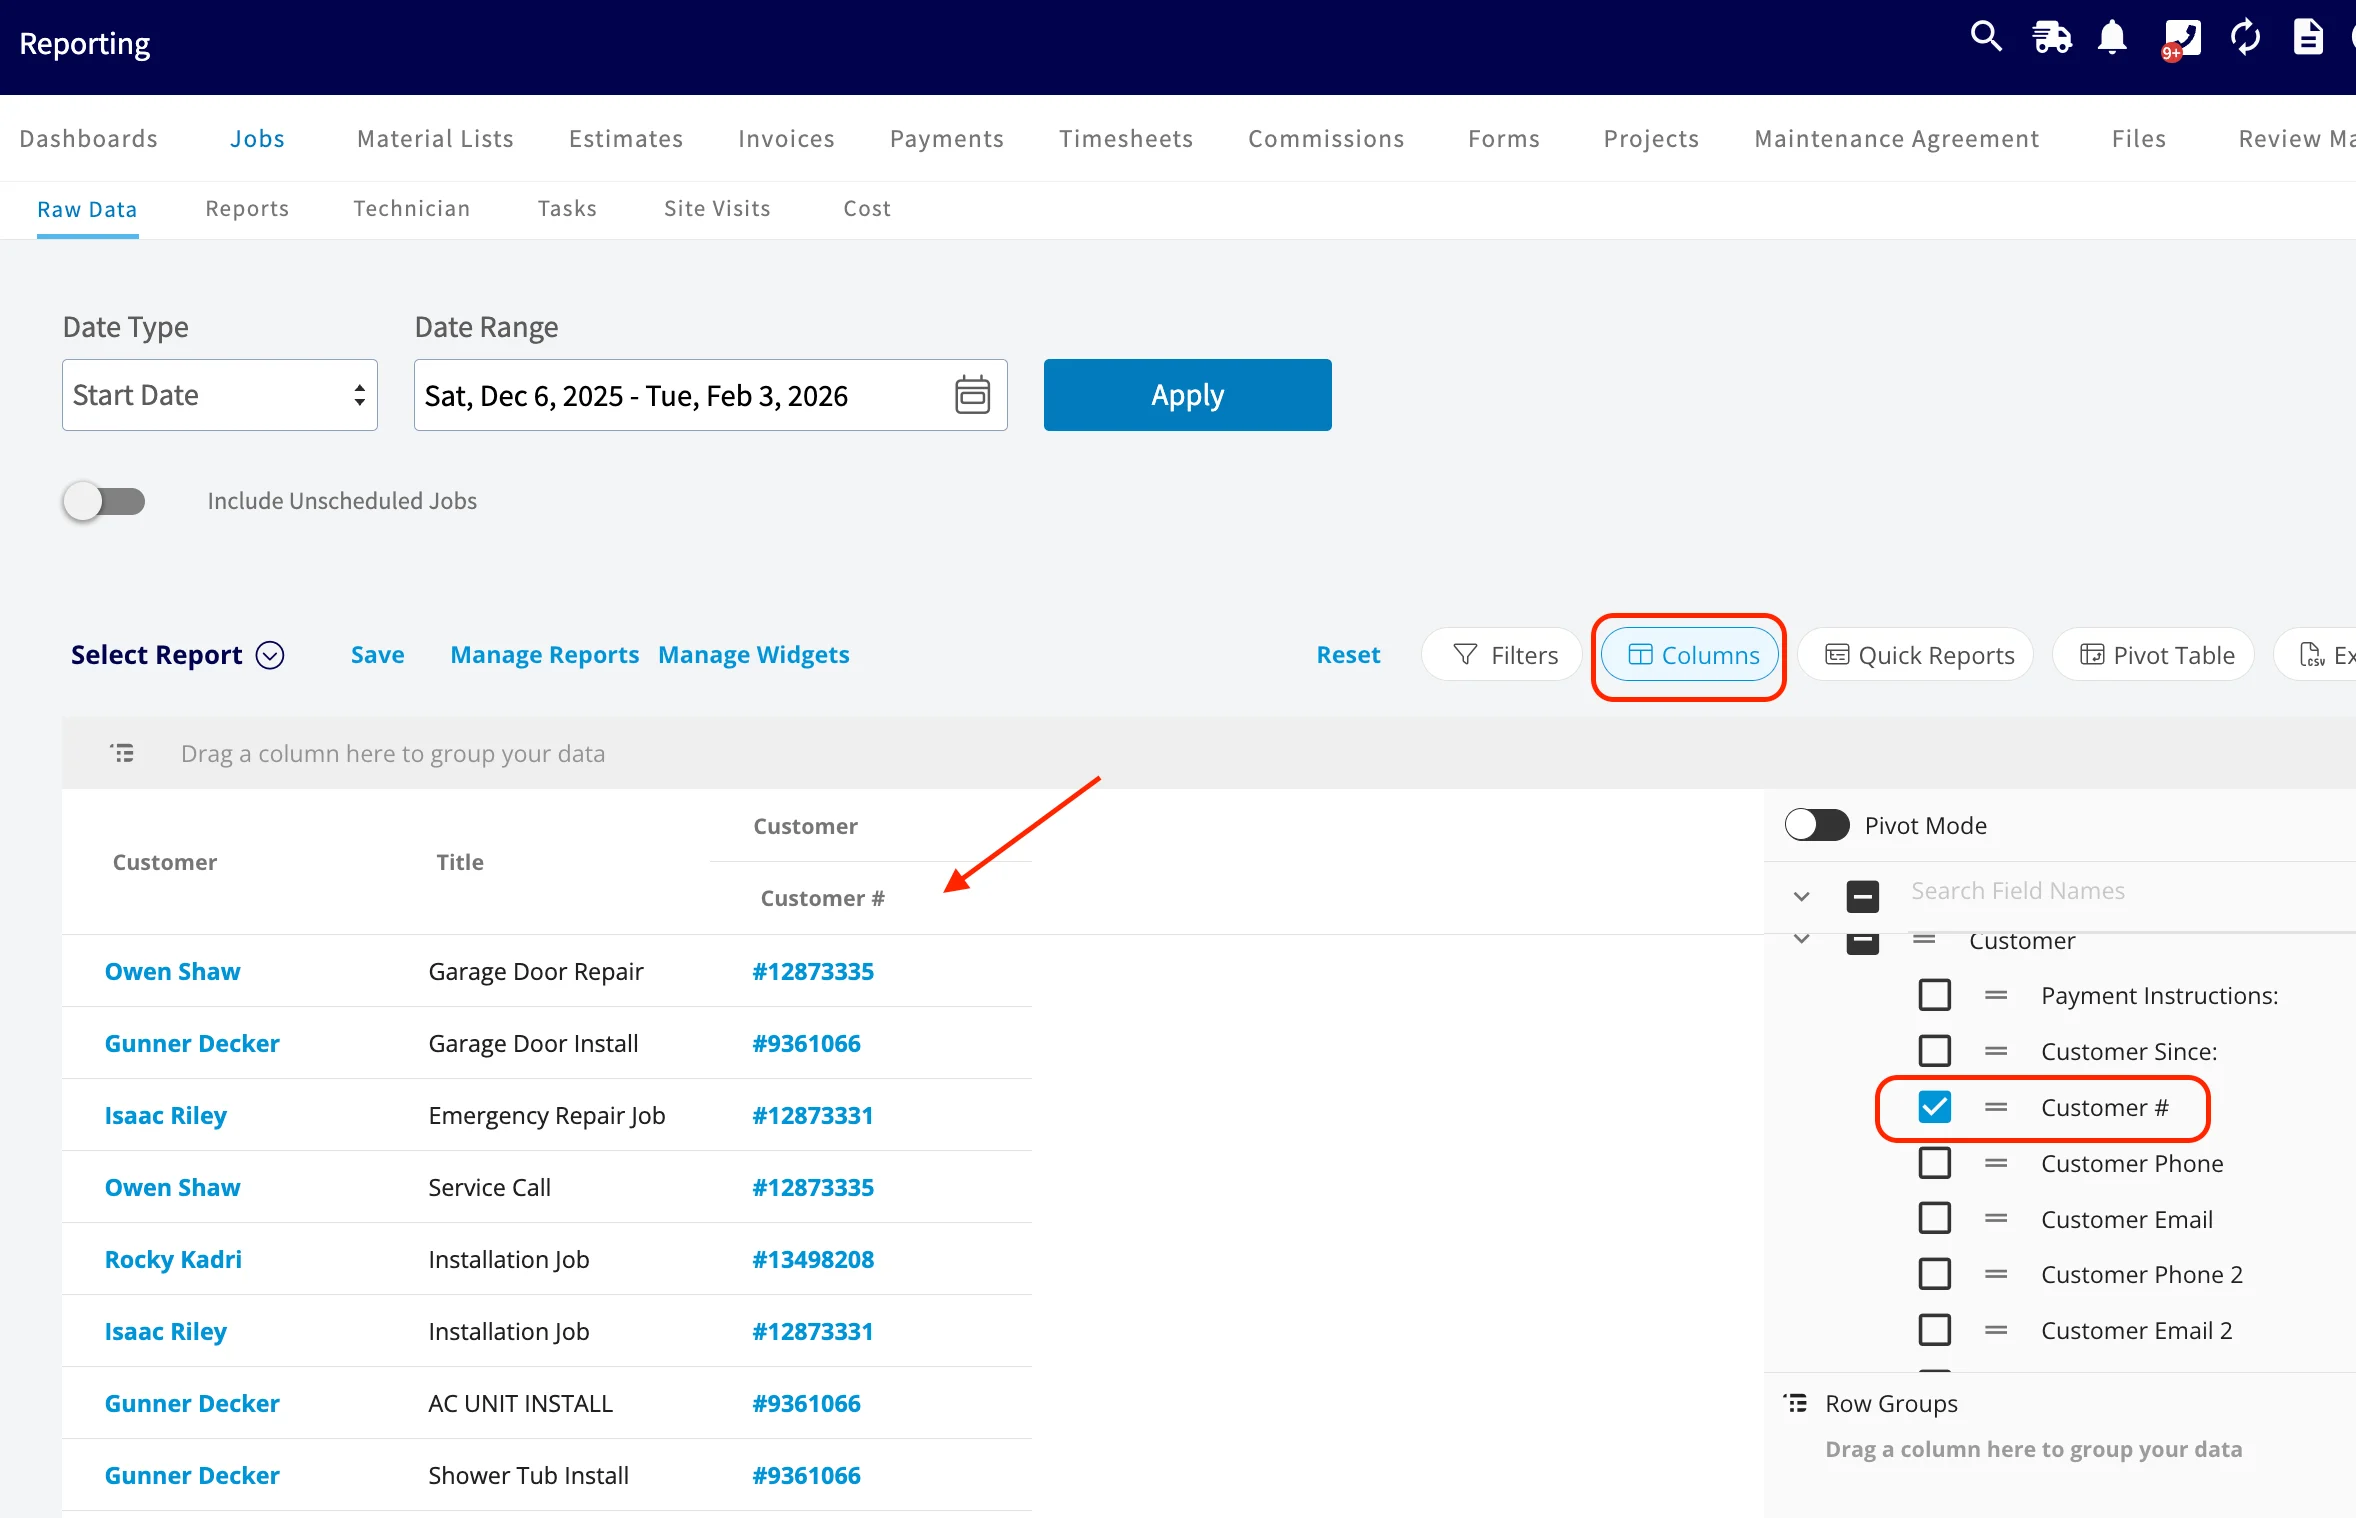
 2. **In any report.** A *Customer #* column is available on every report in FieldPulse.
 3. **In a customer export.** Use the *Export* button on the *Customers* tab, or go to *Company Settings → Customers → Export Customers*. The CSV includes the customer ID for every record.
***
**Have additional questions?**
*Contact us at [support@fieldpulse.com](mailto:support@fieldpulse.com) or use the chat feature in the bottom right corner of your screen.*
3. **In a customer export.** Use the *Export* button on the *Customers* tab, or go to *Company Settings → Customers → Export Customers*. The CSV includes the customer ID for every record.
***
**Have additional questions?**
*Contact us at [support@fieldpulse.com](mailto:support@fieldpulse.com) or use the chat feature in the bottom right corner of your screen.*