> ## Documentation Index
> Fetch the complete documentation index at: https://help.fieldpulse.com/llms.txt
> Use this file to discover all available pages before exploring further.
# Custom Tags for Customers
> Tag customers by trade, service, or any category to filter your list and run targeted reports on each segment.
You can create custom tags for your customers to organize and segment your customers into lists. For example, if you have customers who you do HVAC work for, customers you do handyman work for, and customers you do roofing work for, you could create HVAC, Handyman, and Roofing custom tags.
For example, this would allow you to quickly see all of your HVAC customers in a list by selecting the HVAC tag. You can also run specific reports in the *Reporting* tab on the tags you create.
***
# Adding a Custom Tag to a New Customer
Navigate to *Customers* and click *Create Customer*.
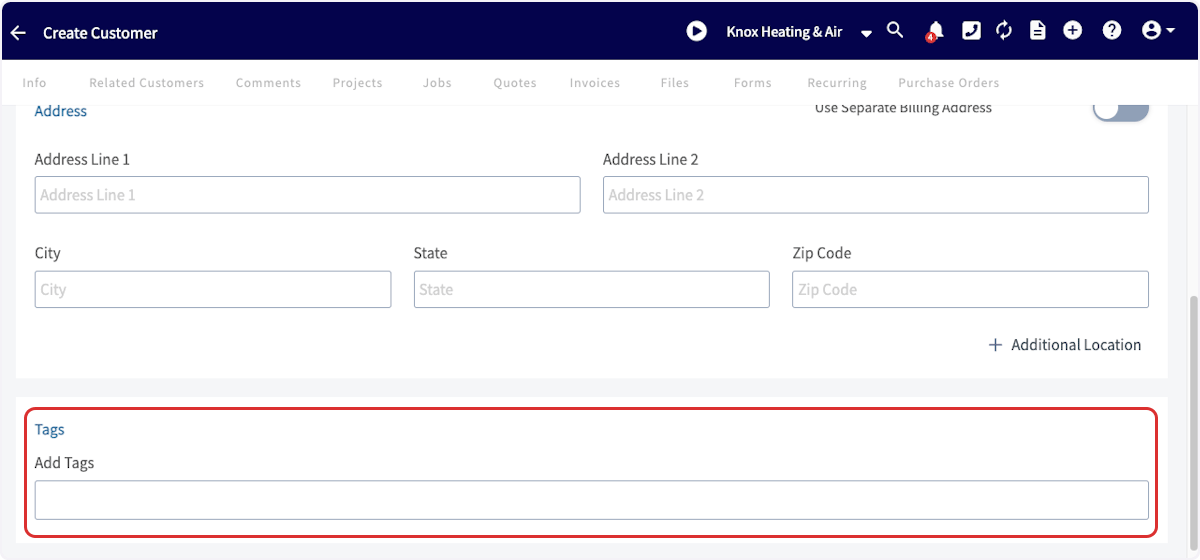
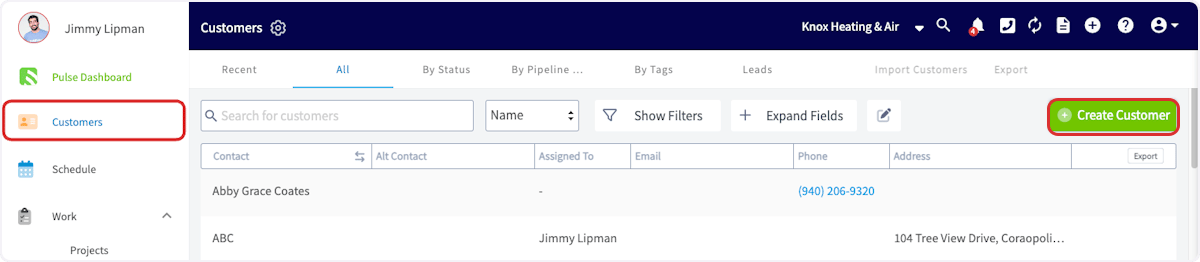 As you create a new customer record, you can add a tag at the bottom of the form.
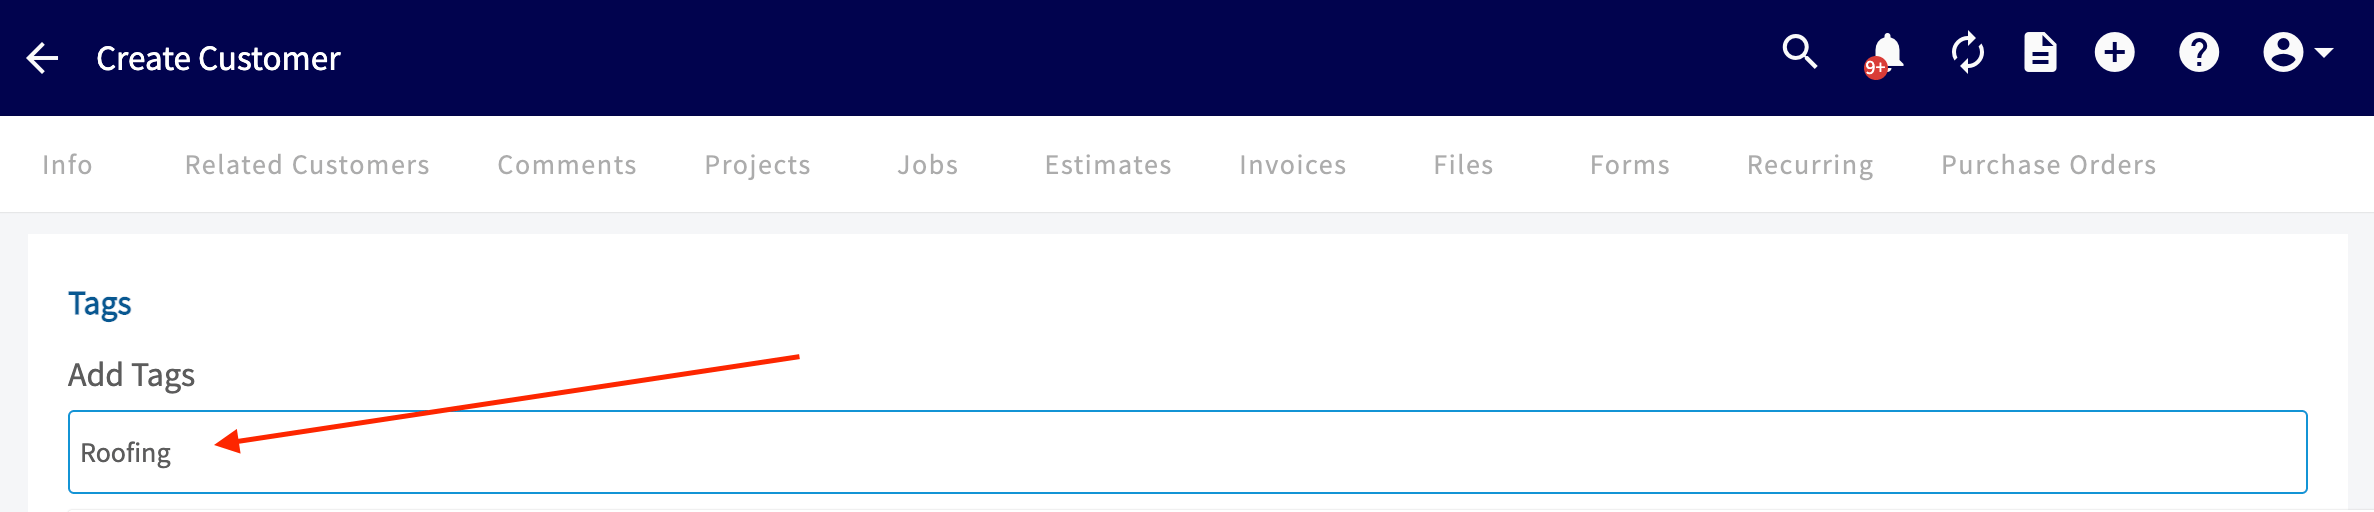
 You can type in a custom tag to add a new tag into the system. Click *Enter* after each tag you'd like to use. You can also customize the color of your new tag!
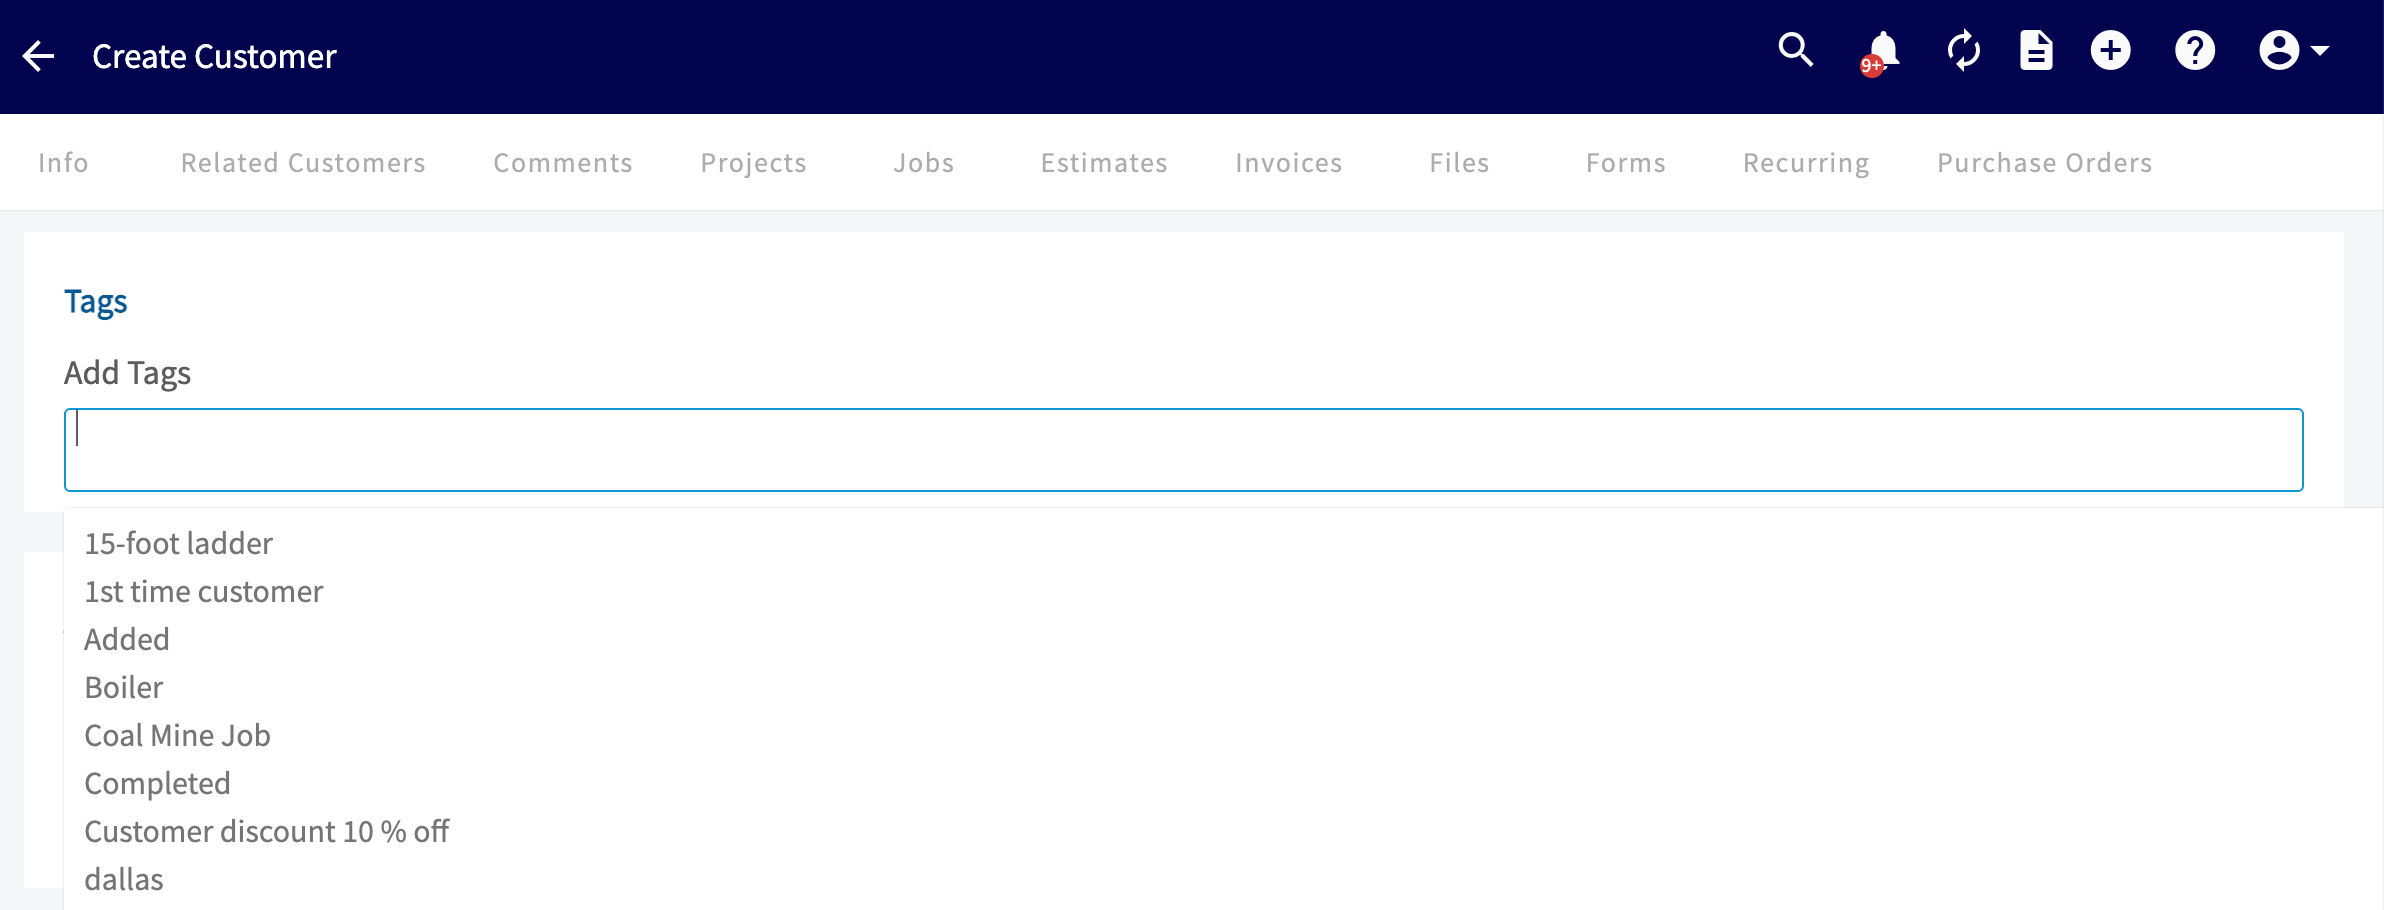
 You can also select from a previously used tag in the tags list.
 Once you have tagged the customer appropriately, scroll down to the bottom of the page and click *Save Customer*. Any tags you created on this record will now appear in the previously used tags list on future customer records.
***
# Adding a Tag to an Existing Customer
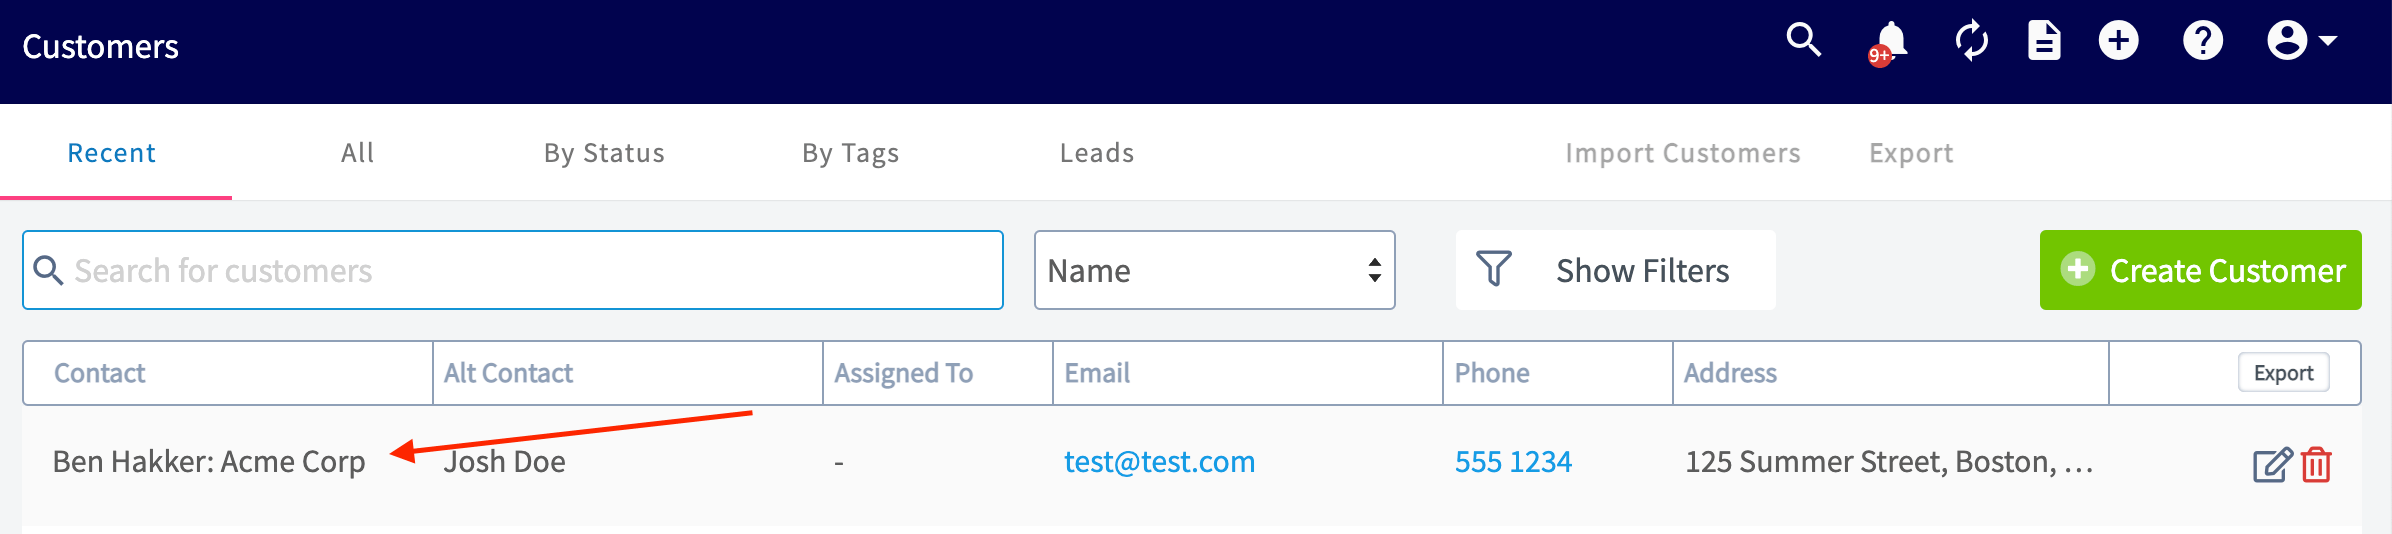
If you want to add a tag to a customer that's already in your system, you can do that from the customer record. Navigate to the *Customers* page and click on the customer you want to add a tag to.
Once you have tagged the customer appropriately, scroll down to the bottom of the page and click *Save Customer*. Any tags you created on this record will now appear in the previously used tags list on future customer records.
***
# Adding a Tag to an Existing Customer
If you want to add a tag to a customer that's already in your system, you can do that from the customer record. Navigate to the *Customers* page and click on the customer you want to add a tag to.
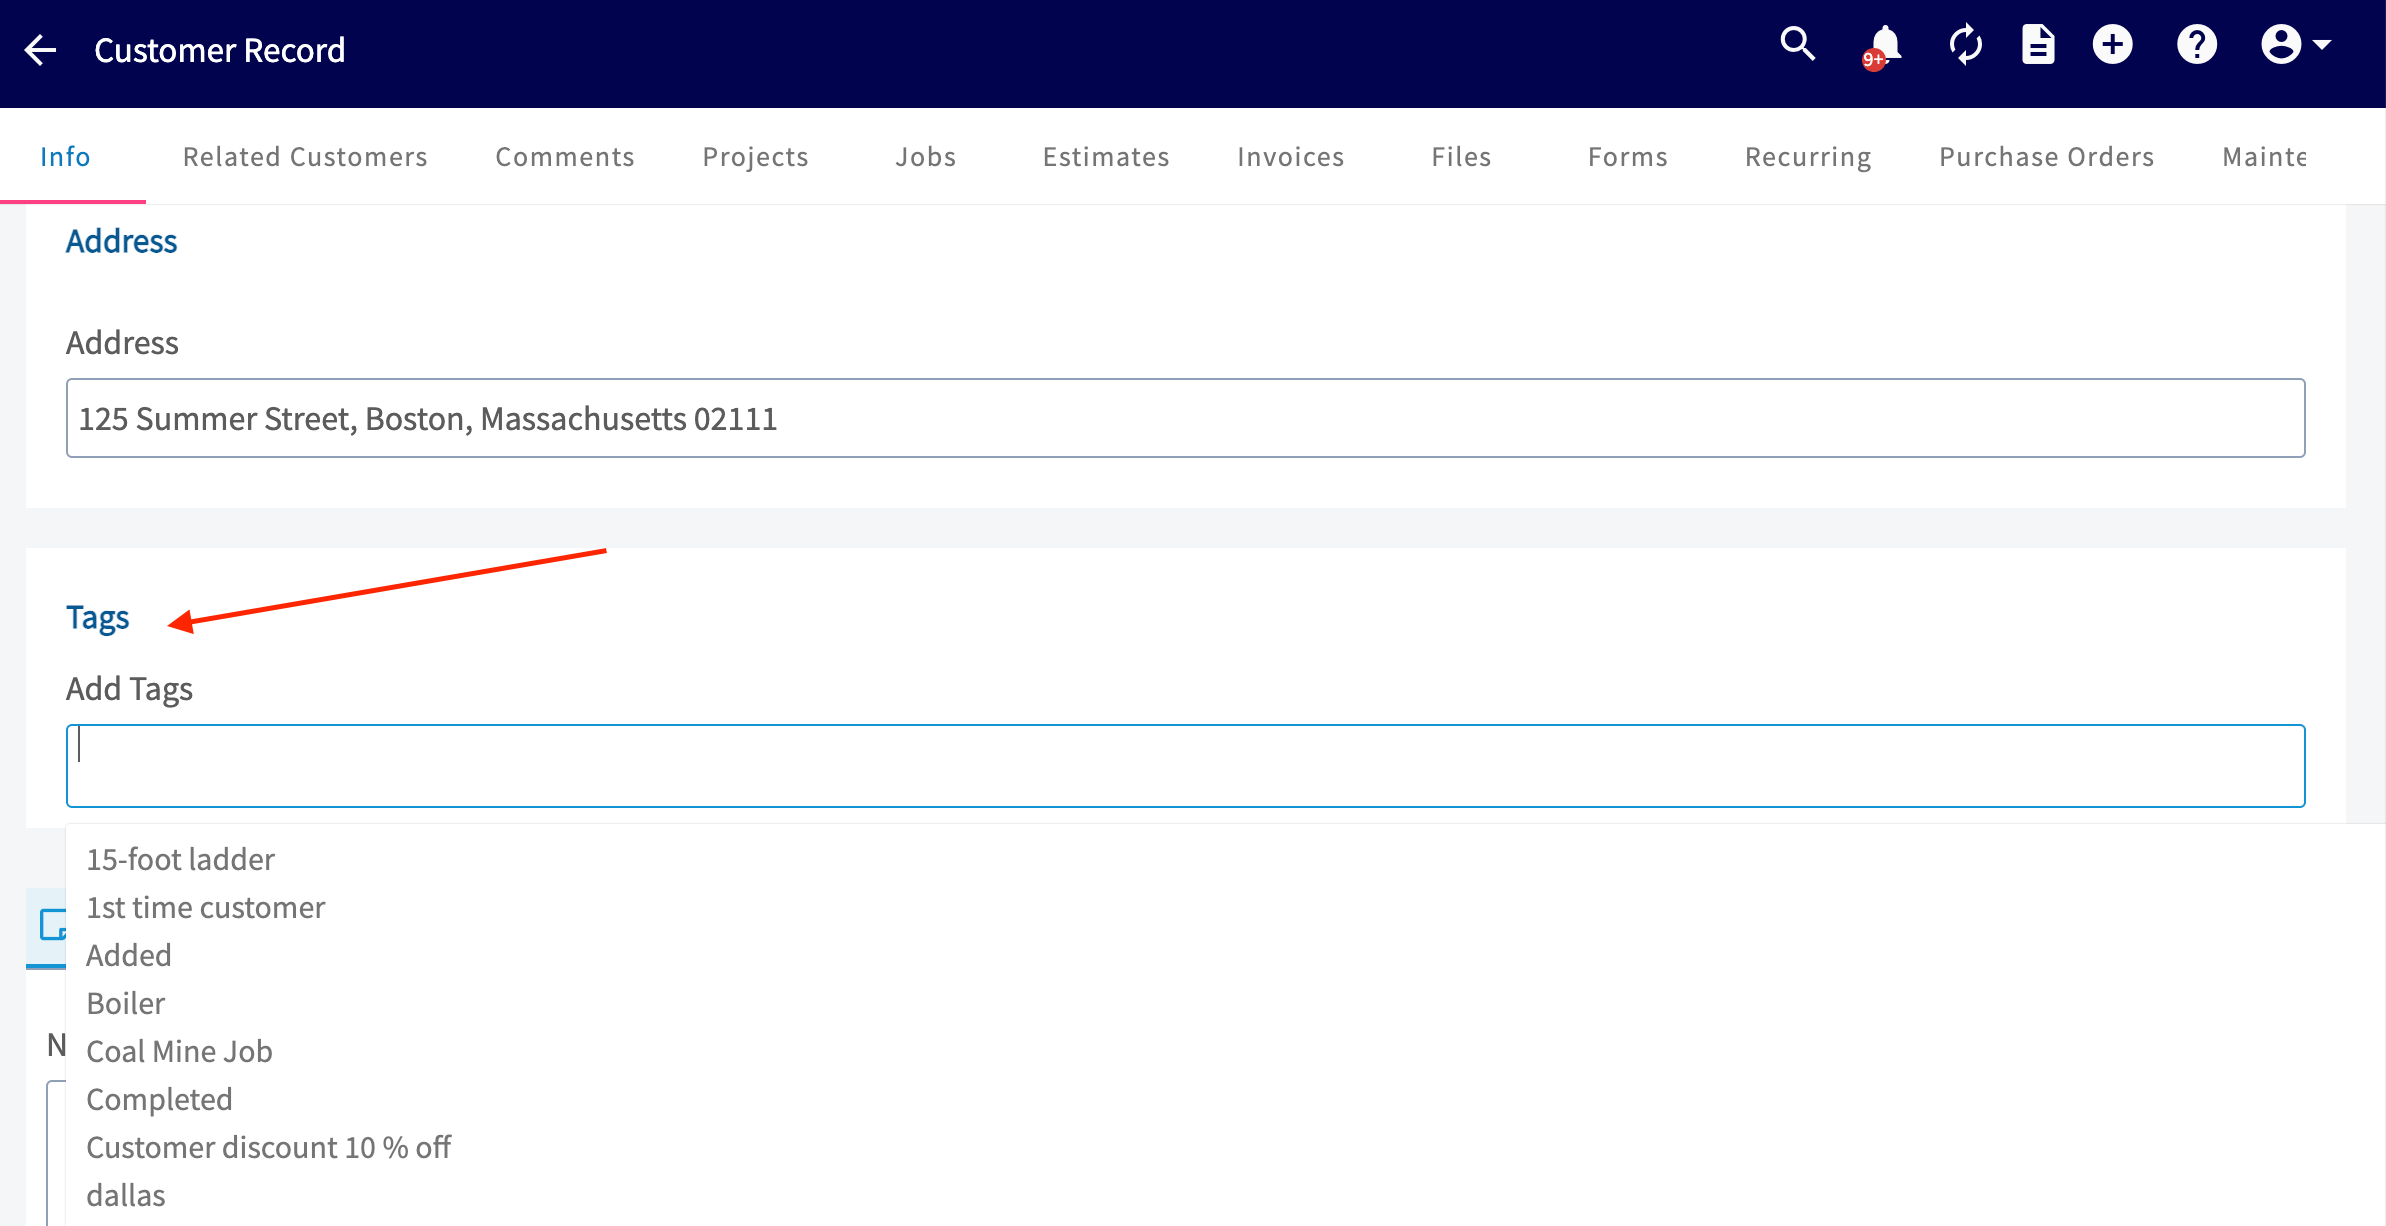
 On the customer record page, click *Edit* and scroll down to the *Tags* section. Start typing to create a new tag, or click on an existing tag in the list that drops down.
 ***
# Sorting Your Customers by Tags
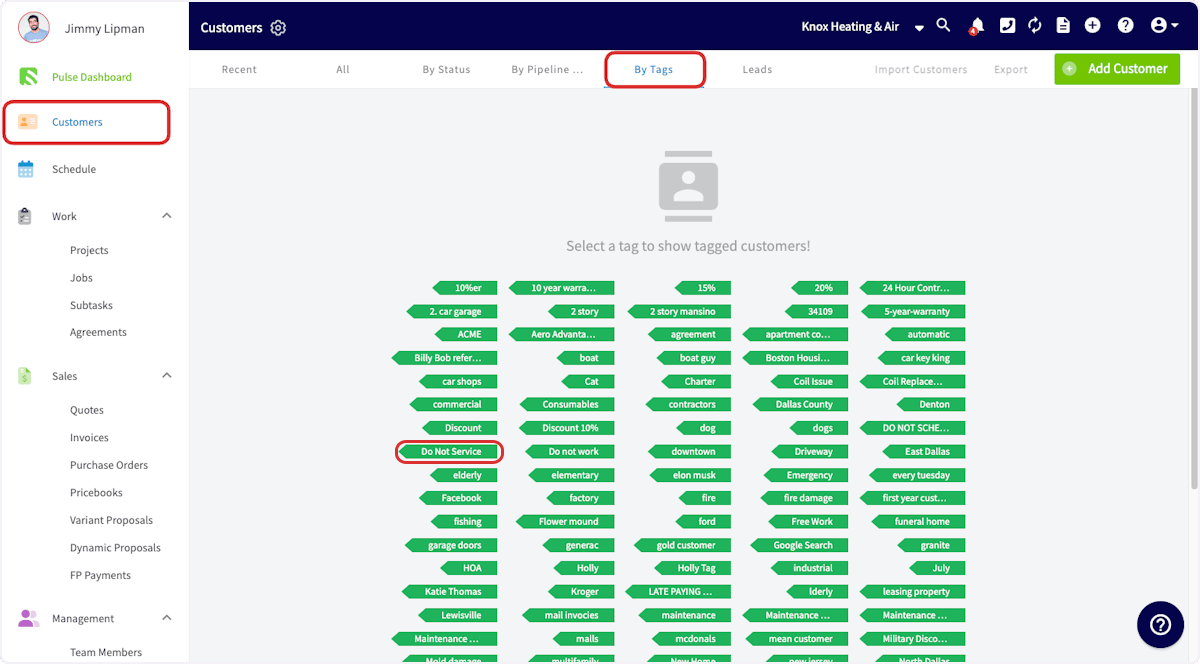
Once you've tagged your customers, you can view your customer lists organized by tags. To do so, go to the *Customers* page and click *By Tags*. From this list, select the tag you'd like to view.
***
# Sorting Your Customers by Tags
Once you've tagged your customers, you can view your customer lists organized by tags. To do so, go to the *Customers* page and click *By Tags*. From this list, select the tag you'd like to view.
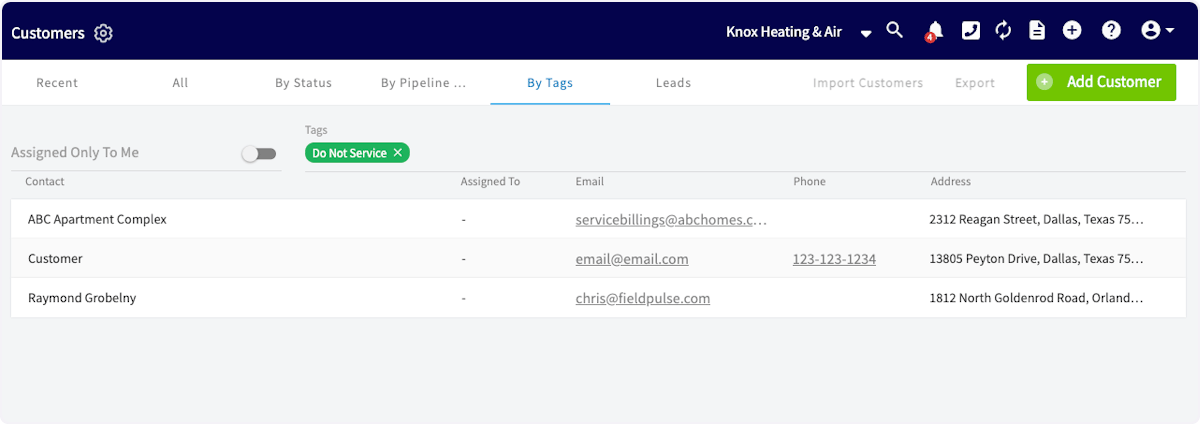
 You will now see all of the customers that carry the selected tag.
 ***
# Deleting a Tag
To delete a tag from the customer record, simply click the little "x" that populates by the tag.
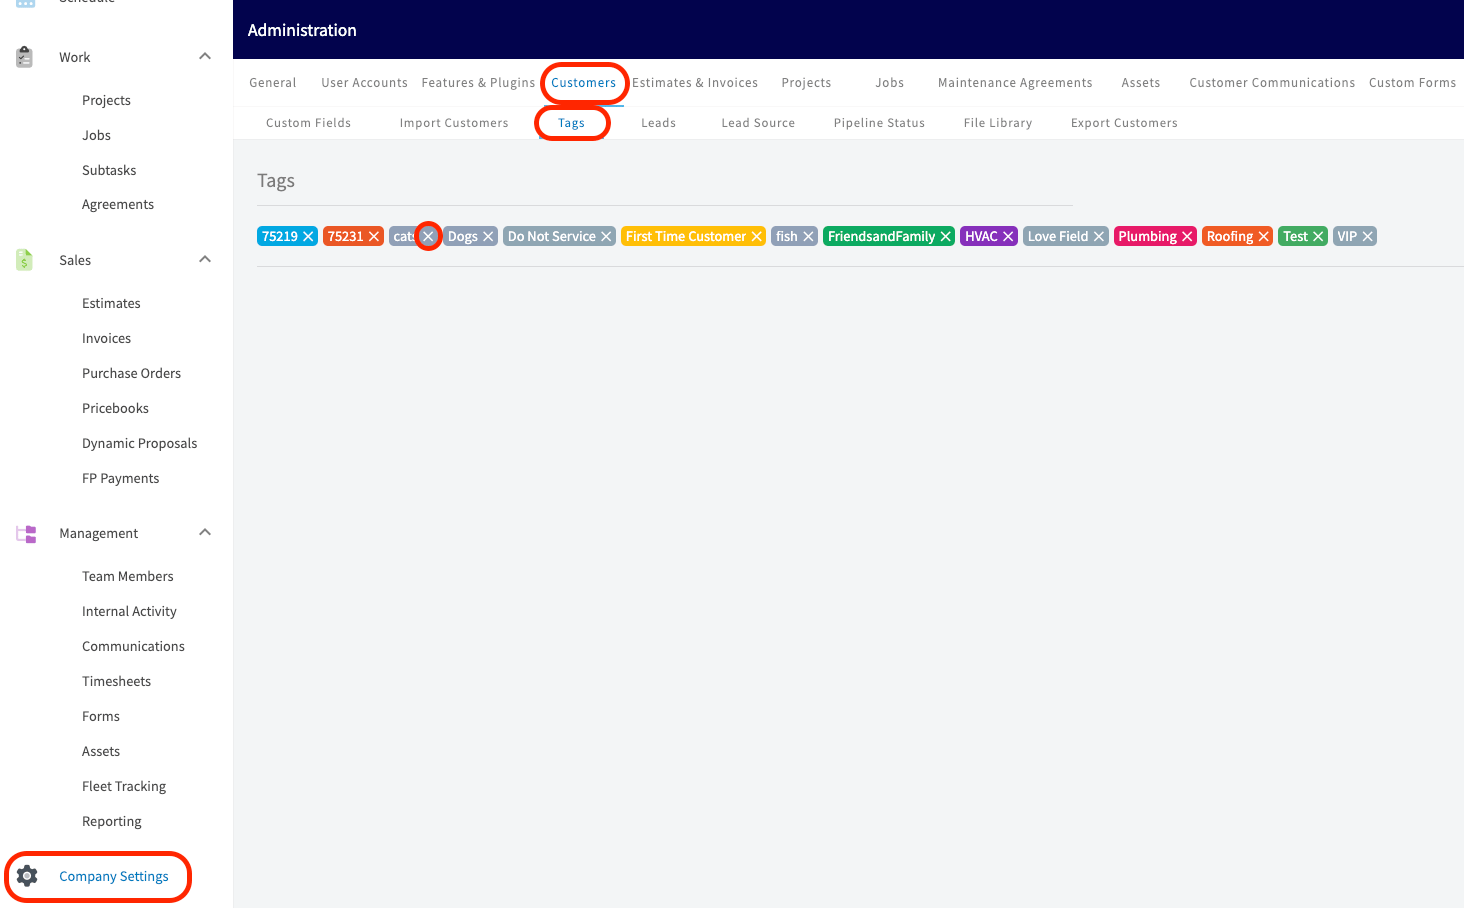
To delete and tag and prevent it from popping up as an option to choose from you will need to navigate to *Company Settings*. Locate the *Customers* tab and click on *Tags*. From here you can easily click the little "x" that populates by the tags you wish to delete.
***
# Deleting a Tag
To delete a tag from the customer record, simply click the little "x" that populates by the tag.
To delete and tag and prevent it from popping up as an option to choose from you will need to navigate to *Company Settings*. Locate the *Customers* tab and click on *Tags*. From here you can easily click the little "x" that populates by the tags you wish to delete.
 ***
# Video Tutorial
***
**Have additional questions?**
*Contact us at [support@fieldpulse.com](mailto:support@fieldpulse.com) or use the chat feature in the bottom right corner of your screen.*
***
# Video Tutorial
***
**Have additional questions?**
*Contact us at [support@fieldpulse.com](mailto:support@fieldpulse.com) or use the chat feature in the bottom right corner of your screen.*