> ## Documentation Index
> Fetch the complete documentation index at: https://help.fieldpulse.com/llms.txt
> Use this file to discover all available pages before exploring further.
# Custom Fields on Project Records
> Add your own fields to project records to capture lead installers, target dates, risk notes, or anything the defaults miss.
You have the flexibility to create **custom fields** for your projects, allowing you to store and display any specific data that is relevant to your project management needs. These fields can be tailored to capture additional information that may not be included in standard project management templates. Here are some examples of how you can utilize custom fields:
* Original expected completion date
* Requested primary project lead/installer
* Risk assessment
***
# Enabling Projects
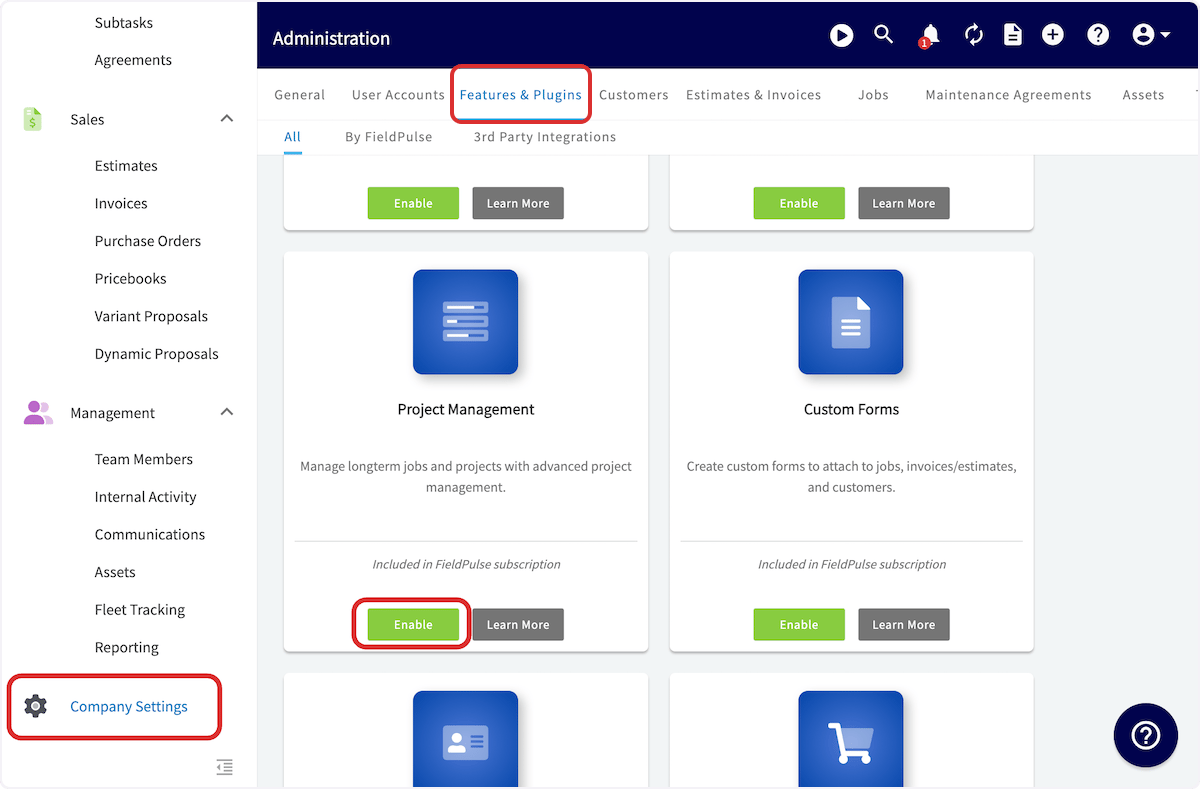
To begin using projects, you'll first need to enable it. Start by clicking on *Company Settings* and selecting *Features & Plugins.* Navigate to *Project Management* and select *Enable*. Now you're ready to begin creating and tracking your projects as well as creating custom fields that have the option to cascade to your jobs, estimates & invoices, and purchase orders.
 ***
# Creating a Custom Field for a Project
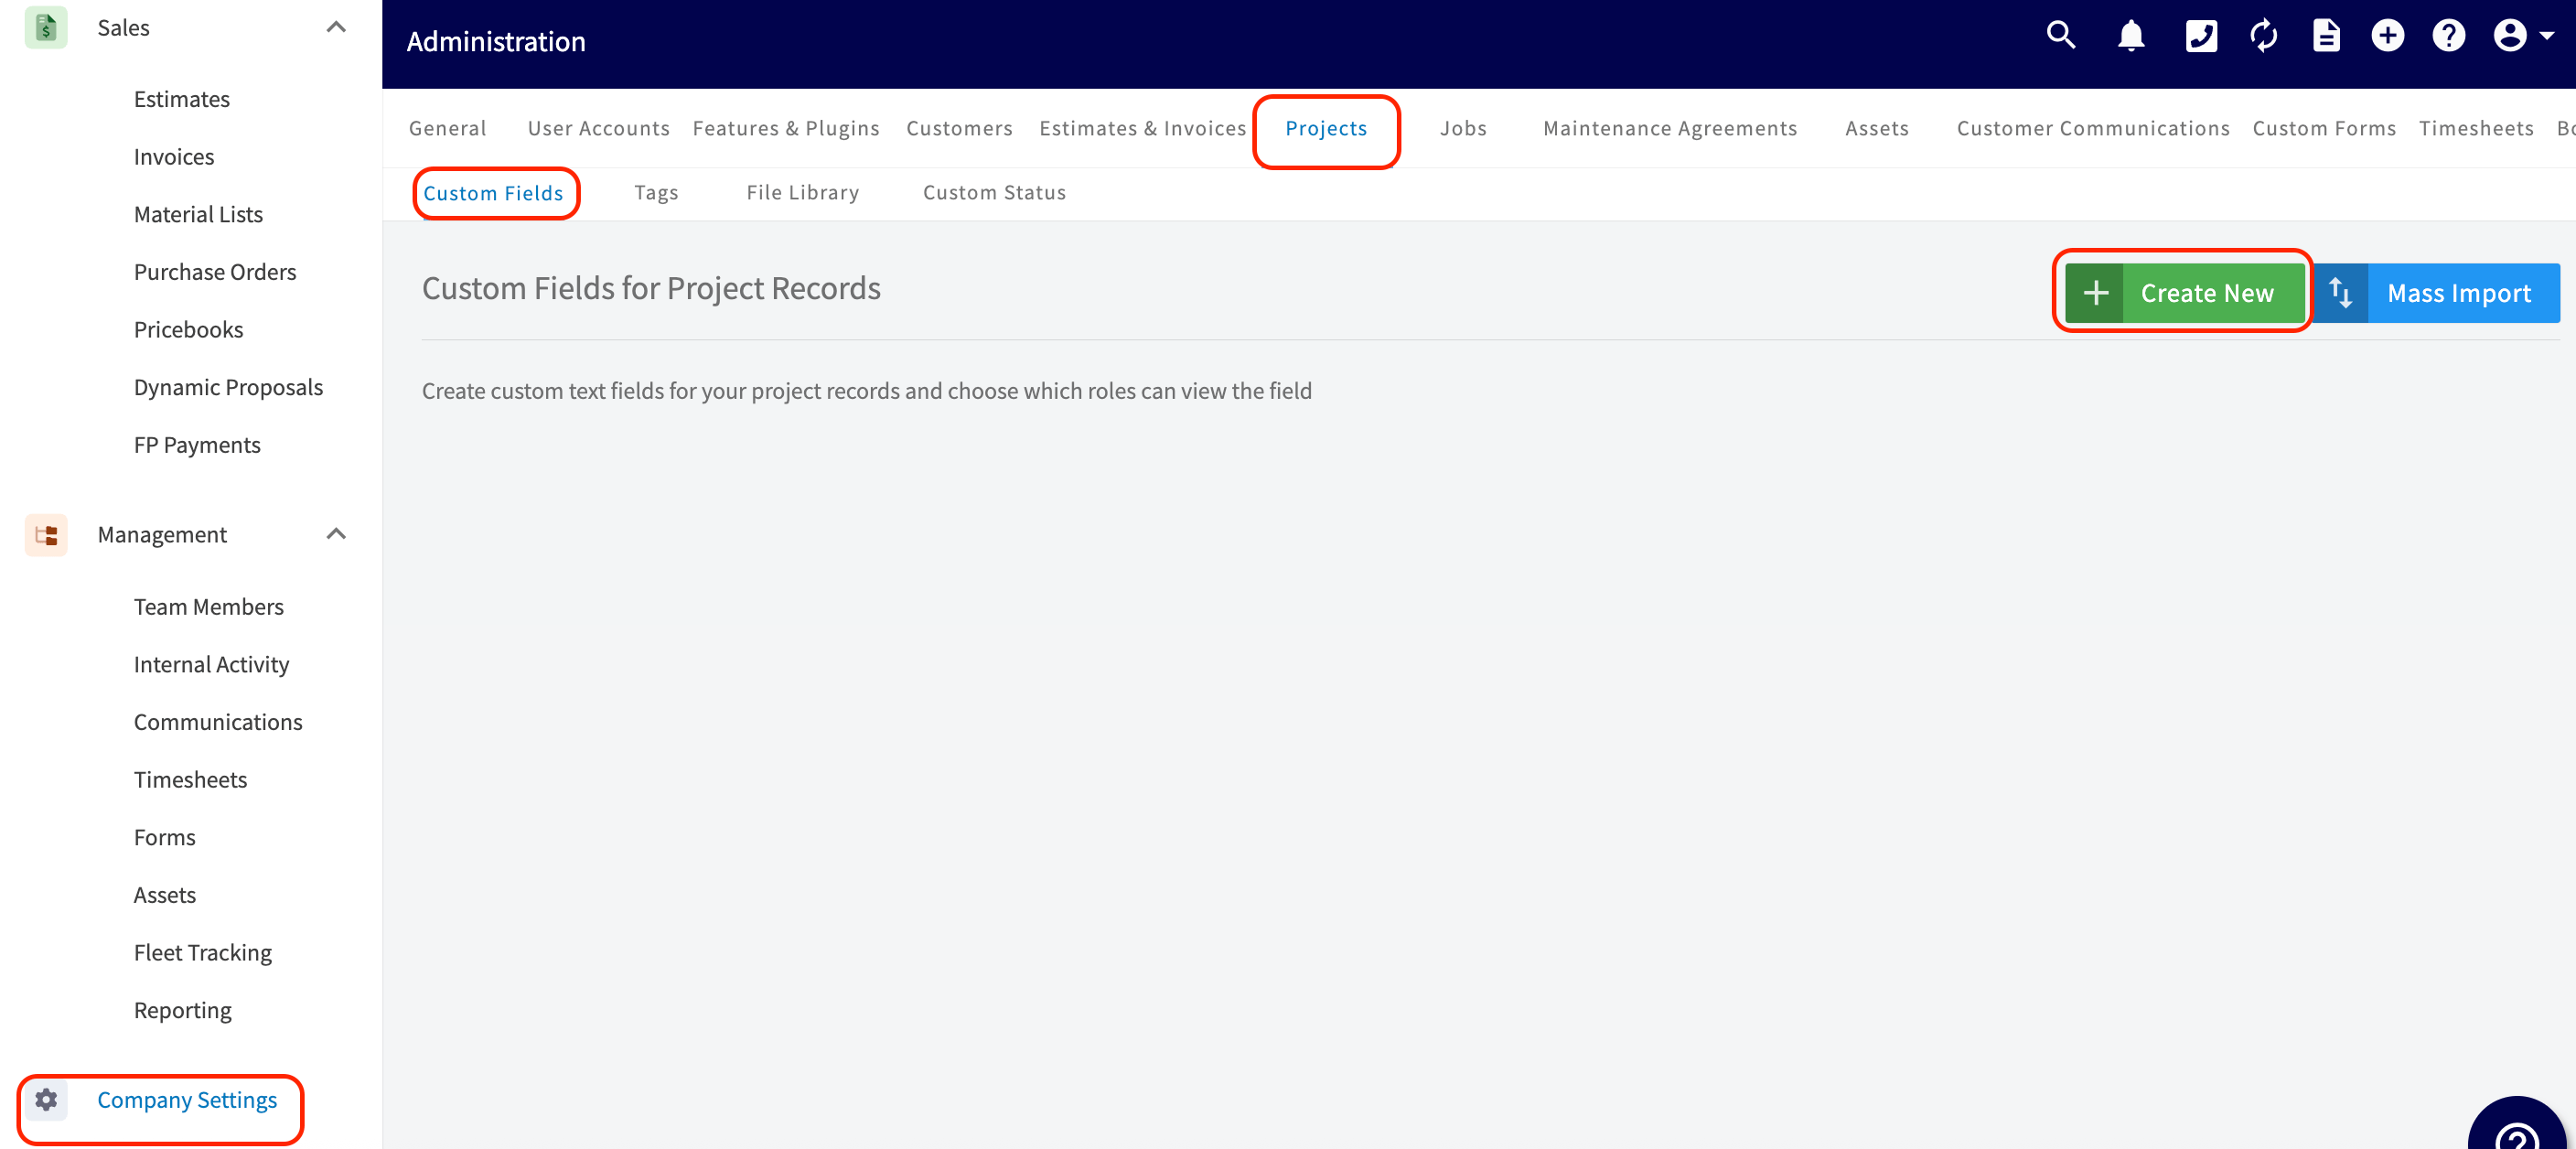
To create a custom field, navigate to *Company Settings*, click on *Projects* and then the *Custom Fields* tab.
On the *Custom Fields* page, click *Create New*.
***
# Creating a Custom Field for a Project
To create a custom field, navigate to *Company Settings*, click on *Projects* and then the *Custom Fields* tab.
On the *Custom Fields* page, click *Create New*.
 In the pop-up window, begin by adding the custom field name.
 Then select from the drop down menu what type of field this will be.
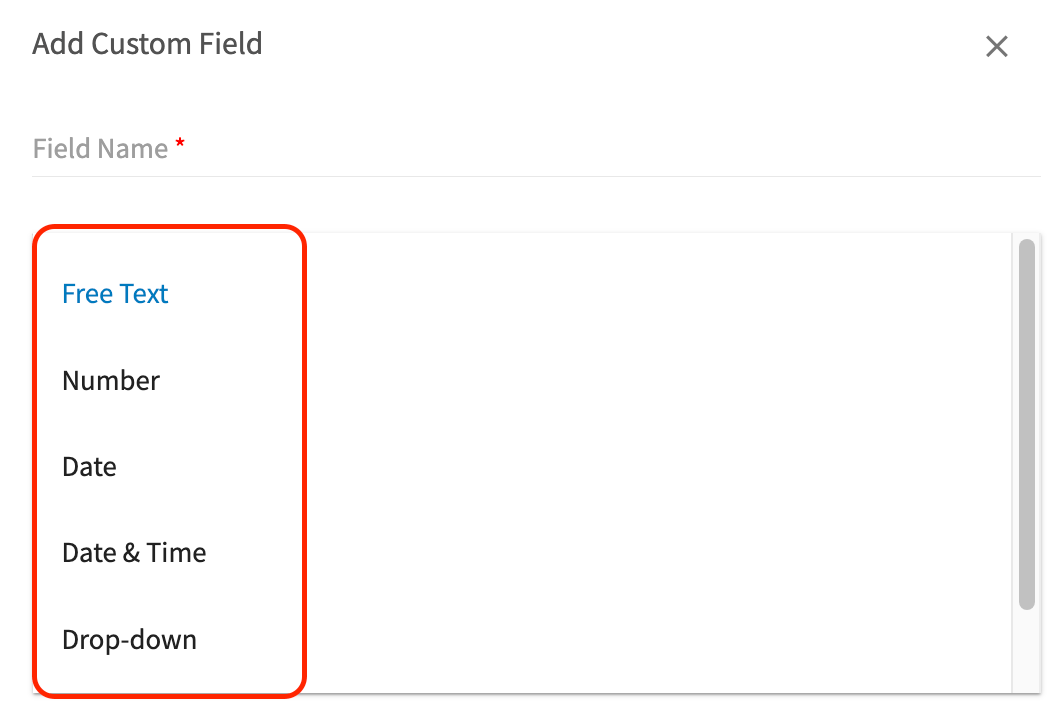 **Type:** Your choices are as follows:
* **Free text:** Here you have the option to add "free text", allowing you to type freely in your own words.
* **Number:** By selecting this, you can easily indicate the number or quantity for this line item.
* **Date:** This option allows you to easily autofill the date in by clicking on the small calendar icon.
* **Date & Time:** This option allows you to easily autofill the date in by clicking on the small calendar icon. The time will default to today's date at 8 am, but you can manually adjust the time.
* **Drop Down:** Upon selecting this option, you will be asked to *Add New Field Options* (see the first picture below) and edit them. After assigning a name to each option, ensure that you click on the *save* icon (see second picture below). By adding all of the options here, when on your item you will then select a single option from a dropdown list.
**Type:** Your choices are as follows:
* **Free text:** Here you have the option to add "free text", allowing you to type freely in your own words.
* **Number:** By selecting this, you can easily indicate the number or quantity for this line item.
* **Date:** This option allows you to easily autofill the date in by clicking on the small calendar icon.
* **Date & Time:** This option allows you to easily autofill the date in by clicking on the small calendar icon. The time will default to today's date at 8 am, but you can manually adjust the time.
* **Drop Down:** Upon selecting this option, you will be asked to *Add New Field Options* (see the first picture below) and edit them. After assigning a name to each option, ensure that you click on the *save* icon (see second picture below). By adding all of the options here, when on your item you will then select a single option from a dropdown list.
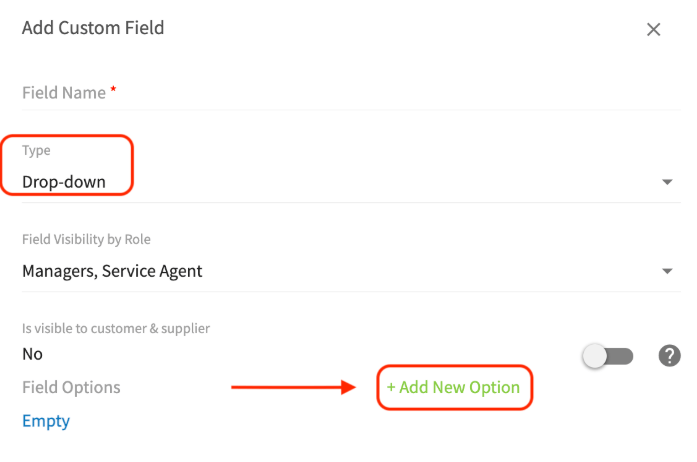
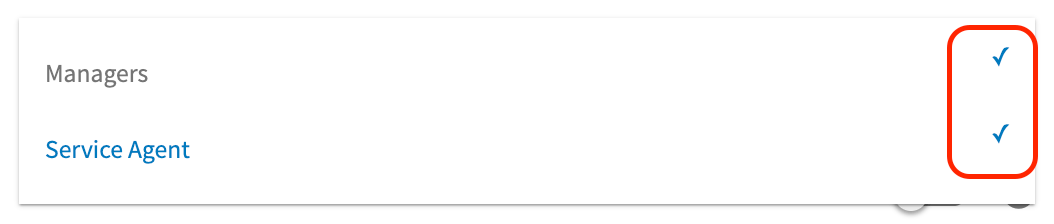
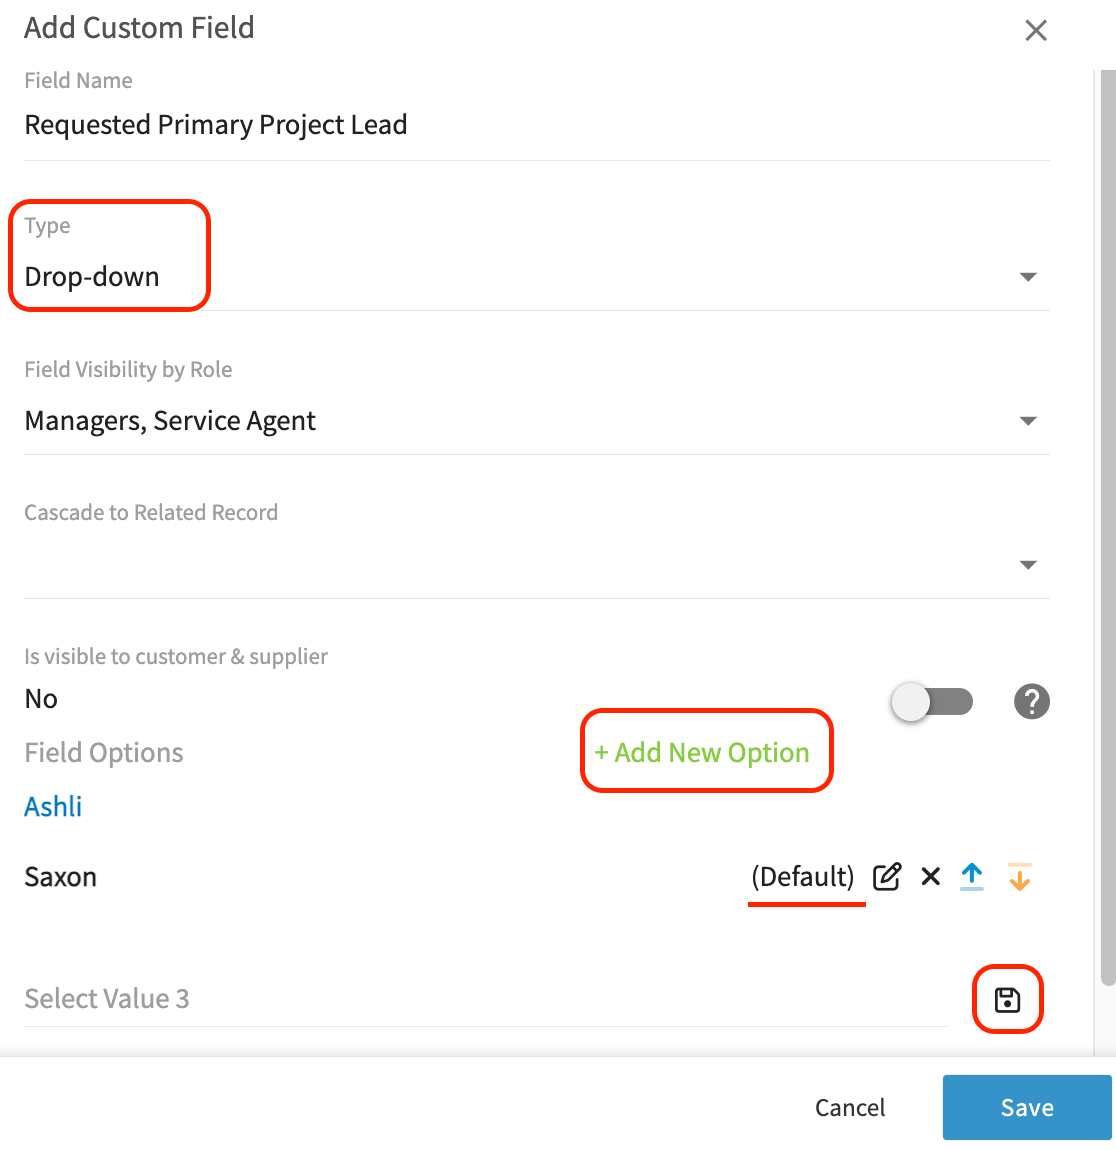 **Field Visibility by Role:** Who on your team has access to this custom field? You have the power to select whether this is for service agents and/or team managers. Simply check or uncheck next to each team member.
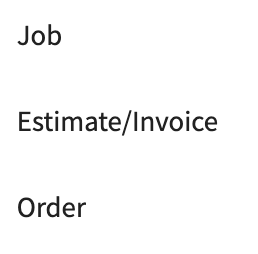
 **Cascade to Related Record:** This will allow you to select additional FieldPulse records where you'd like the information recorded in this custom field to appear. Choose some or all of the related record options mentioned below.
 ***
**Have additional questions?**
*Contact us at [support@fieldpulse.com](mailto:support@fieldpulse.com) or use the chat feature in the bottom right corner of your screen.*
***
**Have additional questions?**
*Contact us at [support@fieldpulse.com](mailto:support@fieldpulse.com) or use the chat feature in the bottom right corner of your screen.*