> ## Documentation Index
> Fetch the complete documentation index at: https://help.fieldpulse.com/llms.txt
> Use this file to discover all available pages before exploring further.
# Creating a Task
> Block off non-billable time like PTO, drive time, and meetings on the calendar with color-coded task categories.
Tasks are non-billable events that will appear on the calendar. These tasks do not need to be assigned to any specific customer, and can be customized and color-coded based on your companies preference. Some examples include:
* PTO
* Drive Time
* Errands
* Lunch
* Internal Team Meeting
* Admin Time
* On-Site Estimate
***
# **Getting Task Categories Setup**
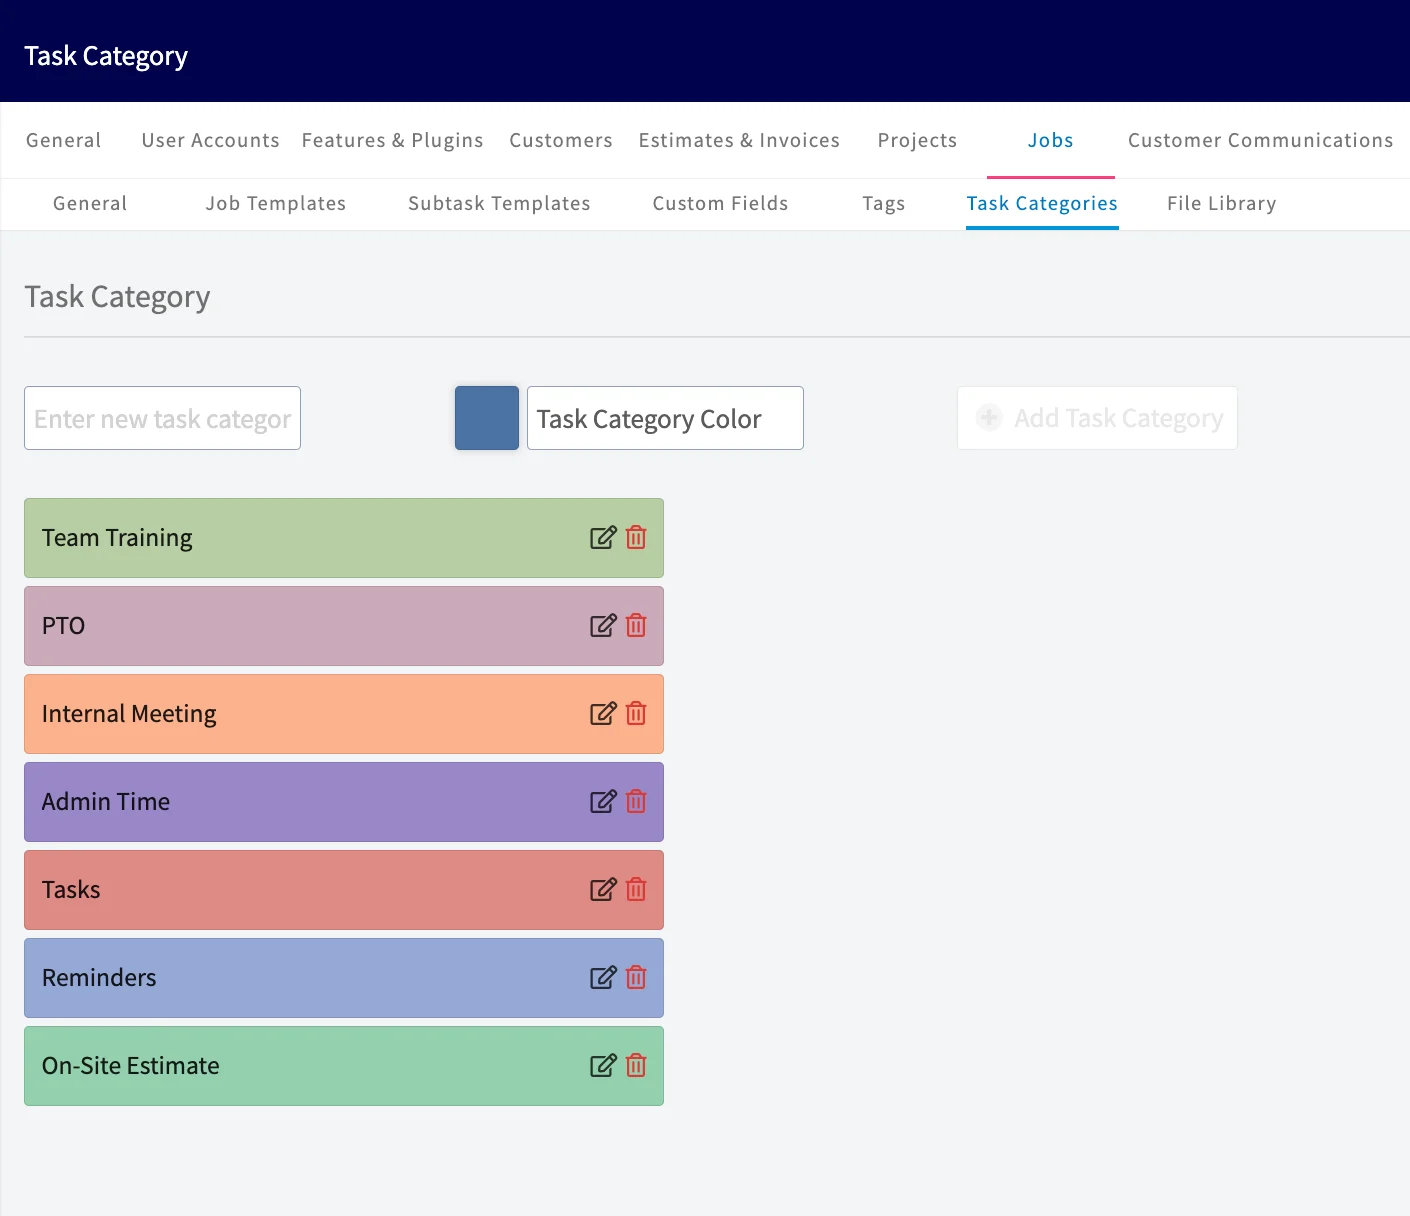
Navigate to *Company Settings*, then select *Jobs*, then *Task Categories*. FieldPulse has preset task categories available, or you can adjust to meet your business needs.
**To add a new task category:** type the task category name, select a color, then select *Add Task Category*.
**To edit a task category:** select the pencil icon next to the task name.
**To delete a task category:** select the trash can icon next to the task name.
 ## Video Tutorial
***
# **Creating a Task**
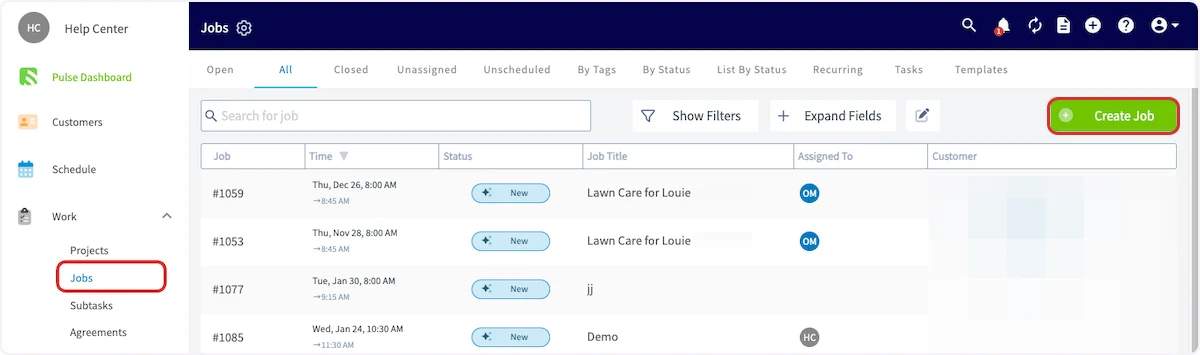
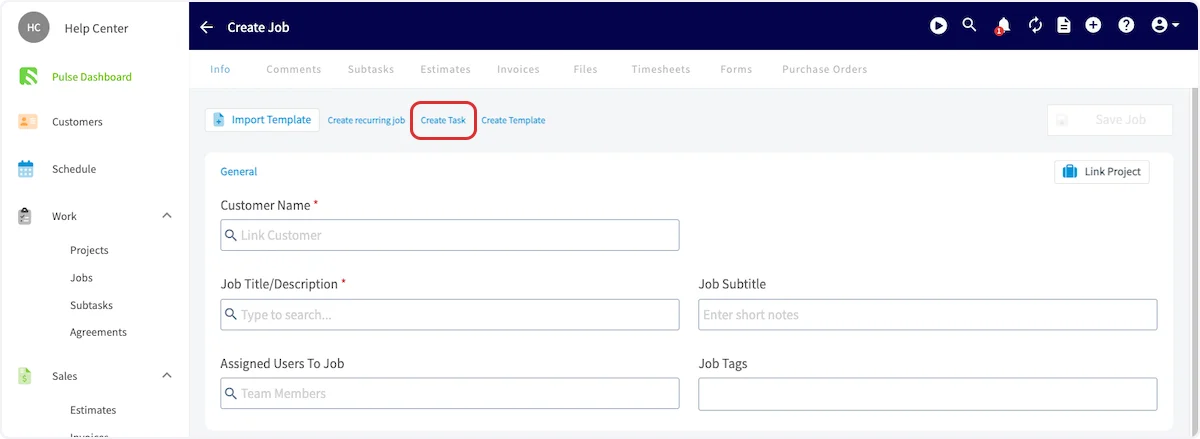
Tasks are created just like you'd create a job. This can be done directly from the schedule or the job tab. If it's linked to a customer, it can also be created from the customer record. Begin by selecting *Create Job,* then click *Create Task* at the top of the new job record.
## Video Tutorial
***
# **Creating a Task**
Tasks are created just like you'd create a job. This can be done directly from the schedule or the job tab. If it's linked to a customer, it can also be created from the customer record. Begin by selecting *Create Job,* then click *Create Task* at the top of the new job record.
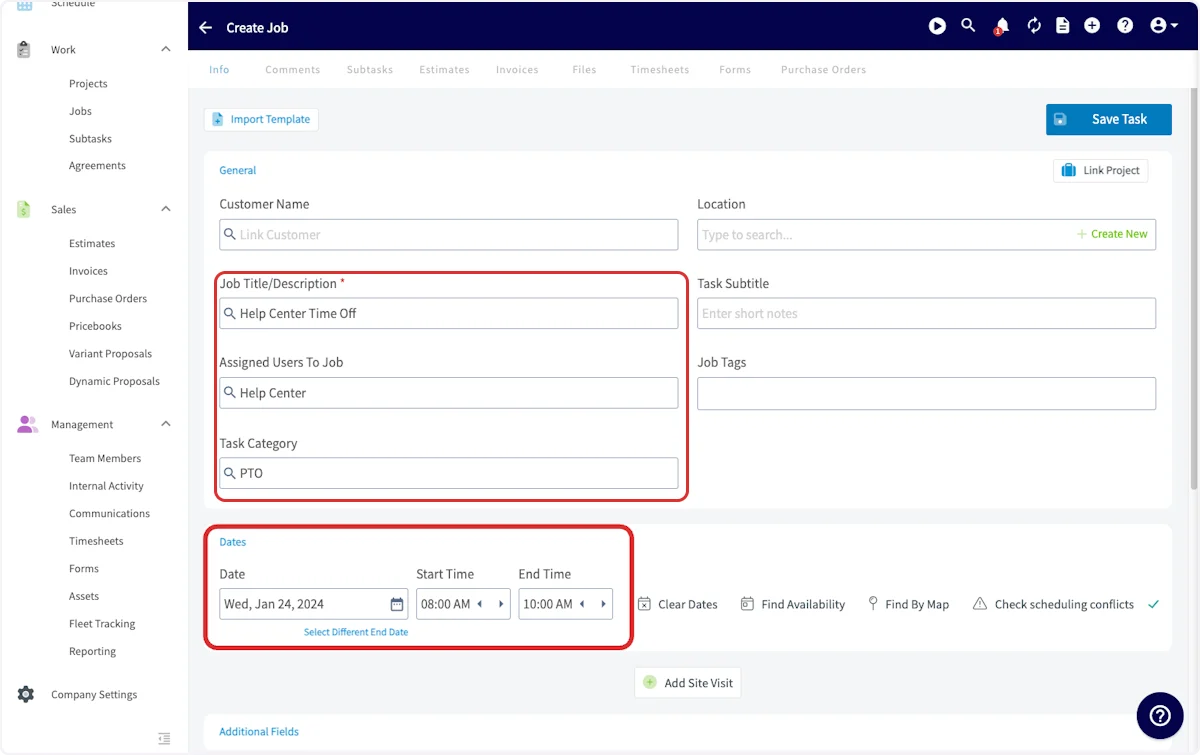
 Notice that linking a customer to a task is optional. Next, be sure to give your job a descriptive title. Ours is "Help Center Time Off." Next click on *Assigned Users to Job* and select a team member to assign them to the job. Select a *Task Category* to identify the task. Here, we've chosen *PTO* as it is time off. Finally, select the dates and times that the task will take place.
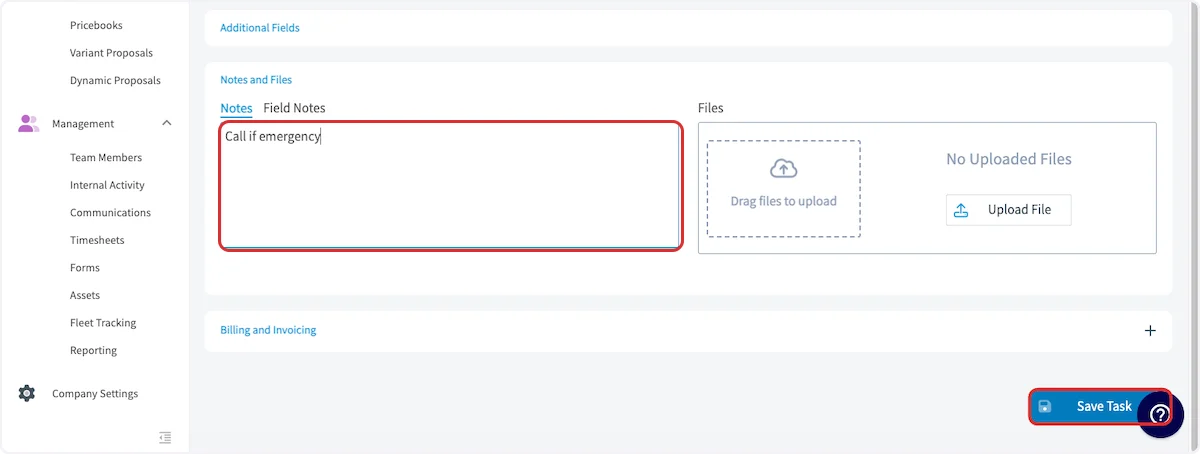
 Add notes if applicable, then press *Save Task*. Once saved, the task will appear on the schedule.
 ***
# Video Tutorial
***
**Have additional questions?**
*Contact us at [support@fieldpulse.com](mailto:support@fieldpulse.com) or use the chat feature in the bottom right corner of your screen.*
***
# Video Tutorial
***
**Have additional questions?**
*Contact us at [support@fieldpulse.com](mailto:support@fieldpulse.com) or use the chat feature in the bottom right corner of your screen.*