(Note: Xero integration is only available for customers in Australia and New Zealand.)
1. Request access to sync with Xero.
To connect to Xero, you will first need to request access by contacting us at support@fieldpulse.com or using the chat feature in the bottom right corner of your screen.2. Turn on the integration in ‘Company Settings’.
Once FieldPulse has enabled you to connect to Xero, go to Company Settings. Find the Features & Plugins tab and navigate until you find the Xero tile. Click Connect to Xero.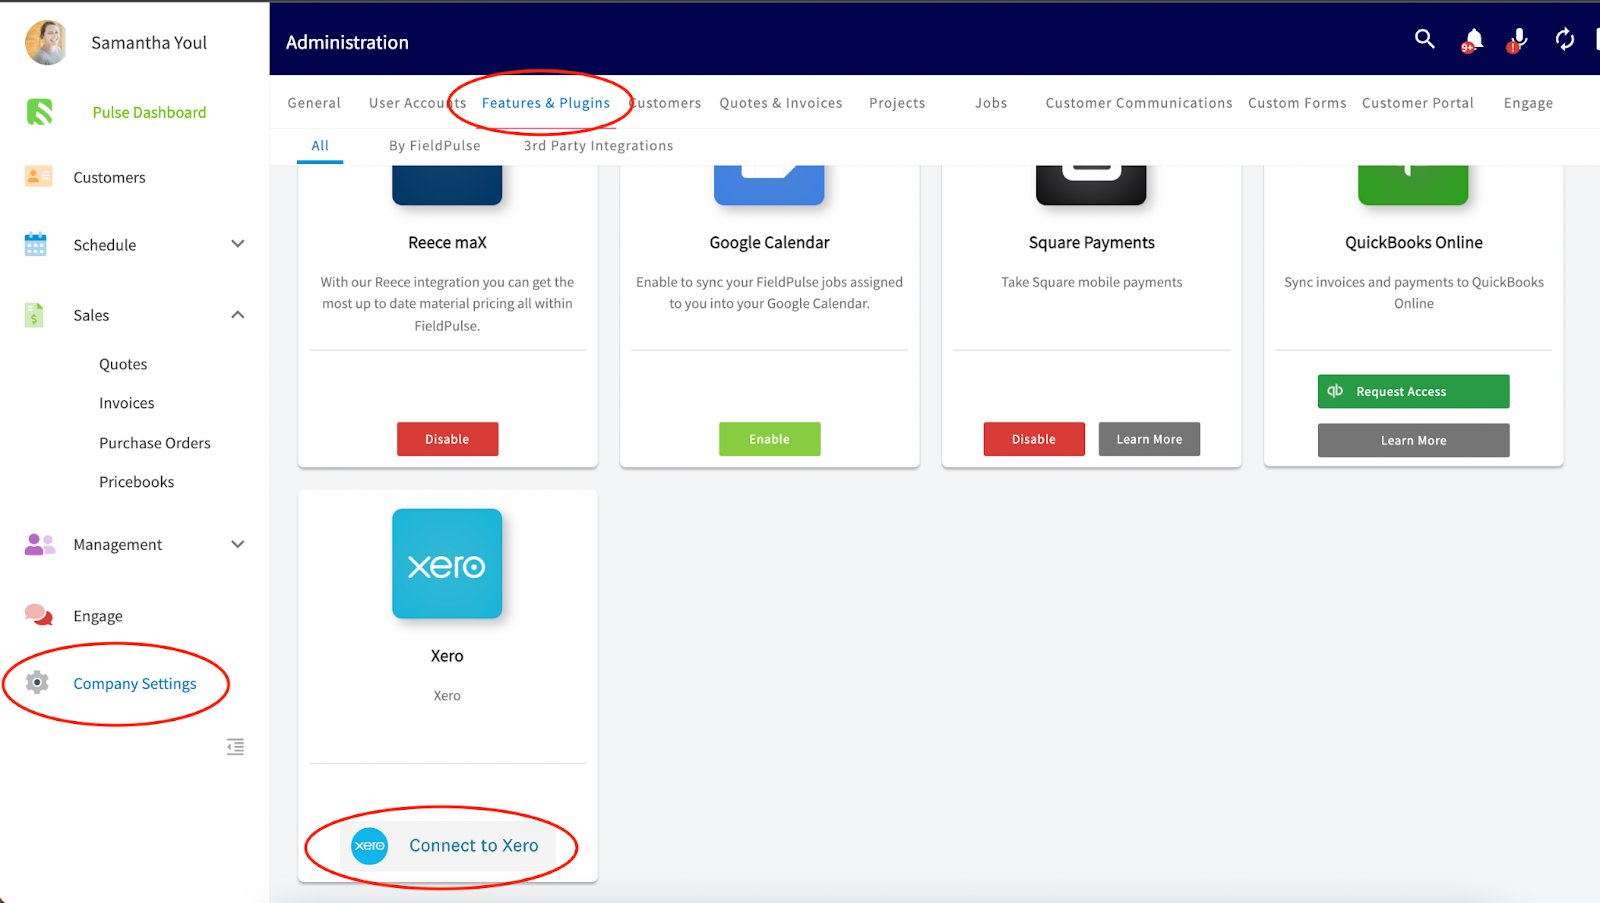
3. Enter your login information for your Xero account.
Click Allow Access and follow any on-screen instructions.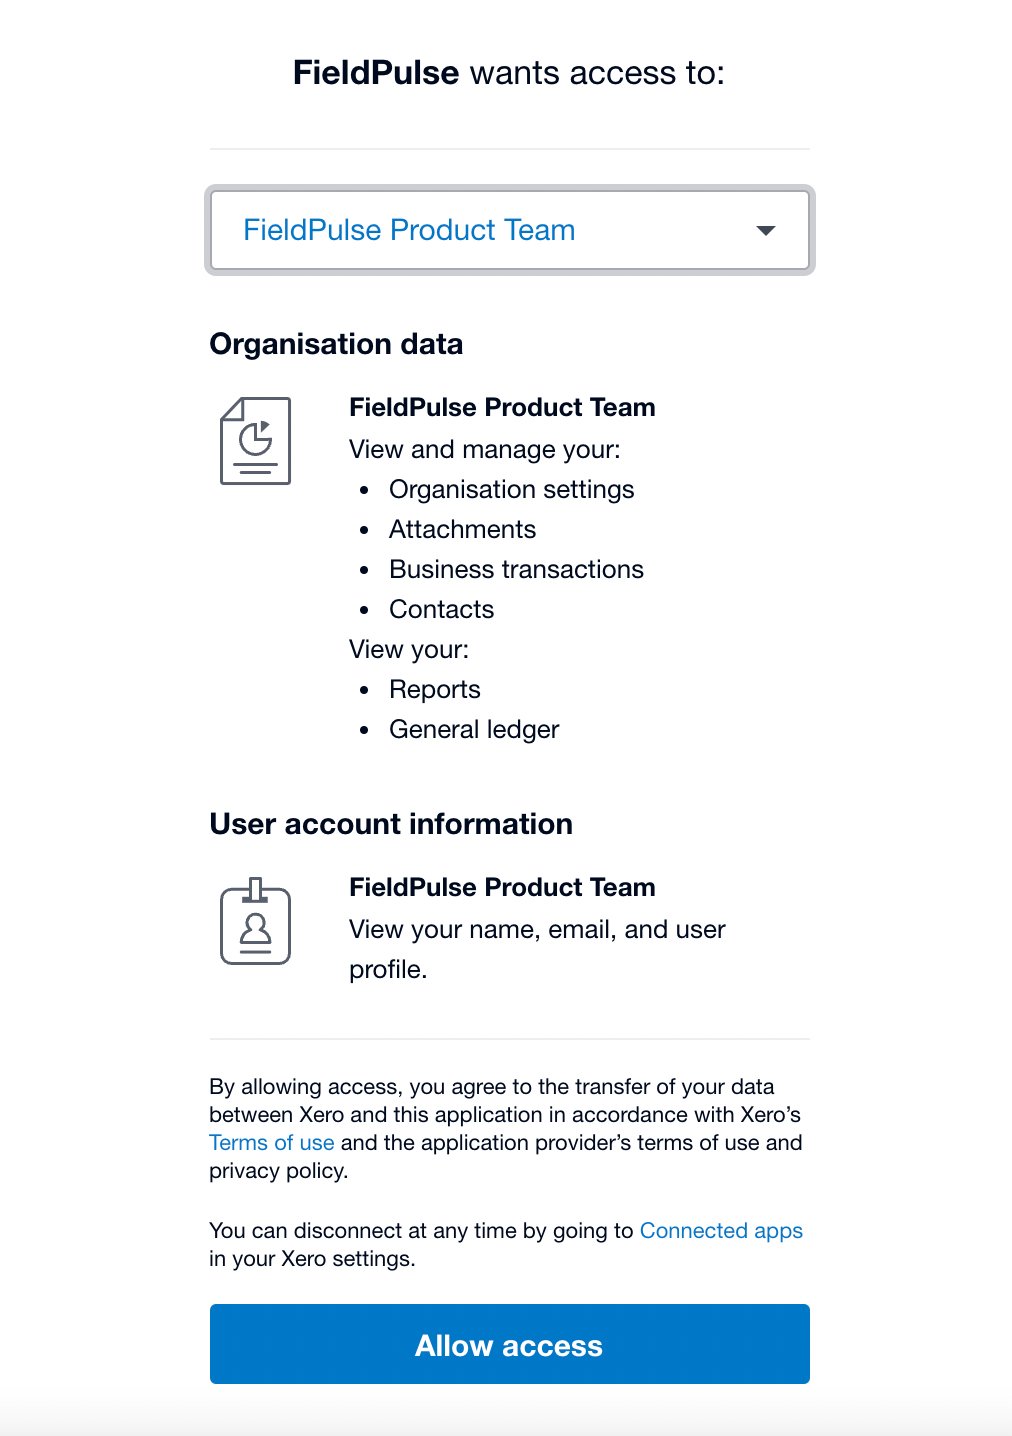
4. Select the historical data you want to share between the programs.
You can choose which historical records are pushed from FieldPulse to Xero, and which records are pulled into FieldPulse from Xero. Use the radio buttons next to each record type to customise. Once selected, all historical data for that record type will be synced accordingly. Note: This setting applies only to historical records. After the initial sync, the integration becomes a two-way sync for customers, line items, invoices, and payments — and a one-way sync for estimates (FieldPulse → Xero).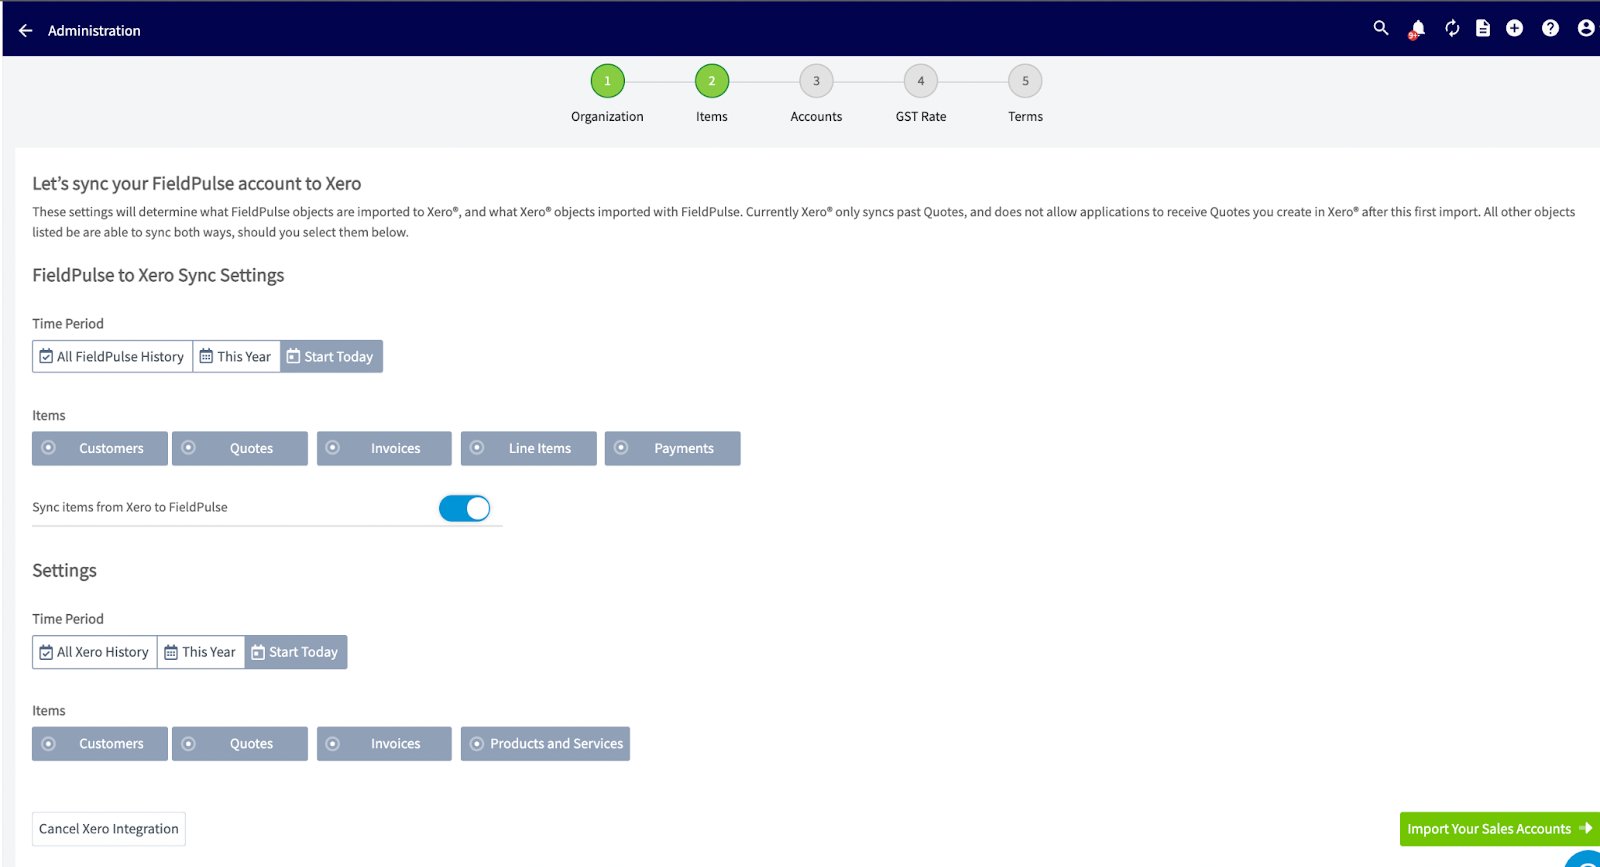
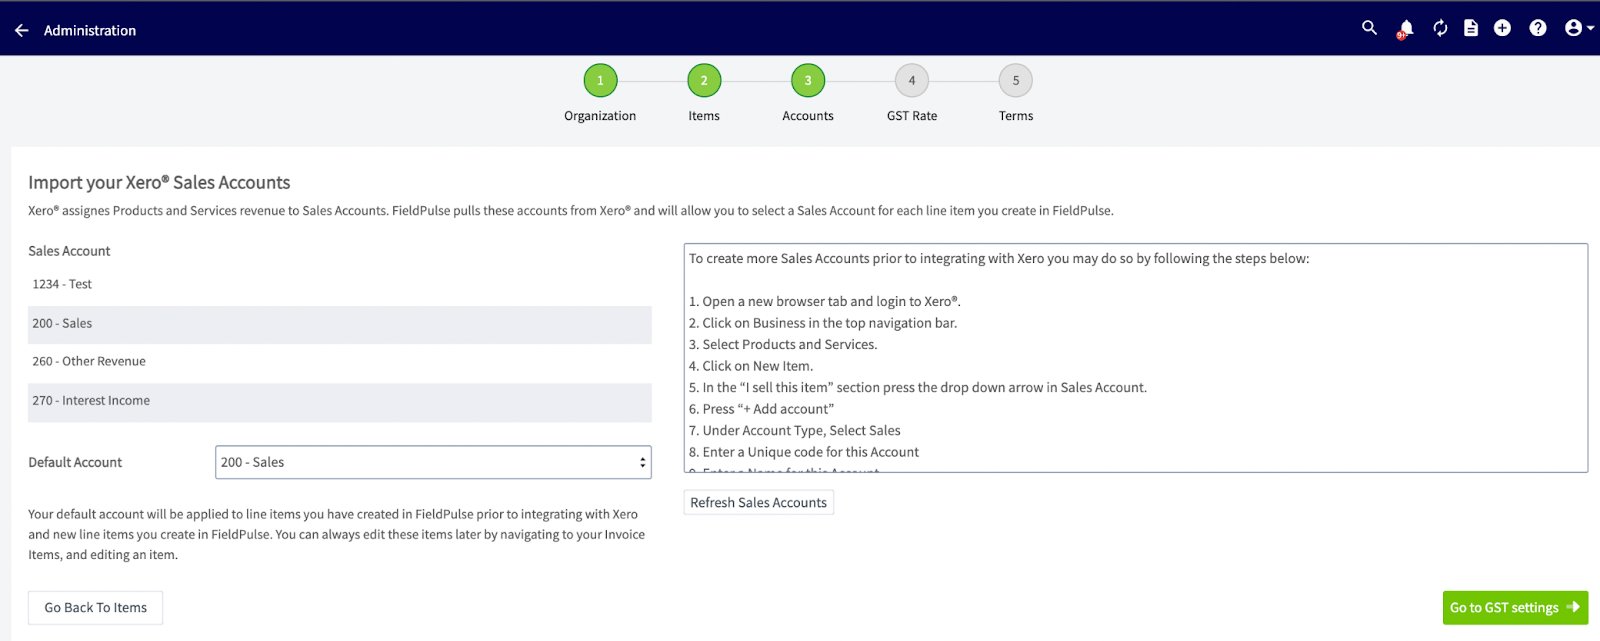
5. Select your default sales account (this refers to items you sell).
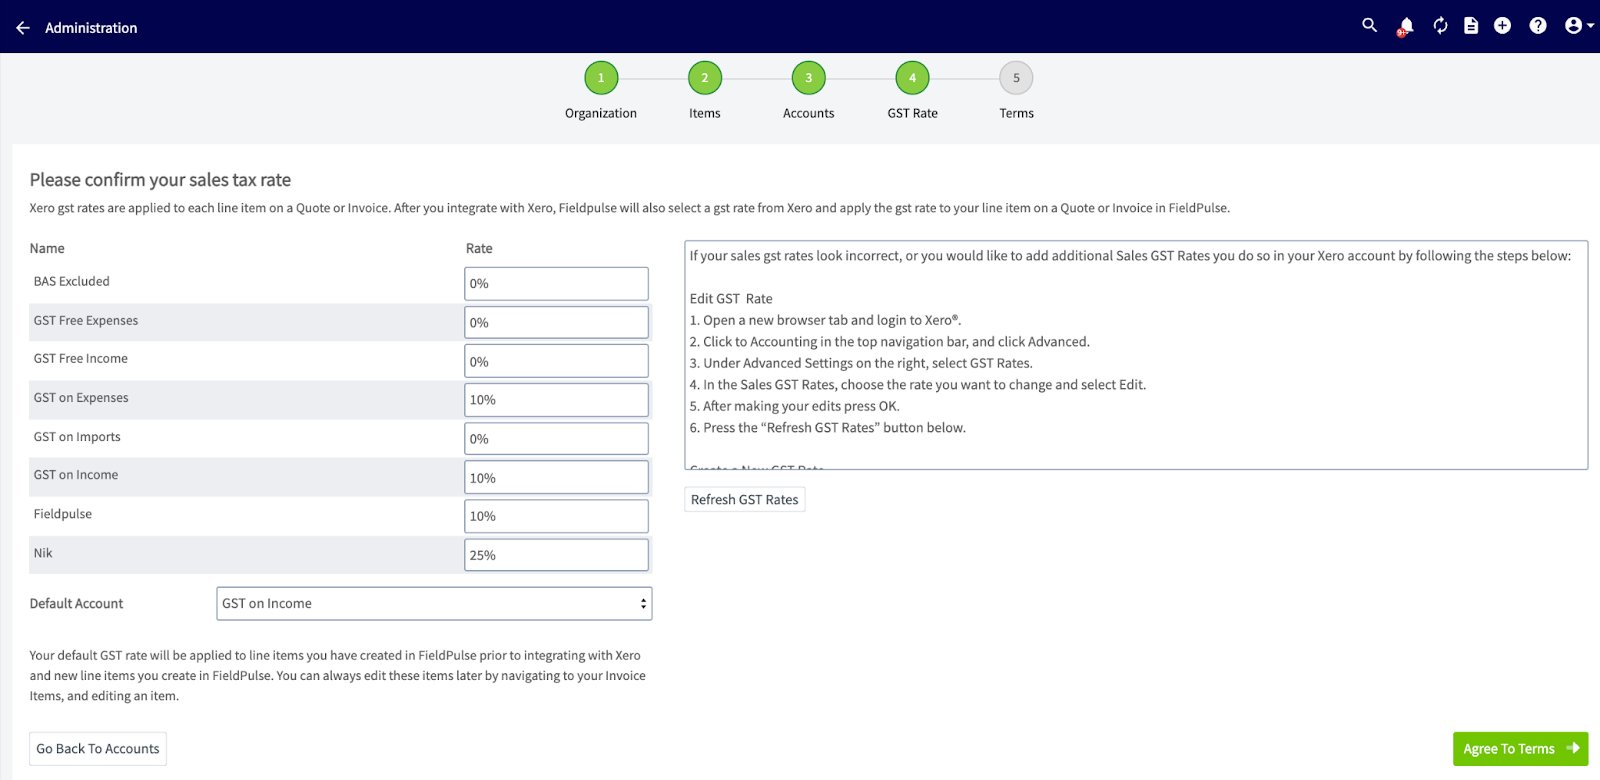
6. Select your default sales tax rate.
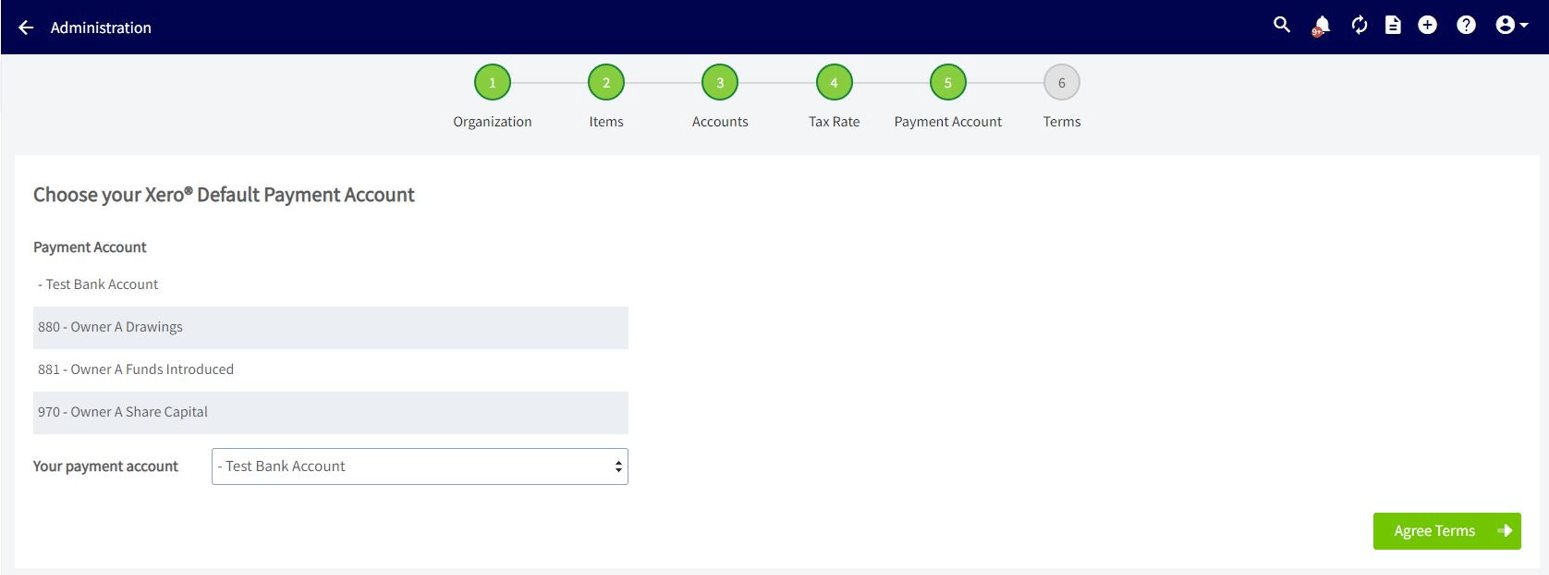
7. Select your default payment account.
8. Then you will be prompted to agree to the Xero integration terms and conditions.
The syncing process will now be initiated, and you should begin to see data from Xero populate into FieldPulse.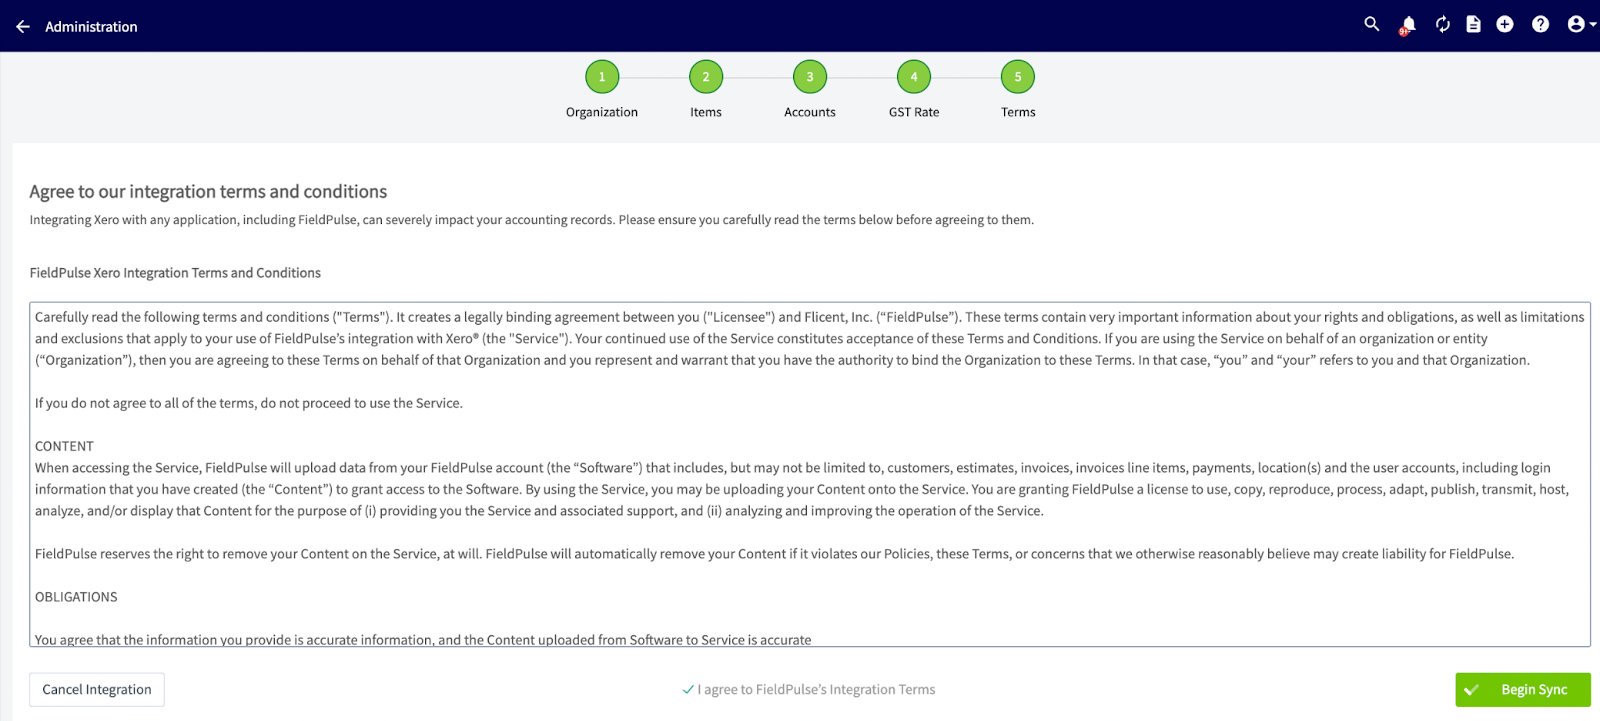
Have additional questions? Contact us at support@fieldpulse.com or use the chat feature in the bottom right corner of your screen.