
- Inspection forms
- Safety checklists
- Intake forms
- Installation forms
Enabling New Custom Forms
I’m already using Custom Forms
No need to worry about your forms—they will continue to function seamlessly in the new version of custom forms.I’m not currently using Custom Forms
If you aren’t currently using custom forms, navigate to Features & Plug-Ins in Company Settings to enable Custom Forms.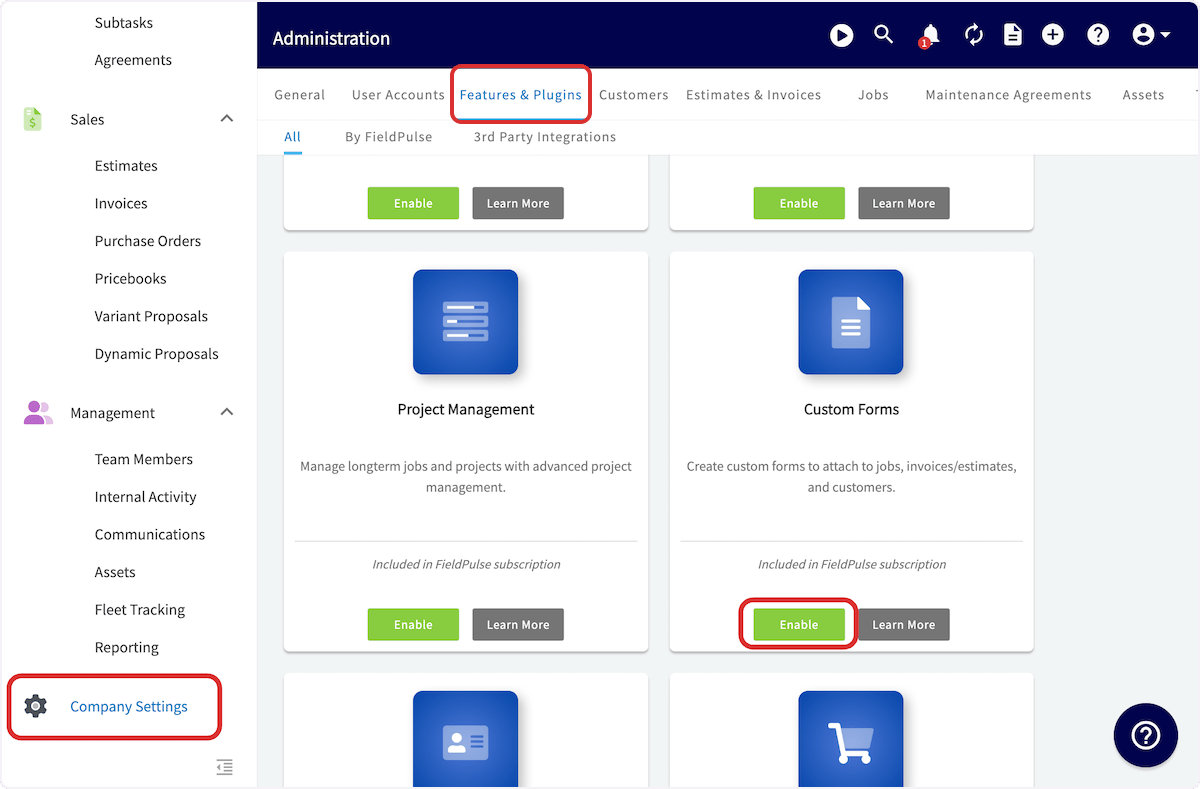
Form Settings
Begin personalizing your custom form by navigating to Form Settings.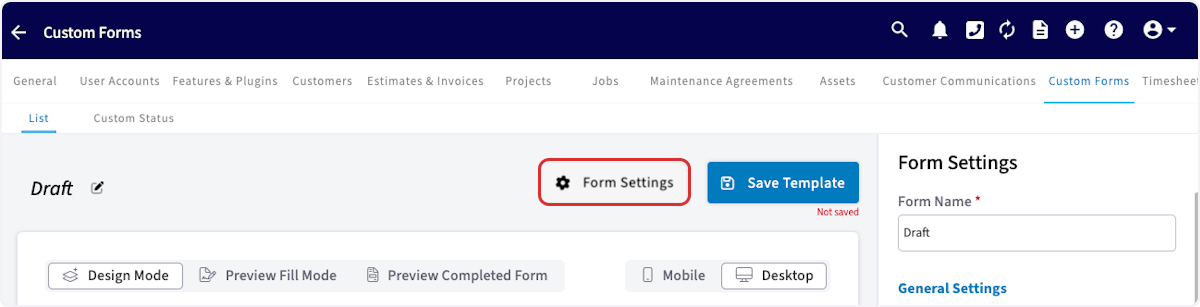
General
Begin by naming your form and adjusting the font size.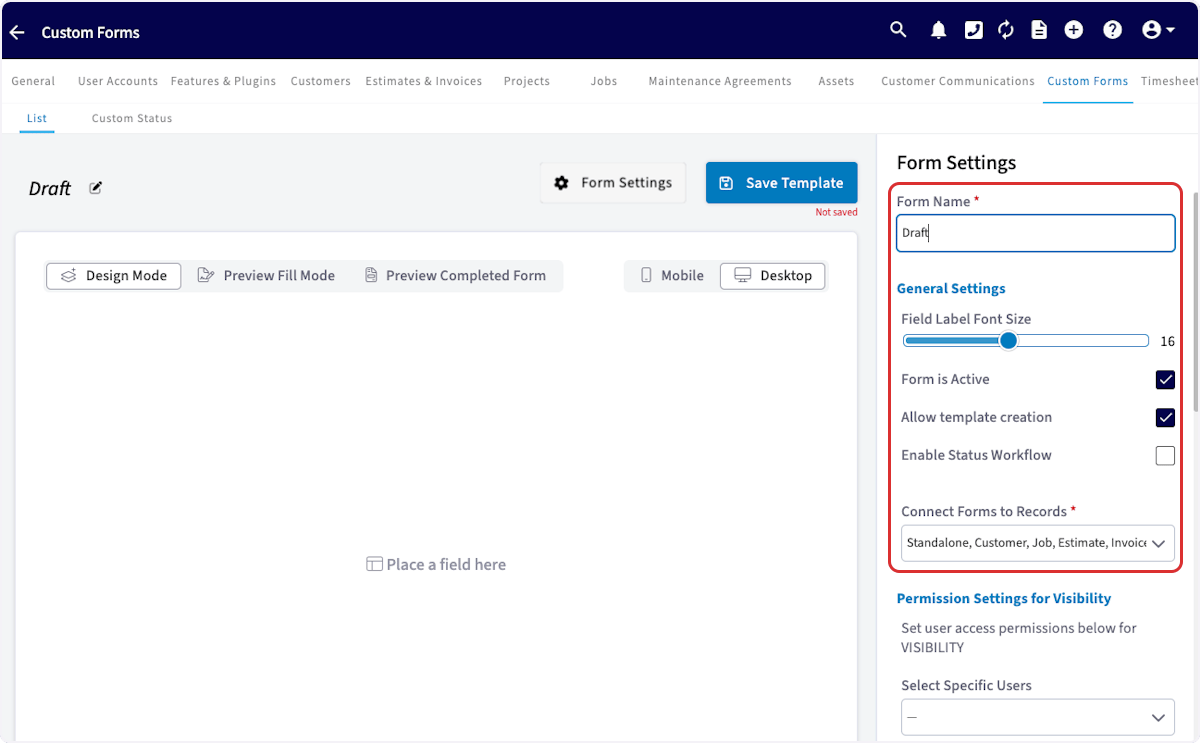
- Form is Active - This will activate the form for use in FieldPulse.
- Allow Template Creation - This will allow this form to be used as a template for future forms.
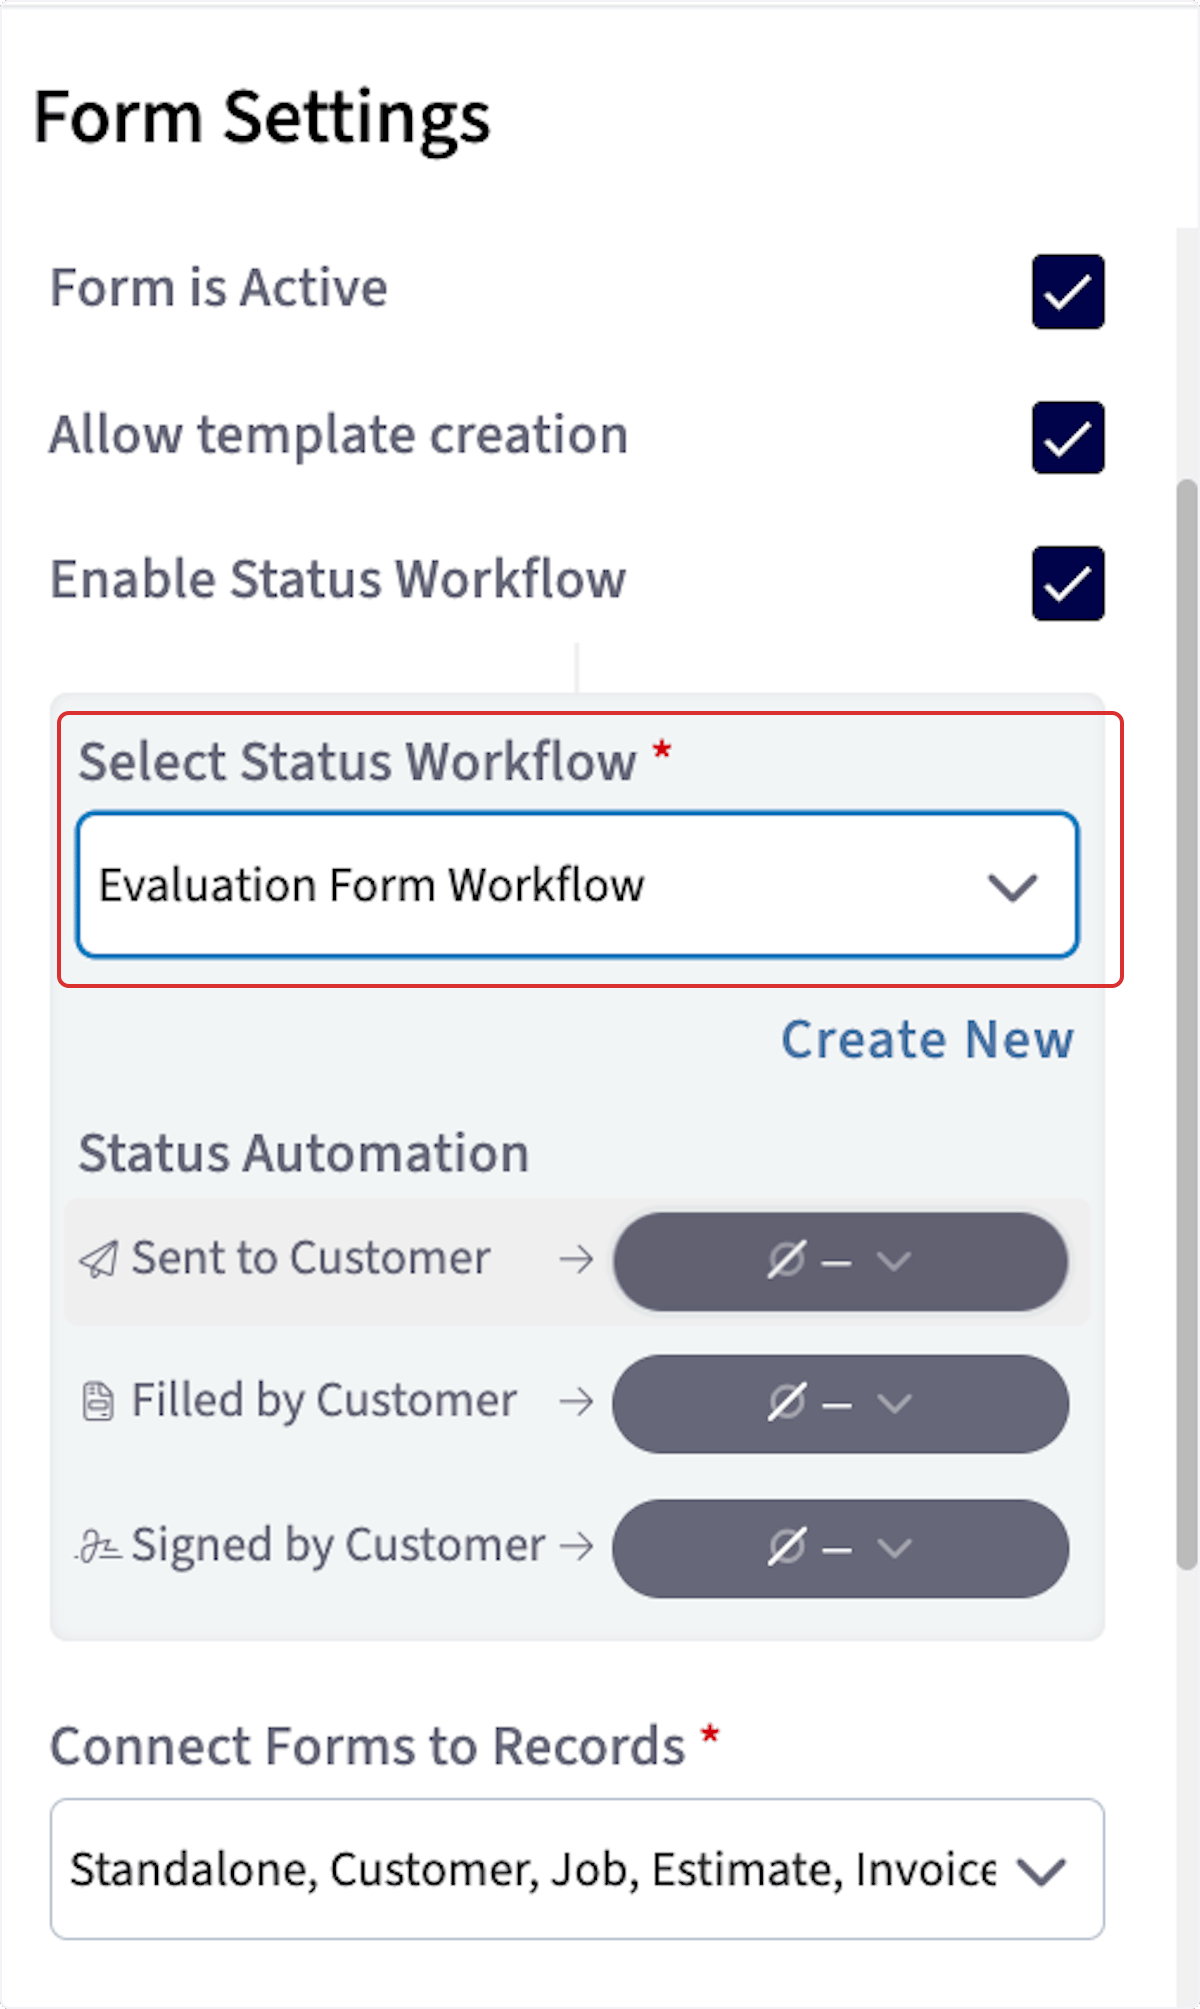
- Enable Status Workflow - This will enable custom status workflows for the form, allowing you to update statuses instantly based on your actions.
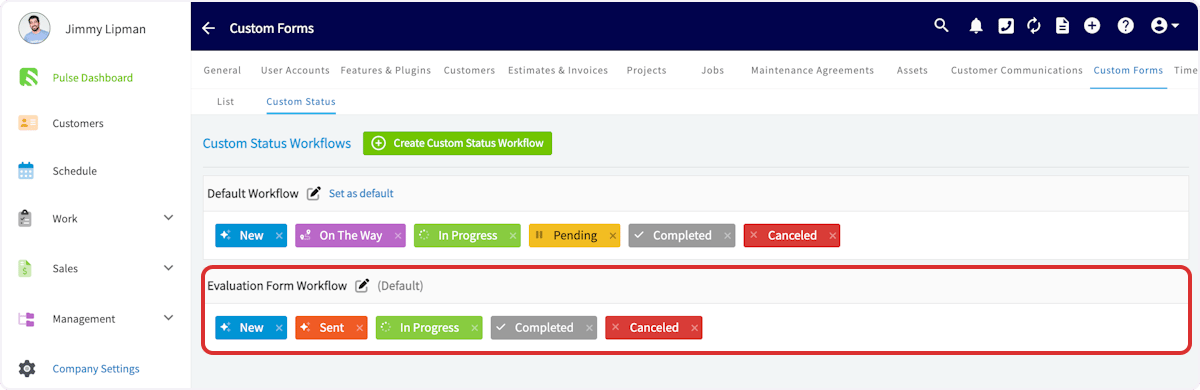
Custom Status Workflows
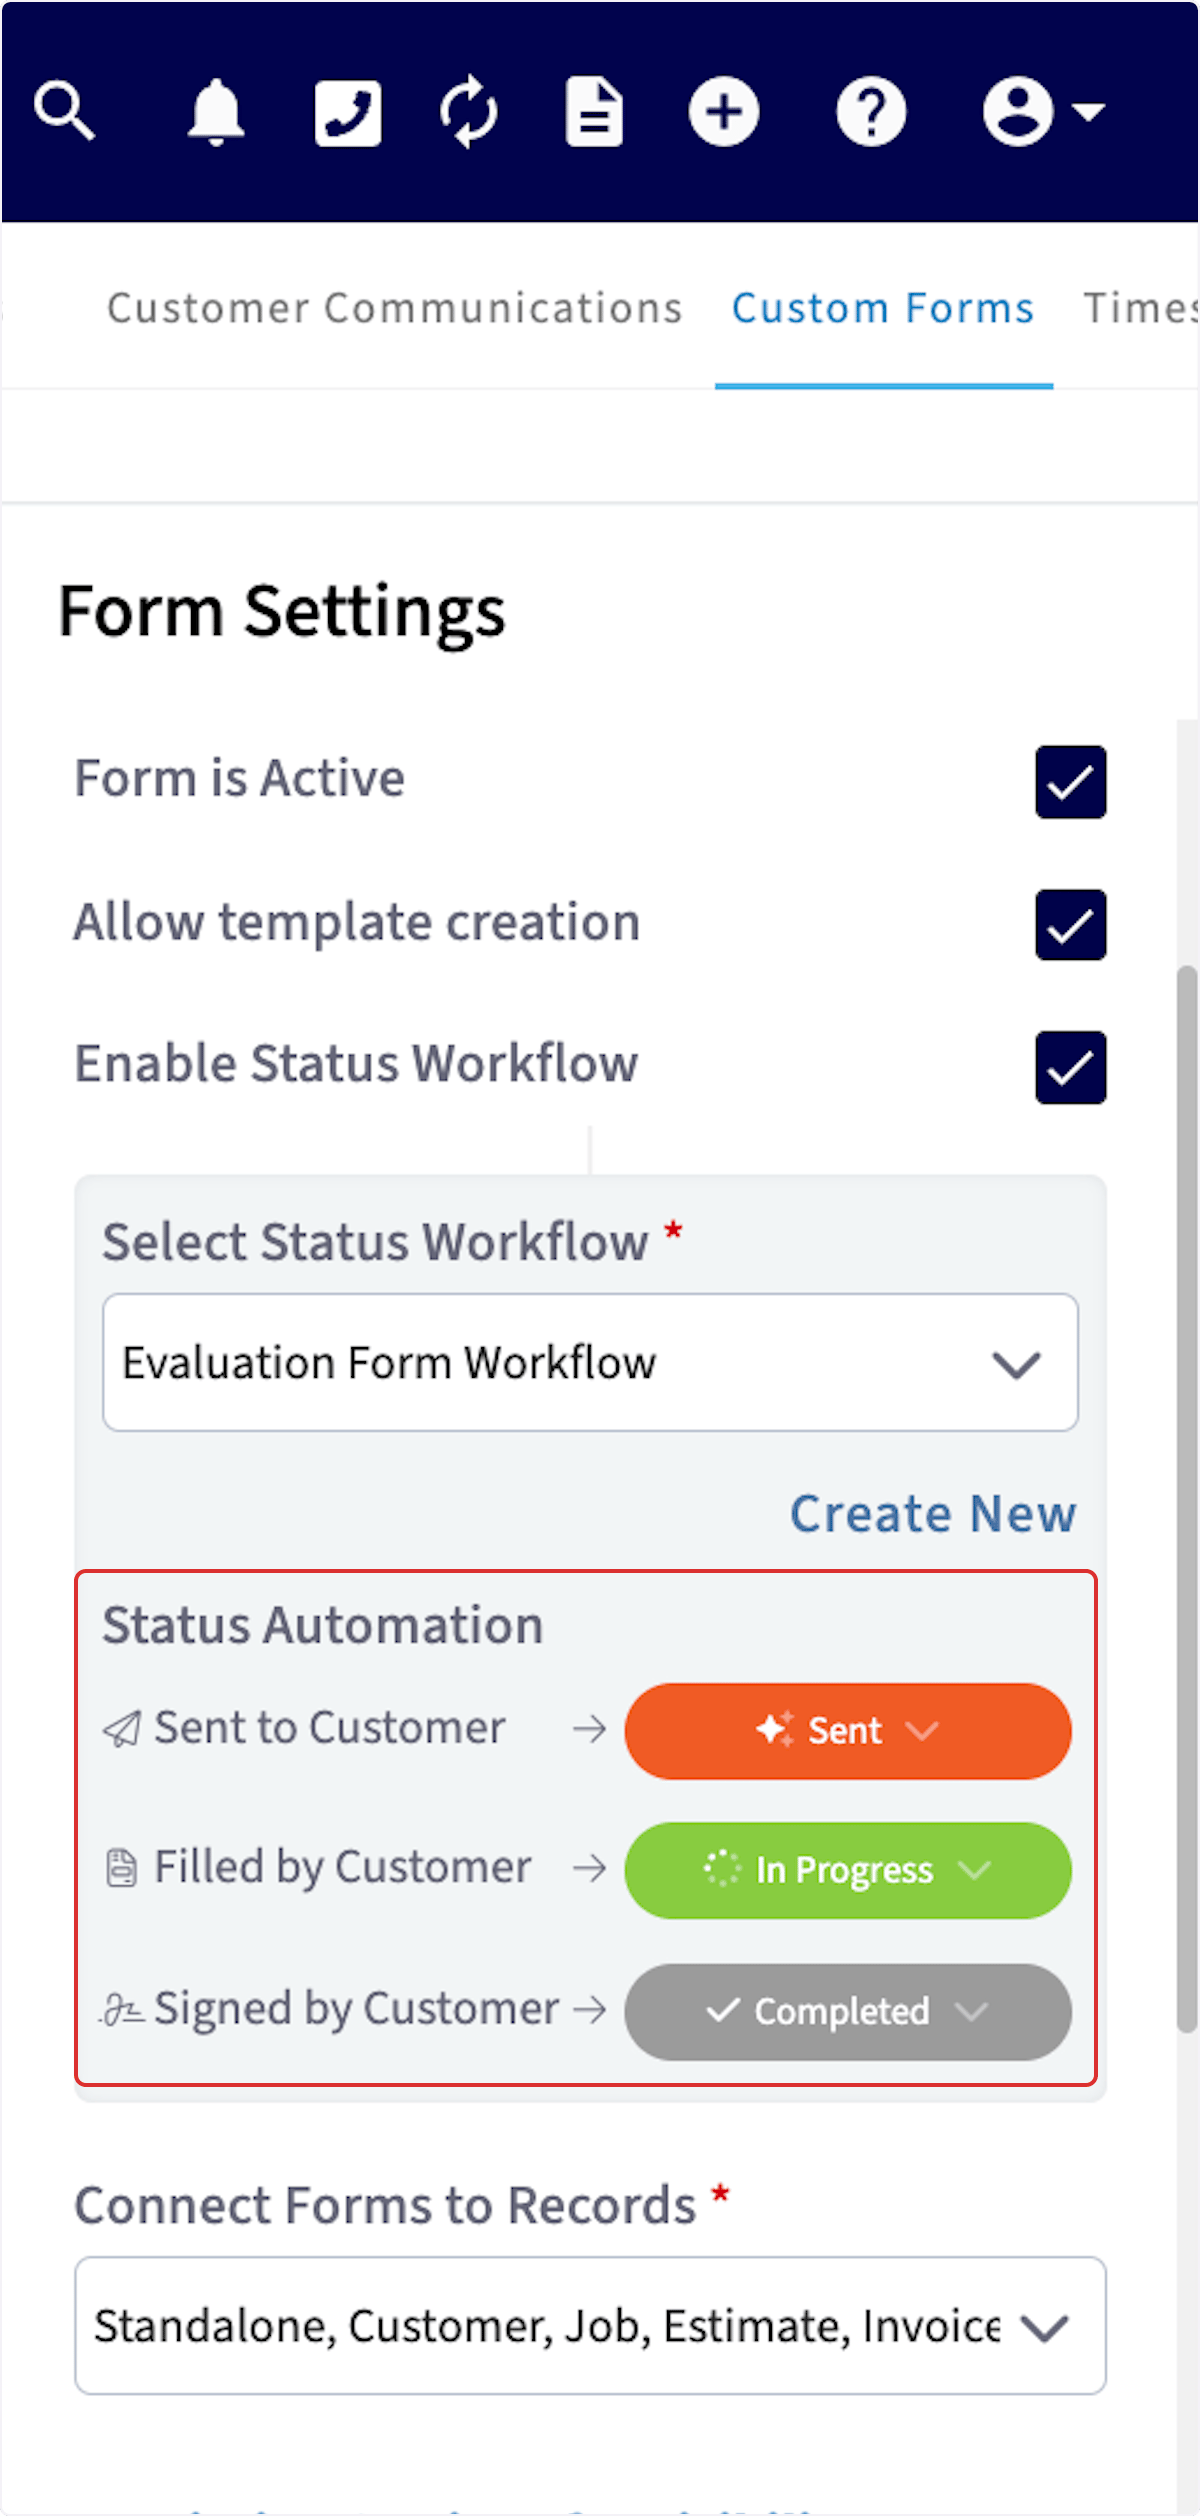
You can create your own custom status workflows and assign them to different forms. You can prompt automatic status changes by setting up triggers such as:- Sent to Customer
- Filled by Customer
- Signed by Customer
Permissions
Next, adjust the permission settings for both visibility and creating/editing. Select specific users, teams, and/or roles to whom you’d like to to give visibility and creating/editing permissions. Note that the visibility and creating/editing permissions are unique.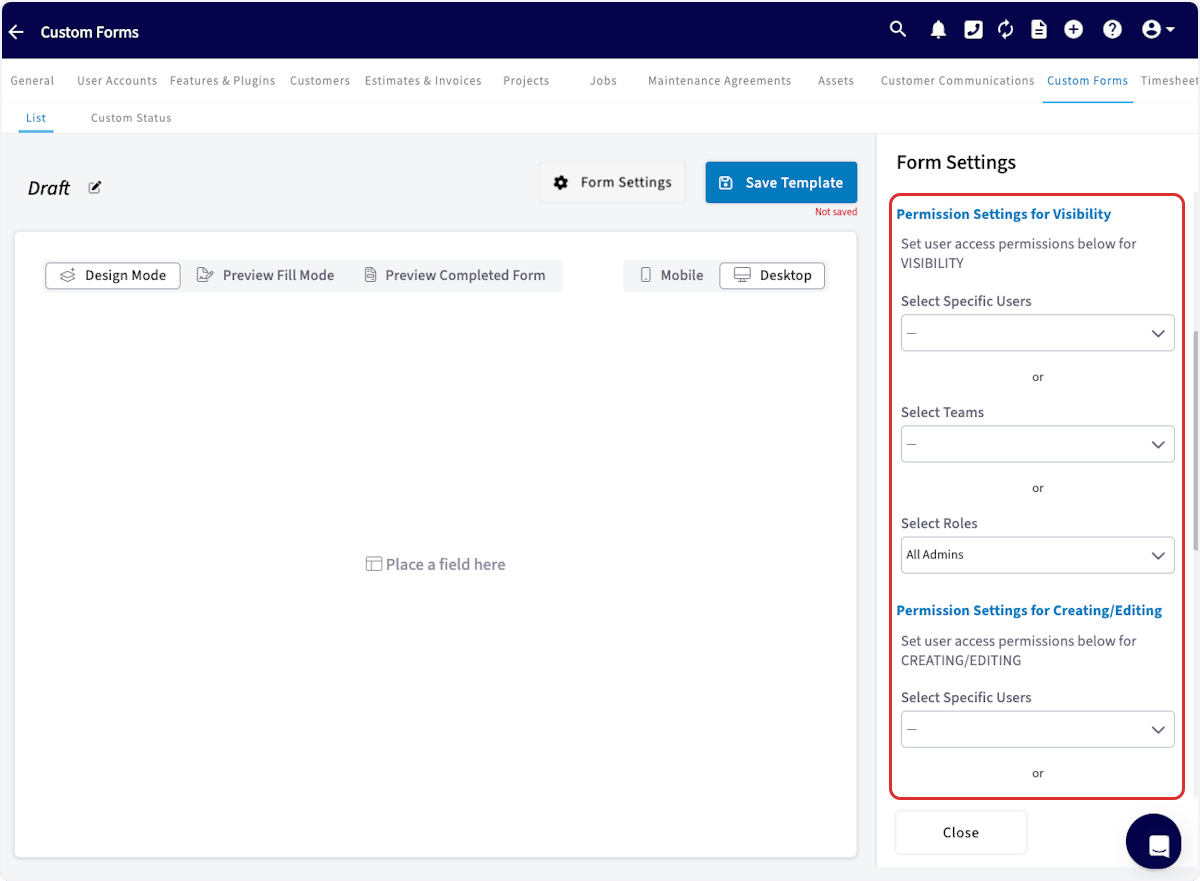
Email & SMS Configuration
You can now customize the default email and SMS messages used when sending a custom form to a customer.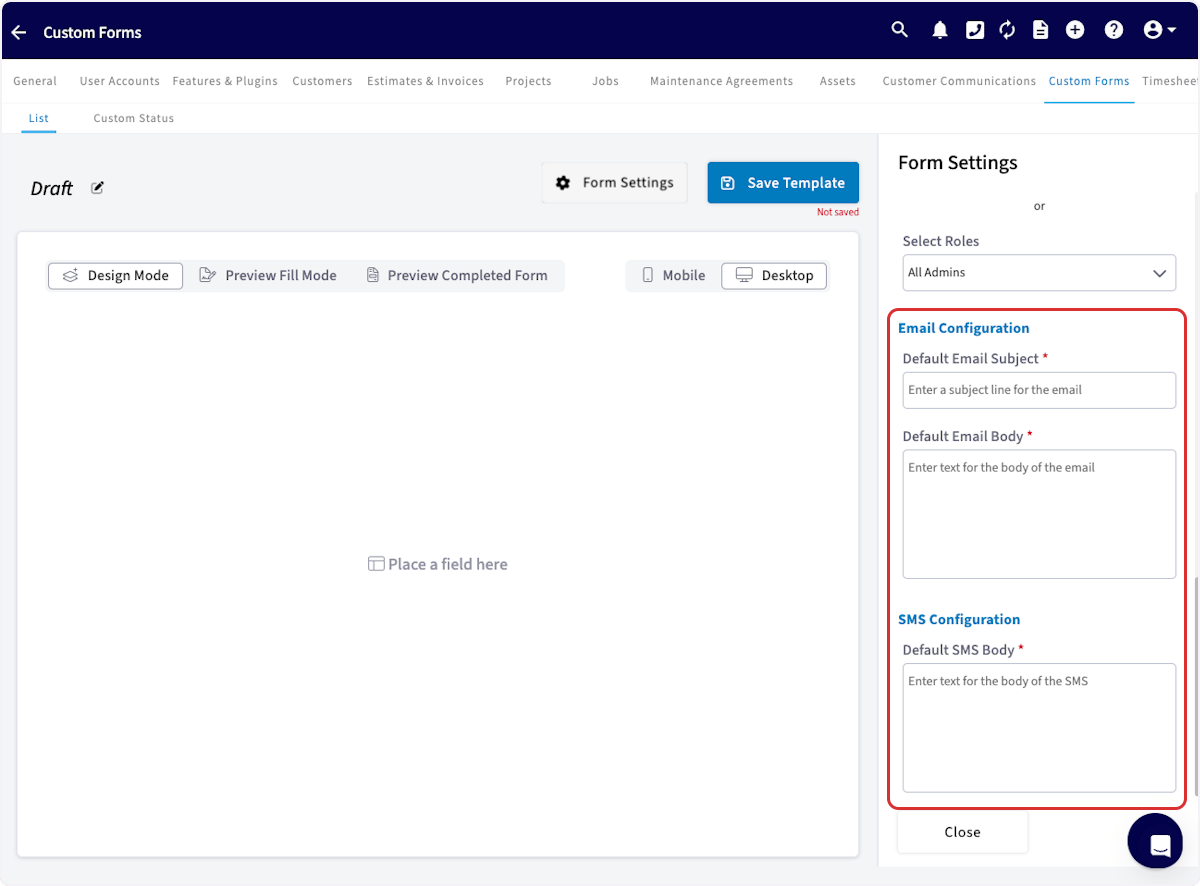
Building a Custom Form
Once you’ve adjusted your form settings, it’s time to start building! Click and drag fields from the right-side menu onto your blank custom form. (Note: Be sure you’re not still in Form Settings. To close the settings, click on Form Settings again.)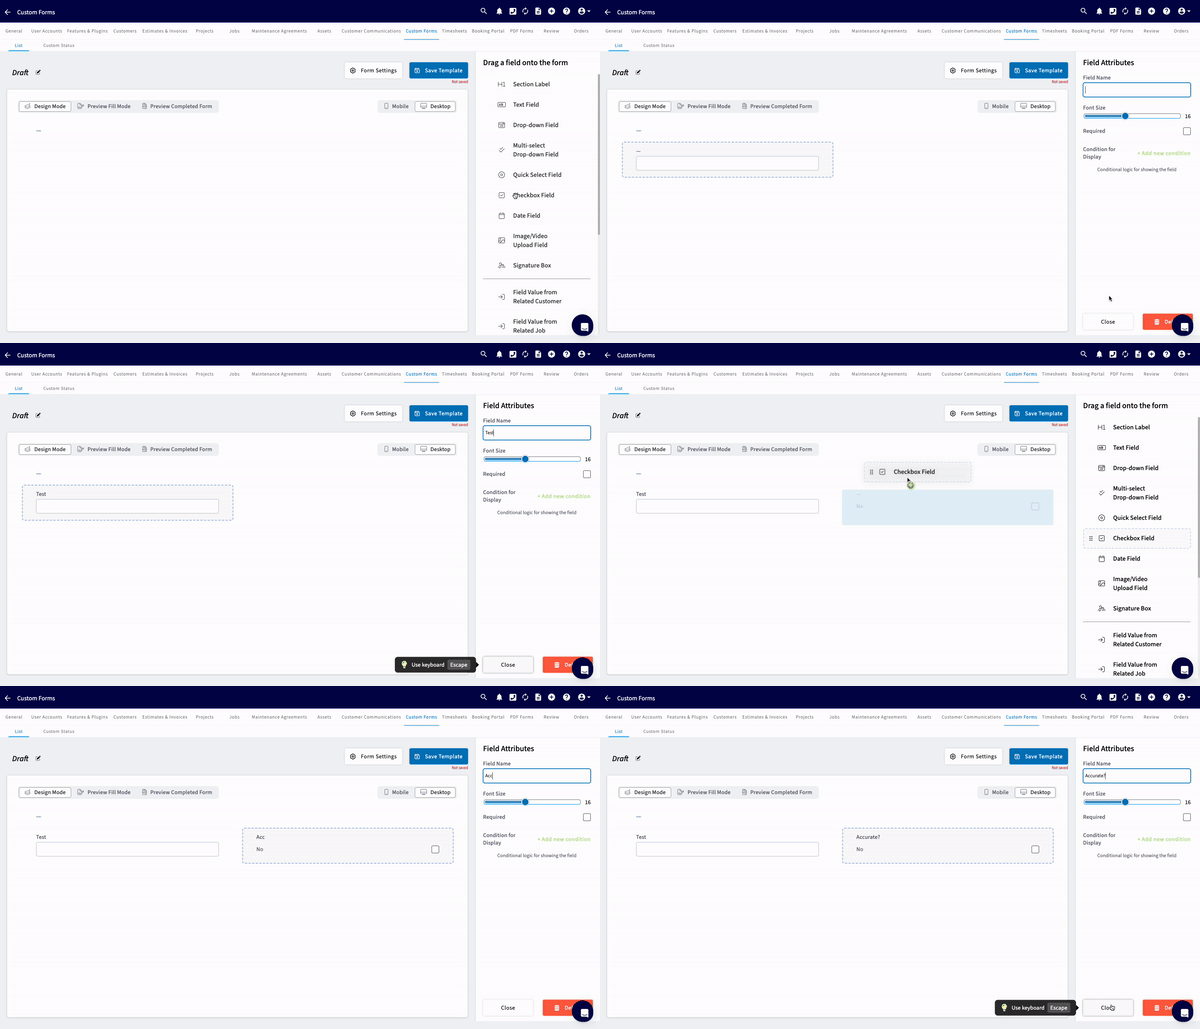
Field Types
- Section Labels - Section header for names and titles
- Text Field - Free text
- Drop-down Field - Select a single option from a dropdown list
- Multi-select Dropdown Field - Select multiple options from a dropdown list, can specify minimum/maximum number of selections
- Quick Select - Multiple choice with up to 5 options
- Checkbox - Select (yes) or leave blank (no)
- Date - Collect date and/or time, can be auto-filled with current date and/or time
- Image/Video - Upload jpg, pdf, mp4, and png files, can specify minimum/maximum number of files
- Signature - Collect a signature
-
Related Record Fields - Import data from related records
-
Customers
- Name, notes, job notes, email, phone, billing address, status/type, pipeline status, lead source, tags, custom fields
-
Jobs
- Title, location name, location, job notes, field notes, status, assigned team members, scheduled date/time, customer arrival window, created by, tags, custom fields
-
Estimates
- Title, estimate notes, internal notes, estimate date, author, status, location, reference, expiration date, tags, custom fields
-
Invoices
- Title, invoice notes, internal notes, invoice date, author, status, location, reference, due date, tags, custom fields
-
Projects
- Title, notes, job notes, start date, end date, completion percentage, custom fields
-
Maintenance Agreements
- Title, job location, status, price per bill, total annual fee, agreement notes, job notes, custom fields
-
Assets
- Asset tag, title, asset notes, install date, location, location details, category, manufacturer, model, model number, serial number, model year, model details, warranty, condition, warranty information, custom fields.
-
Customers
Required Fields
To require a field to be completed on a custom form, select the Required checkbox before moving on.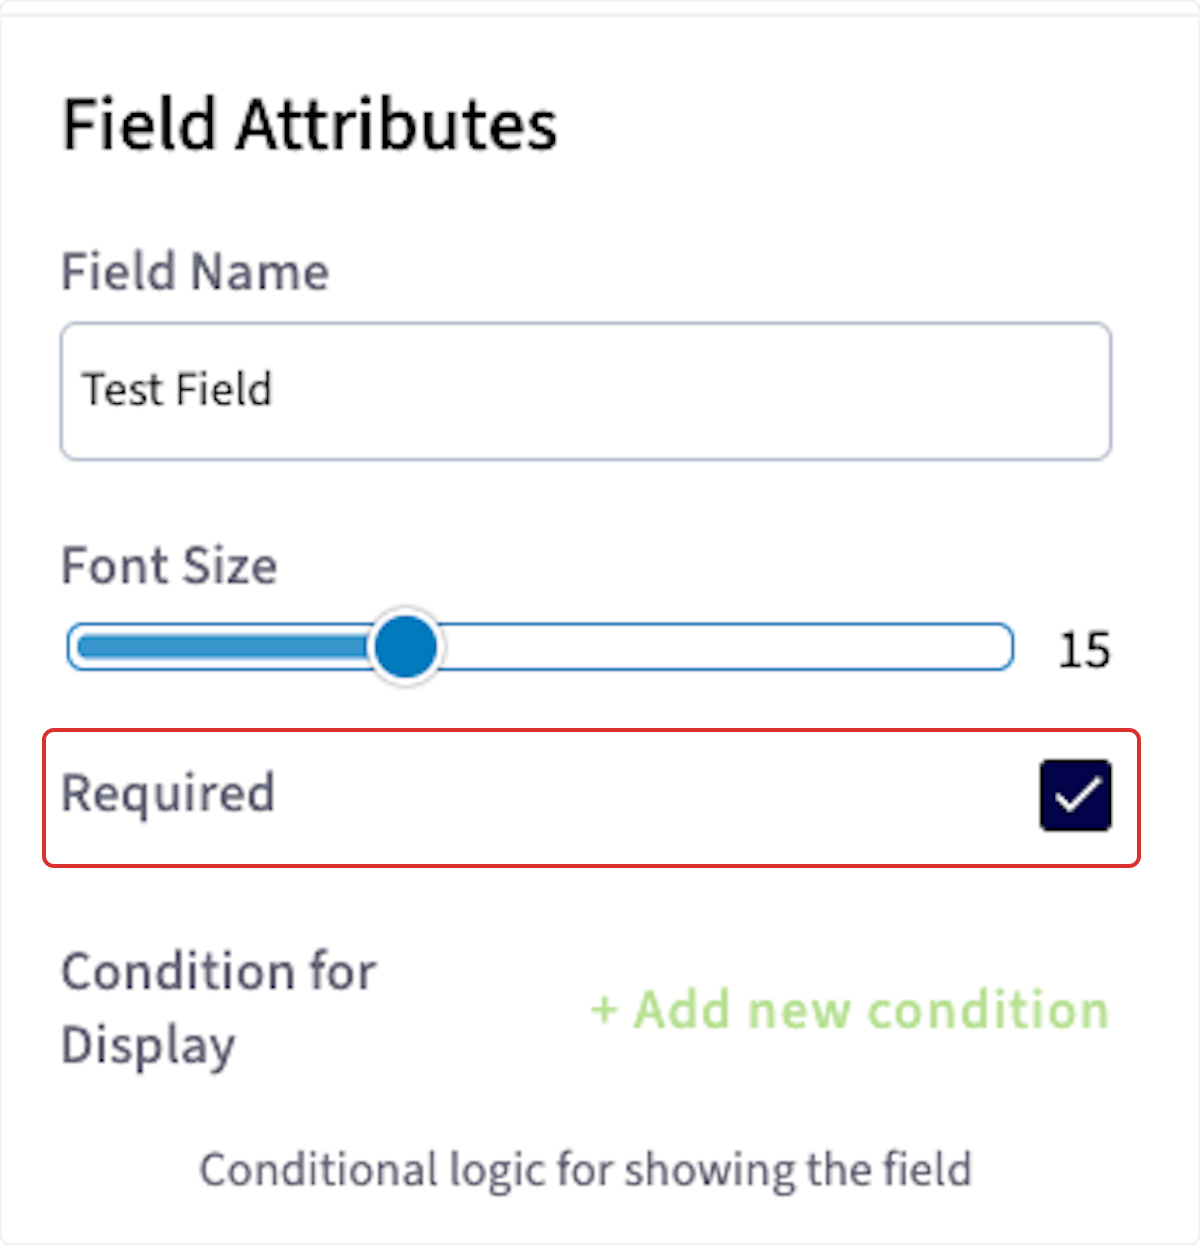
Conditional Logic
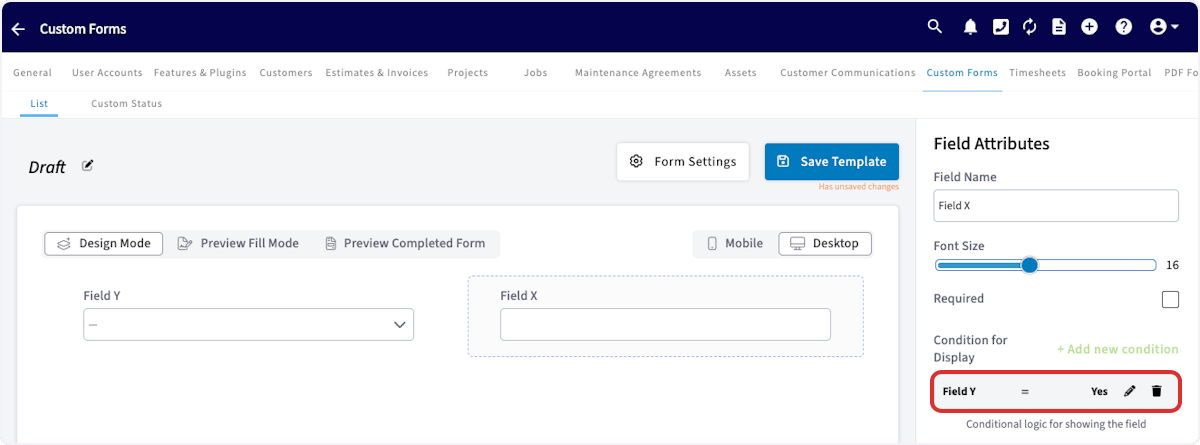
Conditional logic allows certain fields to appear or change based on the responses the user provides. This helps tailor the form to gather only relevant information. In this example. we want to create conditional logic for Field X, so it only appears for the user when certain criteria are met in Field Y. When you’re ready to create conditional logic for Field X, click on Field X and select Add New Condition.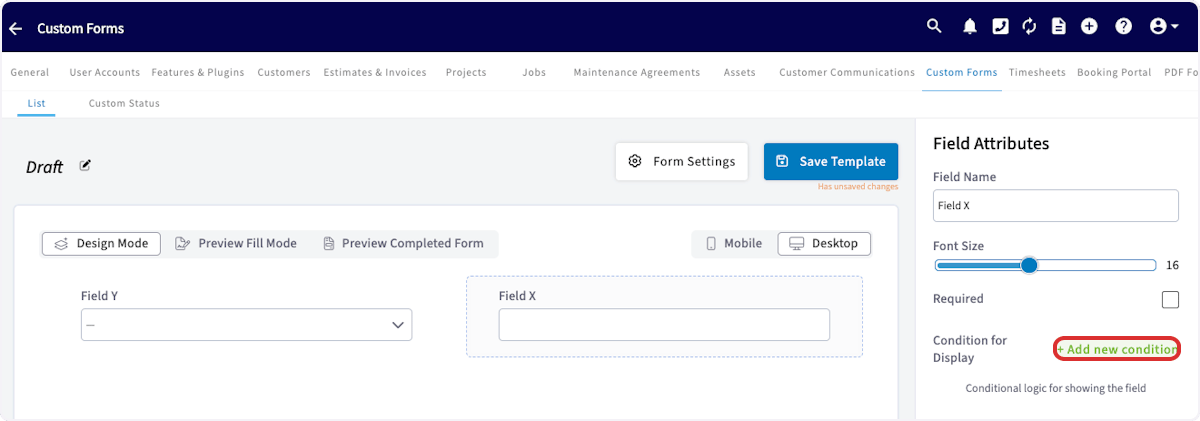
Modes
Use the modes to view your form in different scenarios. You can also preview the appearance of your form on Mobile or Desktop.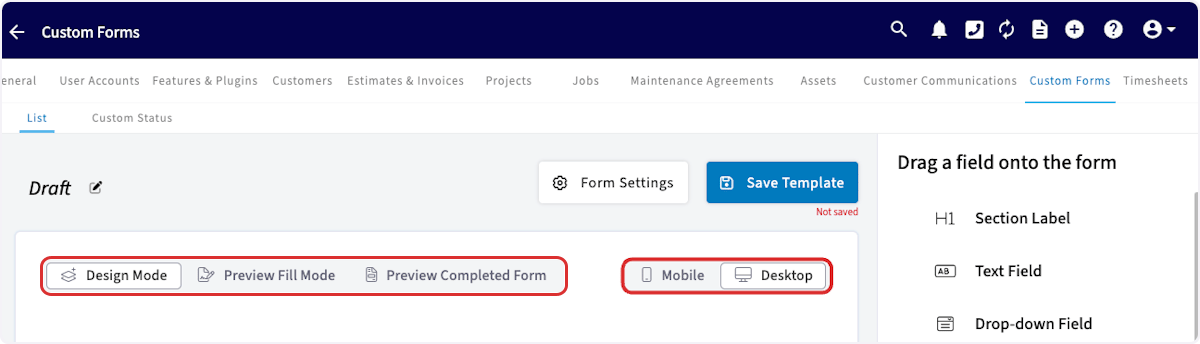
- Design Mode - You can create and edit a form by dragging and dropping fields.
- Preview Fill Mode - You can preview how the form will look when someone is filling it out.
- Preview Completed Form - You can preview how the form will look once it has been filled out.
Using Custom Forms
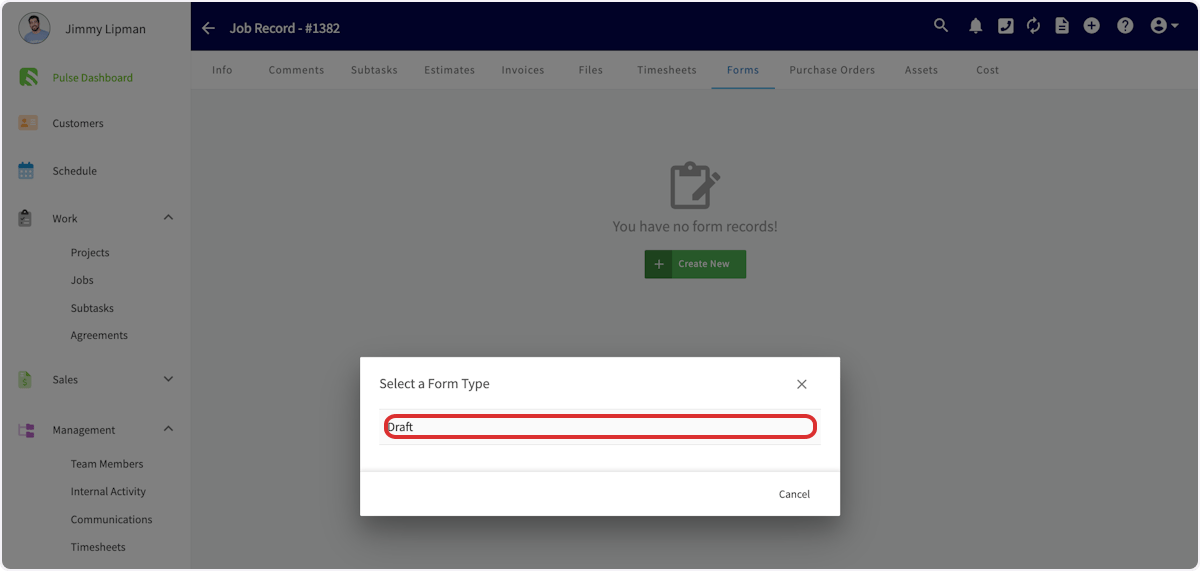
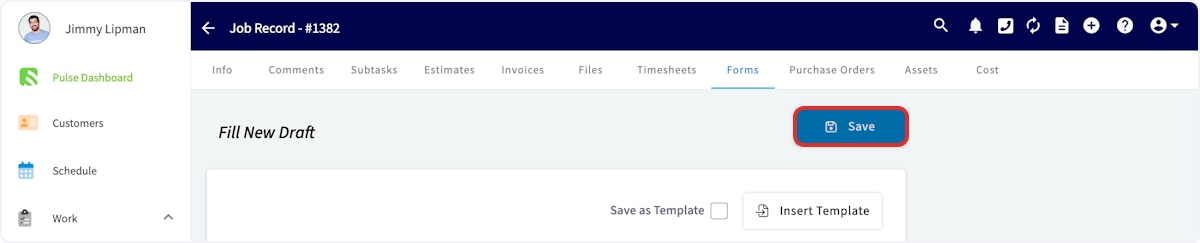
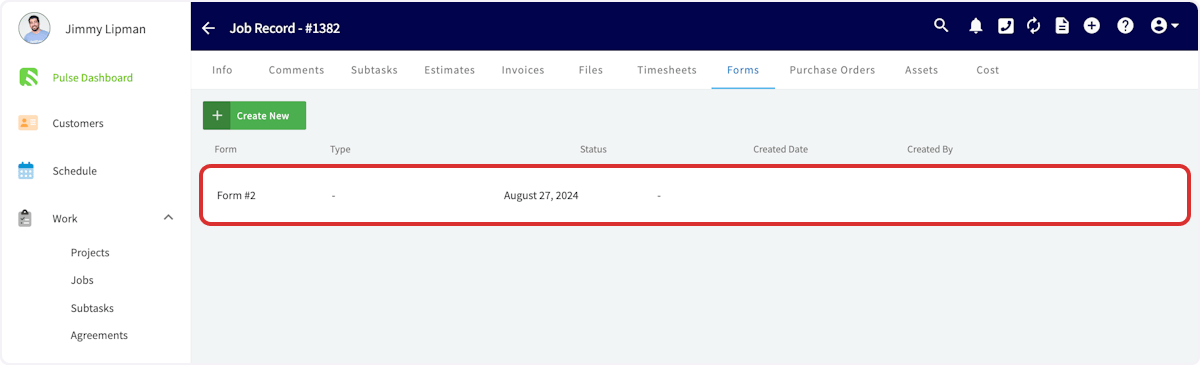
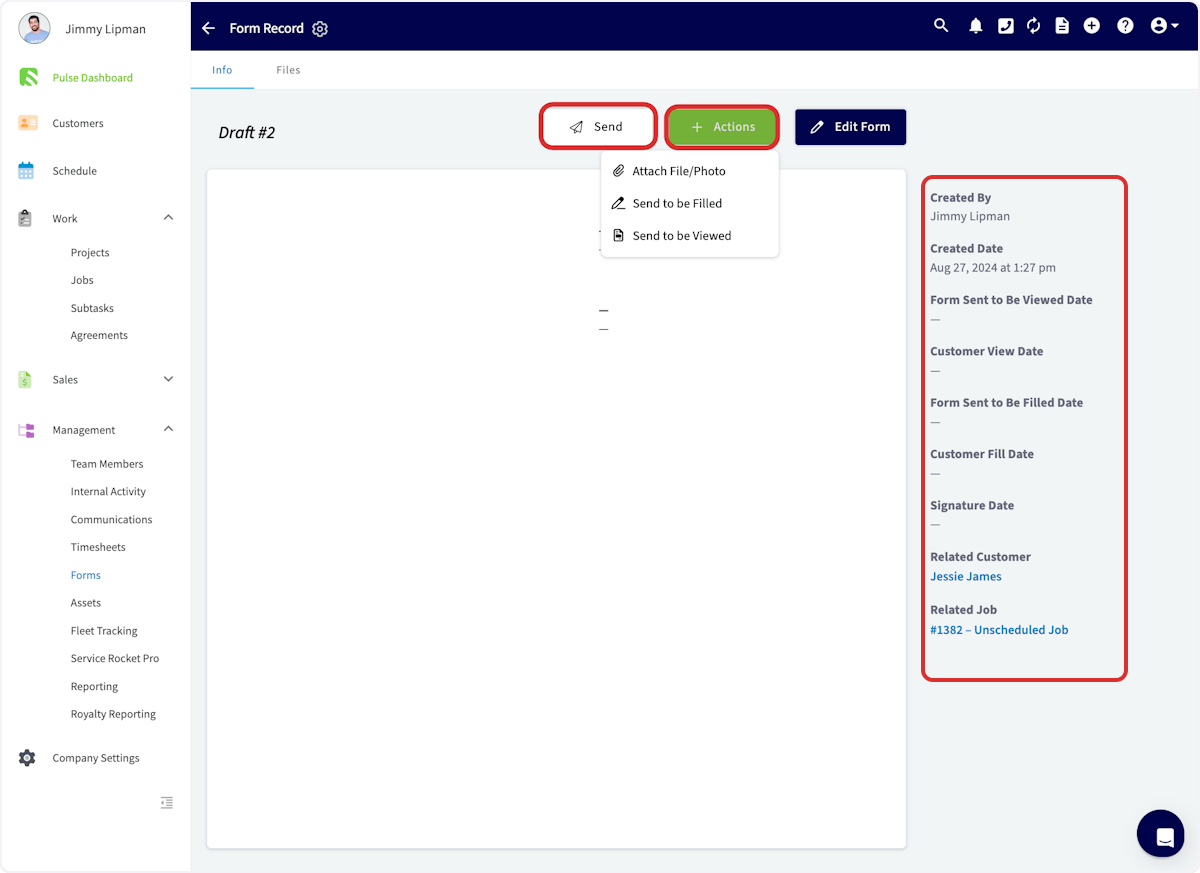
To attach a custom form to a record, begin by entering the record where you want to attach the form. This may be a customer, job, invoice, etc. Select Forms from the top menu, then Create New.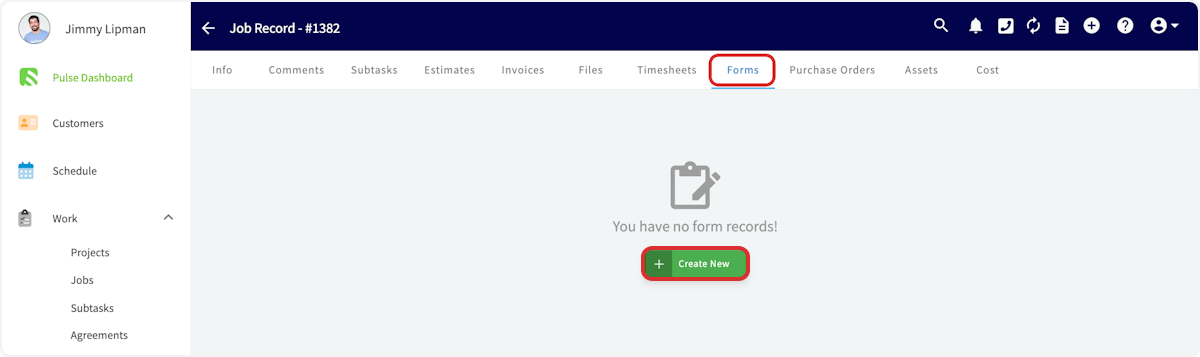
Have additional questions? Contact us at support@fieldpulse.com or use the chat feature in the bottom right corner of your screen.