Overview
With Customer Communications, you can build email and SMS templates that auto-fill with job details, set up automatic triggers for the moments you’d normally have to remember, and even share live trip tracking from a technician’s phone.Prerequisites
Before you can use Customer Communications, make sure the following are in place:- Customer communications are enabled in your account
- For mobile trip tracking: location services enabled on your device
On Web: Admin Experience
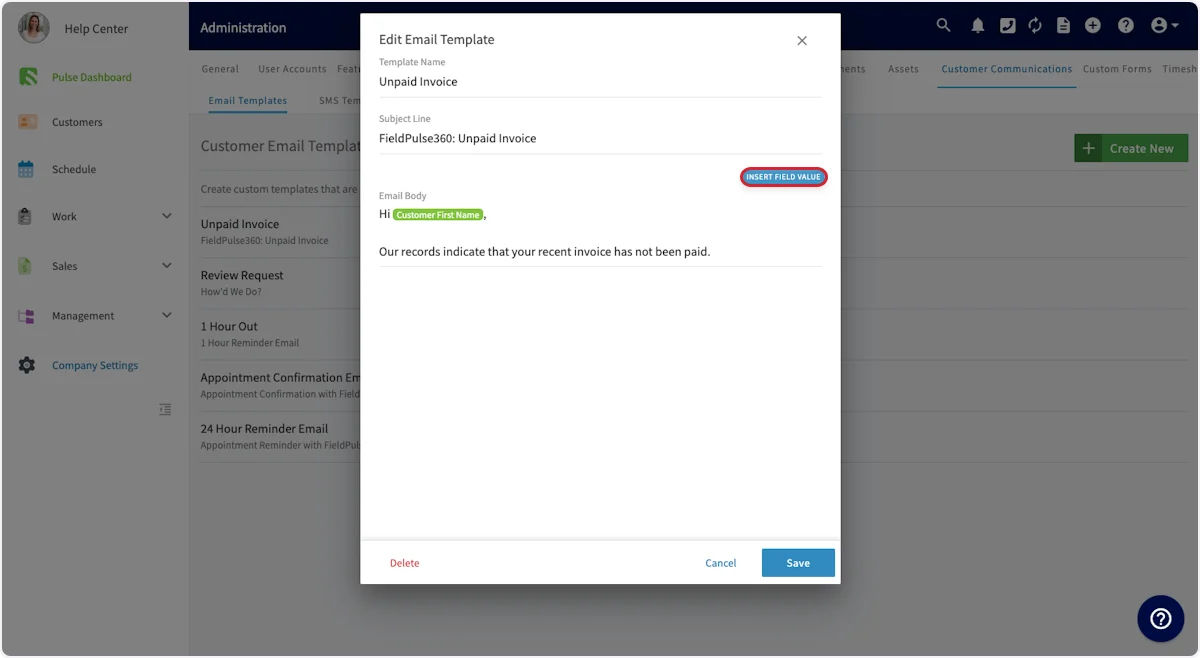
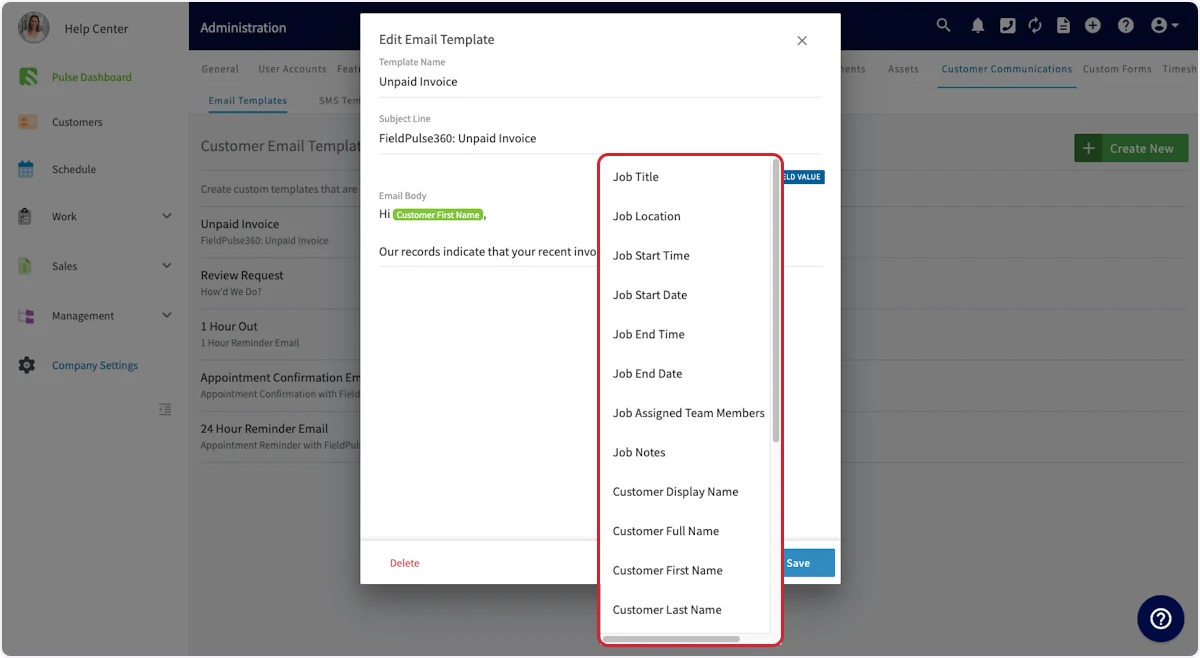
Email Templates
To customize your customer communications, begin by clicking on Company Settings and selecting Customer Communications from the menu at the top of the screen.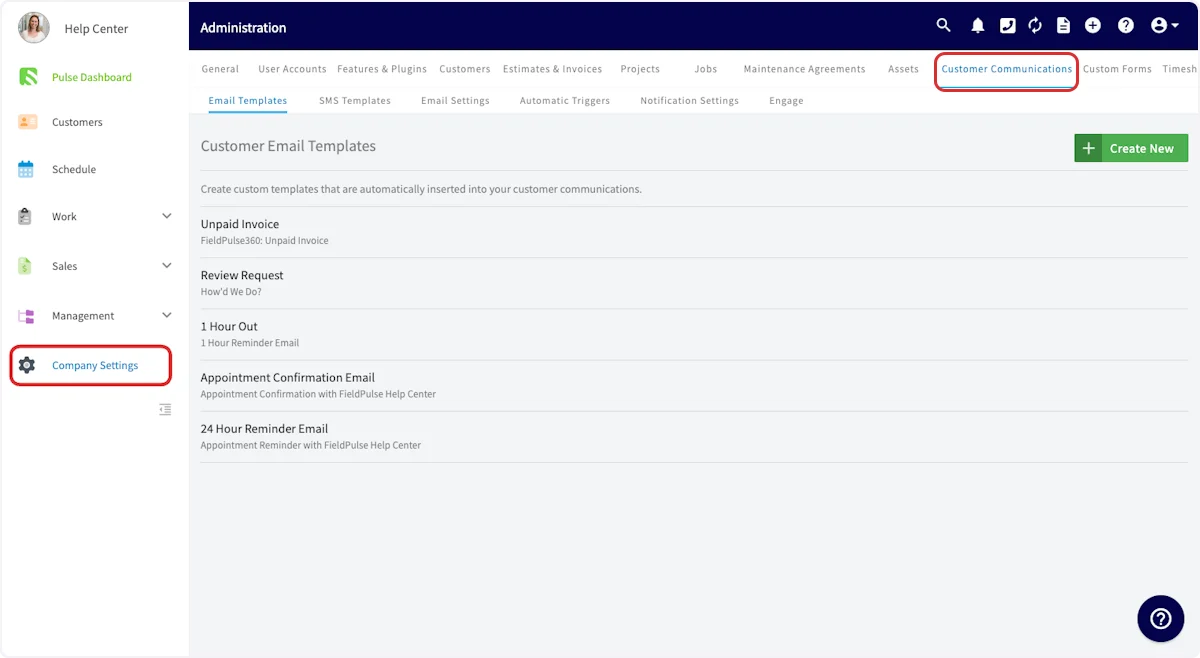

- Feedback requests
- Notification of a technician on their way
- Appointment reminders
Ability to Add Files to Customer Communications
Attach files and photos to SMS and email Customer Communications sent directly from web or mobile, keeping your conversations seamless. This applies to both one-off and templated Customer Communications in FieldPulse. You can send multiple attachments in one message, but you must select and upload files one at a time.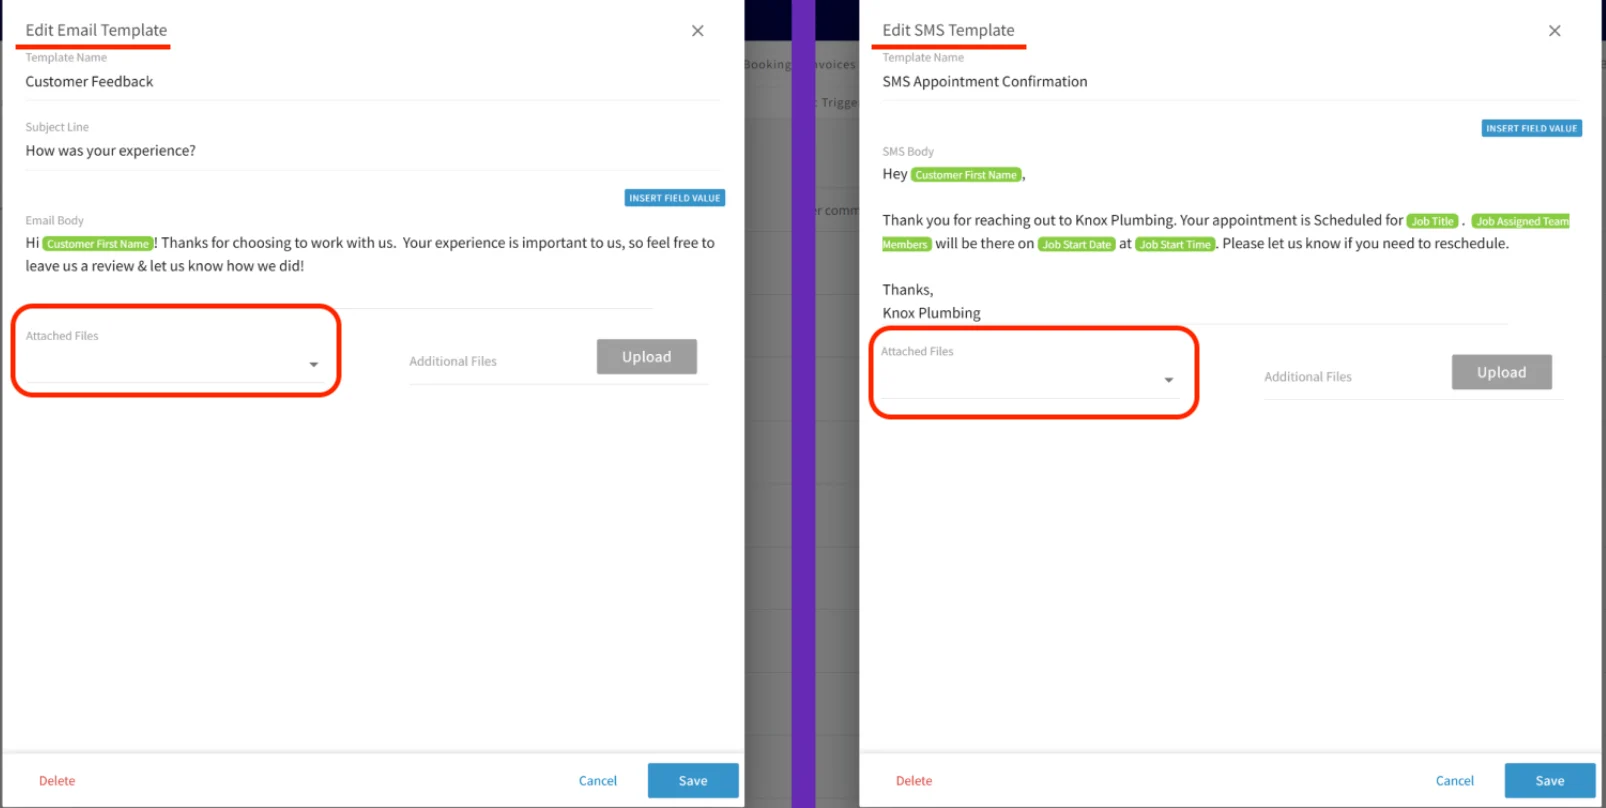
File Size Limits:
- Max file size for email attachments = 10 MB per file
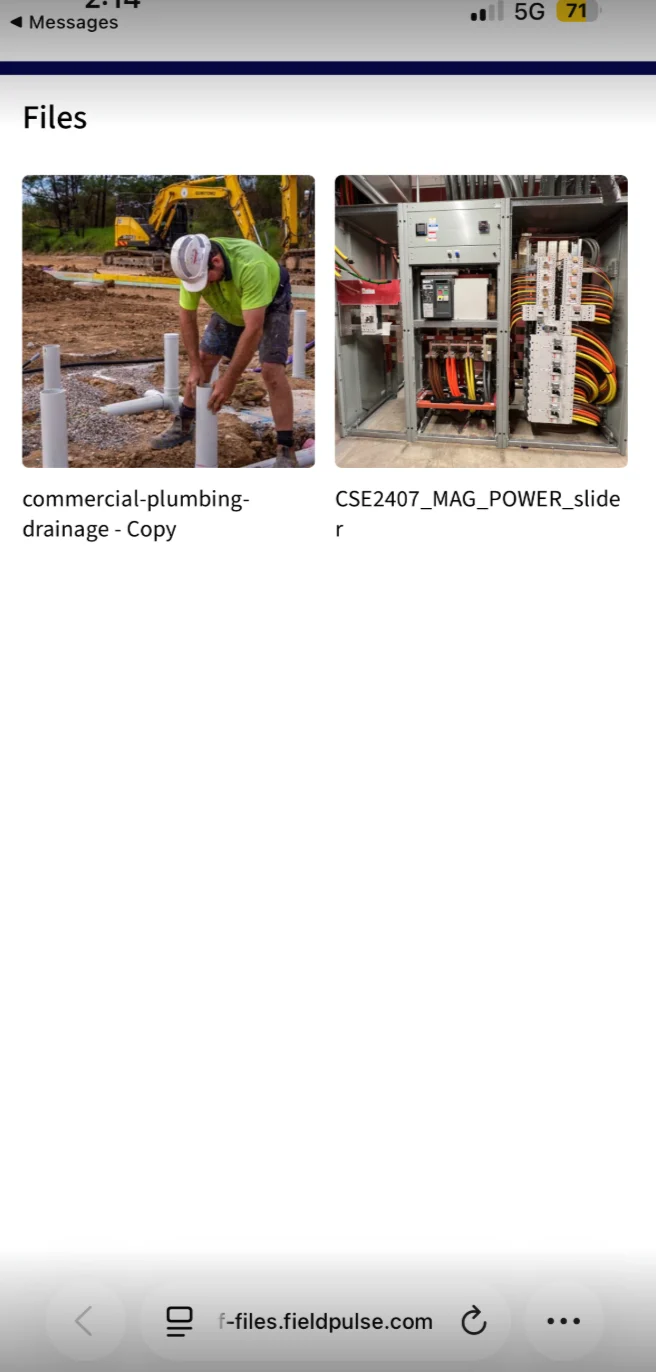
- SMS files have no size limit because FieldPulse will send a URL to your file viewer (shown in the image below)
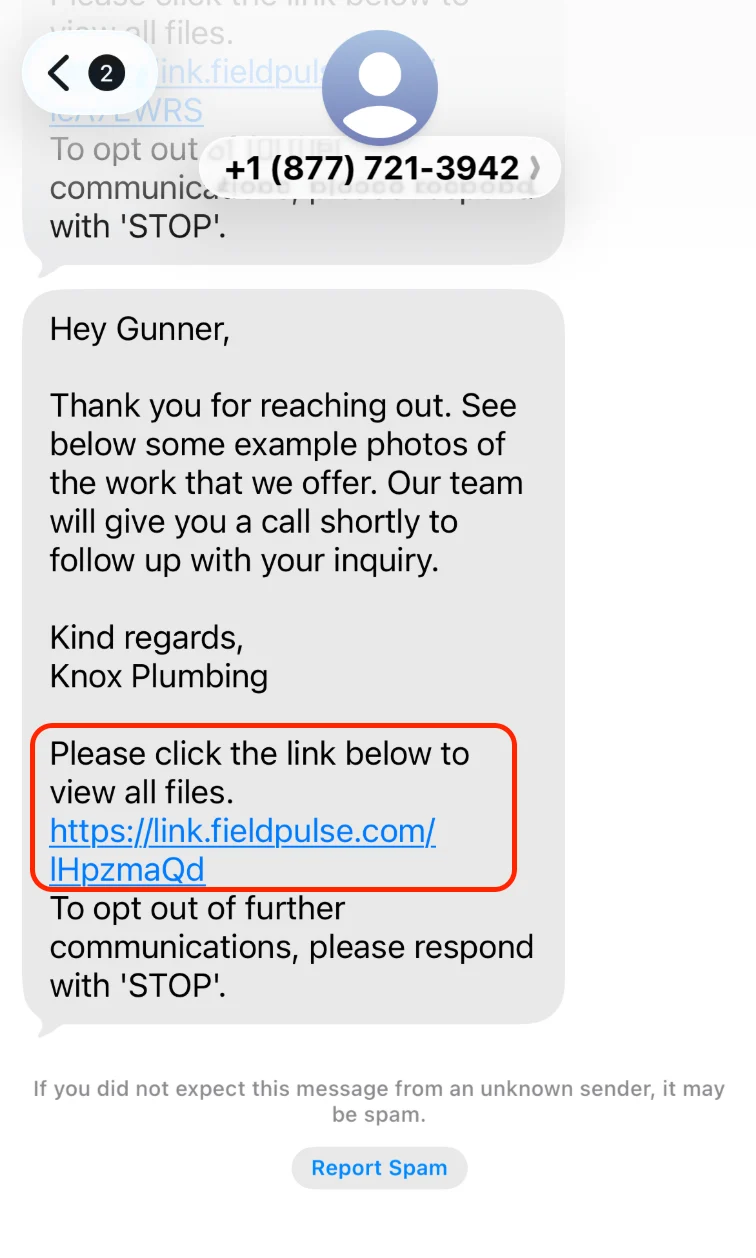
NOTE: “Please click the link below to view all files.” is default text from FieldPulse and cannot be removed/edited.
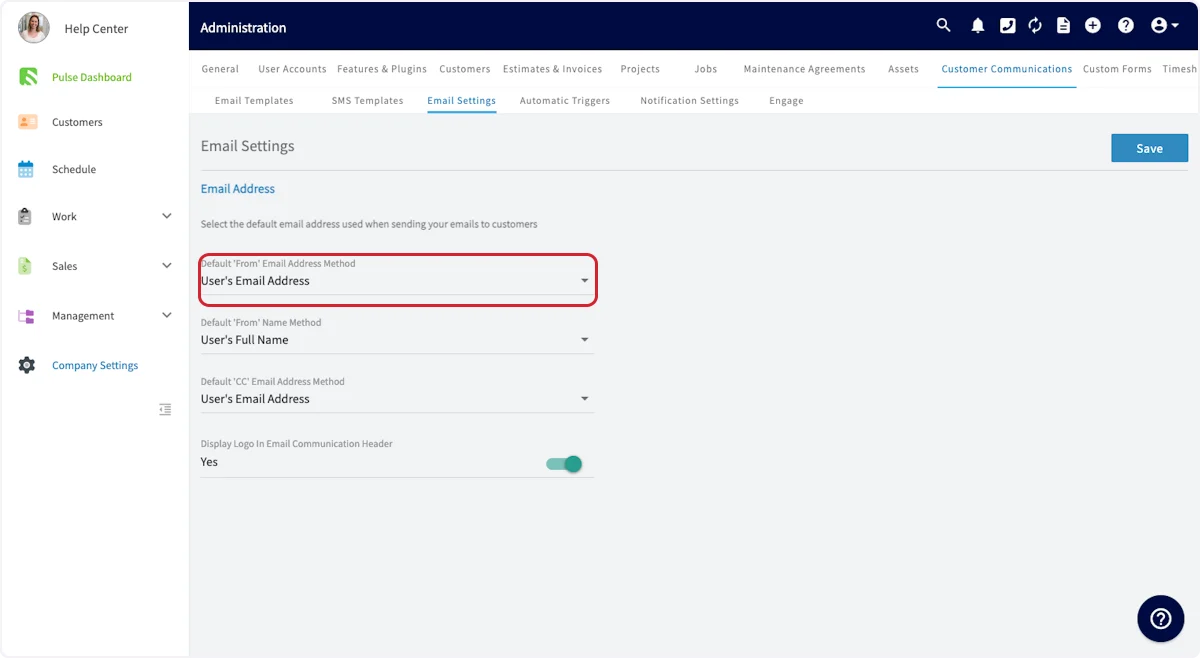
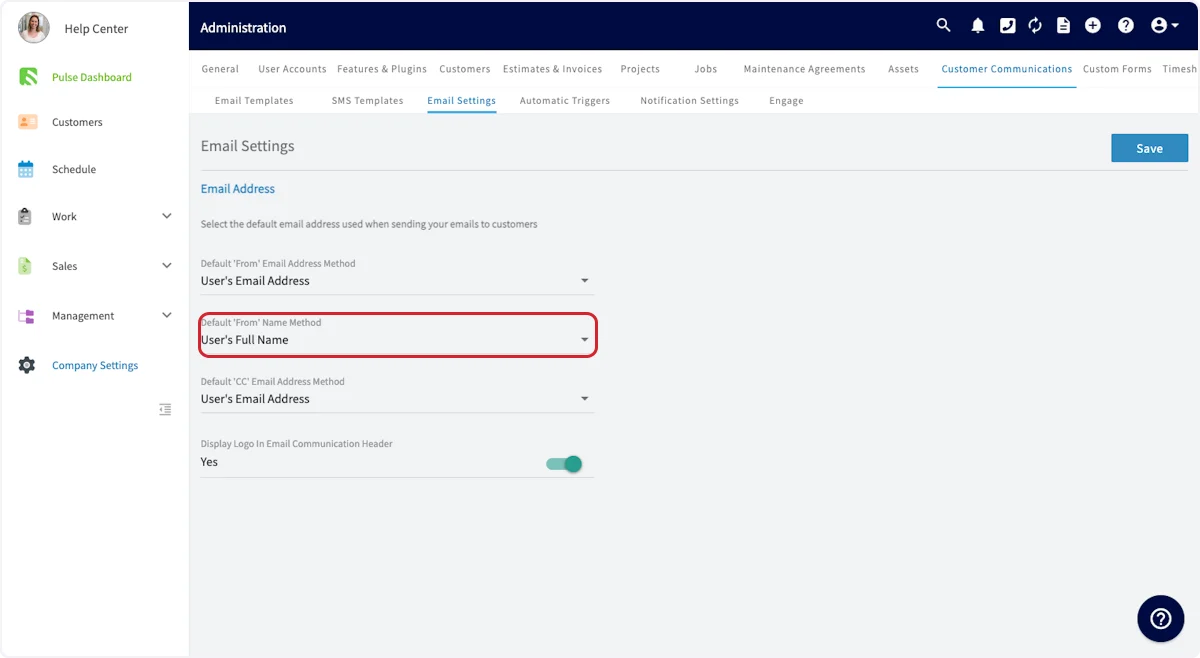
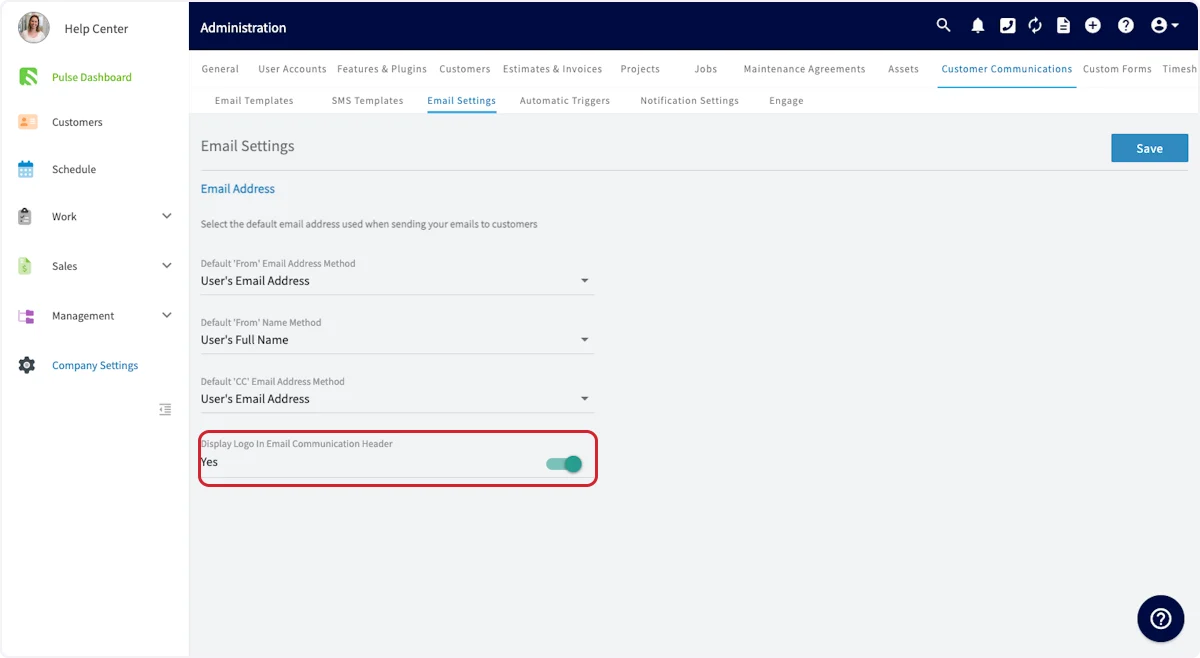
Email Settings
To further customize your customer emails, navigate to Email Settings.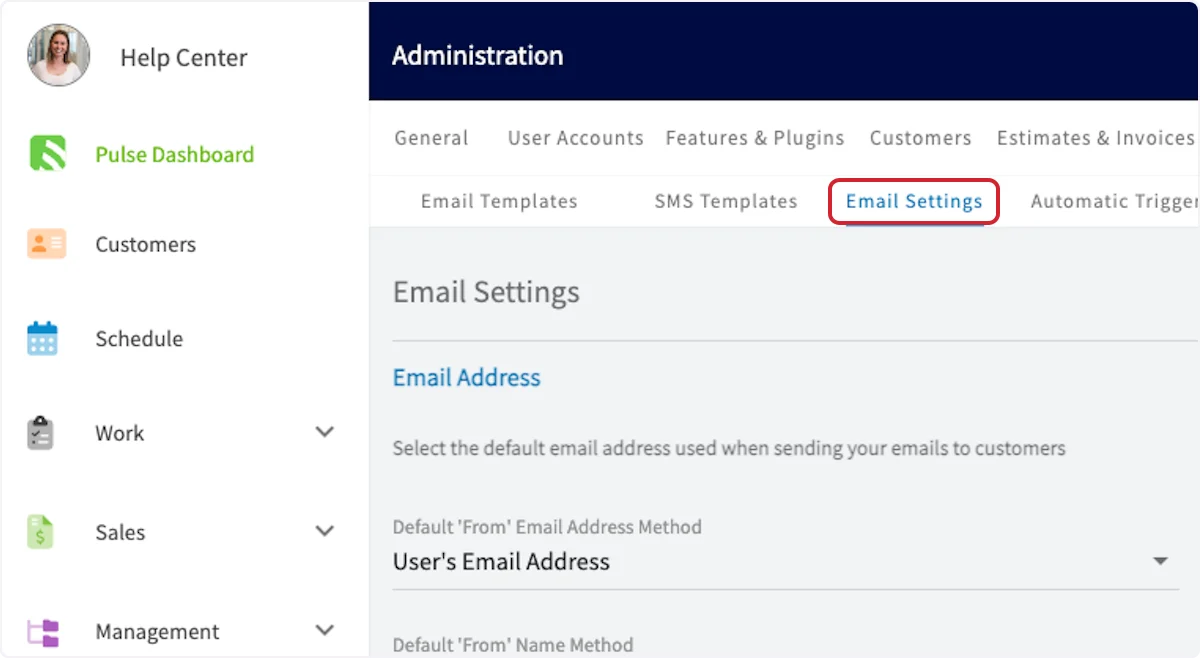
Email Statuses & Notifications
Blocked:This status indicates that the email was not sent to the recipient’s server due to factors such as the sender’s email address being on a blacklist, the content of the email triggering spam filters, or domain-level policies that prevent the email from being delivered. Be sure to have your customer check his/her spam folder. Deferred:
A “deferred” email is one that has not been delivered on the first attempt but is temporarily queued for future delivery attempts. This could be due to issues on the recipient’s server, such as a full inbox or a temporarily unavailable server. Email systems will typically retry sending these emails automatically. Sent:
The “sent” status means that the email has been successfully transmitted to the recipient’s mail server. However, this does not guarantee that the email has been delivered to the recipient’s inbox as it may still be blocked or filtered at a later stage. Open:
This status is used when the recipient has simply opened the email you sent. Clicked:
An email marked as “clicked” signifies that the recipient not only opened the email but also clicked on one or more links within the email.
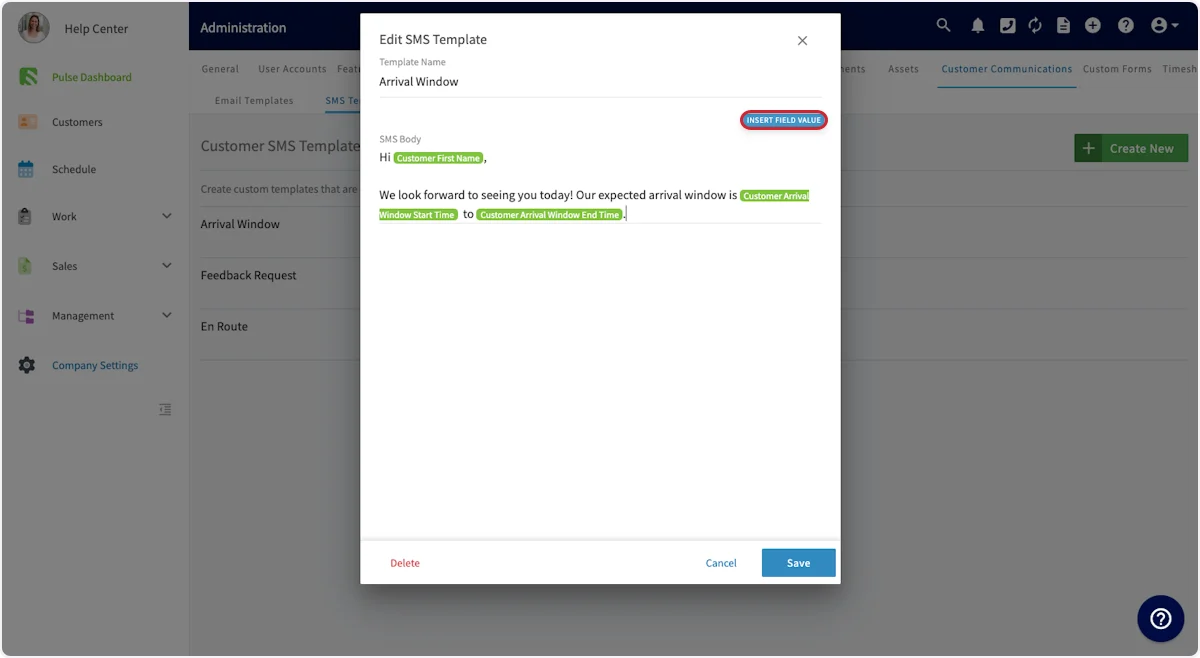
SMS Templates
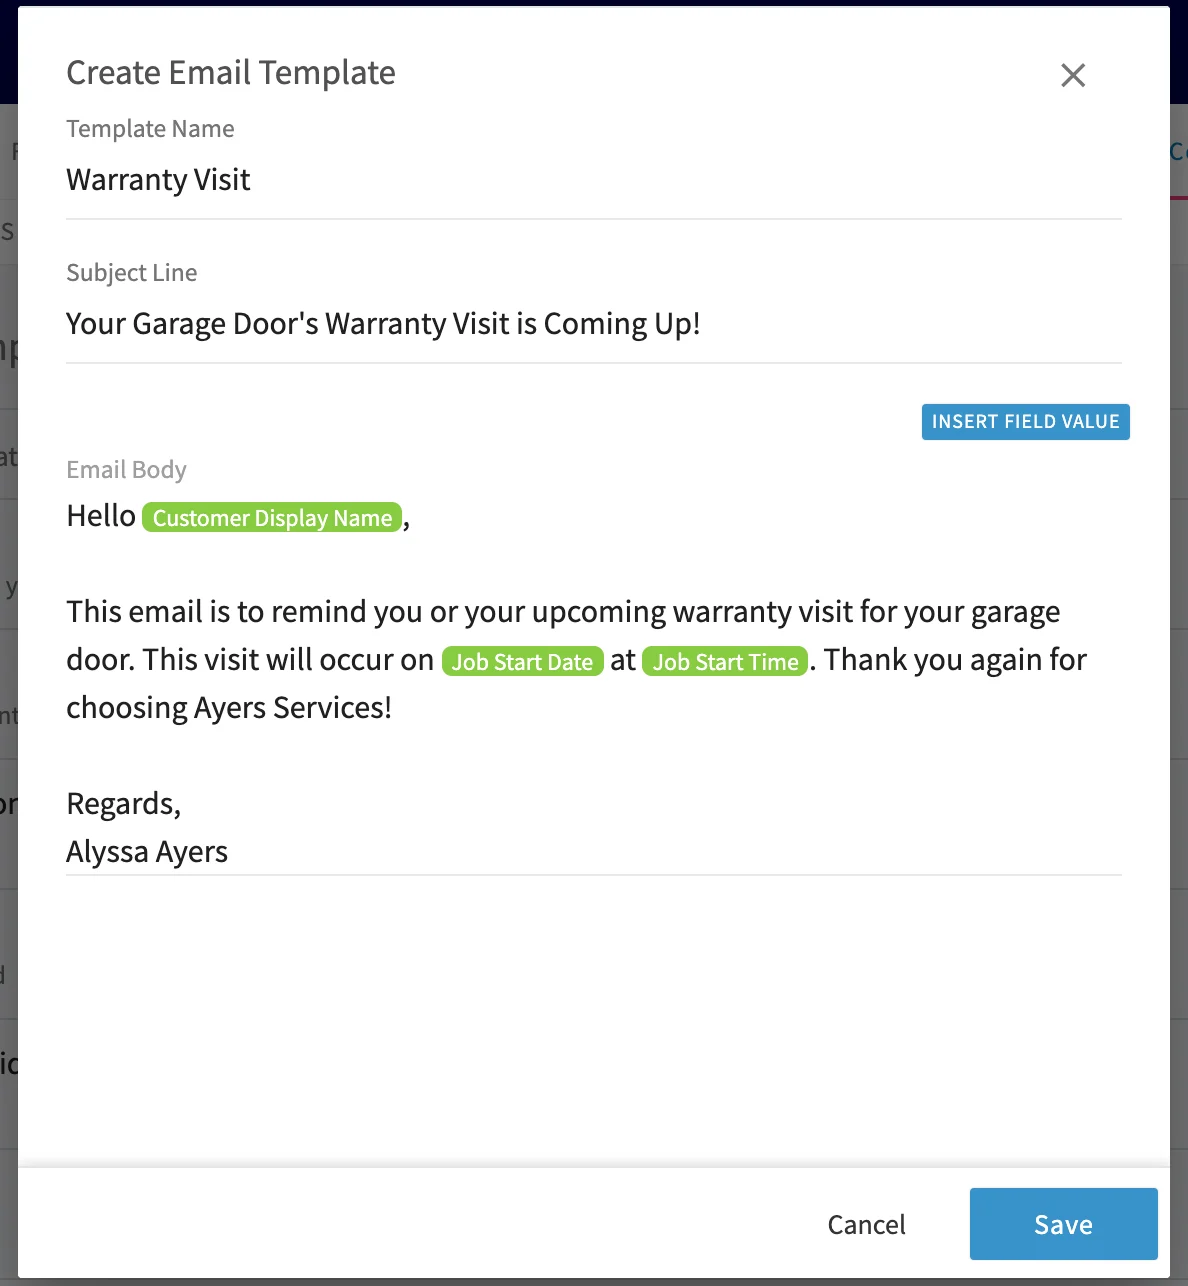
In Customer Communications, you have the option to create email and SMS templates for use with your customers. To create a new SMS Template, select SMS Templates. Then, click Create New.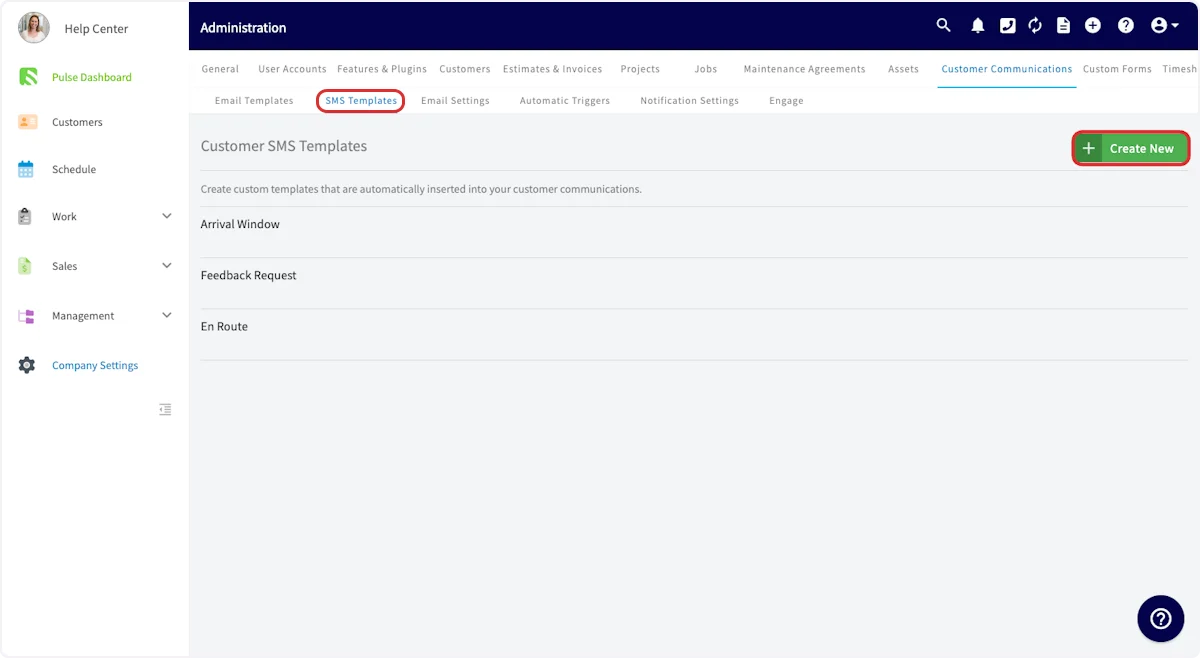
- Feedback requests
- Notification of a technician on their way
- Appointment reminders
Sending Communications to Customers
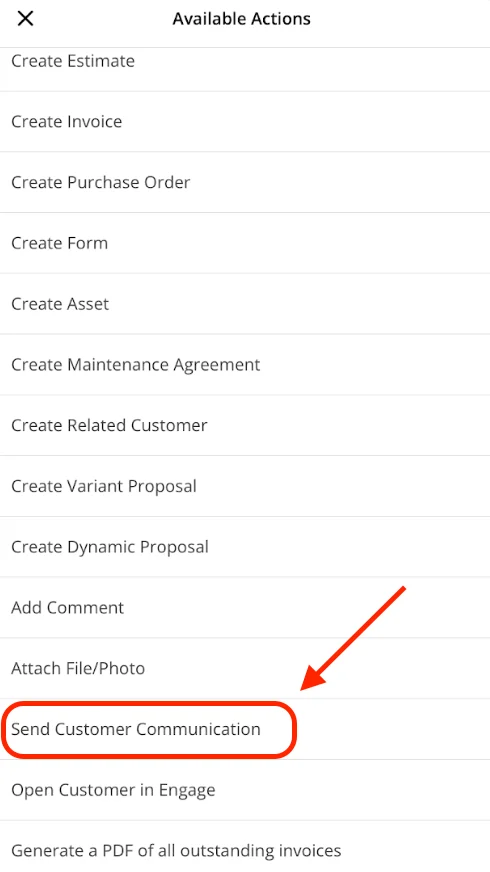
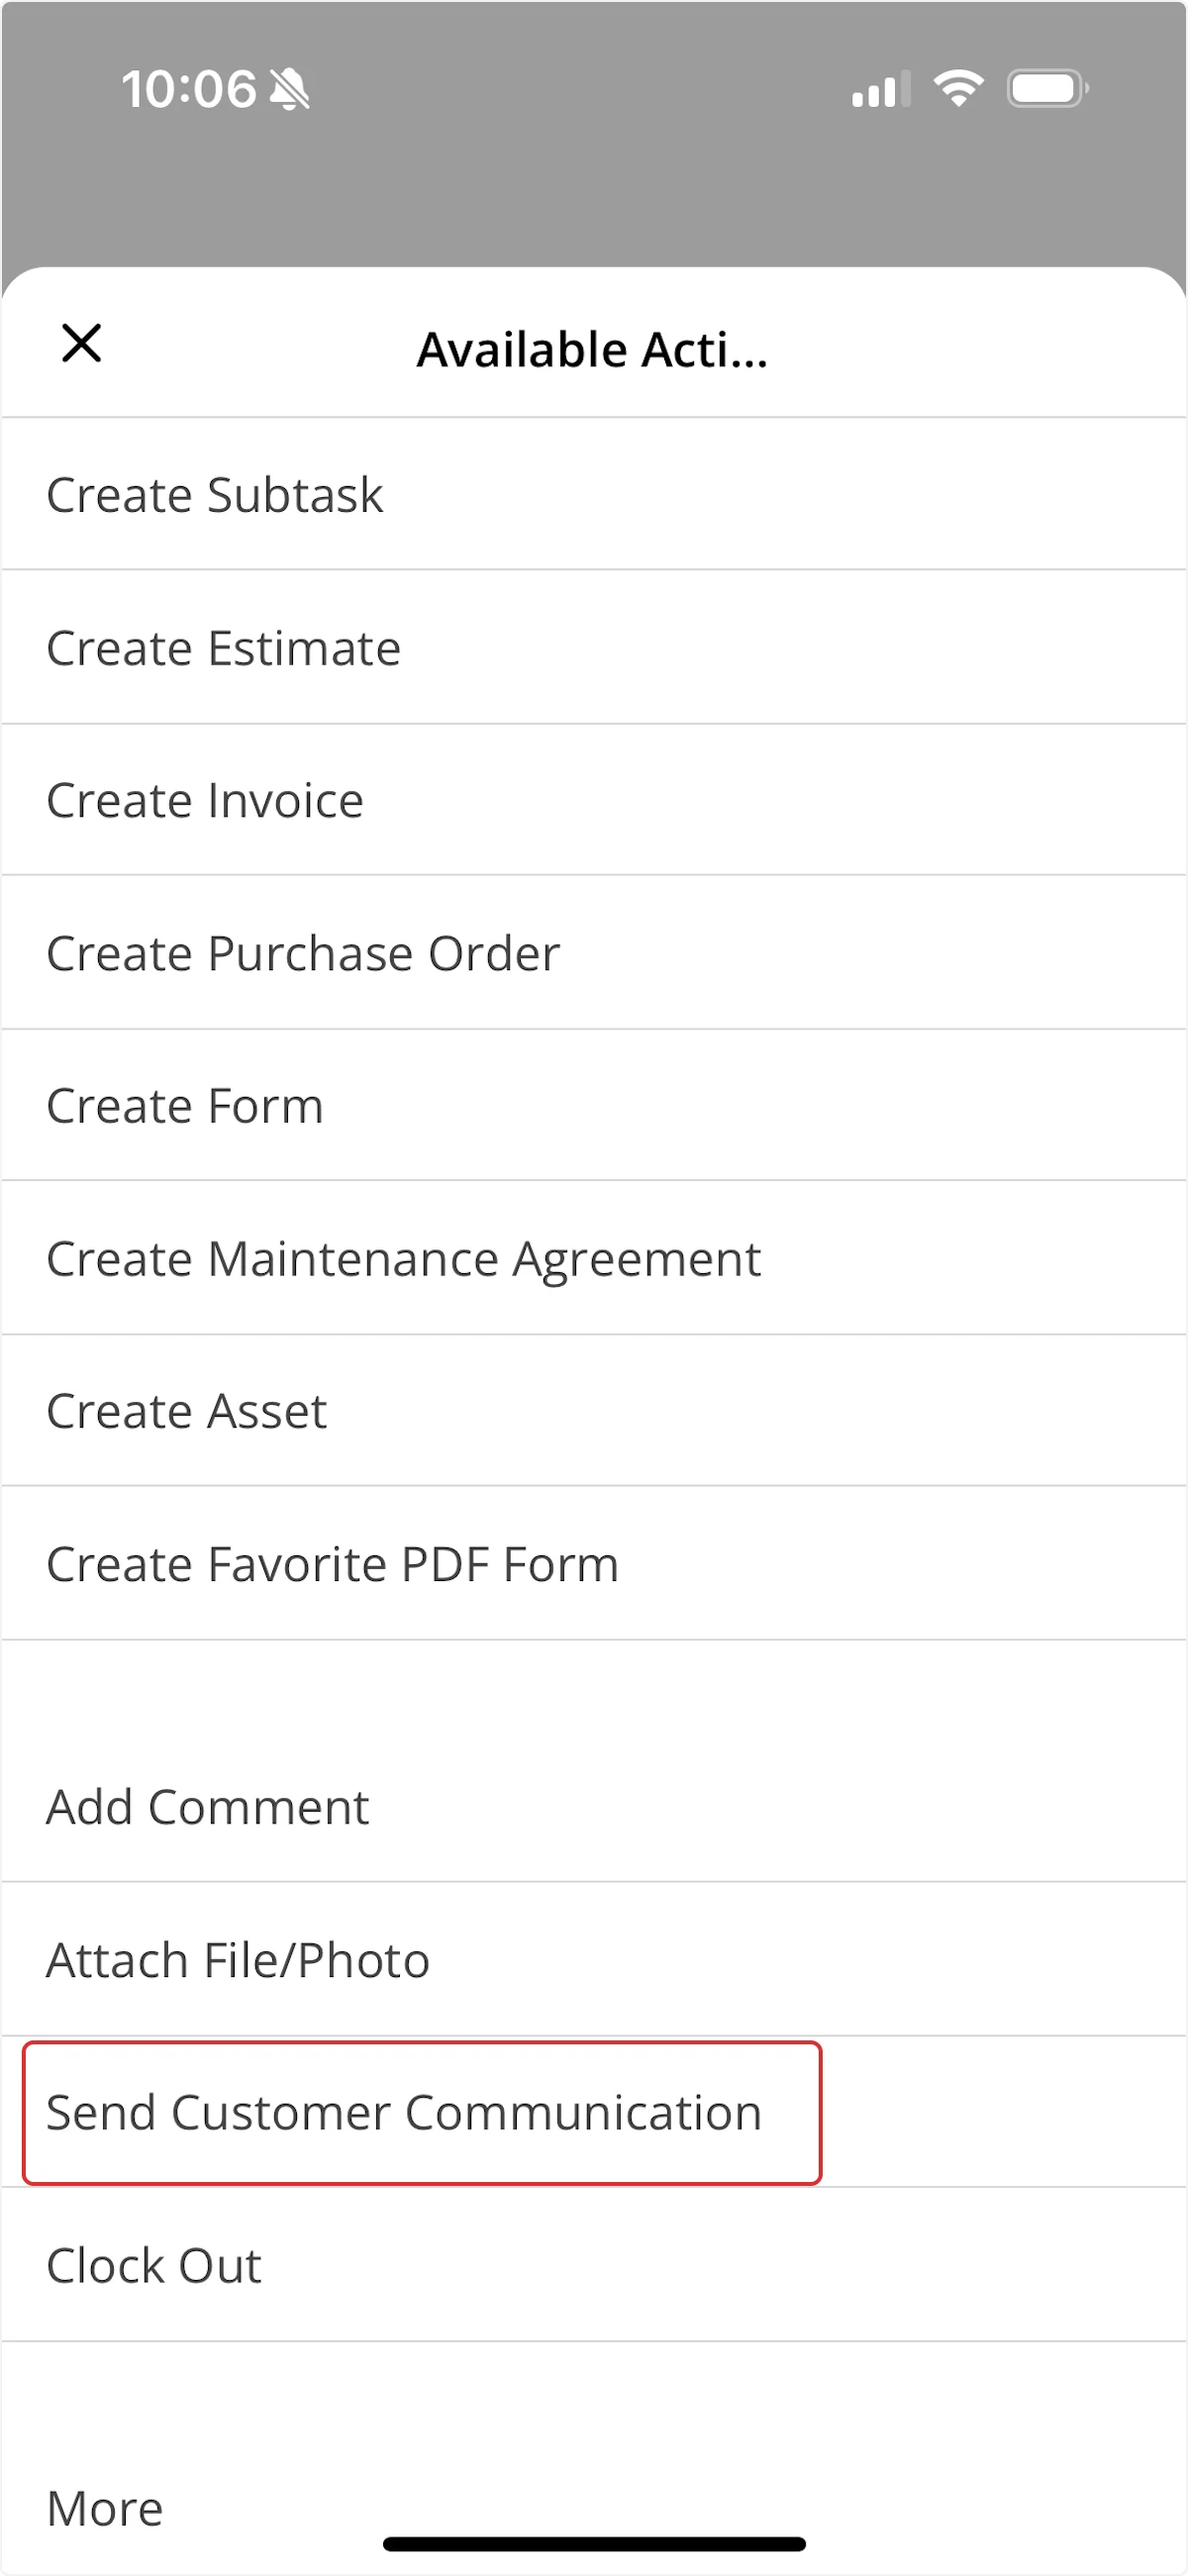
To send emails and/or SMS messages to a customer, navigate to the job or customer record that you want to communicate about, click on the Actions button at top right, and click Send Customer Communication.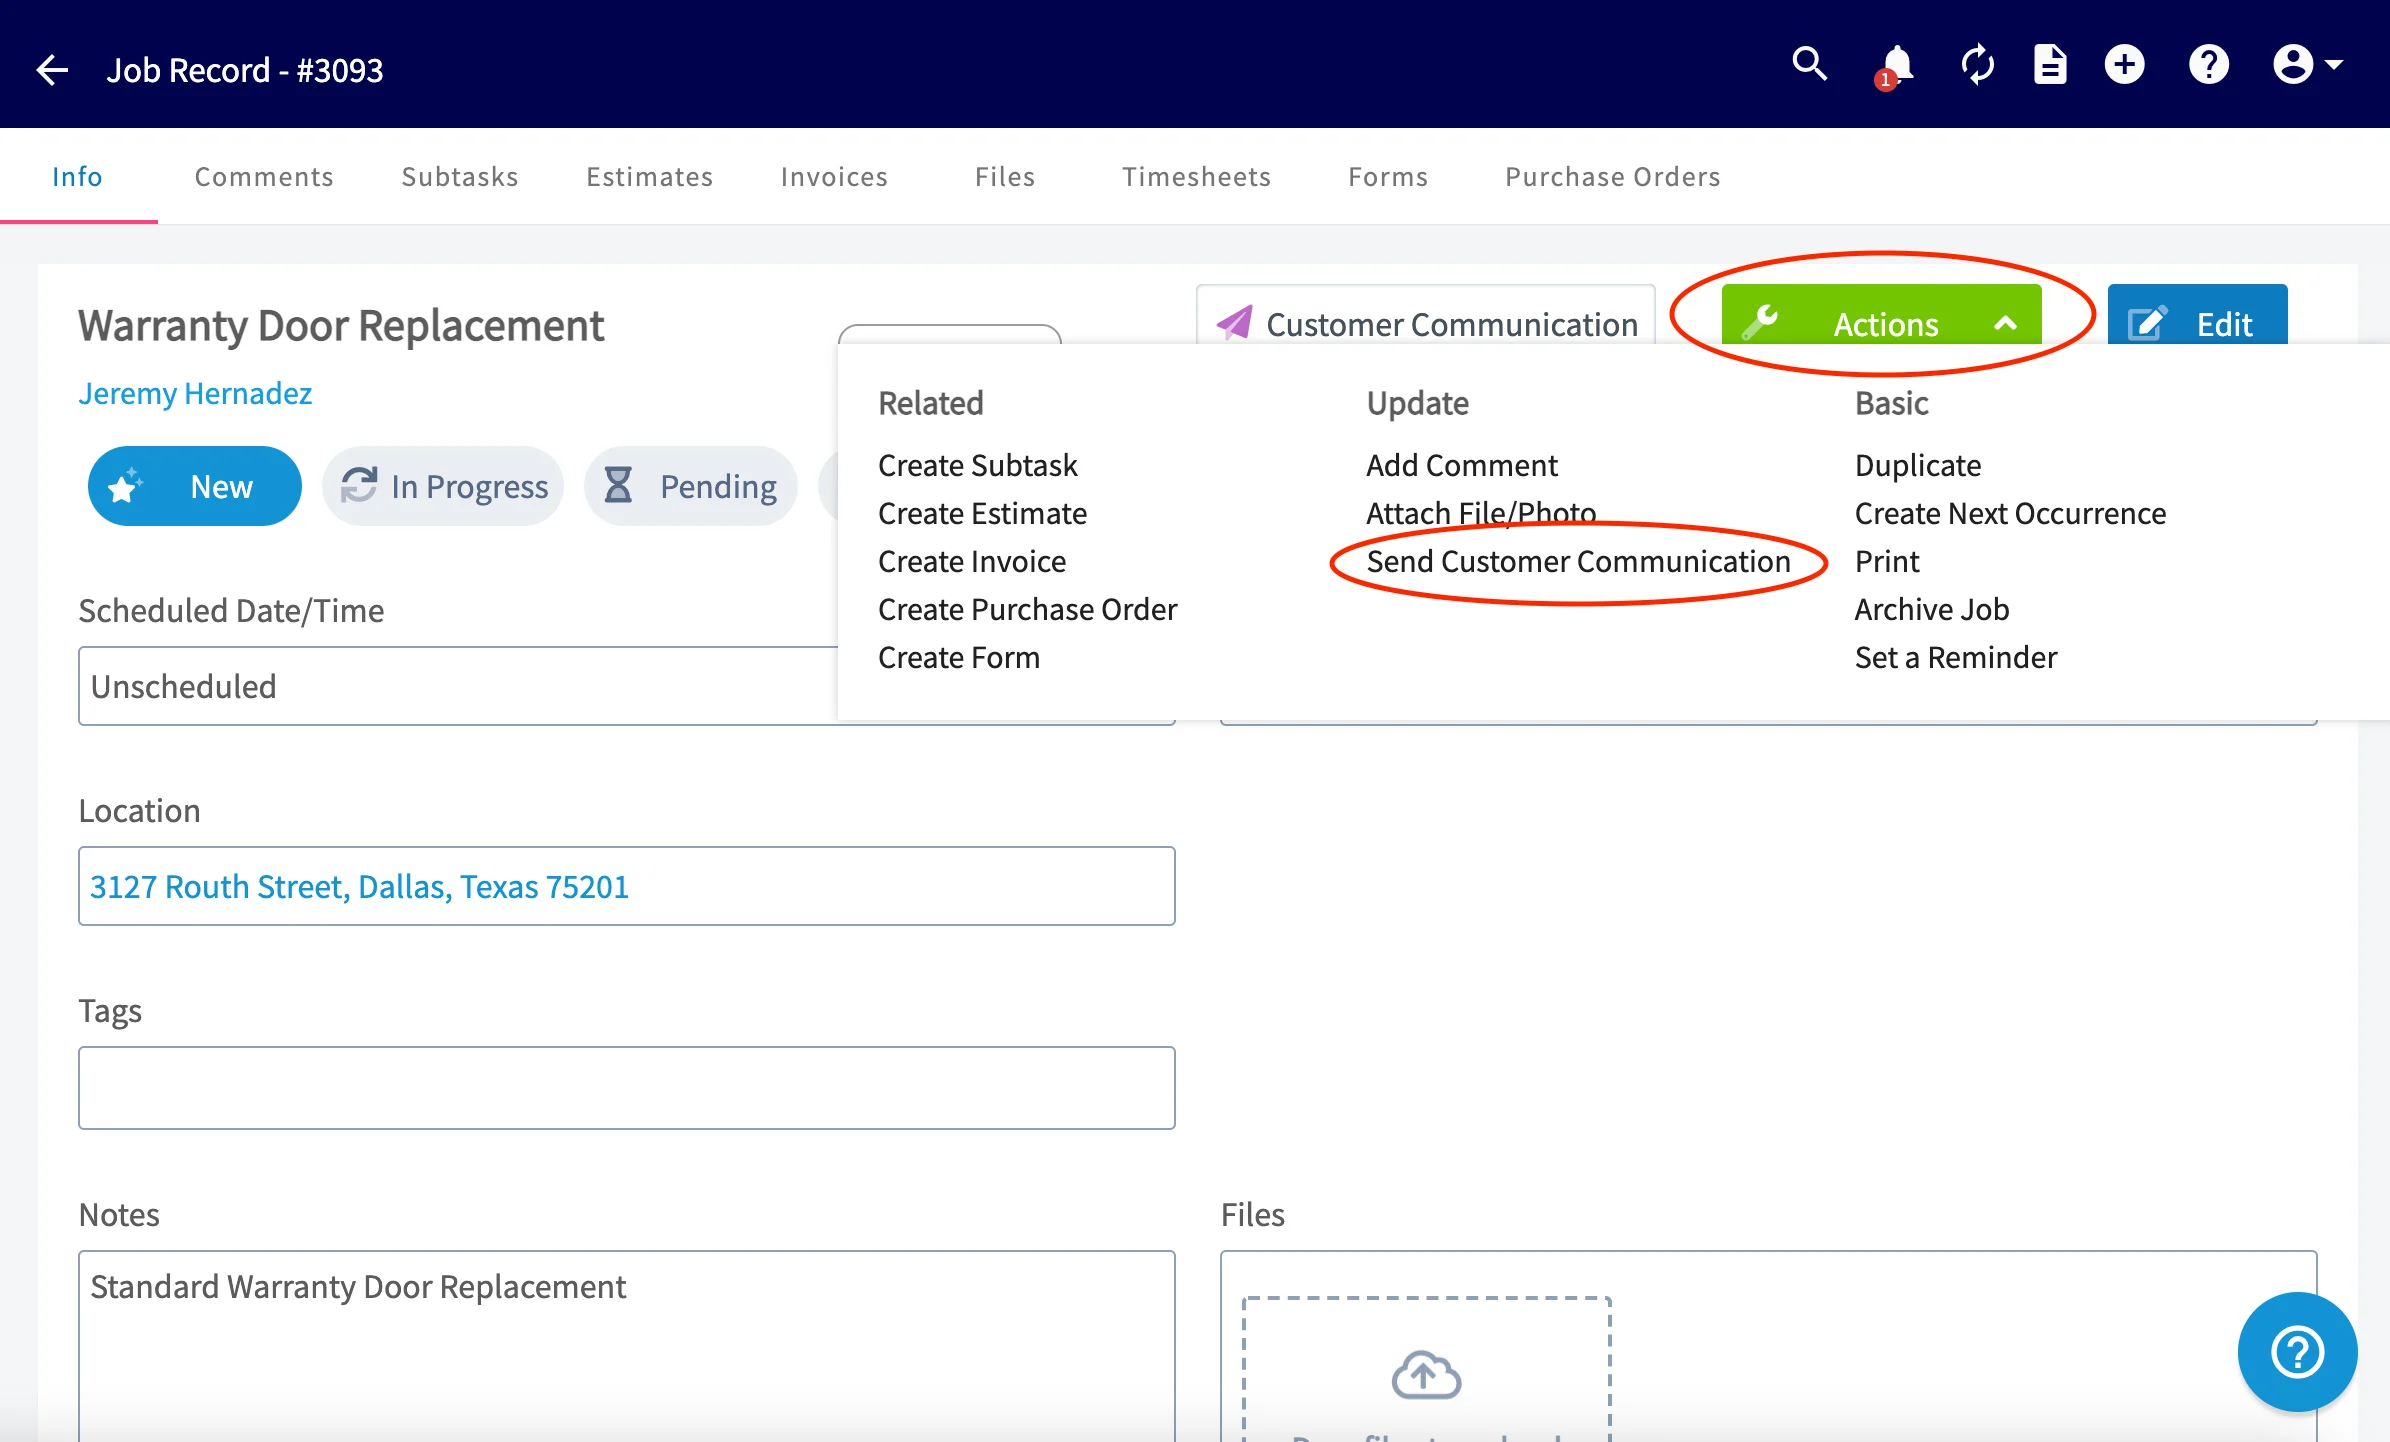
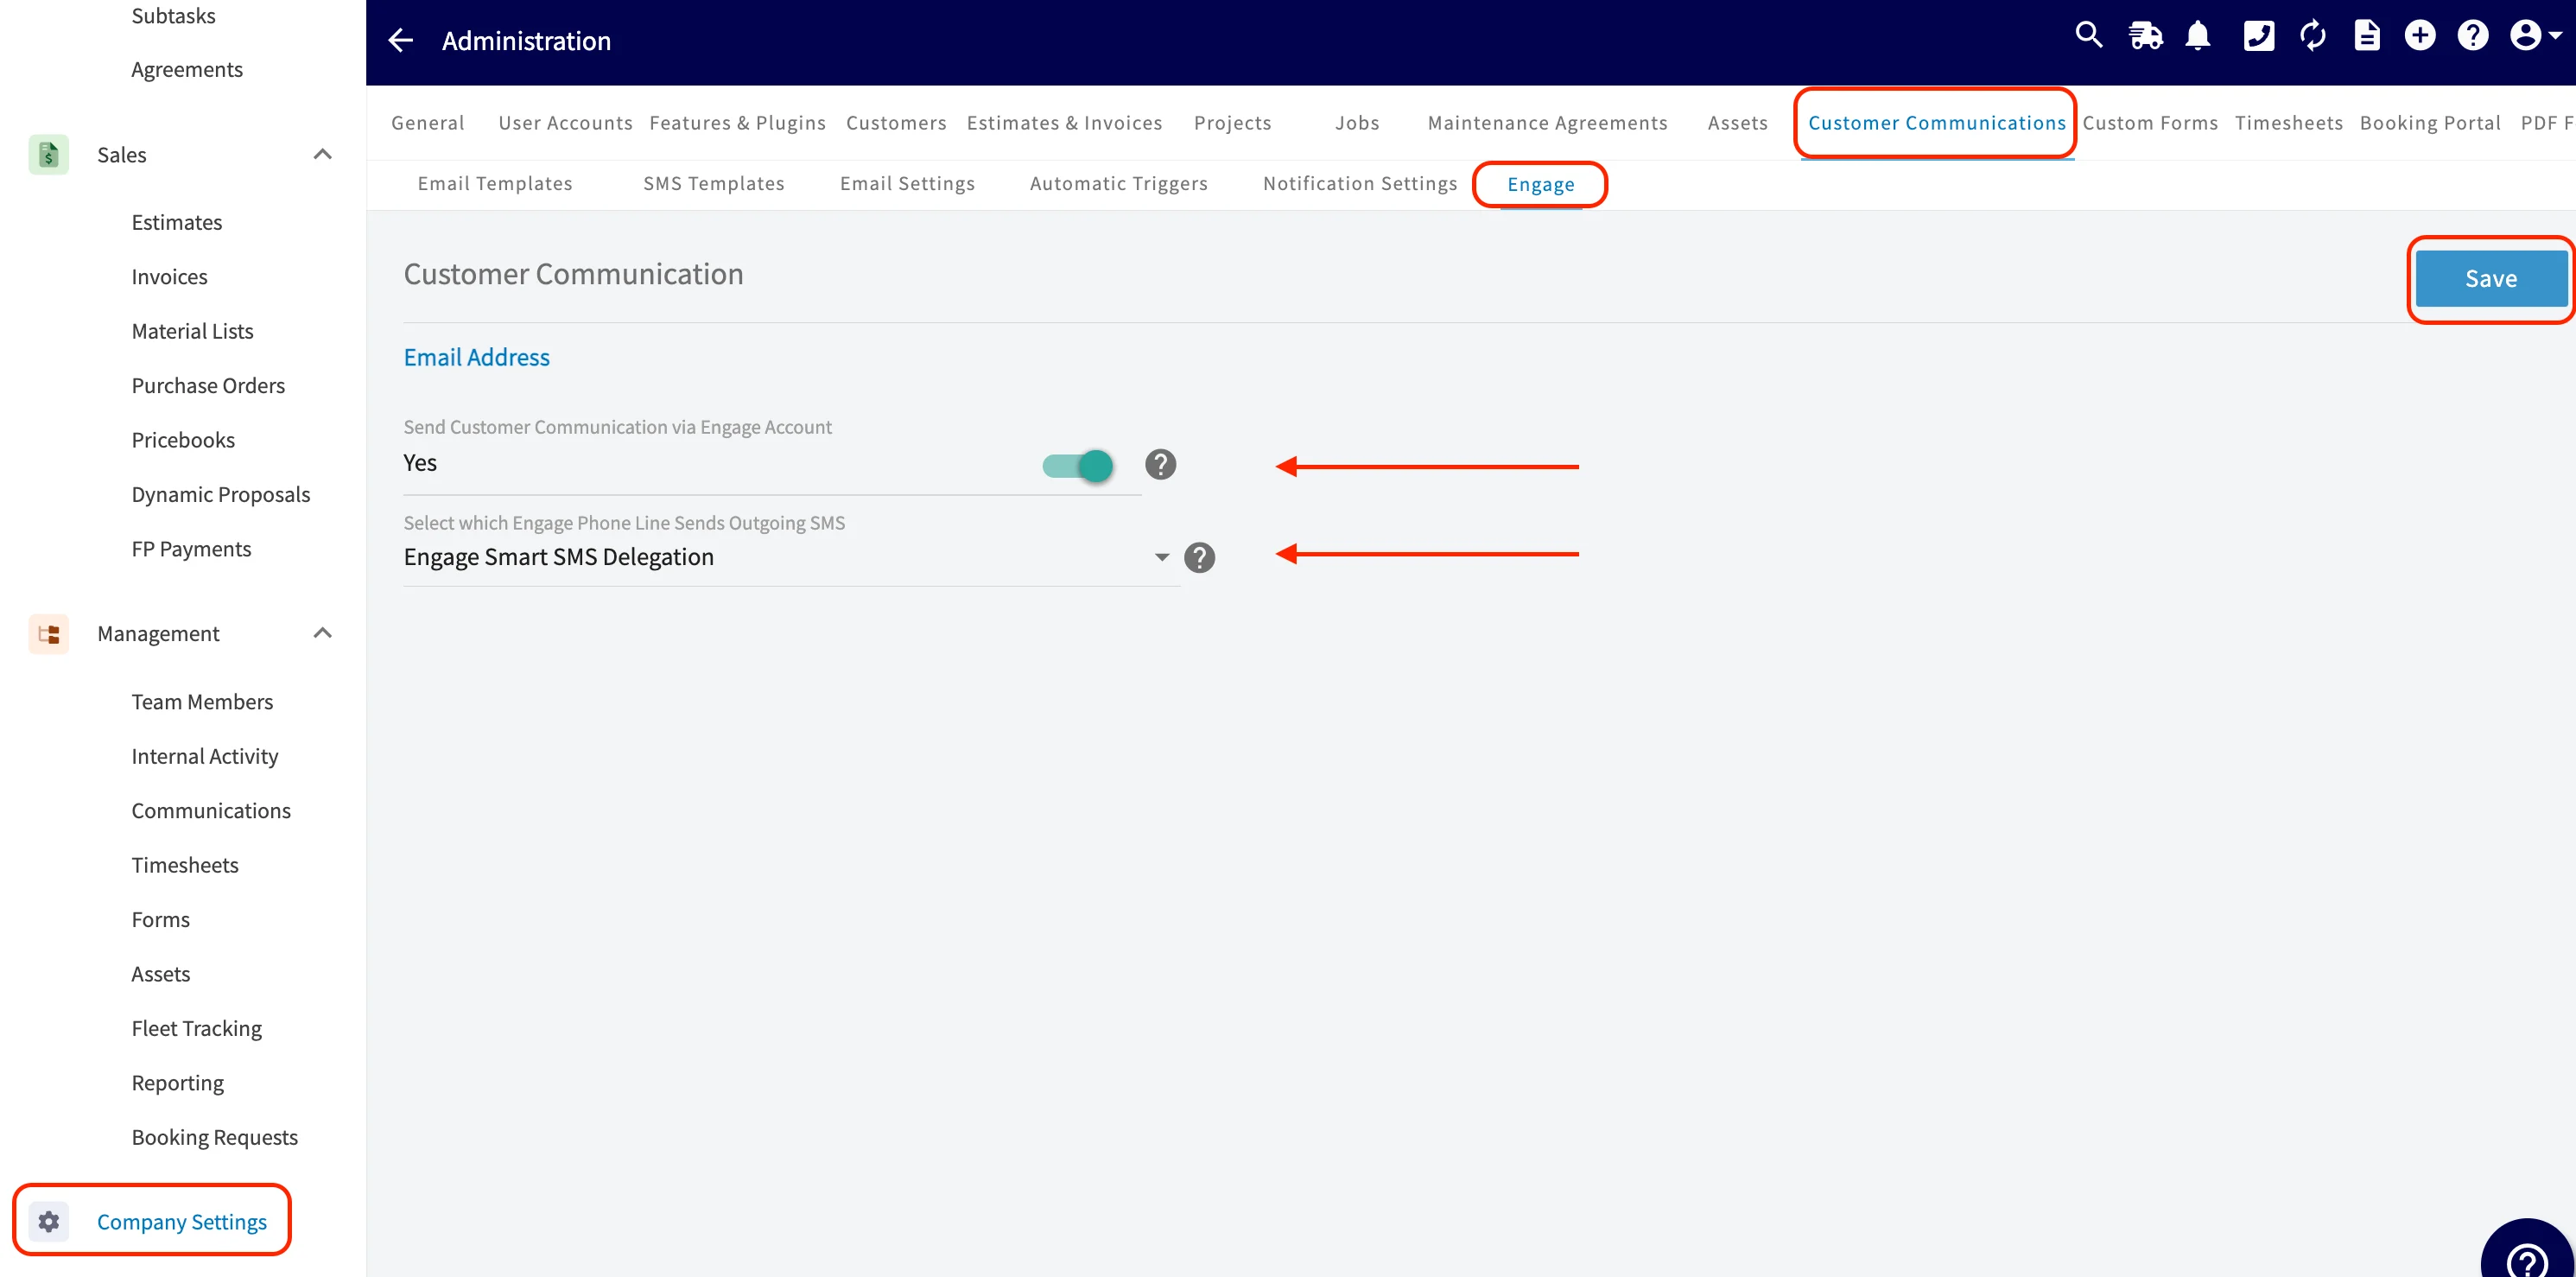
Sending Customer Communications with Engage
If Engage is enabled and the toggle to Send Customer Communication via Engage Account is on, SMS and email automatic triggers will send via one of the following options of your choosing:-
Engage Smart SMS Delegation
-
Our system will auto-select the most relevant phone line based on who’s sending the message.
- If the sender is assigned to an Engage line, their assigned line will be used.
- If the sender is not assigned to an Engage line, the company owner’s assigned line will be used.
- If the sender and owner do not have assigned line, a random available Engage line will be used.
-
Our system will auto-select the most relevant phone line based on who’s sending the message.
-
Custom Phone Line
- Choose one specific phone line for all SMS messages to always be sent from that line.
Sending Customer Communications without Engage
- All email and SMS automatic triggers will be sent through a no reply toll-free number from FieldPulse.
Contact Routing
- Job-related communications: send to the main customer contact or to any additional contacts listed on that Customer record that you designate as the Job’s designated contact.
- All other communications: send only to the main customer contact; these do not send these to any additional contacts.
Creating Automatic Triggers
Setting up automatic triggers allows you to automate the email and SMS message sending process and ensure a consistent experience for all of your customers. To begin the process, select Automatic Triggers. To set up your first automatic trigger, select Create New.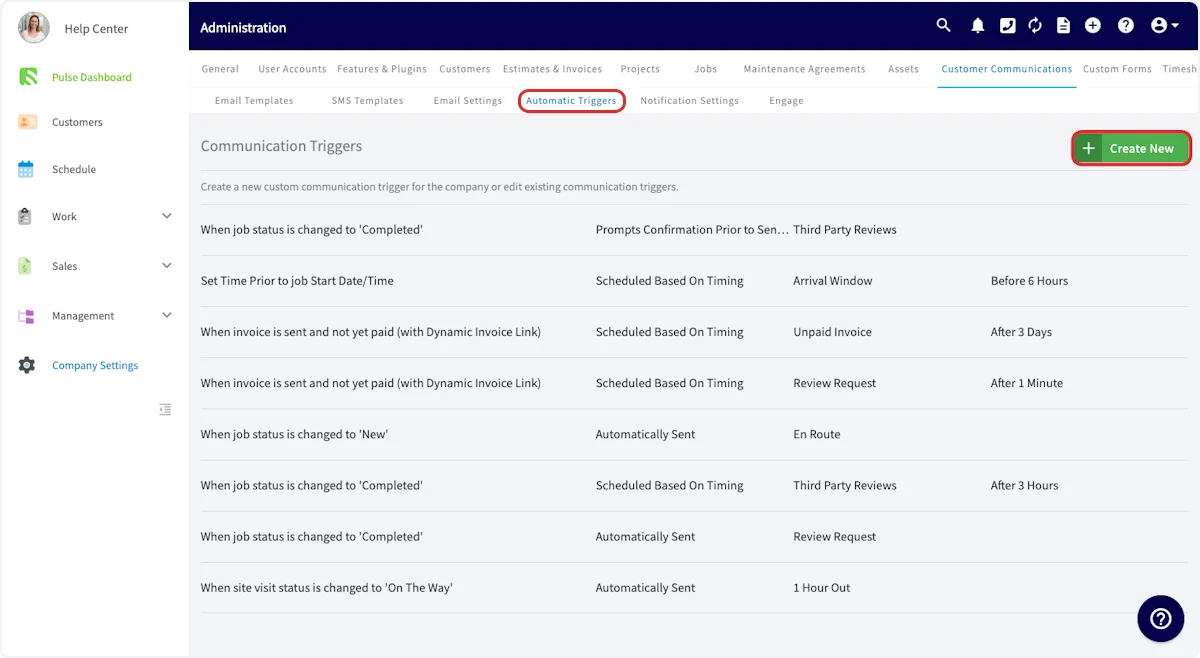
Some trigger options include:
| Trigger | When the Communication will be Sent |
|---|---|
| ”When Estimate is sent and not yet accepted (without Dynamic Estimate Link).” | This will send when the estimate is initially sent and has not yet been accepted by the customer. The Dynamic Estimate Link is not included. |
| ”When Estimate is sent and not yet accepted (with Dynamic Estimate Link).” | This will send when the estimate is initially sent and has not yet been accepted by the customer. The Dynamic Estimate Link is included. |
| ”When invoice is sent and not yet paid (with Dynamic Invoice Link).” | This sends on the date the invoice is past due and includes the invoice link. This only sends to invoices in the invoiced status. The Dynamic Invoice Link is included. |
| ”When invoice is overdue and not yet fully paid (with Dynamic Invoice Link).” | This will send on the date an invoice is past due and include the invoice link. This sends for invoices in the invoiced as well as _partially paid_statuses. The Dynamic Invoice Link is included. |
| ”When the invoice is past due.” | This sends on the date the invoice becomes past due, does not include a Dynamic Invoice Link, and is triggered for any Invoice Status except Paid. |
| ”When an Estimate is Accepted.” | This will send when the Estimate has been accepted by your customer. |
| ”When job is newly created.” | This will send when the Job record is newly created in FieldPulse. |
| ”Set Time Prior to job Start Date/Time.” | This trigger allows you to send communications to your customers at a custom time, set by you, either before or after the job’s start date/time. |
| ”When a payment record is created.” | This will send when a payment record is created in one of the following ways: • Automatically: When a payment is taken/submitted using FieldPulse Payments. • Via Sync: When a payment is received from QuickBooks or another connected accounting system. • Manually: When a payment is manually marked/logged in FieldPulse through the web app or mobile app. |
| ”When job status is changed to [Status]”. | This will send to your customers when the Status of the Job record changes to a Status you specify. |
| ”When site visit status is changed to [Status].” | This will send to your customers when the Status of the Site Visit record changes to a Status you specify. |
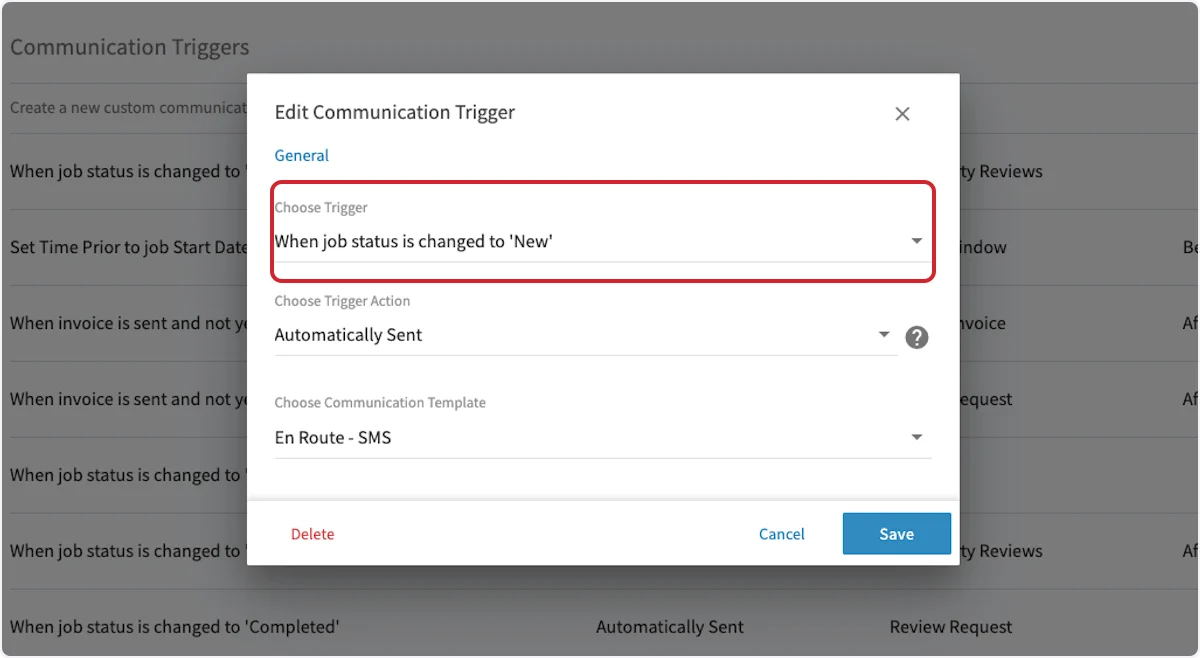
For this example, we’ve selected the trigger When job status is changed to ‘New’.
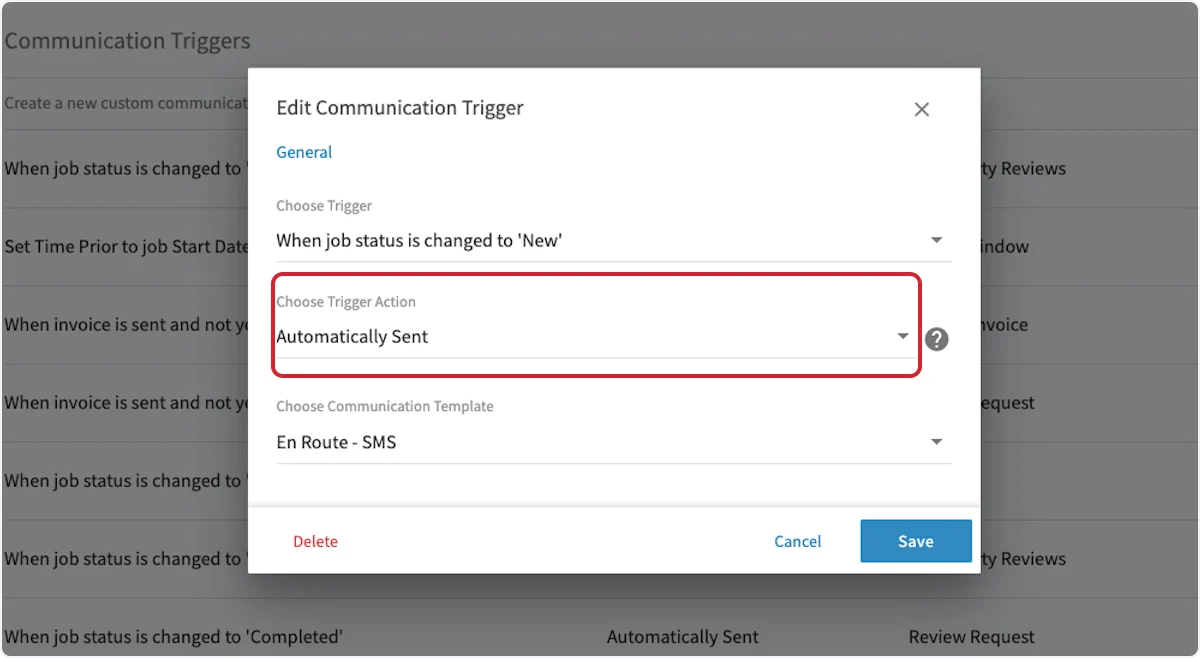
- Automatically Sent - Choosing this option will automatically send the customer communication immediately after the trigger is triggered without a preview or confirmation.
- Prompts Confirmation Prior to Sending - Choosing this option will open a pop-up after the trigger is triggered for you to confirm that you want to send this customer communication prior to sending.
- Scheduled Based On Timing - Choosing this option will automatically send the customer communication based on a scheduled timing sequence that you specify.

Attaching Photos to a Communication
To attach a photo to a Customer Communication, begin by tapping the Upload button before sending out your communication.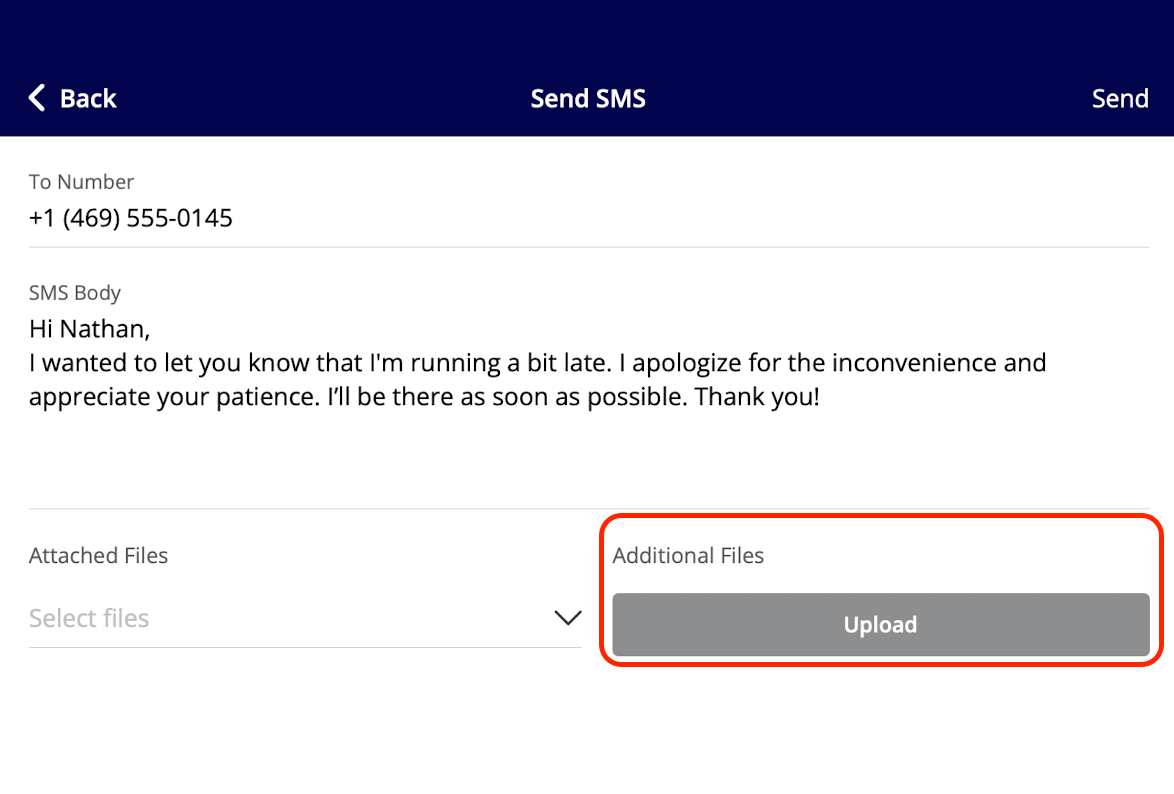
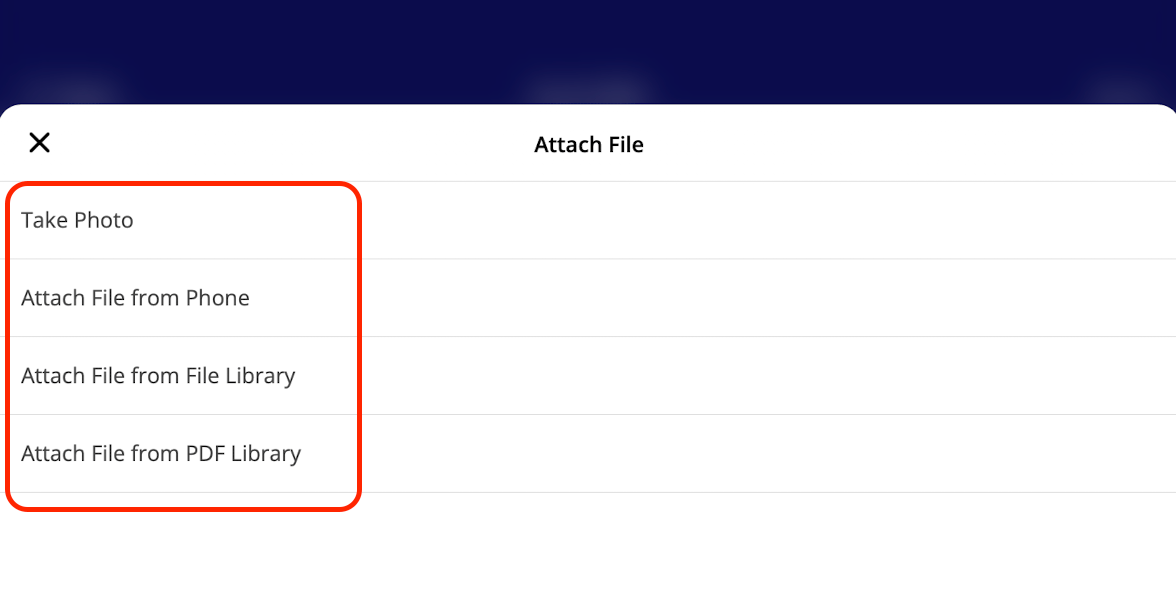
- Choose from Library: select an existing photo from your device’s photo library
- Choose File: select a file from your device storage
- Choose from FieldPulse: select a file already attached to the record in FieldPulse
- Take Picture: open your device camera to capture a new photo on the spot
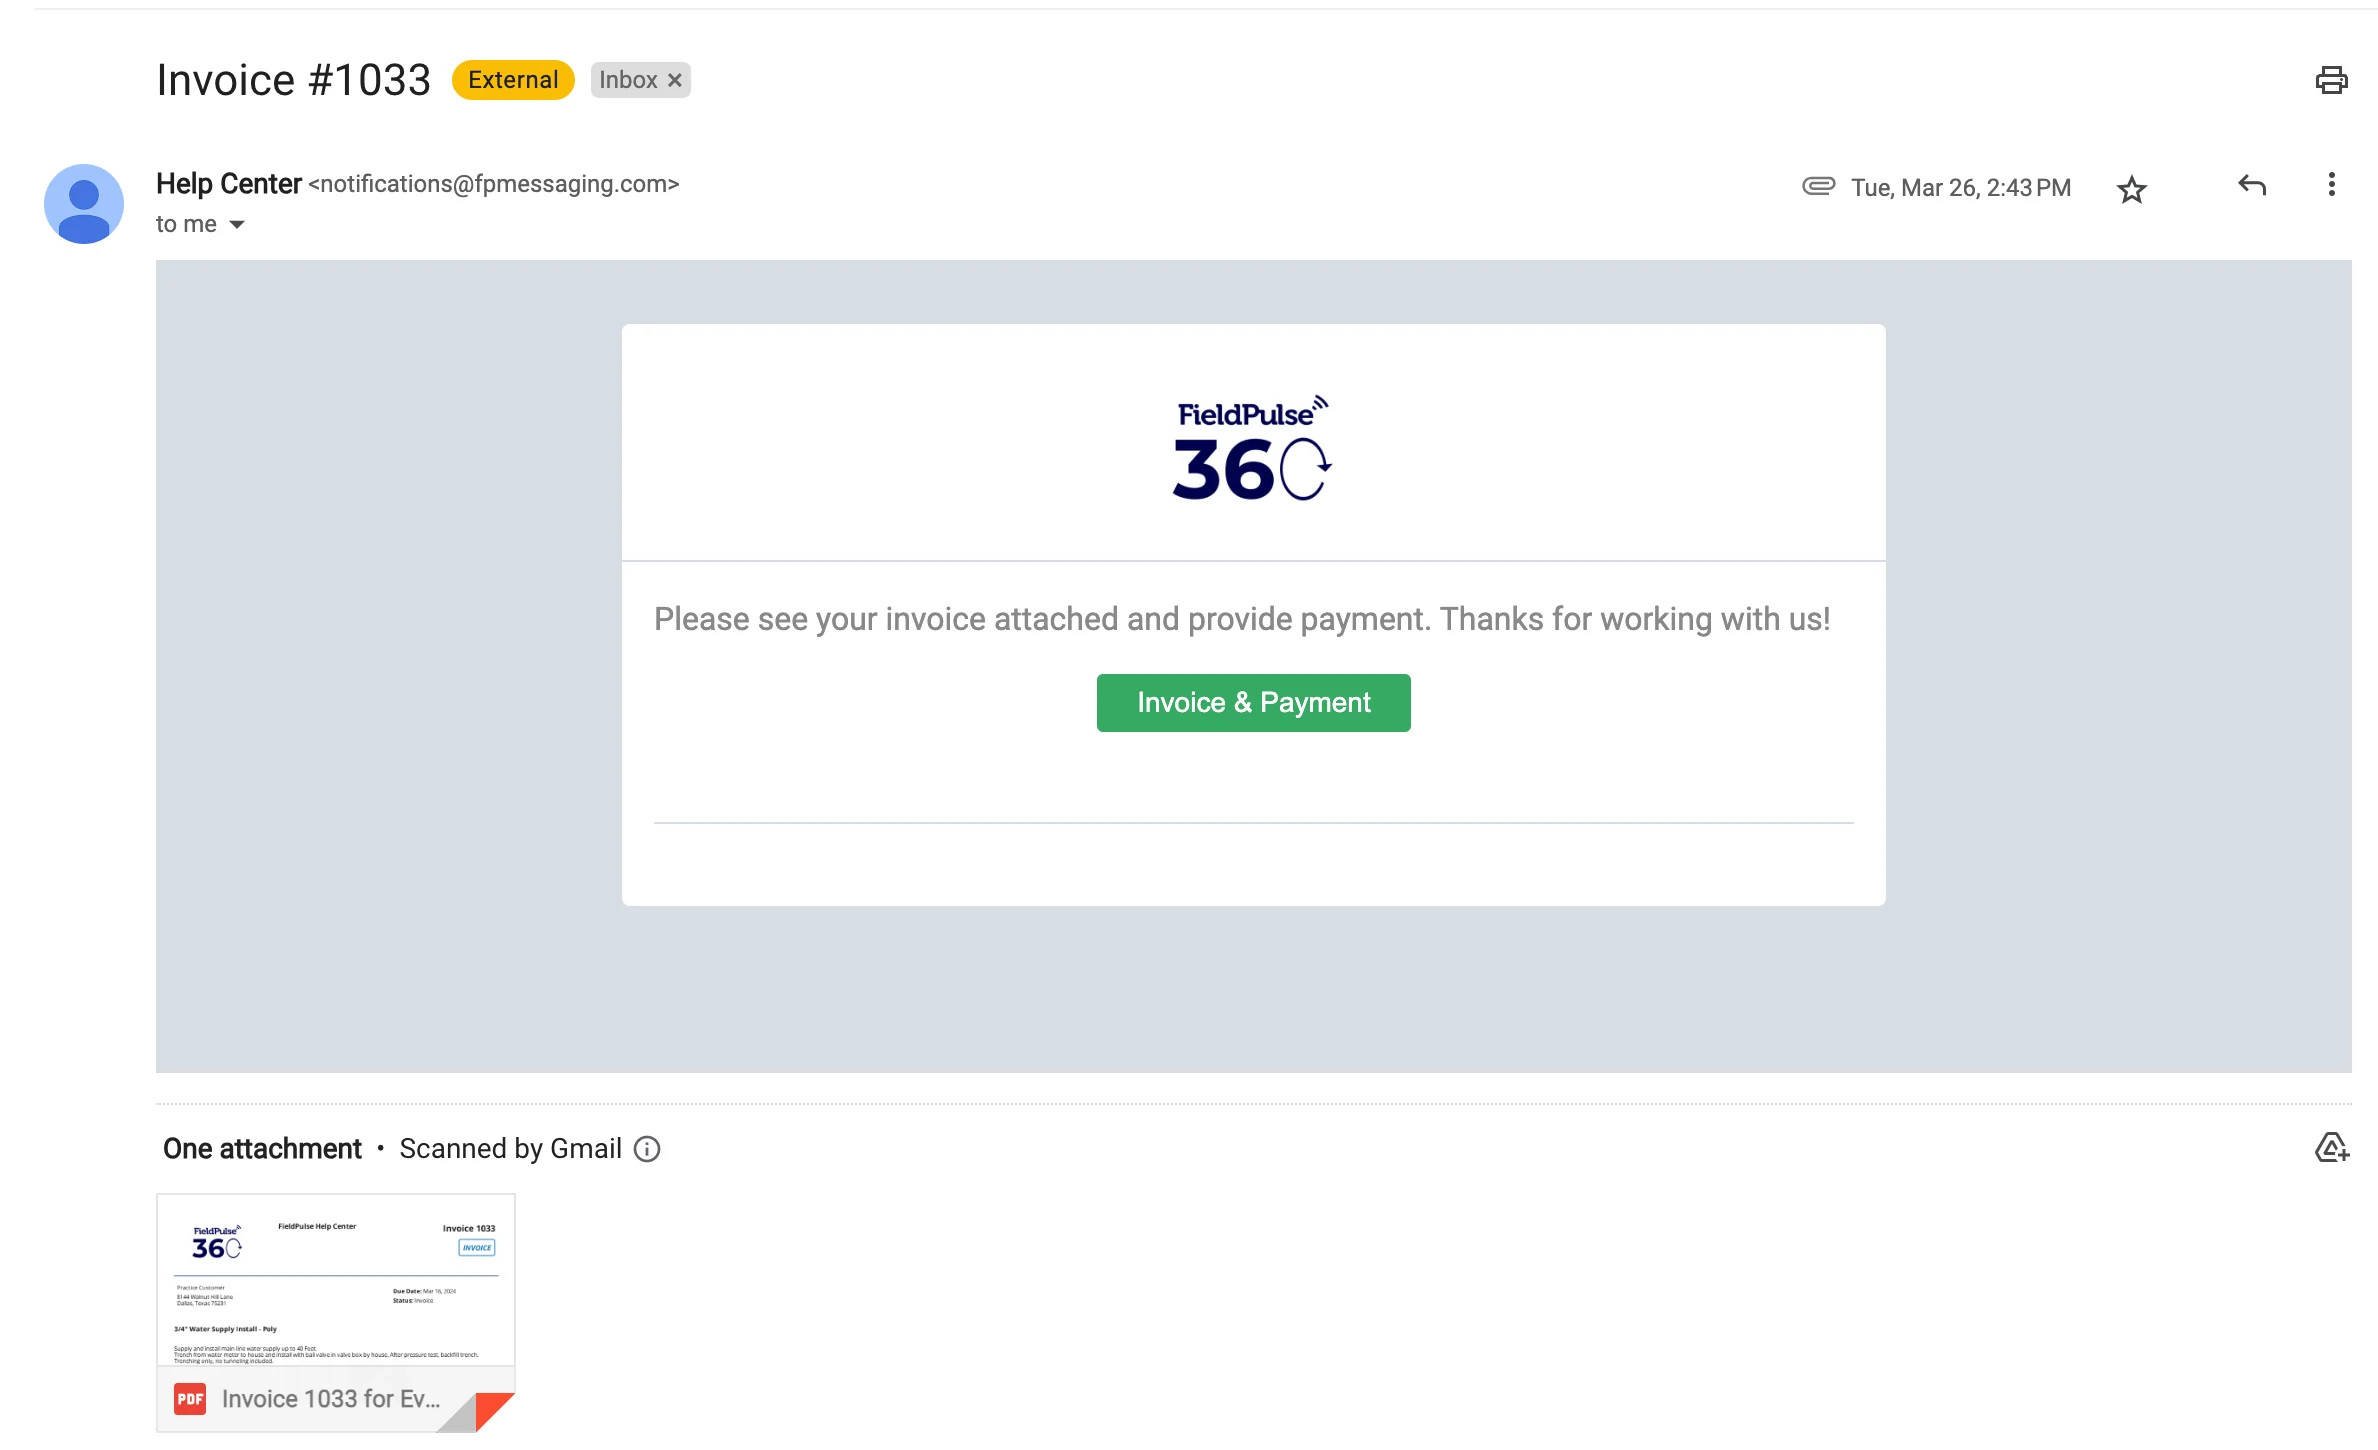
What Your Customer Sees
On Mobile: Field Experience
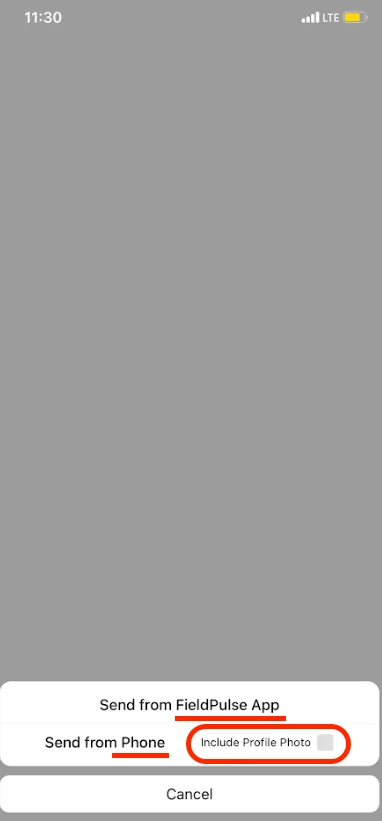
User Profile Photo Messages
Let your customers know who to expect! You can send the assigned user’s profile photo along with a customer communication SMS in the FieldPulse mobile app. This is available when sending SMS via your native phone, and can’t be used with automatic communication triggers at this time. When on the Customer record, select the green Actions button.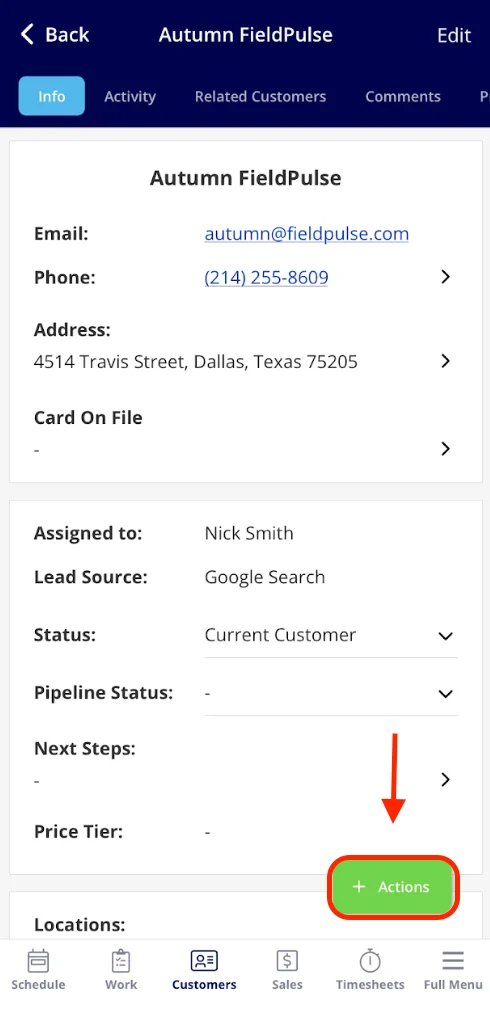
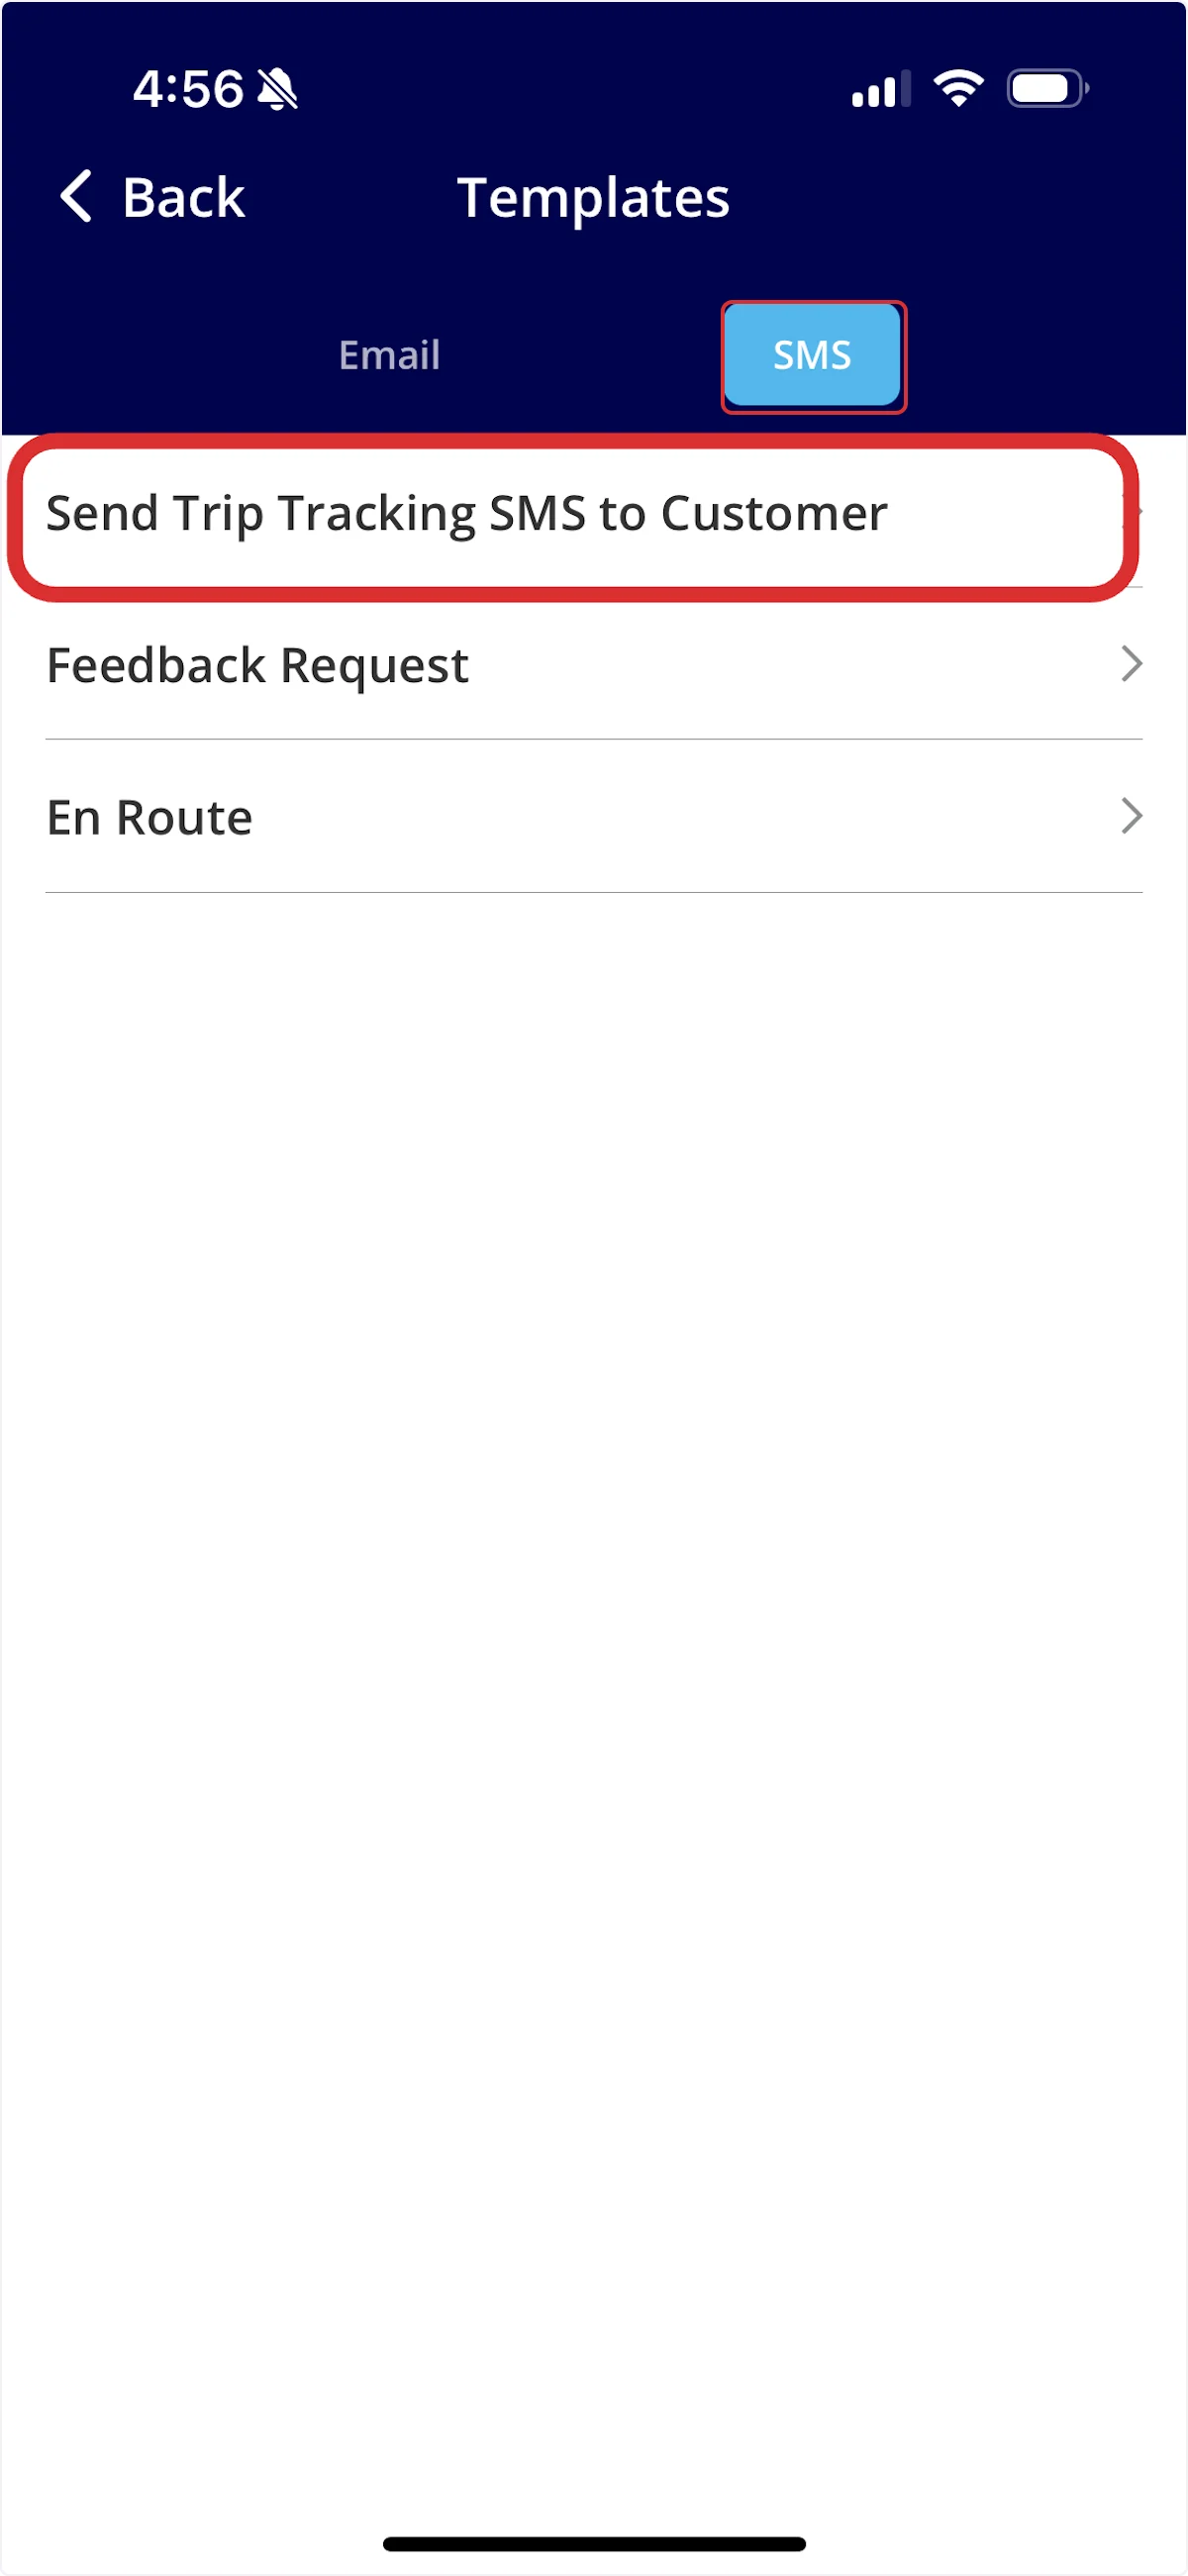
Trip Tracking Messages
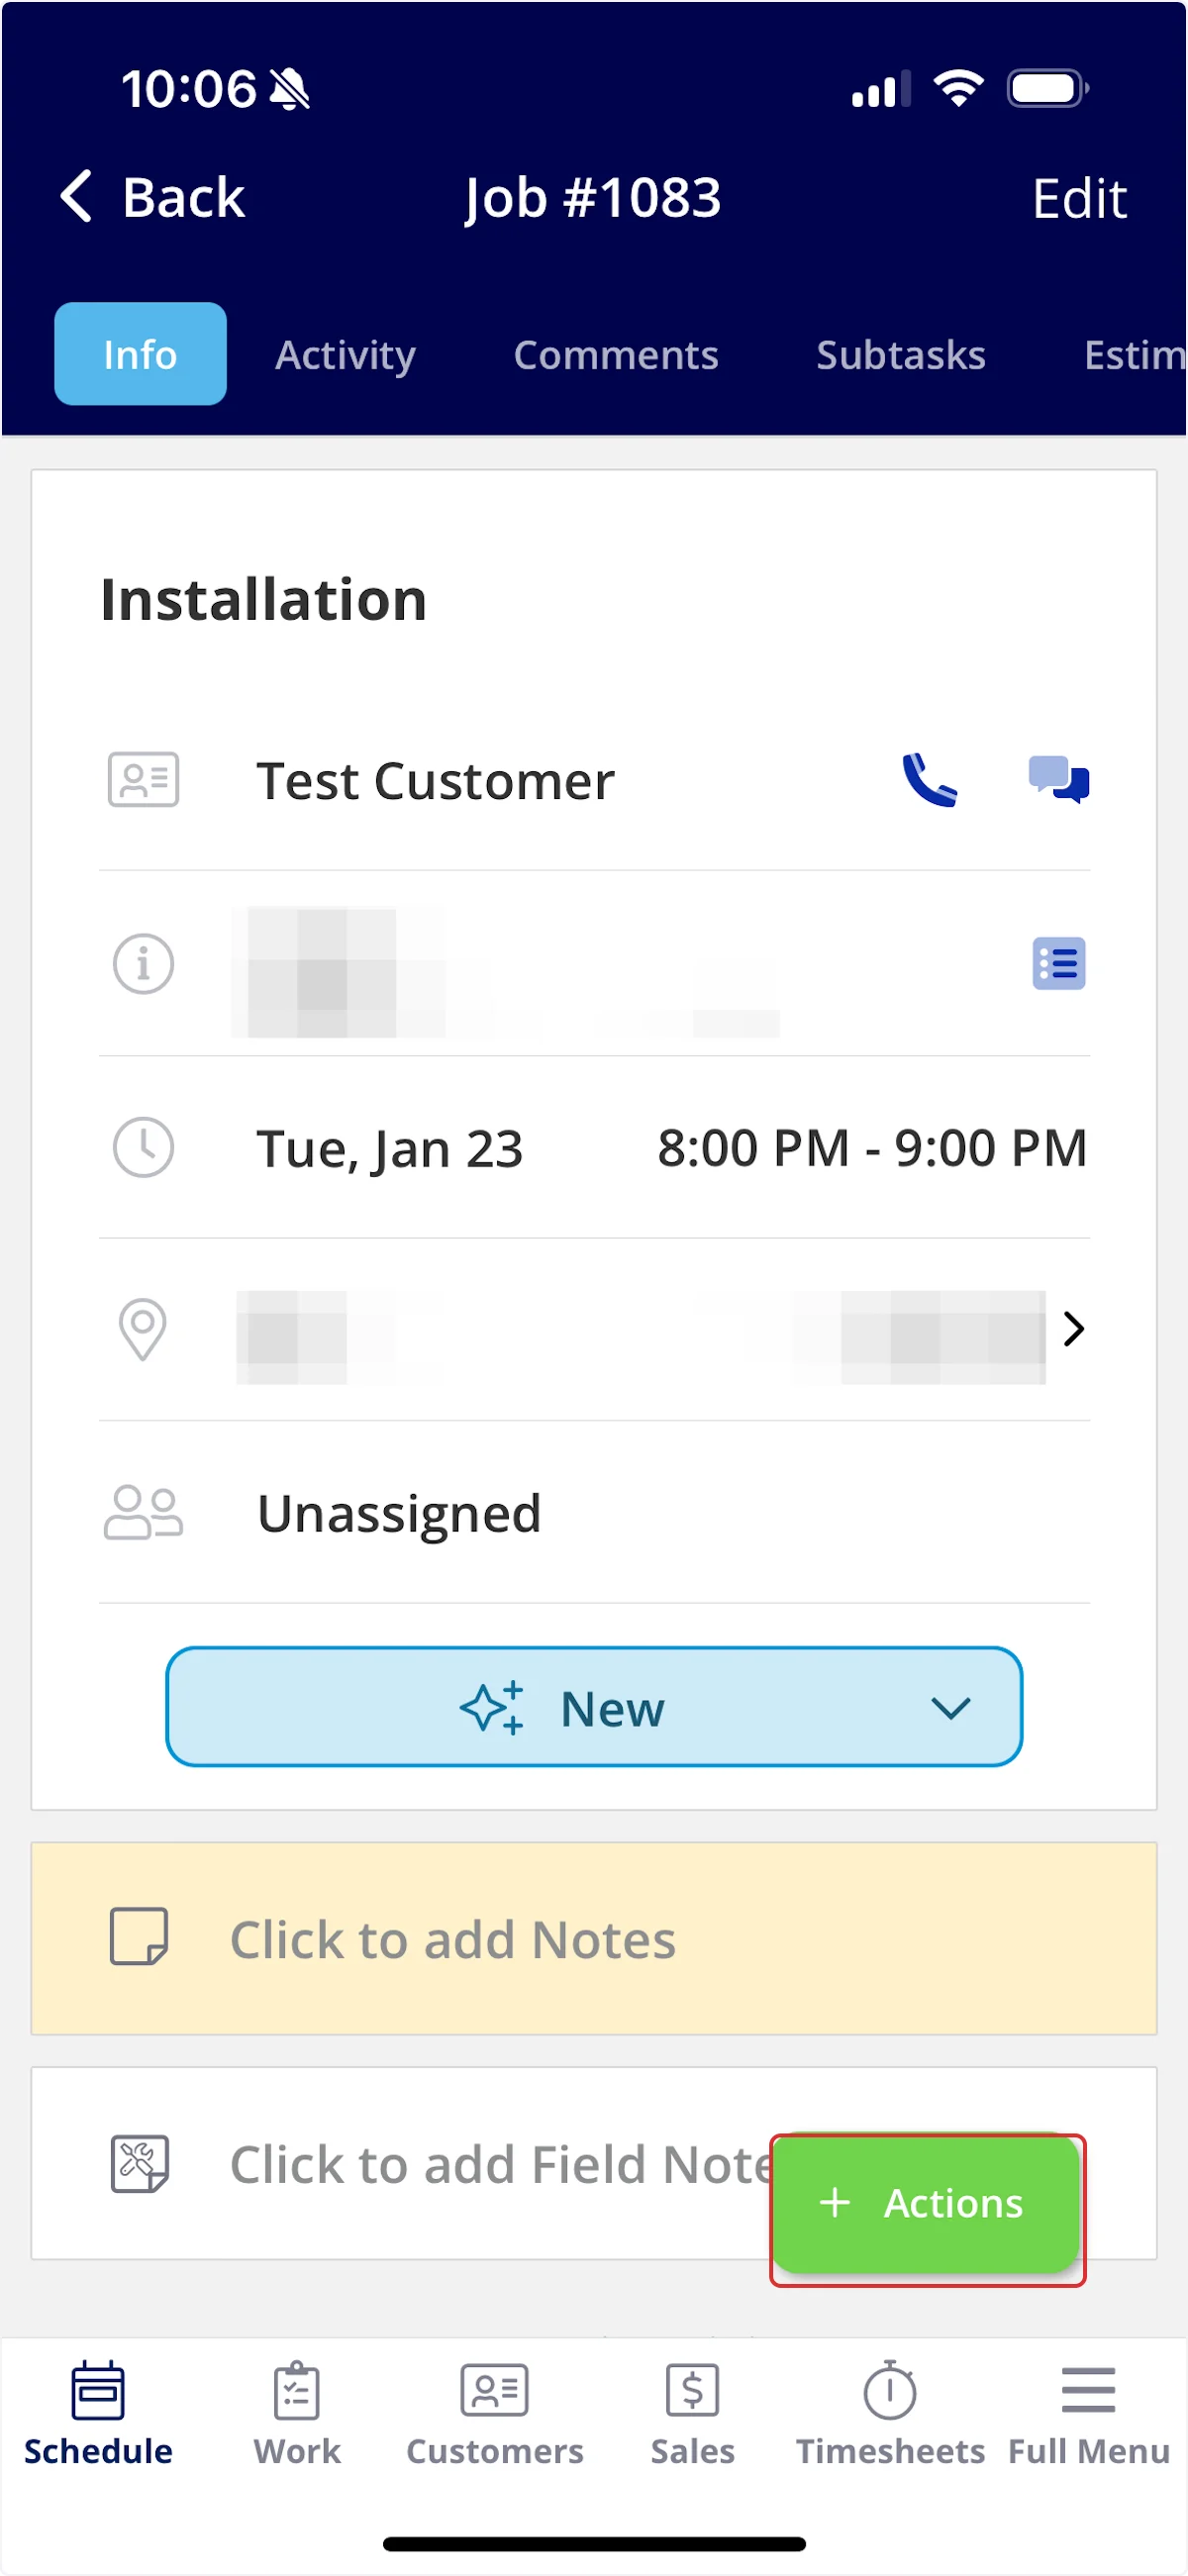
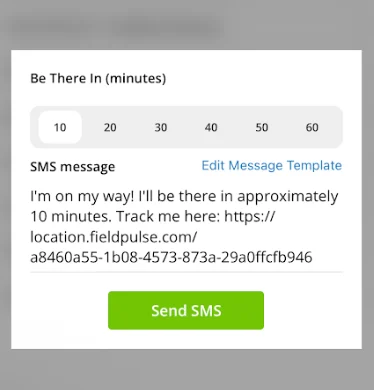
Did you know you can send a text to your customers when you’re on the way, sharing your real time vehicle location and ETA? To send a location tracking text, begin by clicking on the job you’re heading to.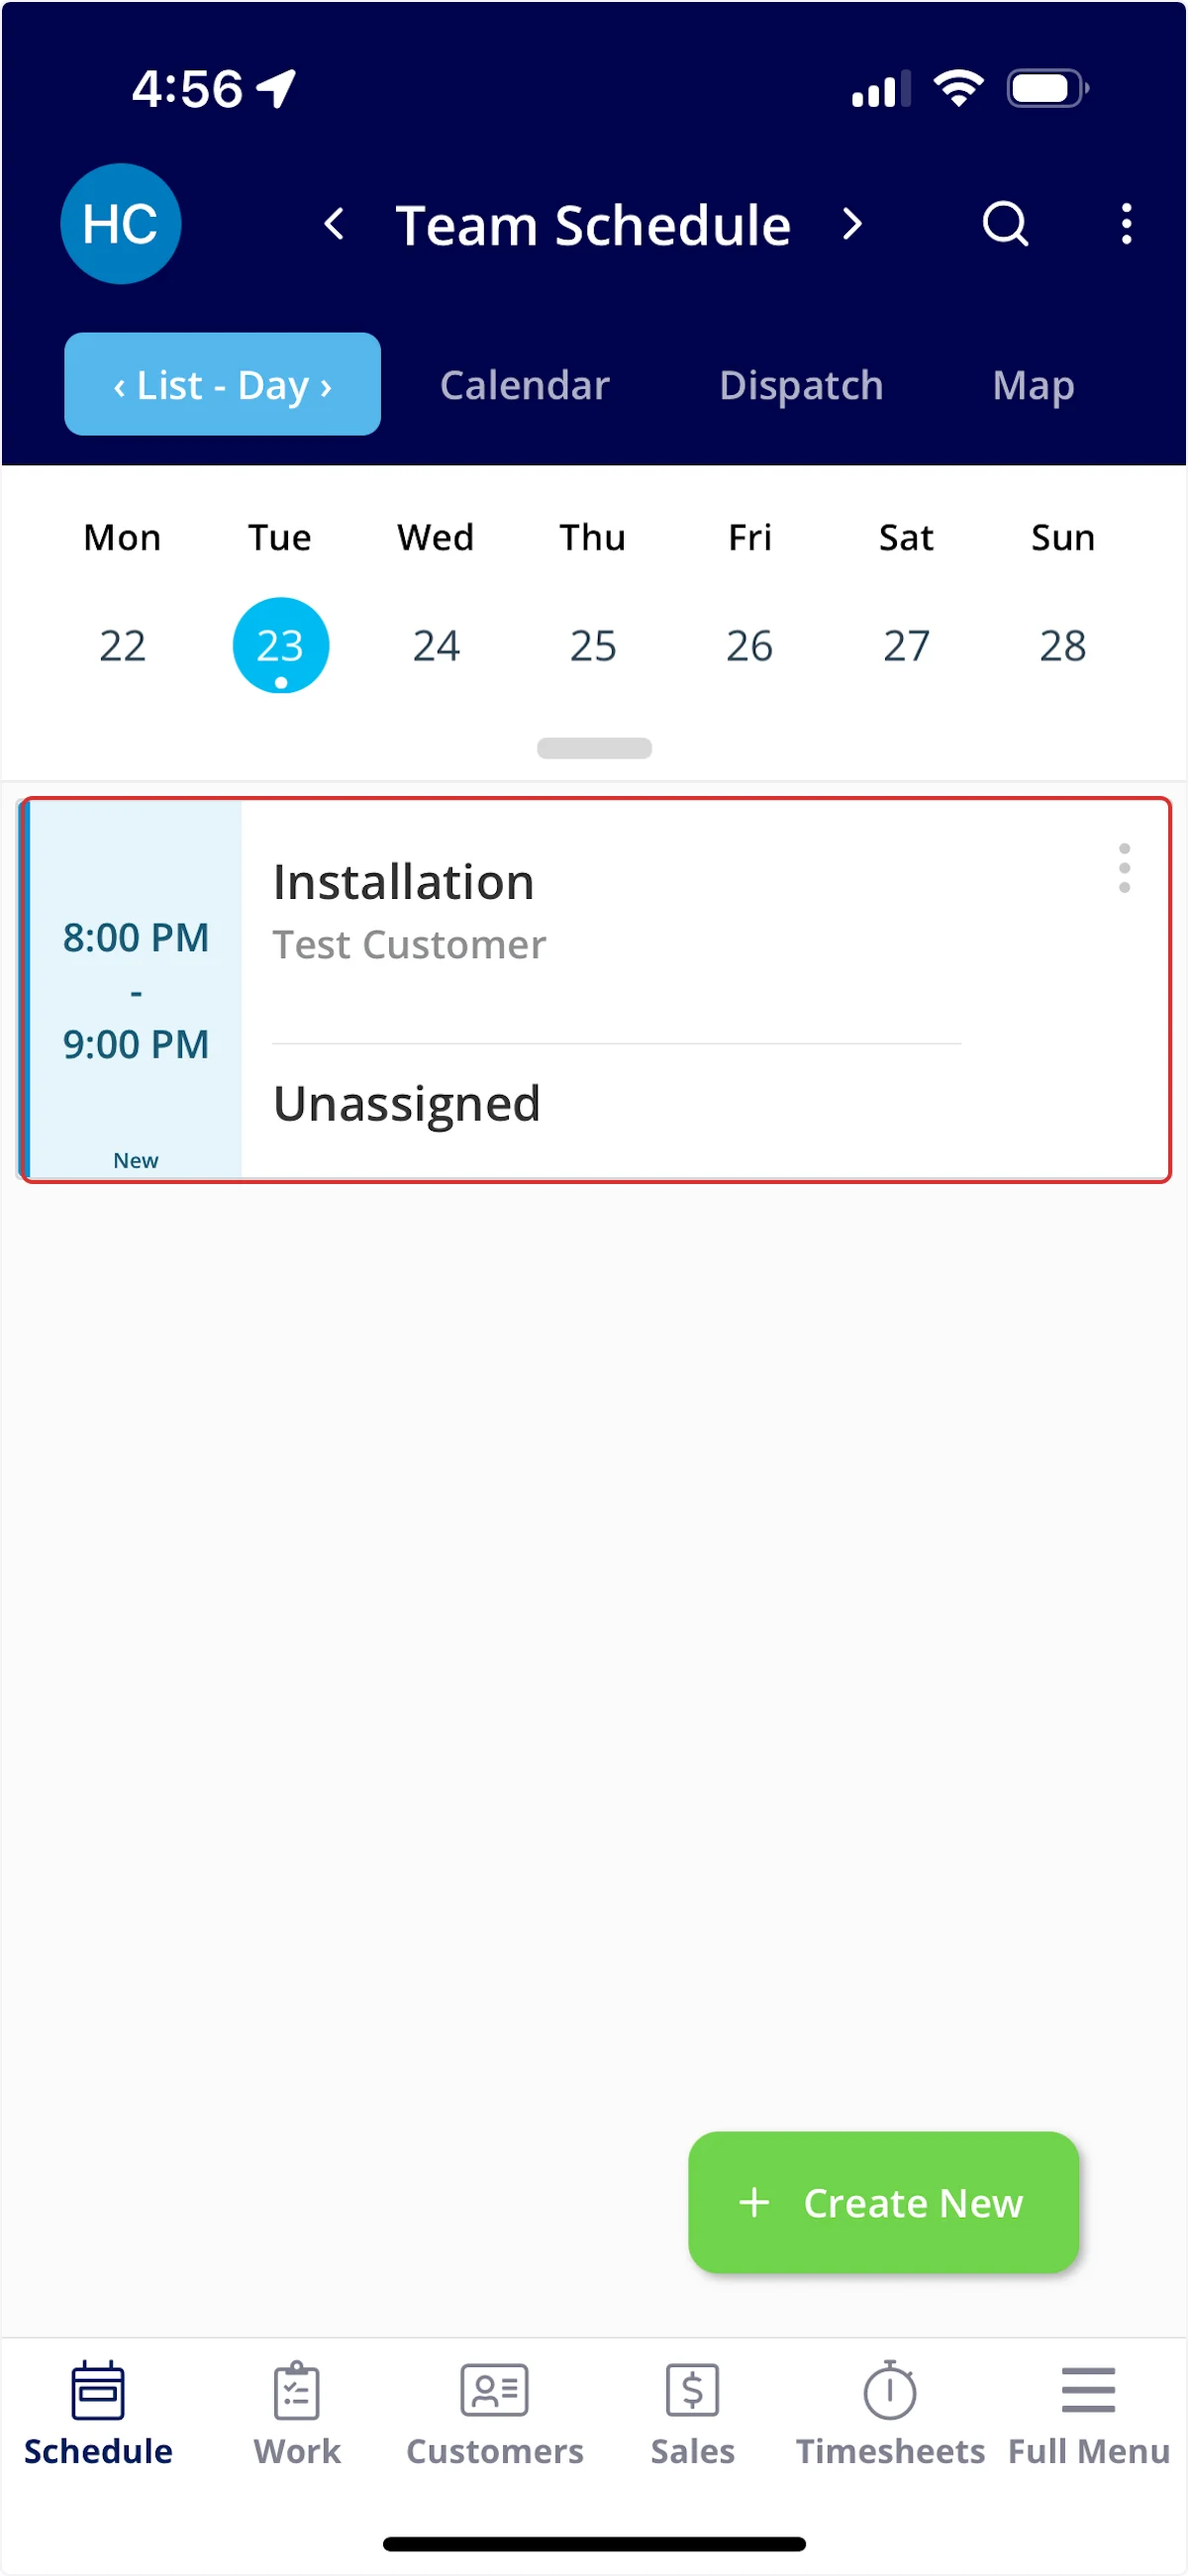
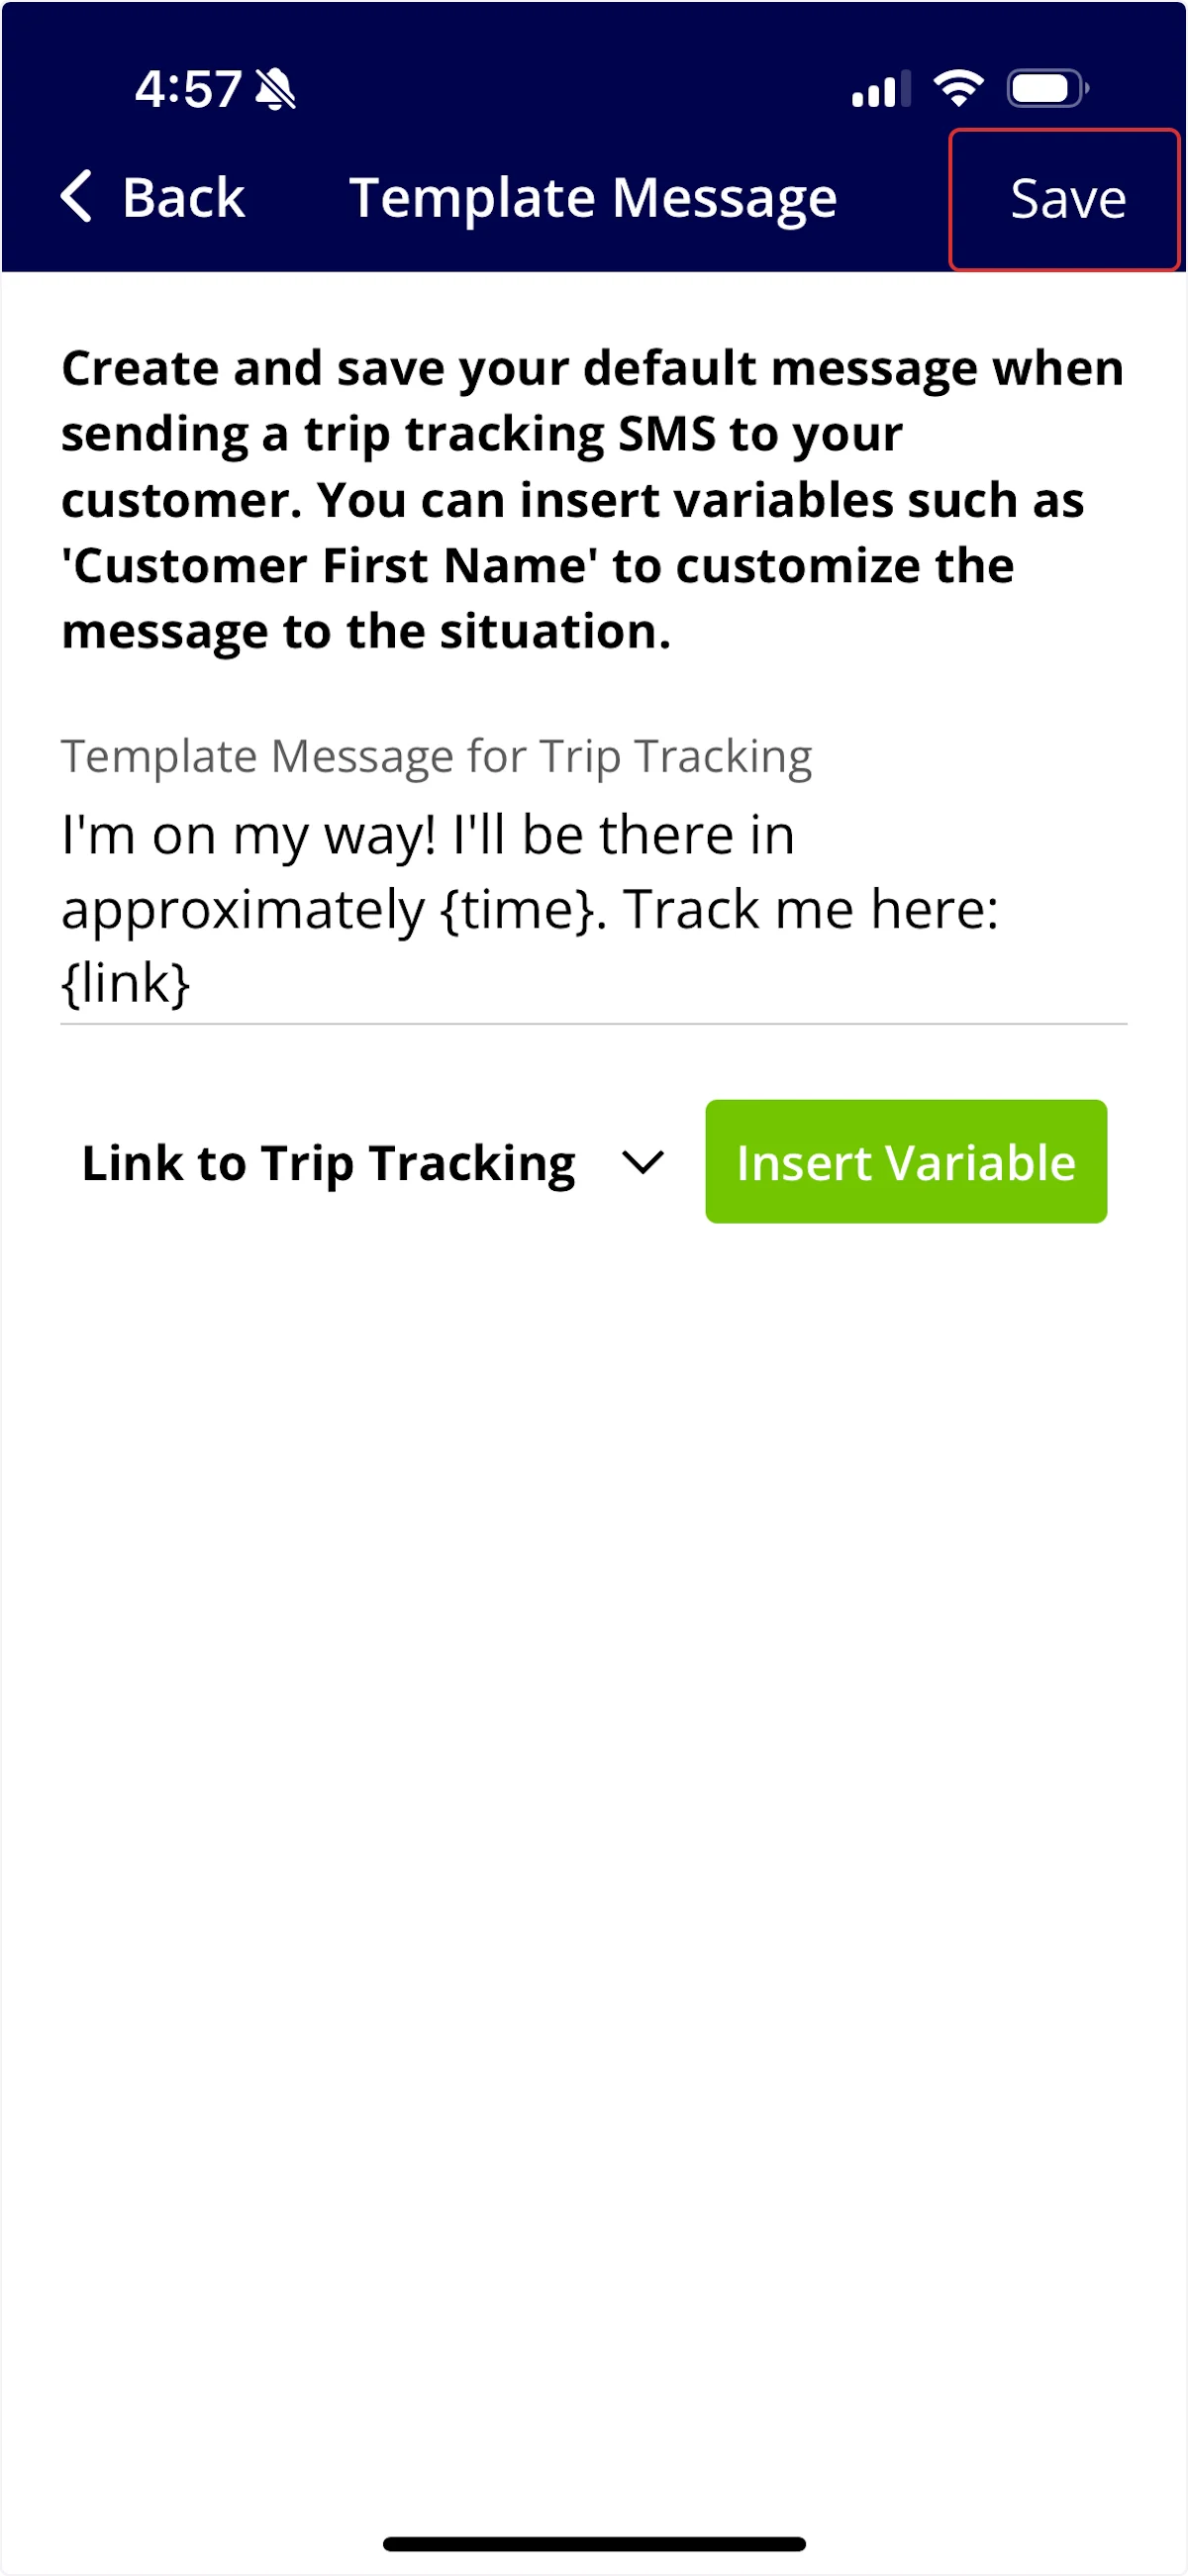
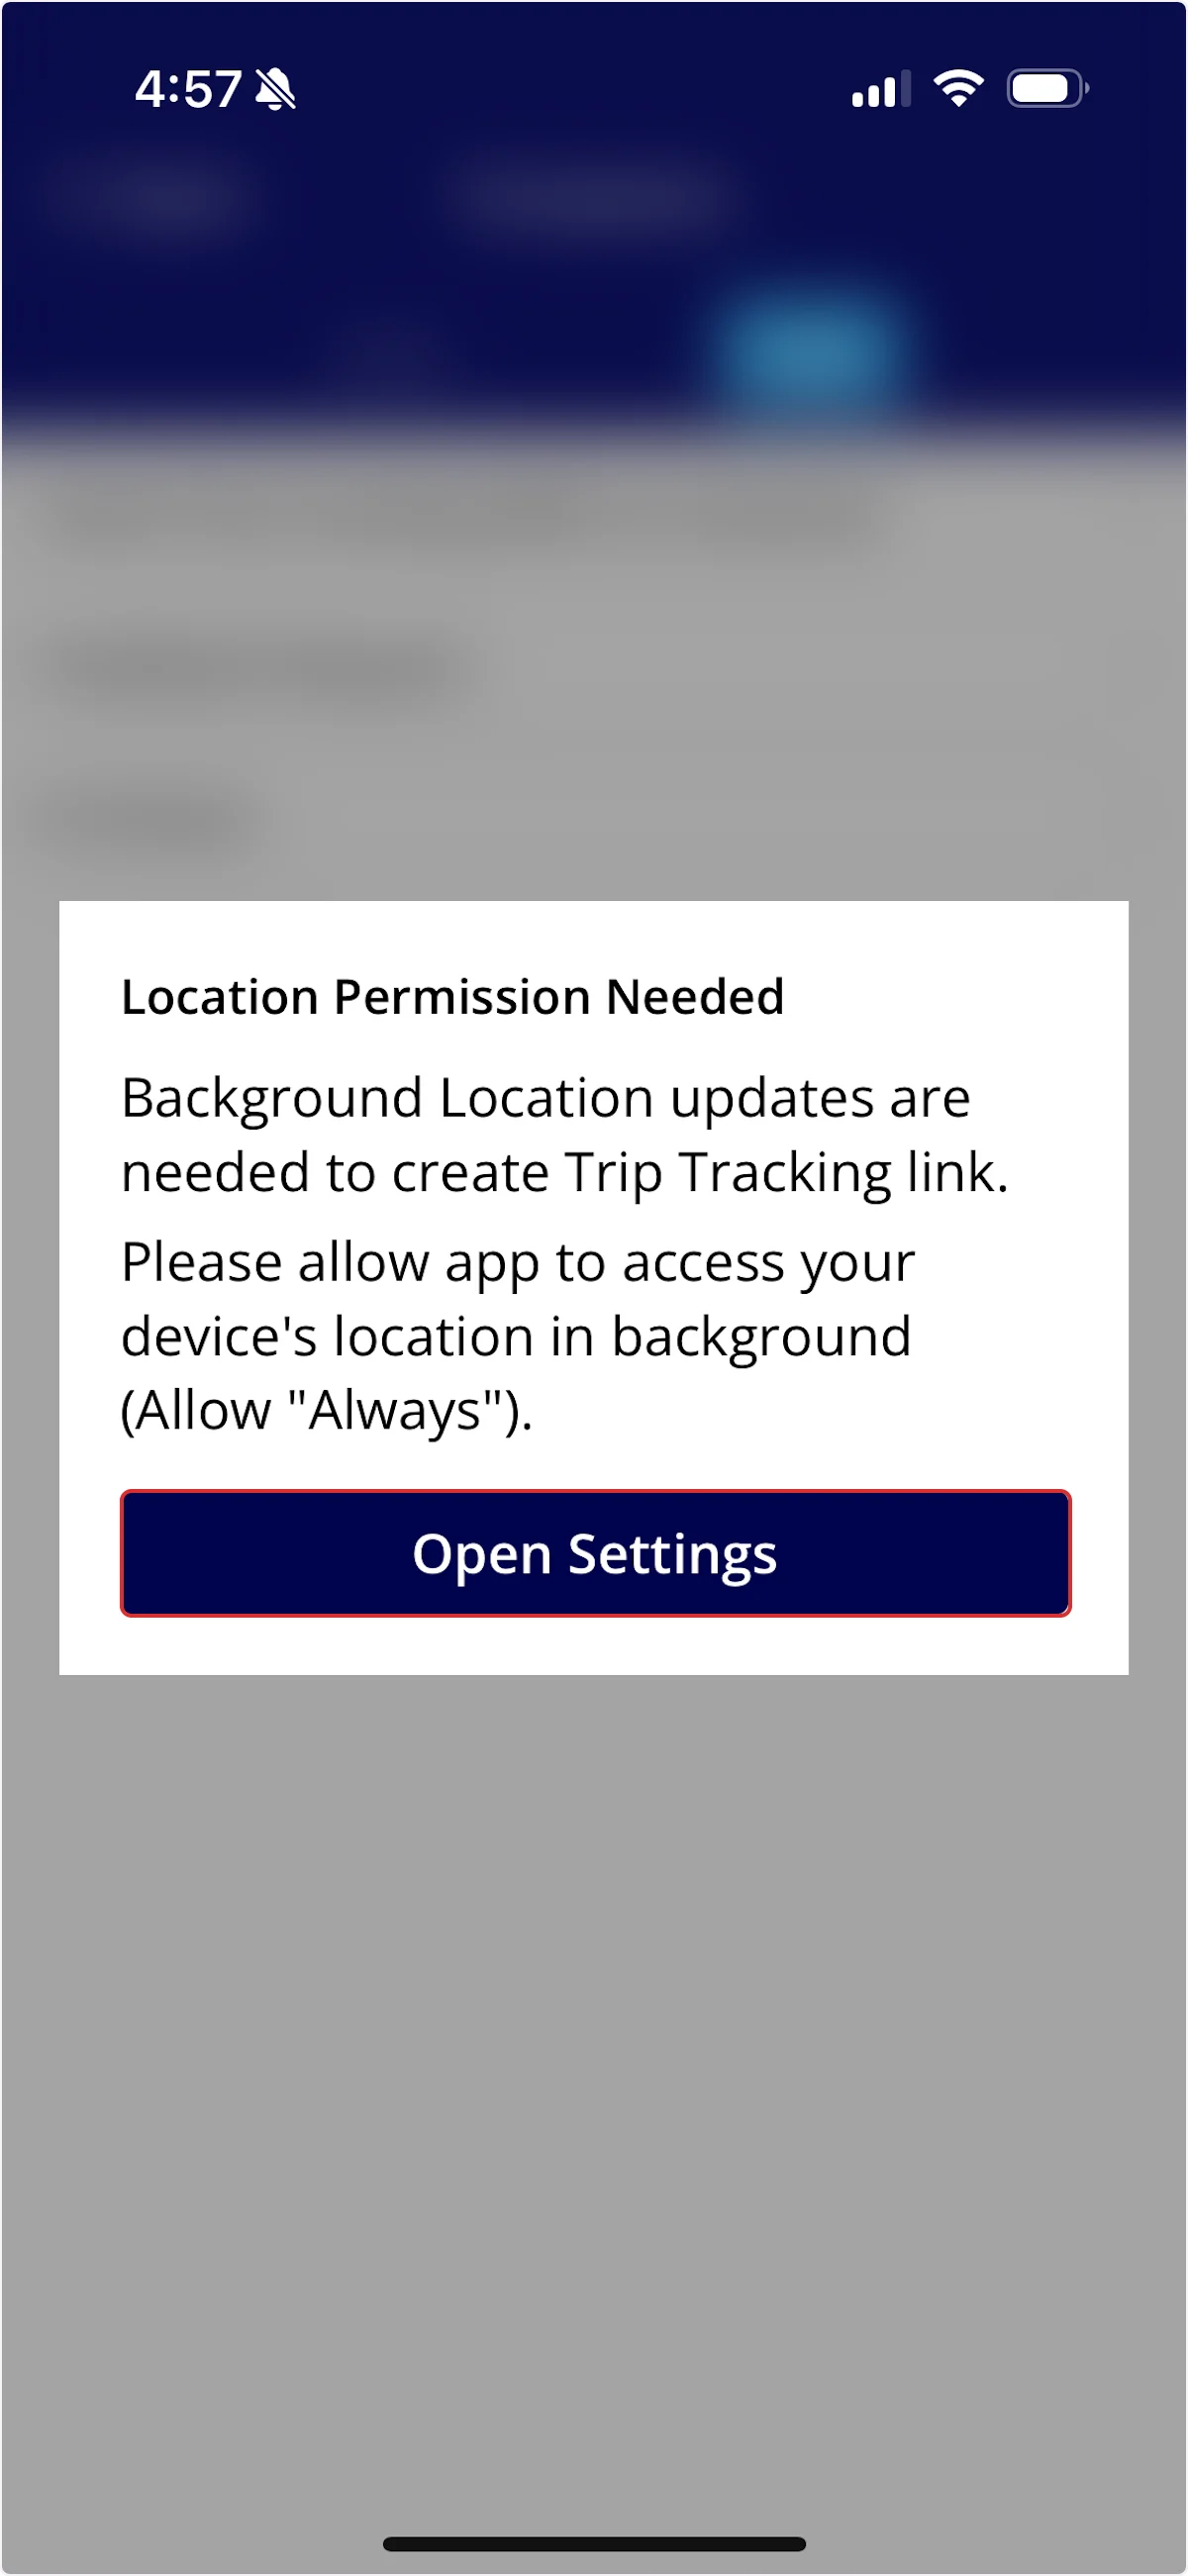
The live location tracking link will remain active for one hour after it is sent. This ensures that your privacy is protected while your team is on the move throughout the day.
Please Note: Trip Tracking Messages cannot be associated with Automatic Triggers. They must be sent out manually.
Please Note: Trip Tracking Messages cannot be associated with Automatic Triggers. They must be sent out manually.
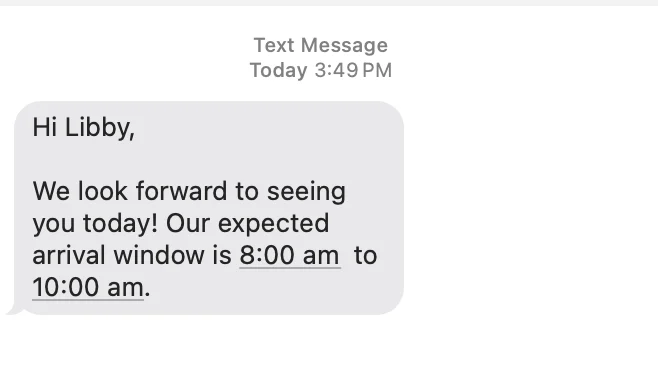
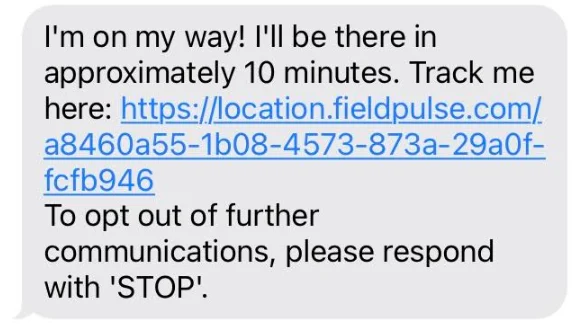
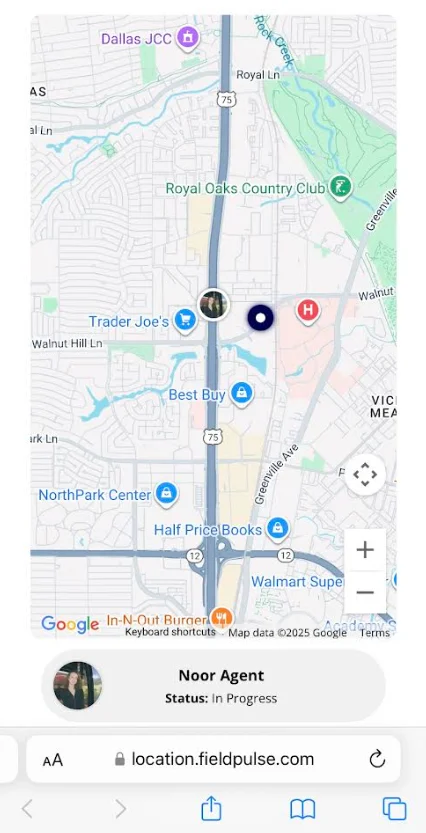
What Your Customer Sees
Example trip tracking text:
Example trip tracking map:
FAQs
What time do communications send from FieldPulse to my customers? For any communications that are date-dependent (not time/hour-dependent), they are sent at 8:00 AM in the timezone you have set up in your FieldPulse account.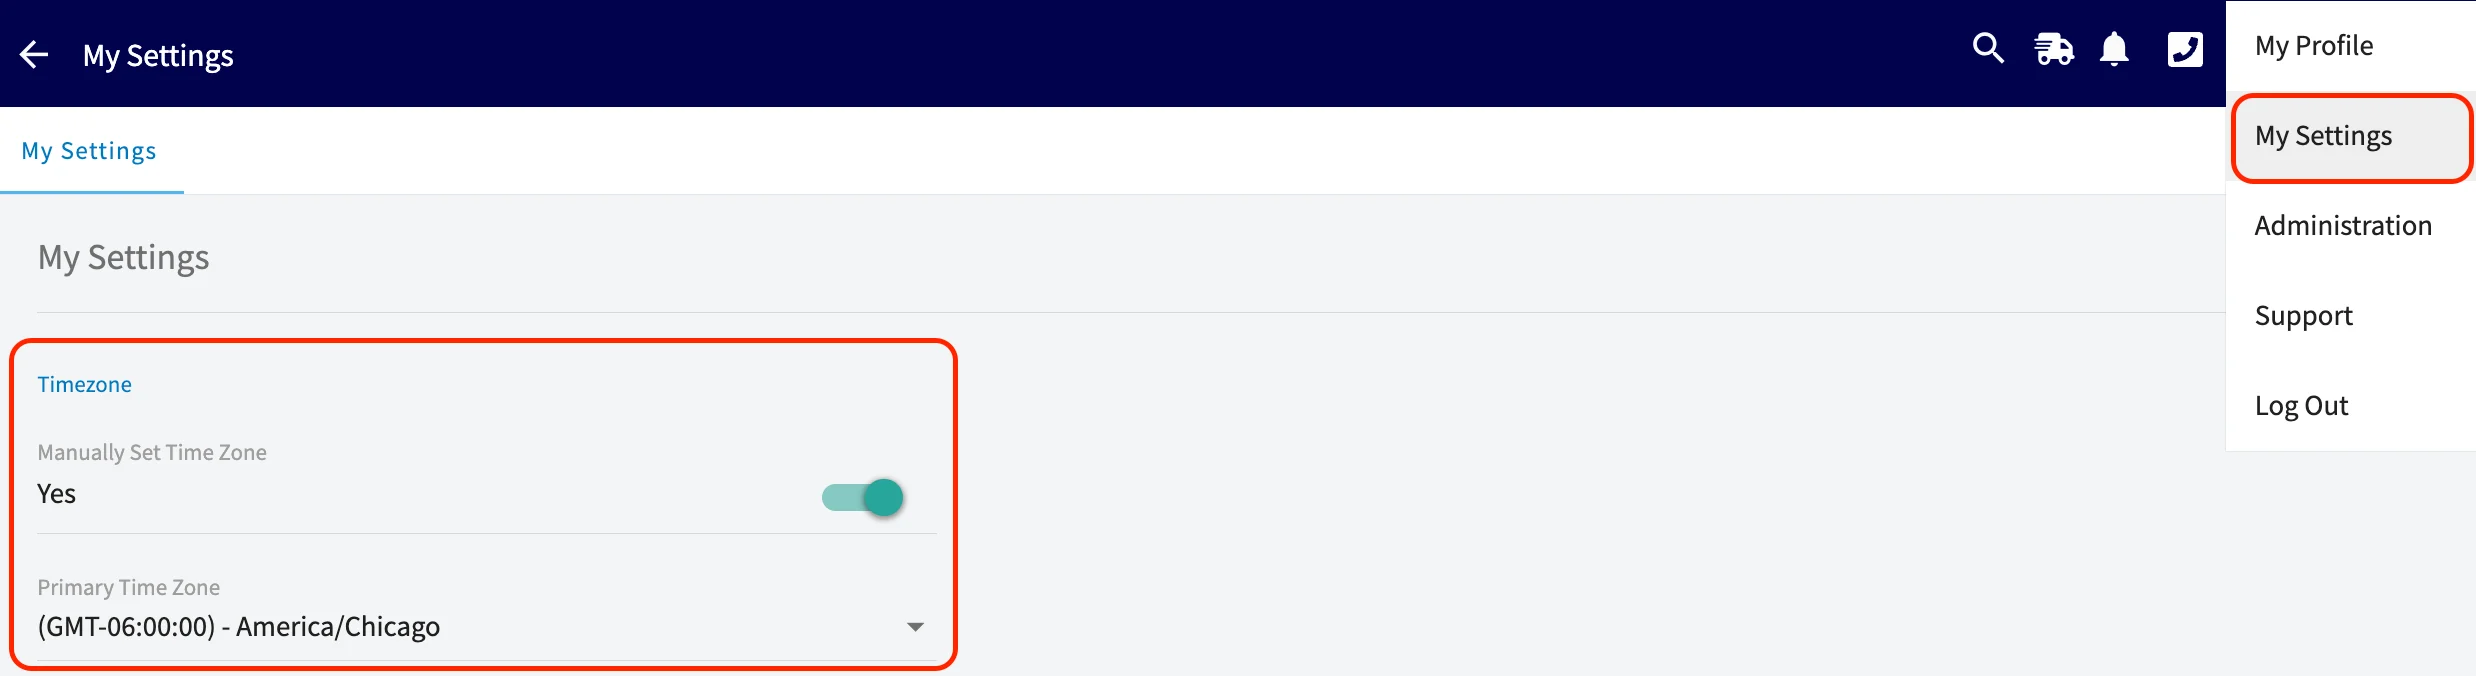
- If the trigger is 3 days after a job is moved to the Completed status, the message should send at 8:00 AM in your timezone on that day.
- If the trigger is 30 hours after a job is moved to the Completed status, the message should send exactly 30 hours after the job entered the Completed status, based on the specific completion time of that job.