Enabling Booking Portal
To begin using Booking Portal, you’ll first need to enable it. Start by clicking on Company Settings and selecting Features & Plugins. Navigate to Booking Portal and select Enable. Now you’re ready to begin setting up your booking portal!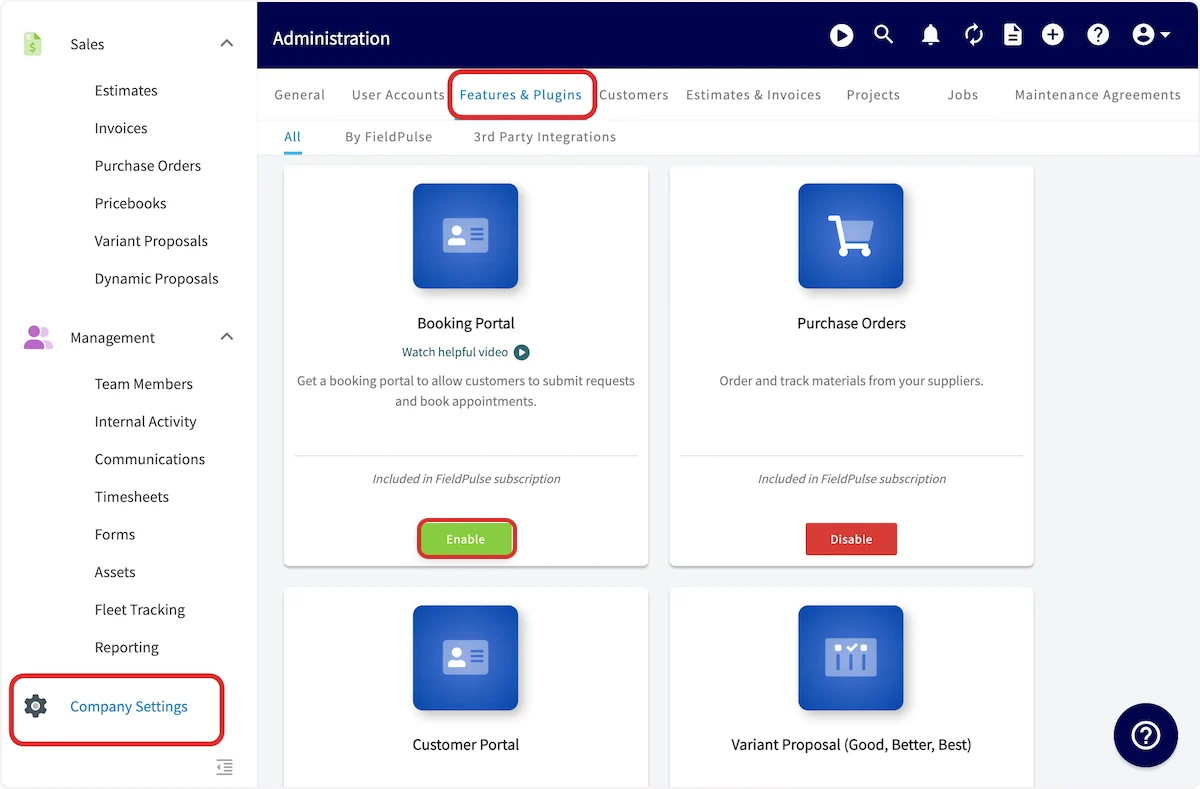
Setting Up Booking Portal
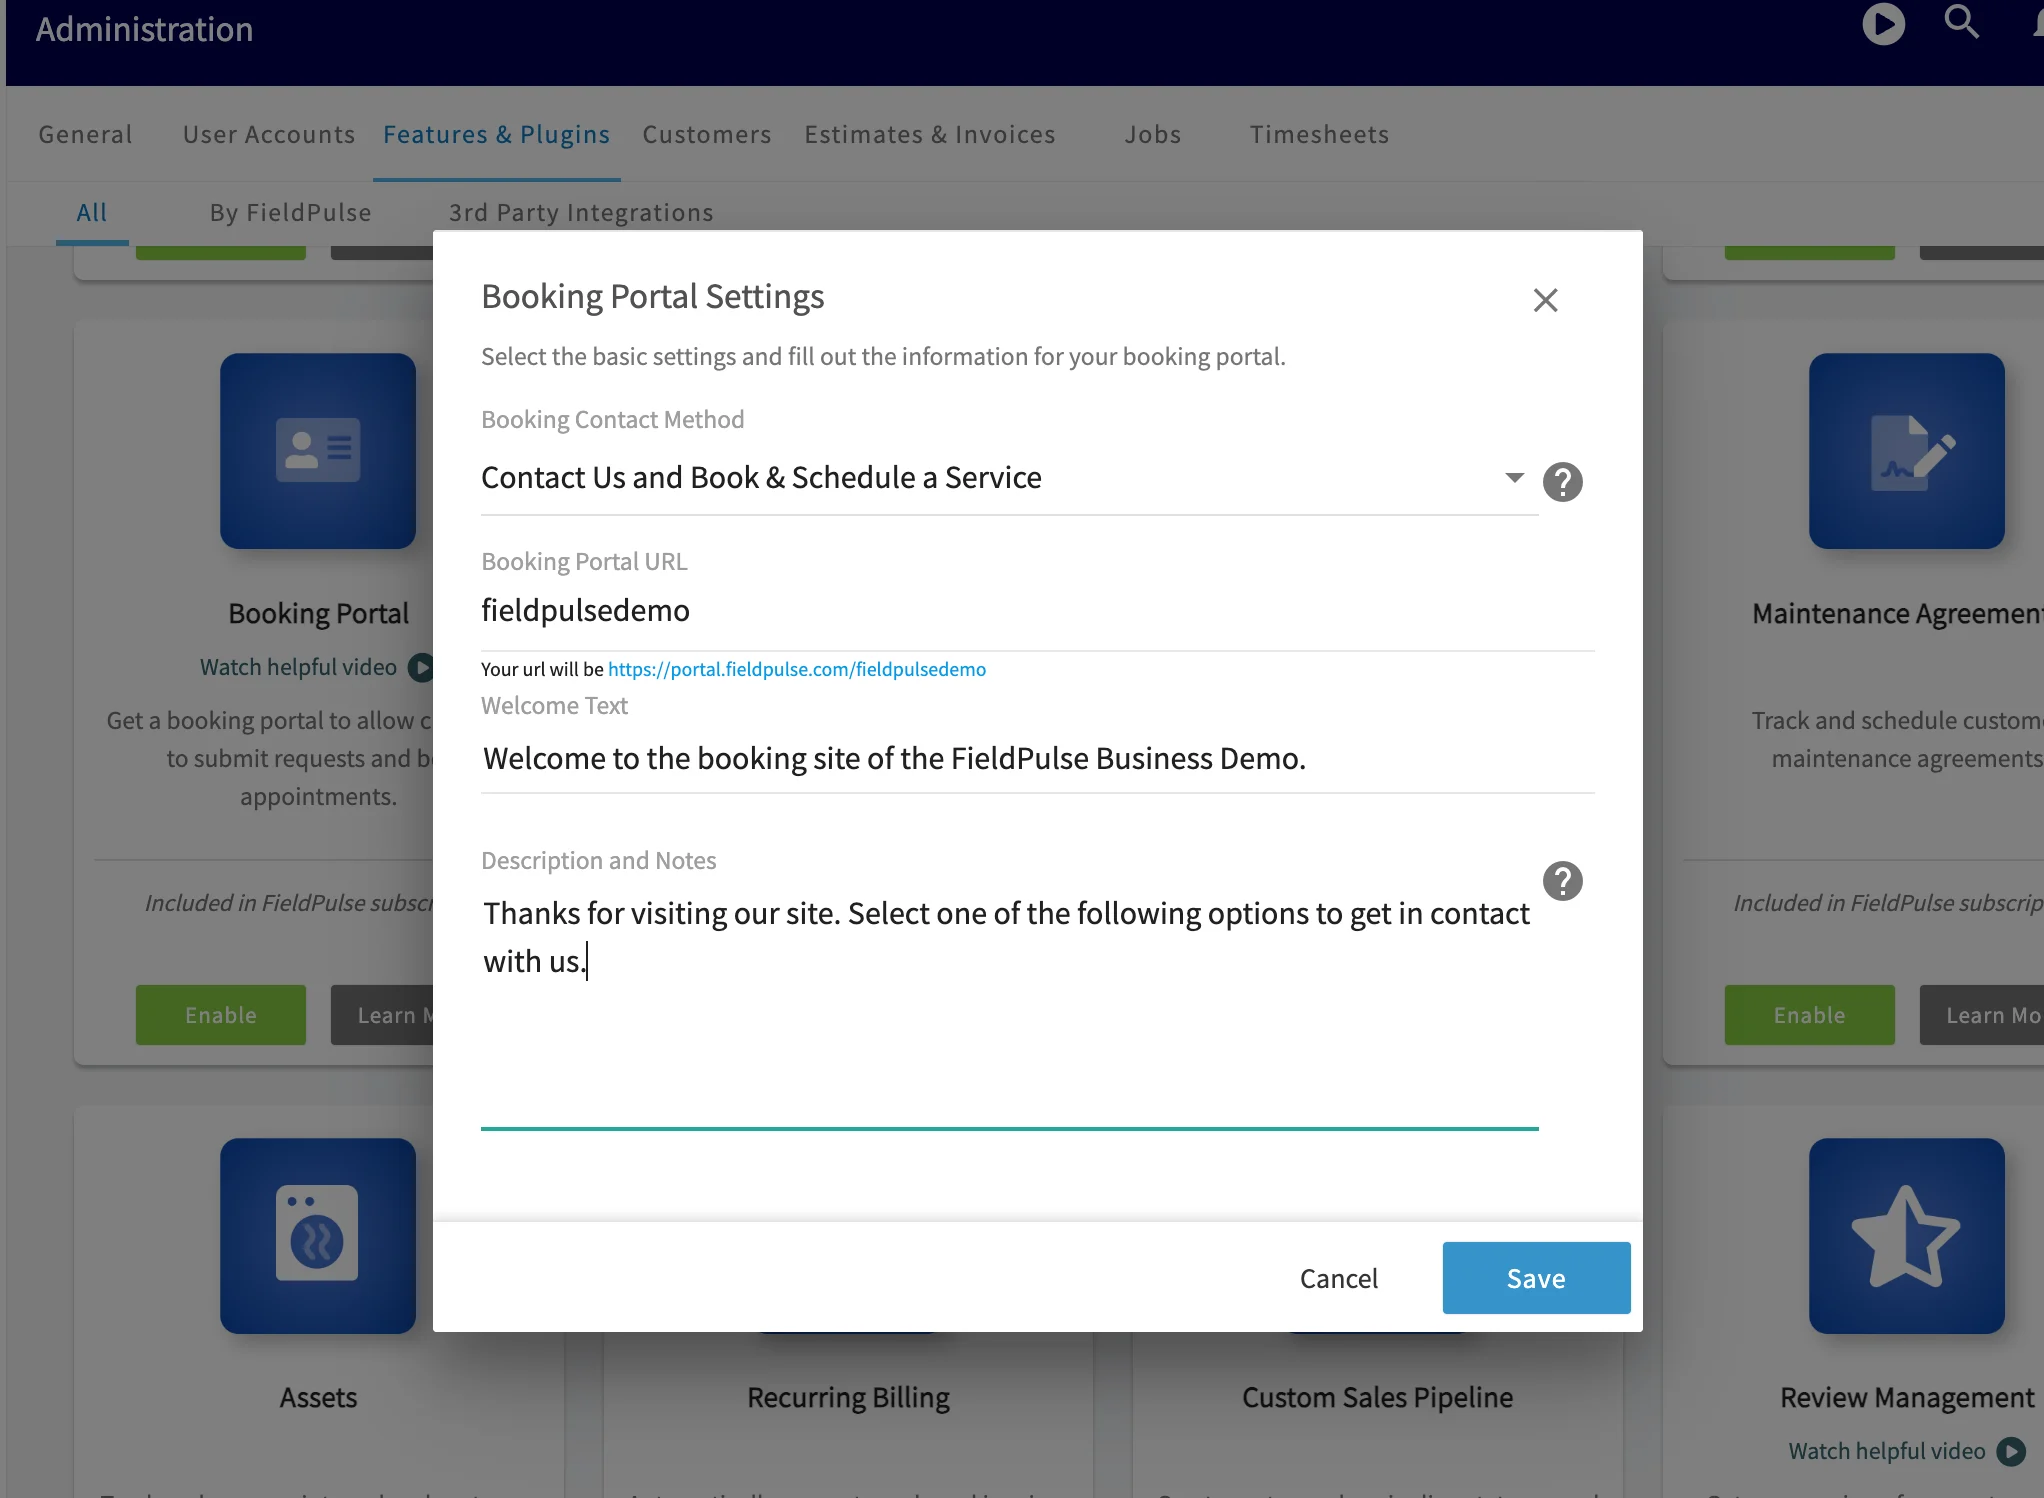
You will be prompted to customize your booking portal settings. Begin by selecting your booking contact method:- Contact Us Only: allows customers to fill out a simple contact form that is sent to you.
- Contact Us and Book a Service: allows customers to select a specific service and submit a request without giving them the option to select a specific time. This is helpful if you want to review their request prior scheduling a time.
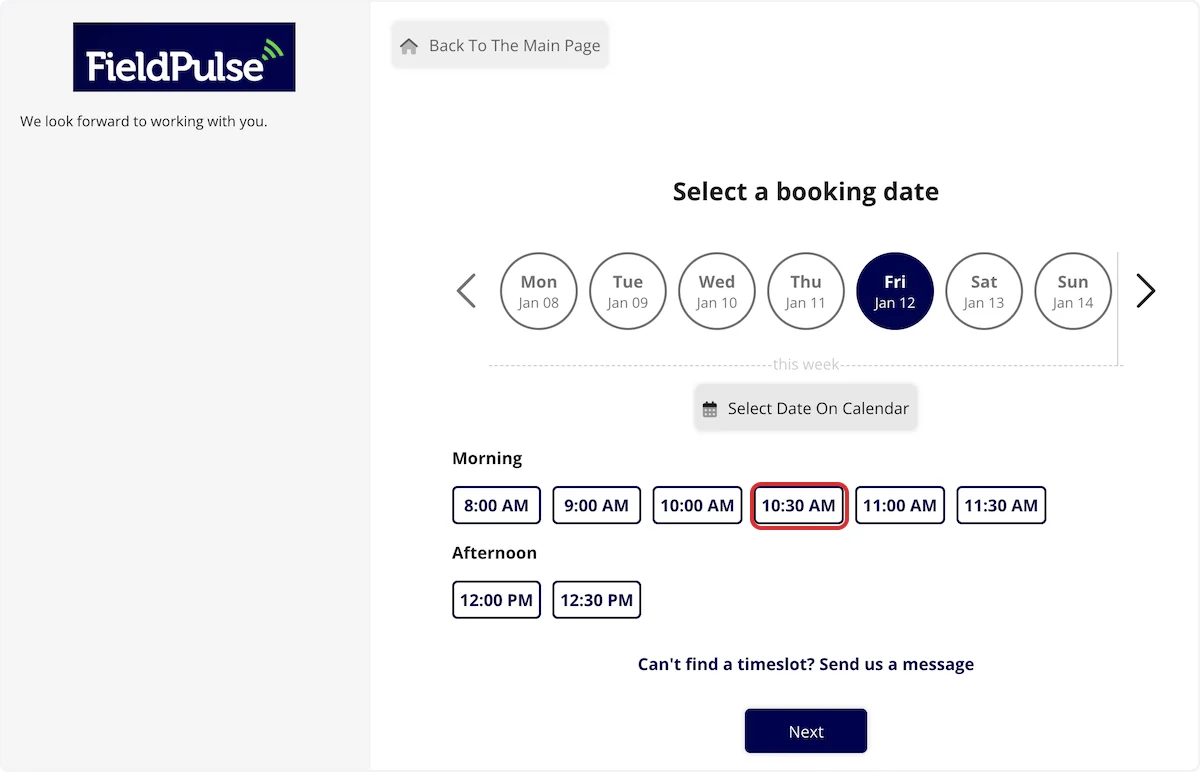
- Contact Us and Book & Schedule a Service: allows customers to select a service and choose a specific time.
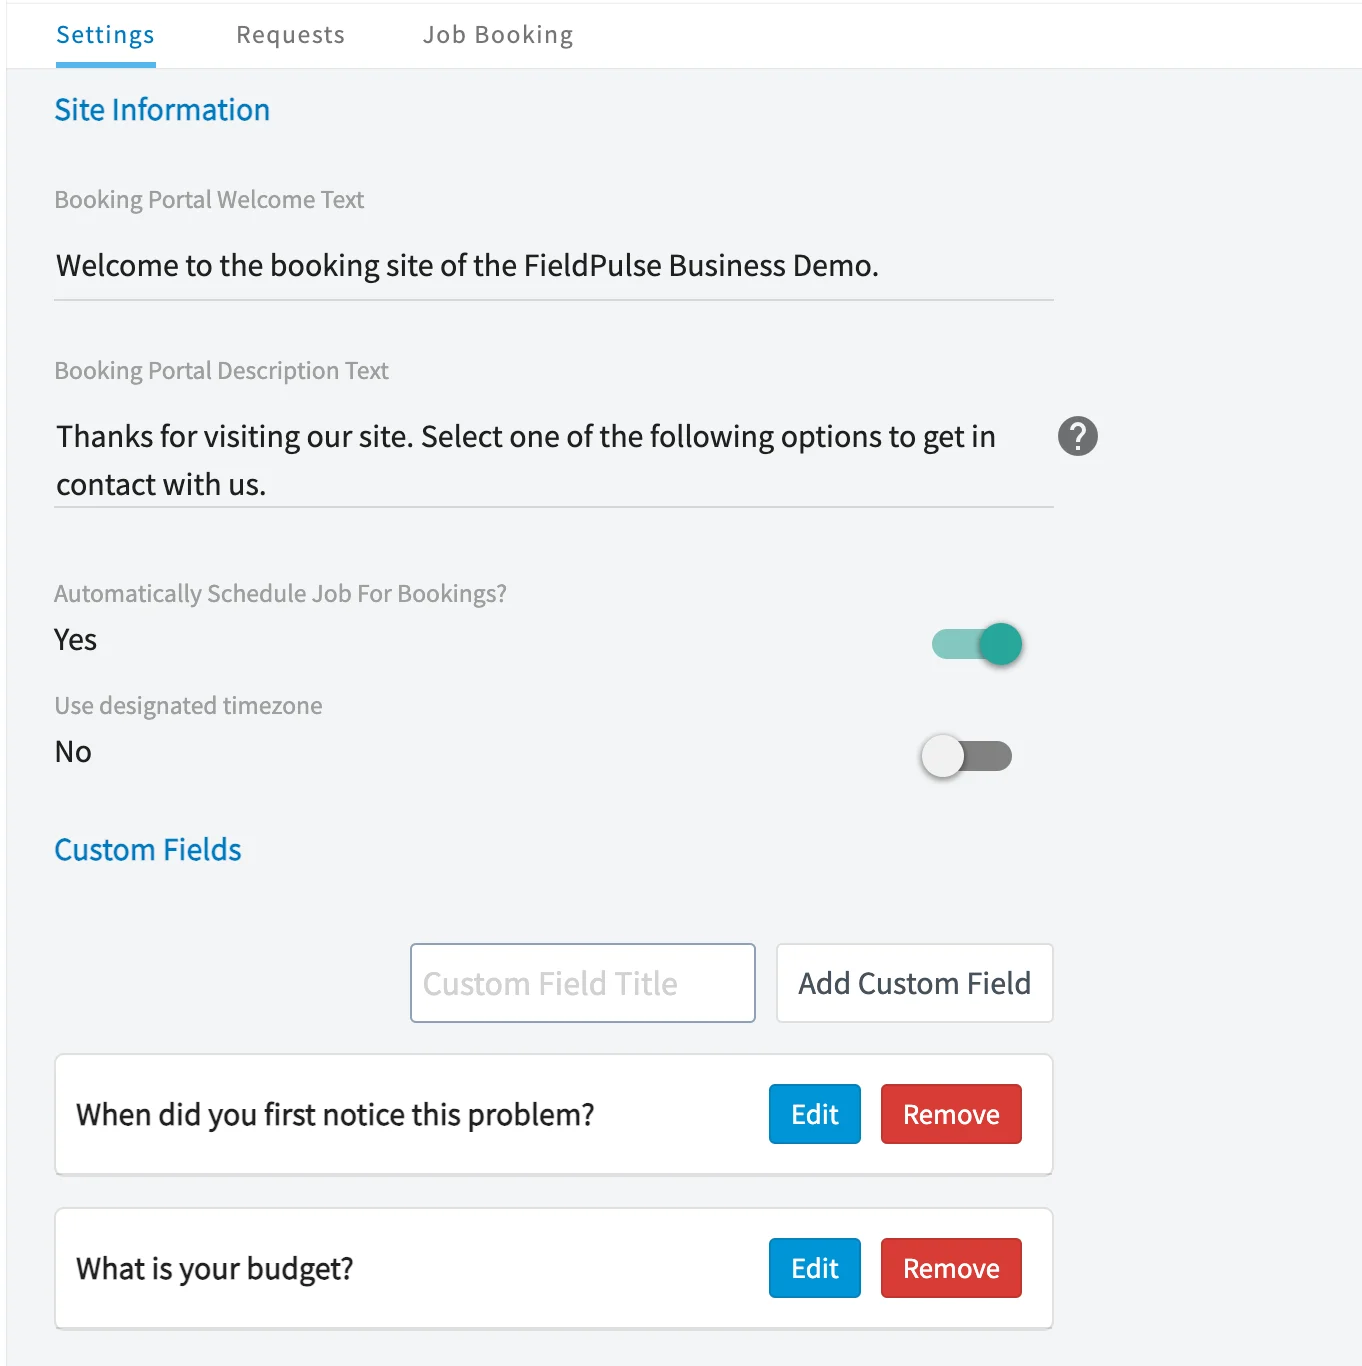
- Automatically Schedule a Job for Booking: this option controls whether or not jobs requested through the booking portal get automatically booked on your schedule. If left off, you will have to review requests and approve each one manually. If using our Smart Scheduler, we recommend turning this on.
- Use a Designated Timezone: use this option if you want all times displayed in a specific timezone, regardless of the customer’s location.
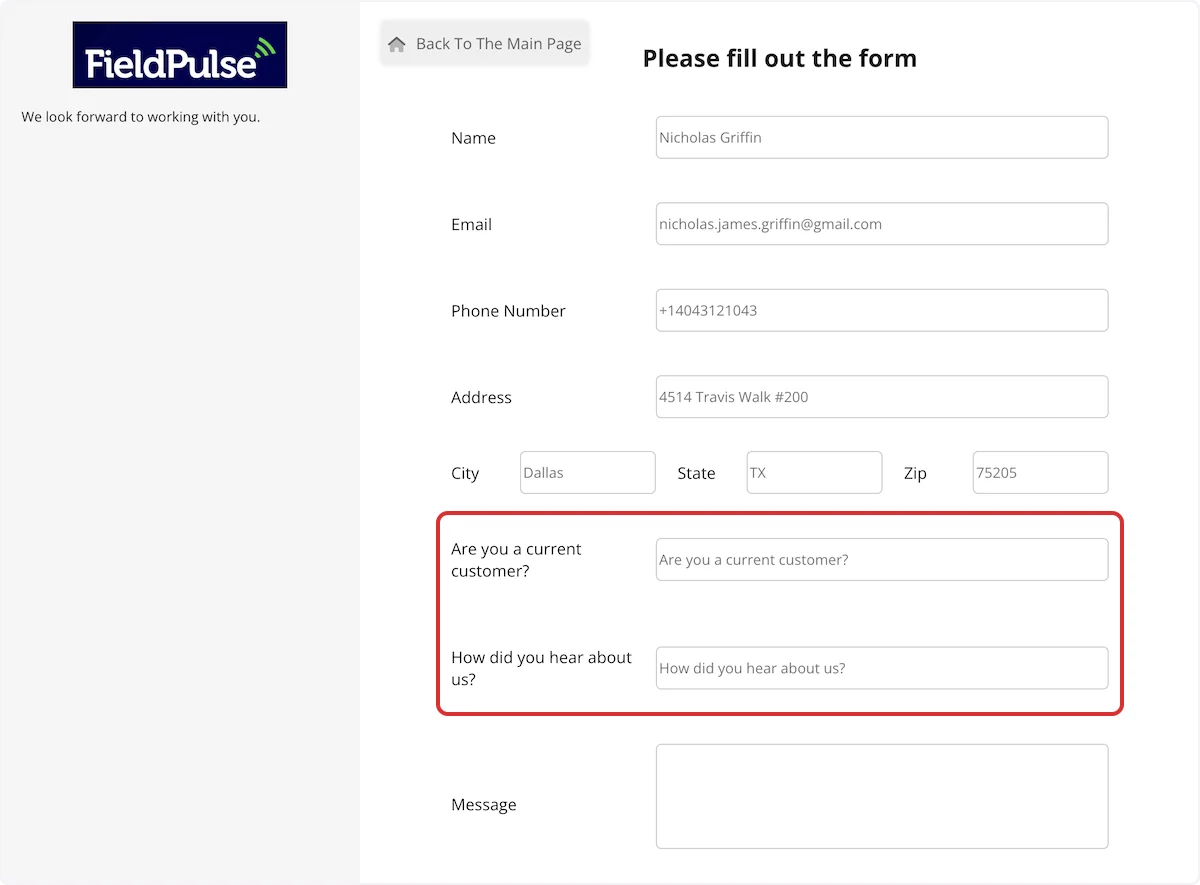
- Custom Fields: allows you to gather specific information from your customers during the online booking process.
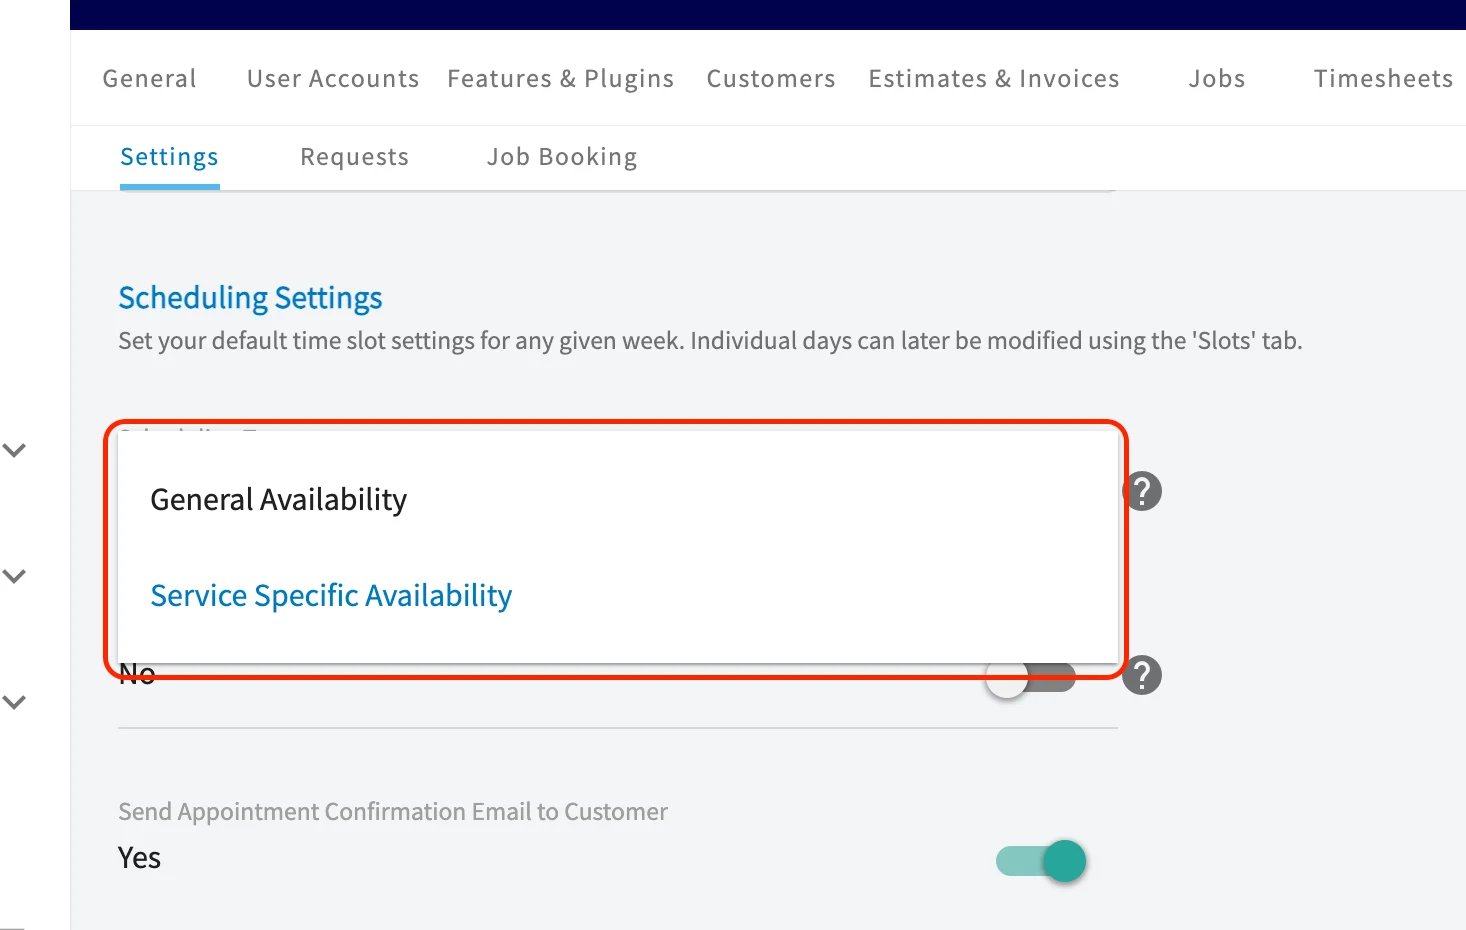
- General Availability: this option allows your business to set generic time slots for the days of the week as well as available time slots per hour. It does not take your existing schedule into account.
- Smart Scheduler: define your availability for each individual service based on your team’s availability, skills, days of the week, and more. We recommend this option as it is highly customizable and will take your team’s schedule into account when displaying times to your customers on the portal.
Creating Services
The next step is to create services available for scheduling on the Booking Portal. The setup process for General Availability and the Smart Scheduler is similar, with the Smart Scheduler offering additional options. You can add multiple categories, each including their own services.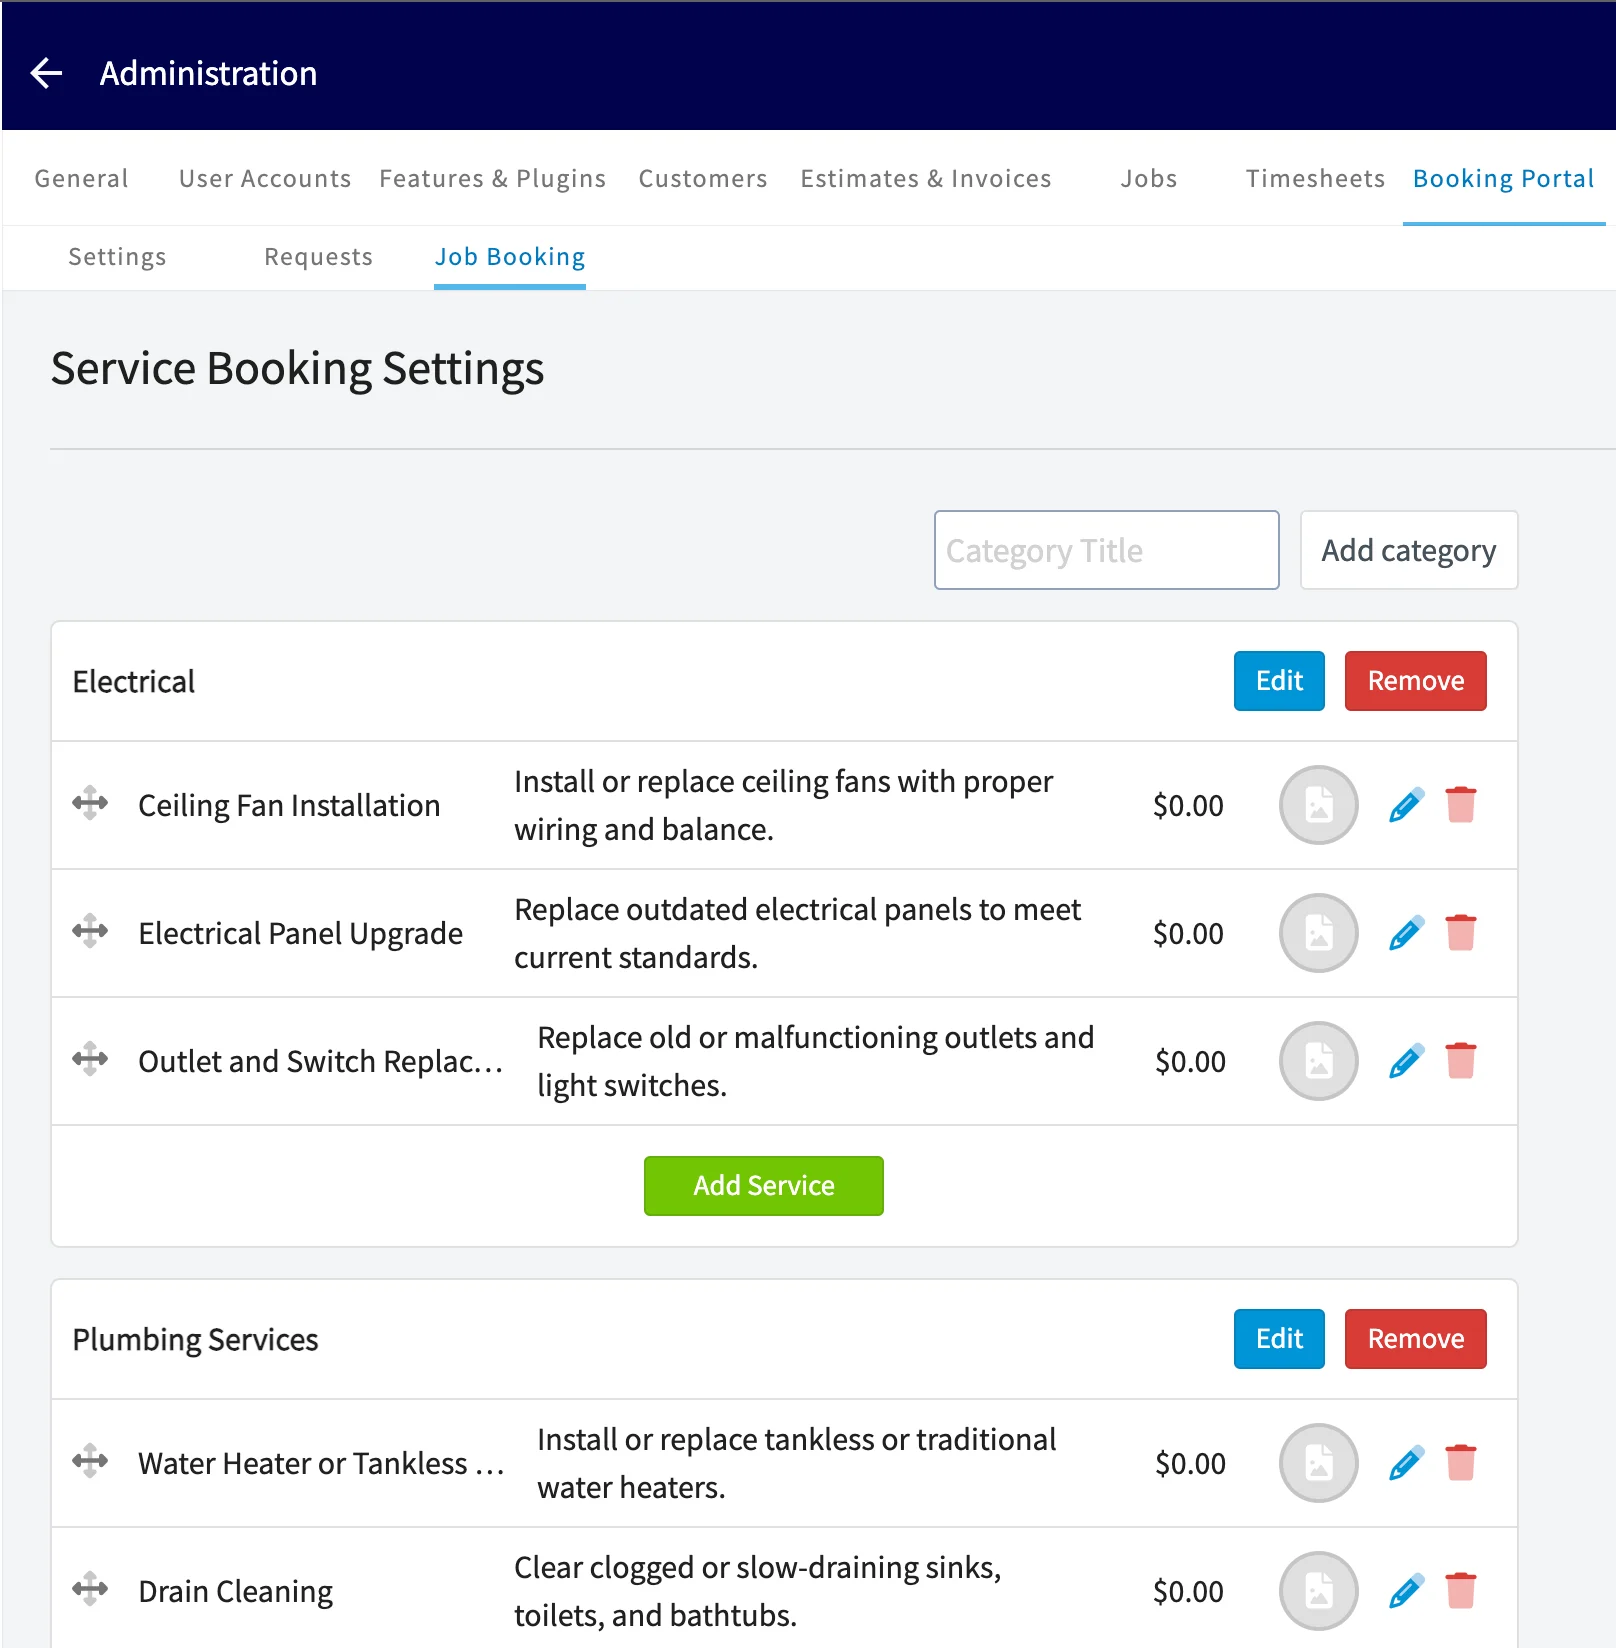
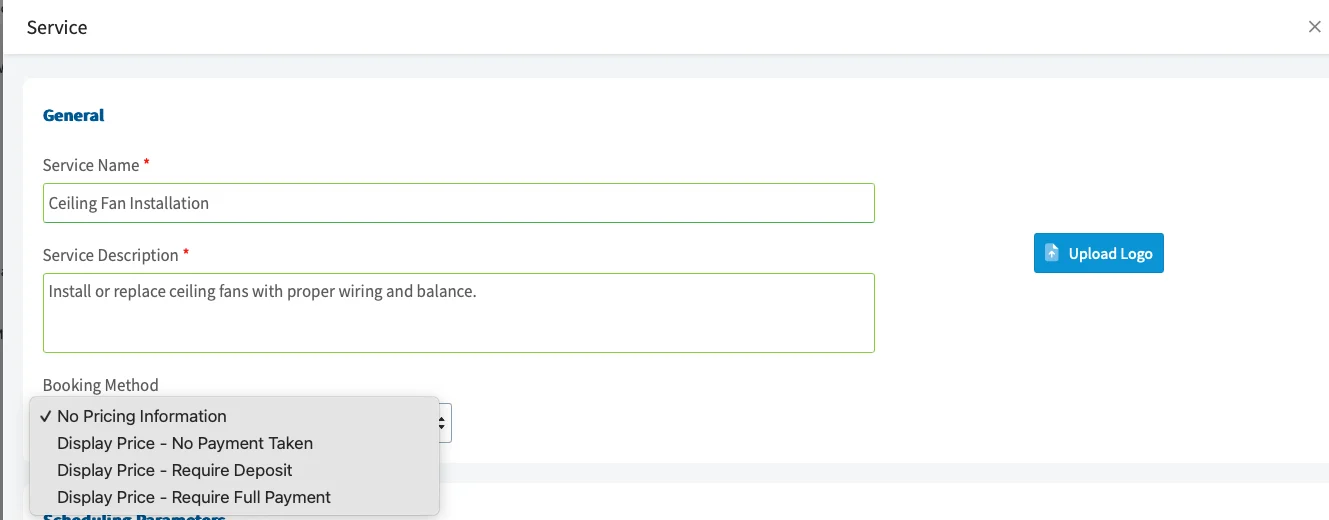
- No Pricing Information: The price is not visible to the customer.
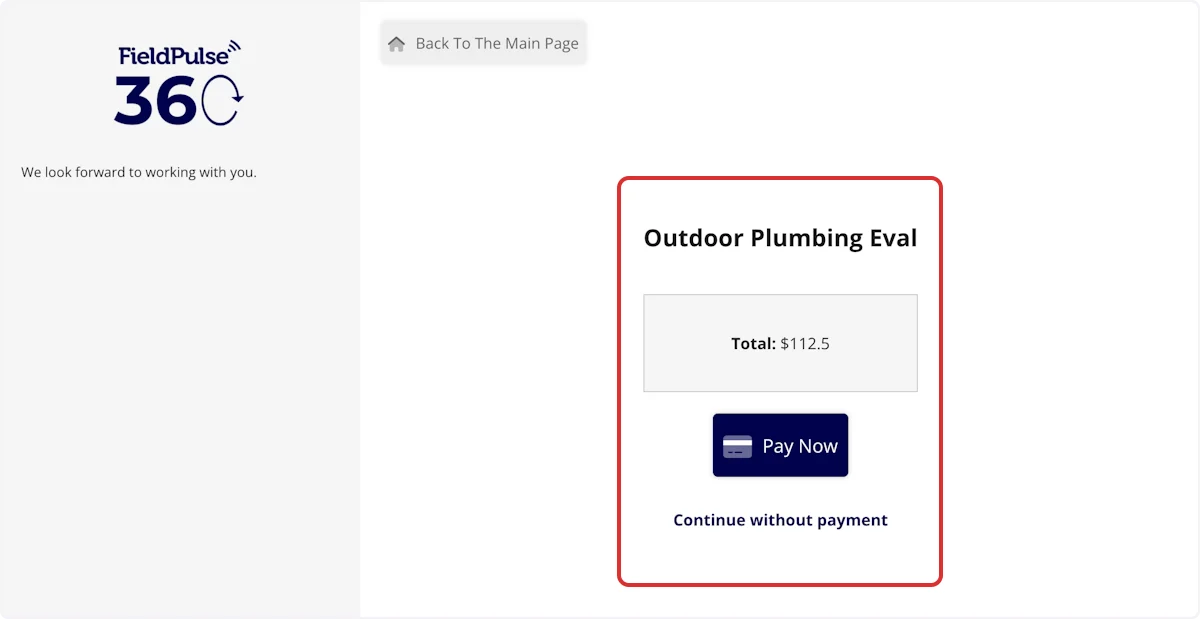
- Display Price - No Payment Taken: The price is visible to the customer.
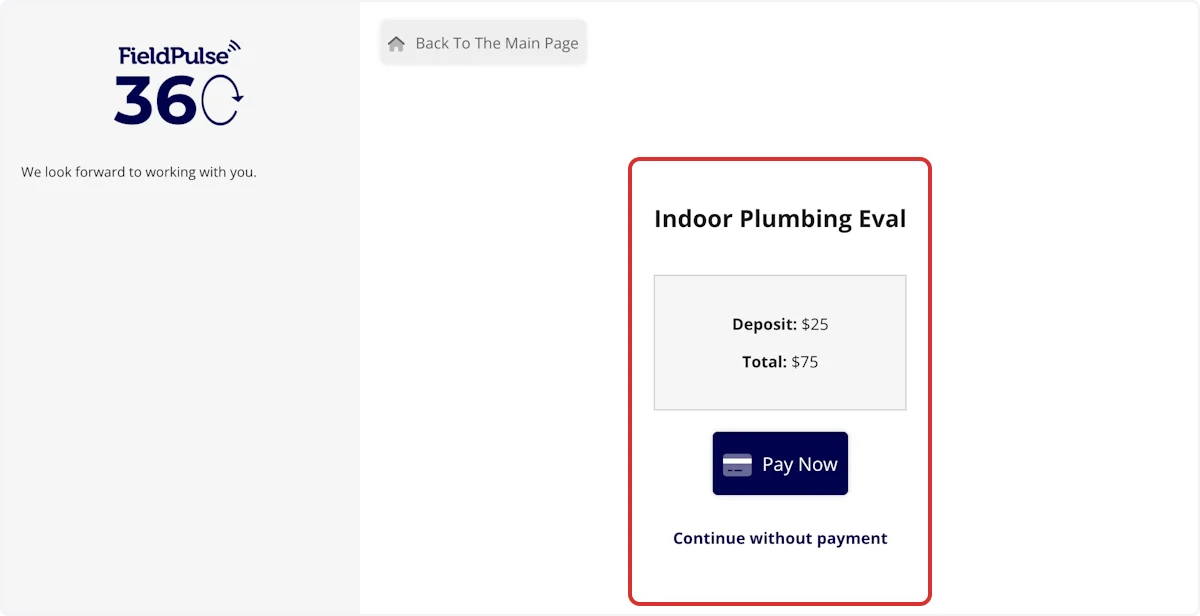
- Display Price - Require Deposit: The price is visible to the customer and requires a deposit to book. You can designate the deposit amount.
- Display Price - Require Full Payment: The price is visible to the customer and requires payment in full to book.
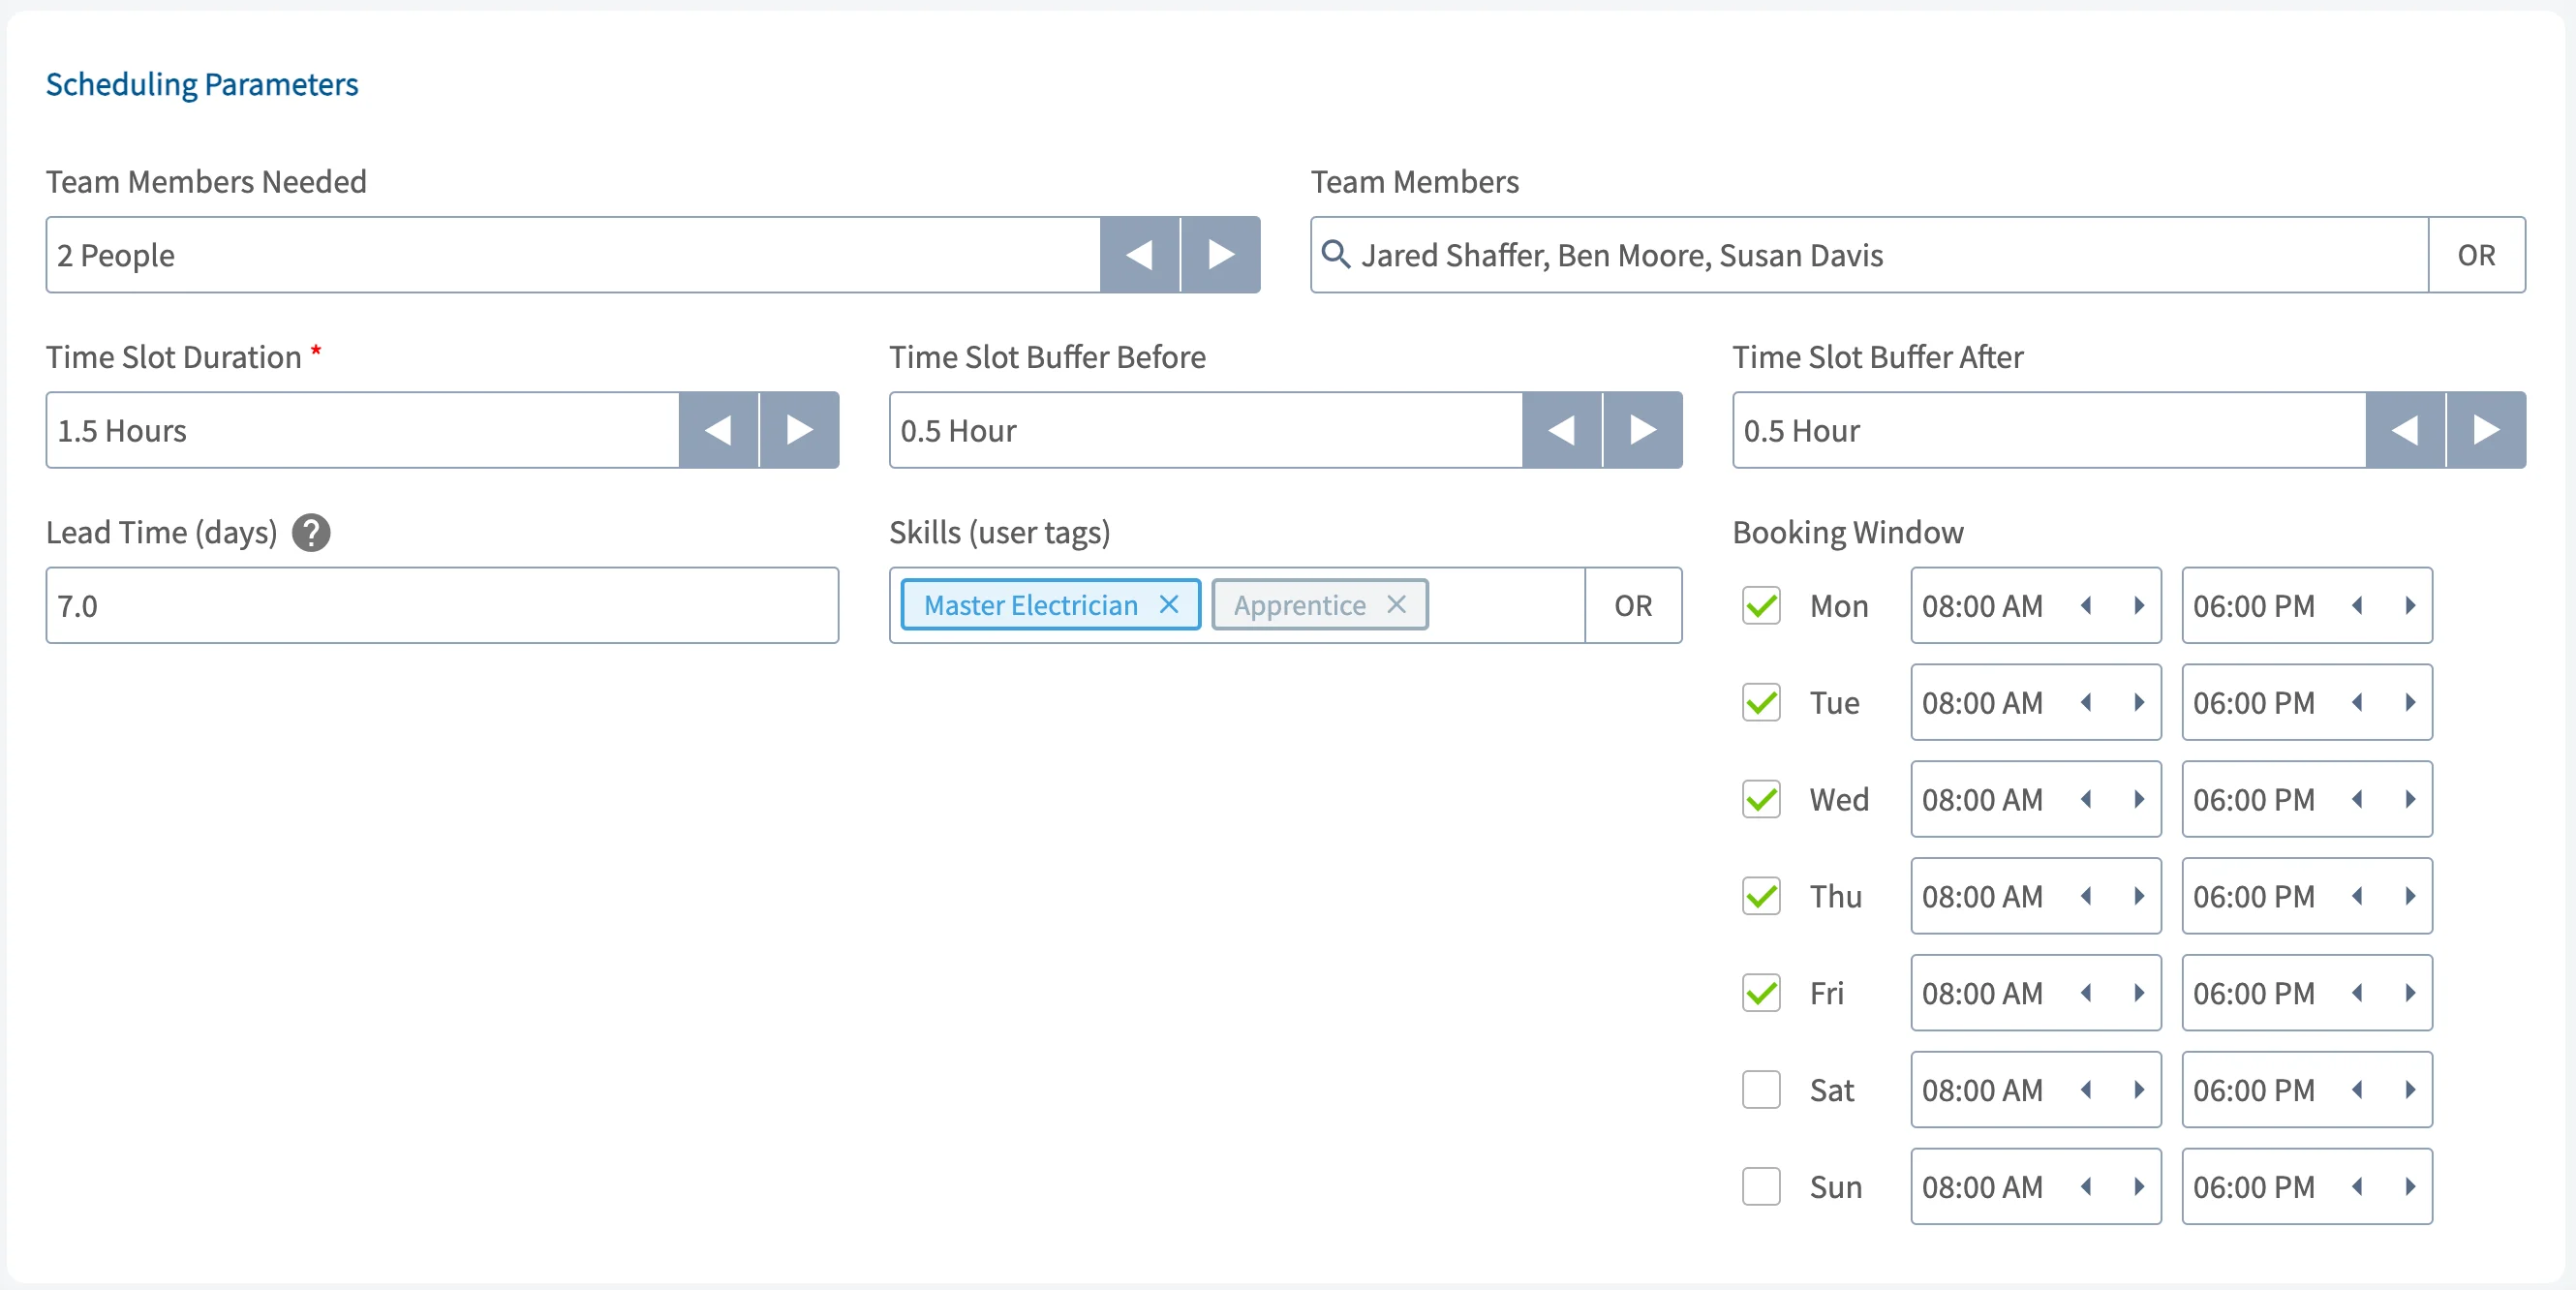
- Team Members Needed: by default, we require at least one team member needed for a job. If you set 2 people required, FieldPulse will identify time slots that are available for different combinations of two of your employees.
- Team Members: select specific team members who are eligible to work this service.
- Time Slot Duration: this represents the amount of time that a service will block off on your users’ calendars.
- Time Slot Buffers: optionally add a required amount of time to be available on your employees’ calendars before and after a job. This is helpful for taking into account drive time between multiple jobs.
- Lead Time: this is the minimum amount of time required before a service can be booked. Adding a lead time ensures customers don’t book services too soon when your team needs a bigger heads up.
- Skills: utilize user tags to specify skills and other information to qualify specific users for working the service.
- Booking Window: select specific hours on each day of the week for when the service is available.
Booking Portal Notifications
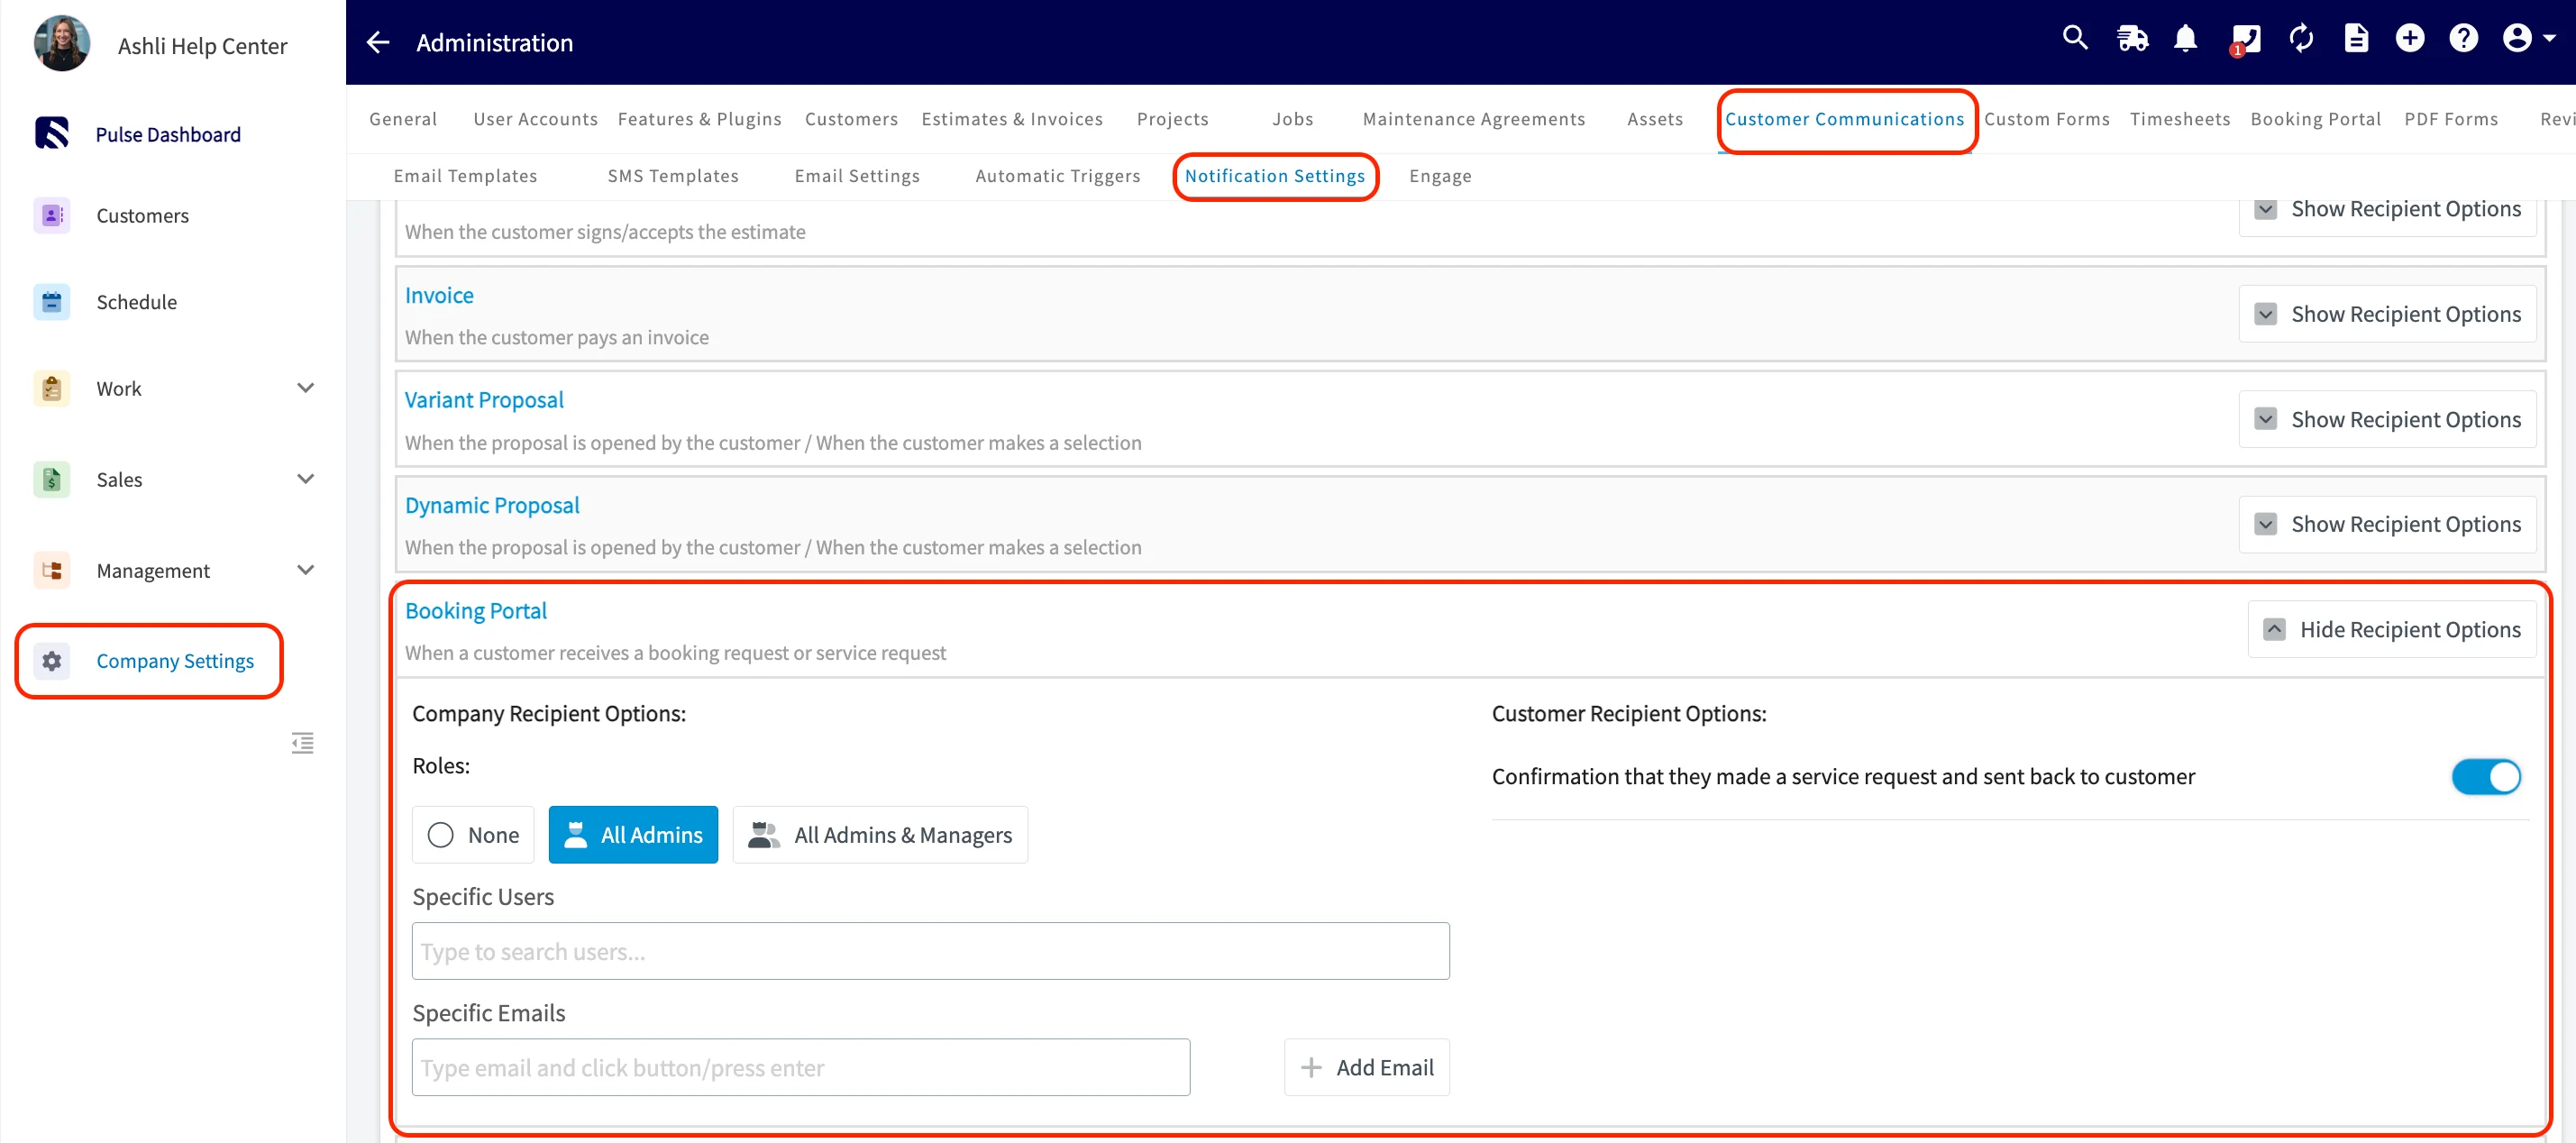
Company Recipient Options
- Identify the team members who should receive alerts when a customer submits a booking request. You can do this by going to Company Settings > Customer Communications > Notification Settings > Booking Portal.
- Optionally, you can enable an automatic confirmation email to be sent to customers after they submit their booking request. Please note, this confirmation indicates that their request has been received, but it does not mean the appointment is yet confirmed—it simply alerts your customers that their request is under review.
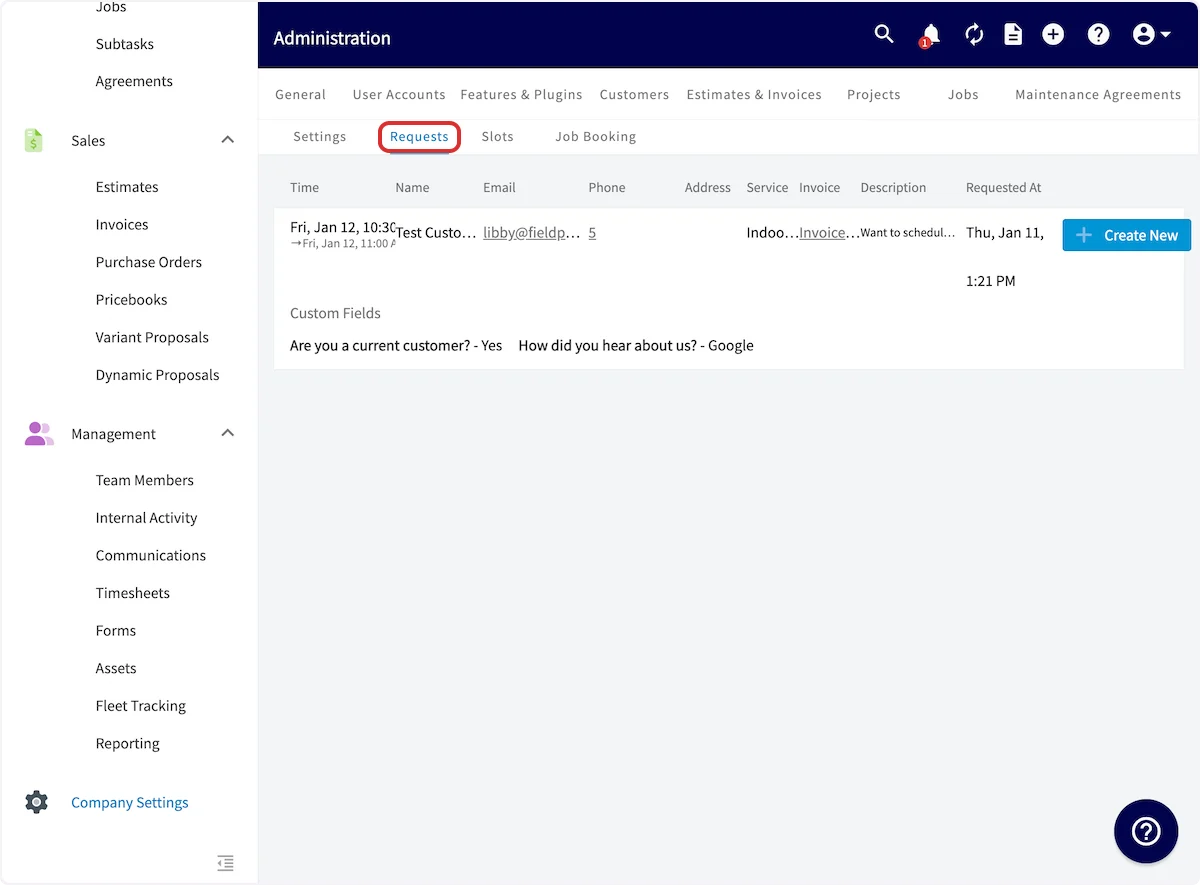
Manage Requests
If you do not have Automatically Schedule a Job for Booking enabled, you will use the Booking Portal tab or the Requests tab to review customer submissions from your booking portal. Click Create New next to a request to create a customer and/or a job based on this request. The details entered by your customer will be auto-populated into the new customer record.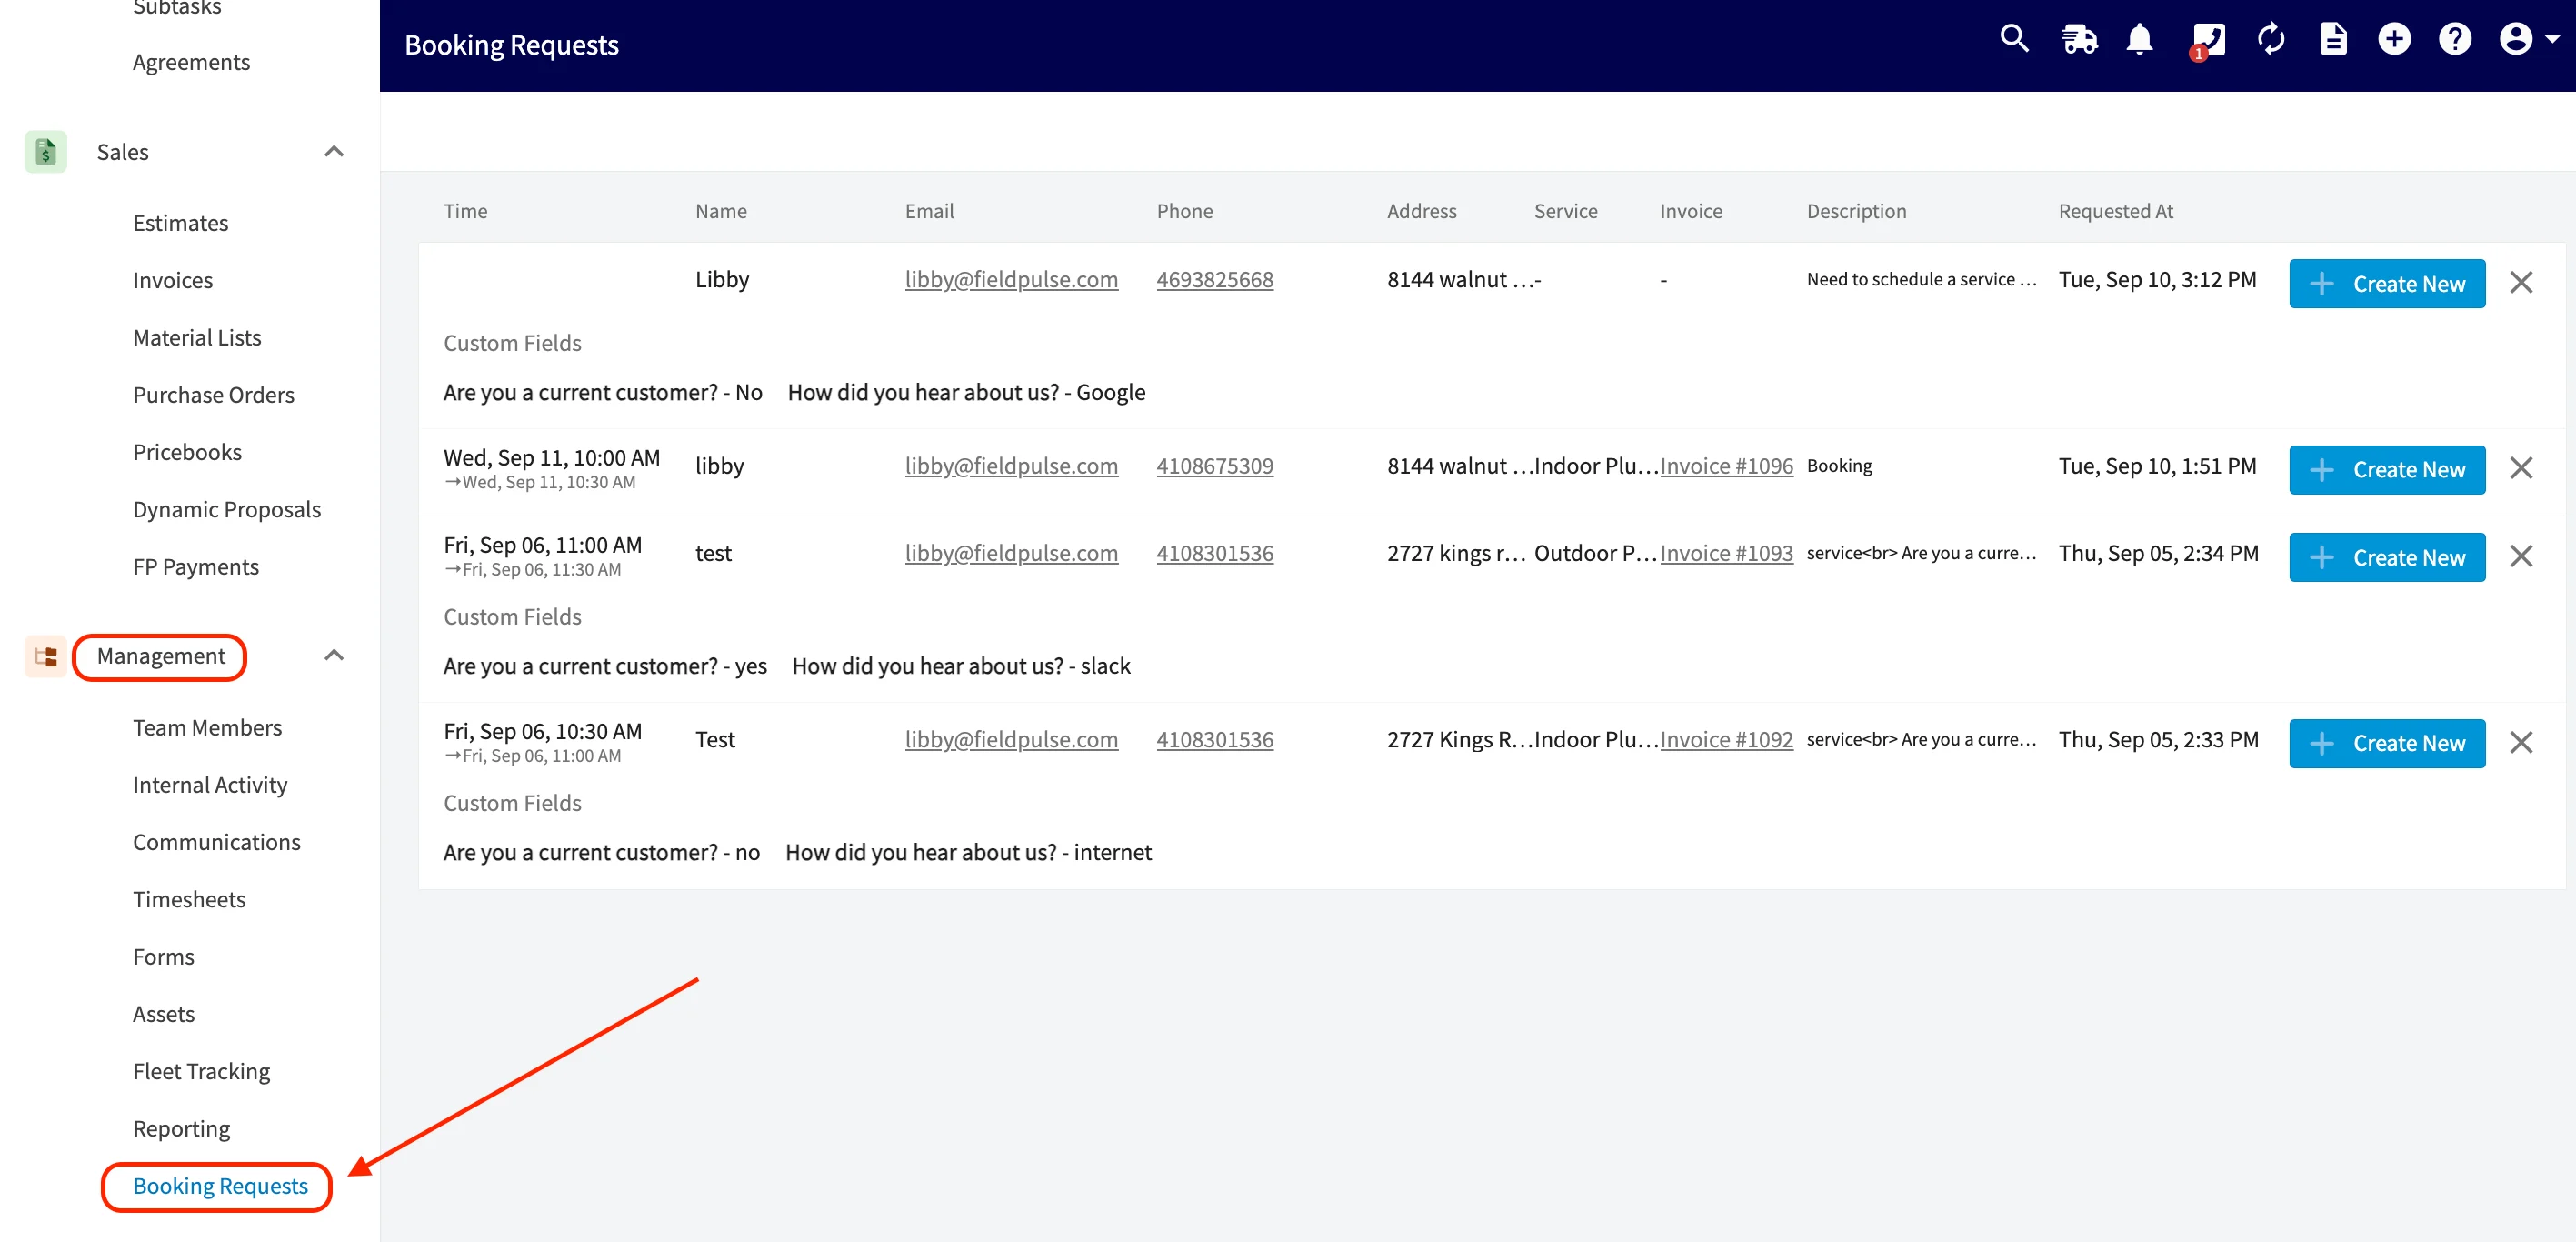
Embedding Booking Portal
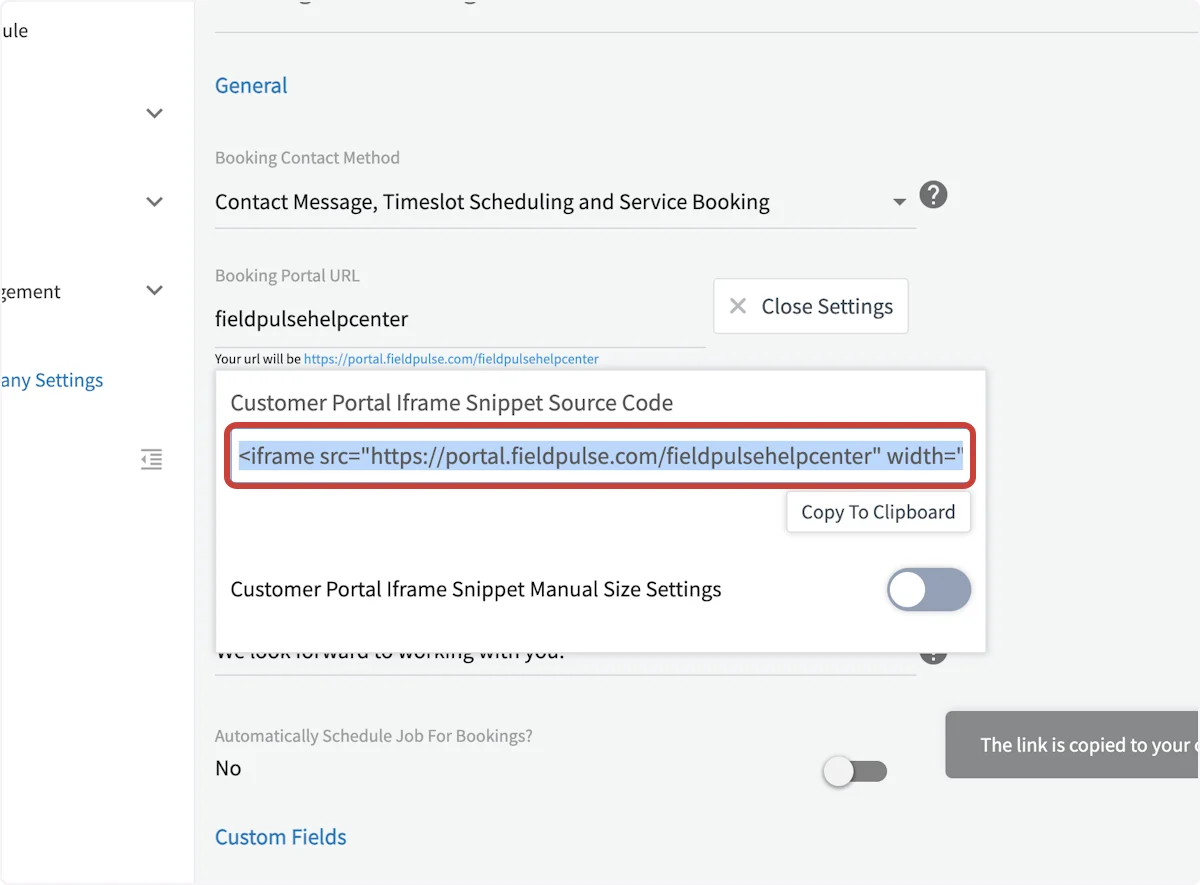
To include the booking portal directly in your website, you are able to select Embed Iframe and click Copy to Clipboard. If you want to adjust the display settings, you can toggle on Customer Portal Iframe Snippet Manual Size Settings to adjust the pixels.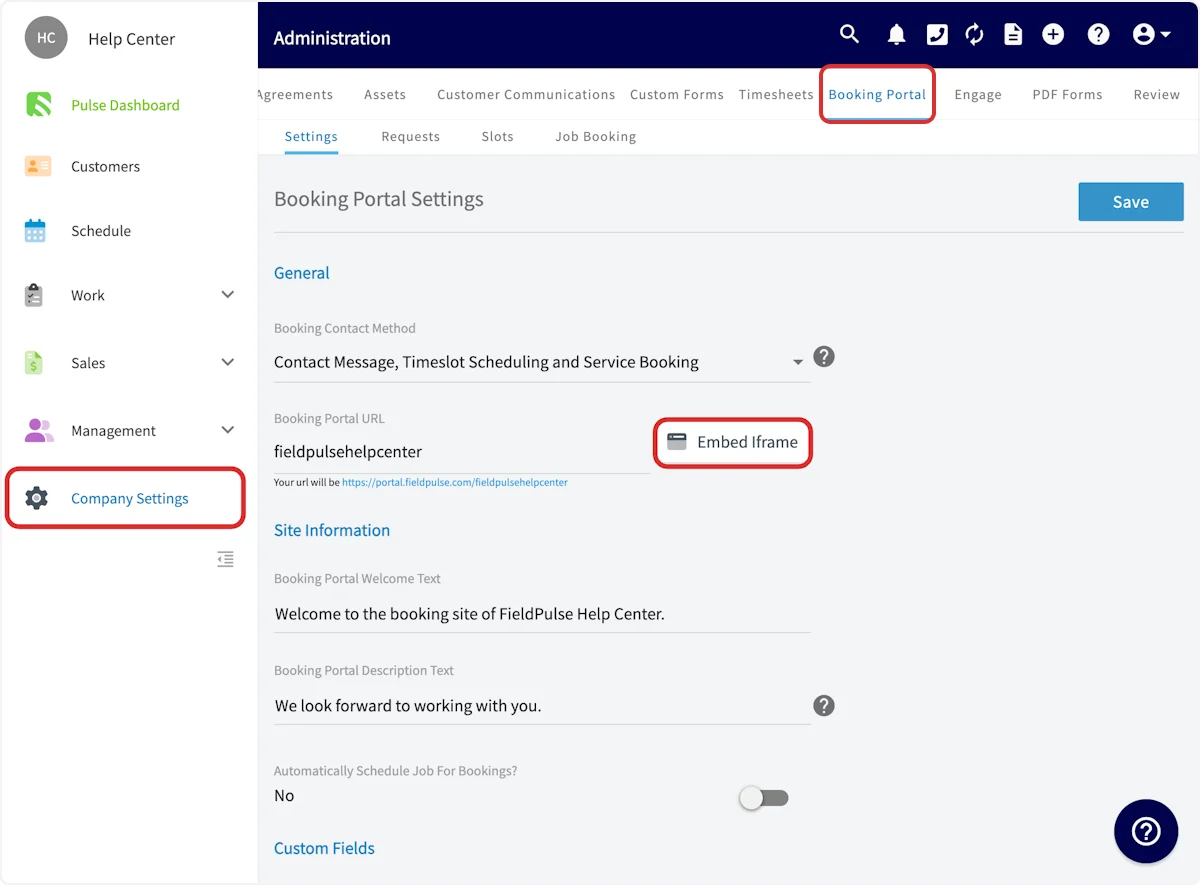
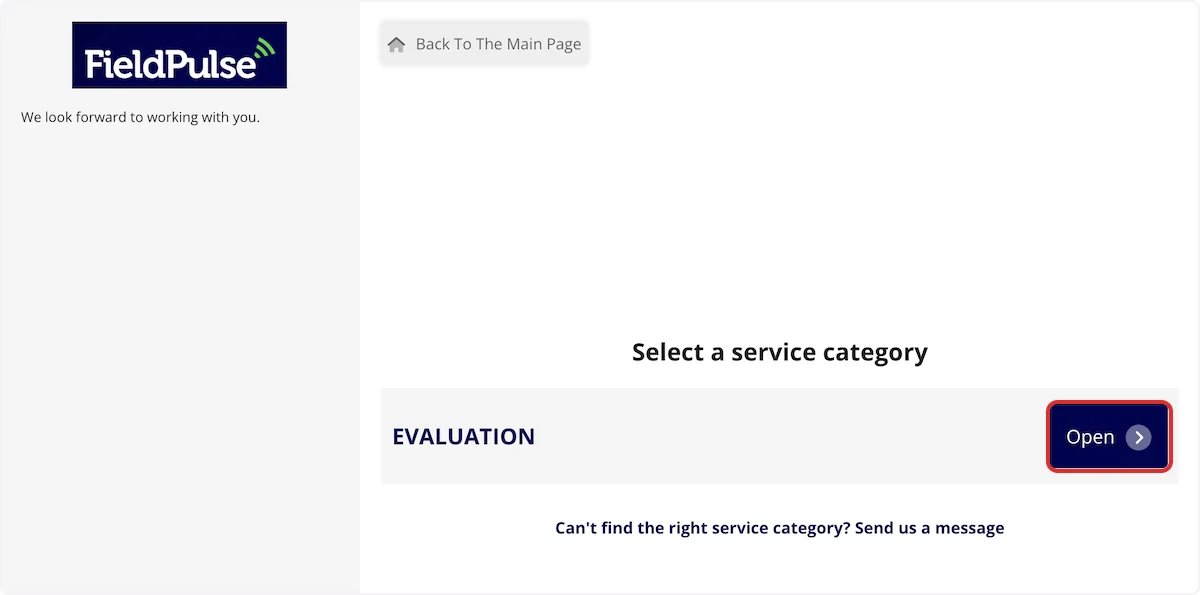
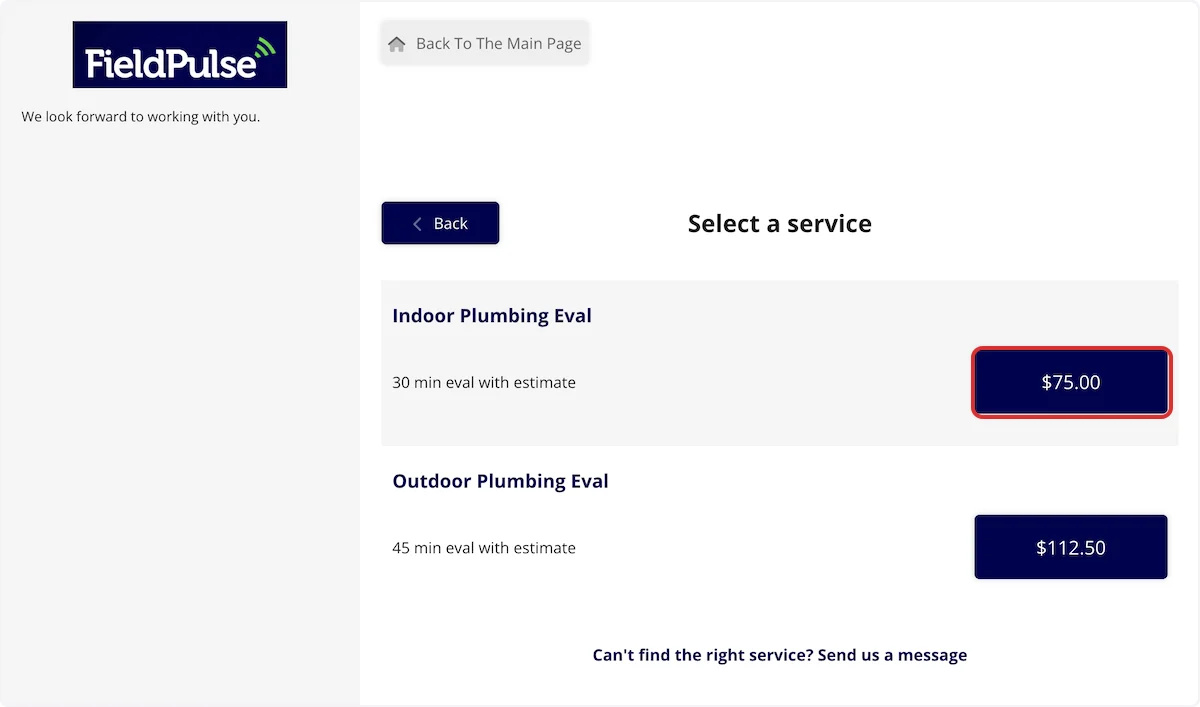
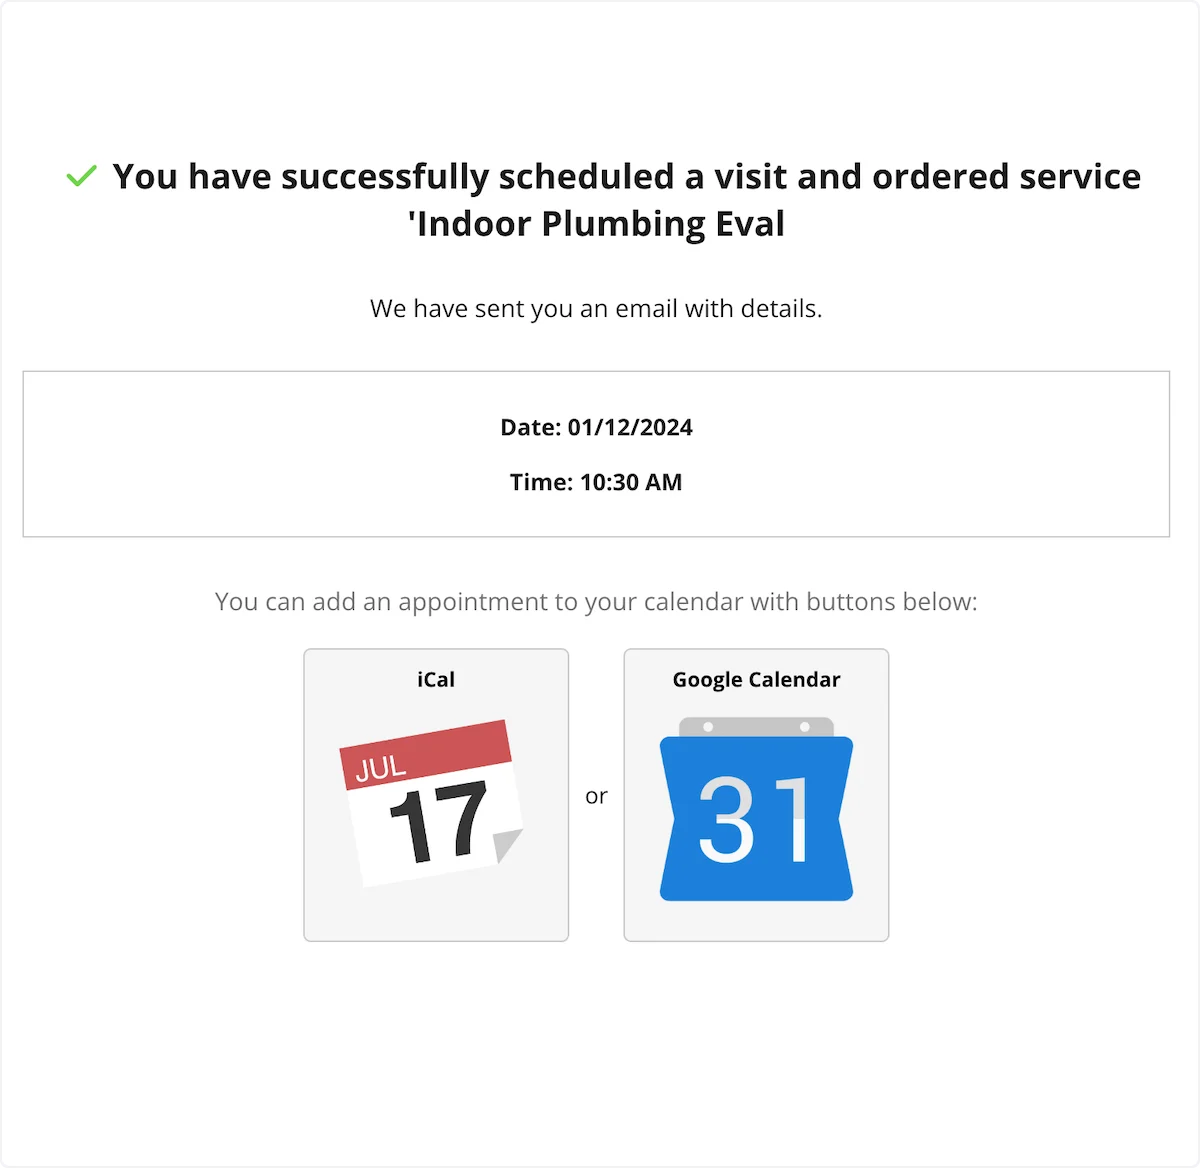
Customer Experience
Here, you can see the customer view for your Booking Portal. (Note: If you’ve added your logo in Company Settings, it will display here. We have entered the FieldPulse logo as an example.)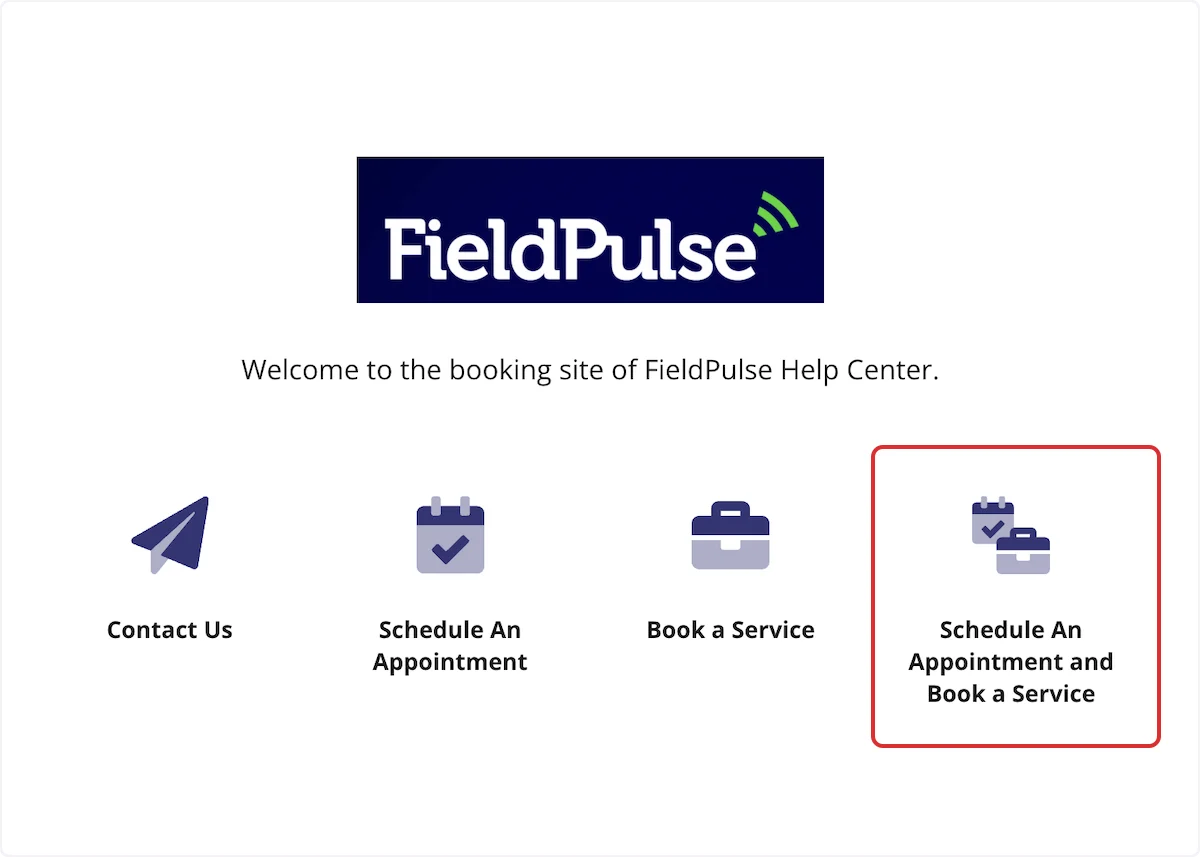
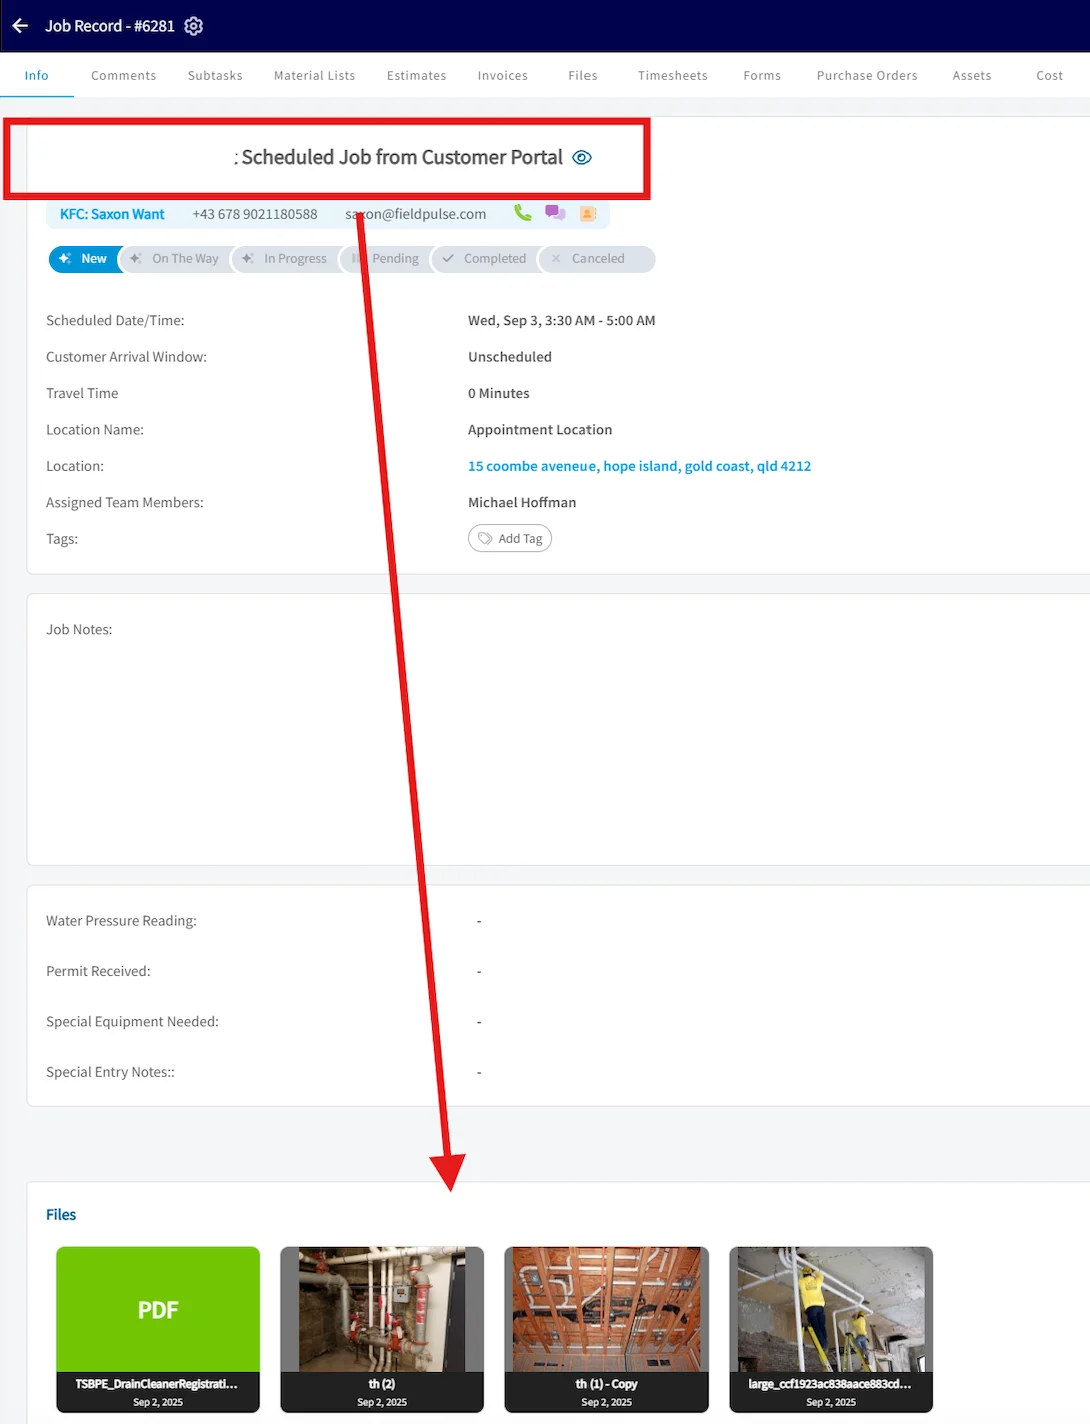
Booking Portal Photos & Files
On the web app, photos and files uploaded through the Booking Portal will now attach directly to the job / service record created from the request. This means you no longer have to worry about lost attachments, making it easier to keep all relevant information organized and accessible.How It Works
This update applies to two types of job creation:- Manually Created Jobs: When you create a job manually through Company Settings, navigate to Booking Portal > Requests > Create New > Job. Any photos or files you upload during this process will be directly linked to the job.
- Automatically Created Jobs: If you have the Scheduled Service feature enabled, jobs will be created automatically based on your team’s schedule. Any photos or files uploaded during the booking process will also attach directly to these automatically generated jobs.
Video Tutorial
FAQs
What happens when an existing customer submits a new booking portal request? Will a duplicate customer be created? No, a duplicate customer will not be created. When a request comes through the booking portal, FieldPulse automatically checks to see if the customer already exists in your account.- If a match is found: The system will skip creating a new customer profile and will instead use the existing record to generate the new job or invoice.
- If no match is found: The system will automatically create a brand-new customer record.
Have additional questions? Contact us at support@fieldpulse.com or use the chat feature in the bottom right corner of your screen.