
Who uses this: An Administrator sets another user’s inventory permissions from the user account in Company Settings. Availability: All regions.Inventory permissions control which inventory hubs a user can open and what that user can do with the stock in each one. This matters most for teams that work out of several inventory locations, such as vans or warehouses — a technician might have parts on hand but need to view inventory for another part that is only available elsewhere. Setting inventory permissions per user and per hub gives that technician the visibility they need while keeping the hubs you did not assign out of reach.
Overview
An inventory permission is a per-user setting that grants one user access to one inventory hub. You set inventory permissions on the individual user account in Company Settings, after turning on that user’s Ability to View Item List. These settings determine whether the user can view or adjust inventory for that hub from the Item/Inventory List page. For each hub, you check any combination of three permissions — Full Adjustment, View Access, and Inventory Count — so one user can hold different access on different hubs. A technician can have full adjustment on their own truck and view access on the office warehouse at the same time.Video walkthrough
Watch the inventory permissions walkthrough for a full run-through. The written steps below stand on their own.Before you begin
- An Administrator makes these changes. Inventory permissions live on the individual user account inside Company Settings.
- Set up your inventory hubs first, so every hub you want to assign appears in the list. See Inventory Hubs Overview.
- Check the user’s role first. Inventory permissions can be edited for a Team Manager or a Service Agent, and are not available for a Limited Agent or an Assignment User. The Settings reference below lists every role.
Step-by-step setup
Open the user’s feature permissions
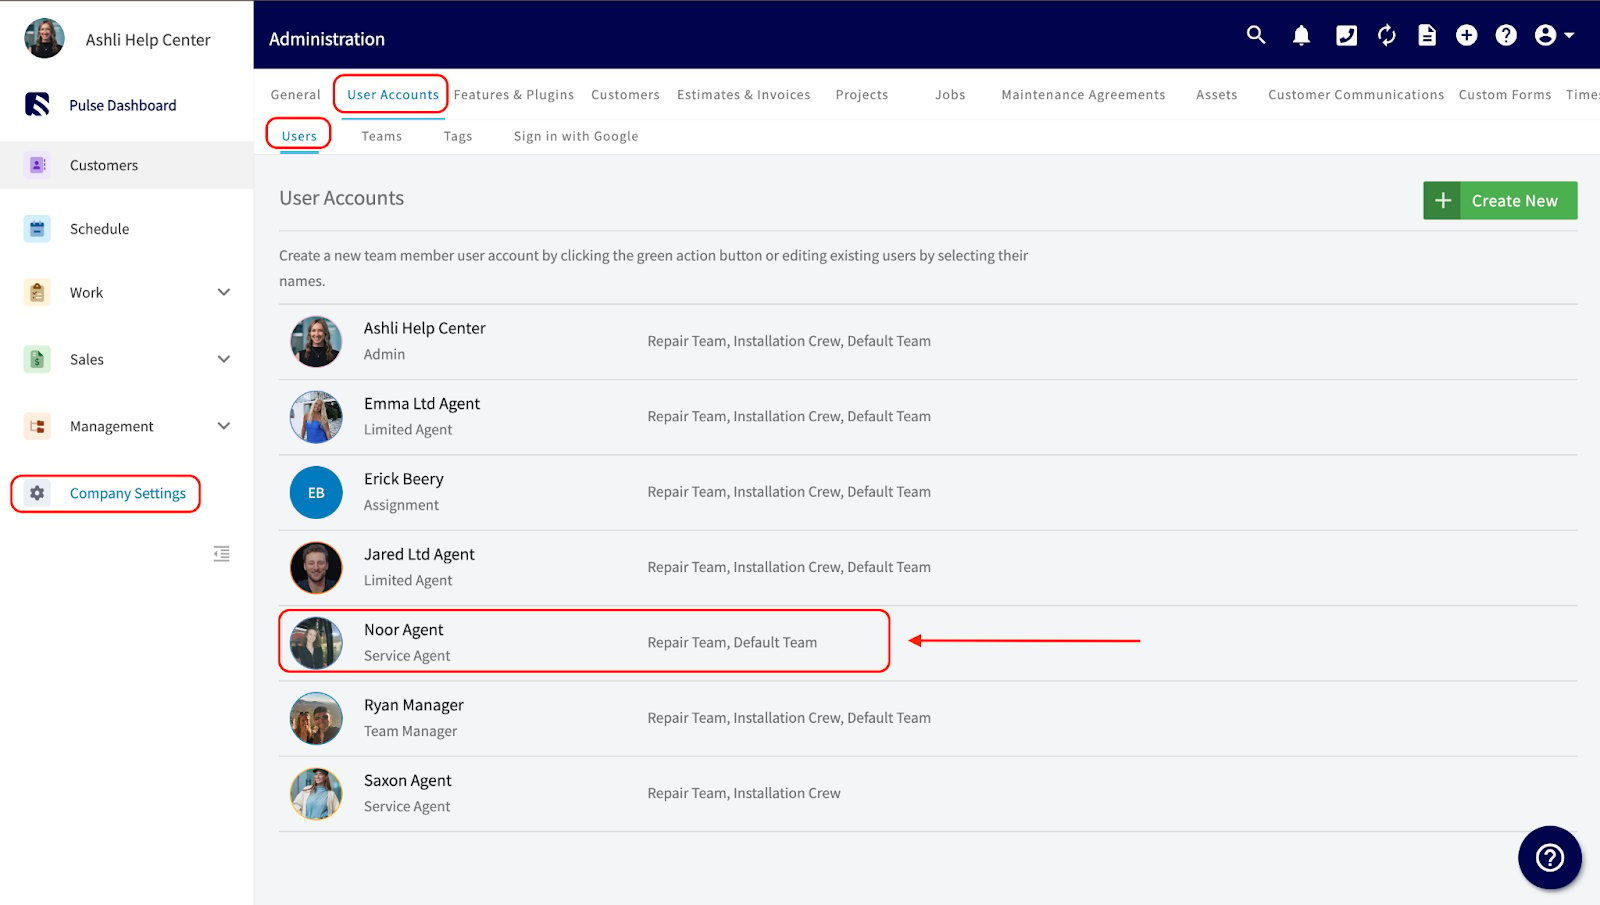
- Go to Company Settings, then select User Accounts.
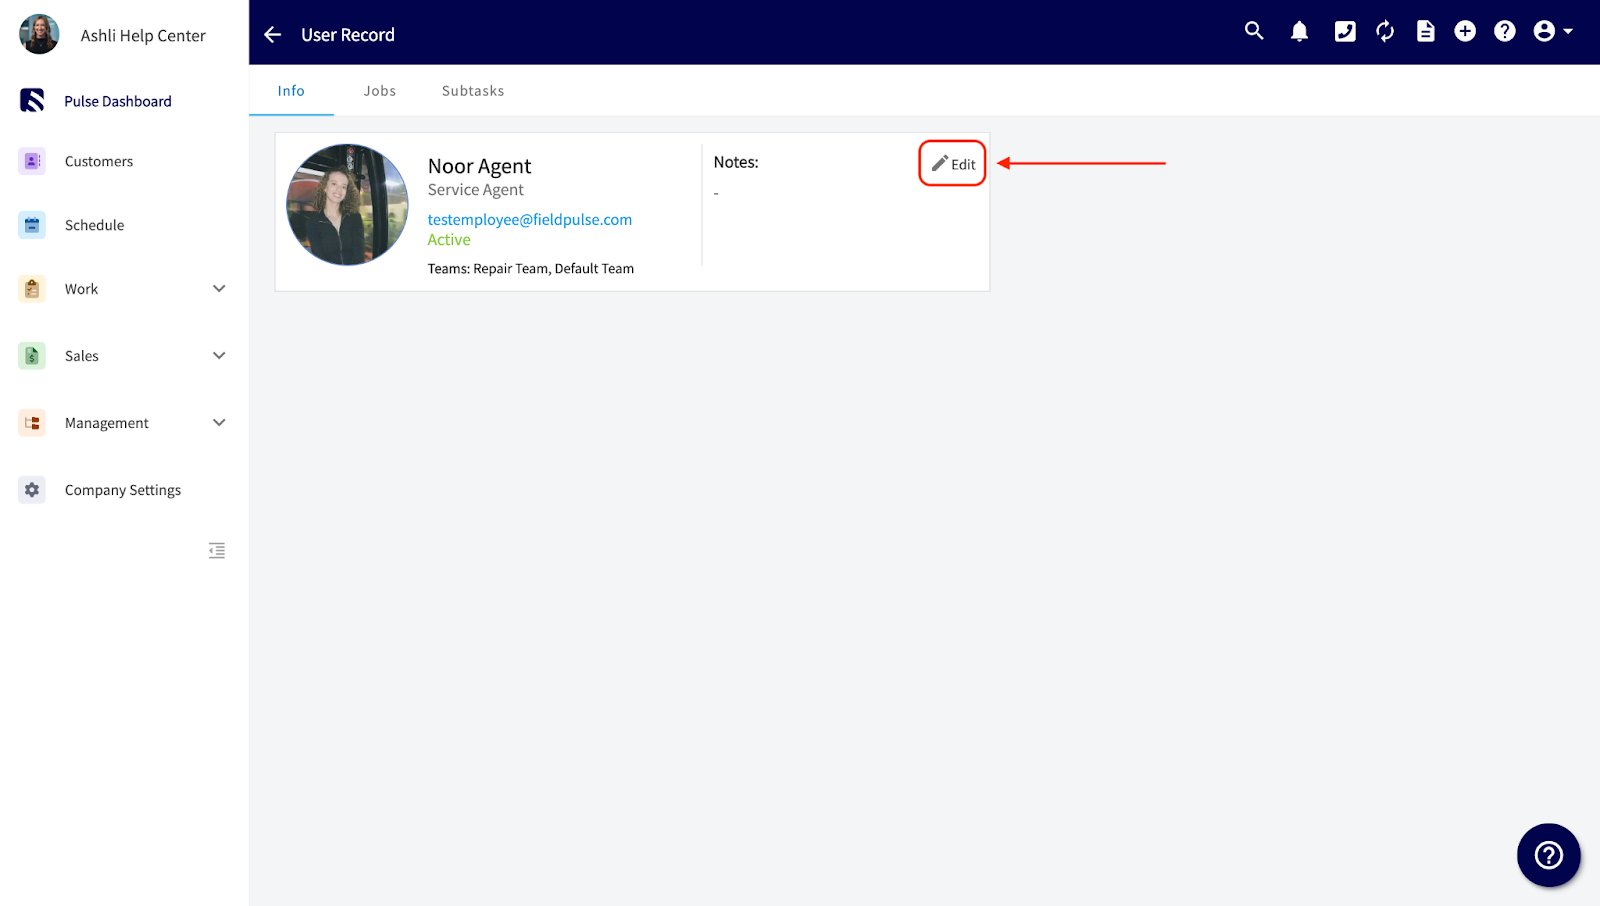
- Select the user’s name, then select Edit.
Turn on Ability to View Item List
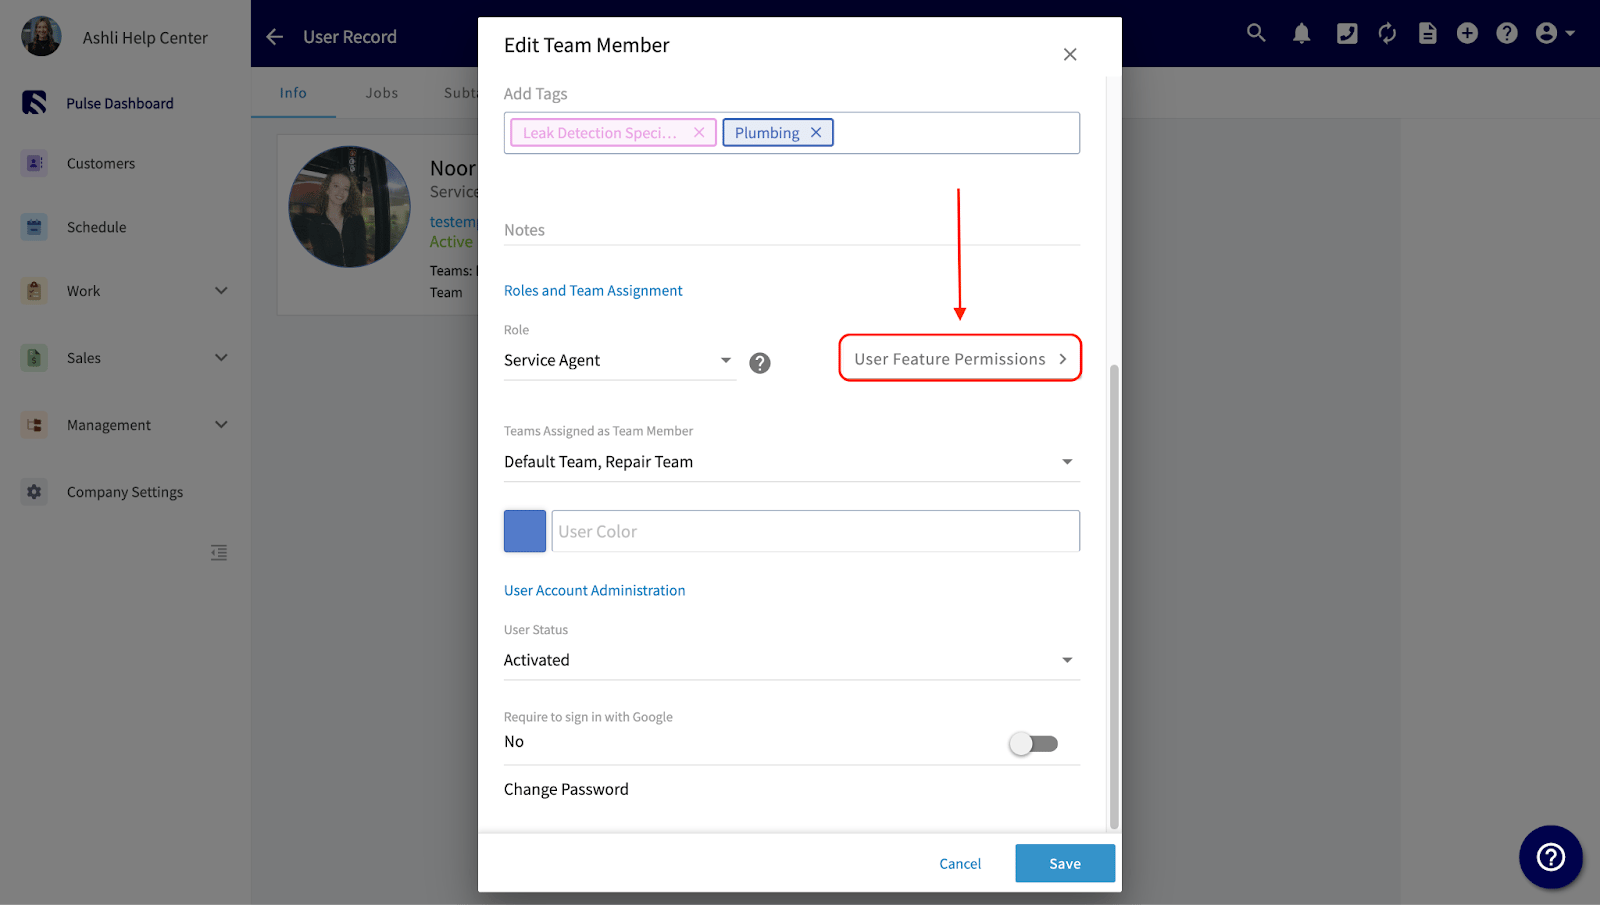
- In the Edit Team Member panel, select User Feature Permissions.
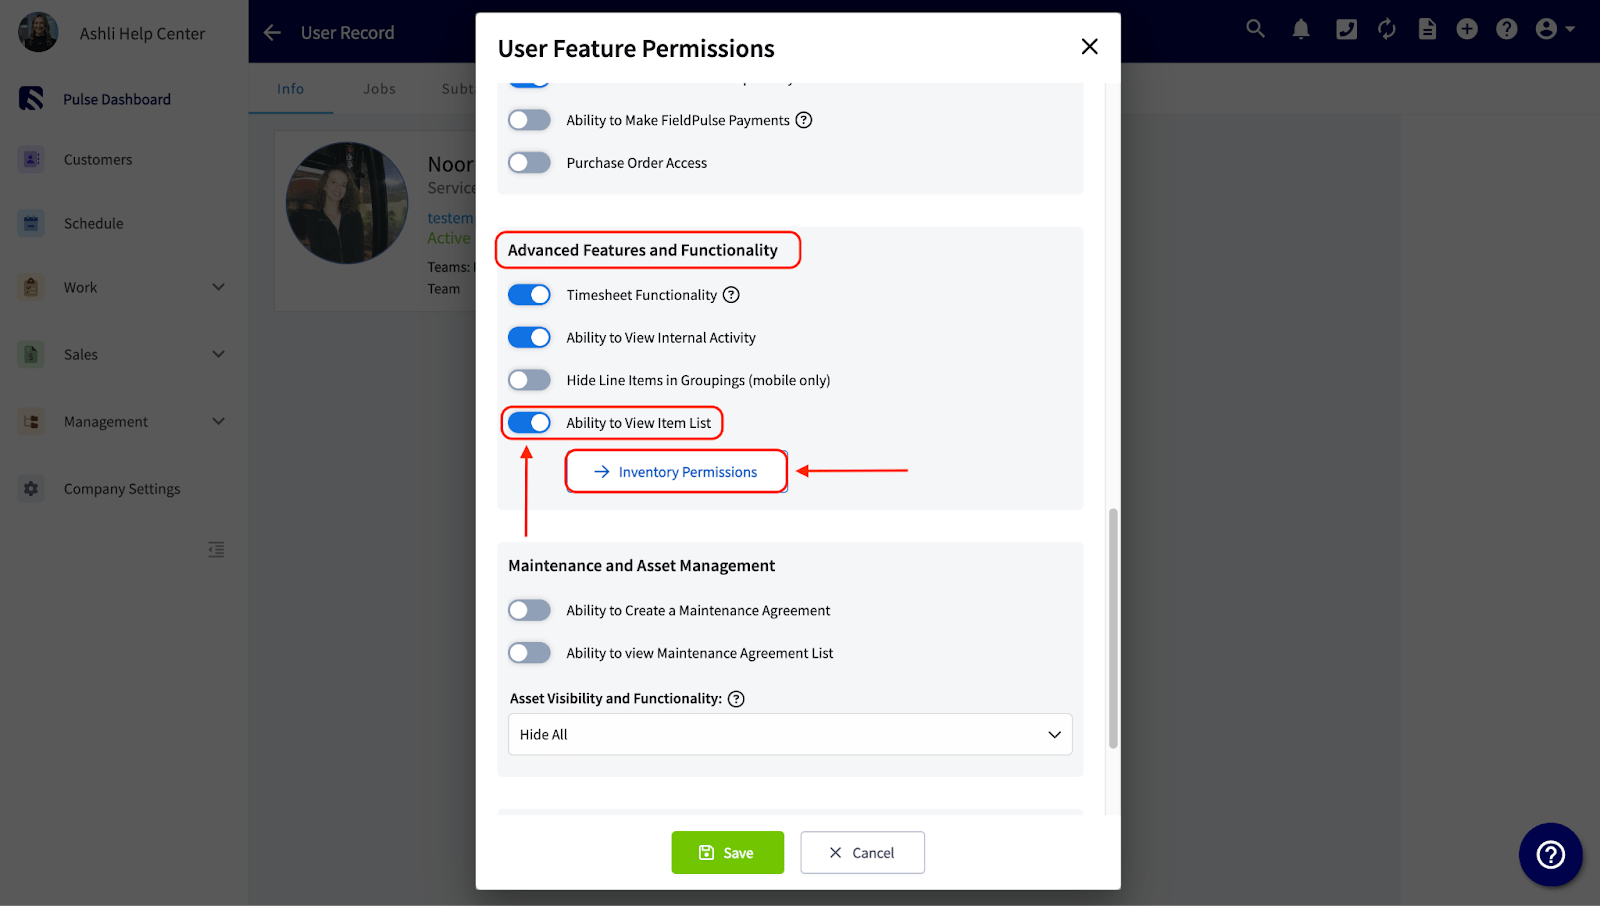
- Scroll to the Advanced Features and Functionality heading.
- Toggle on Ability to View Item List. The Inventory Permissions link appears underneath the toggle once it is on.
Set access for each hub
- Select Inventory Permissions to open the Inventory Hub User Permissions window, which lists every inventory hub in your account.
- For each hub, check the boxes for the access that user should have — Full Adjustment, View Access, Inventory Count, or any combination of the three. Select All above a column applies that permission to every hub at once.
- Select Save.
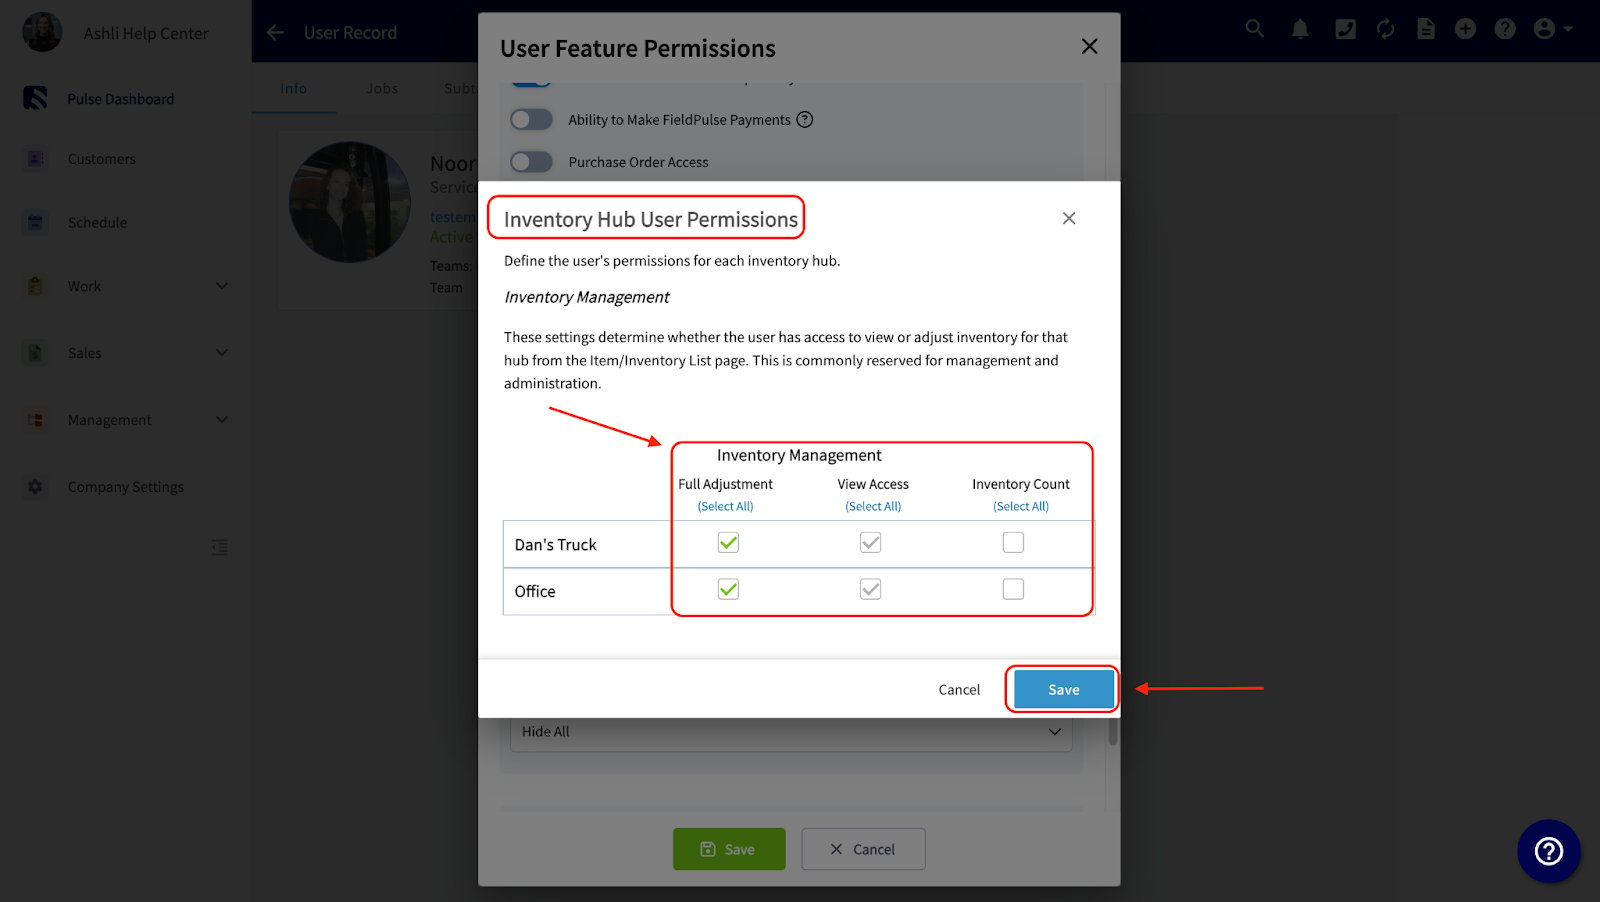
See it in action
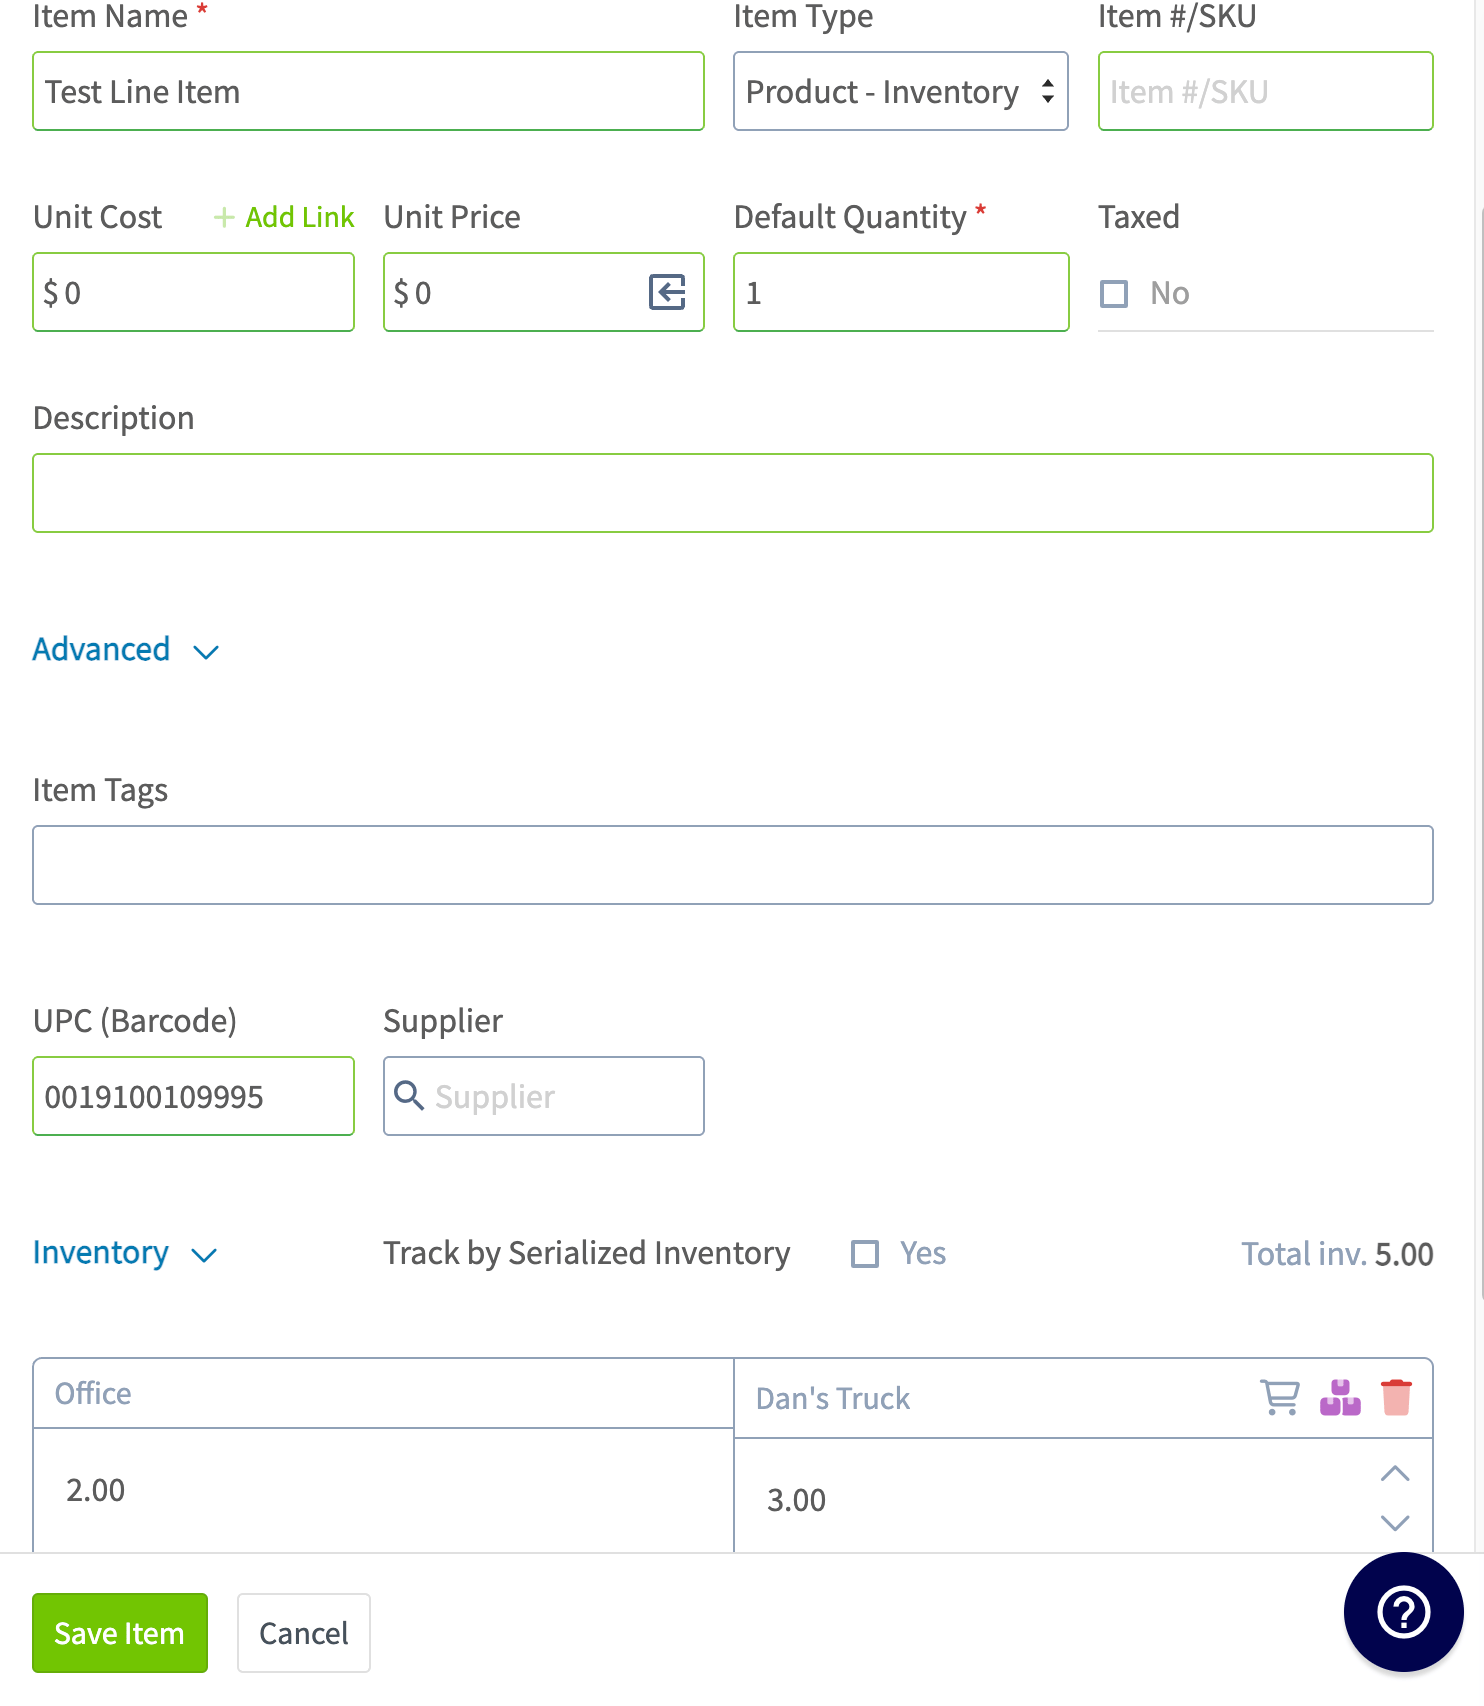
Once the permissions are saved, the user sees a column for each hub you granted them. The example below shows a user with Full Adjustment for “Dan’s Truck” and View Access for “Office”: both hubs appear as stock columns on the Inventory tab under Line Items, and as separate quantity fields on the item record itself.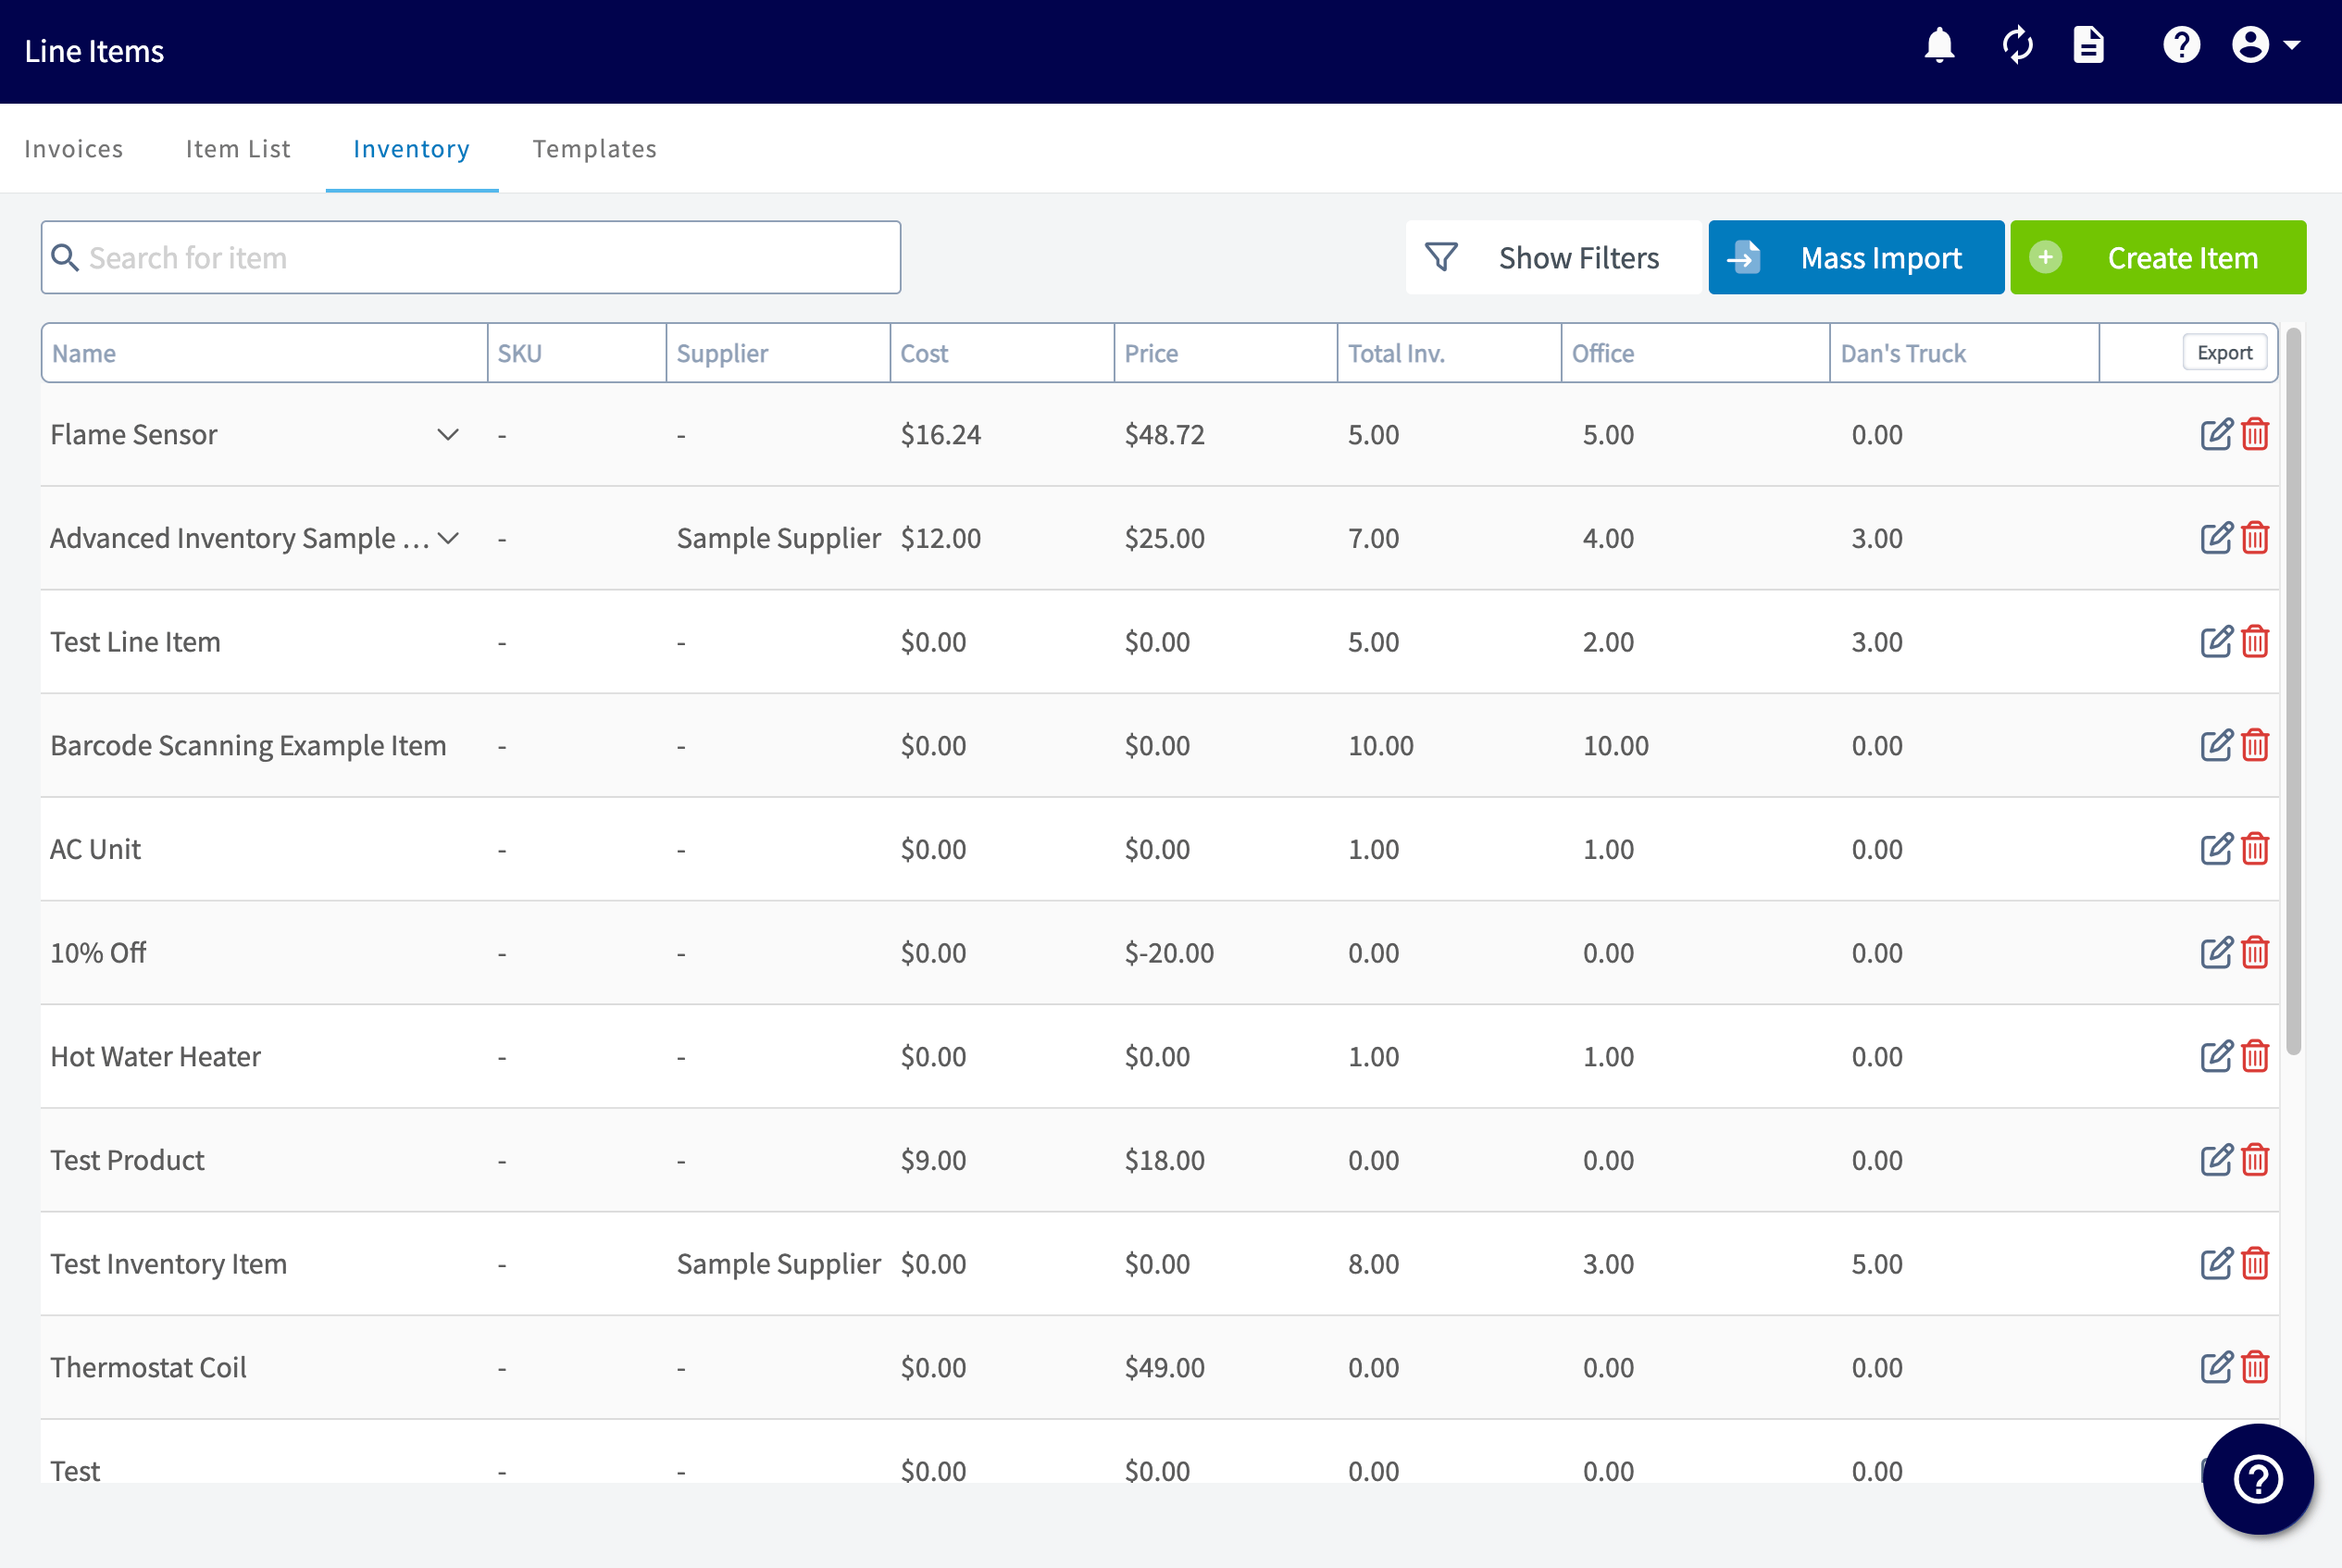
Settings reference
Inventory permissions vary based on user type. Whether you can edit a user’s inventory permissions depends on the role assigned to that user:
For every hub a user can reach, you choose from three permissions, and a user can hold more than one on the same hub:
To learn more about user roles within FieldPulse, see User Roles and Permissions Details.