
Who uses this: Service Agents log their own time, Team Managers log time for team members on the teams they manage, and Admins log time for any user across the business. The Ability to edit timesheet Clock In/Clock Out time setting controls which roles can adjust their own recorded times. Availability: All regions.Employee timesheets record when each team member clocks in and clocks out, so the hours you pay for come from real clock-in data instead of memory at the end of the week. Team members clock in from the FieldPulse mobile app in the field or from the web app at the office, and admins and managers review those hours in Team Timesheets.
Overview
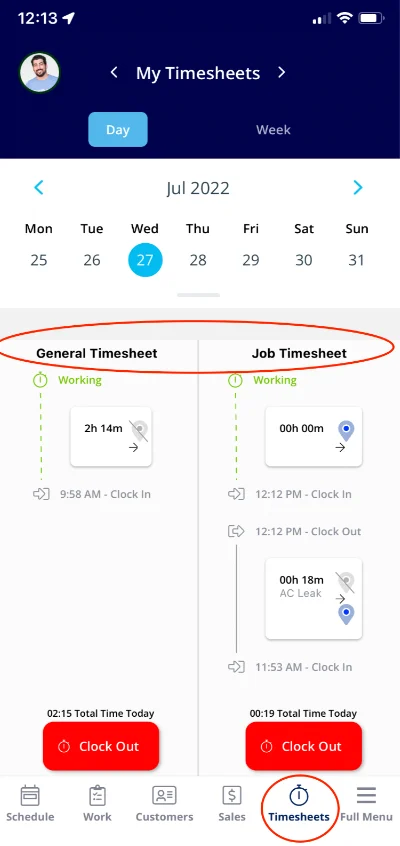
Employee Timesheets lets team members clock in and clock out to track time and location. FieldPulse geo-tags every clock-in and clock-out made from the mobile app, so you can confirm where a team member was when they started or finished. By default, the account uses one timesheet per user to clock in and clock out throughout the day, including clocking into specific jobs. Turning on the two-timesheet system splits that into two separate timesheets:Before you begin
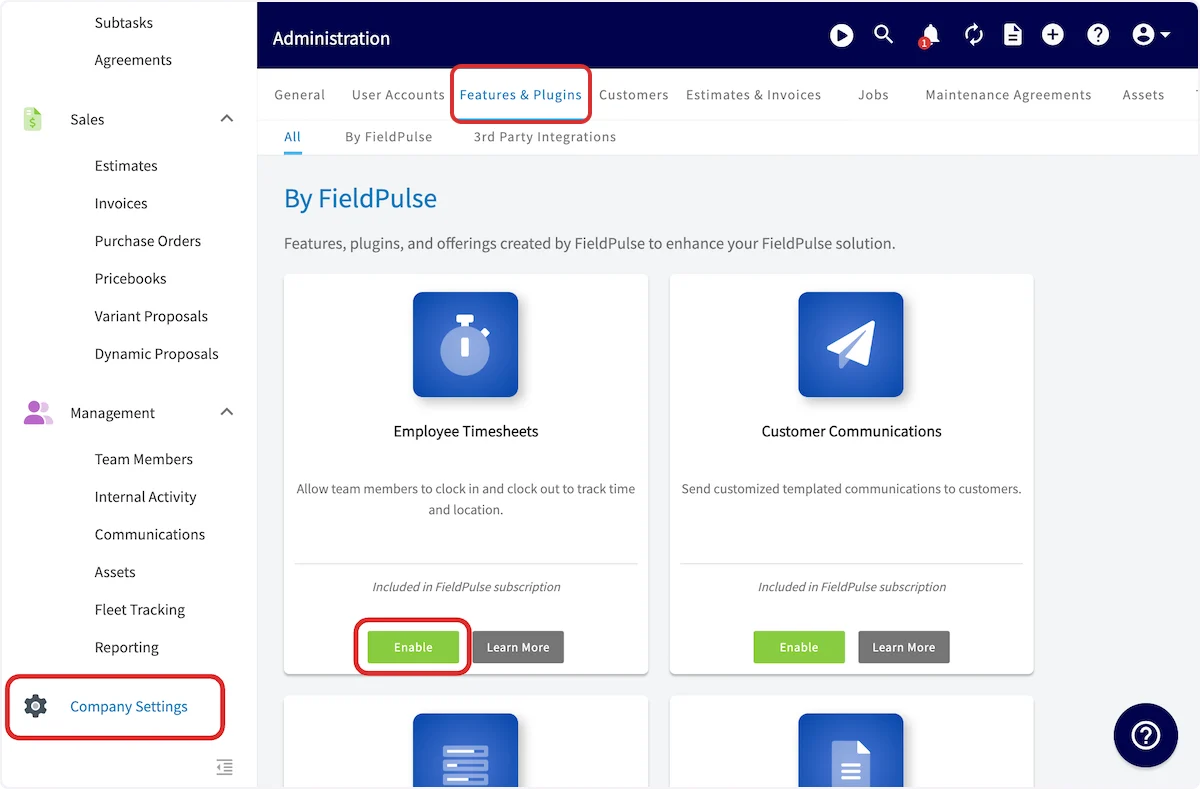
An Administrator enables Employee Timesheets and chooses the settings before anyone can clock in — Company Settings is visible to Administrators only.- Select Company Settings, then the Features & Plugins tab.
-
Find the Employee Timesheets tile and select Enable.
-
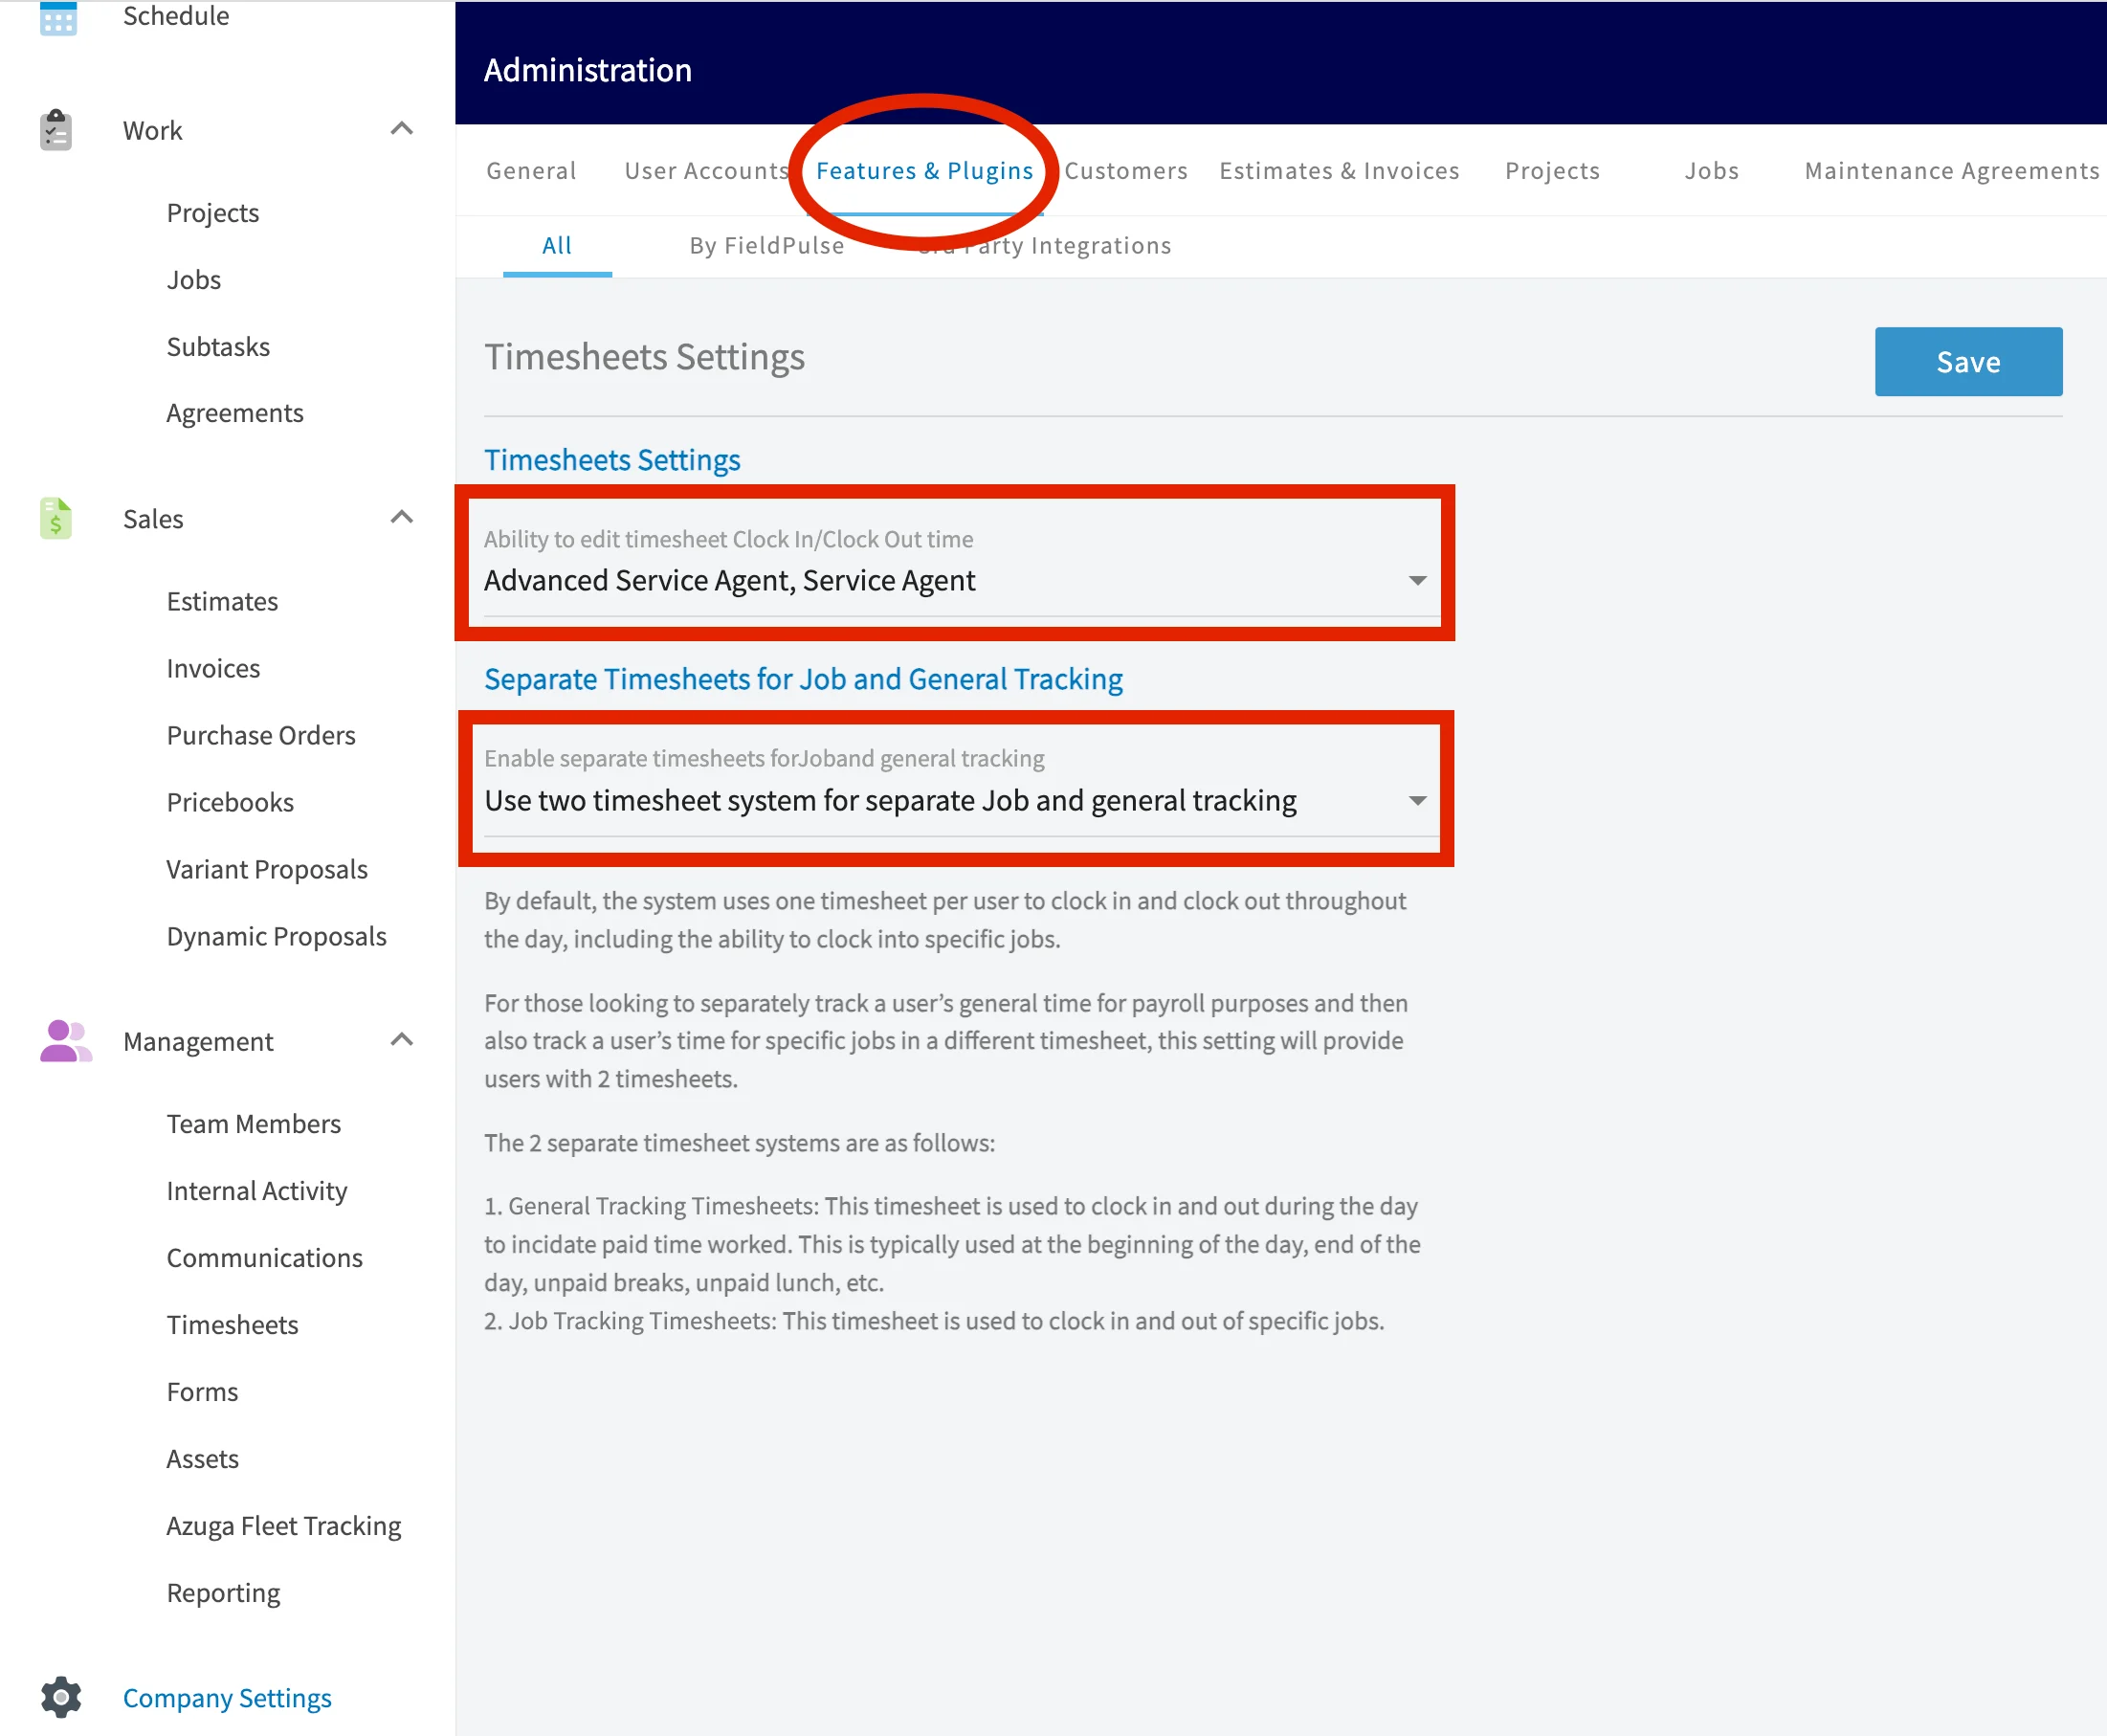
Select Settings on the Employee Timesheets tile to open the Timesheets Settings page.
-
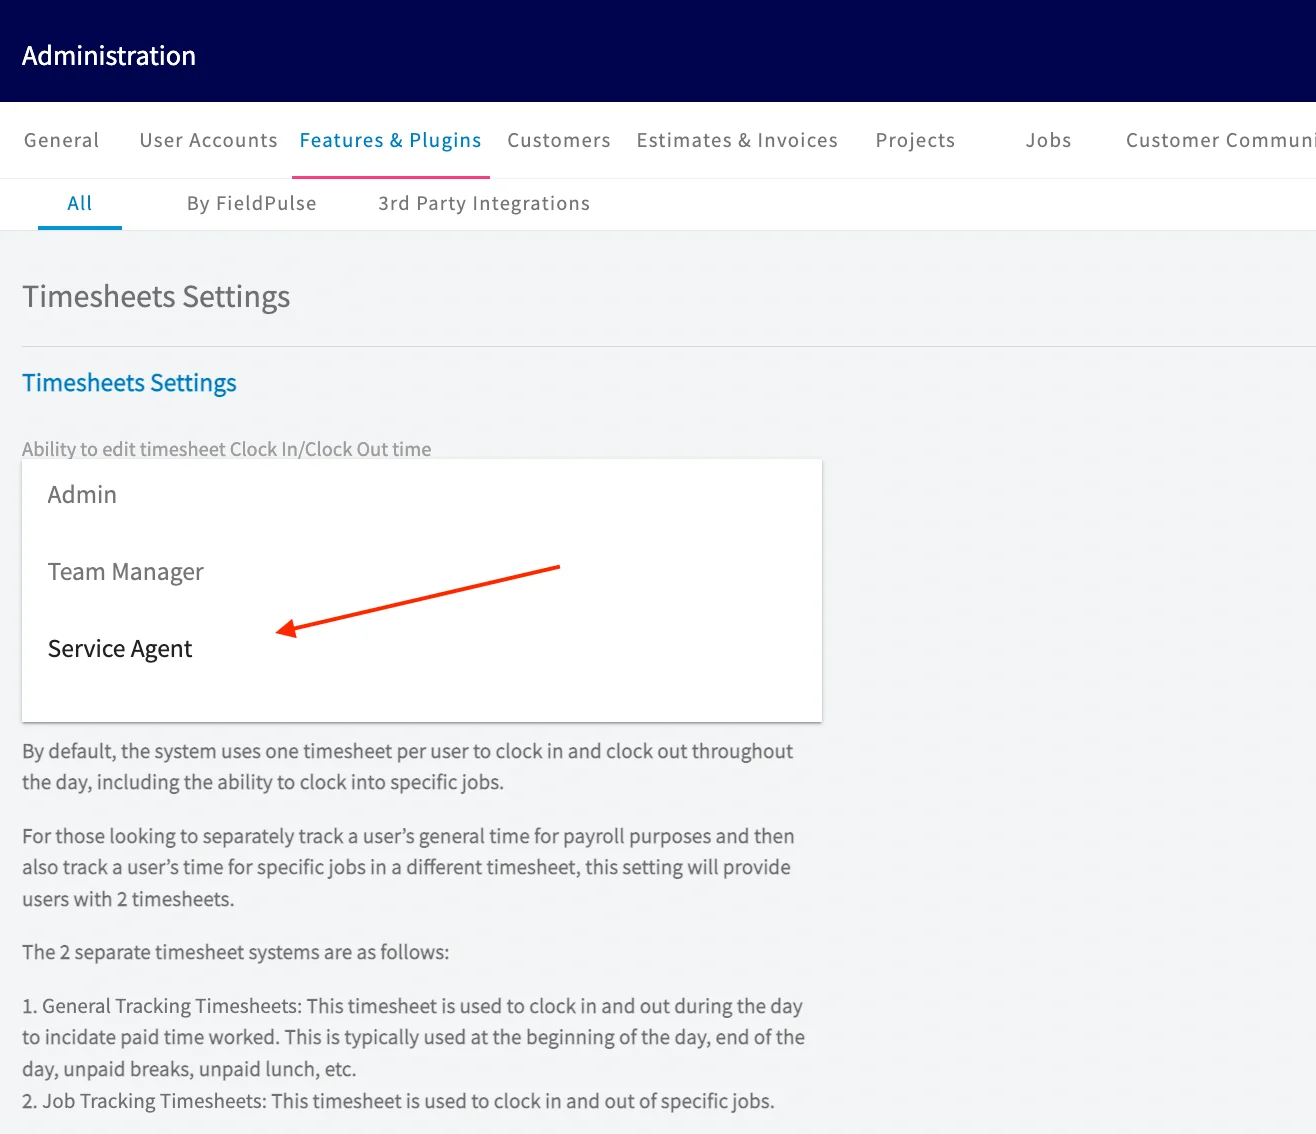
Under Ability to edit timesheet Clock In/Clock Out time, choose the roles that can manually adjust their own clock-in and clock-out times. Deselect Service Agent to take that access away from your service agents.
-
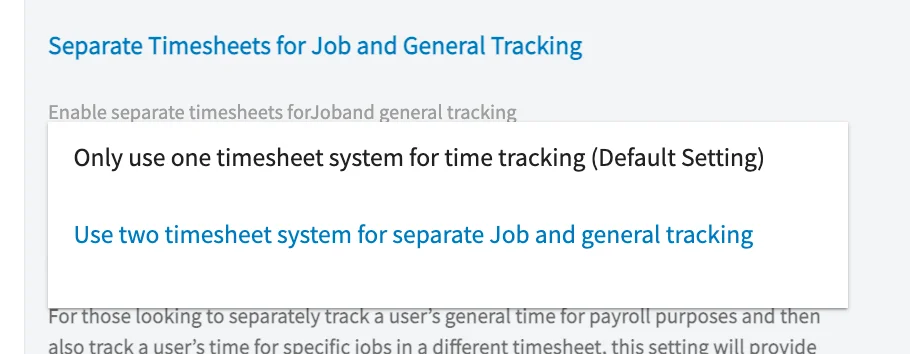
Under Separate Timesheets for Job and General Tracking, choose Only use one timesheet system for time tracking (Default Setting) to give your team a General timesheet only, or Use two timesheet system for separate Job and general tracking to add a separate job timesheet.
-
Set Make Job field required on Job Timesheets to Yes to stop a team member from saving a Job Timesheet clock-in or clock-out that is not linked to a job.
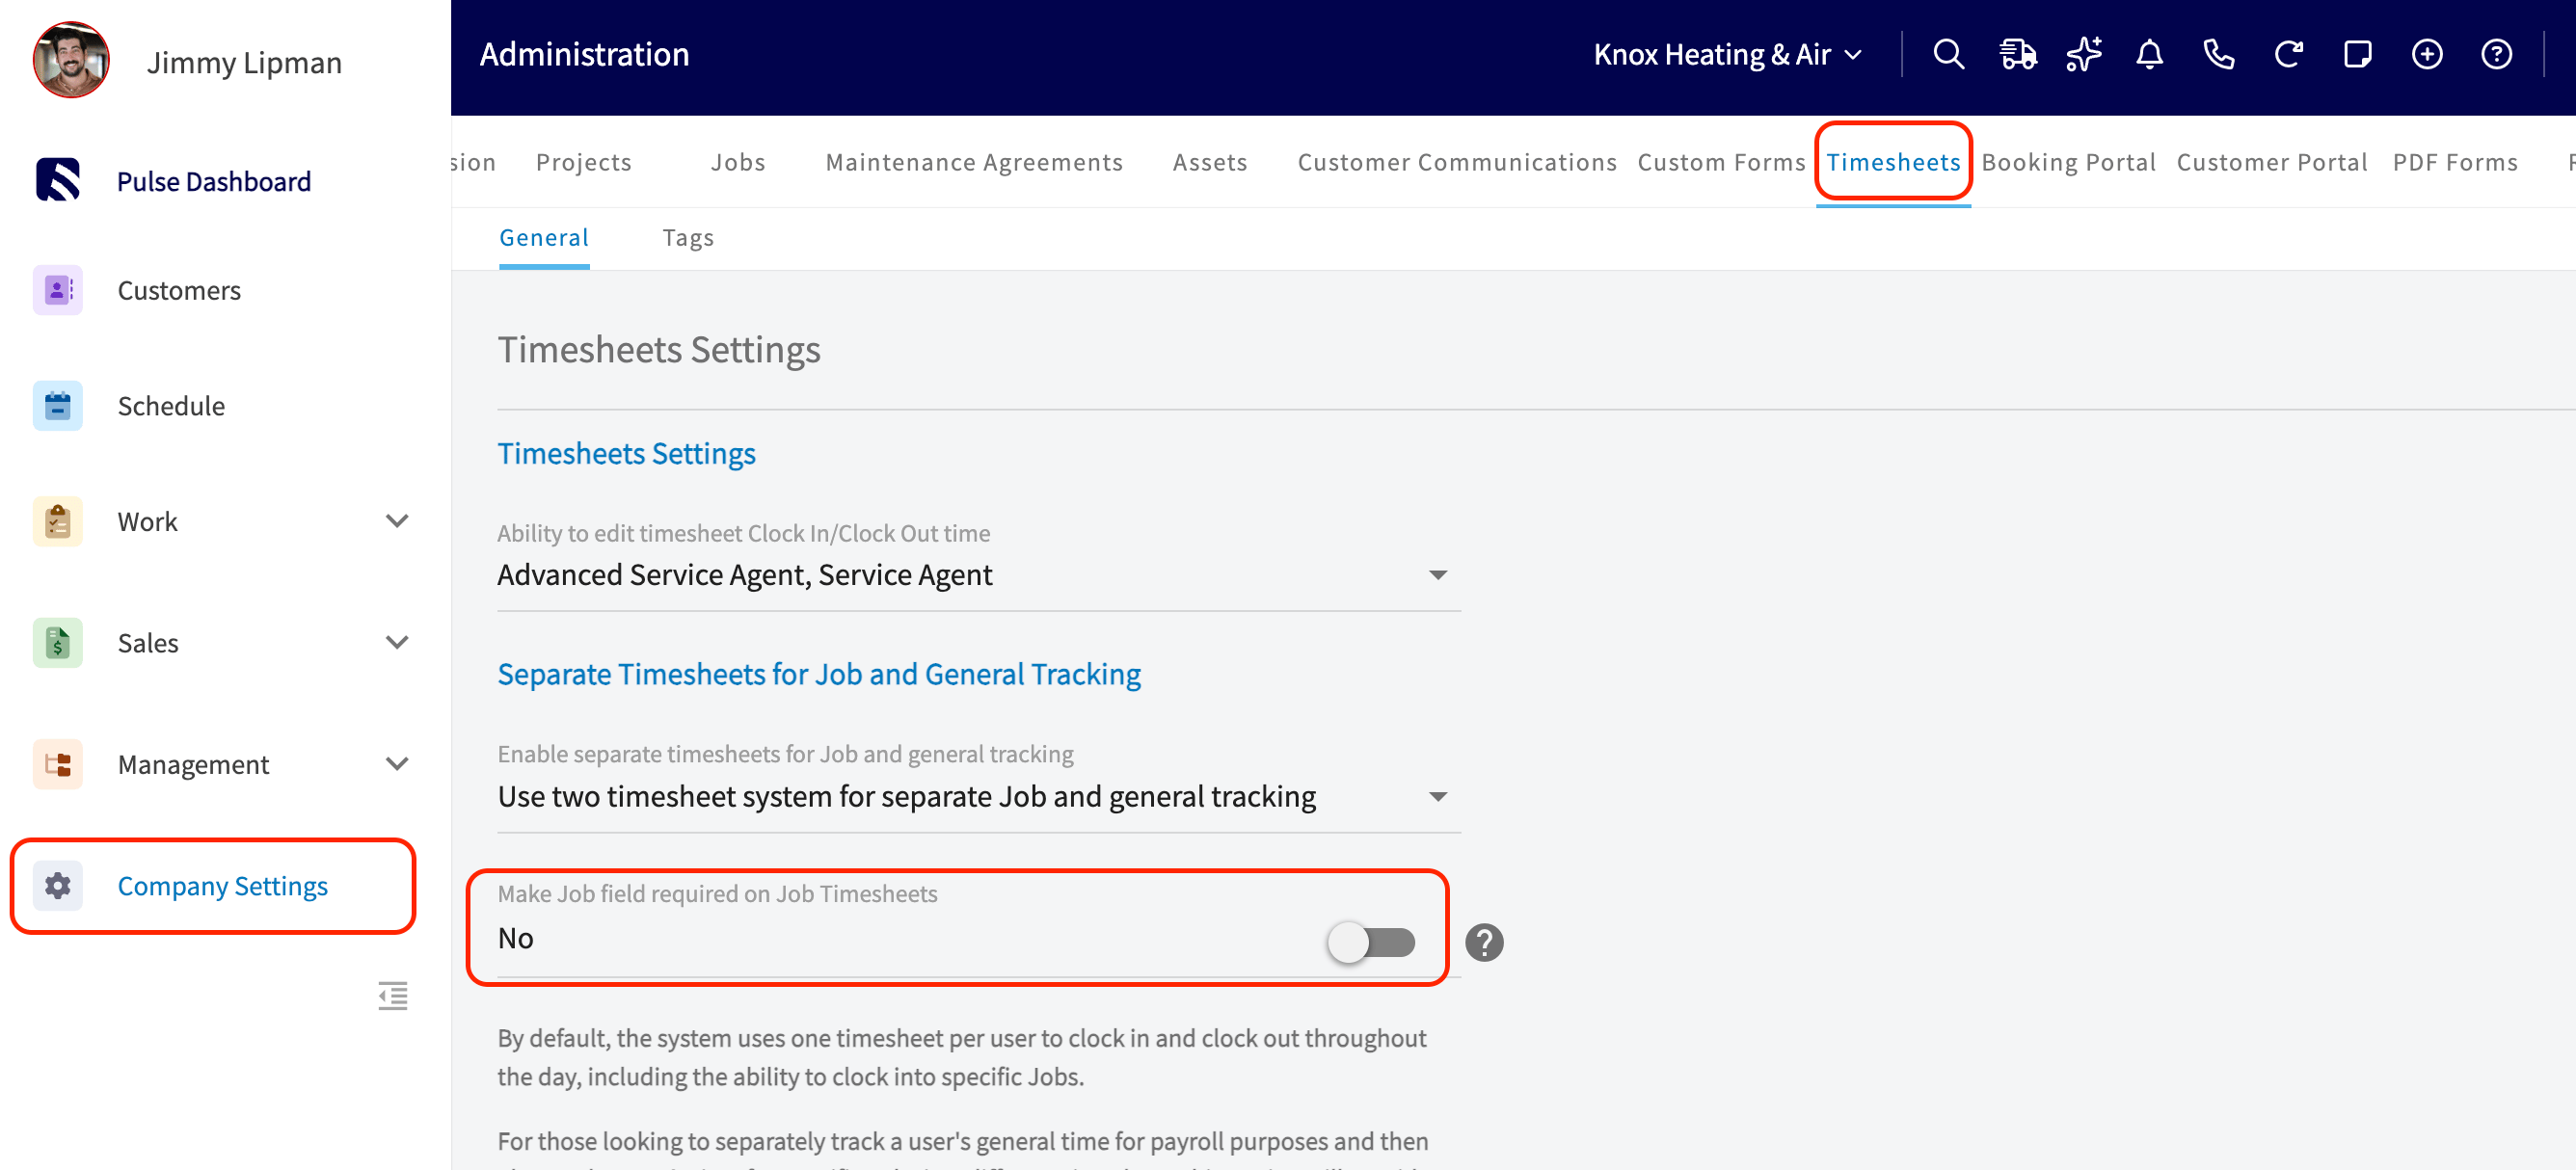
- Select Save.
On web
Team members clock in and out from My Timesheets in the web app, and admins and managers review everyone’s hours from Timesheets.Clock in and out in the web app
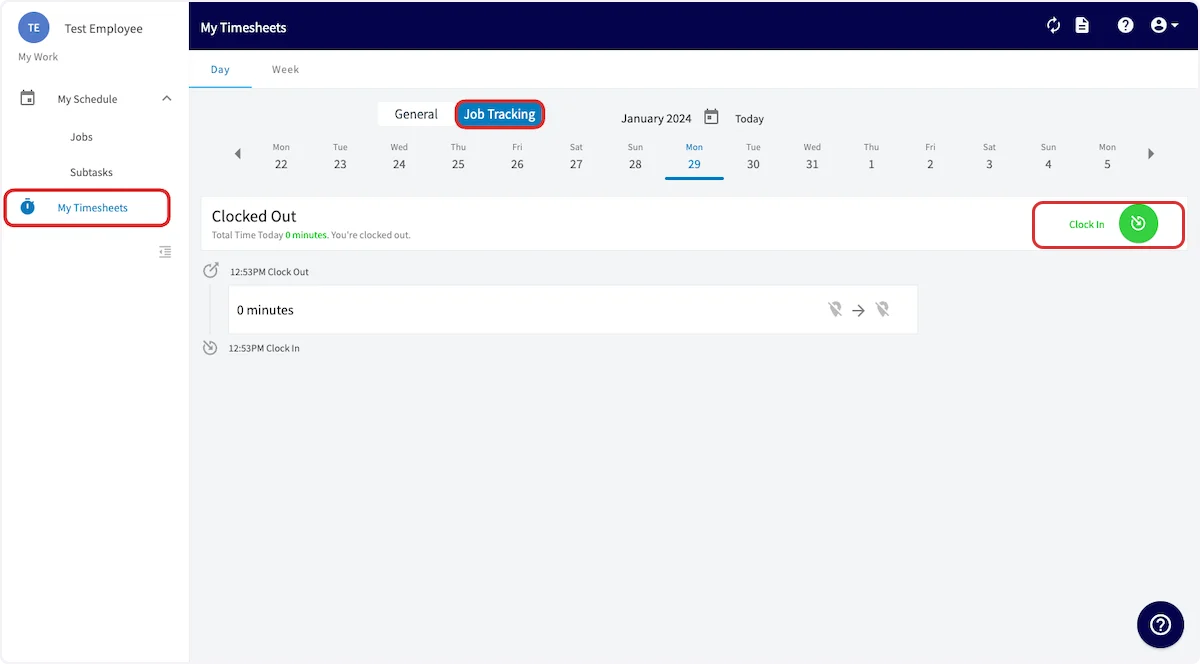
These steps show the Service Agent view. Team Managers and Admins follow the same process with more options in the left-side menu.- Select My Timesheets in the left-side menu.
- Select General or Job Tracking to choose which timesheet you are clocking into.
-
Select Clock In.
-
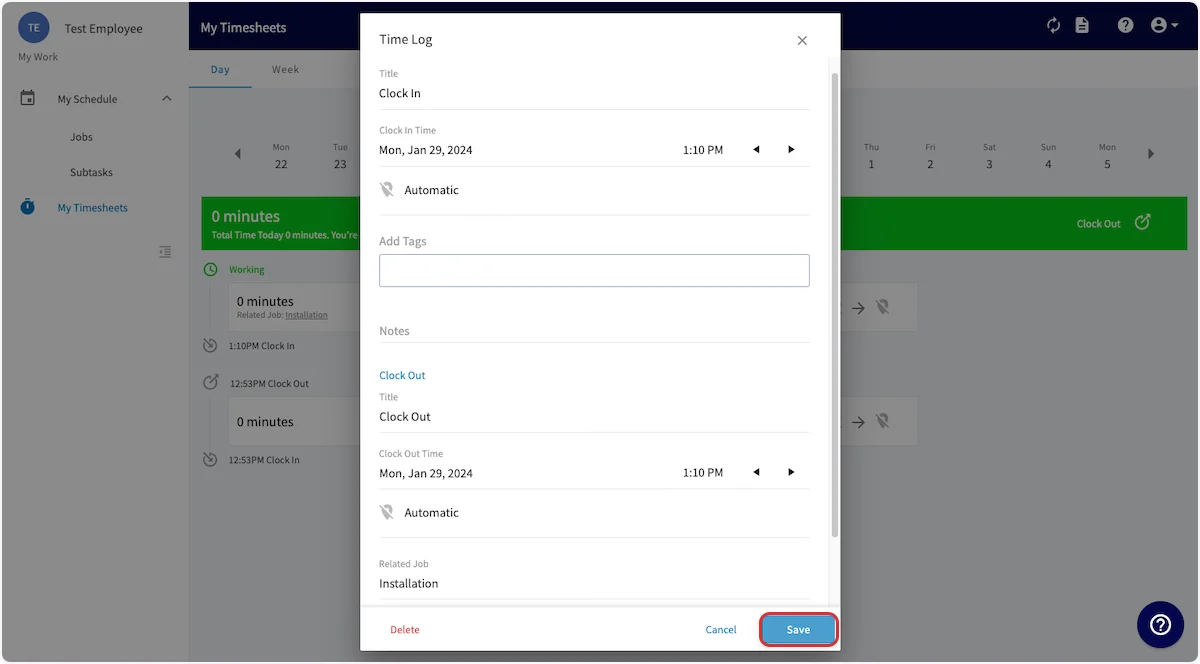
Add your clock-in details. You can change the Title, adjust the Clock In Time, or add Notes. On the Job Tracking timesheet, you can also select a Related Job for the clock-in.
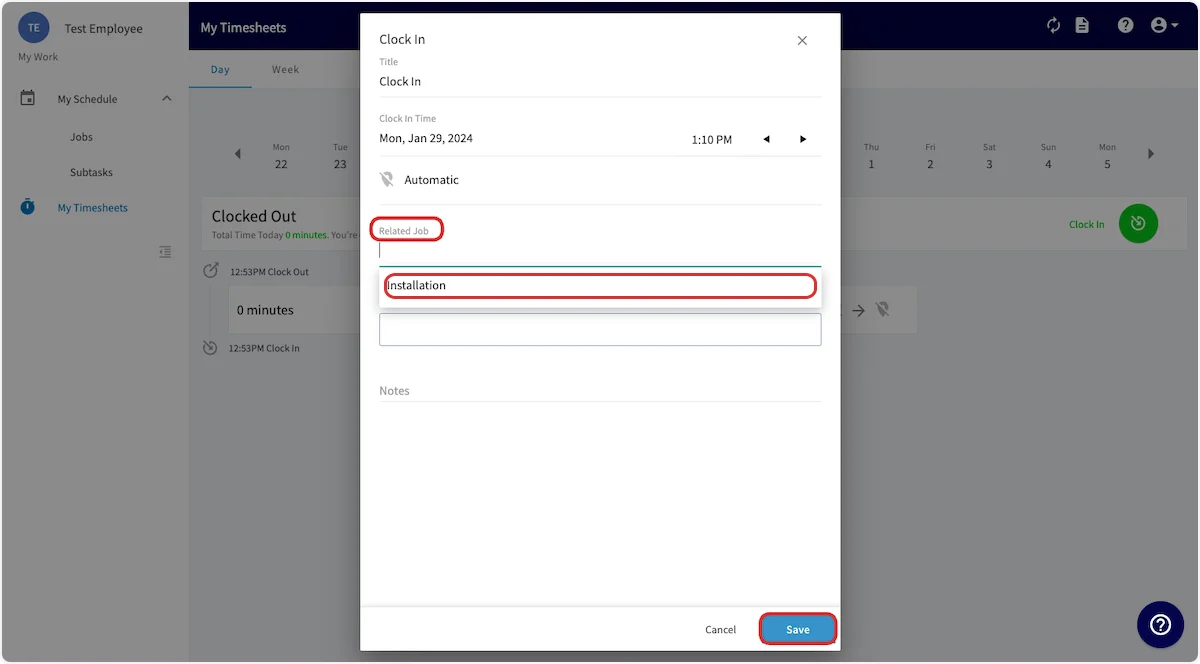
- Select Save. If you modify the time, FieldPulse marks the entry as modified.
-
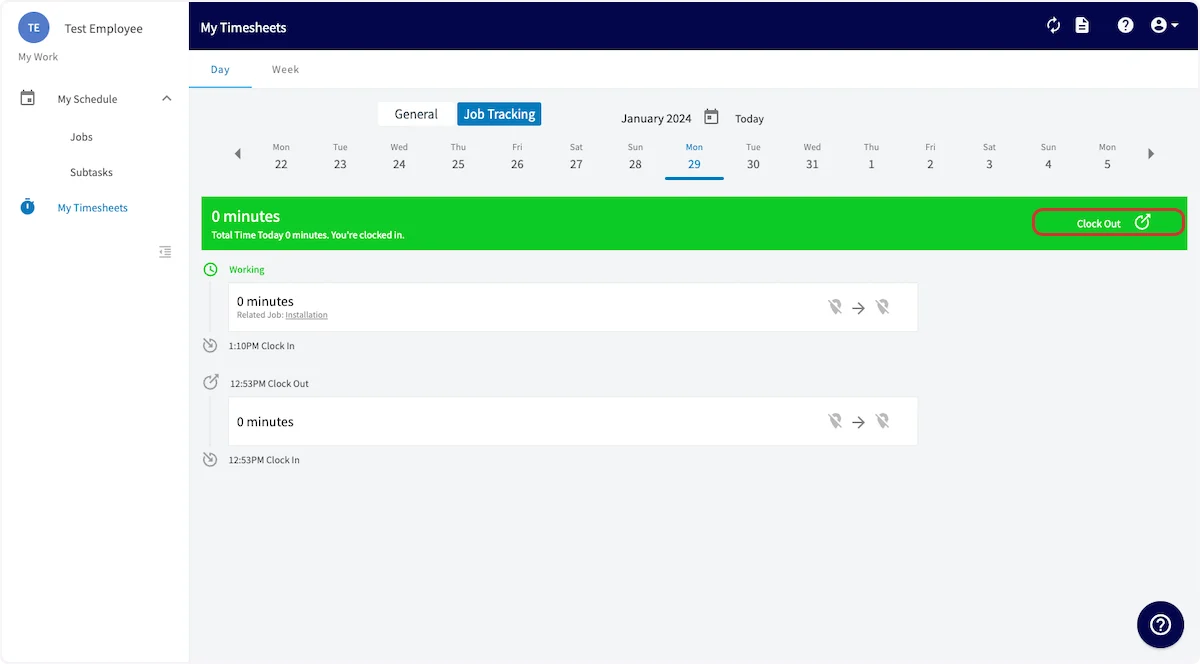
When you are ready to clock out of the general timesheet or a specific job, open that timesheet and select Clock Out.
-
Add or edit the time log, then select Save to record the entry.
Review your team’s hours
- Select Timesheets in the left-side menu to open Team Timesheets.
- Toggle between My and Team to switch between your own timesheets and your team’s.
- Toggle between General and Job Tracking to choose which timesheets are displayed.
-
Under Day, choose the Overview, Dispatch, or Map view.
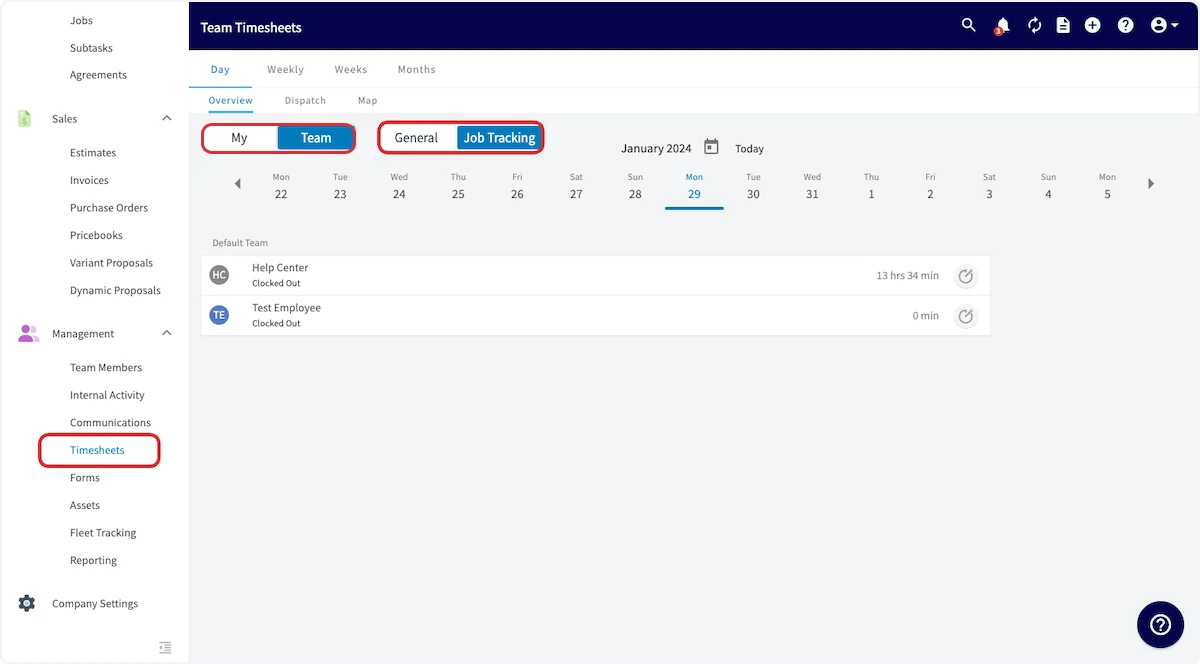
- Select a team member’s name to open their specific log, where you can view or modify the details of an entry.
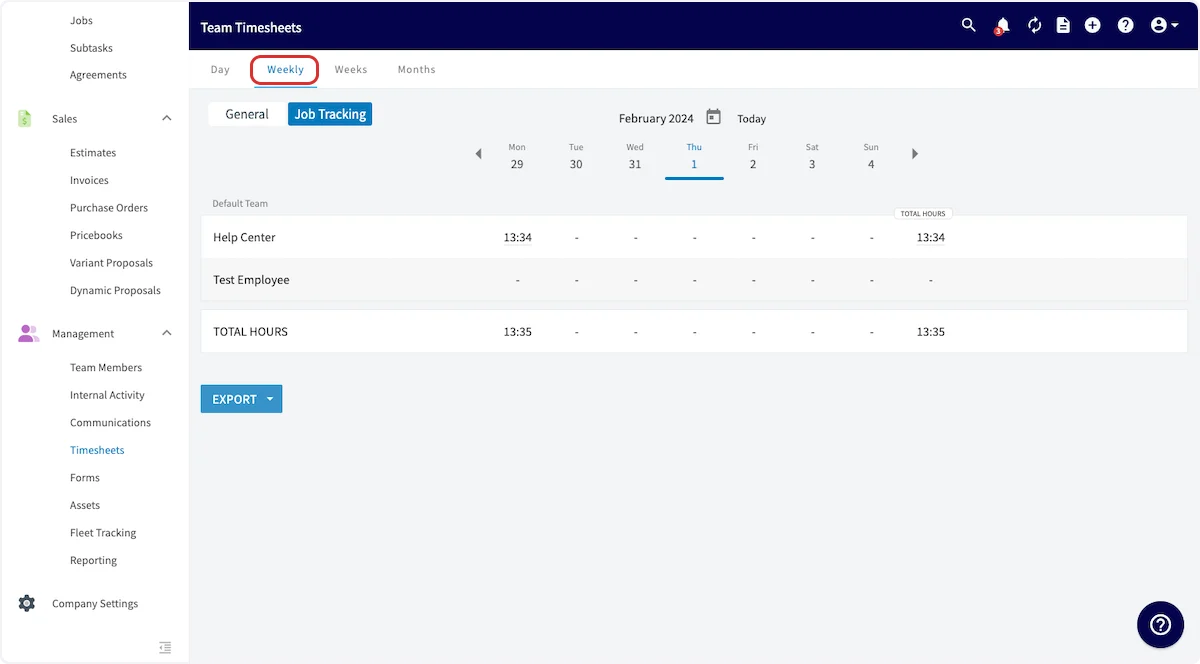
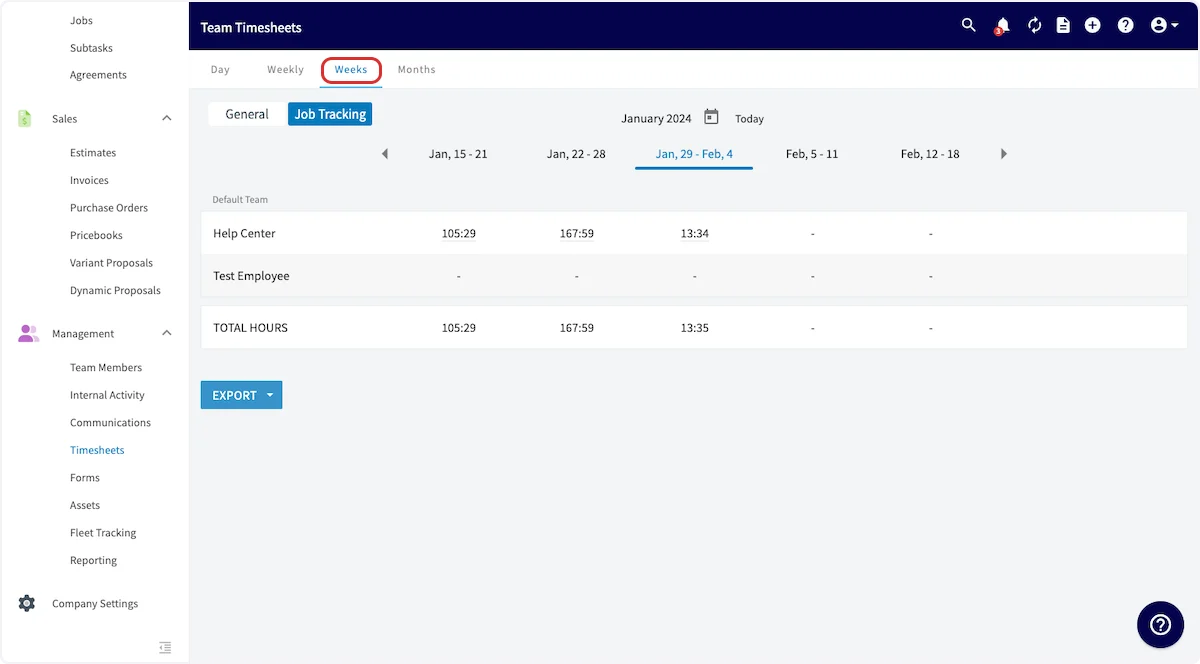
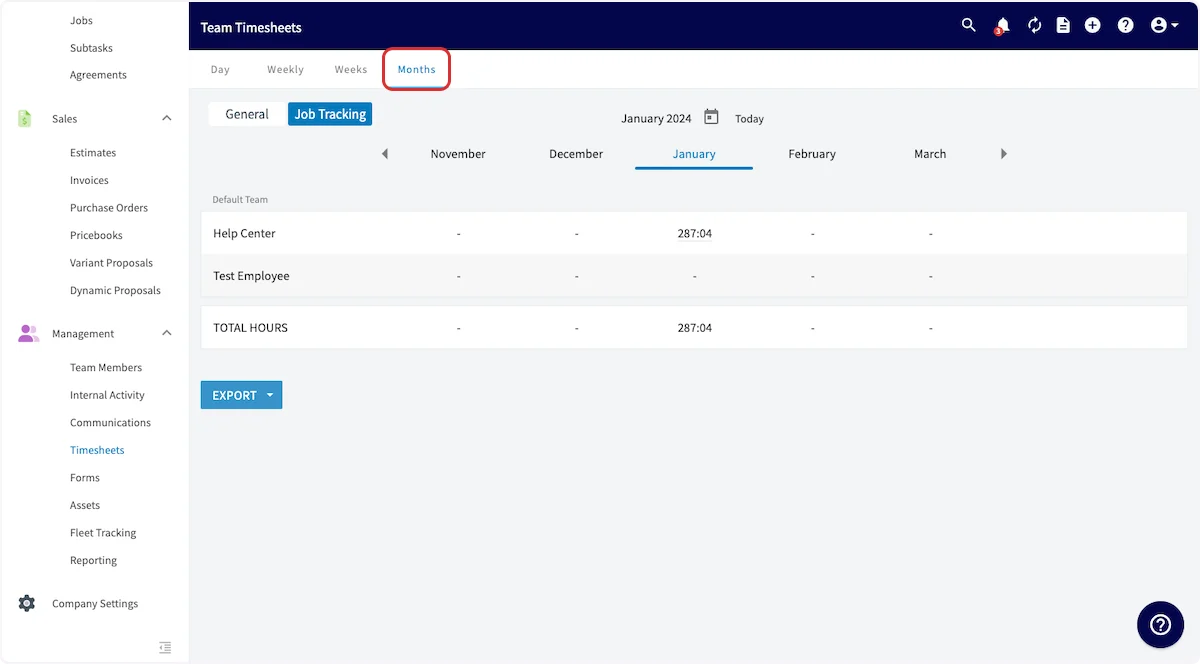
The Weekly, Weeks, and Months tabs each have an EXPORT button below the totals.
When a user is deactivated, their timesheets disappear from the Timesheets menu and from the job records they are linked to. You can still access a deactivated user’s timesheets through Reporting.
Review the hours logged on one job
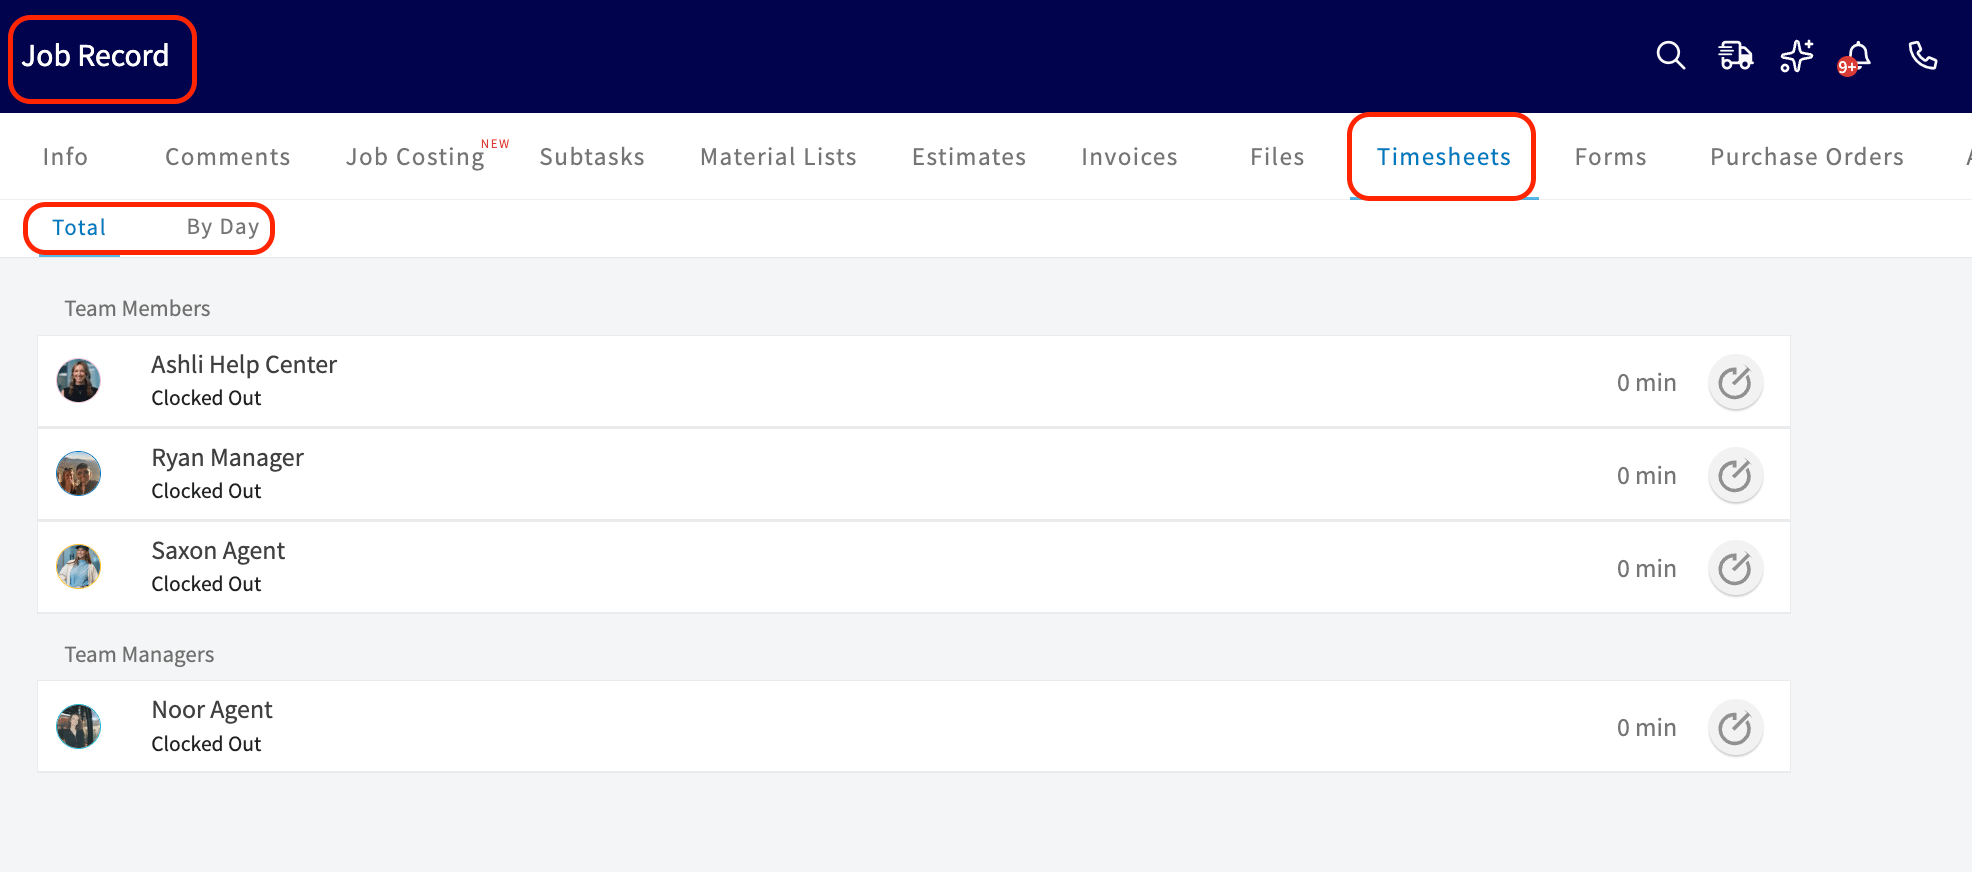
Team Timesheets covers the whole company. Each Job record also has its own Timesheets tab, so you can see who clocked in on that one job without scrolling past everyone else.- Open the Job record and select the Timesheets tab.
-
Select Total to see every timesheet entry logged against the job, or By Day to break those same entries out by calendar day.
Check a clock-in or clock-out location
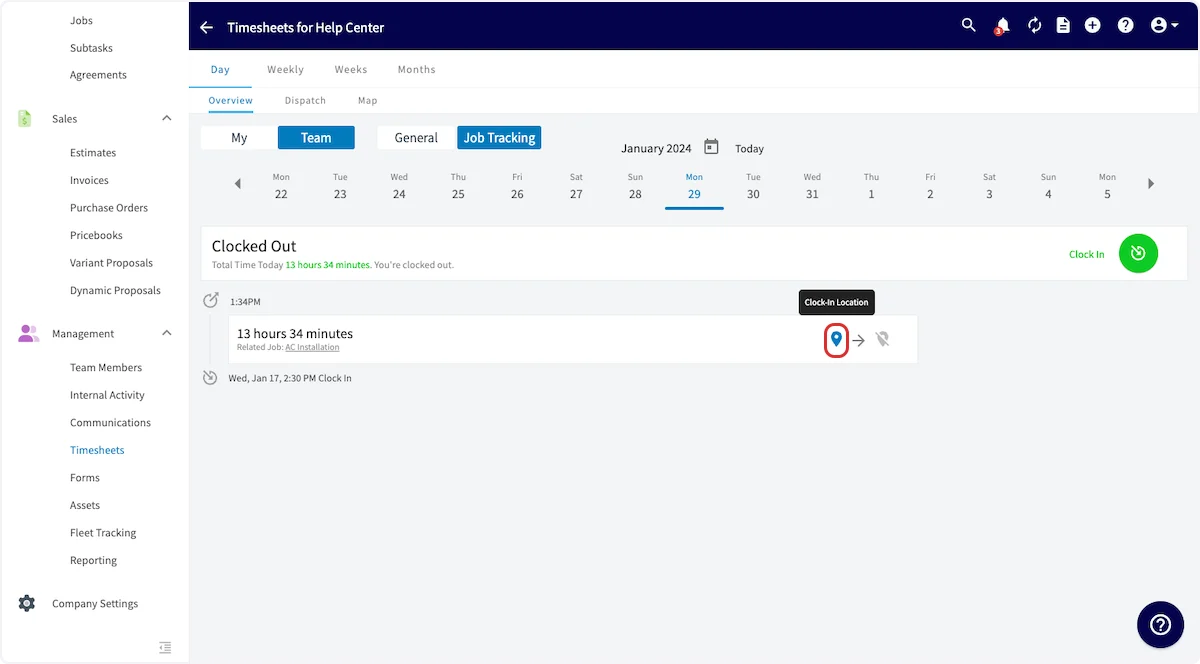
When a team member clocks in or out on the mobile app, FieldPulse geo-tags their location.- In Team Timesheets, select the team member’s name to open their timesheets.
-
Select the blue location marker on the clock-in or clock-out entry to open a map of that location.
Log backdated time
Log backdated time when a team member worked but did not clock in at the time. In the web app you can log a backdated timesheet even while that team member is currently clocked in.-
Open the Timesheets tab and select Log Backdated Time in the top right corner.
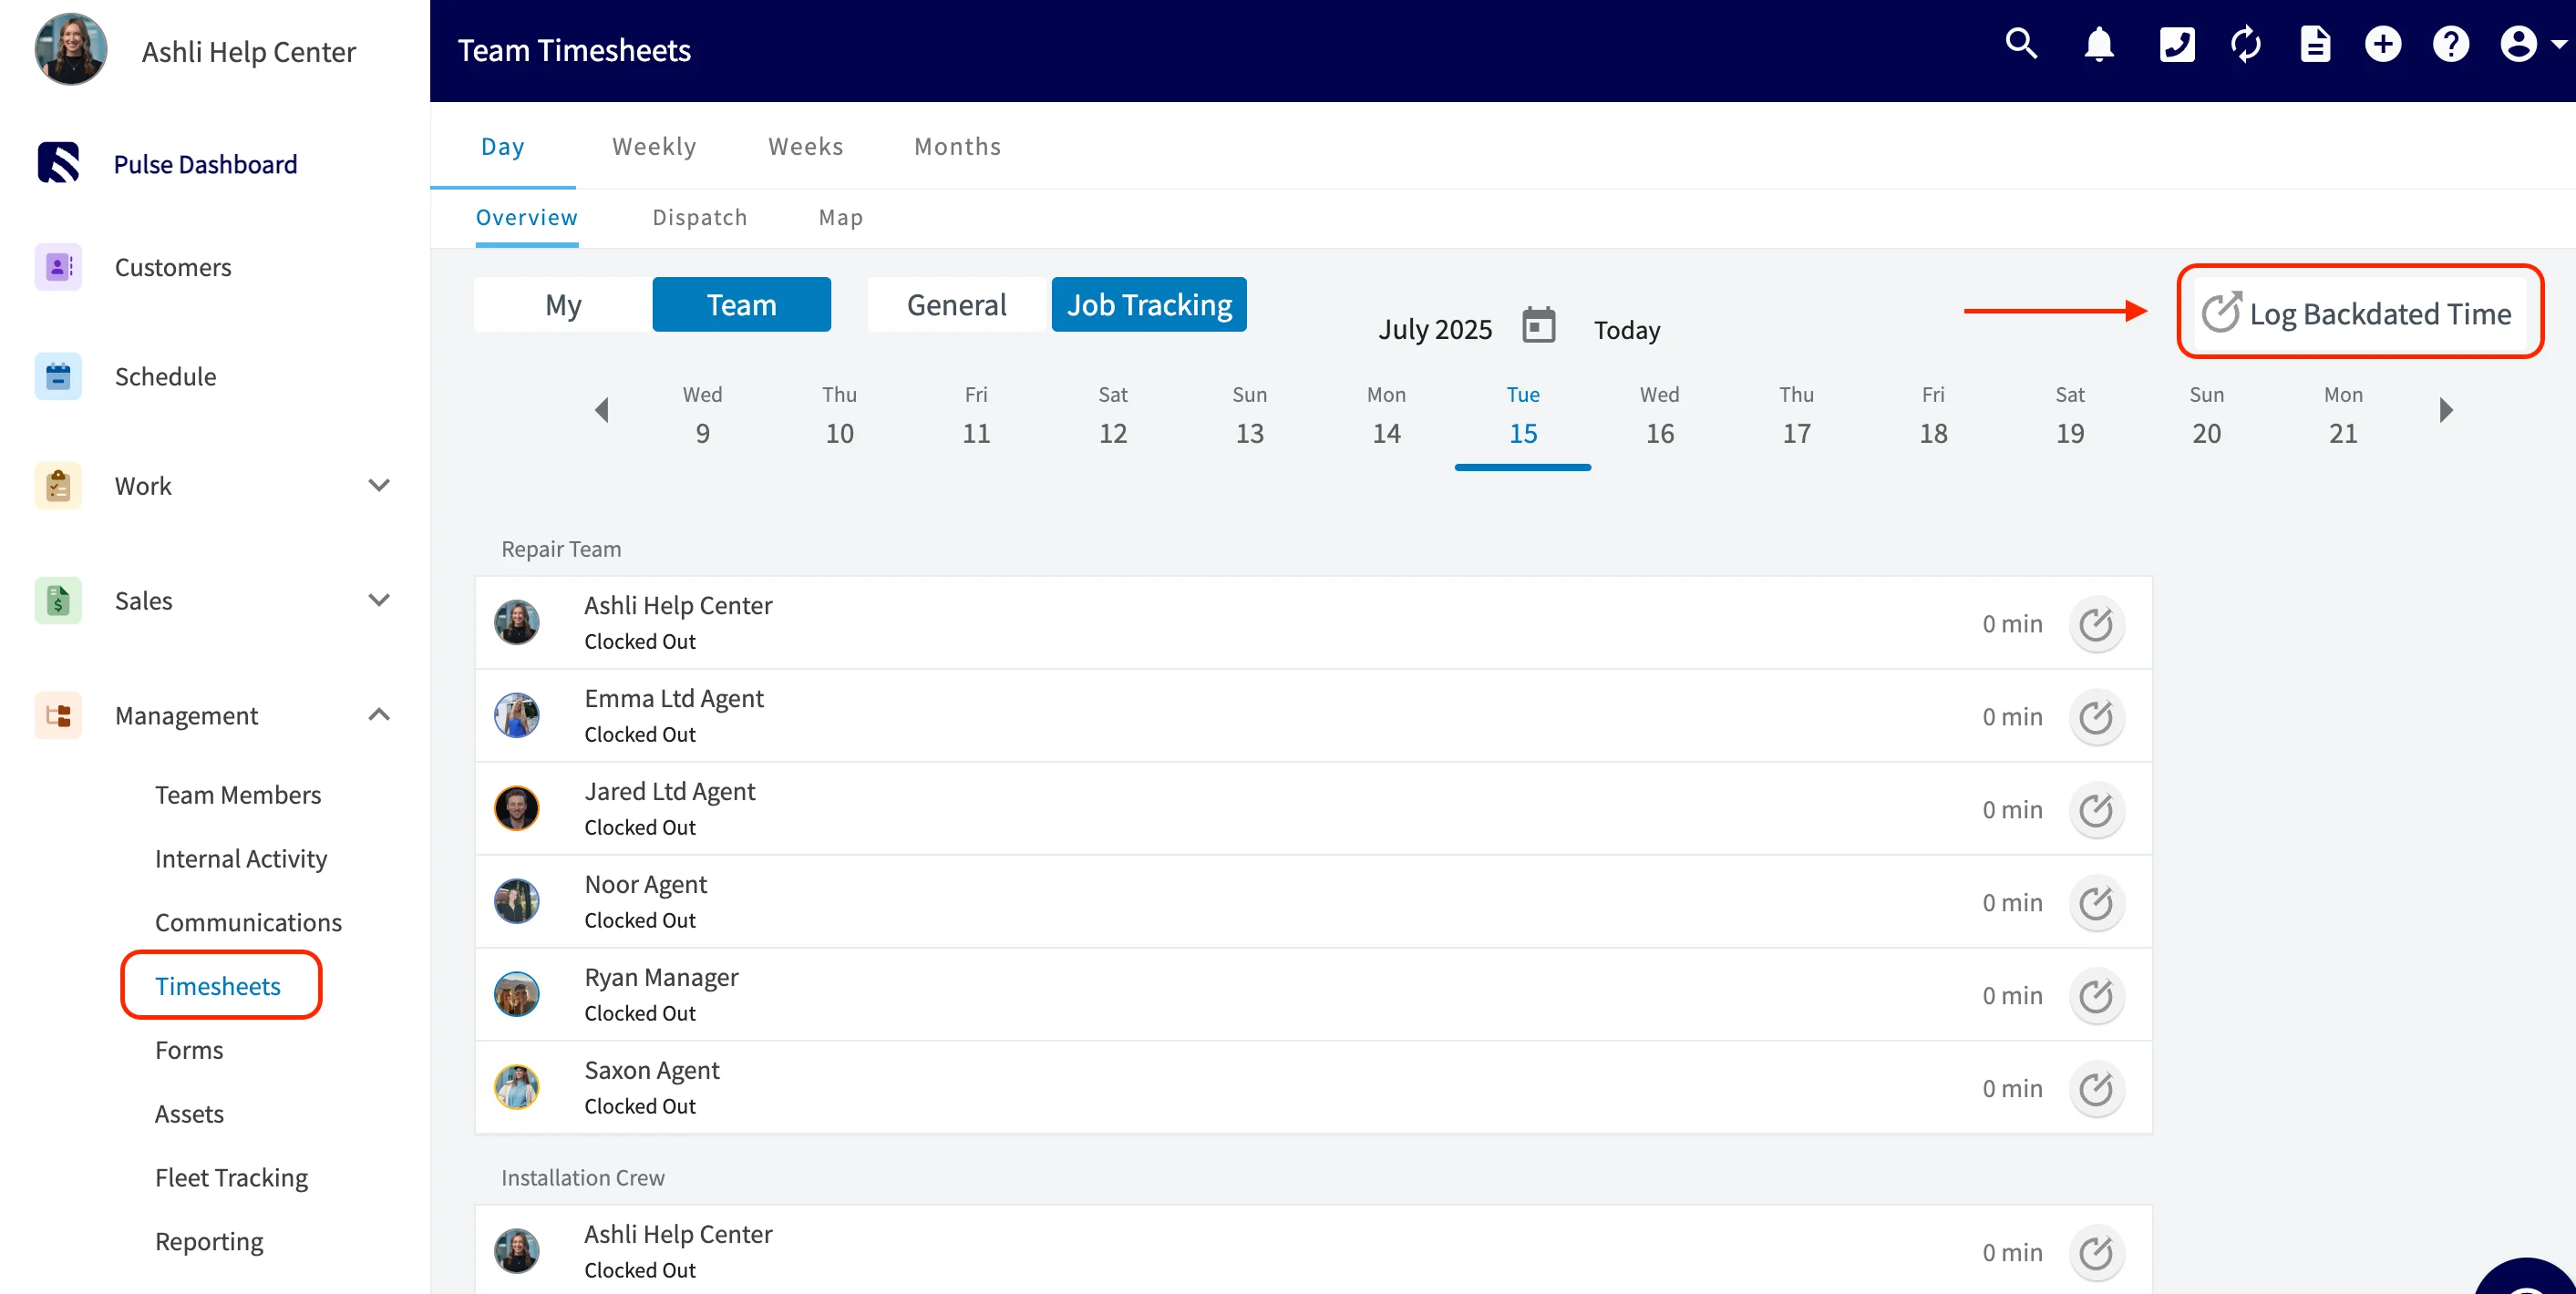
- Choose the User the time belongs to.
- Enter the Clock In Time and the Clock Out Time. Both are required.
- Add Tags, Notes, a Related Project, or a Related Job if you want them.
- Select the blue Log Time button to save the entry.
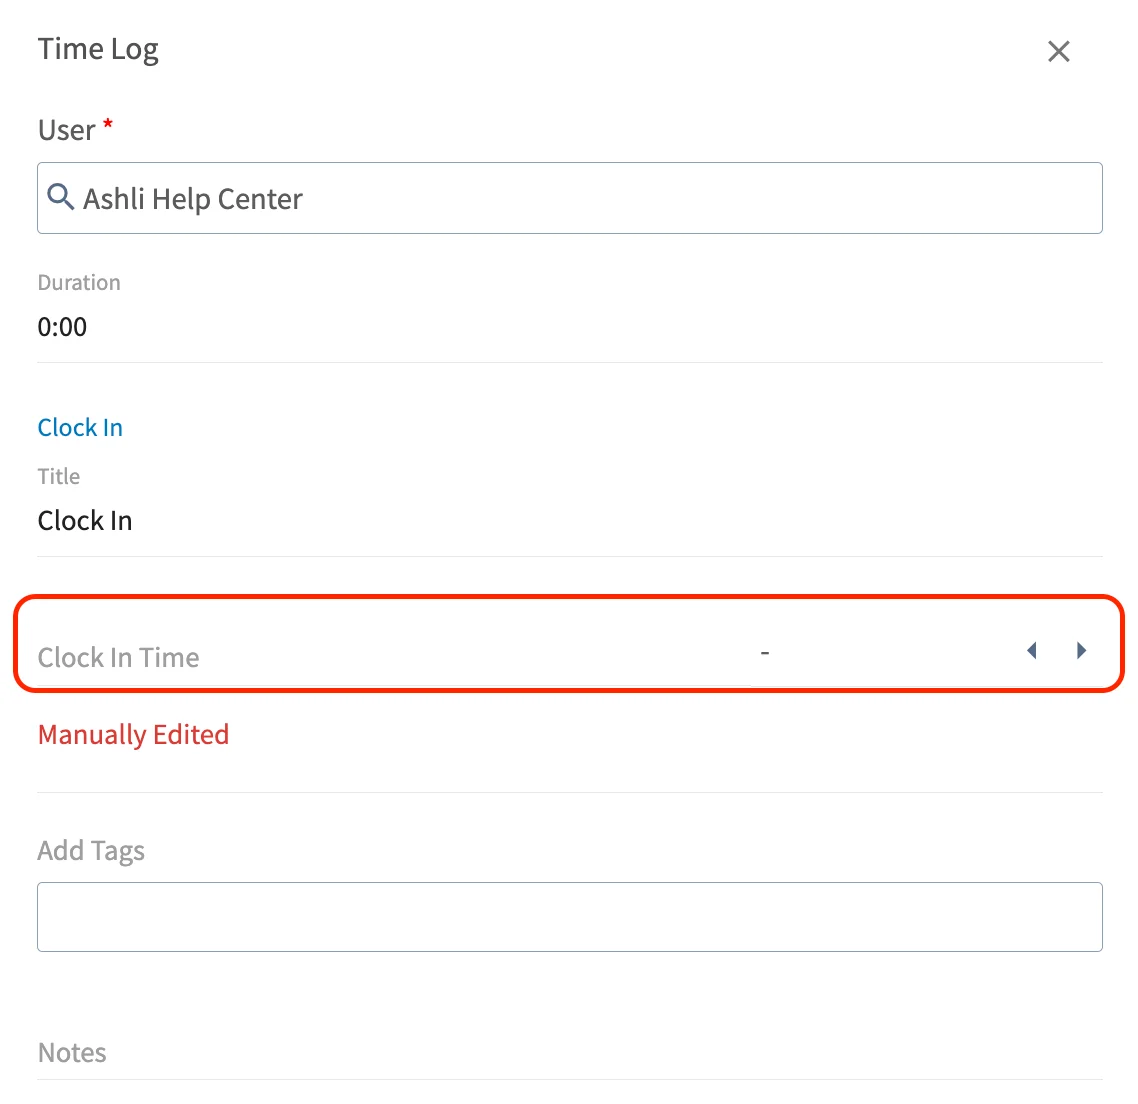
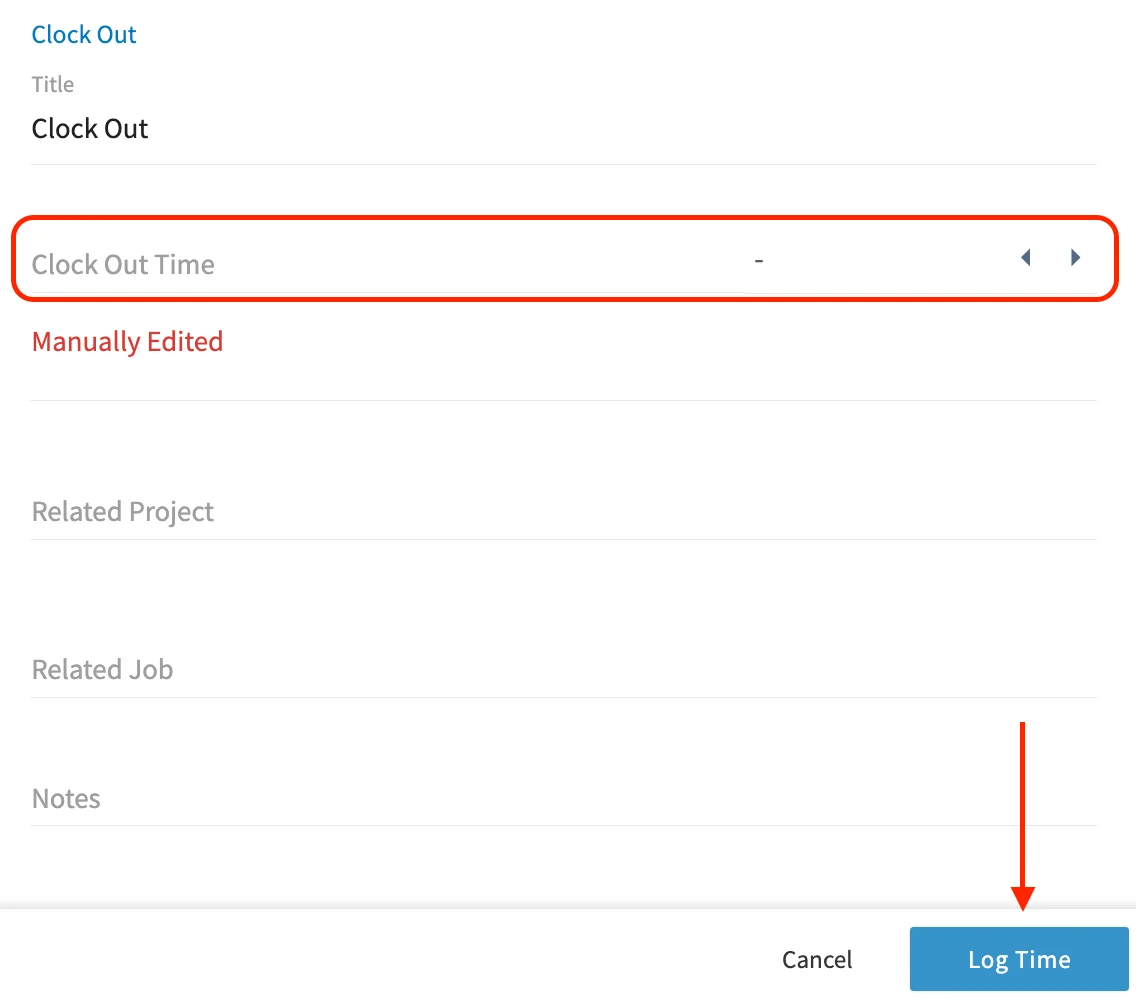
Two limits apply to backdated entries:
- Historical time punches must be for past dates and times only. Future timesheets cannot be logged with this feature.
- Log Backdated Time is available on the web app only. Mobile users open the web app to log backdated time.
Watch the interactive backdated timesheets demo to see Backdated Timesheets in action.
Video walkthrough: Timesheets in the FieldPulse web app
On mobile
Clocking in and out from the mobile app is the most common way team members track time.Clock in and out on a general timesheet
- Select Timesheets in the bottom menu.
-
Select Clock In under General Timesheet.
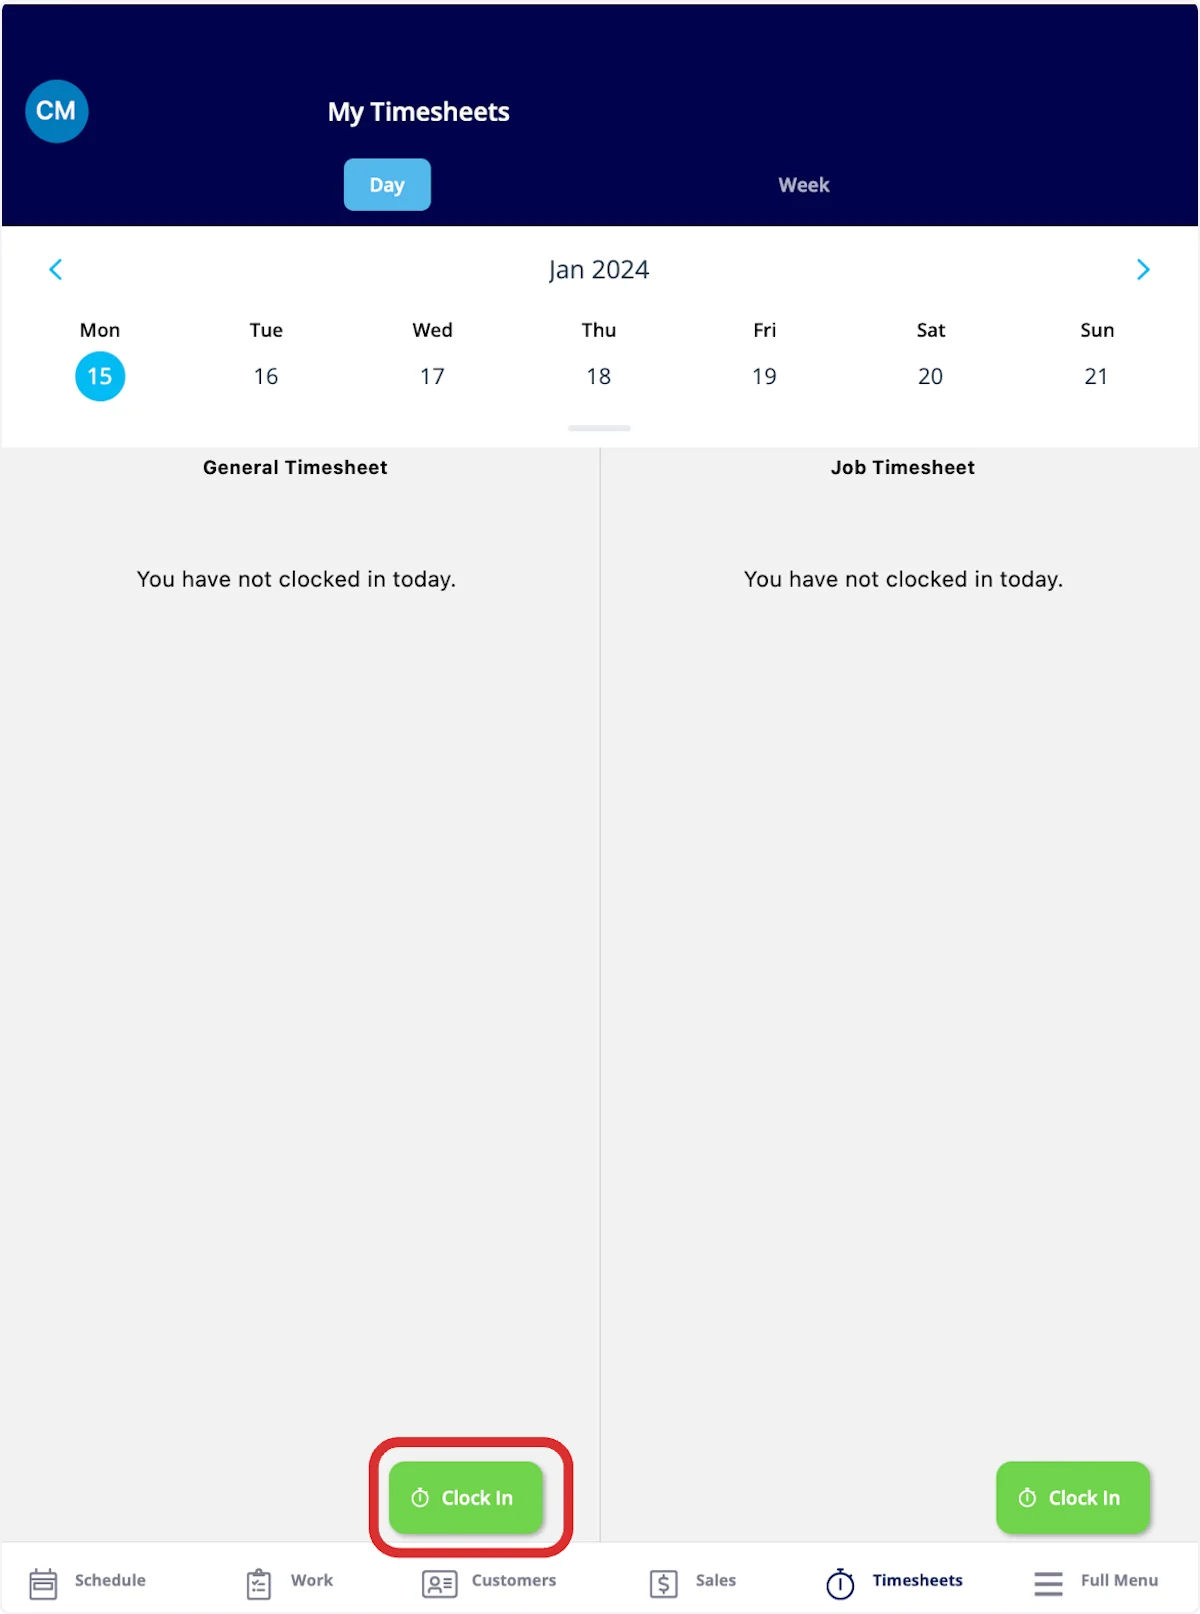
- Add Notes or Tags to the clock-in if you want them.
-
Select Save Clock-In or Save to record your time.
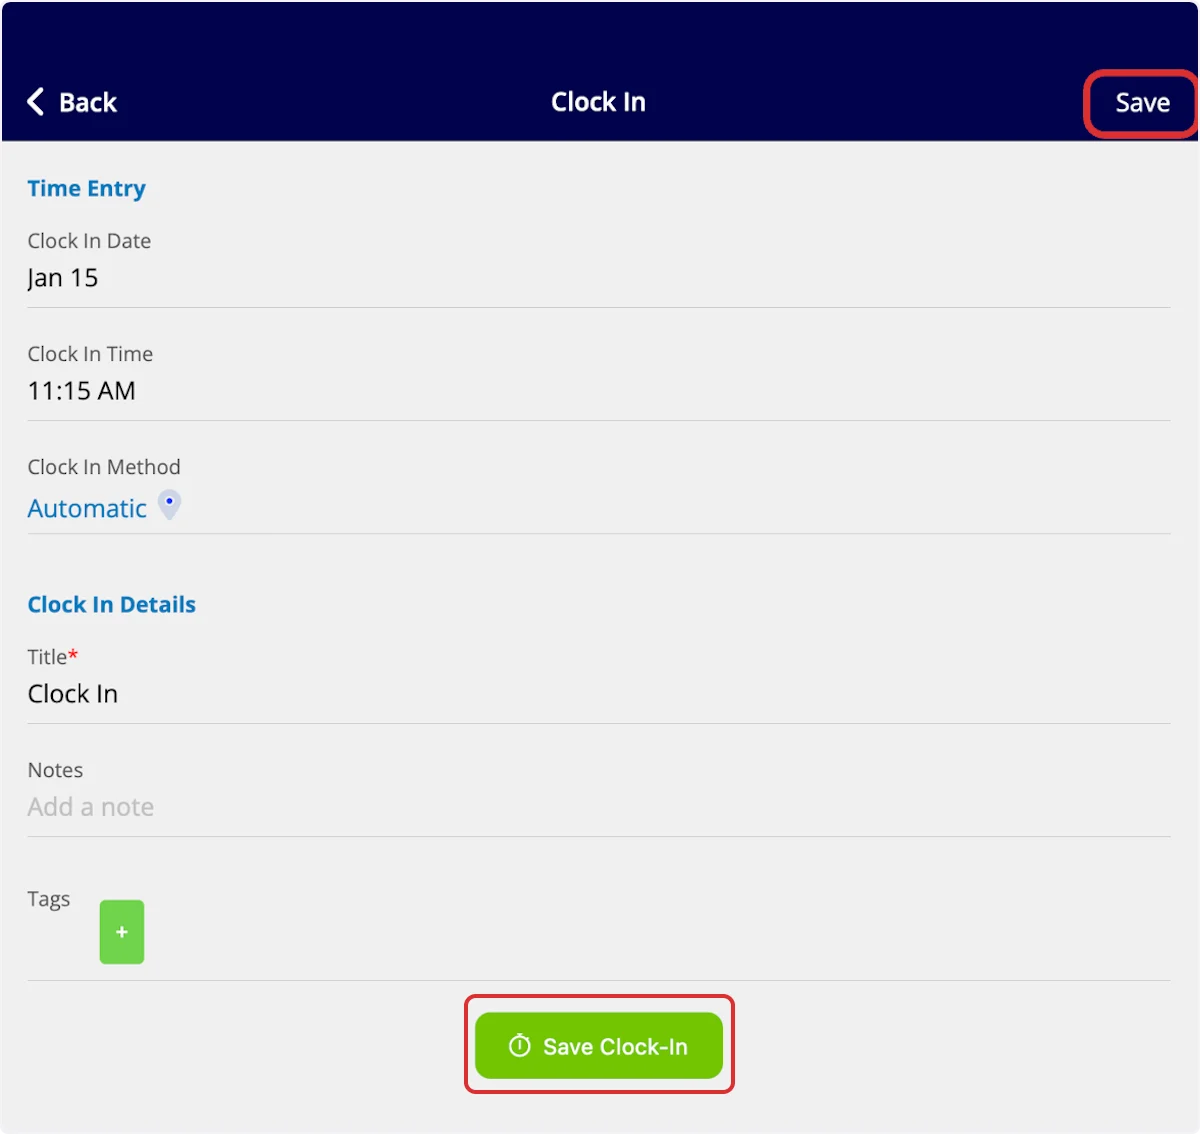
- Repeat the process when you are ready to clock out.
Clock in and out on a job
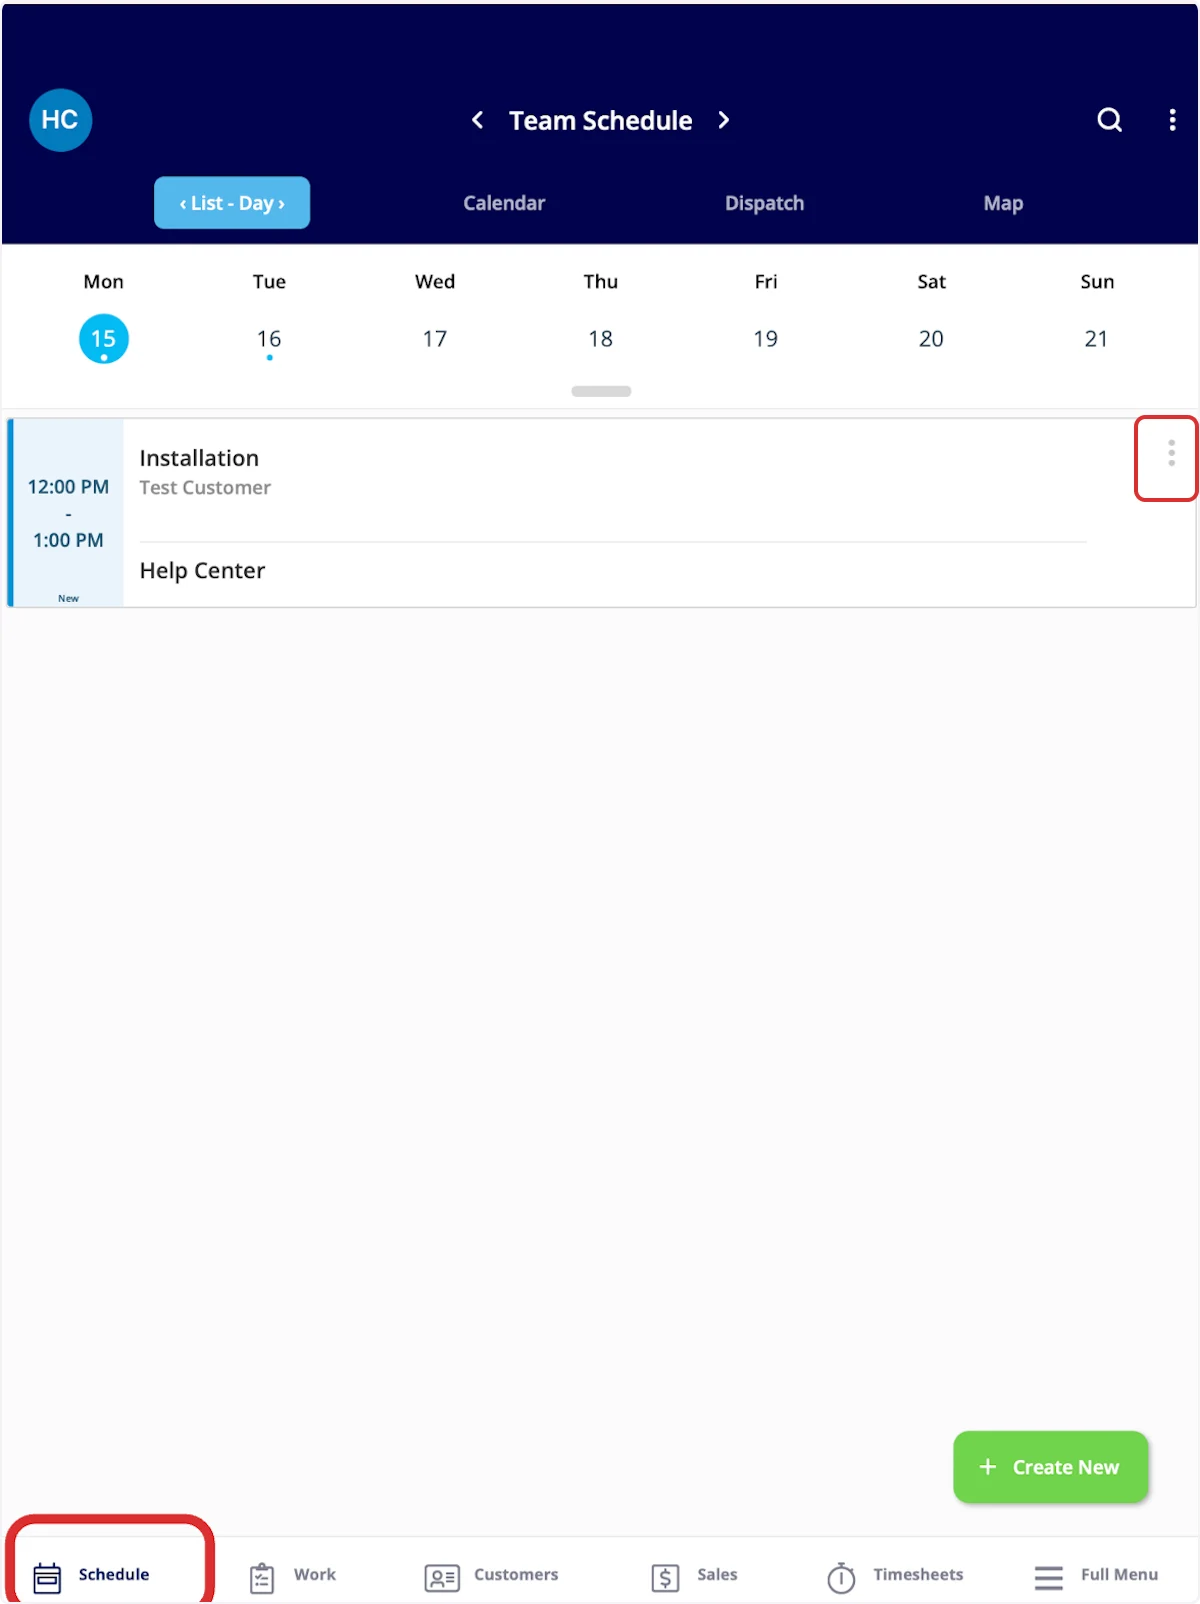
- Select the Schedule tab at the bottom of the screen to see your jobs for the day.
-
Select the three dots on the right side of the job.
-
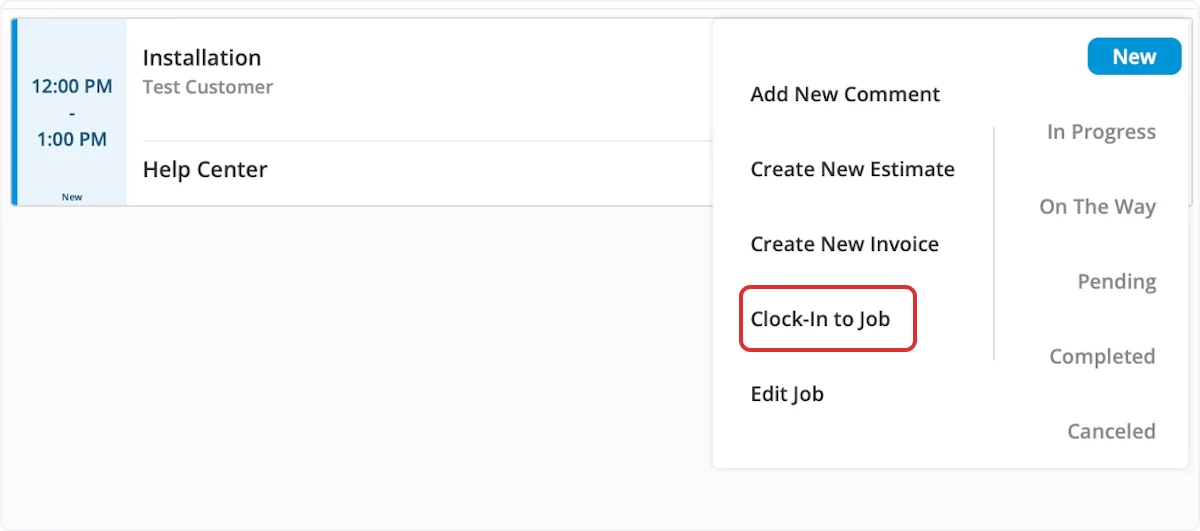
Select Clock-In to Job from the short menu that appears.
-
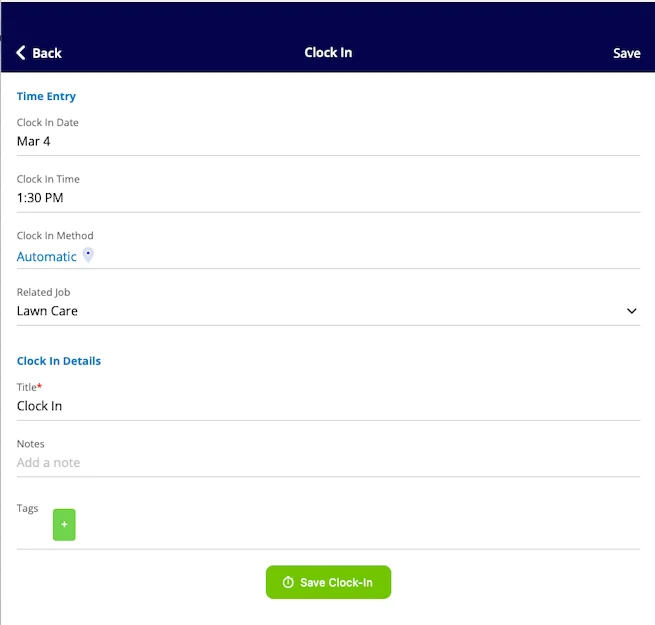
Add Notes or Tags on the clock-in screen. The Related Job field already contains the title of the job you are clocking in for.
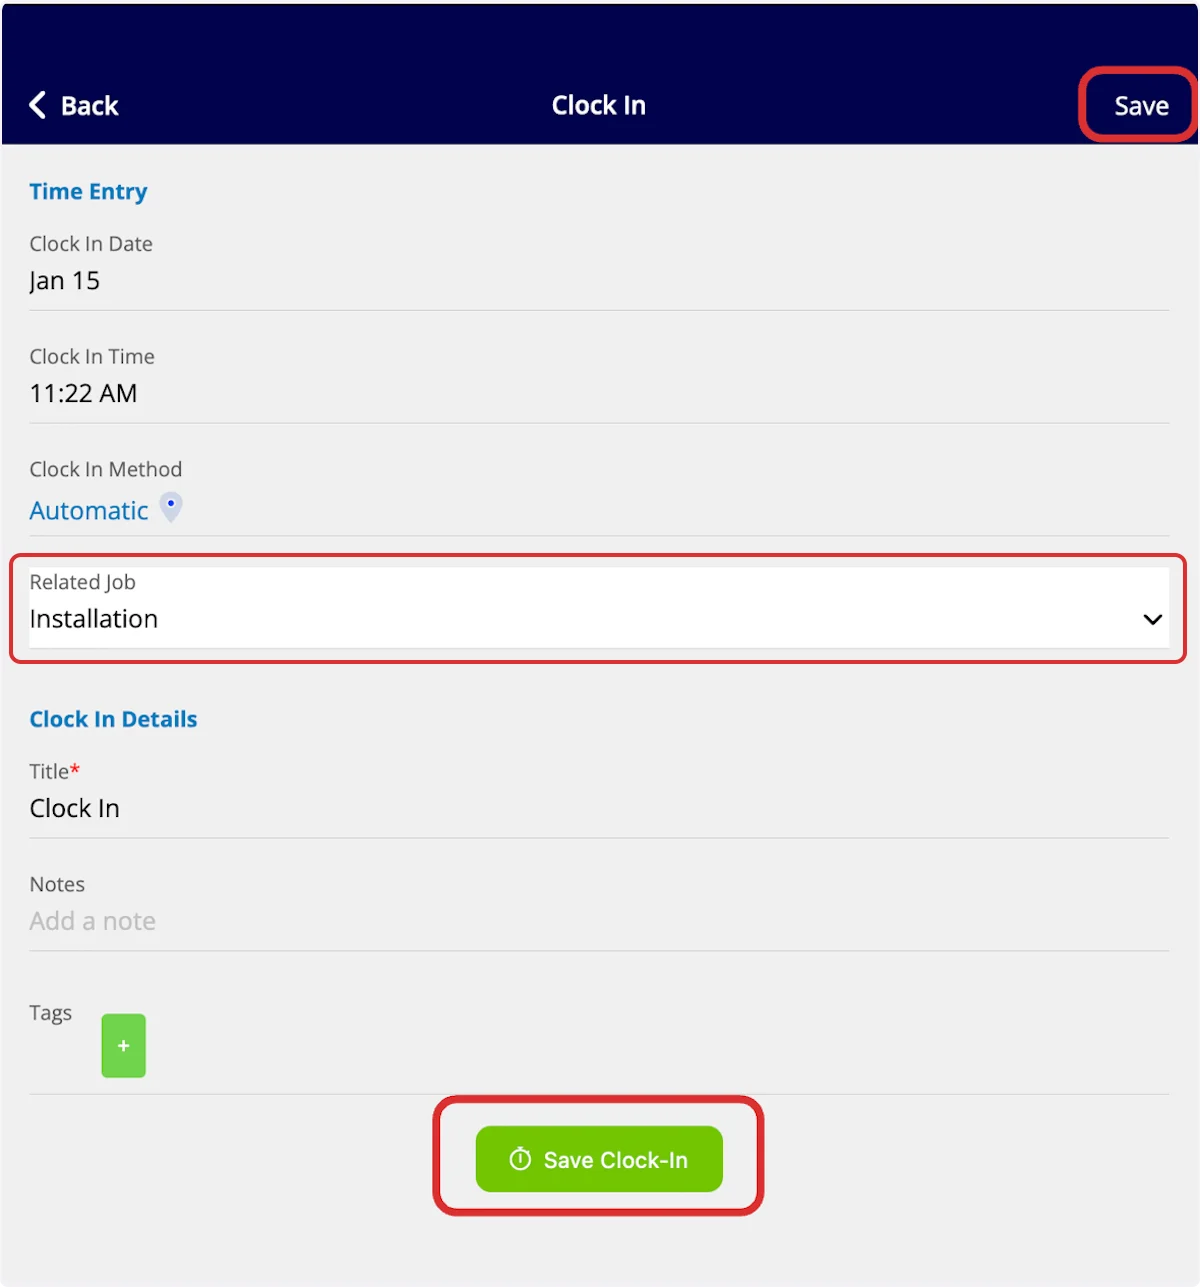
- Select Save Clock-In or Save to record your time.
- Return to the Schedule tab when you are ready to clock out of the job.
- Select the three dots on the right side of the job.
-
Select Clock-Out to Job.
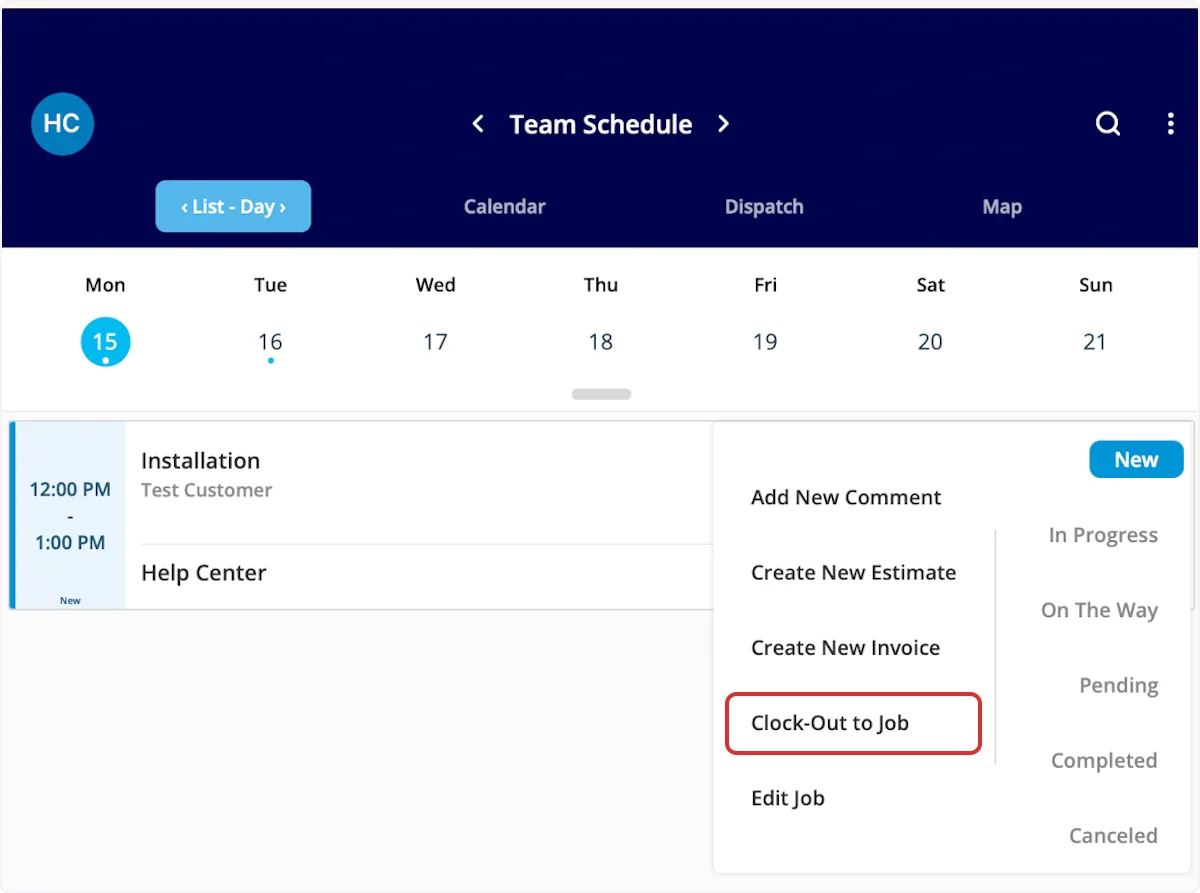
Clock out from the Timesheets tab
You can clock out of a general timesheet or a job-specific timesheet from the same place.- Select Timesheets at the bottom of the screen.
-
Select Clock Out under the timesheet you want to close.
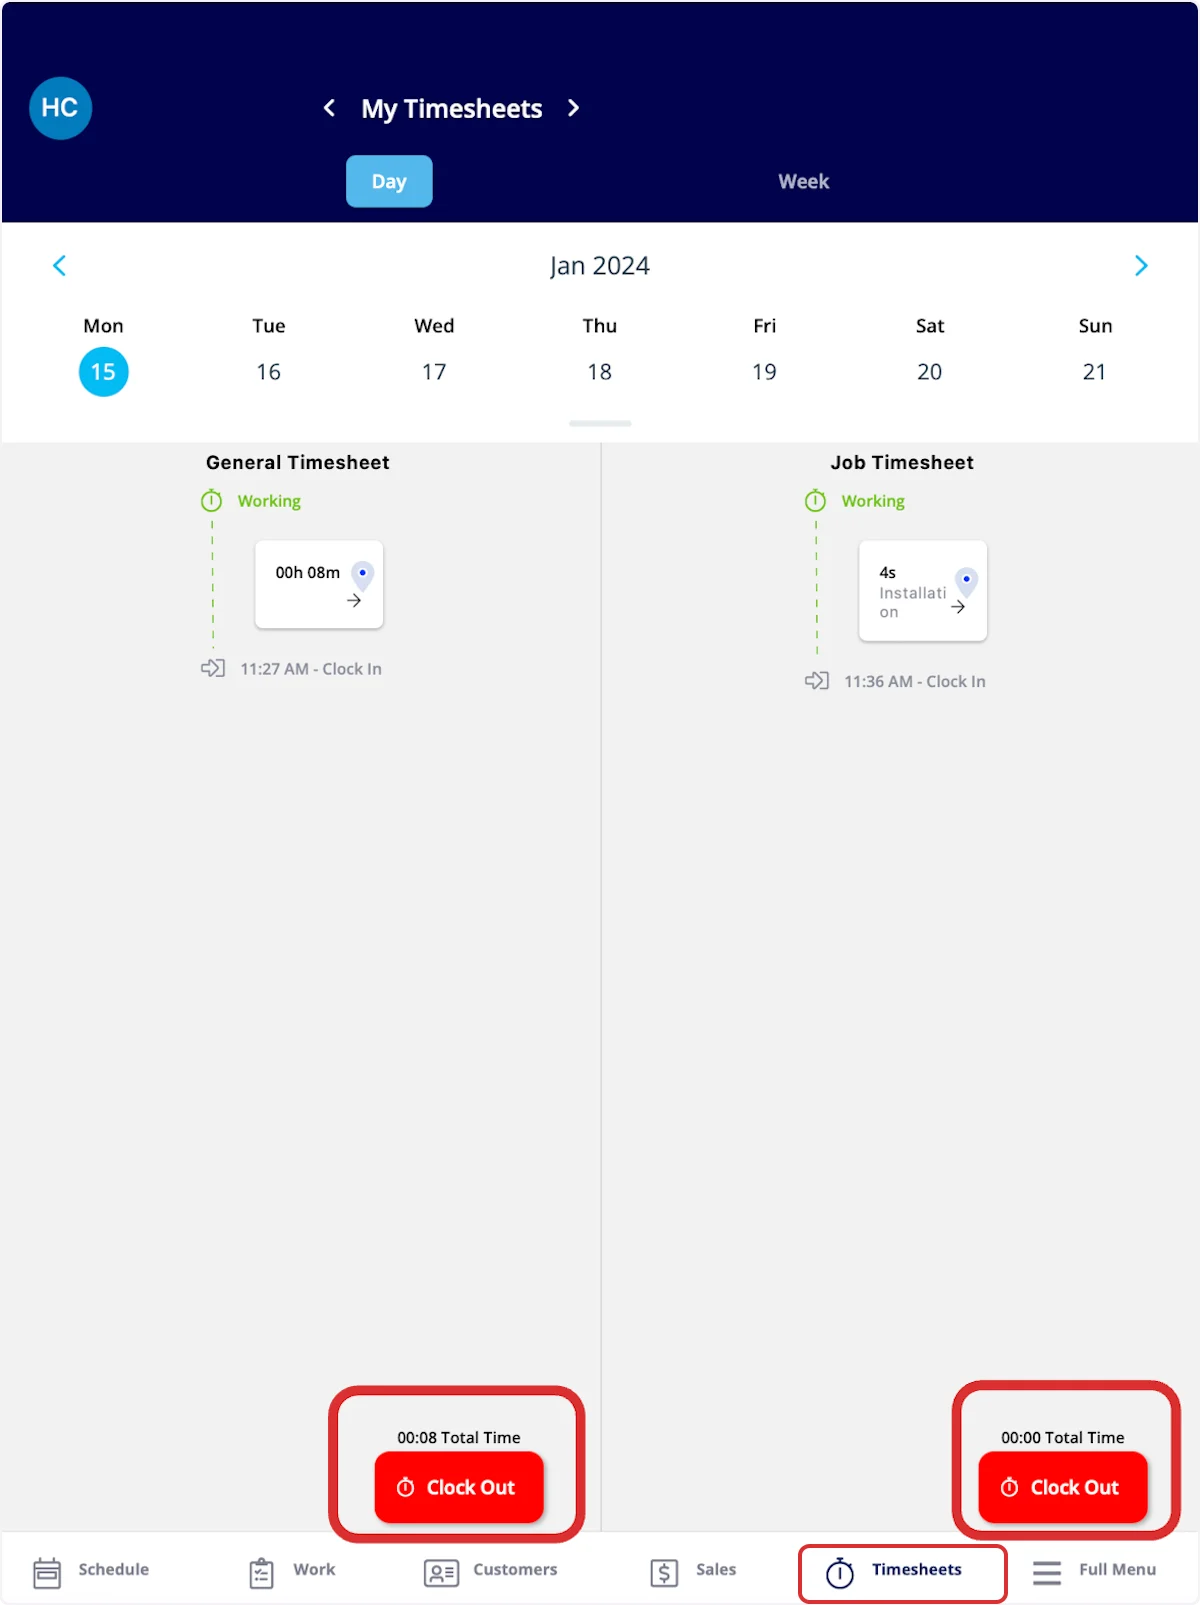
View your own timesheets
My Timesheets shows your entries by Day or Week, switched at the top of the screen. You can also clock in or out from this view using the Clock In and Clock Out buttons at the bottom of the screen.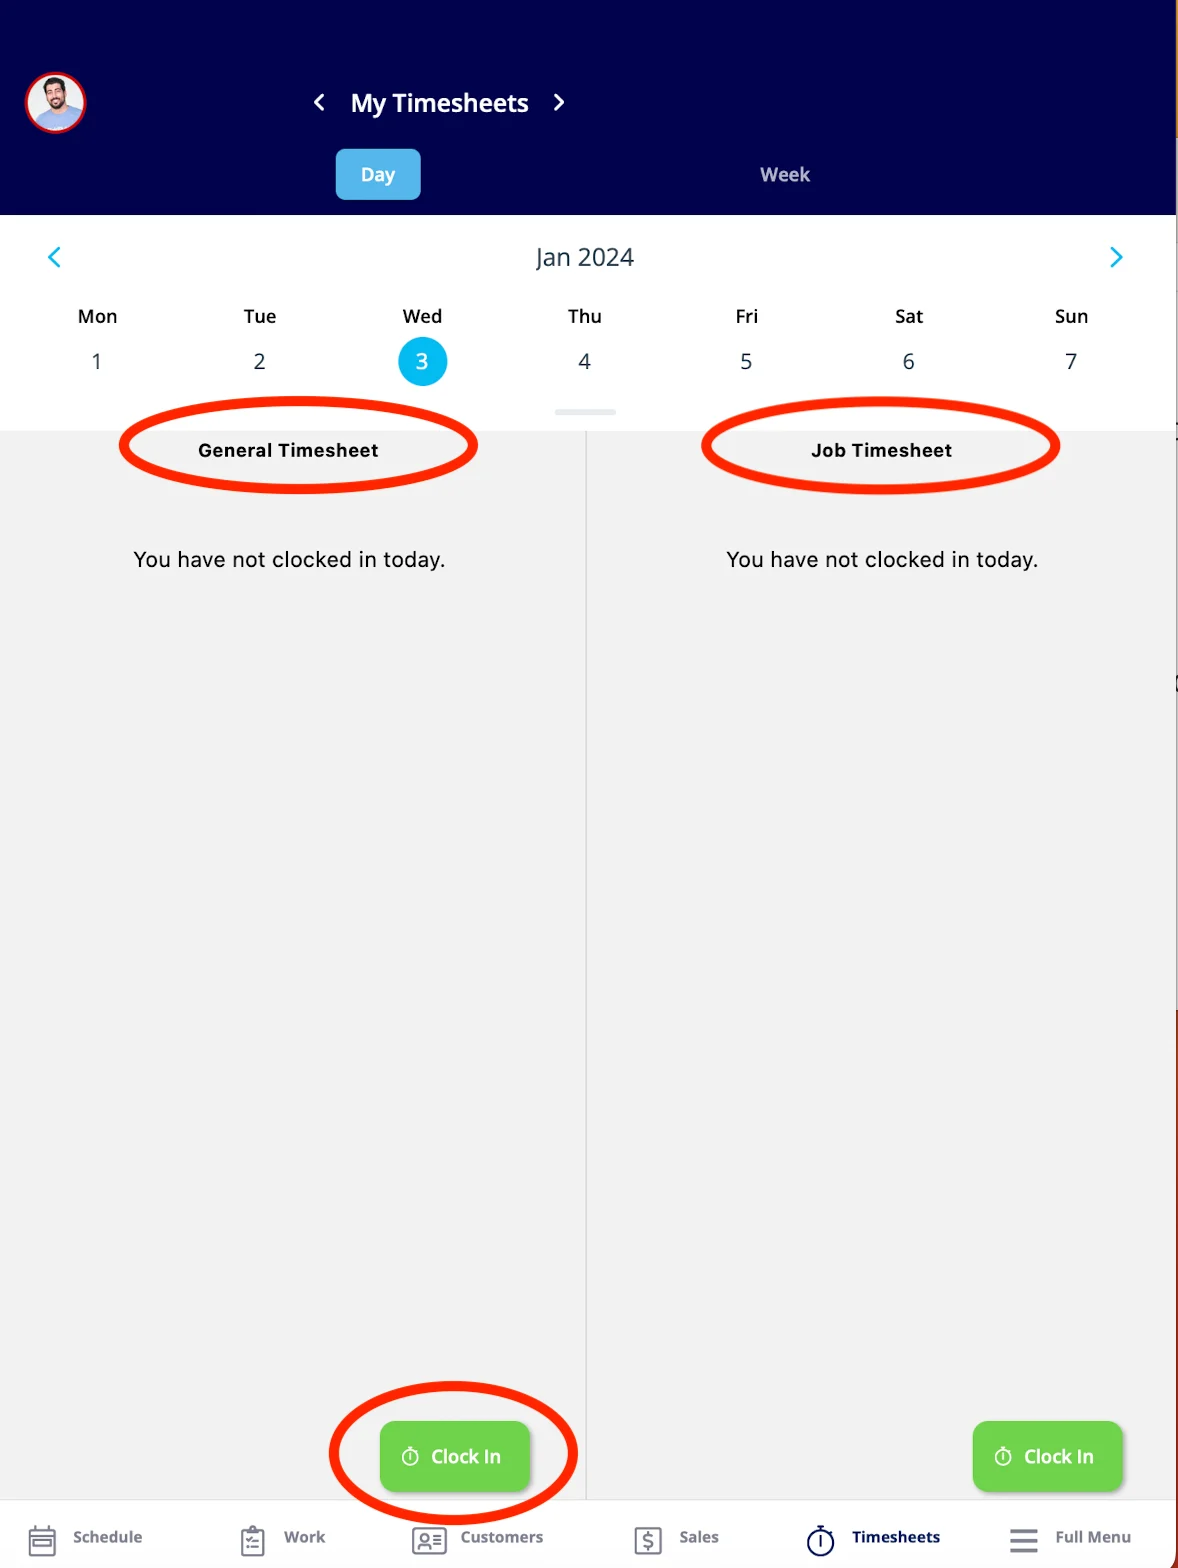
View and adjust your team’s timesheets
-
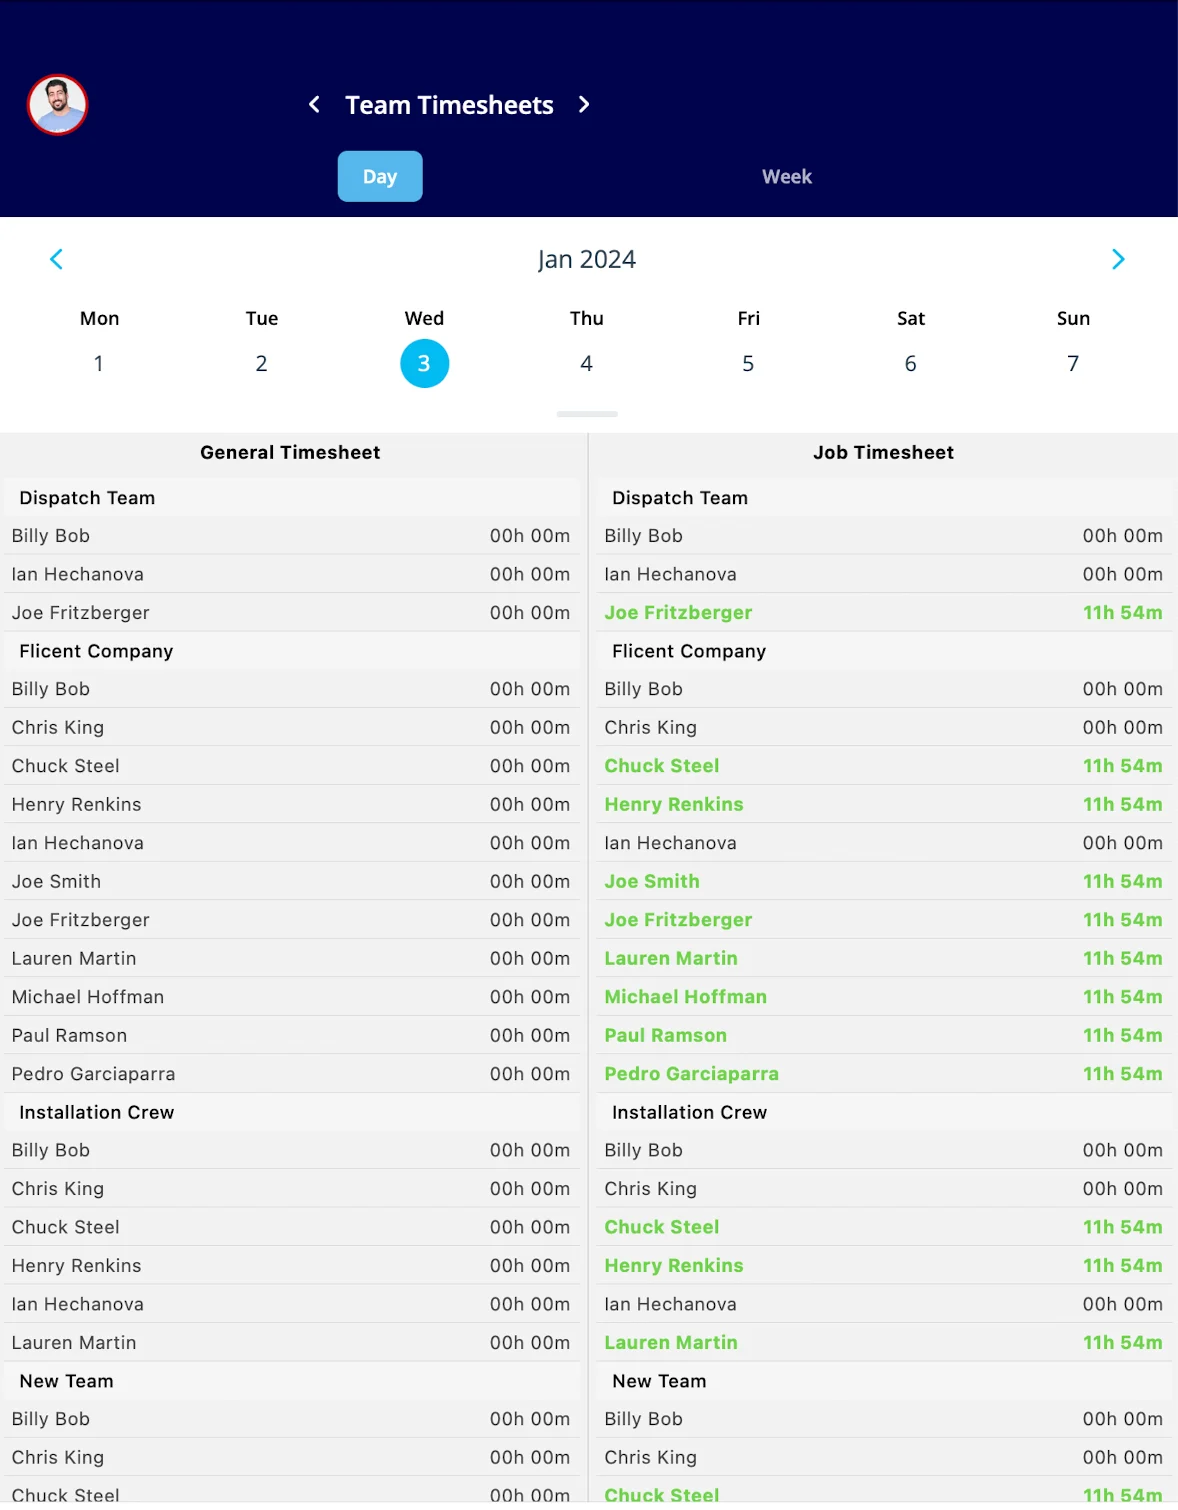
Select the arrows next to My Timesheets to switch the view to Team Timesheets.
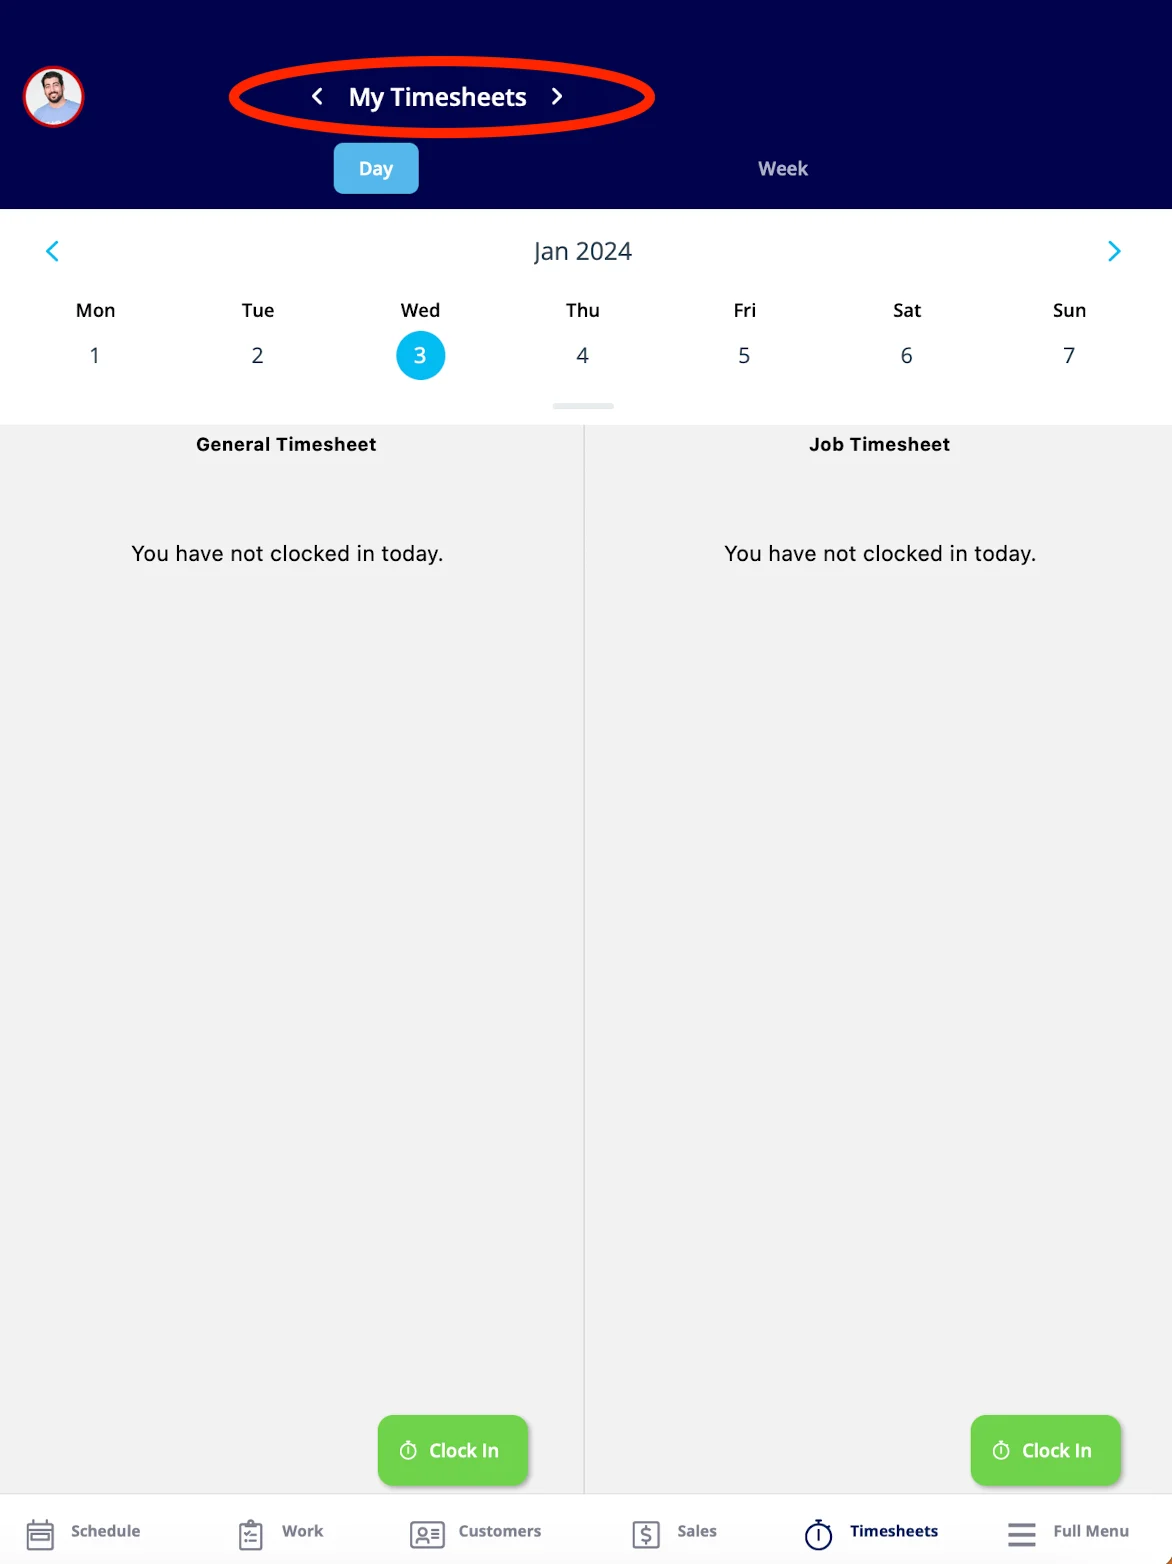
-
Review your team members’ entries, sorted into the General Timesheet and Job Timesheet columns. You can switch between day and week here the same way you do in My Timesheets.
-
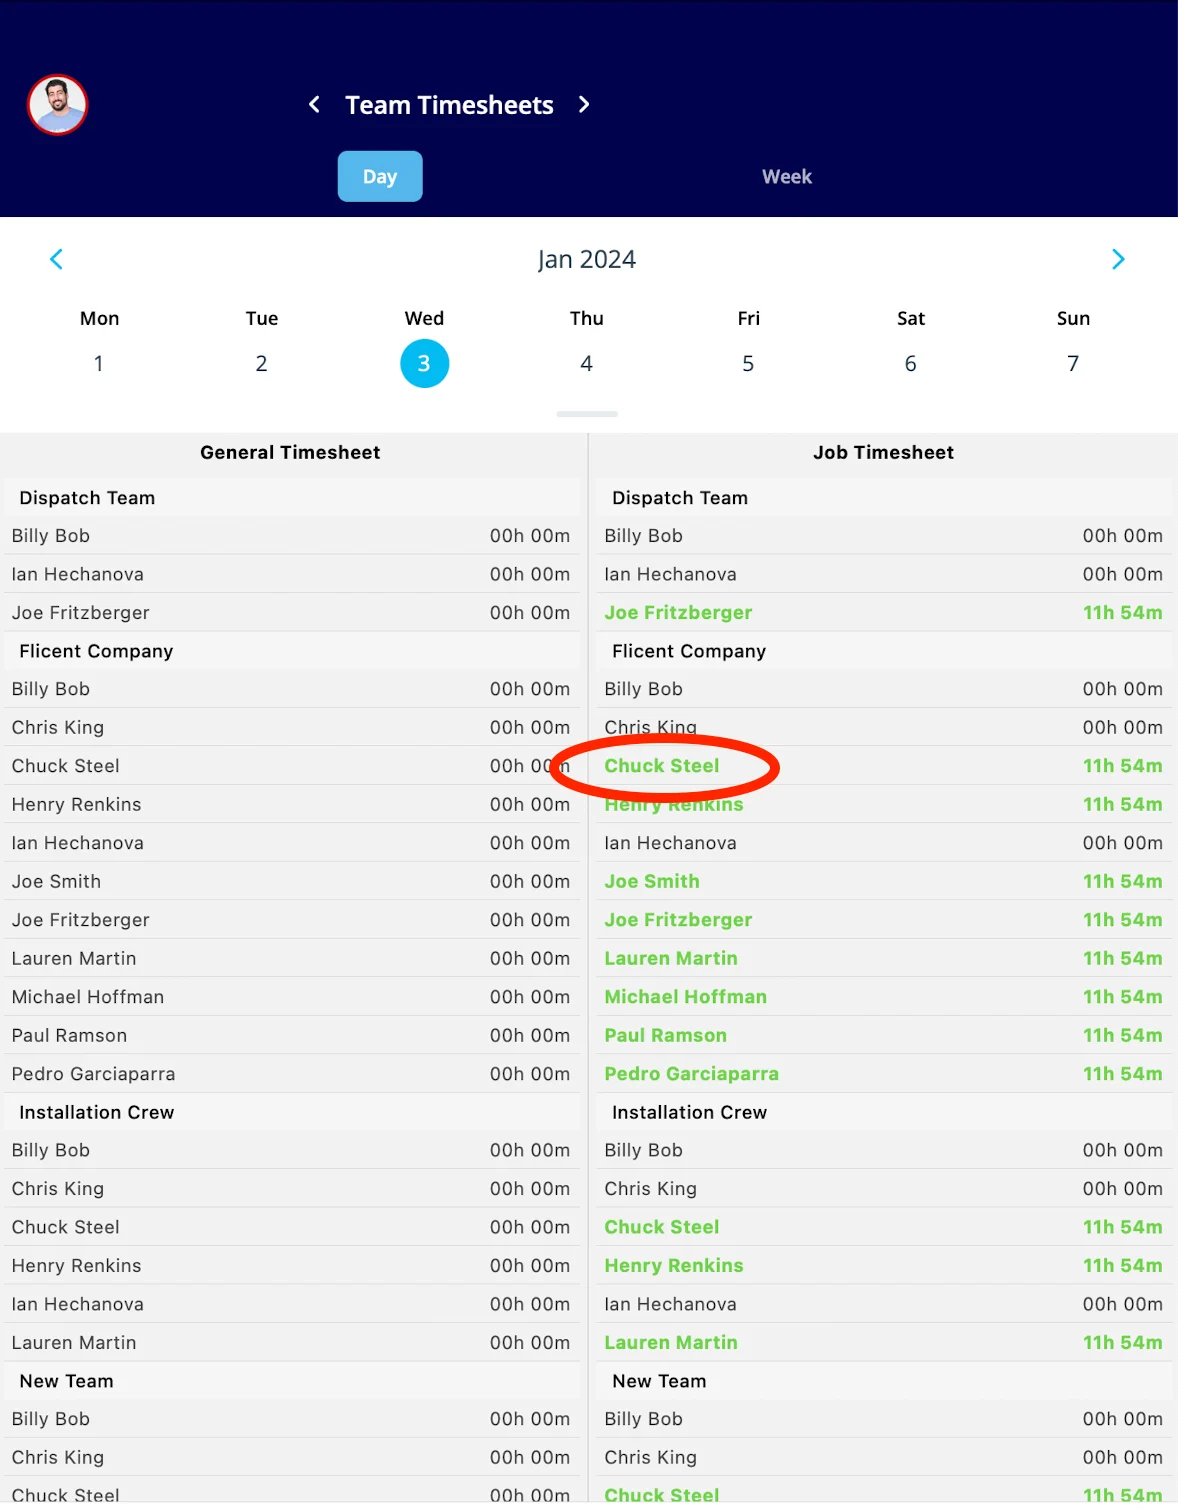
Select a team member’s name to look more closely at their timesheet.
-
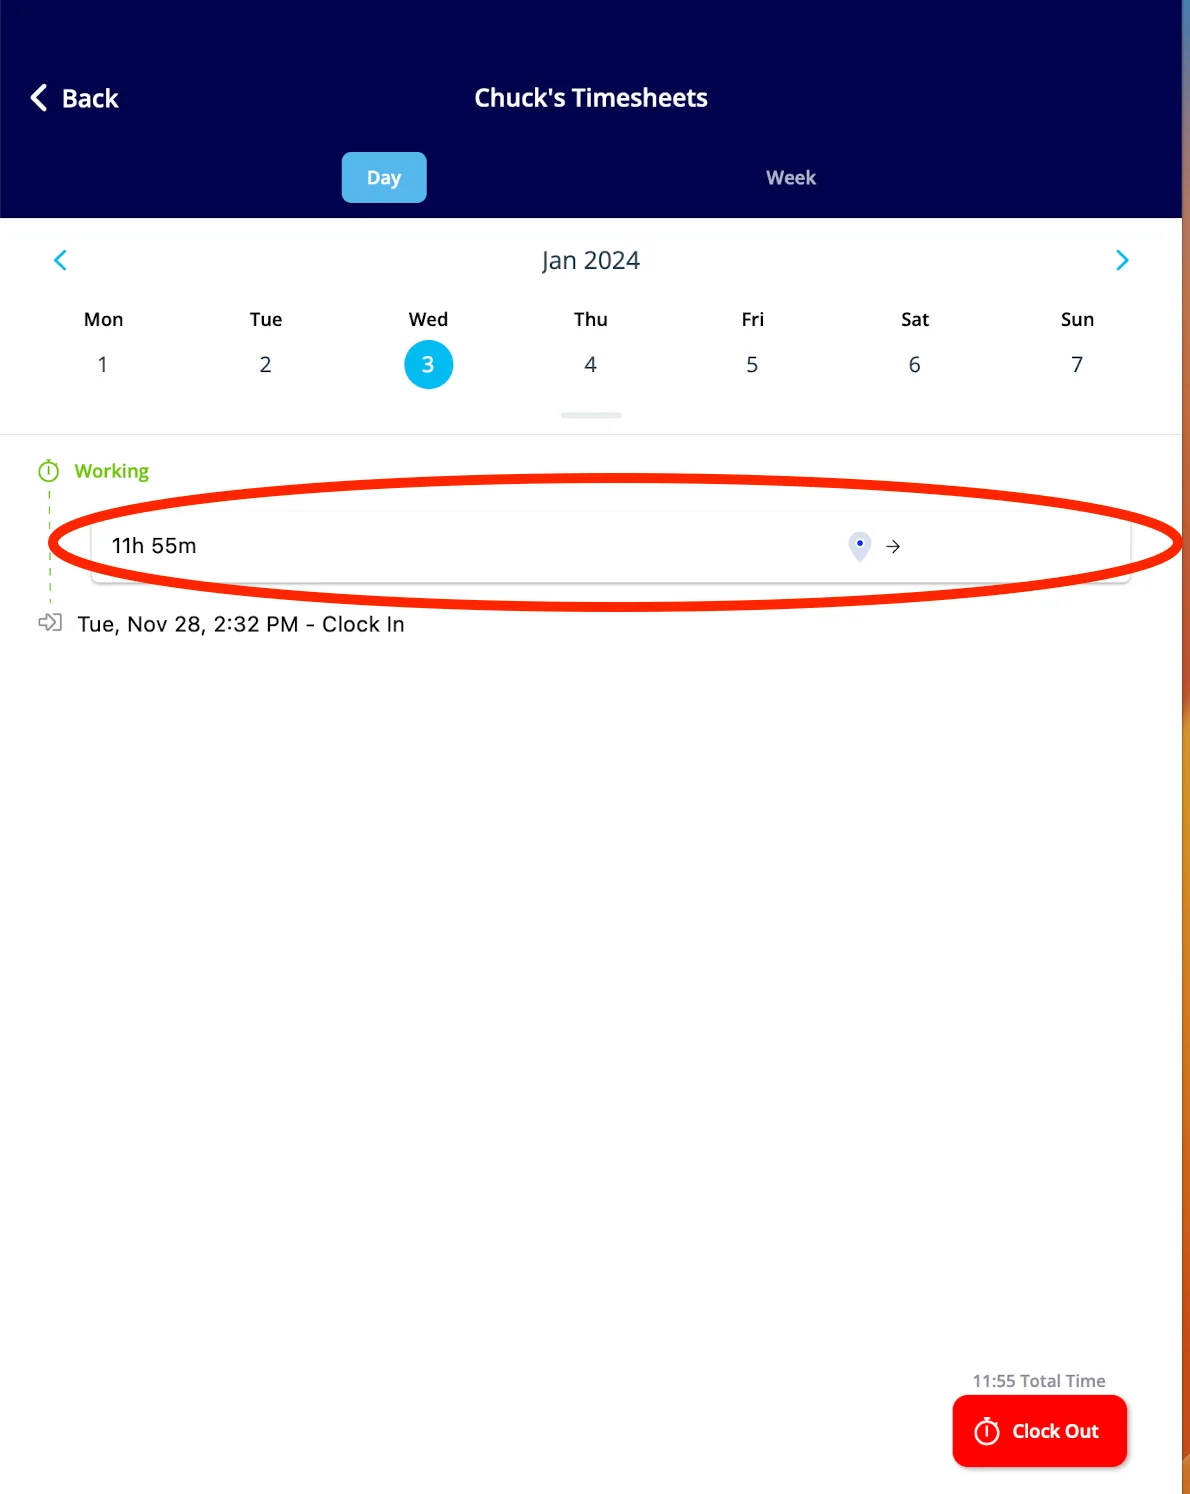
Select the recorded time to open the entry and view its details.
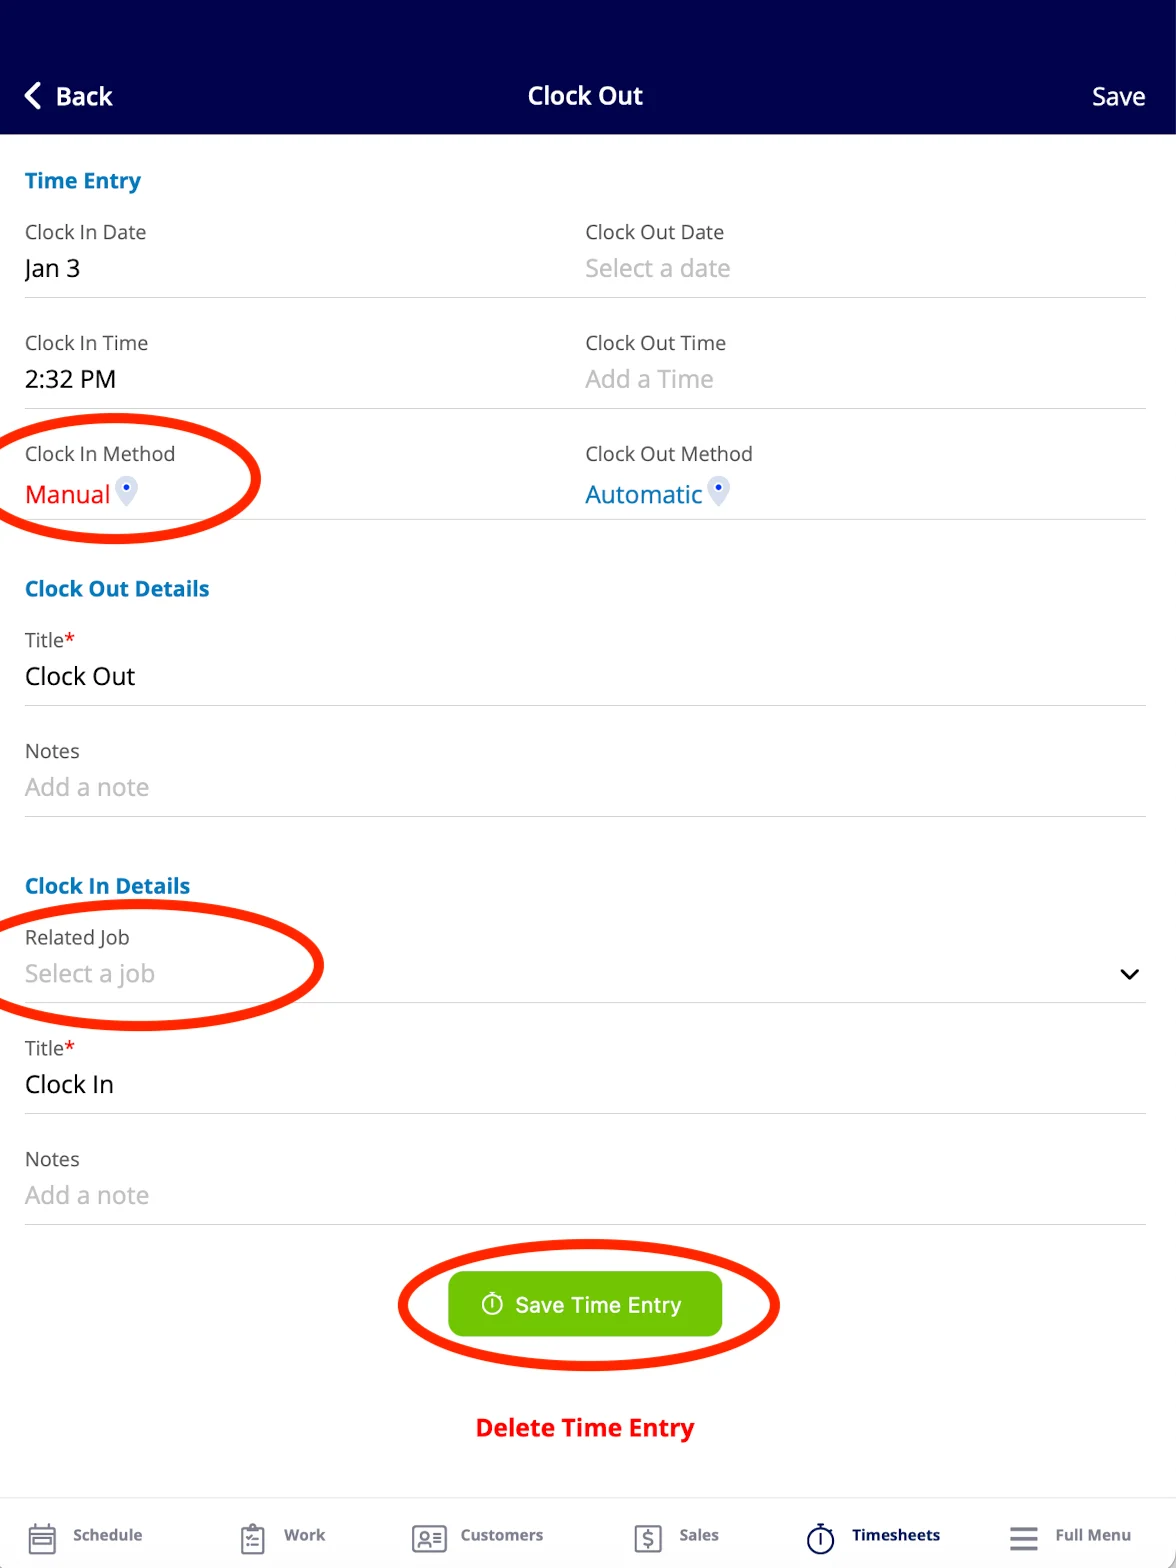
- Adjust the Clock In and Clock Out dates and times, and select a Related Job for the entry if you need one.
-
Select Save Time Entry.
Set custom status timesheet triggers
Custom status timesheet triggers prompt you to clock in or clock out when you select specific custom statuses on jobs and site visits.-
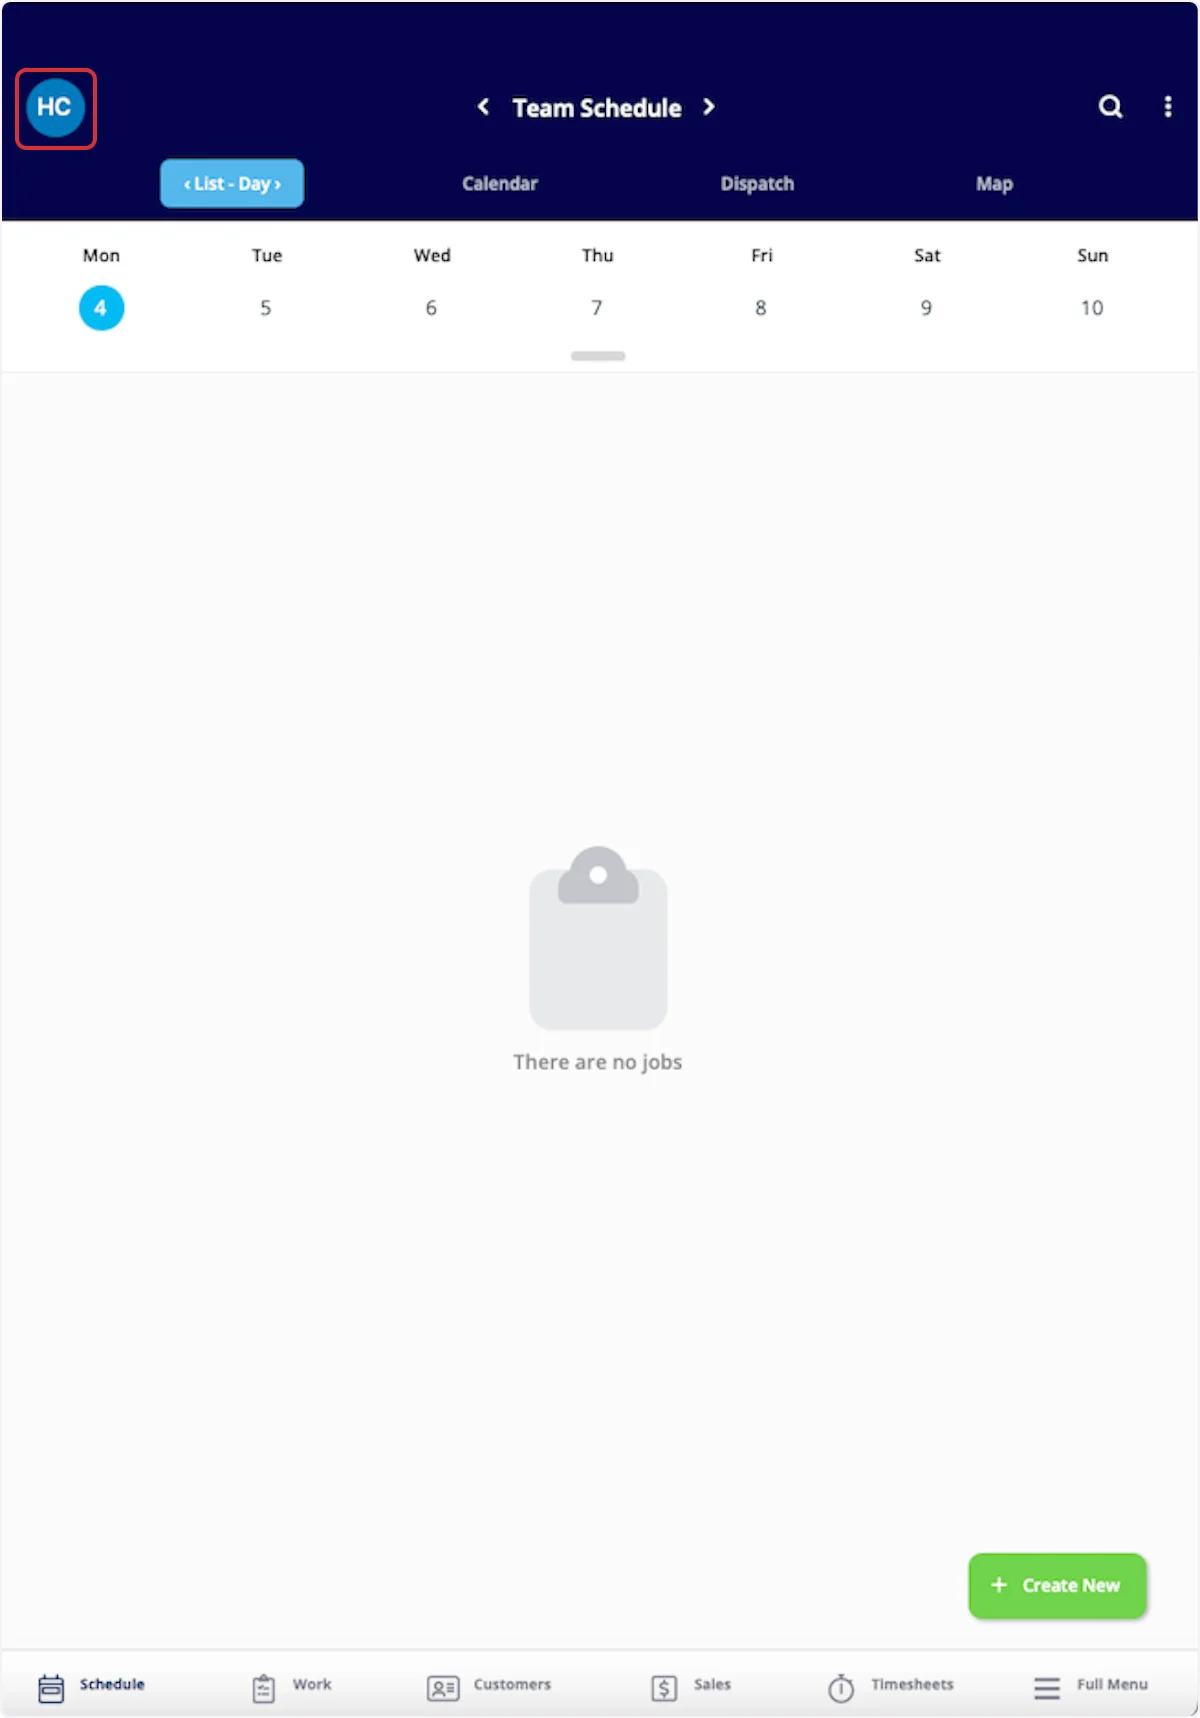
Select your photo or initials in the top corner of the mobile app.
-
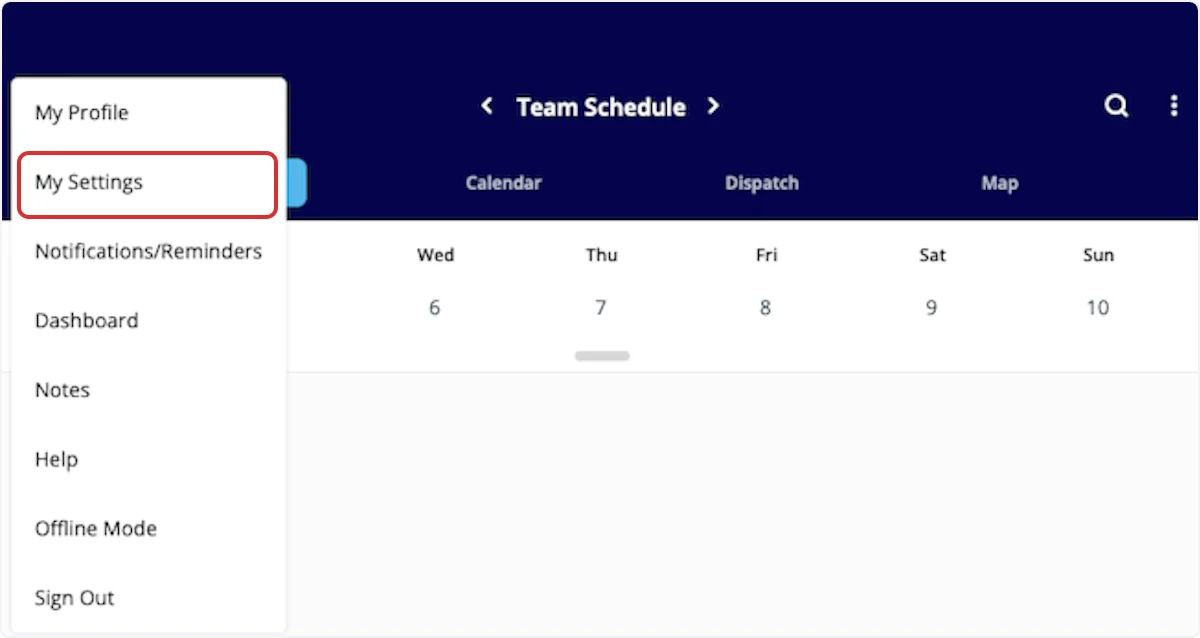
Select My Settings.
-
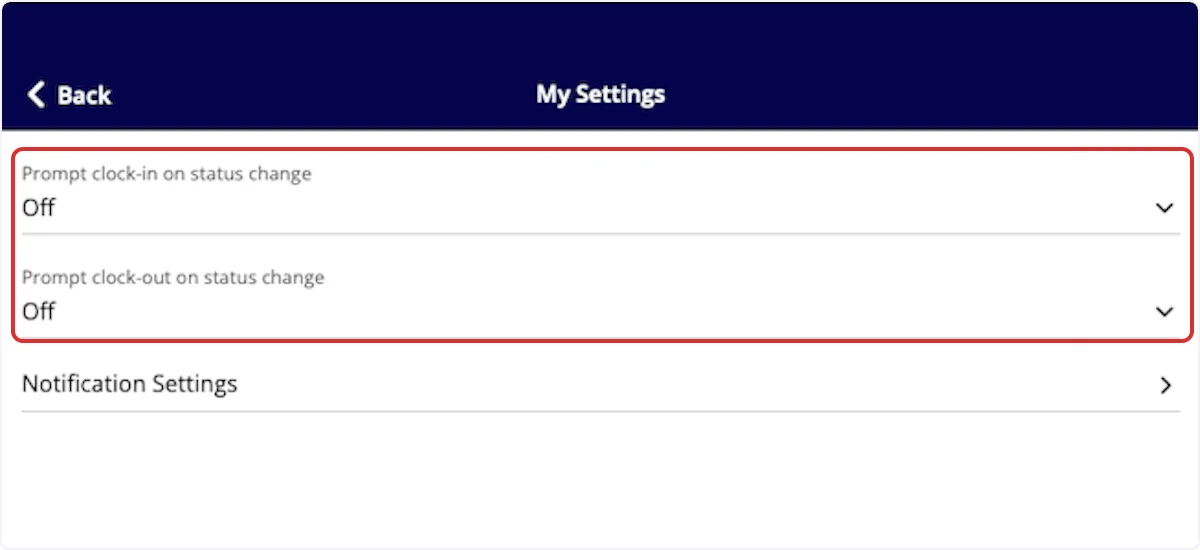
Select the field you want to edit first — Prompt clock-in on status change or Prompt clock-out on status change.
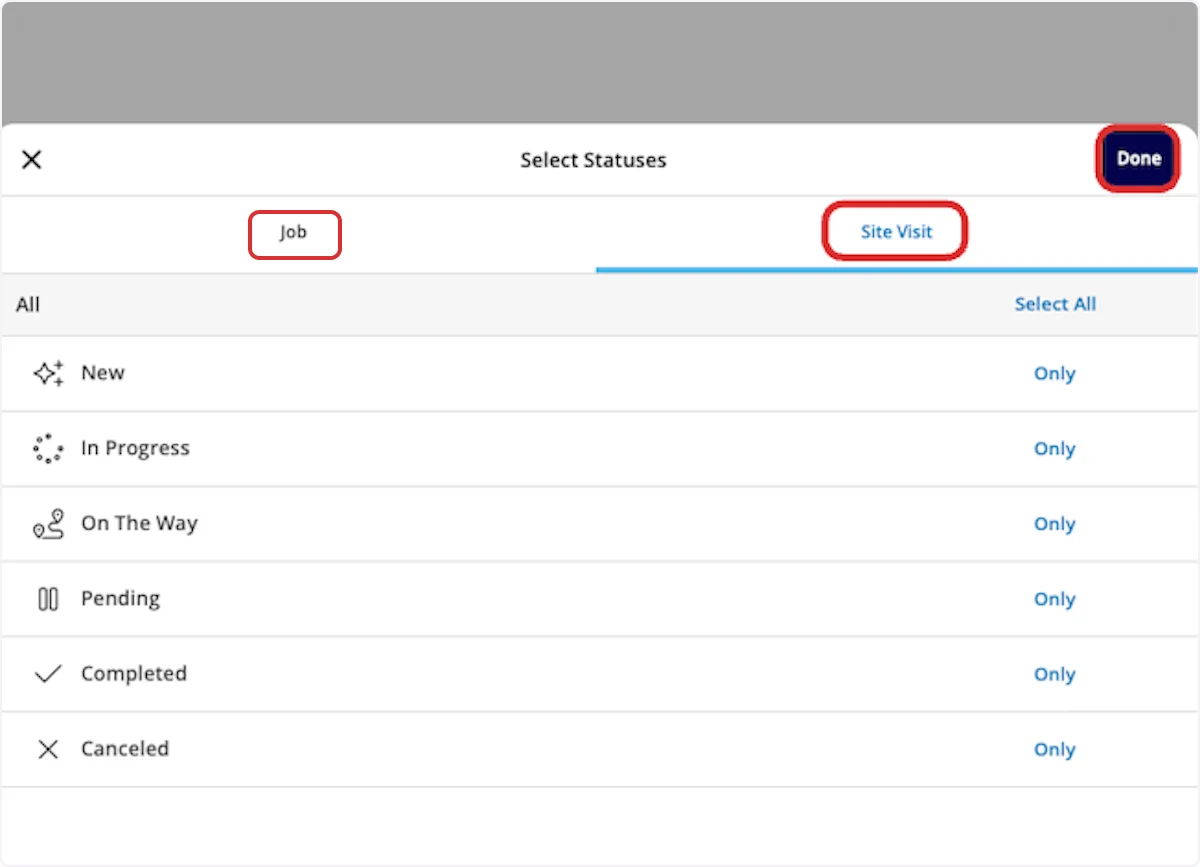
- Under the Job and Site Visit tabs, select every status you want to be prompted on — for example, In Progress as the status that triggers a clock-in. If you have multiple custom status workflows, select the applicable statuses on each workflow.
-
Select Done to save your selections.
- Repeat the process for your clock-out status triggers — for example, Completed as the status that triggers a clock-out.
These settings are saved to each user’s account and persist across logouts, app updates, and device reinstalls.
Video walkthrough: Custom status timesheet triggers
Video walkthrough: Timesheets in the FieldPulse mobile app