
Who uses this: Each pricebook’s Pricebook Visibility setting controls which team roles can view it. Availability: Sales Suite add-on — the Pricebook must be enabled on your account.The Pricebook is a flat-rate sales tool your team quotes from instead of pricing each job from scratch. You build it once — categories, flat-rate jobs, and add-on options with your own labor, overhead, and markup baked in — and your techs select from a menu that fills the pricing and line items into an estimate, invoice, or variant proposal.
Overview
The Pricebook is where your pricing lives so it doesn’t live in someone’s head. Each flat-rate job carries its labor hours, materials, and markup, so the price the customer sees is consistent no matter who quotes it. You organize flat-rate jobs into categories and sub-categories, offer add-on lists for upsells, and display jobs as a plain list or in a Good / Better / Best format that gives the customer a choice. Because the Pricebook feeds your estimates and invoices, the numbers a tech sees on-site are the numbers you set — including your costs and profitability on each job — so your team can quote with confidence and take signatures and payment on the spot.Before you begin
- Confirm the Pricebook is enabled on your account. If it isn’t, contact the FieldPulse team at support@fieldpulse.com or use the chat in the bottom-right corner of your screen.
- Know your numbers: your hourly labor cost, your hourly overhead cost, and the markup percentages you want to charge.
- Confirm the line items you’ll use already exist in your Item List, or be ready to create them as you build — see Setting Up Item List & Inventory.
- Already keep a pricebook in a spreadsheet? You can import it instead of building by hand — see How to Import a Pricebook.
Step-by-step setup
1. Find the Pricebook
Once the Pricebook is enabled, it appears under the Sales section in the left menu. You can build and use pricebooks in the FieldPulse web app or the mobile app.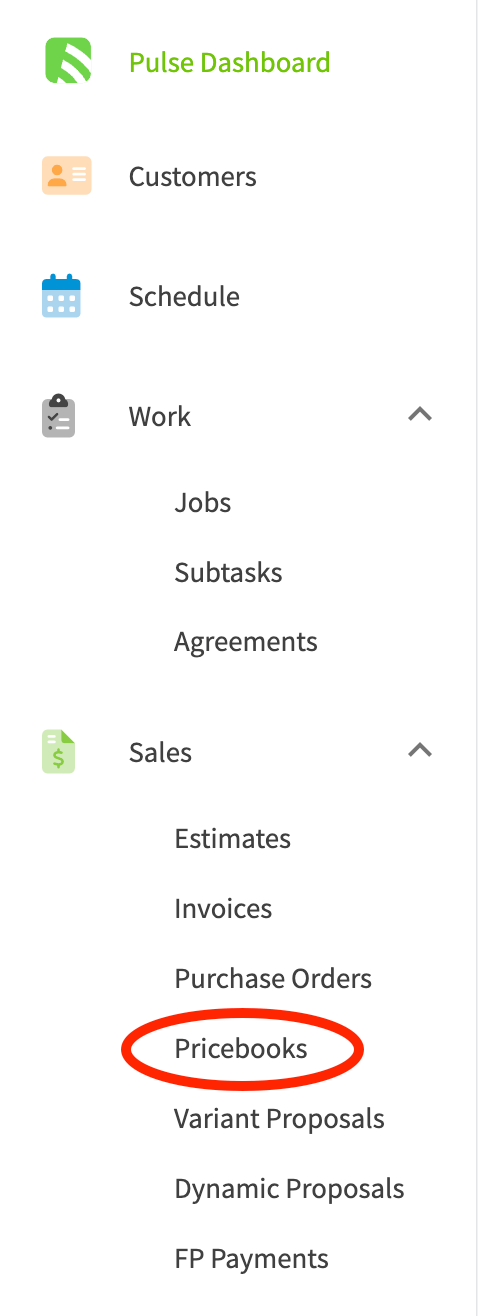
2. Create a pricebook
You have three ways to start a pricebook:- Build a new one — Select + Create Pricebook and start entering your information.
- Import an existing one — Bring in a pricebook from Excel, Google Sheets, or CSV. See How to Import a Pricebook.
- Start from a FieldPulse template — Contact support@fieldpulse.com or use the chat in the bottom-right corner of your screen to have a starter pricebook imported into your account.

3. Set the basic info and rates
Once you create, import, or open a pricebook, set its Pricebook Title and description on the Basic Info & Setup tab, choose which team roles can view it under Pricebook Visibility, and adjust the Theme to match your brand.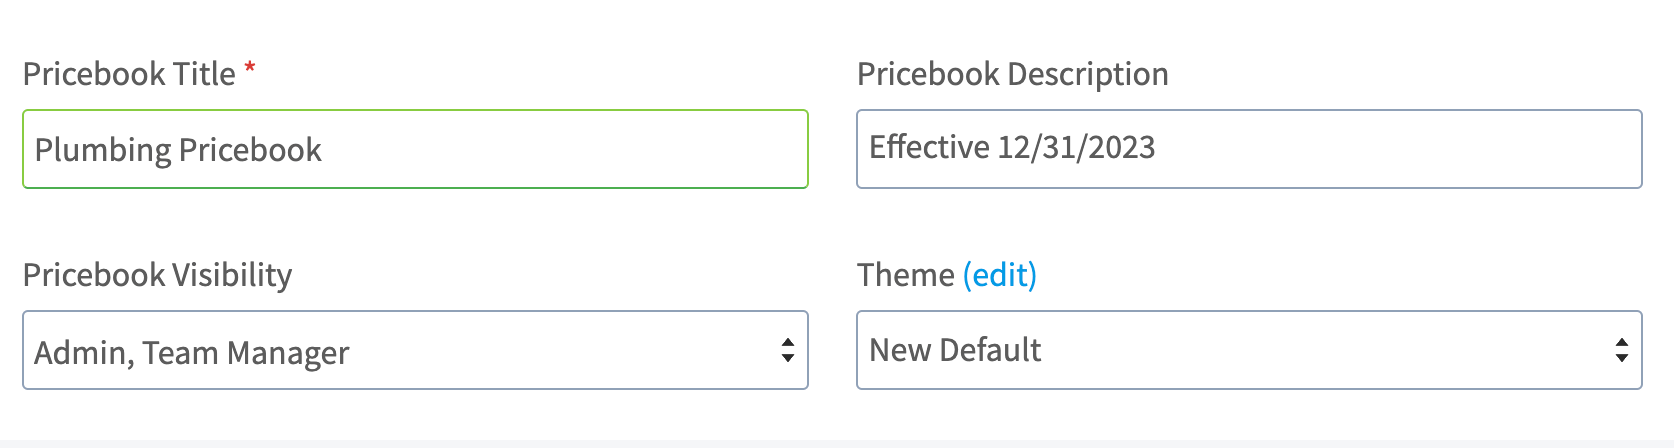
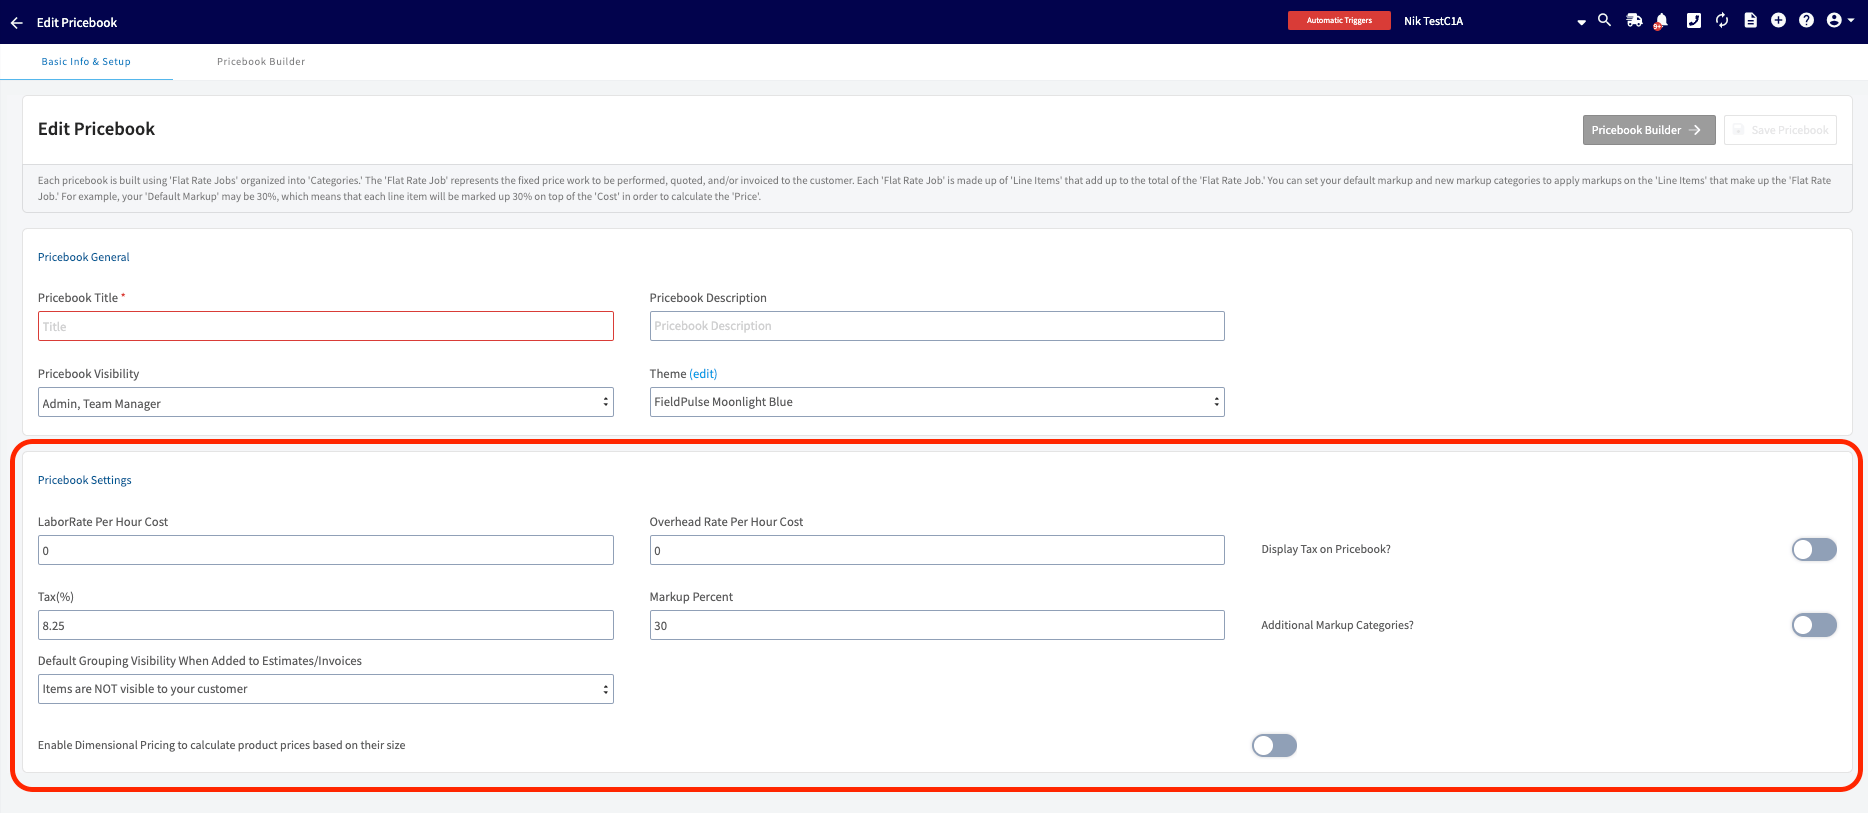
- Enter your Labor Rate per Hour Cost — what labor costs you per hour, not what you charge the customer.
- Enter your Overhead Rate per Hour Cost — your hourly overhead. This number may take some calculating, but entering it means every job in the book is priced to turn a profit.
- Set your default Markup Percent for all labor, supplies, and equipment.
- Add Markup Categories to customize markups beyond the default — for example, a rate for labor, a rate for supplies costing $1–$50, or a rate for all stainless steel items. Select Add Markup Category, enter a title and percentage, and select + Save after each one. You can create as many markup categories as you need.
- Set Default Grouping Visibility When Added to Estimates/Invoices to control whether groupings show by default; you can override this for individual flat-rate jobs when adding them to estimates or invoices. When you change it, a pop-up asks whether to update the default for future use or apply it to all existing jobs in the pricebook.
4. Open the Pricebook Builder
When you’re ready to add categories, flat-rate jobs, and add-ons, select Pricebook Builder.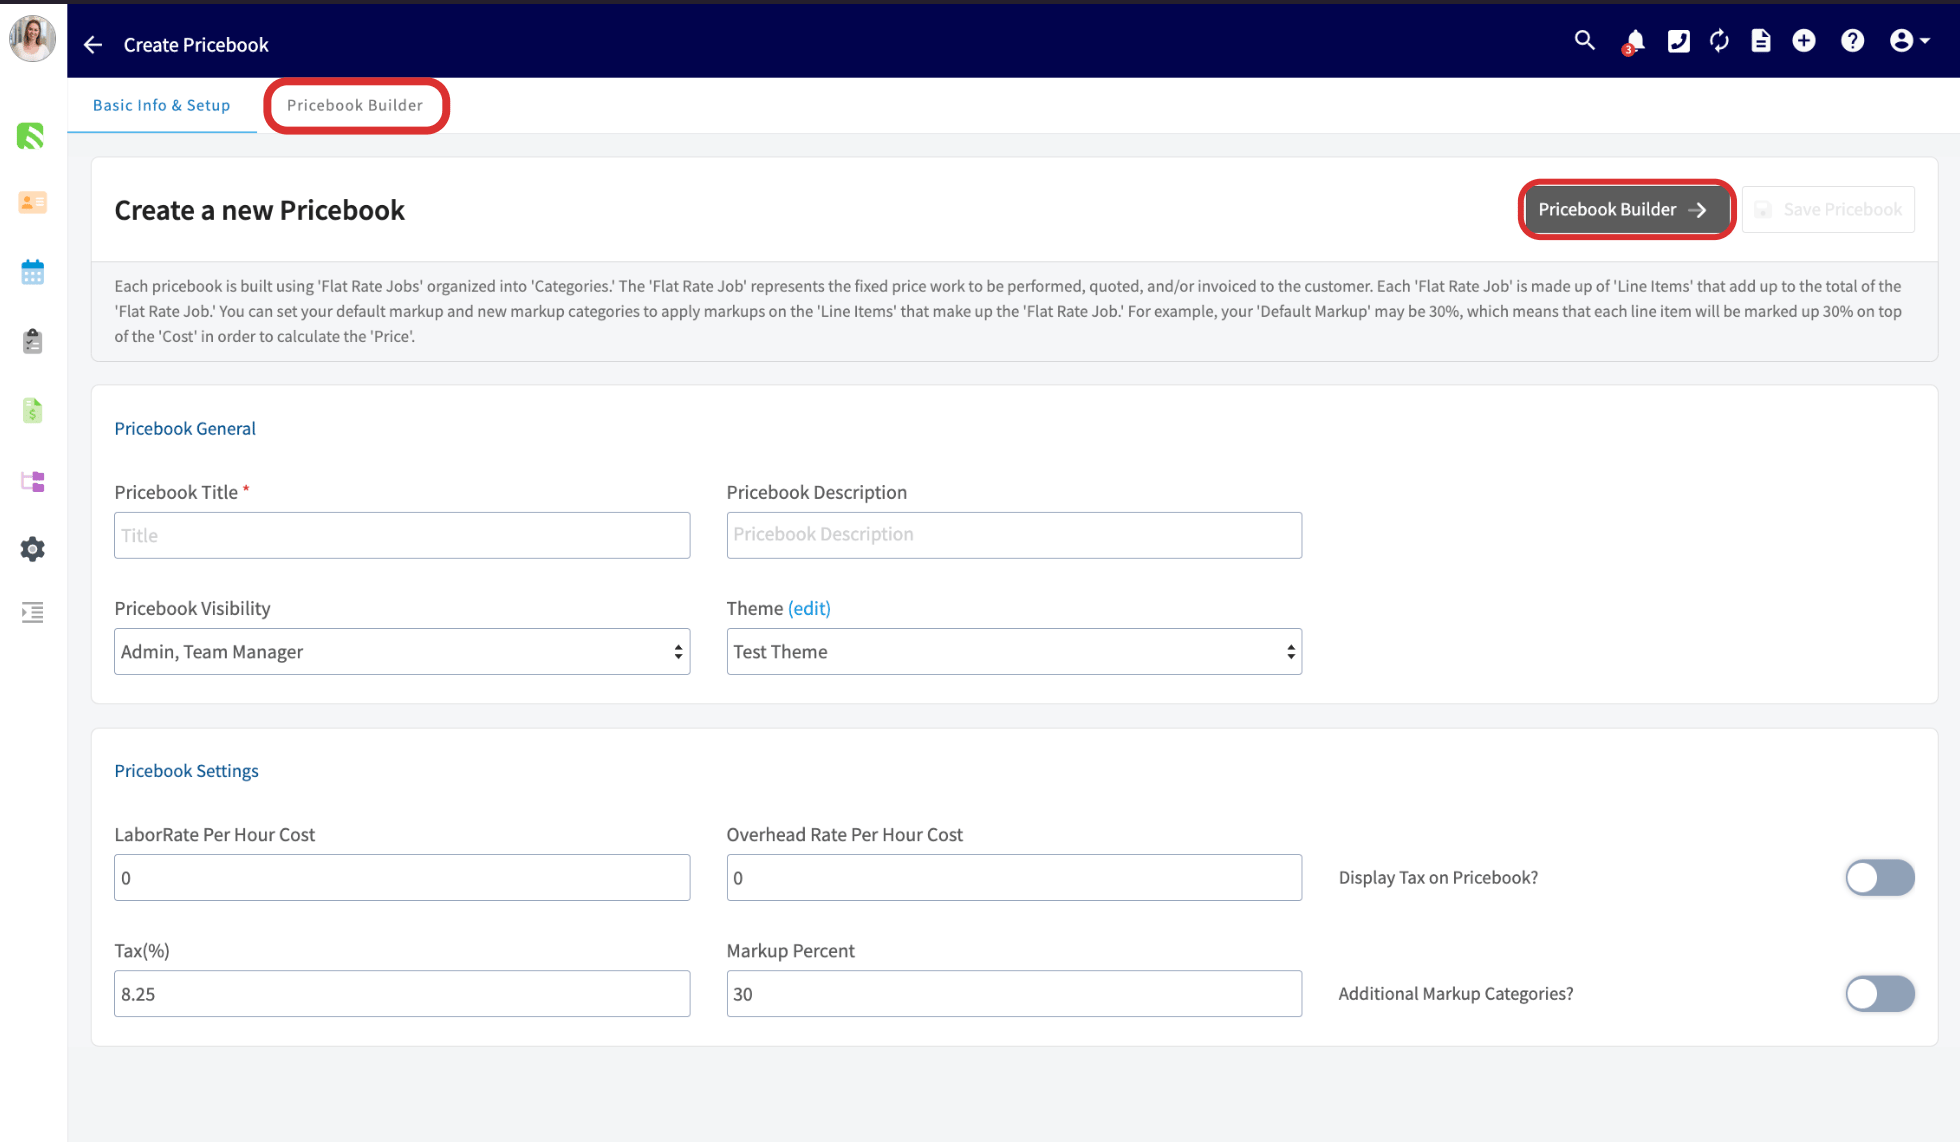
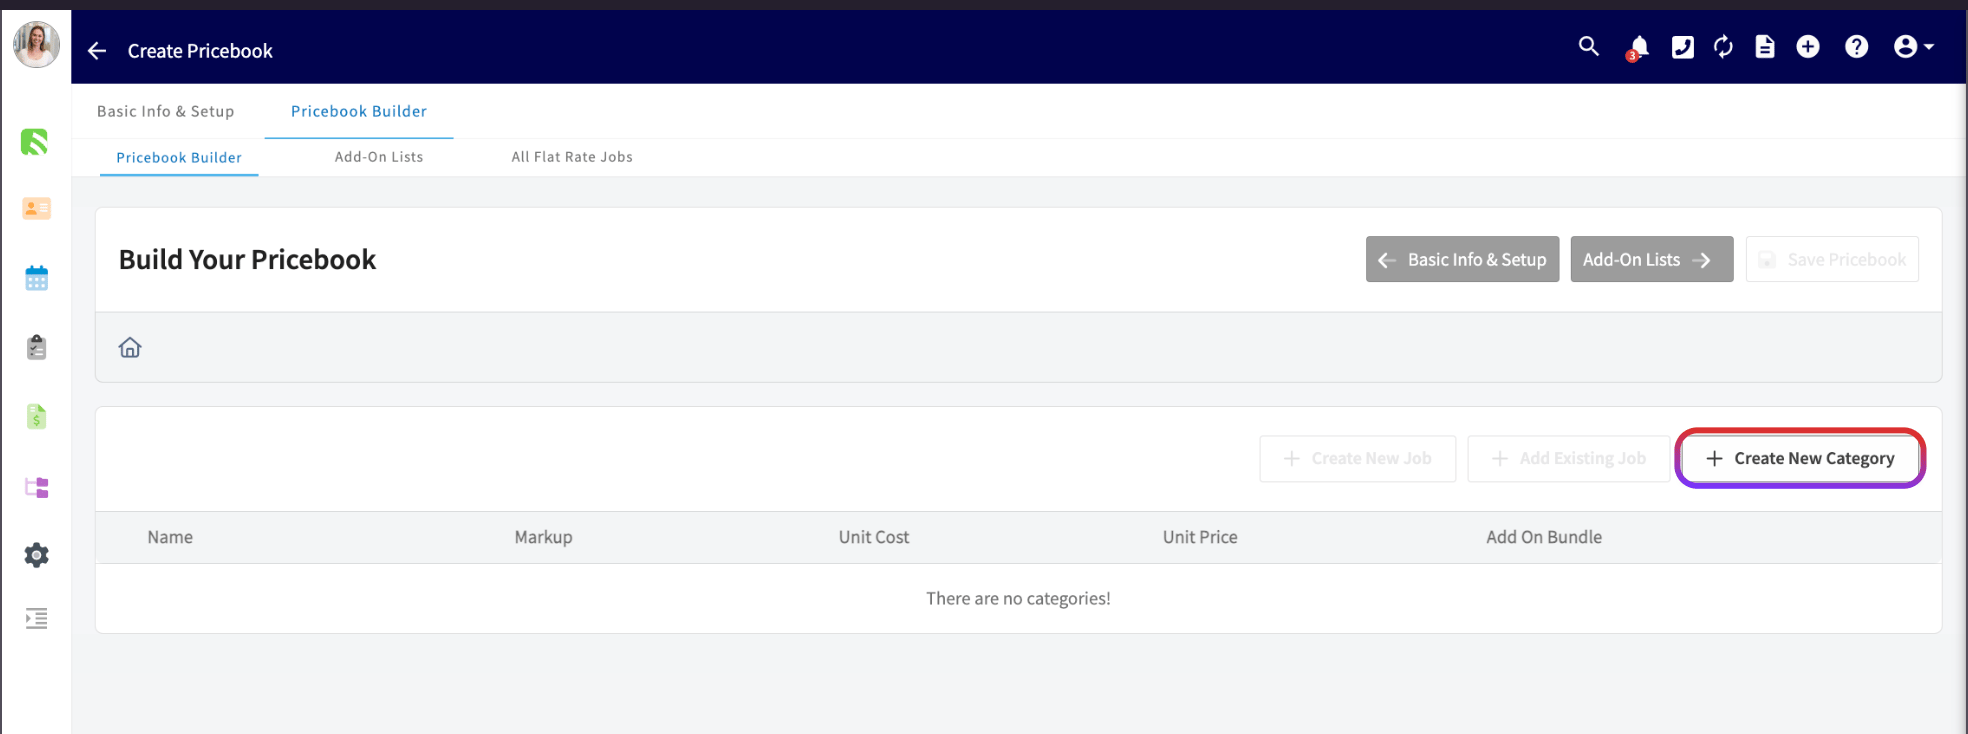
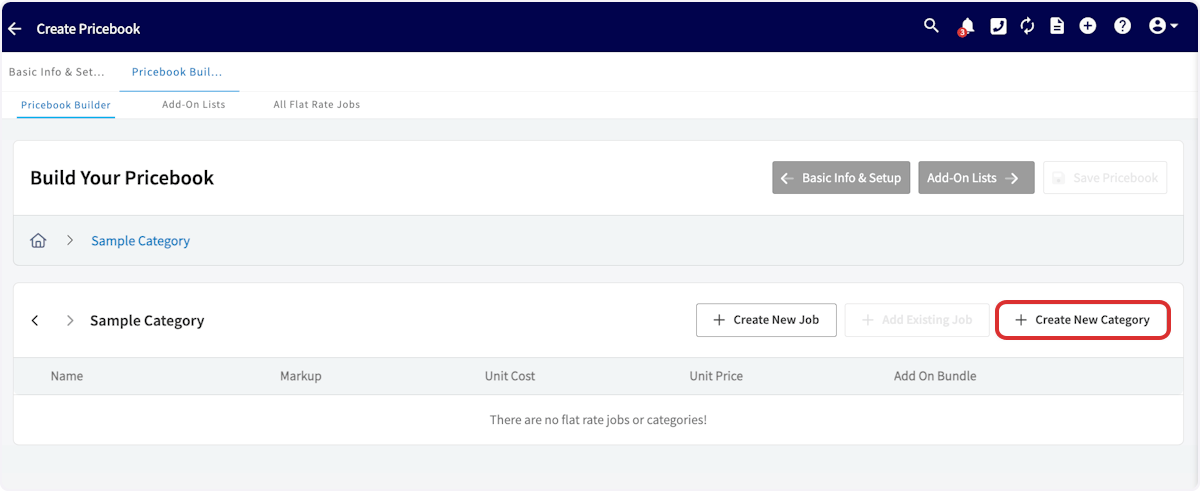
5. Create categories
Categories organize your flat-rate jobs:-
On the Pricebook Builder tab, select Create New Category.
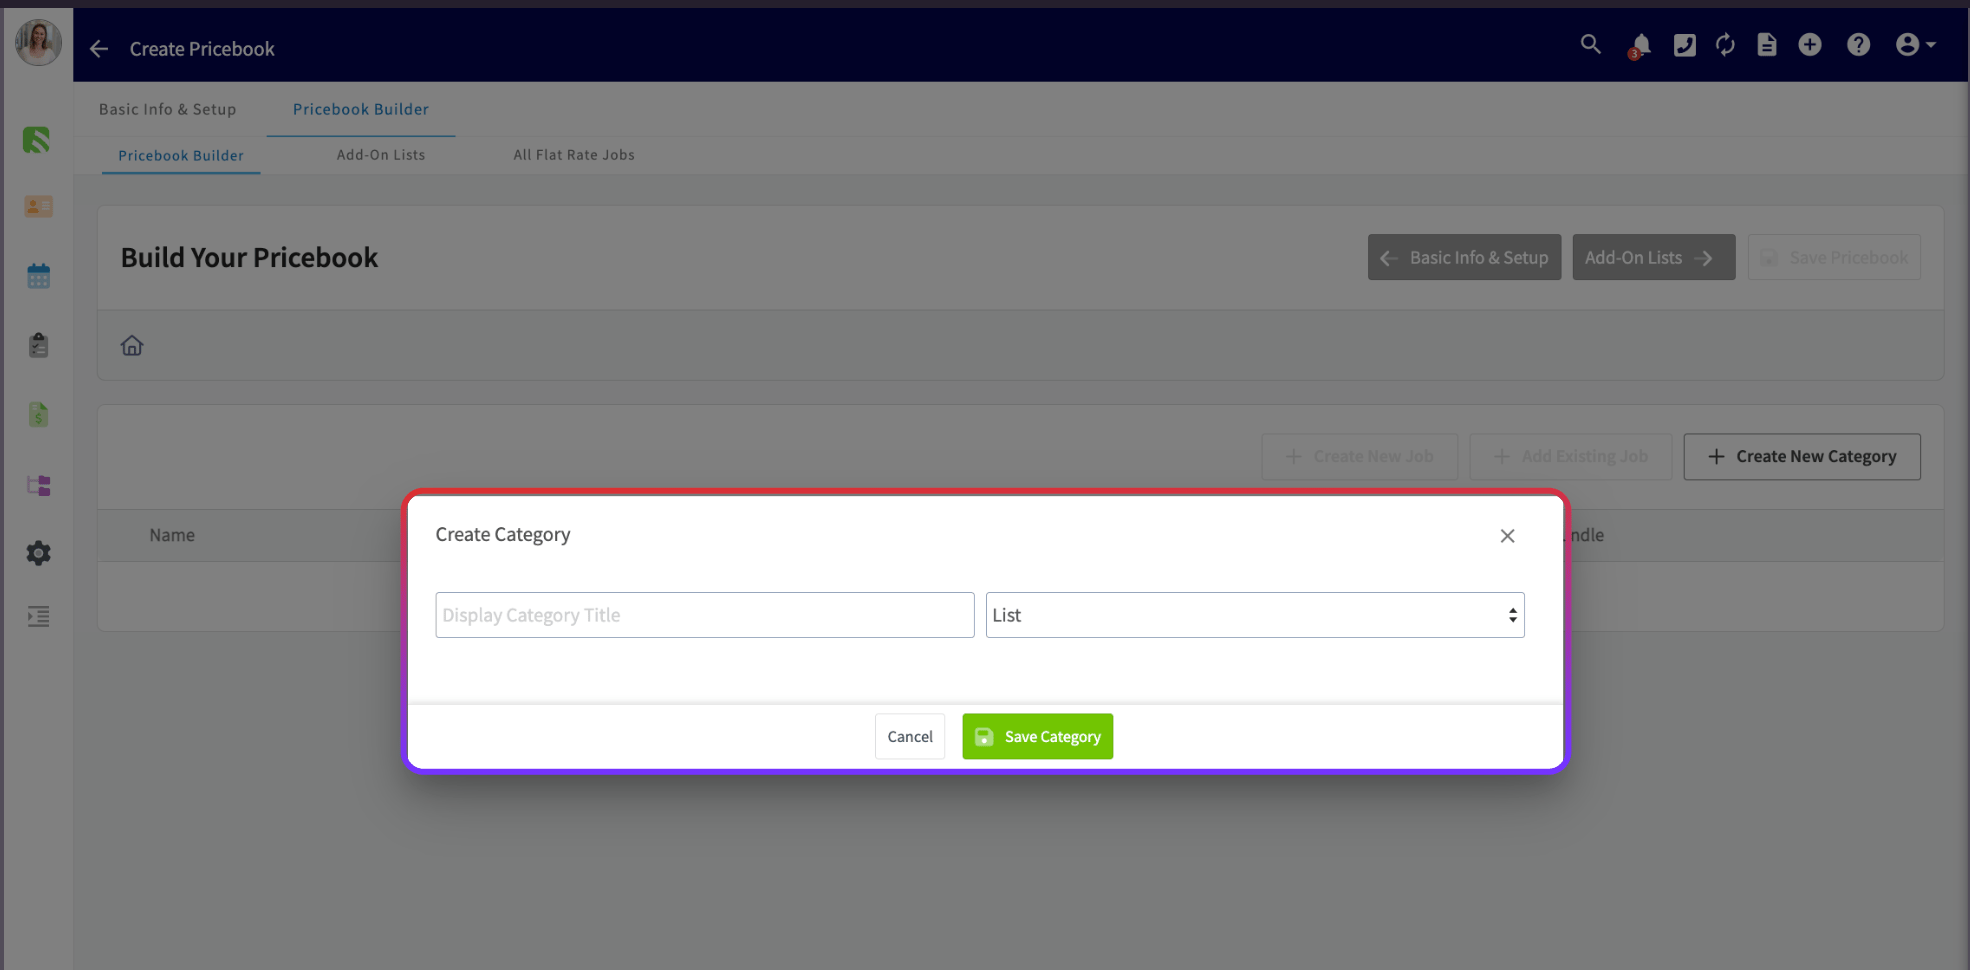
- Enter a display category title.
- Choose whether jobs in this category appear as a List or in a Good/Better/Best format. If you aren’t sure, you can change this later.
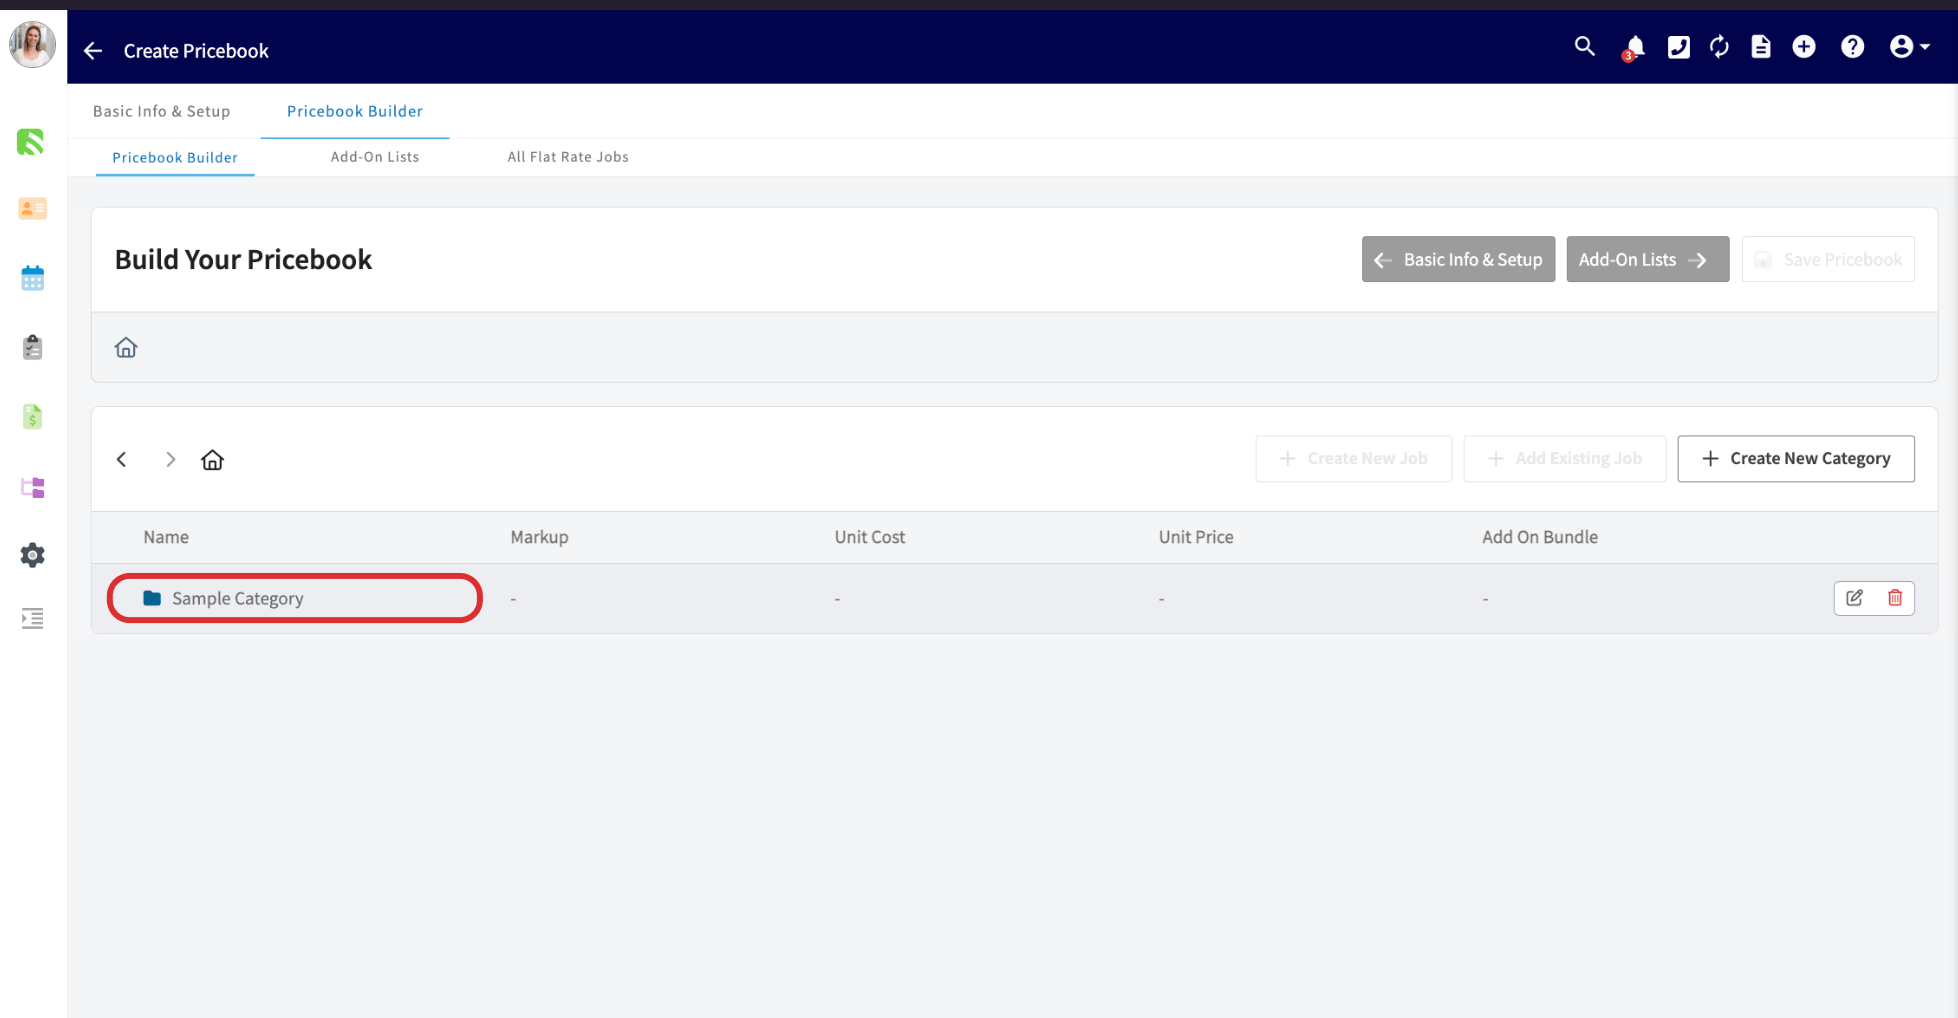
- Select Save Category.
6. Create add-on lists
Add-on lists are upsell options you link to flat-rate jobs:-
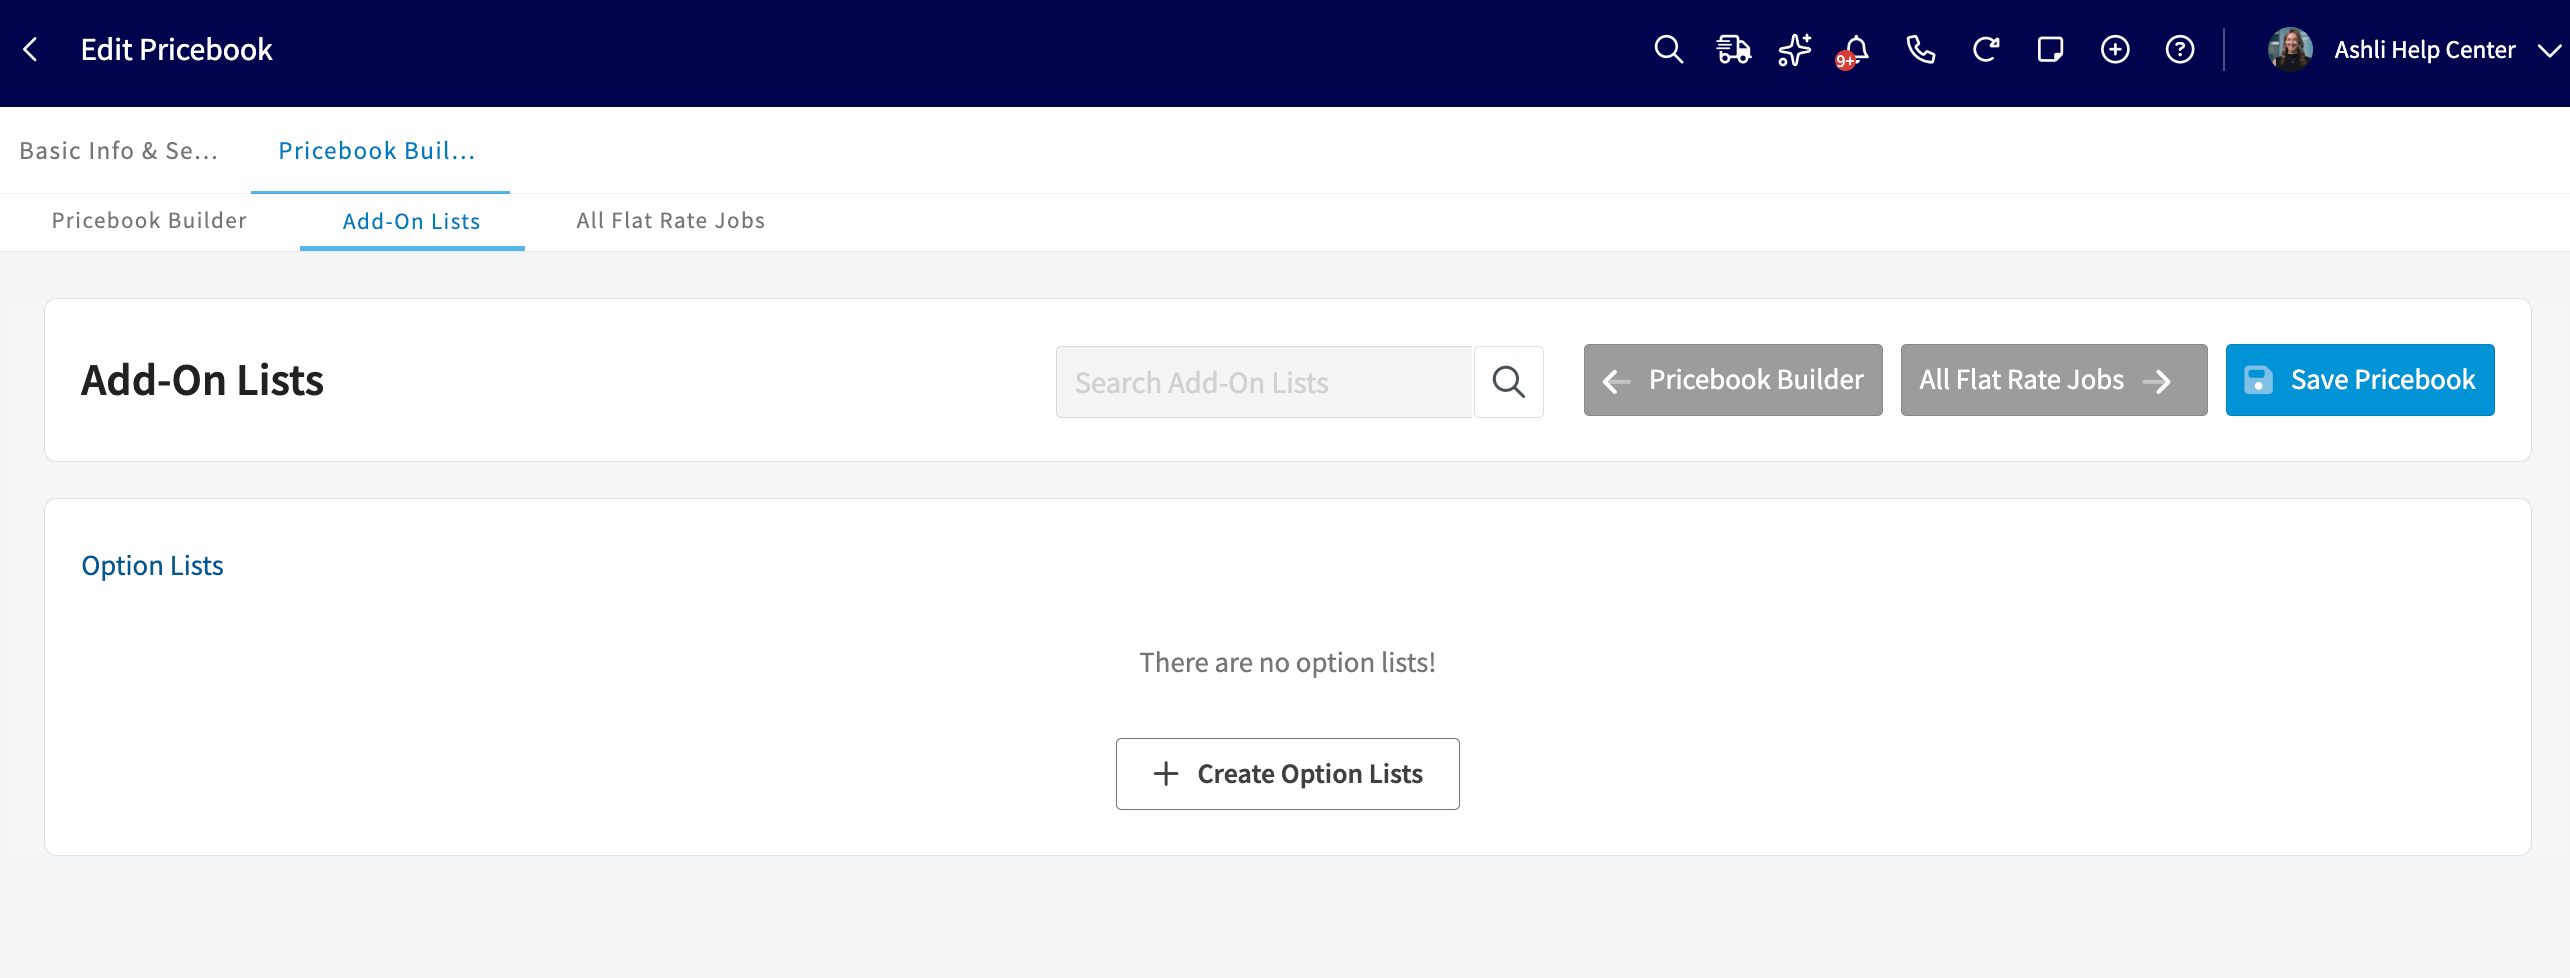
Select Add-On Lists, then select Create Option Lists.
-
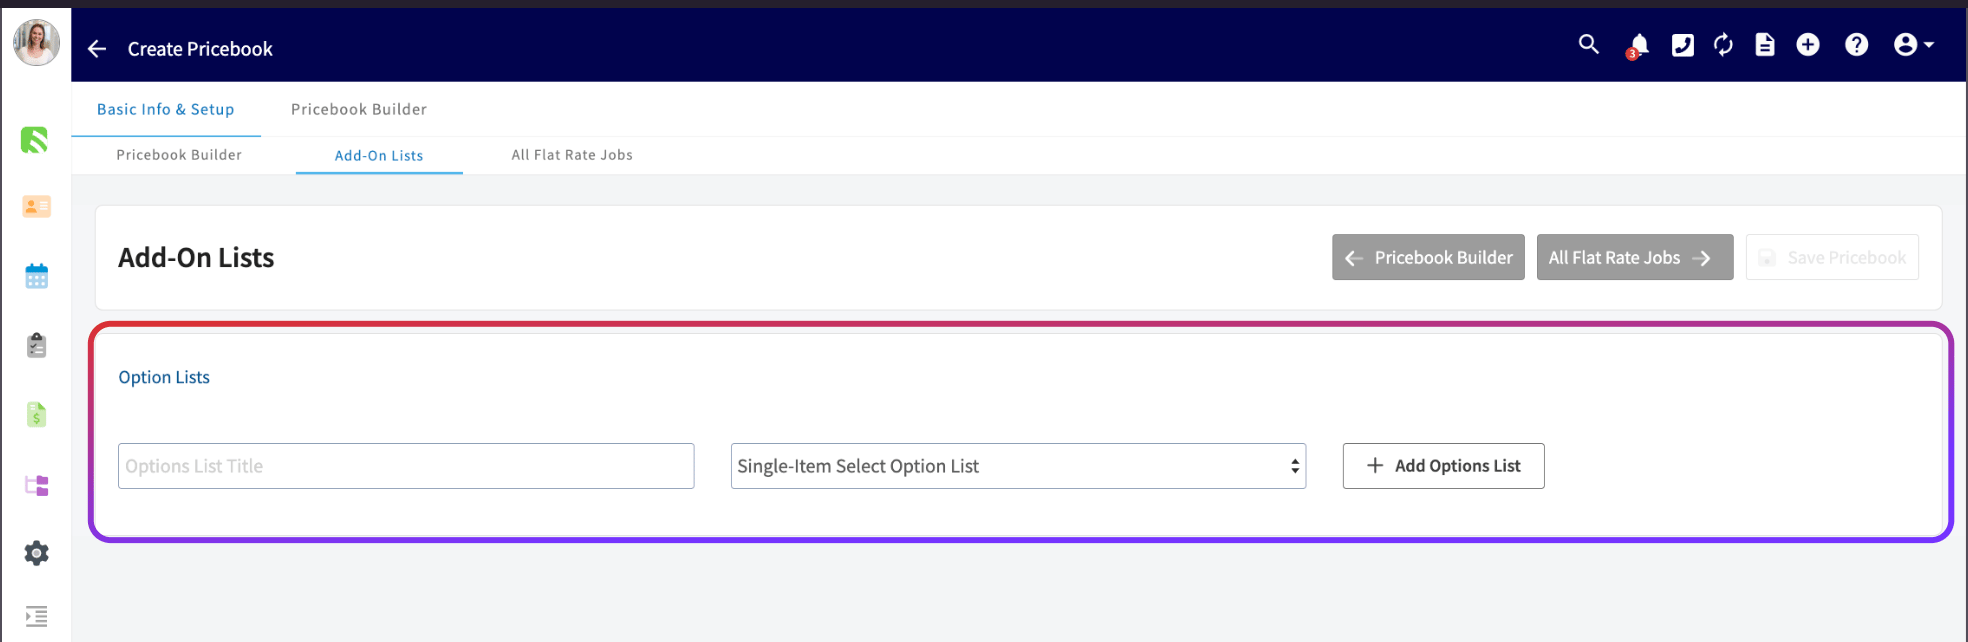
Enter an options list title, then choose whether the list is single-item select (you or your customer can pick only one item from the list) or multiple-item select (you or your customer can pick as many items as desired), and select Add Options List. If you aren’t sure, you can change this later.
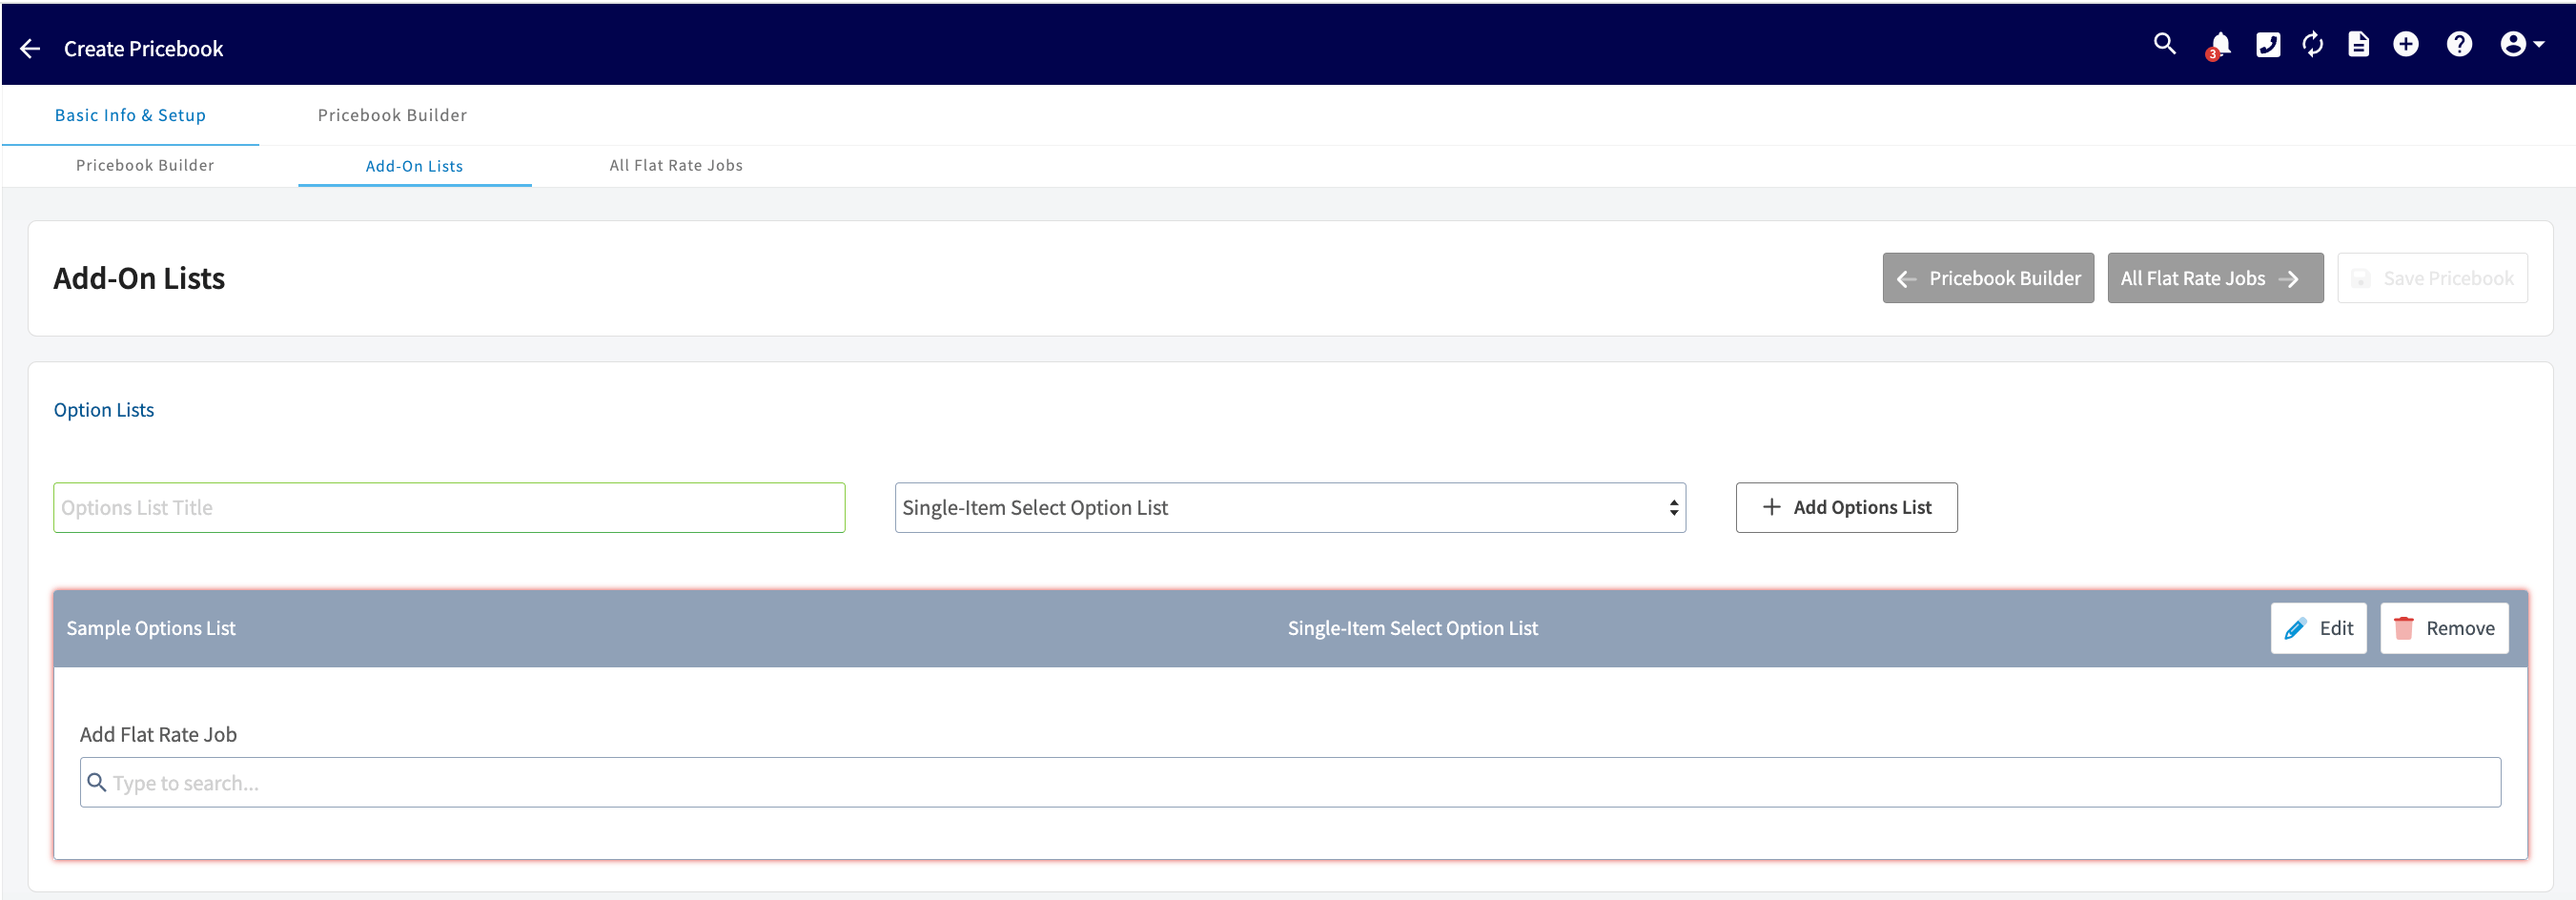
- Under Add Flat Rate Job, search and add each flat-rate job you want housed under this options list. A flat-rate job can appear in more than one options list.
7. Create flat-rate jobs
-
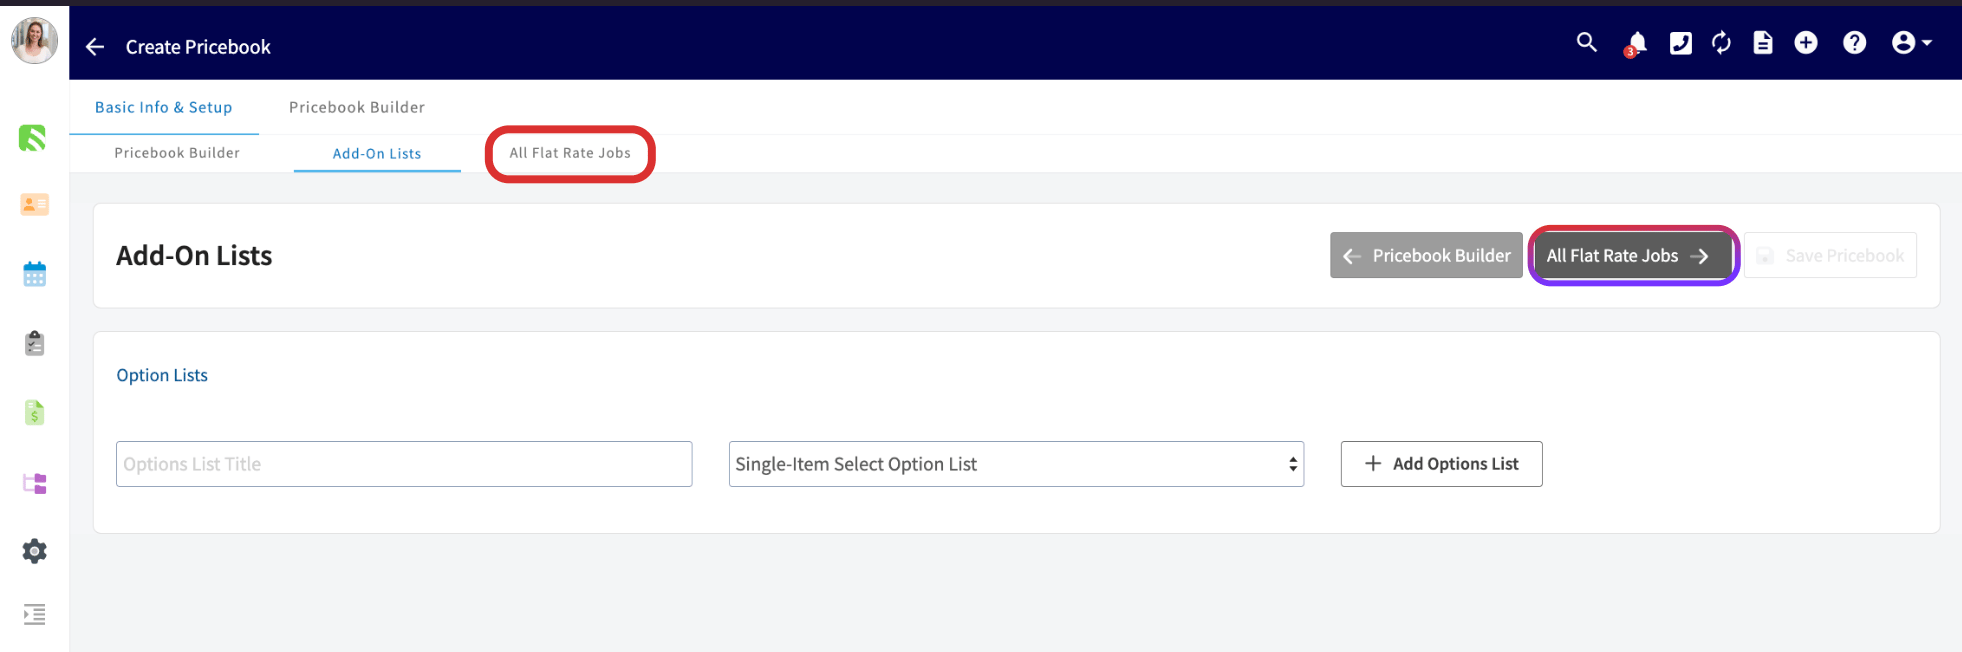
Select All Flat Rate Jobs, then select Create New Job.
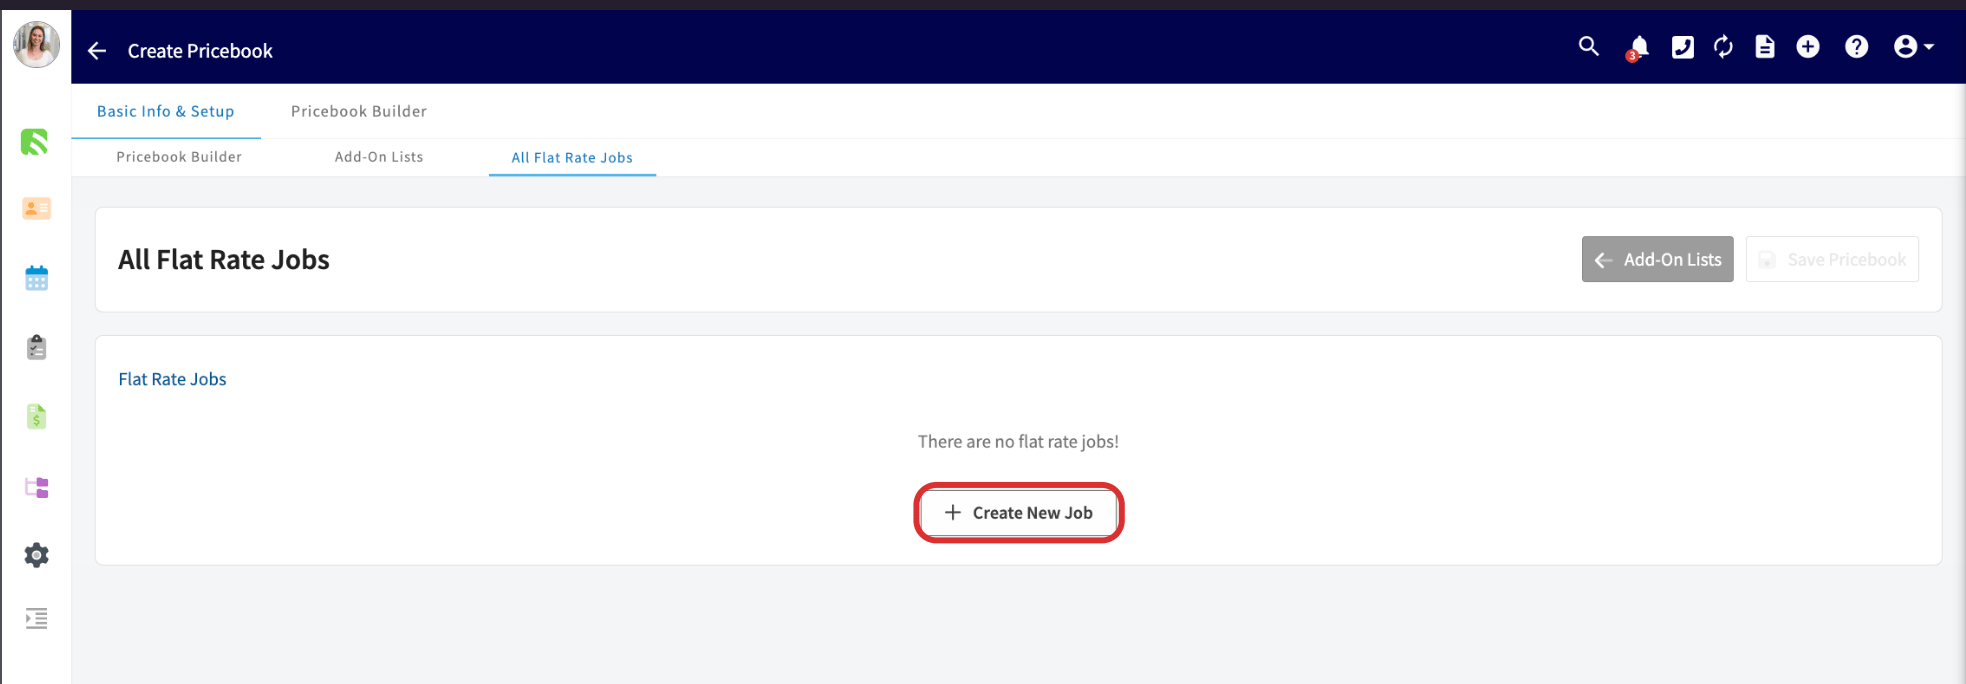
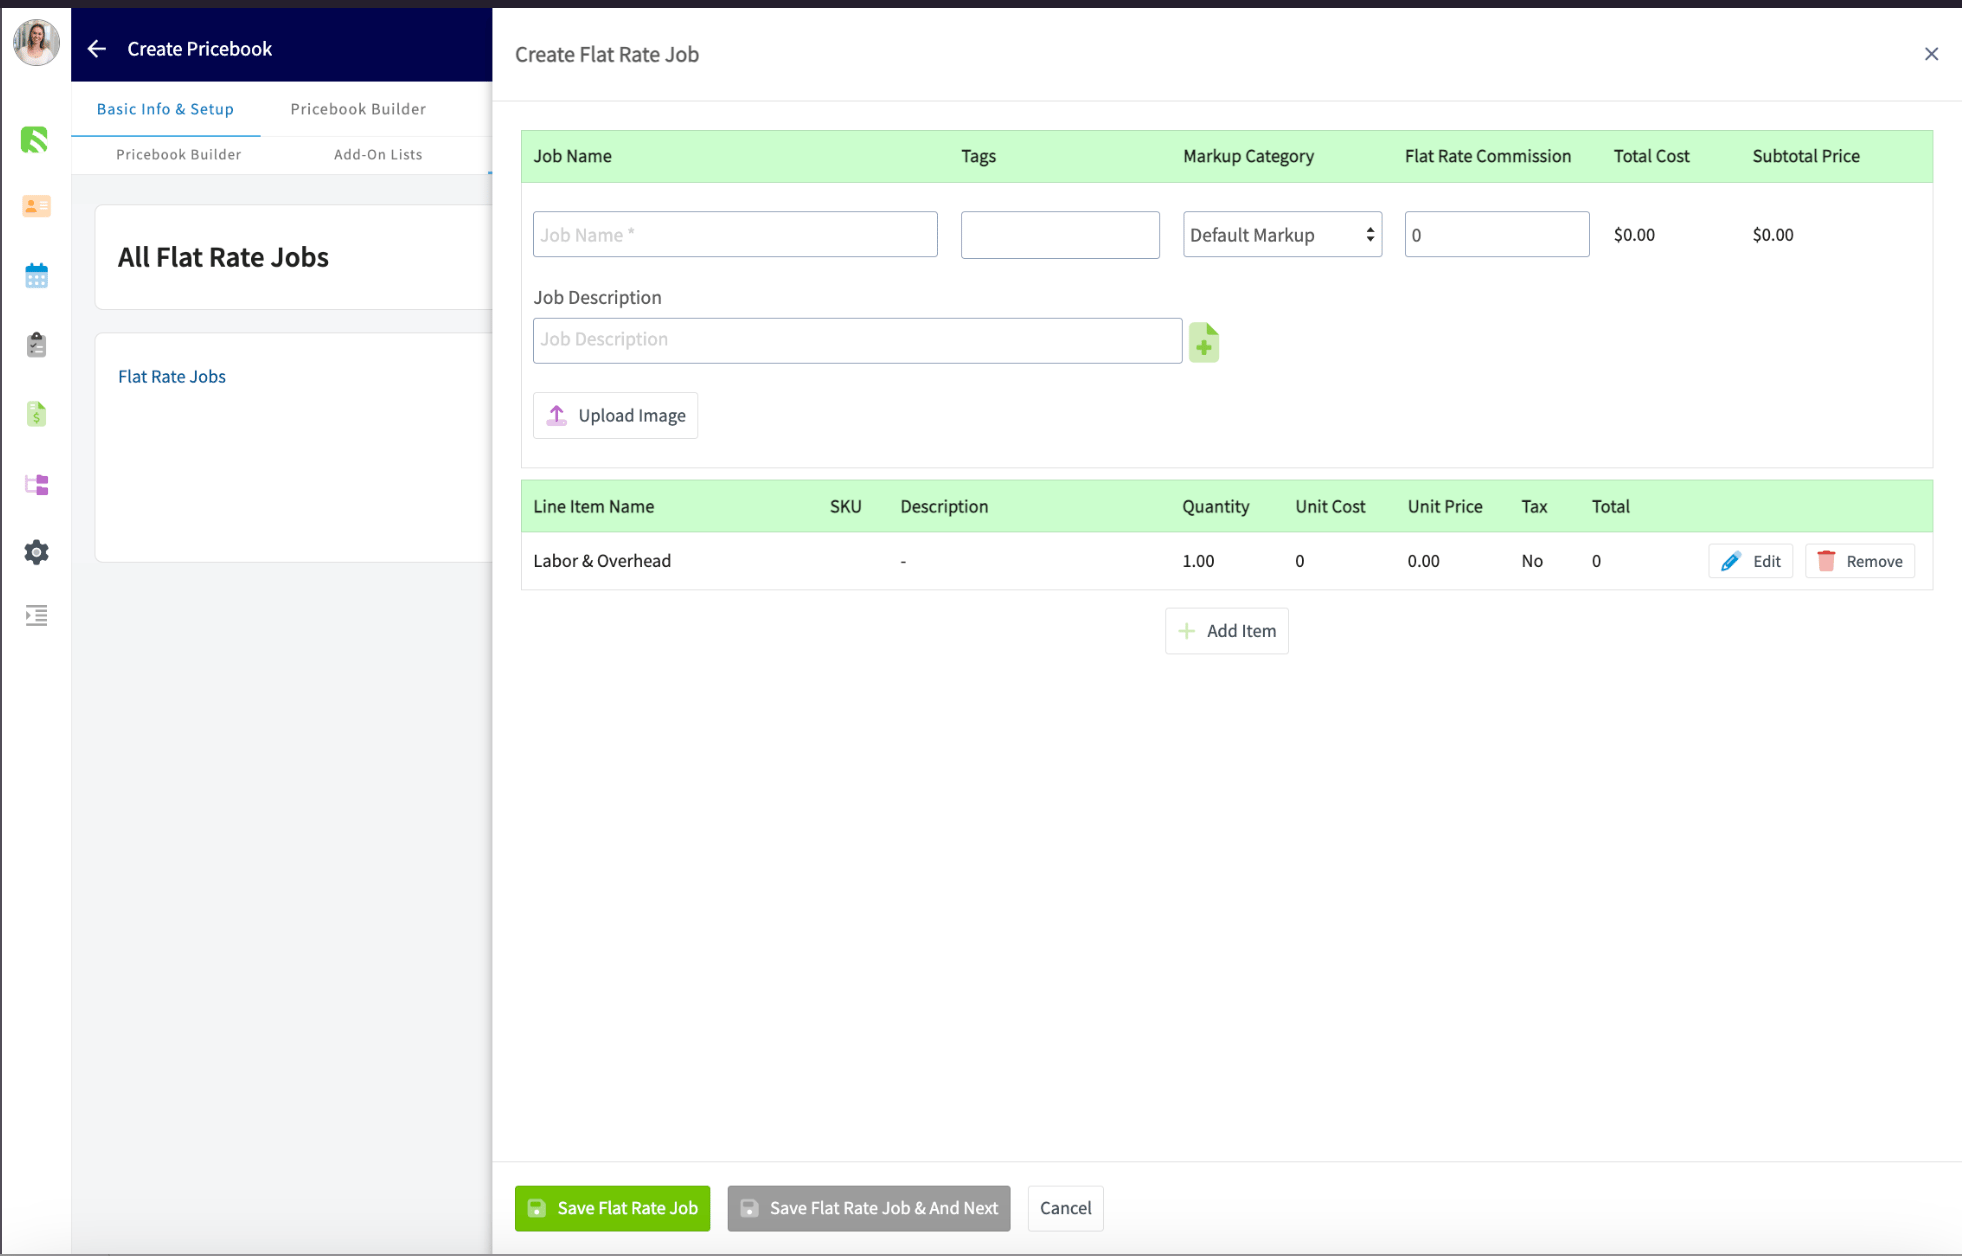
- Enter a Job Name. Add a description, an image, and tags if you want them.
-
Select the Markup Category for this job from the dropdown — the default markup you set earlier, unique markups by item, or one of the markup categories you created.
-
Select Edit on the Labor & Overhead line to enter the quantity of hours the job requires and a description, then select Save Item.
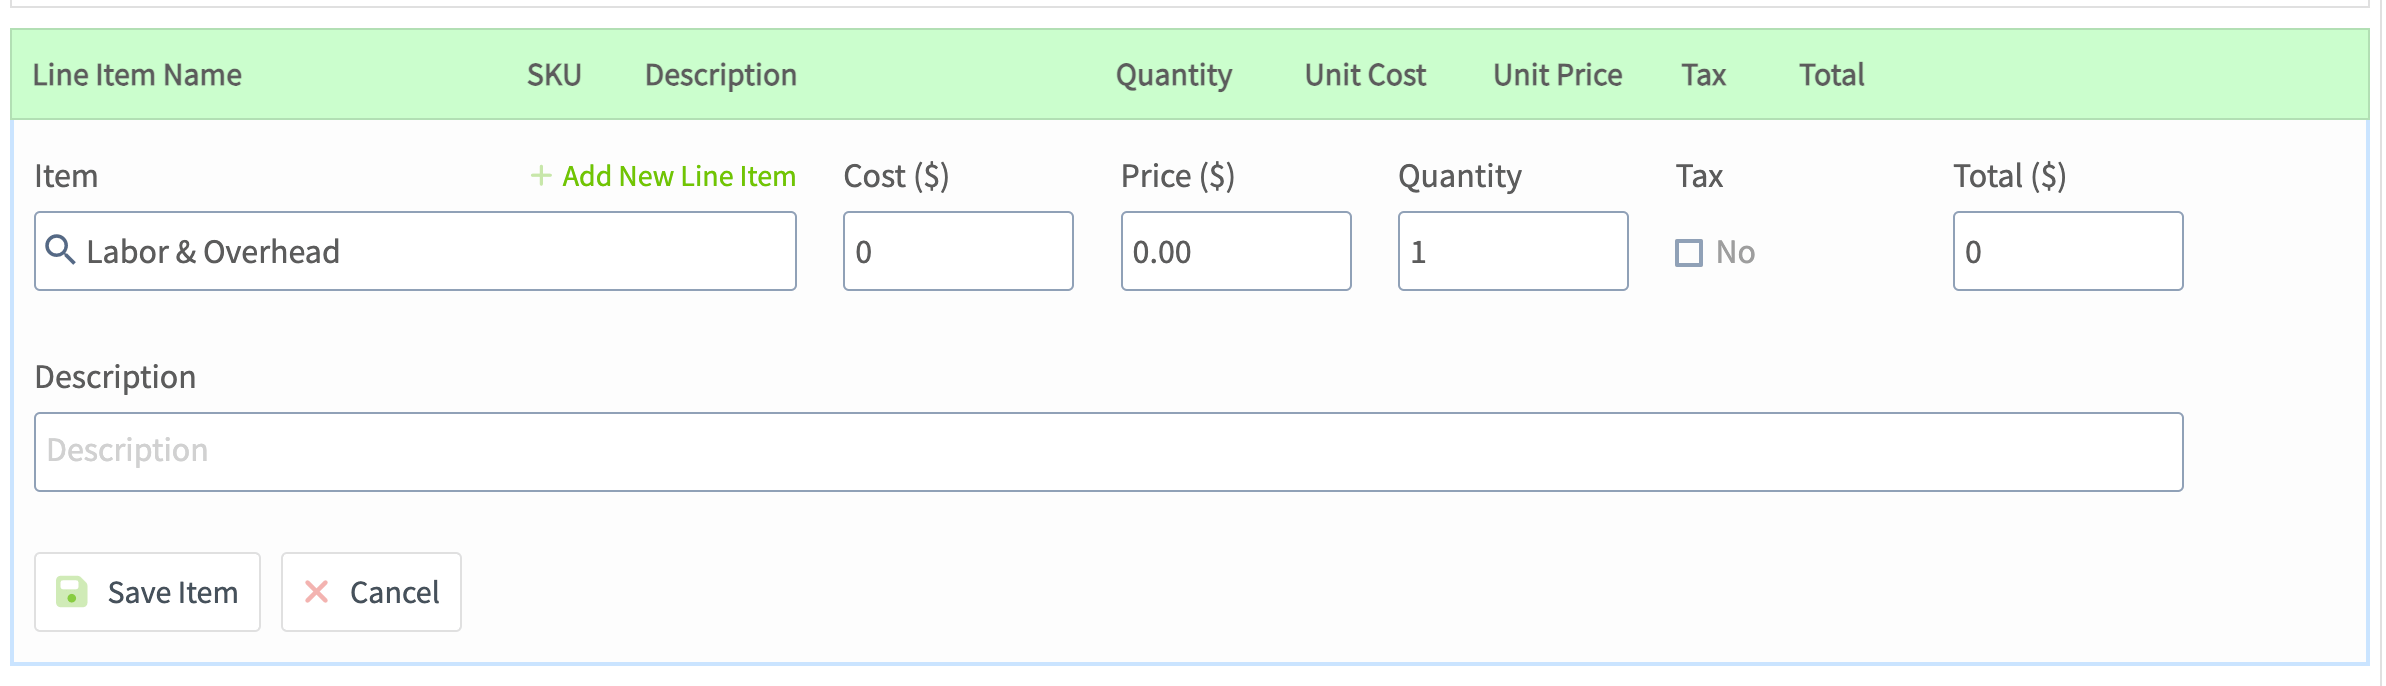
- Select + Add Item for every material the job needs. The Pricebook pulls from your Item List, or you can create a new line item. Cost, price, and description fill in automatically when you select an item; adjust them and the quantity as needed.
- To reorder line items, click and hold the six-dot icon to the left of a line item and drag it into place. The new order applies to future estimates and invoices built from this flat-rate job.
- Repeat Create New Job for each flat-rate job, and select Save Pricebook when you’re done.
Video walkthrough: building a Pricebook in the web app
On mobile
Use the Pricebook in the field to build estimates, invoices, and variant proposals with clear pricing and add-ons in front of the customer:-
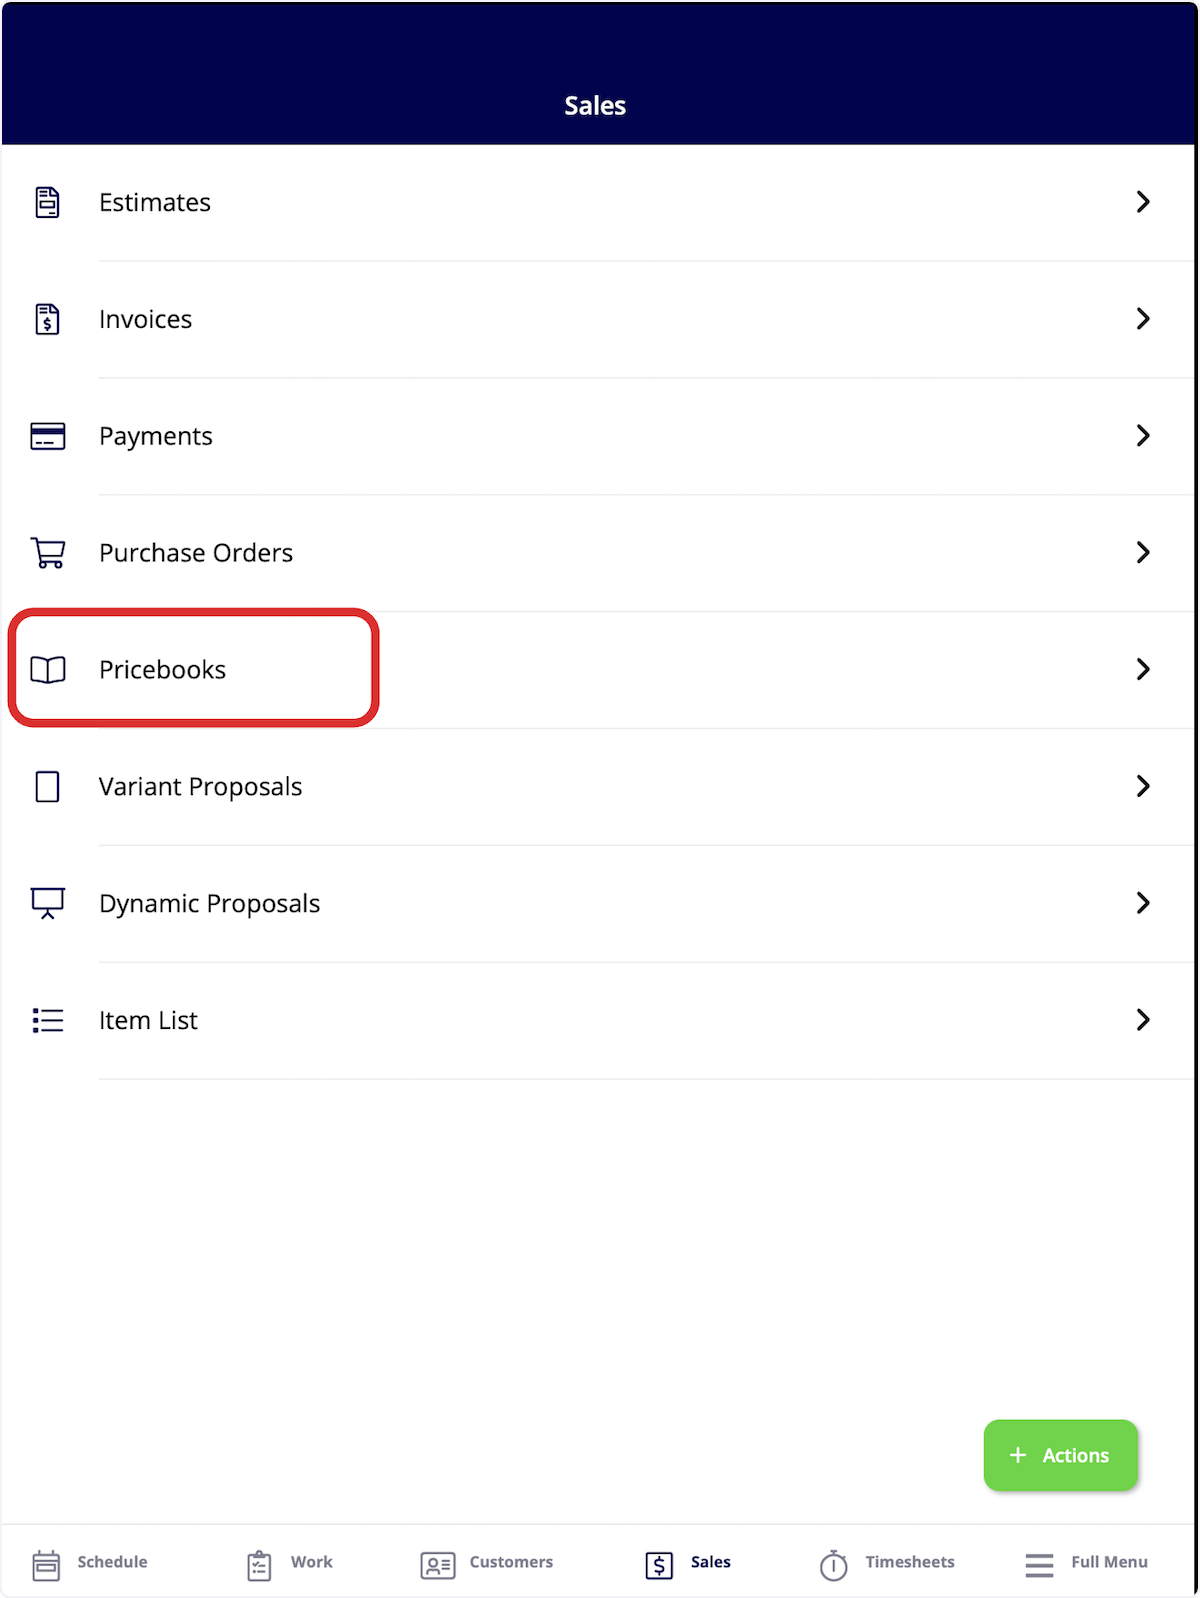
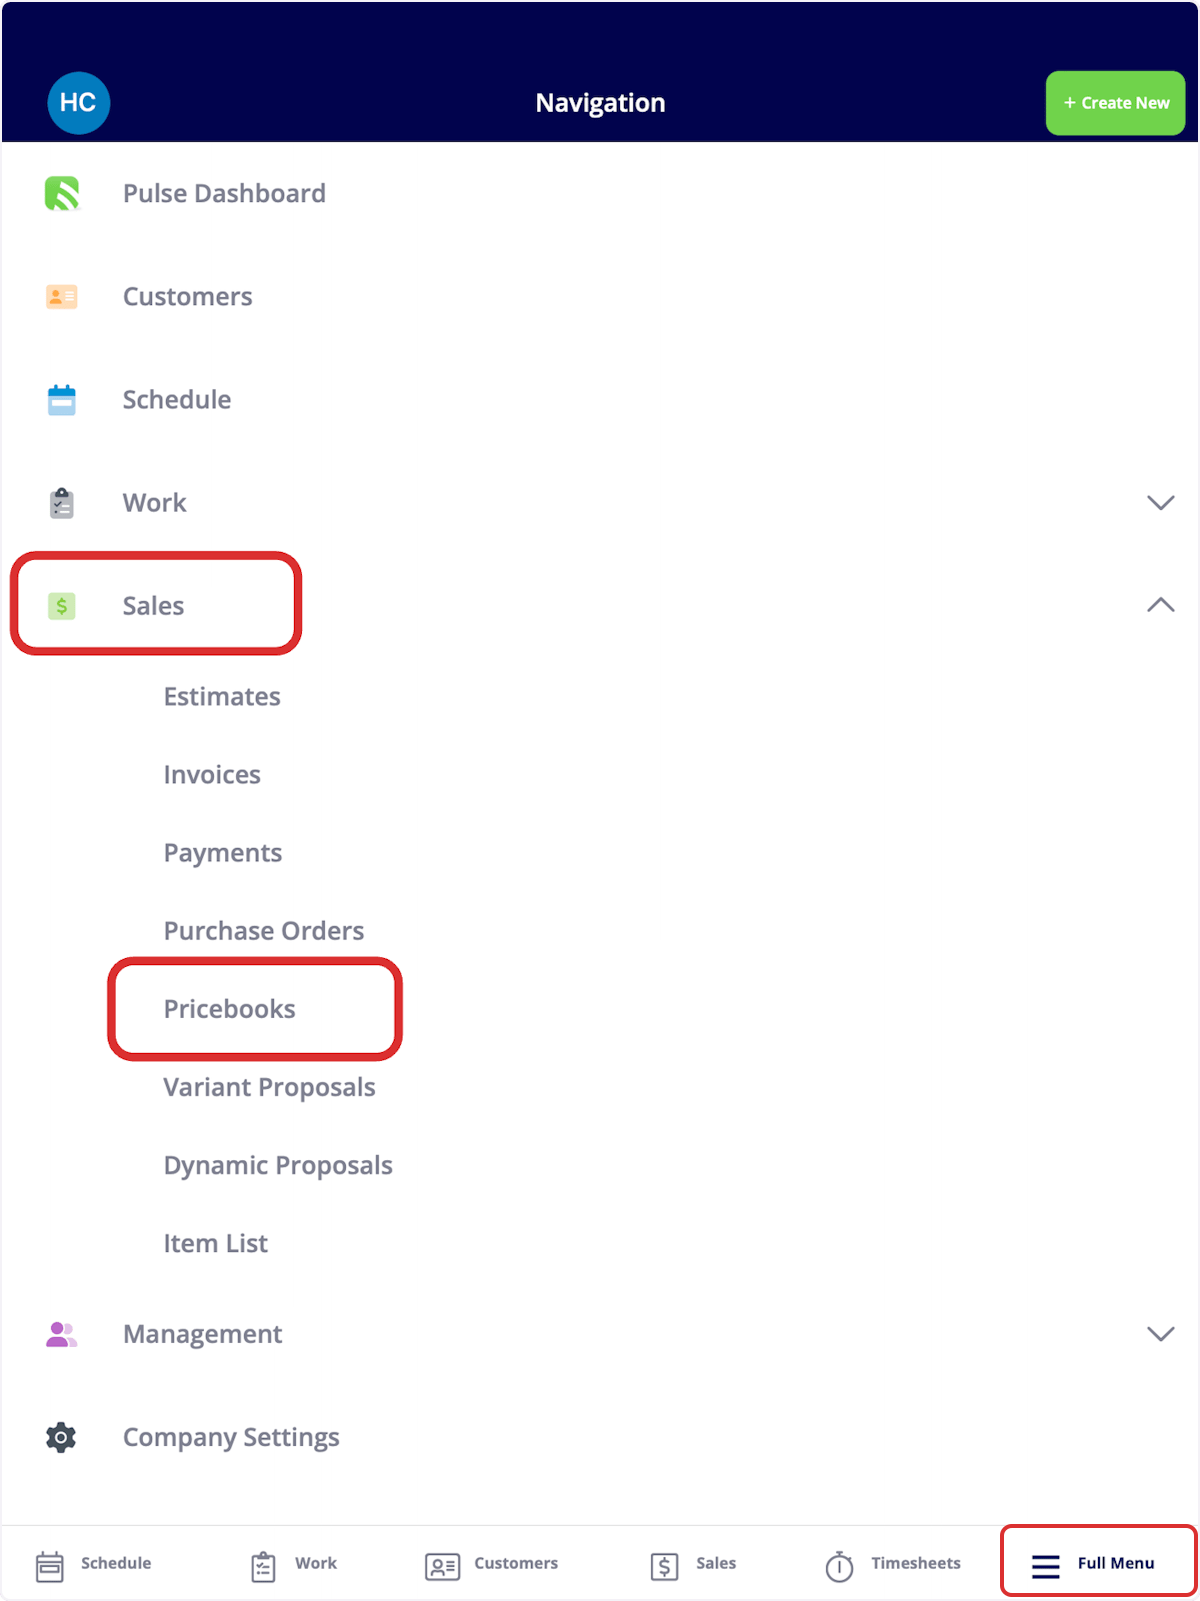
Select the Sales tab at the bottom of the screen and select Pricebooks, or select Full Menu > Sales > Pricebooks.
-
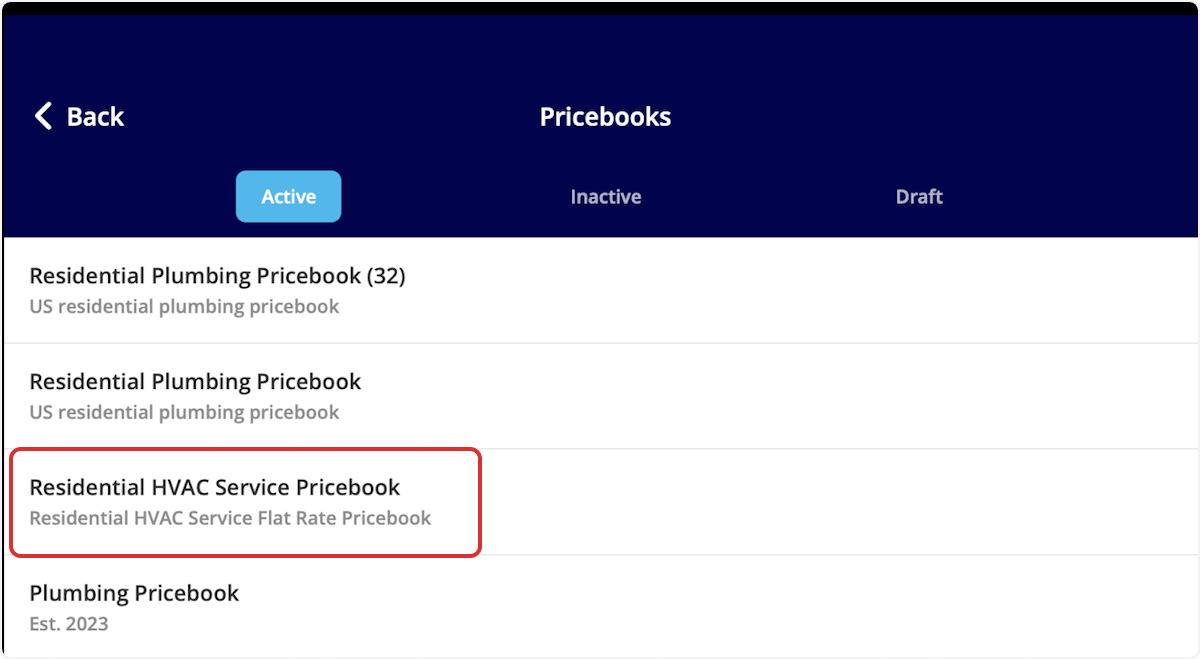
Select the pricebook you want to use.
-
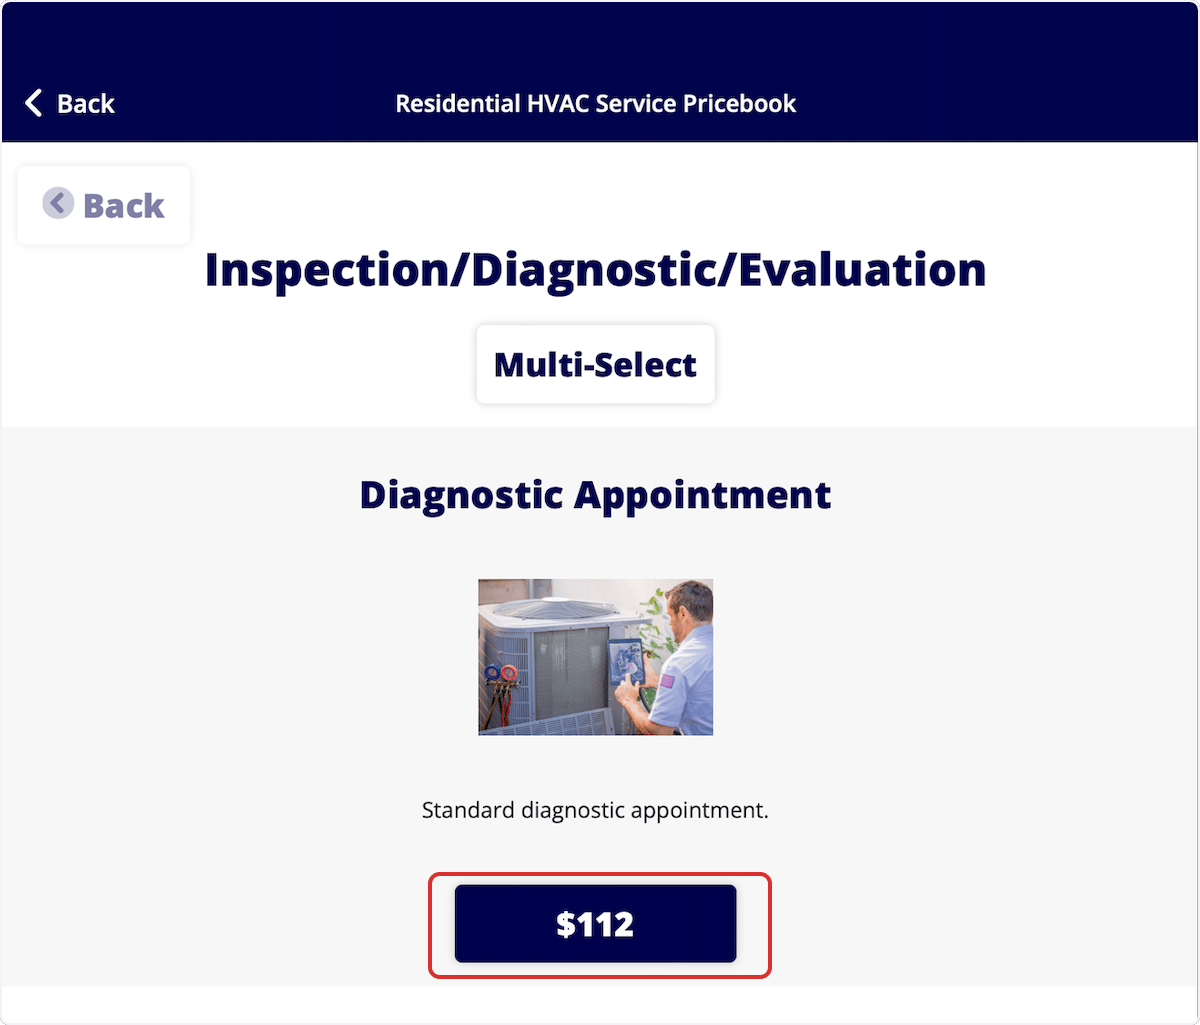
Select the category your job is under. Select Multi-Select to add several flat-rate jobs, or tap the listed price to add a single flat-rate job.
-
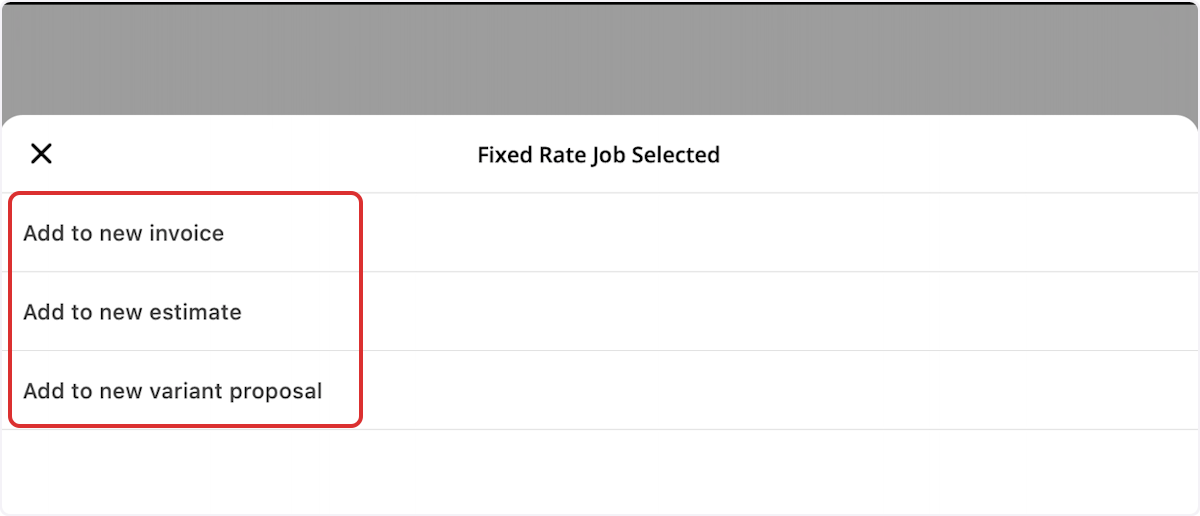
Choose whether to add the flat-rate job(s) to a new invoice, estimate, or variant proposal.
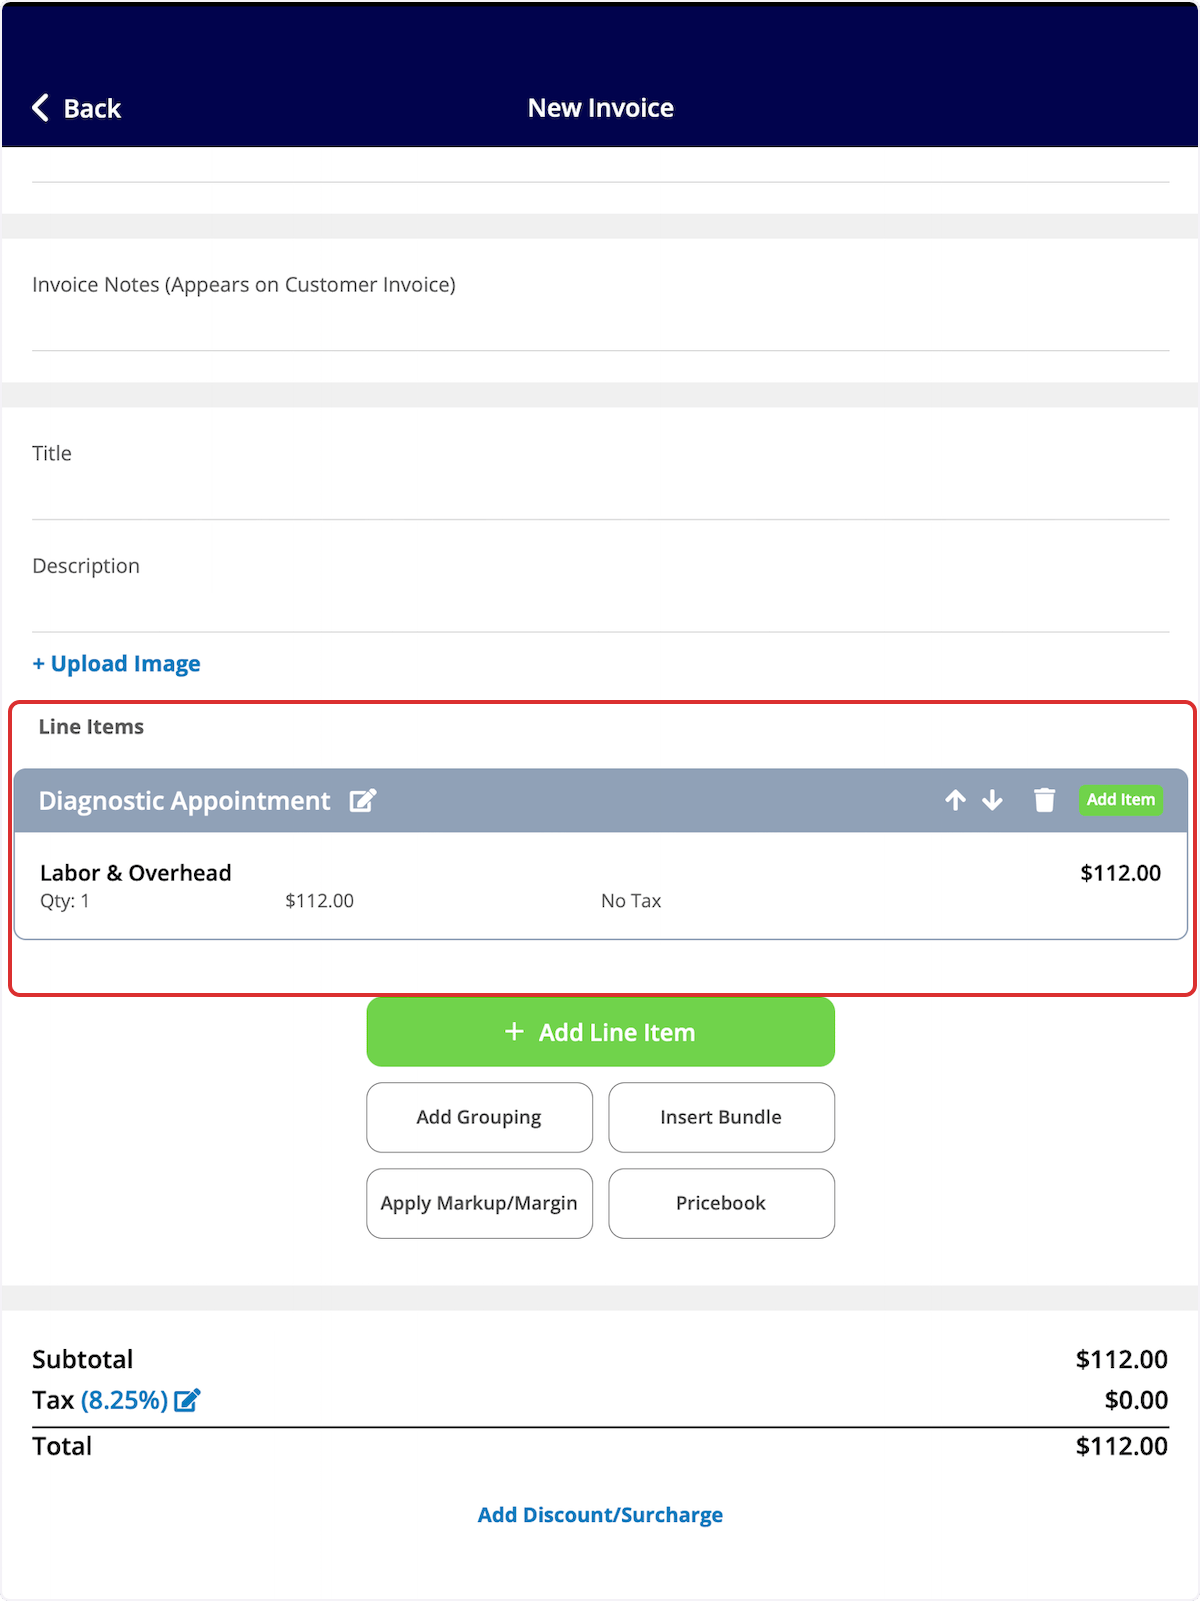
- The pricing and item details auto-populate into the document. Add the customer details and anything else you want to capture, then send it to your customer, present it on-site, or collect payment.
Video walkthrough: using the Pricebook on mobile