Overview
To keep your stock counts accurate, FieldPulse lets you choose when inventory is deducted from your hubs: when a Material List is completed or when an Invoice is finalized. You can set a default for your company, configure templates, and override the setting on individual records as needed.Prerequisites
Before setting up inventory deduction, make sure the following are in place:- Inventory is set up in your account, including hubs and any serialized items
- The Deduct Inventory toggle on a record is available to Admins and Team Managers
- To learn more about Inventory permissions, click here
On Web: Admin Experience
Set Up Your Default Deduction Method
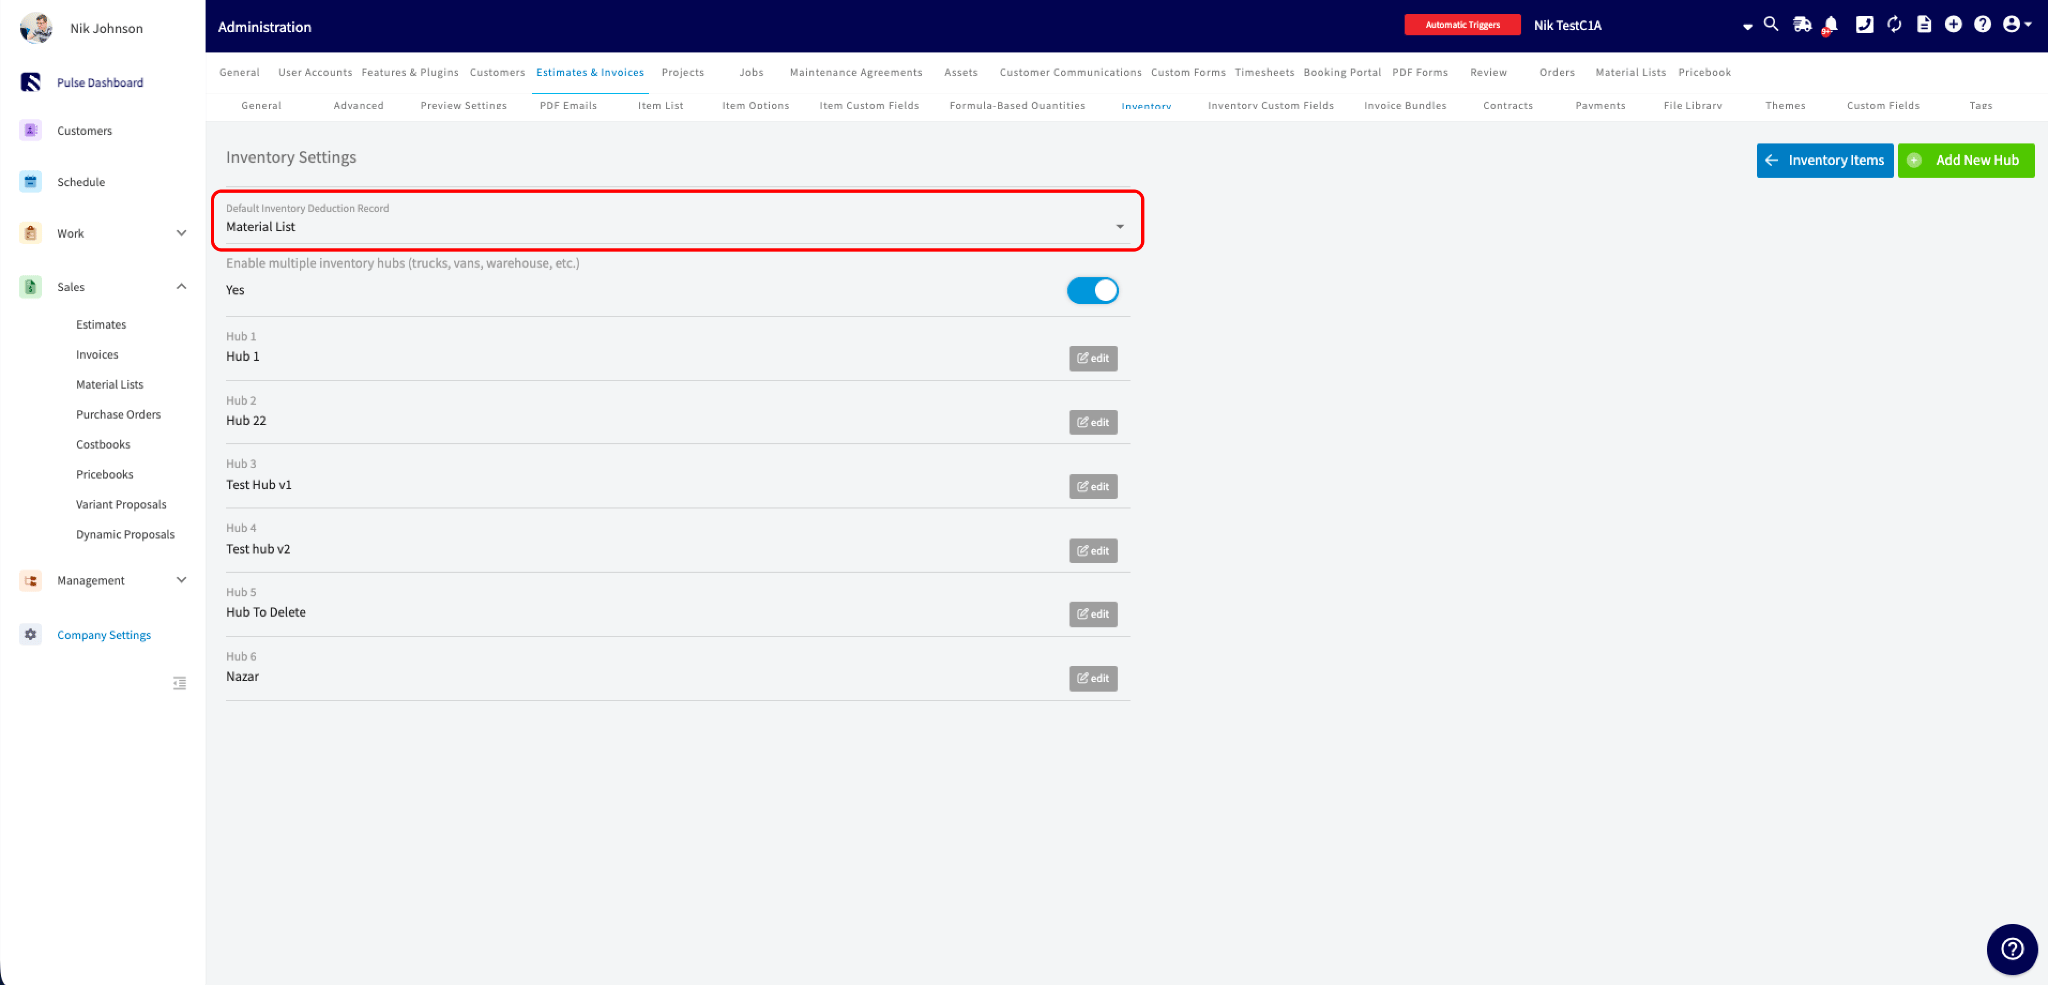
You can specify which record should be used by default for inventory deductions. Here’s how to set it up:- Navigate to Company Settings > Estimates & Invoices tab > Inventory subtab > and click the Inventory Settings button in the top right corner.
-
Select your record deduction preference:
- Material List - inventory will be deducted when the Material List reaches a Completed-type status.
- Invoice - inventory will be deducted when the Invoice reaches the Invoiced / Finalized status.
Set Up Toggle Defaults on Templates
If you build Material Lists or Invoices from templates, you can set the toggle on the template itself so every record built from it inherits the right behavior. Here’s how:- Open a Material List or Invoice template.
- Switch on Deduct Inventory from Material List or Deduct Inventory from Invoice.
- Save the template.
Flexible Deduction Options
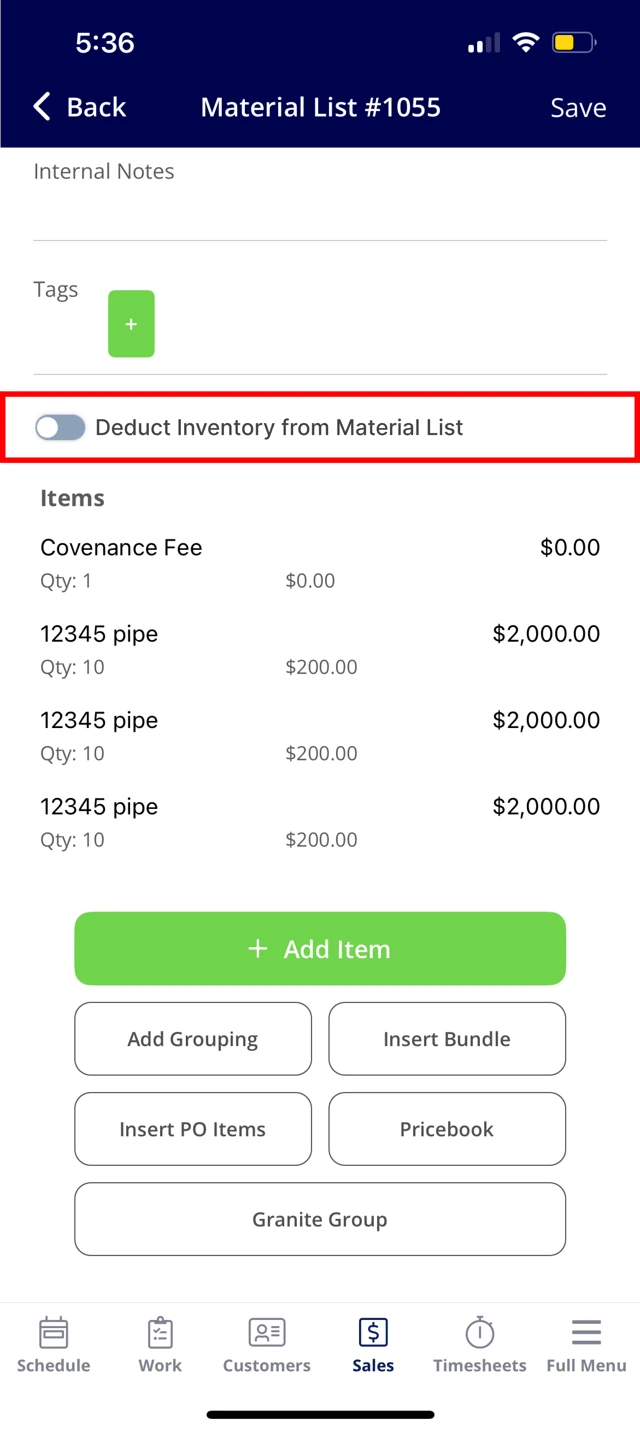
When creating or editing a Material List or Invoice record, you will encounter a toggle labeled Deduct Inventory from Material List or Deduct Inventory from Invoice. This feature is designed to support your flexible workflows. Why This Matters: In most cases, for example, you may prefer to deduct inventory from Material Lists, which you’ve set as your default method. However, there may be instances where a job is straightforward and quick, allowing you to skip the material list and proceed directly to invoicing. The toggle allows you to override your default setting for that specific record, ensuring you can deduct inventory according to the job’s needs.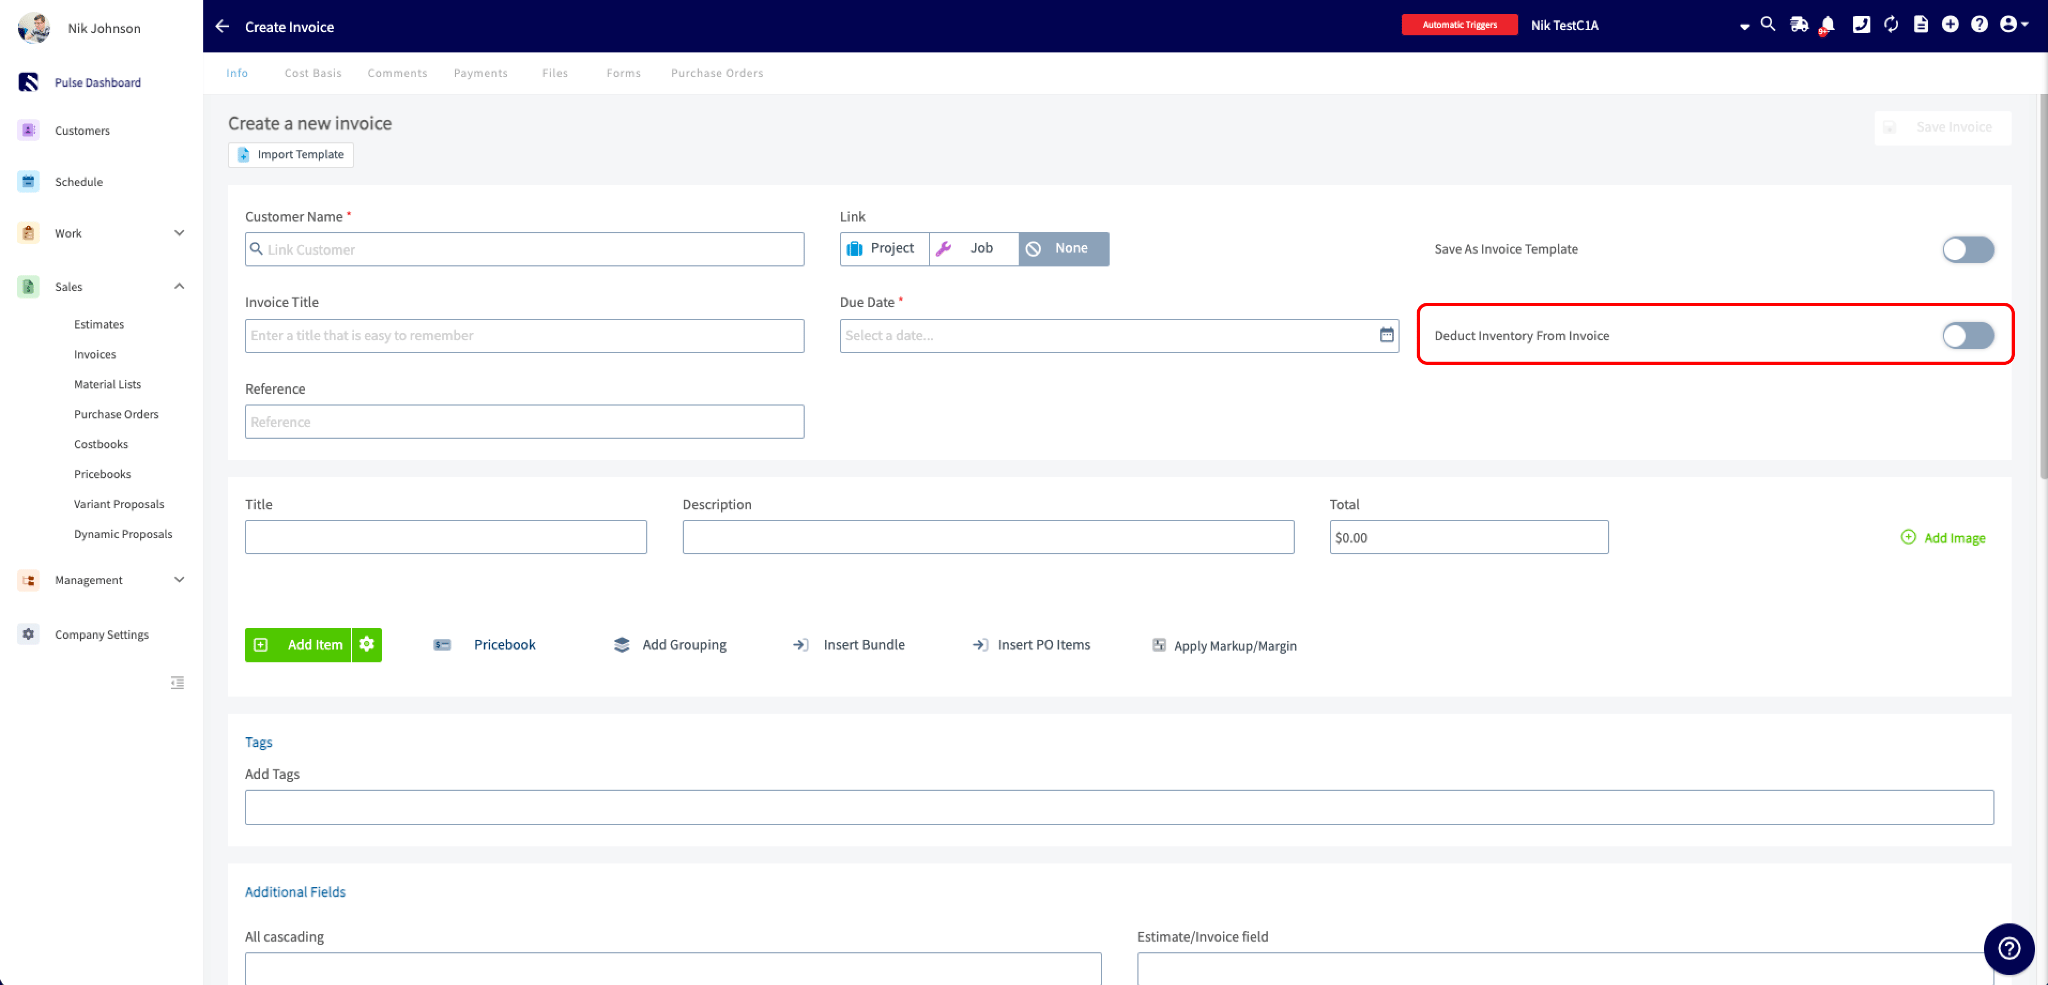
How the Toggles Behave Together
A few rules to be aware of when working with related Material List and Invoice records:- The toggle is editable only while inventory hasn’t been deducted yet. Once a record reaches a Completed-type status (Material List) or Invoiced / Finalized status (Invoice), the toggle will lock.
- If a record is moved back to Draft, inventory is returned and the toggle will re-enable.
- When a Material List and Invoice are linked, FieldPulse keeps them in sync so inventory is never deducted twice. Turning on Deduct Inventory from Invoice automatically turns off Deduct Inventory from Material List on the linked Material List.
- Items added to a completed record (a change order) will be deducted when the record is re-completed.
Serialized Inventory Behavior
Serialized items follow the same trigger rules as regular inventory, with two additional safeguards to prevent the same serial number from being deducted twice:- When a record is completed, the serial numbers on it are locked and can’t be edited.
- If a serial number that’s already been deducted on another record is added to a new record, an error icon will appear next to that line item.
-
If a user attempts to complete a record that still contains an already-deducted serial number, the Serial Number No Longer Exists pop-up will appear with two options:
- Continue Editing: keeps the record in Draft so you can swap in a valid serial number.
- Proceed Without Deducting This Item: completes the record and deducts everything else.
Counting Inventory
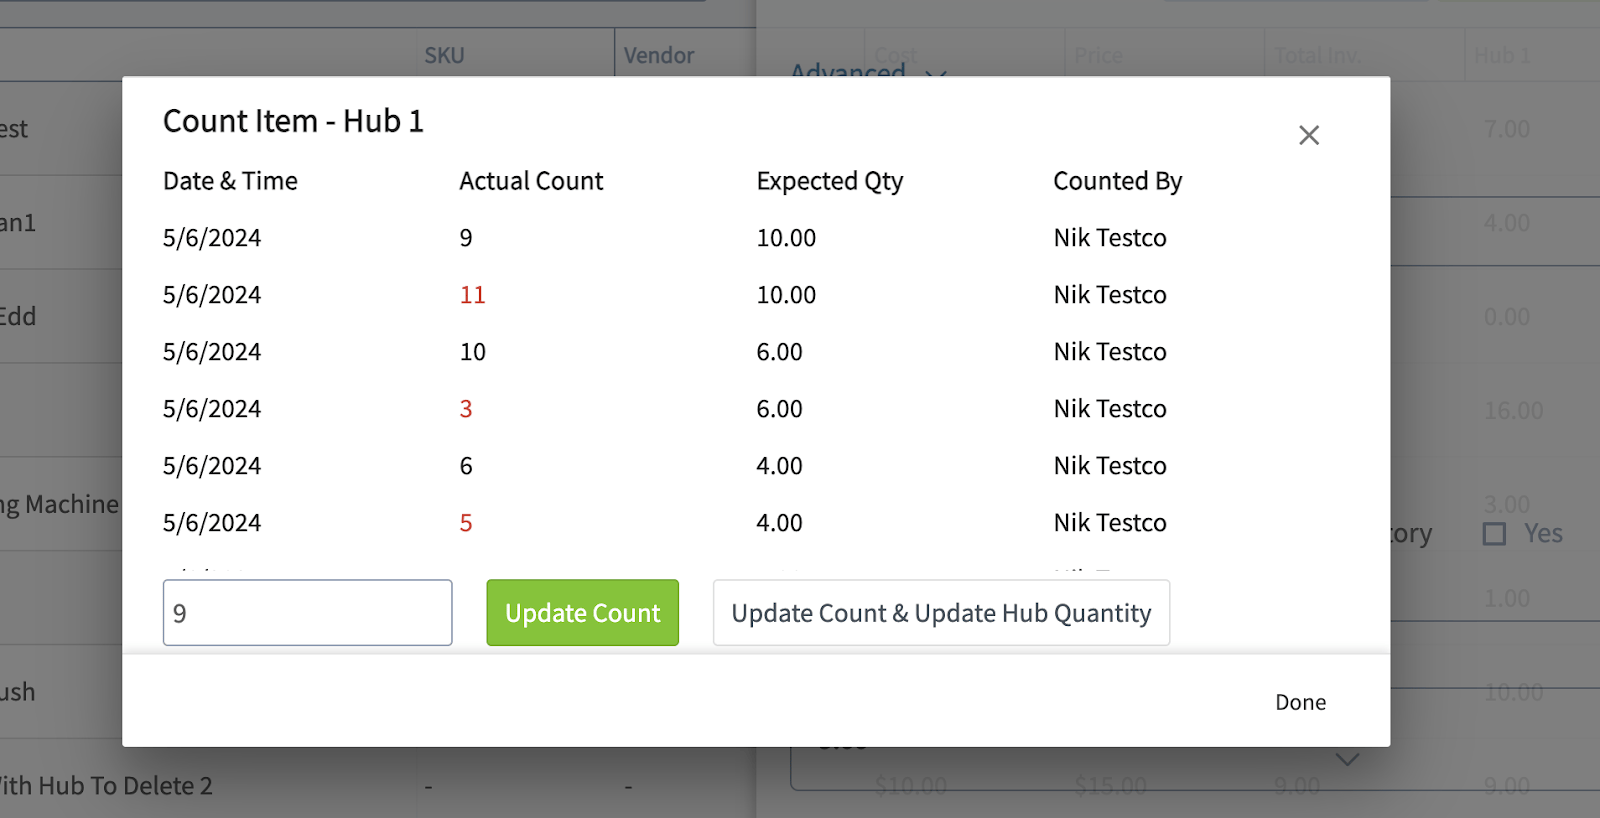
The inventory count tool helps you track and manage inventory levels across multiple inventory hubs efficiently. Follow the steps below to stay on top of your inventory levels. To use this tool from the web app, begin by navigating to the inventory item you’d like to count and select the clipboard icon.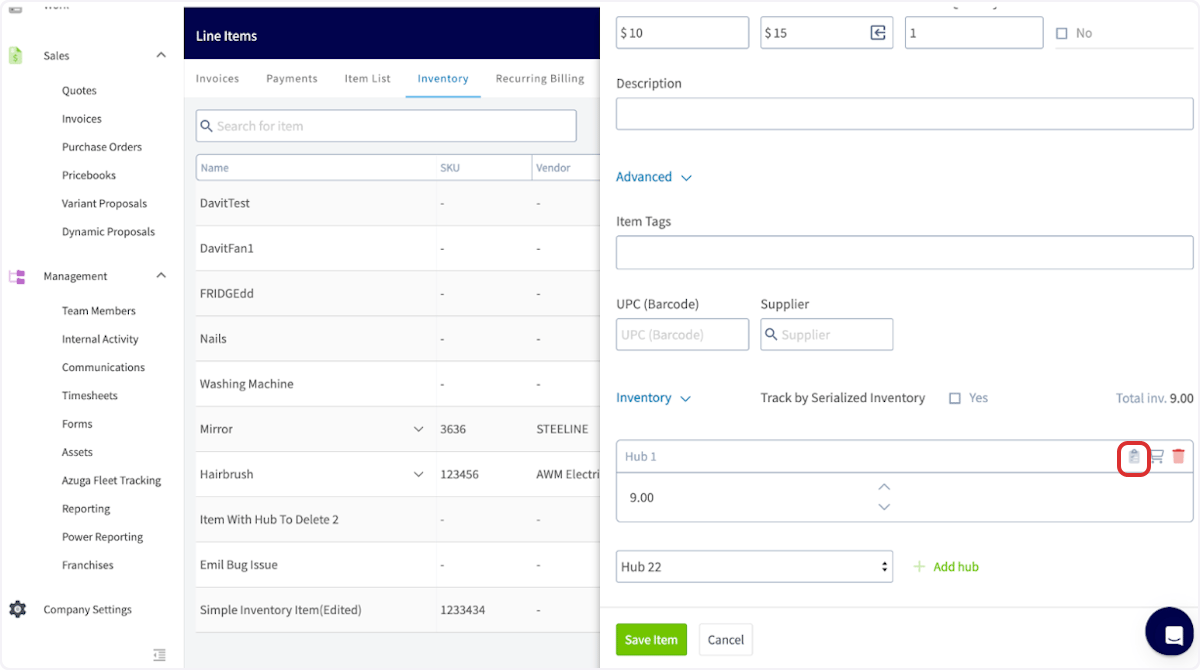
- Actual Count: The number of items currently present.
- Expected Quantity: The expected number of items.
Inventory Count Reporting
To access Inventory Count Reporting, navigate to Reporting in the left-side menu. Select Invoices, then Inventory Count.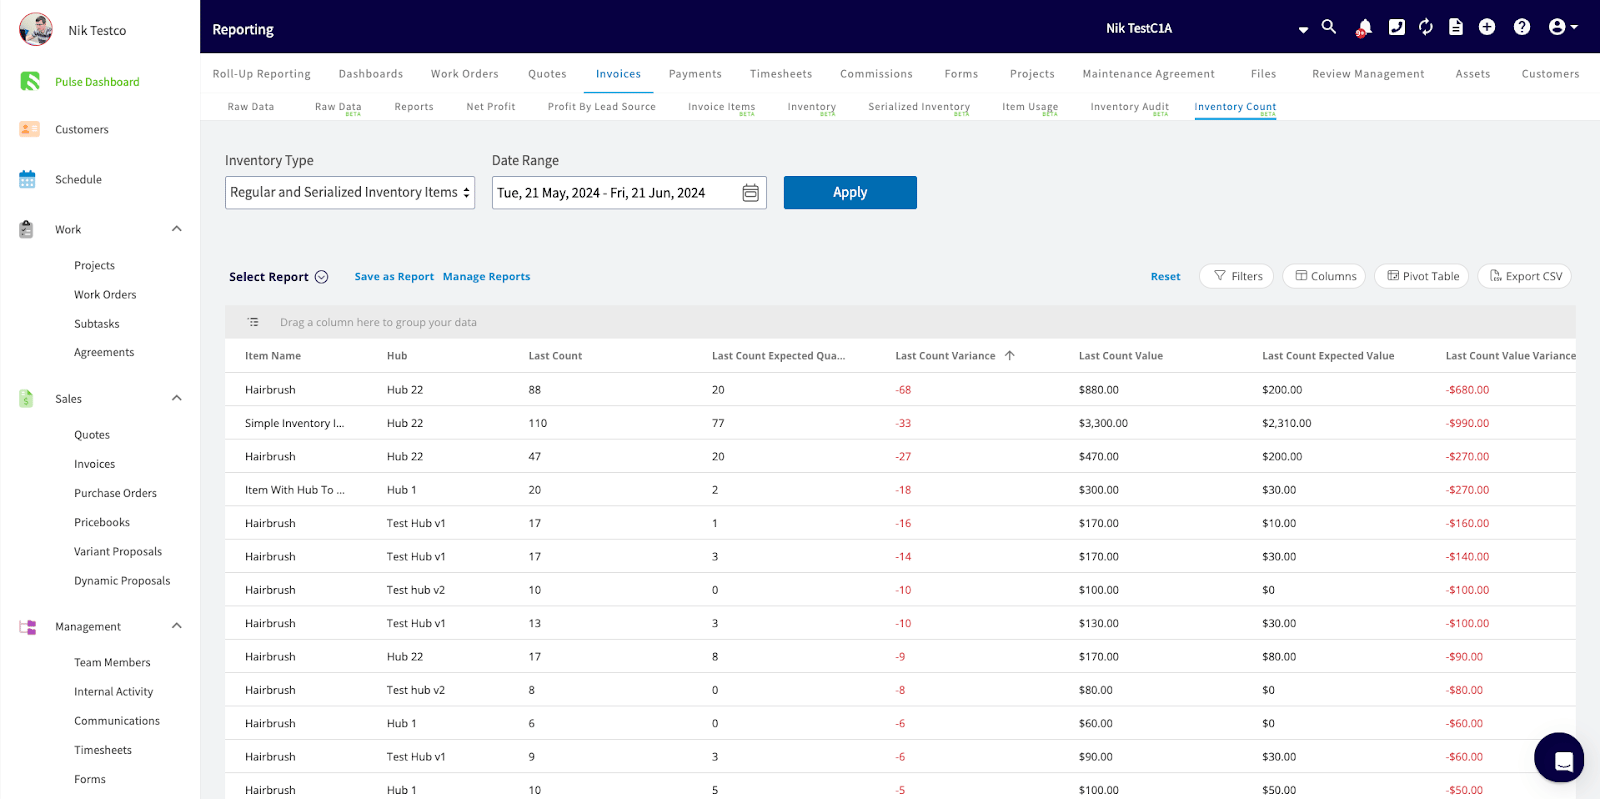
On Mobile: Field Experience
The toggle and inventory count tool are both available in the mobile app. Note that Inventory Settings and template configuration live in the web app only, so plan to do your initial setup there. Toggle deduction on a record:- Open the Material List or Invoice in Draft status.
- Tap the Deduct Inventory from Material List or Deduct Inventory from Invoice toggle.
- Save.
Count an item with the barcode scanner:
In the mobile app, you can use the barcode scanner to quickly pull up the item, enter the count, and update it. Visit the Barcode Scanning article to learn more about this feature. Scan the barcode of your inventory item, then select the clipboard icon to open the inventory count feature.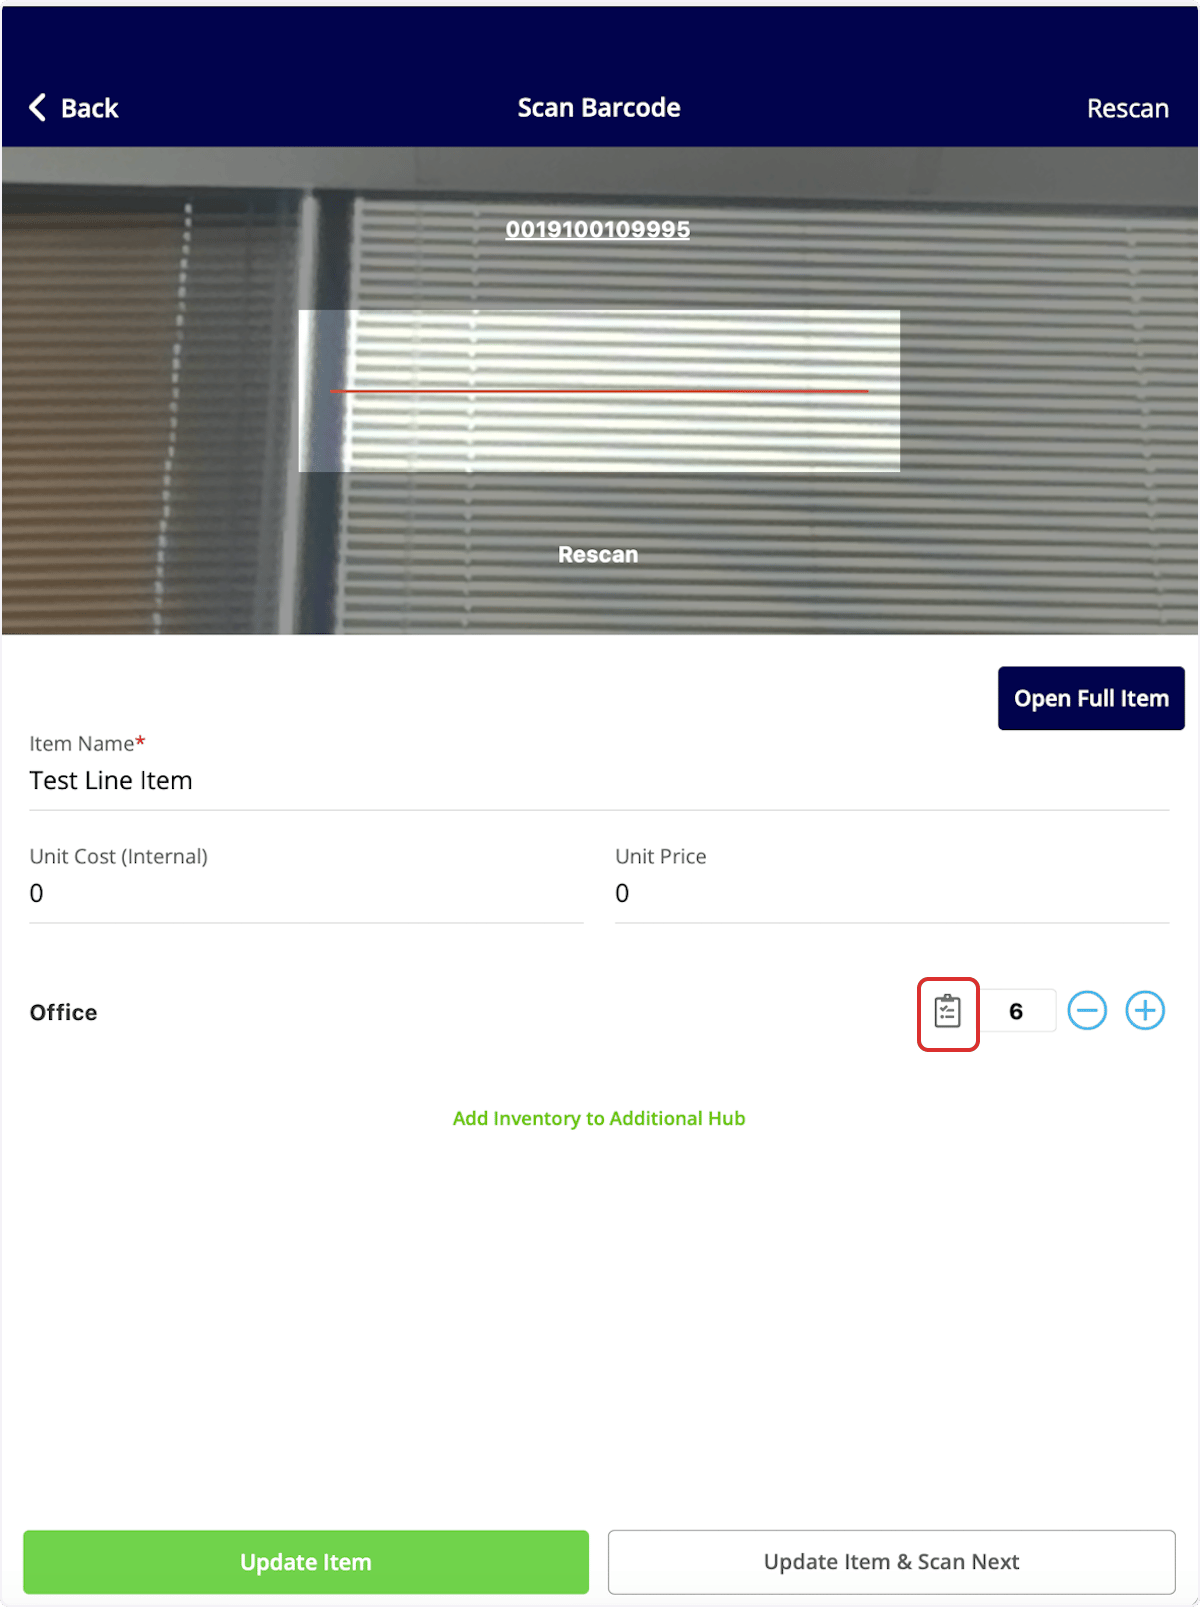

Troubleshooting
| Issue | Likely cause | Fix |
|---|---|---|
| The Deduct Inventory toggle doesn’t appear on a record | The user isn’t an Admin or Team Manager | Update the user’s role, or have an Admin or Team Manager edit the record. |
| Inventory didn’t deduct when the Material List was completed | The toggle was off, or the linked Invoice is set as the deduction record | Open the Material List in Draft, switch the toggle on, and re-complete. Or confirm the linked Invoice will be the deduction record when finalized. |
| New records aren’t using the right default | Default Inventory Deduction Record isn’t set or was changed recently | Confirm the setting in Company Settings > Estimates & Invoices > Inventory > Inventory Settings. |
FAQs
Can technicians or service agents flip the toggle? No. Only Admins and Team Managers can use the Deduct Inventory toggle on a record. Other roles can still build Material Lists and Invoices; they just won’t see the toggle. Can I count inventory across multiple hubs at once? Counts are tracked per item, per hub. Work through each hub for that item, or open Inventory Audit Reports for a higher-level view.Have additional questions? Contact us at support@fieldpulse.com or use the chat feature in the bottom right corner of your screen.