
Who uses this: Founding Users generate the API key and manage webhooks, and developers use the key to build custom integrations. Availability: All regions; FieldPulse Support turns on Developer Platform for your account.The FieldPulse API is a developer interface that lets your other business apps read and write FieldPulse data and trigger actions across tools. Use it to push FieldPulse data into another application, or to have an action in one application create or update records in FieldPulse. The full reference lives in the FieldPulse API documentation on Postman, and you generate your own API key from Company Settings once Developer Platform is turned on for your account. To turn it on, contact FieldPulse Support.
Overview
The FieldPulse API is an Application Programming Interface: a way for different software applications to communicate and share information with each other. It’s useful when you want to display FieldPulse data inside another app, or have an action in one application trigger a response in another. Some of what teams build with it:- CRMs: Create and update FieldPulse customers in a third-party CRM.
- Task tracking: Create and update subtasks on job records from a third-party task manager.
- Internal communication: Sync comments on jobs and customer records from tools like Slack or Microsoft Teams.
- Lead capture: Send lead data (name, email, address) captured on your website into FieldPulse.
- Lead management: Manage customer pipeline statuses from marketing and sales apps.
- Scheduling: Create and assign jobs to field technicians from a third-party app.
- Estimates & invoices: Send estimates and invoices, get their dynamic links, update preview settings, and sync invoices with accounting software. Includes marking estimates as converted once accepted.
- Material lists, custom fields, and contracts: Create material lists, push custom-field data in, and write and send contracts from a third-party tool into FieldPulse.
How it works
The FieldPulse API exposes FieldPulse records, such as customers, jobs, estimates, and invoices, as endpoints you call over HTTP. The complete list of endpoints, the actions each one supports, and the request and response details for each are in the API Reference tab of this Help Center. To get started, read Getting Started for the base URL, authentication, HTTP methods, and status codes. Then browse the endpoints in the API Reference. Rate limit: The API enforces 50 requests per second. If you exceed it, requests return a 429 (Too Many Requests) response with a RateLimit-Reset header telling you when the limit resets. Accounts also have a monthly request limit of 600,000 requests, which returns a 429 when reached. Webhooks: Webhooks send FieldPulse events to your own systems as they happen. You create and manage them yourself in Company Settings. See Webhooks below, and the Webhooks reference for event names and payloads. FieldPulse notifies all API users before any breaking changes.Getting access
Developer Platform is turned on for each account by FieldPulse Support, and only the Founding User can use it.- Review the FieldPulse API documentation to find the endpoints for the data you want to view, create, or edit.
- As the Founding User, request API access to FieldPulse Support and describe how you plan to use it.
- FieldPulse Support reviews your request and turns on Developer Platform for your account.
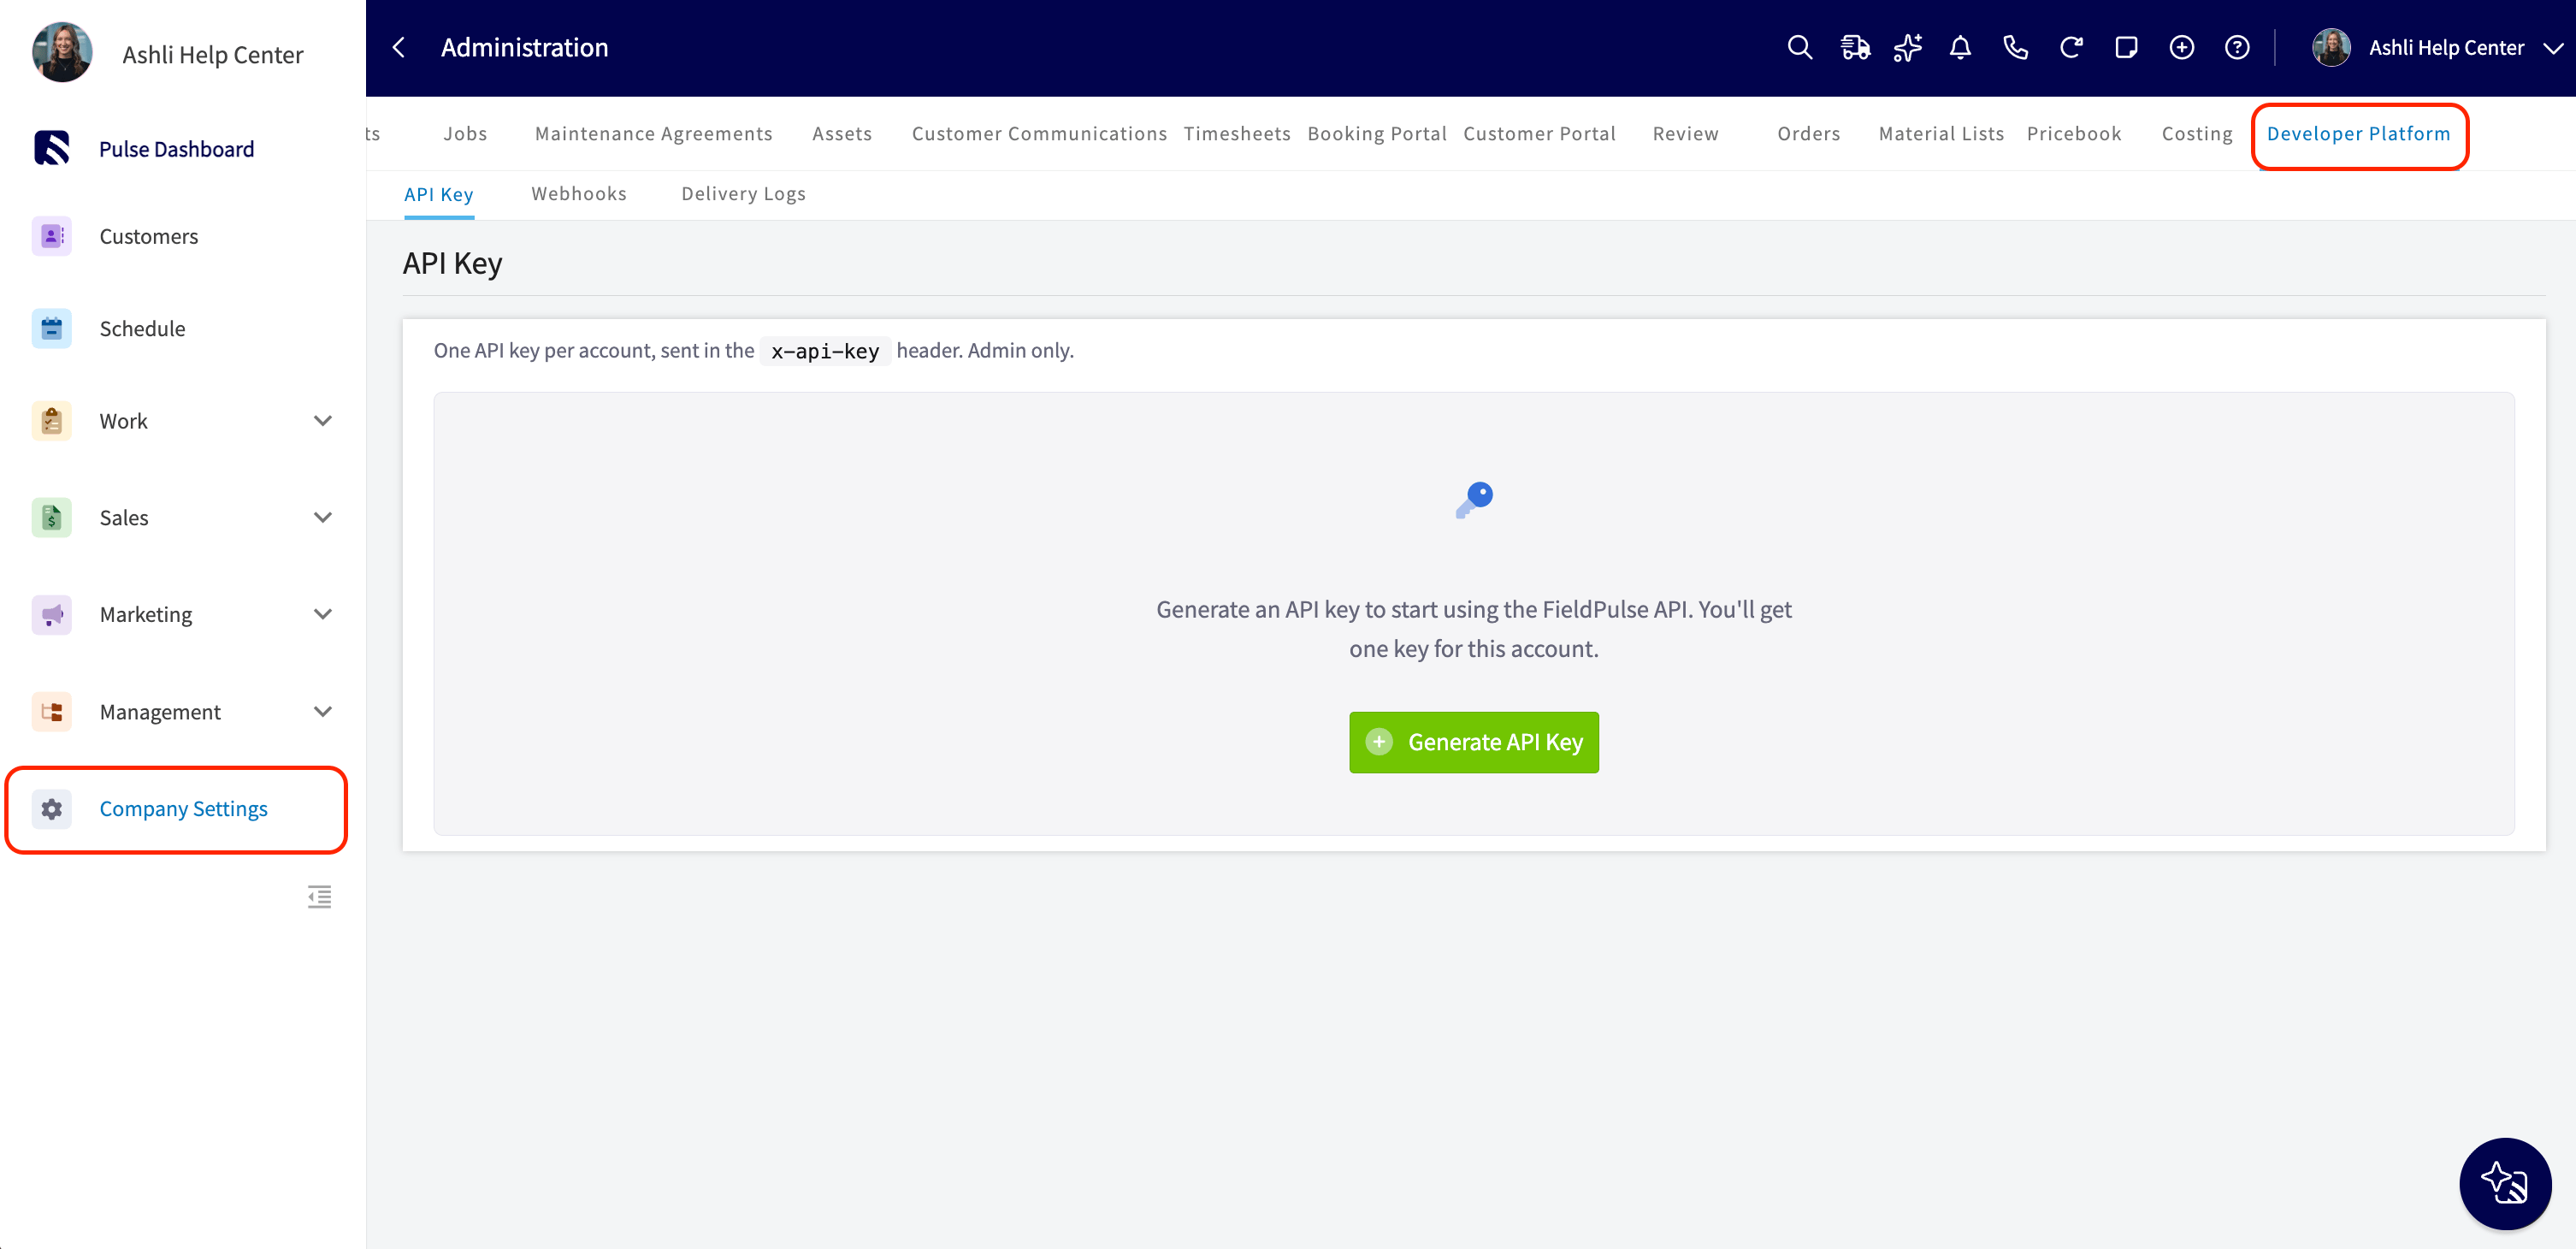
- Once enabled by FieldPulse Support, open Company Settings. A Developer Platform tab appears as the last tab.
Admins, Team Managers, and Service Agents do not see the Developer Platform tab. Only the Founding User can view or change the API key, webhooks, and Delivery Logs.
Your API key
Each account has one API key. Send it in thex-api-key header of every API request.
Generate your key
- Go to Company Settings > Developer Platform > API Key.
- Click Generate API Key.
- Click Copy and store the key in a secure place, such as a password manager.
- Click Done.
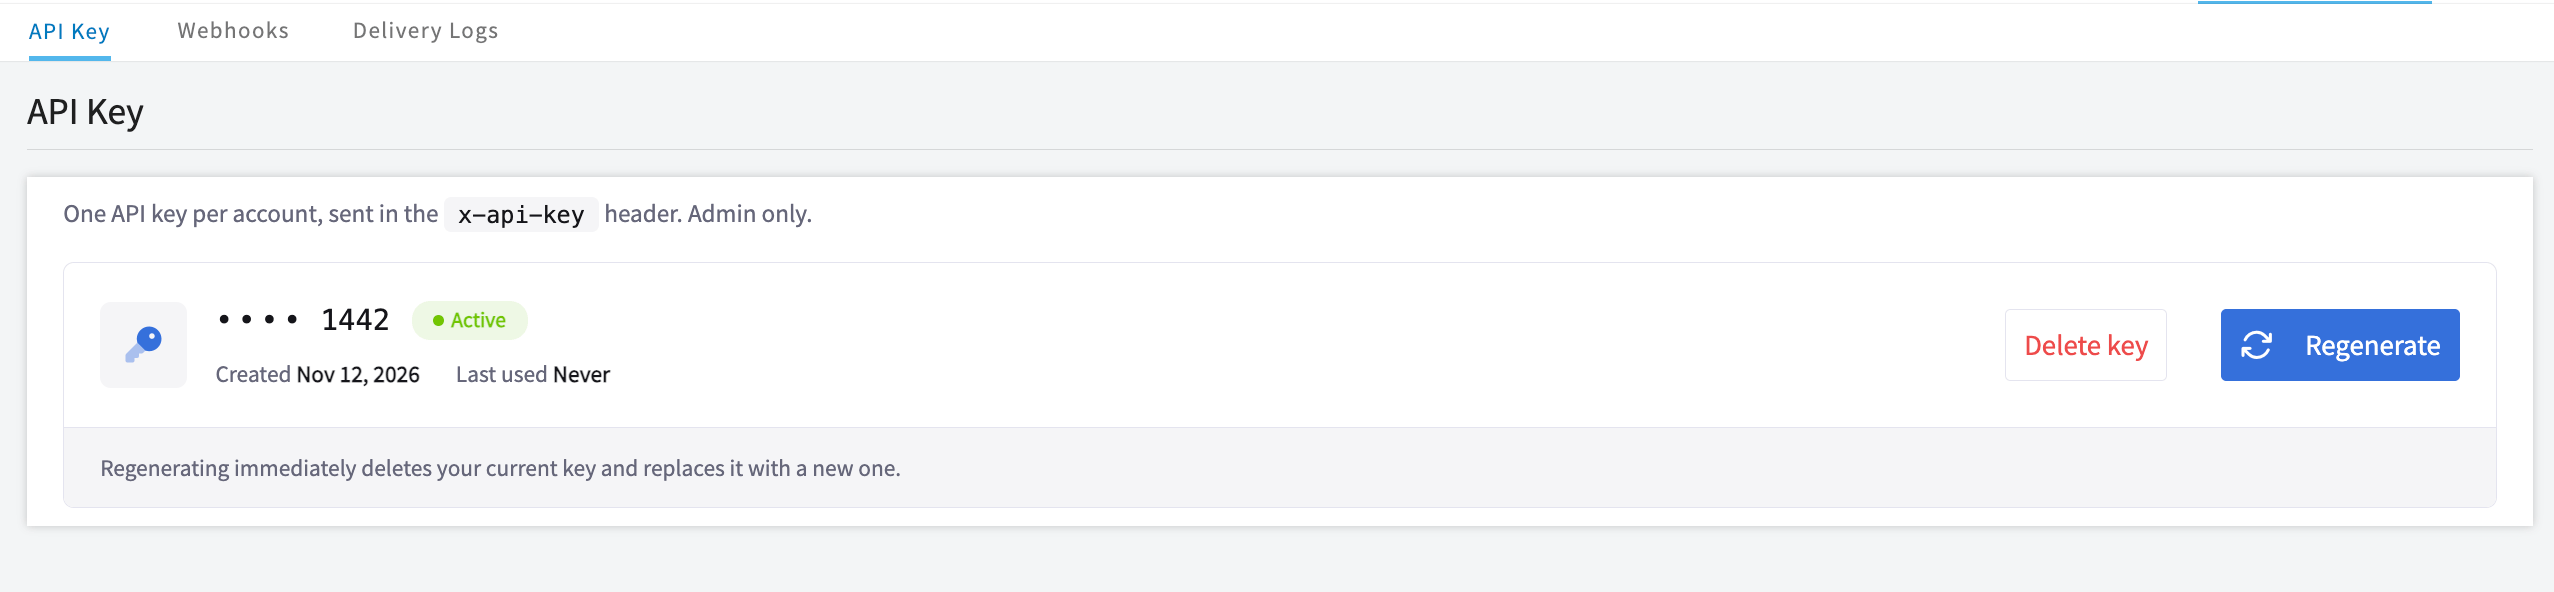
The full key is shown only once. After you click Done, only the last four characters appear. If you lose the key, regenerate it.
Regenerate your key
Regenerate your key if you lose it or think it has been exposed.- On the API Key sub-tab, click Regenerate.
- Read the warning and click Regenerate to confirm.
- Copy the new key and click Done.
The previous key stops working immediately and cannot be restored. Update every integration that uses it right away.
Webhooks
A webhook sends a message to a URL you choose each time a selected event happens in FieldPulse, so your other systems stay current without checking the API for changes.Events you can send
Create a webhook
- Go to Company Settings > Developer Platform > Webhooks.
- Click Create New.
- Enter a Name that describes what the webhook does.
- Enter the Endpoint URL that should receive the events.
- Choose a record type from the Entity dropdown.
- Select the Events to send. The choices depend on the entity you picked.
- Leave Active on to start sending right away, or turn it off to save the webhook without sending.
- Click Create Webhook.
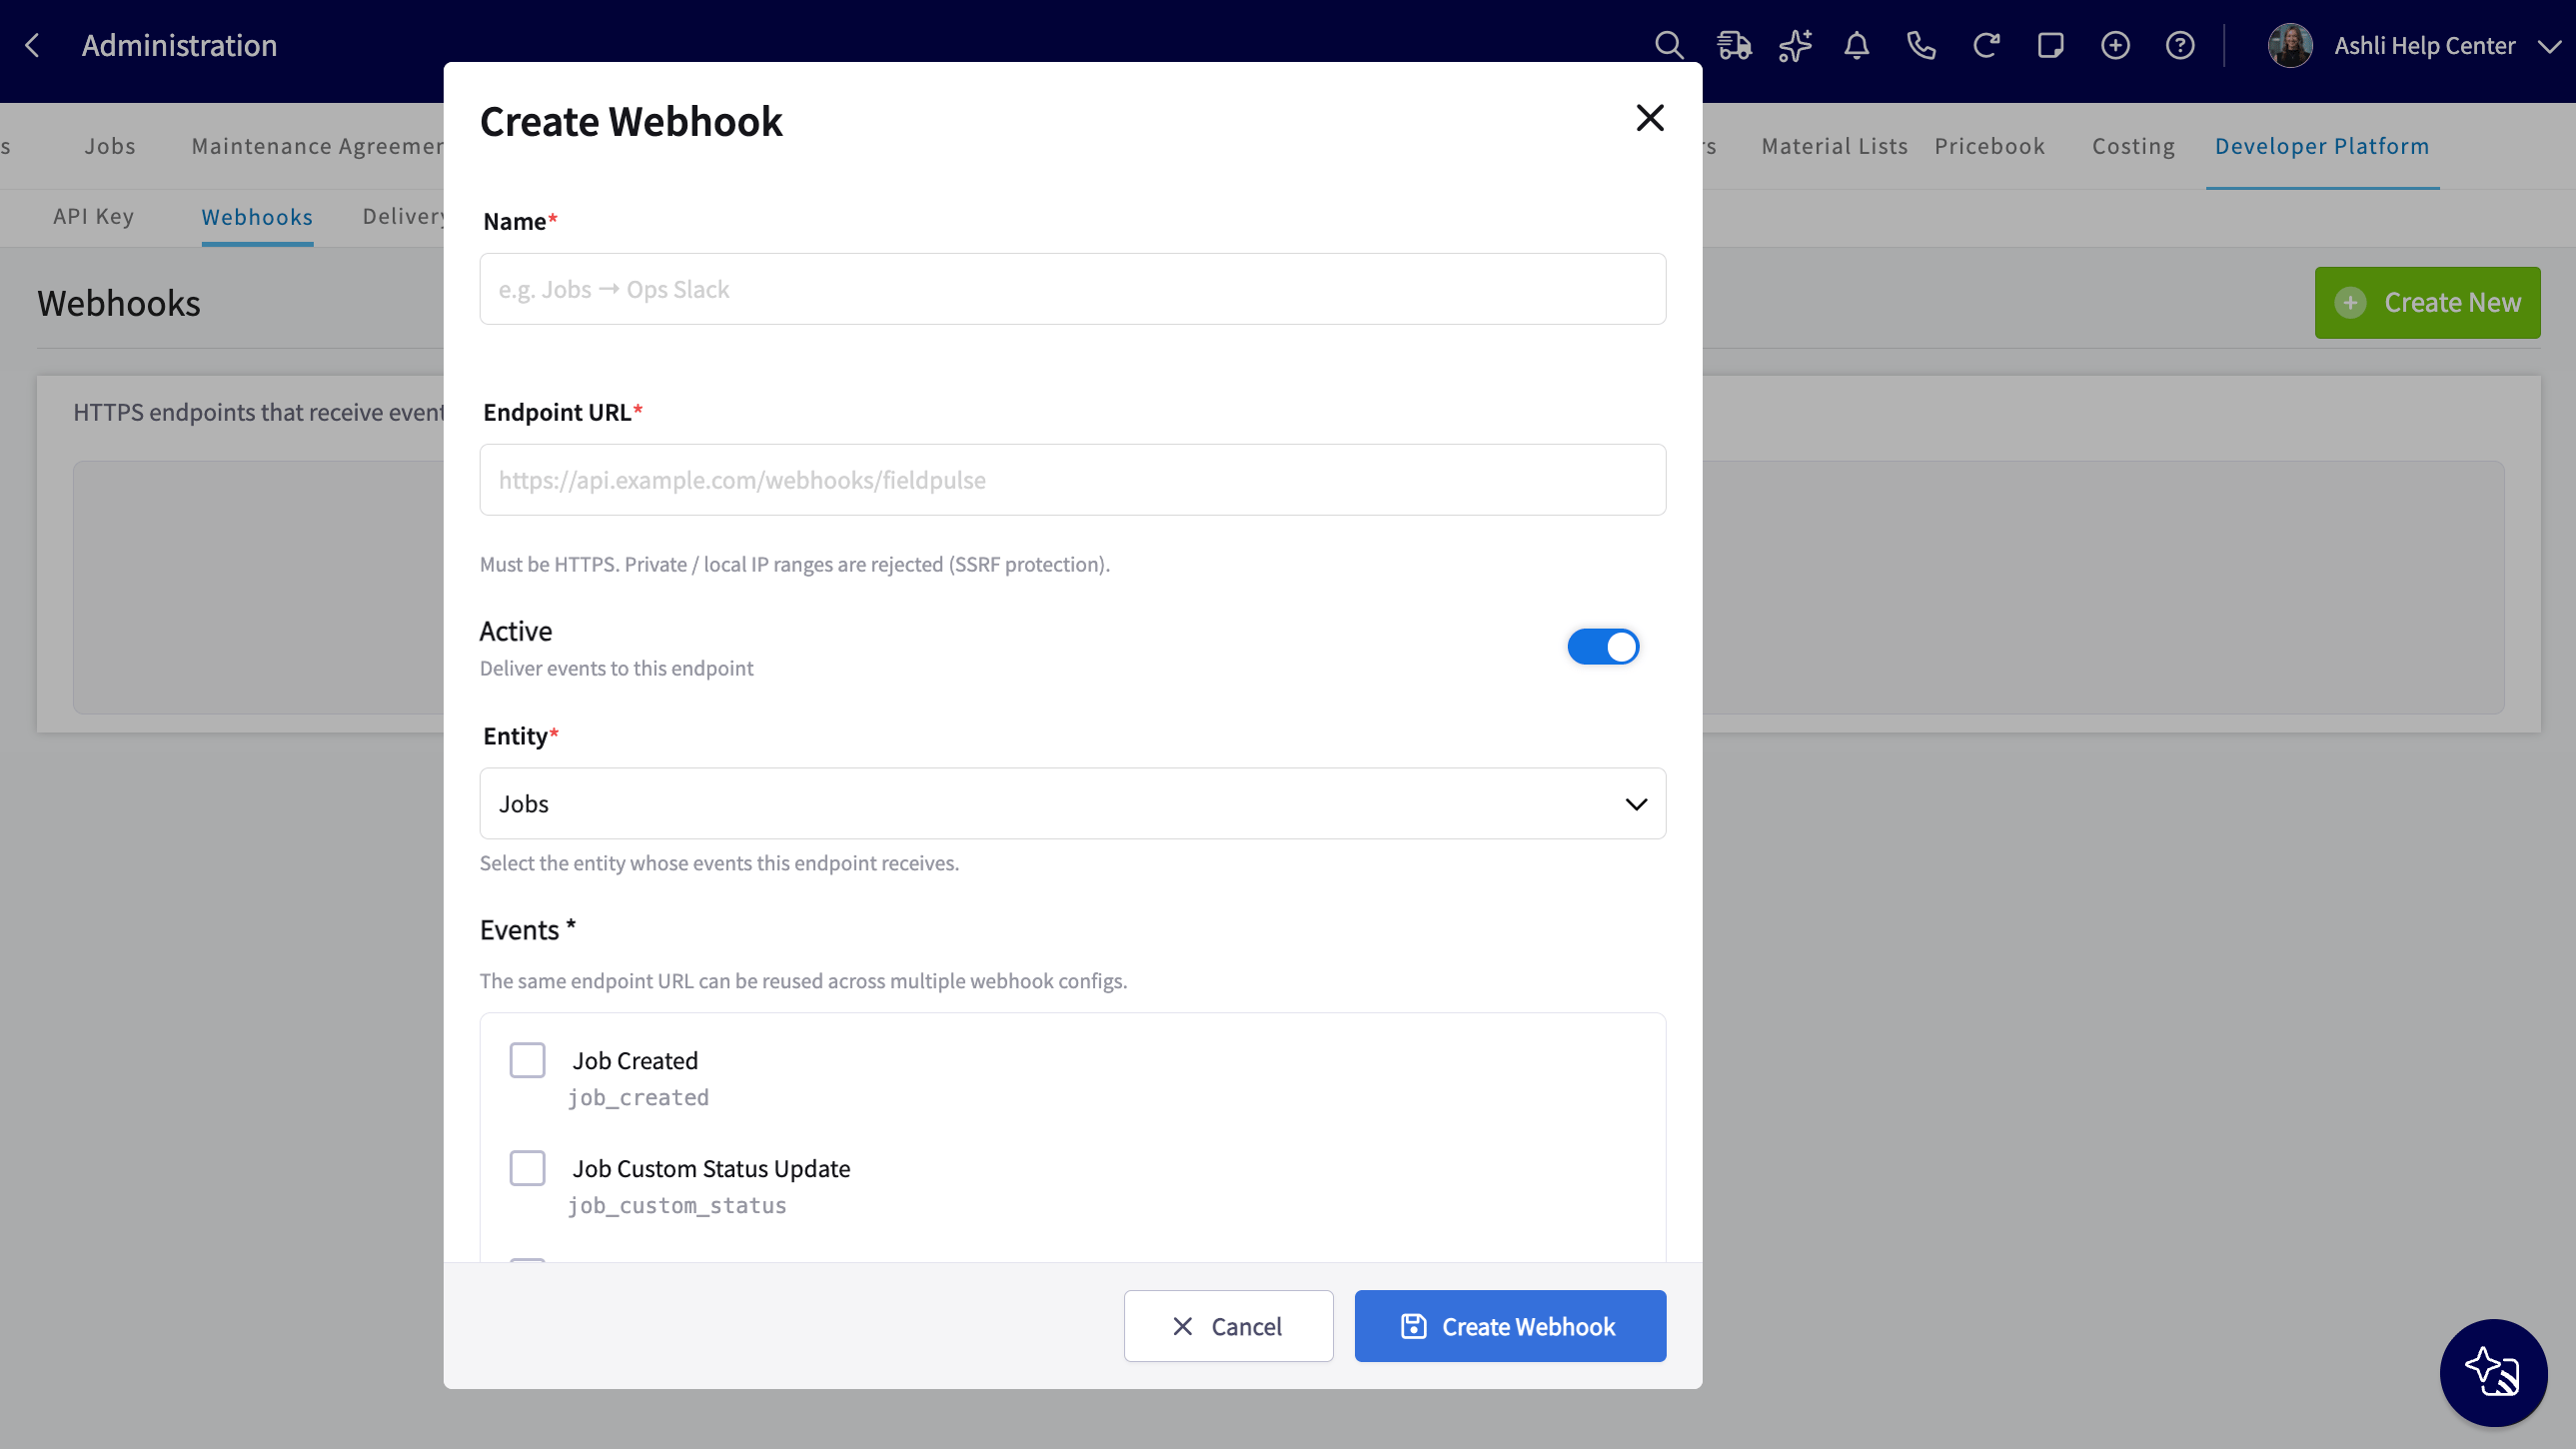
For Status Update events on Jobs, Estimates, and Invoices, you also choose which custom status workflow to watch. Webhooks fire on changes to the workflow, not on every status change within it.
Endpoint requirements
Manage your webhooks
The Webhooks list shows each webhook’s name, endpoint URL, status, and latest delivery.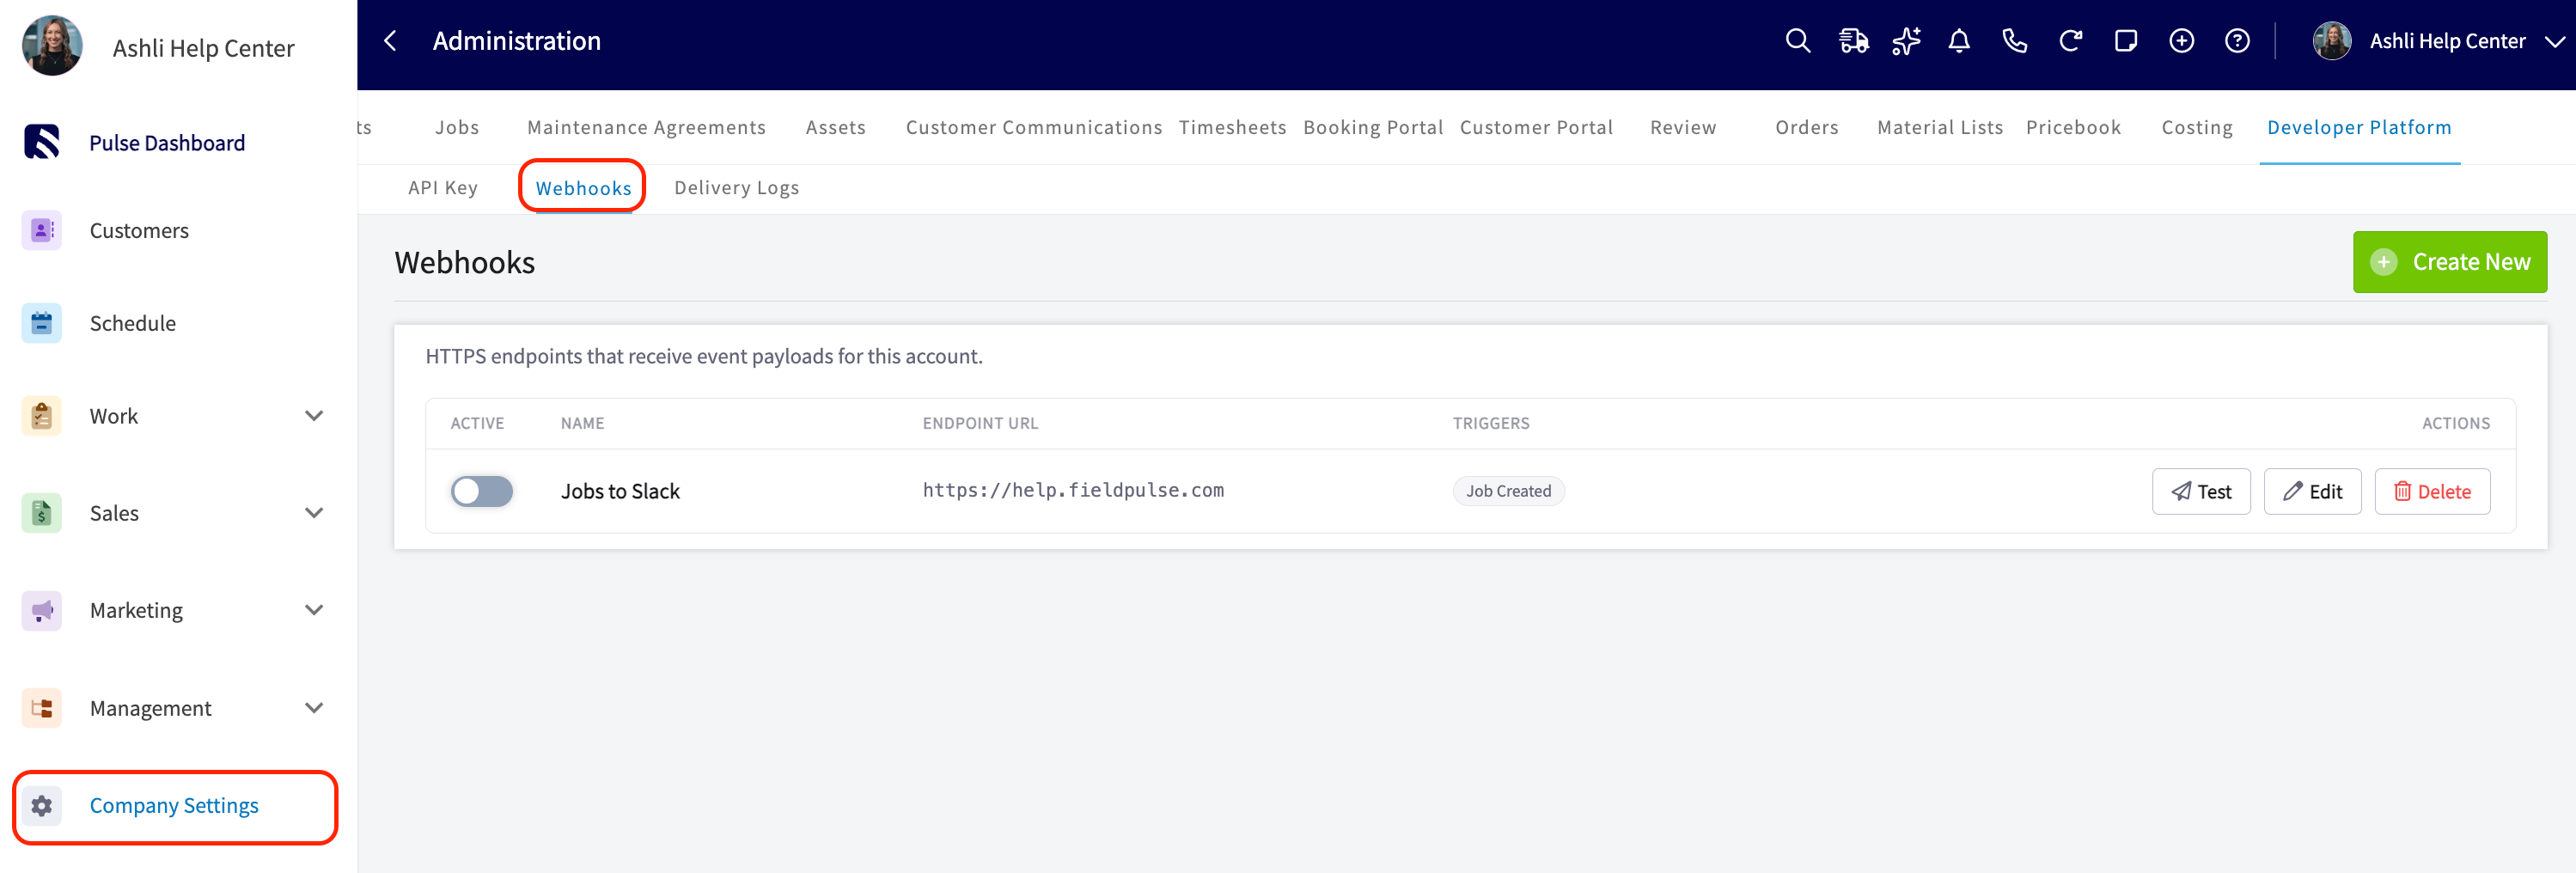
FieldPulse Support can recover a deleted webhook for 30 days. After that it is permanently removed.
Delivery Logs
Delivery Logs list every message FieldPulse has sent to your webhooks, so you can confirm events are arriving and troubleshoot the ones that are not.- Go to Company Settings > Developer Platform > Delivery Logs.
- Filter by Webhook, Result (All results, Success, or Failed), and Time range (Last 24 hours, Last 7 days, or Last 30 days).