Who uses this: An Admin creates email and SMS templates — templates live in Company Settings, which only Admin users can view. Availability: All regions · Customer communications must be enabled on your account.A template is a customer communication — an email or a text message — that you write once in FieldPulse and send many times. Field Values inside the template pull each customer’s own details into the message, so an appointment reminder names that customer, that job’s start time, and that job’s location, even when FieldPulse sends it automatically.
Overview
You build email and SMS templates in Company Settings > Customer Communications, on the Email Templates and SMS Templates tabs. Every template needs an internal template name that your customers never see. An email template also needs a subject line and an email body; an SMS template needs an SMS body. Field Values are what make a template reusable. When you select Insert Field Value while writing a template, FieldPulse drops in a placeholder — Customer First Name, Job Start Date, Job Location — and fills it from the details already entered on the job and customer records. Once a template exists, you can send it by hand from a job or customer record, or tie it to an automatic trigger so FieldPulse sends it on its own. Messages worth templating include:- Feedback requests
- “Your technician is on the way” notifications
- Appointment reminders
Video walkthrough
Video walkthrough: Customer Communications in the FieldPulse web app
Before you begin
- Confirm customer communications are enabled on your FieldPulse account.
- Sign in as an Admin. Templates and email settings both live in Company Settings, which only Admin users can view.
- Decide the internal names you’ll use. Customers never see the template name, so name each one for what the message is about — your team picks templates from that list later.
Step-by-step setup
Create an email template
-
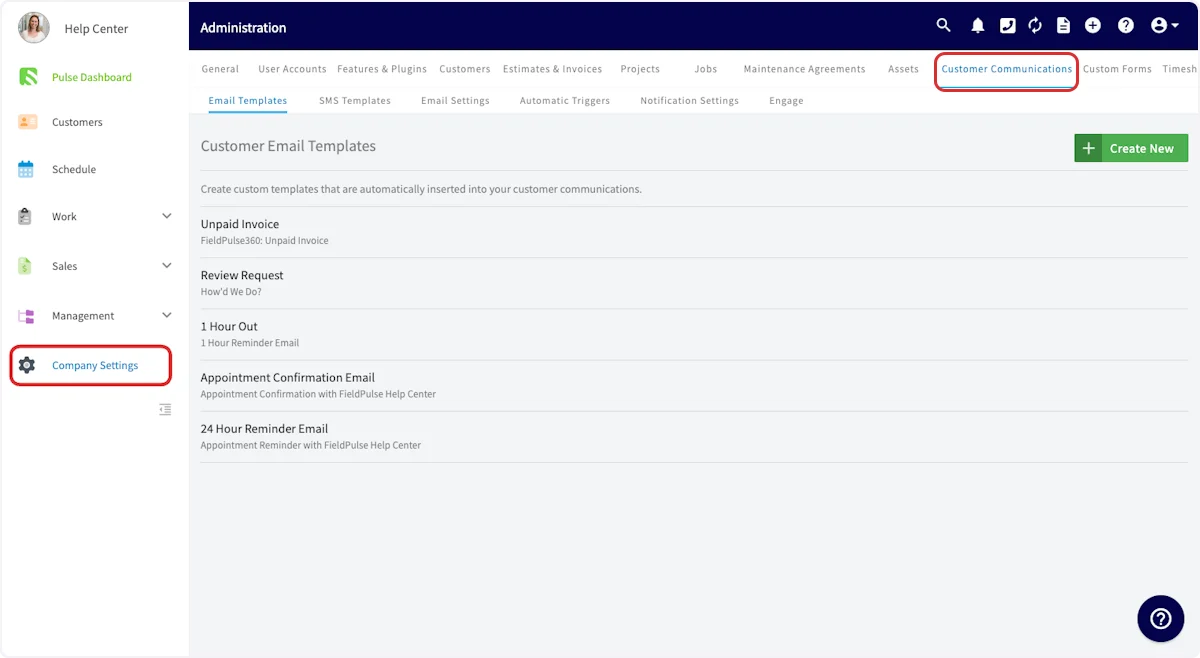
Go to Company Settings and select Customer Communications.
-
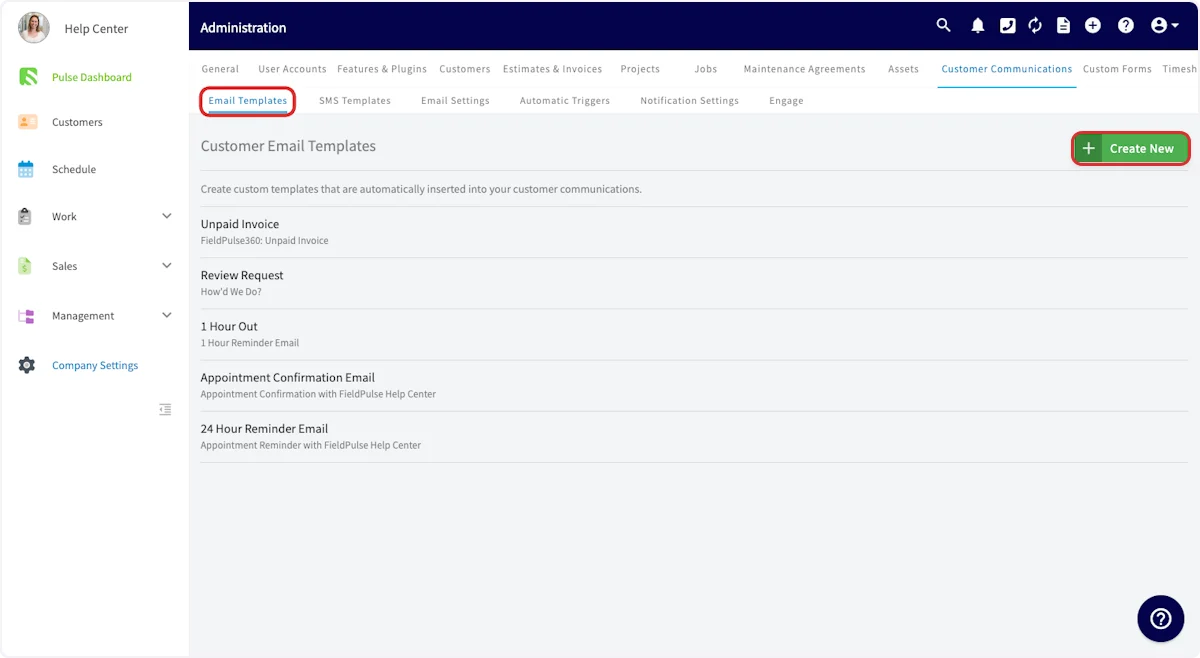
On the Email Templates tab, select Create New.
- Enter a Template Name. Customers never see this name, so use it to say what the email is for.
- Write the Subject Line and the Email Body.
-
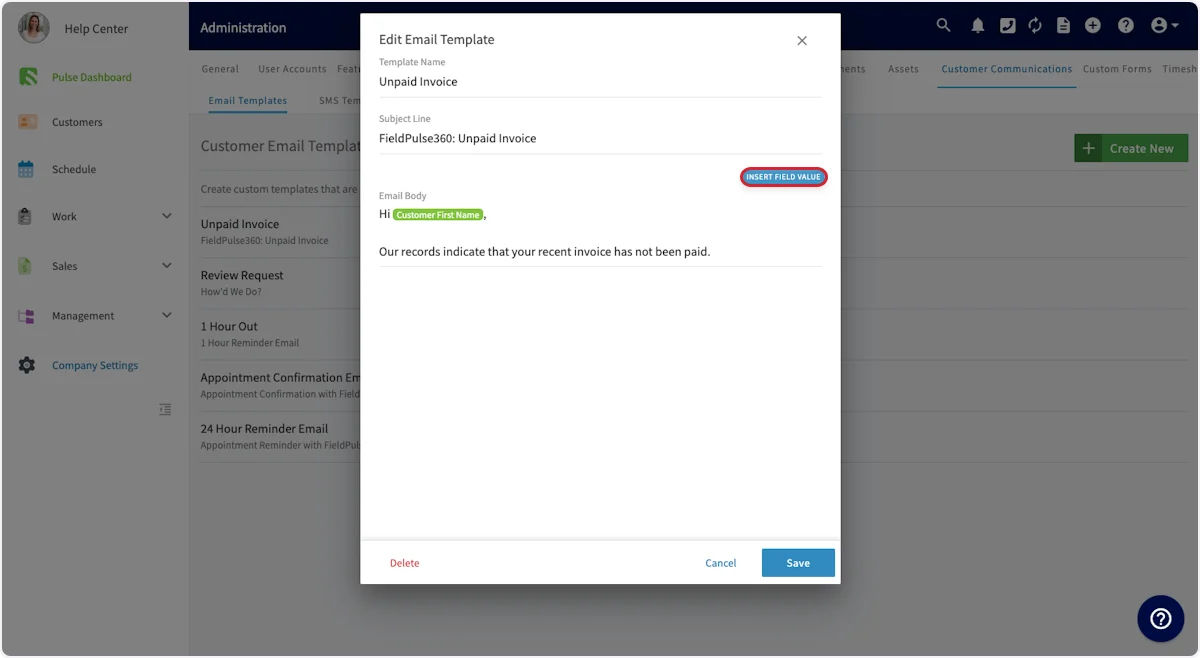
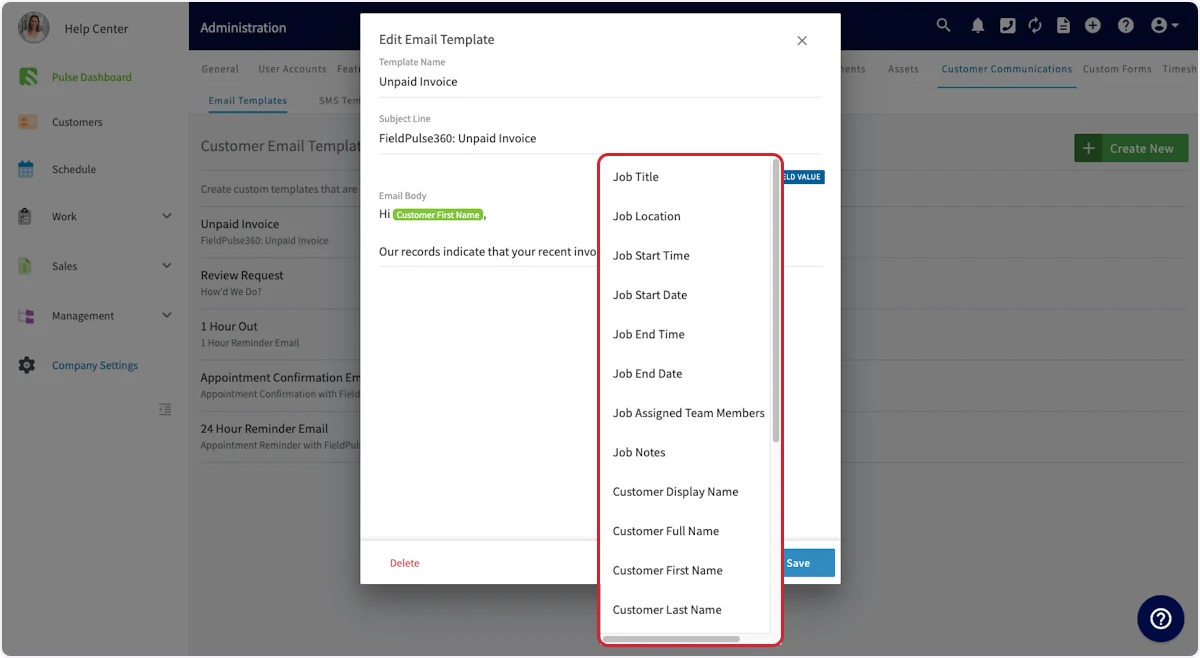
To pull a customer’s own details into the message, select Insert Field Value.
-
Choose the detail to insert — Job Location, Job Start Date, Customer First Name, and so on. FieldPulse fills each Field Value from the details already entered on the job and customer records.
-
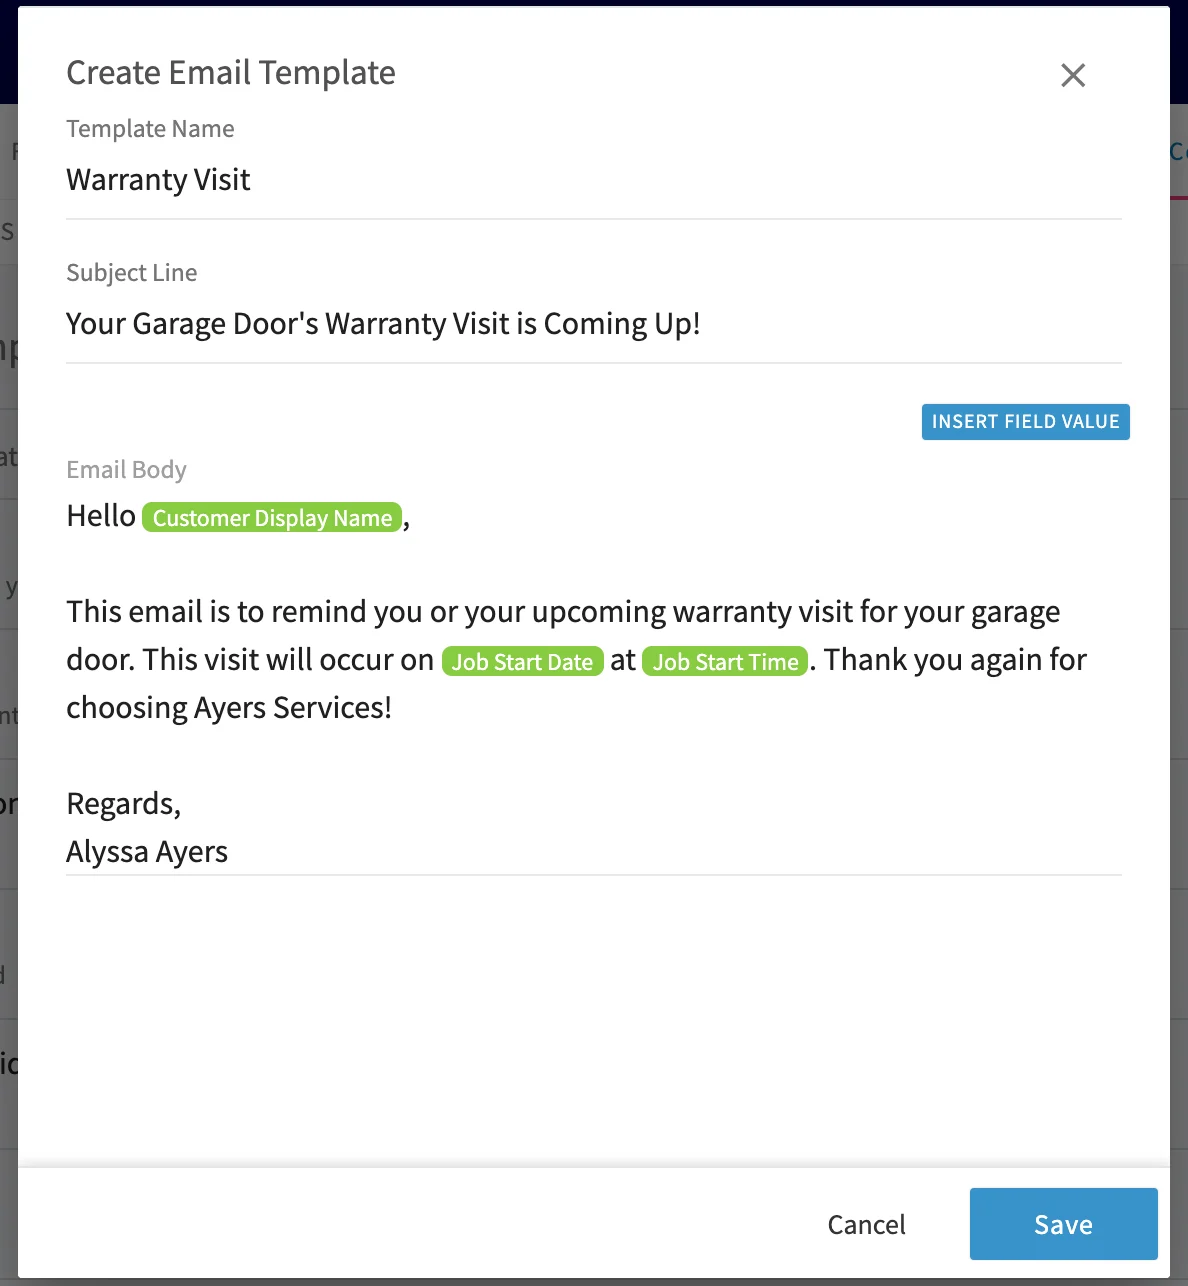
Check the finished message. Each Field Value sits in the body as a green placeholder that FieldPulse fills in with that customer’s and job’s details.
- Select Save.
Create an SMS template
-
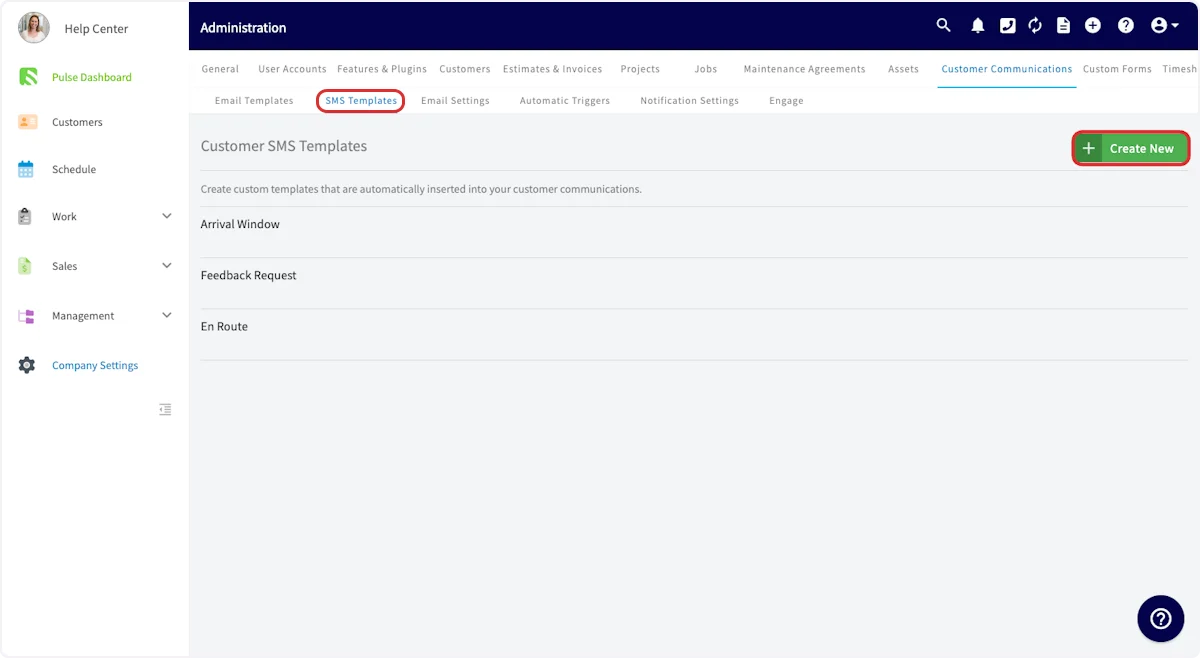
In Customer Communications, select the SMS Templates tab, then select Create New.
- Enter a Template Name that says what the message is about. As with email templates, customers never see this name.
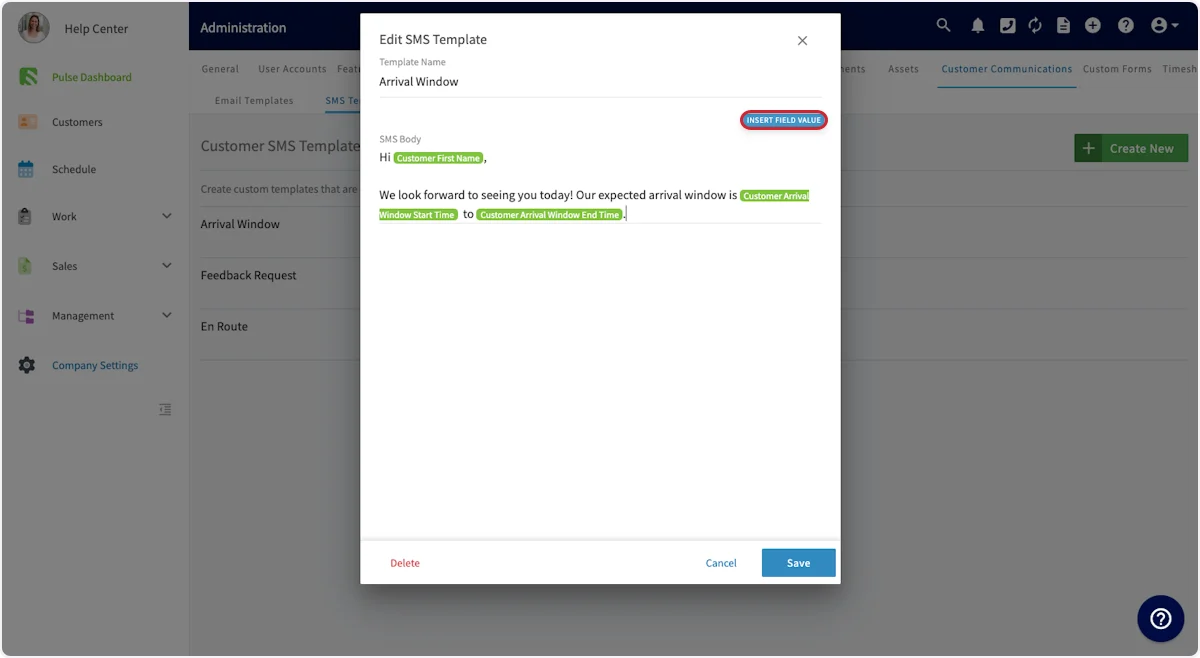
- Write the SMS Body — the text message your customer receives.
-
Select Insert Field Value to personalize the message, the same way you would in an email template.
- Select Save.
Set your email sender defaults
Email settings decide which address and name your customer sees in their inbox, and whether your logo appears at the top of the email. The Settings reference below lists what each option does.-
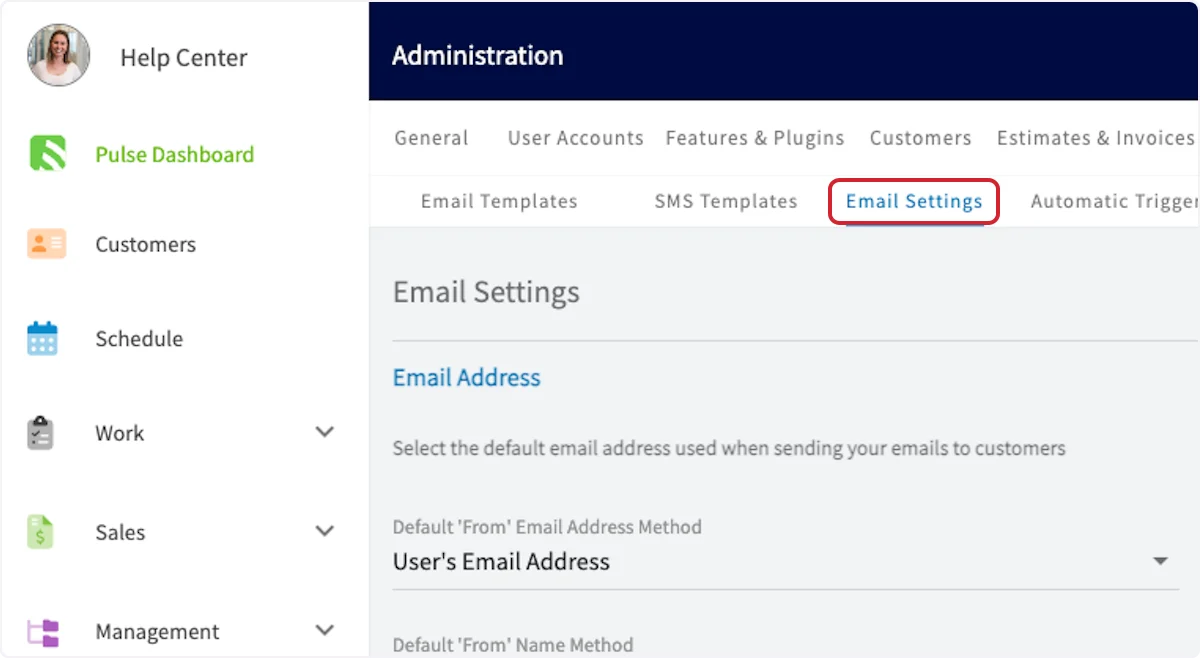
In Customer Communications, select the Email Settings tab.
-
Choose the Default ‘From’ Email Address Method — one designated address for every customer email, or the address of whoever created the email.
-
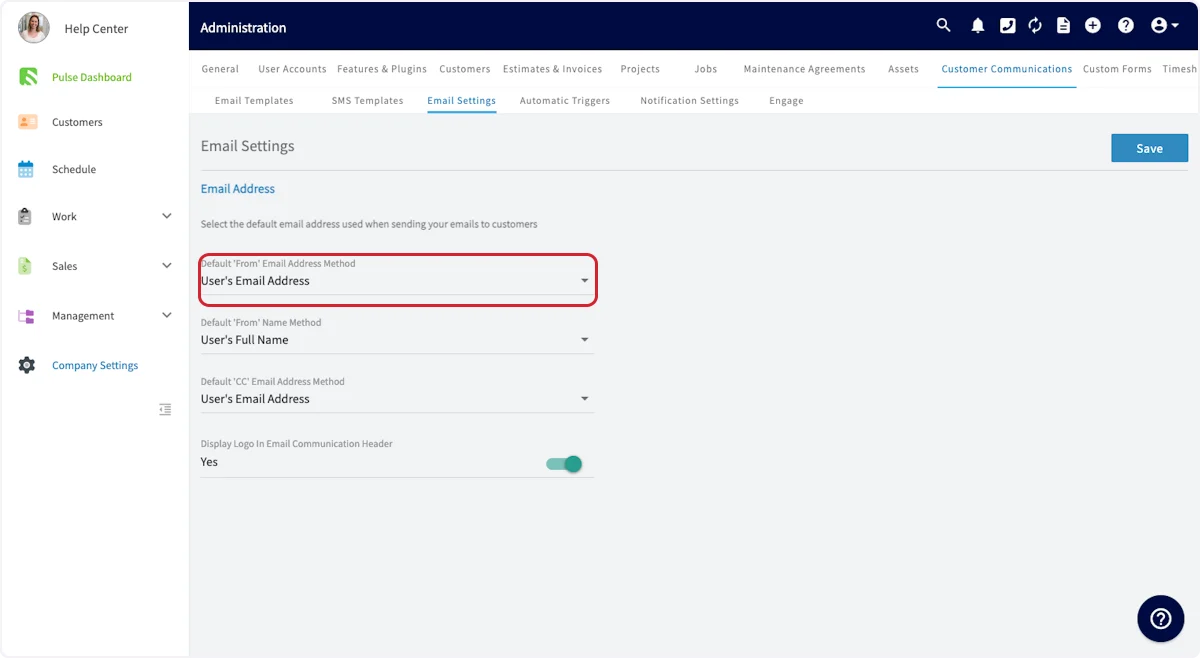
Choose the Default ‘From’ Name Method — one designated name on every email, or the full name of the associated user.
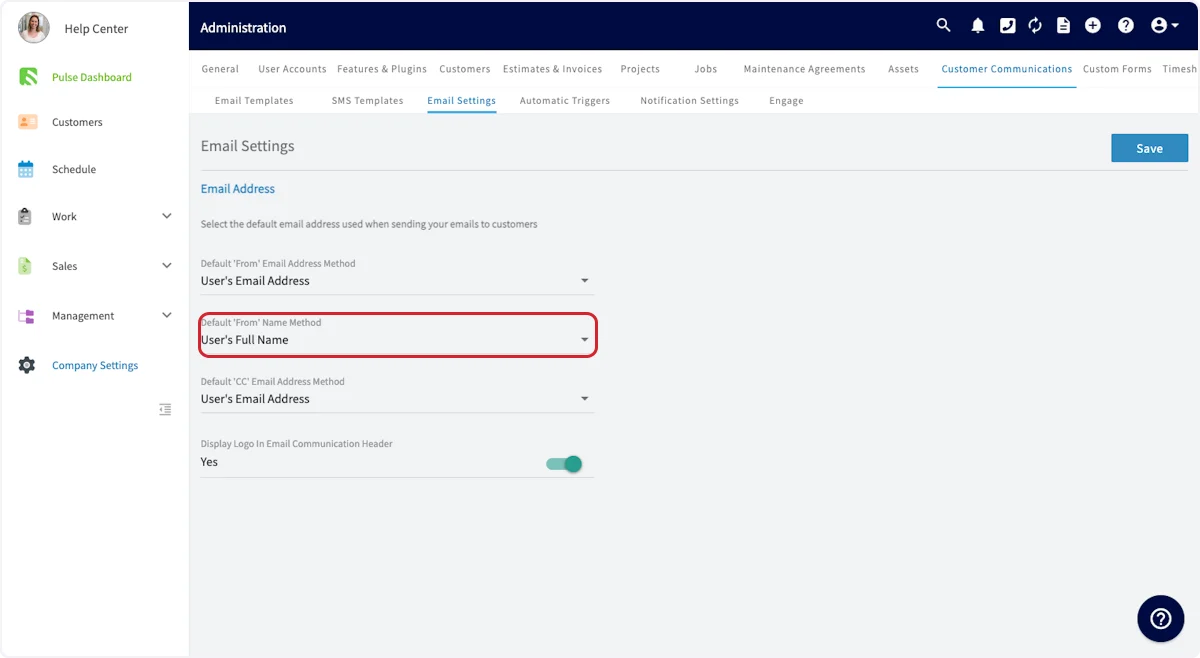
- Choose the Default ‘CC’ Email Address Method, which offers the same two options. Use it to CC the front office on every customer email.
-
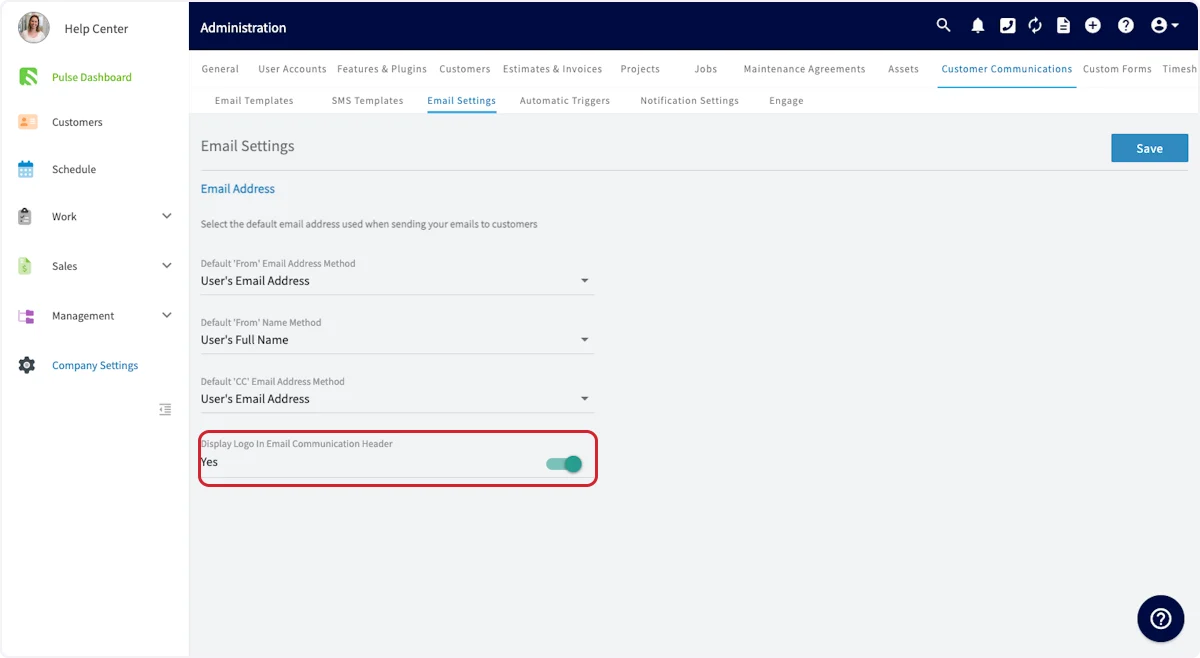
Toggle Display Logo In Email Communication Header on to show your company logo above the email.
- Select Save.
Attach files to a template
Both the Edit Email Template and Edit SMS Template screens carry an Attached Files picker and an Upload button under Additional Files, so you can build a file or photo into the template itself. One message can carry several attachments, though you select and upload the files one at a time. The File attachment limits table below gives the size caps.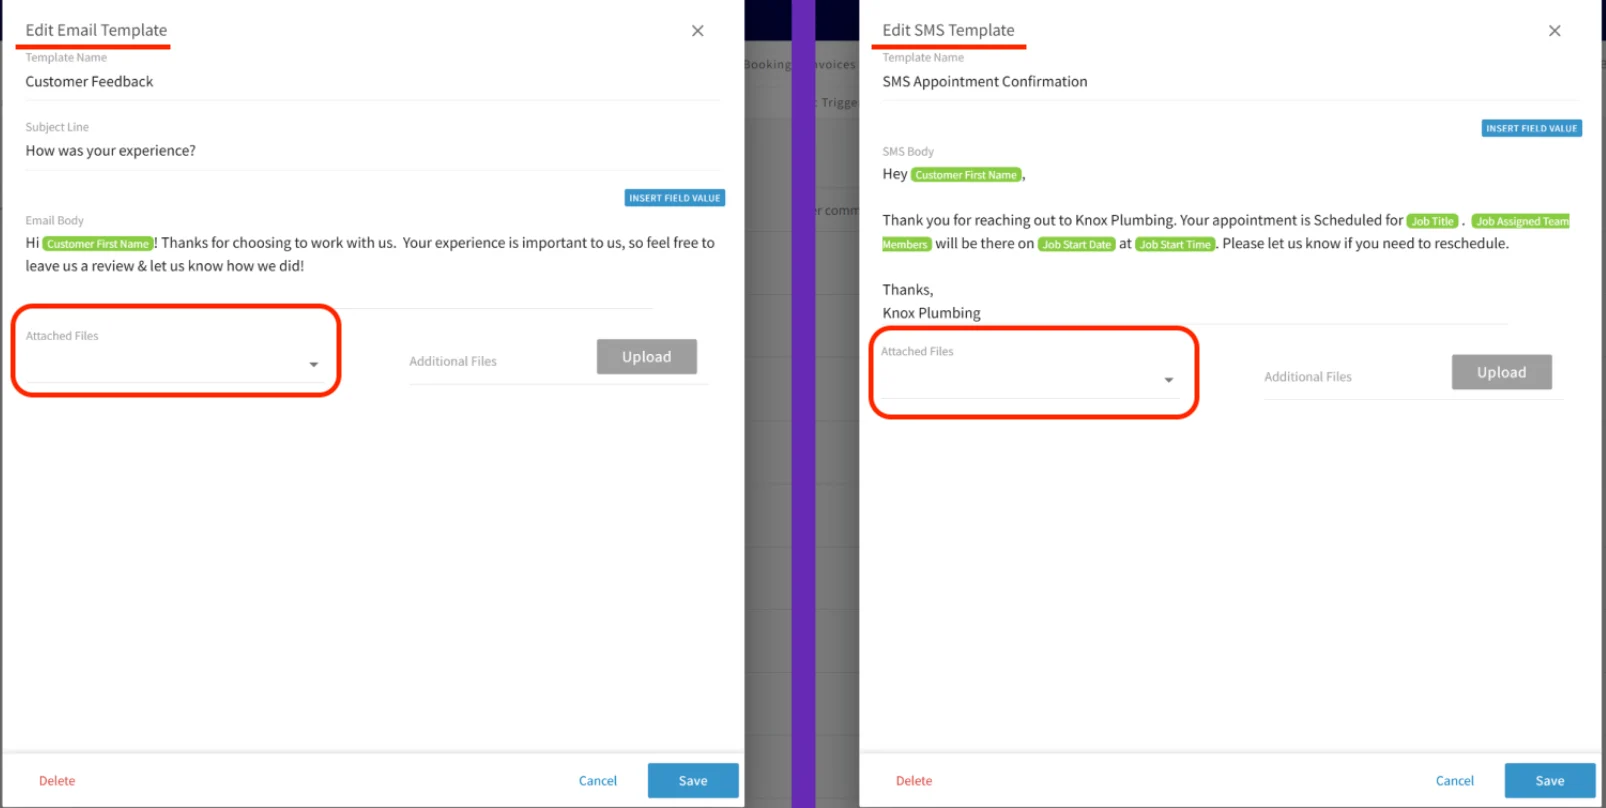
Settings reference
Email settings
Field Values
Insert Field Value offers job details and customer details. Scroll the list to see every option. The available Field Values include:- Job Title
- Job Location
- Job Start Time
- Job Start Date
- Job End Time
- Job End Date
- Job Assigned Team Members
- Job Notes
- Customer Display Name
- Customer Full Name
- Customer First Name
- Customer Last Name
- Customer Arrival Window Start Time
- Customer Arrival Window End Time
Email statuses
After an email sends, its status tells you how far it got:
For the full delivery-status list, including the statuses that email and SMS share, see Customer Communications Overview.
File attachment limits
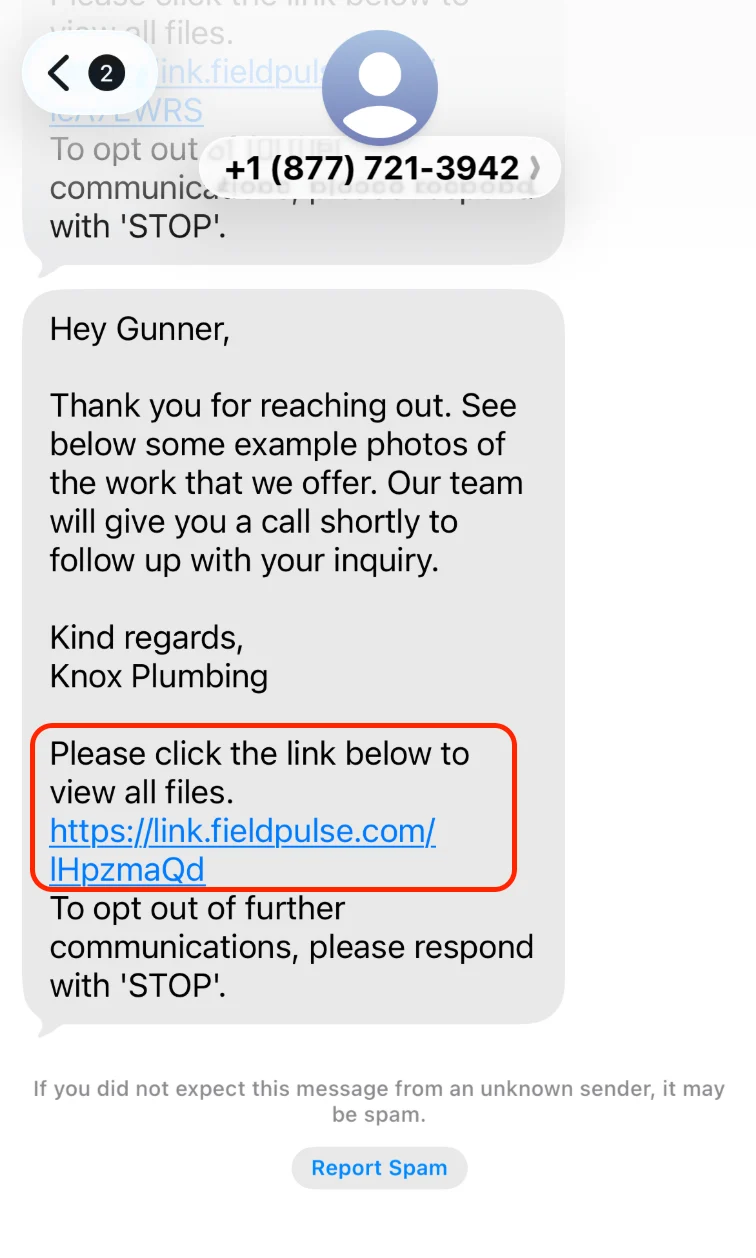
“Please click the link below to view all files.” is default FieldPulse text on SMS attachment messages and cannot be removed or edited.