Who uses this: Administrators and Team Managers can create and send estimates and invoices by default, and an Administrator can turn that permission on for a Service Agent; the account-wide default signature setting sits in Company Settings, which only Administrators can view. Availability: All regions.You can collect a customer’s electronic signature on an estimate or invoice by email, directly in FieldPulse. Request a signature on a single estimate or invoice at the moment you email it, or turn on a default so every new estimate and invoice carries a signature field. A contract can go out with the same signature request.
Overview
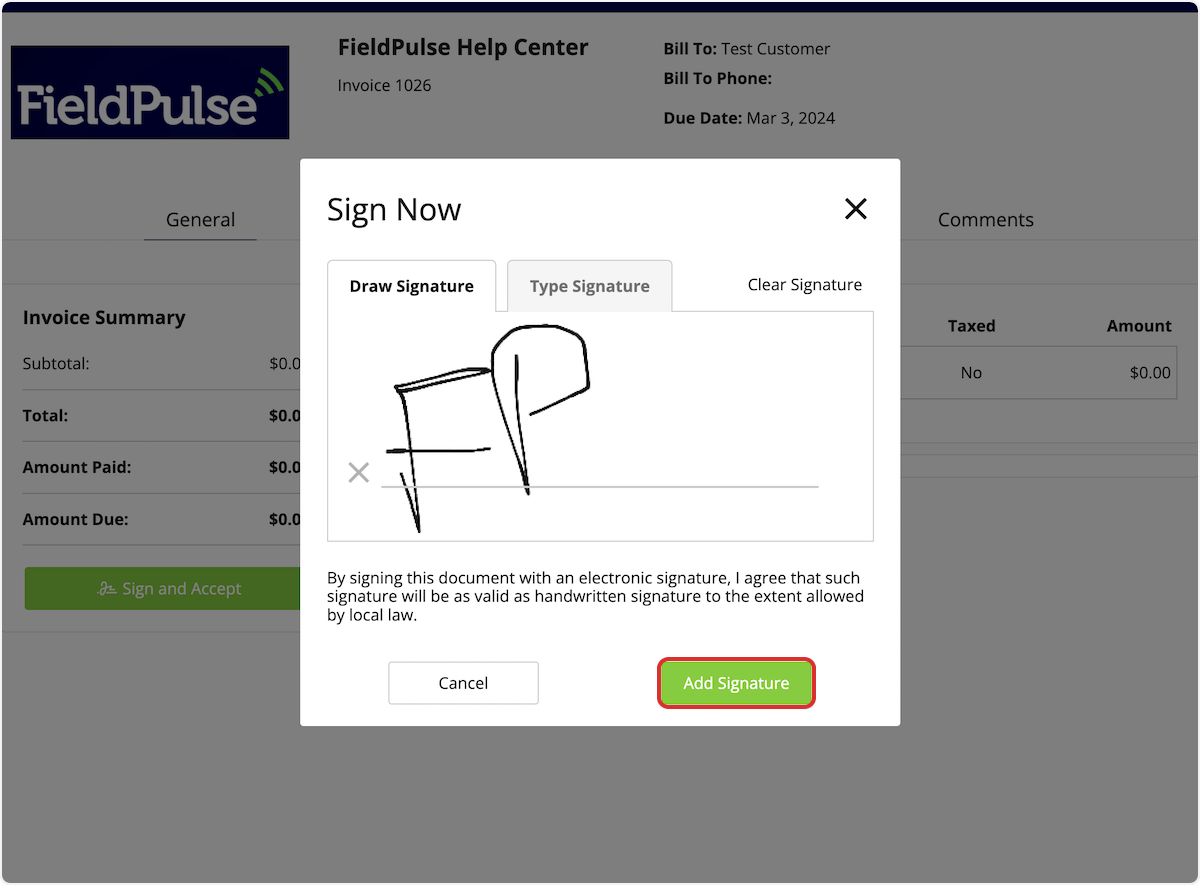
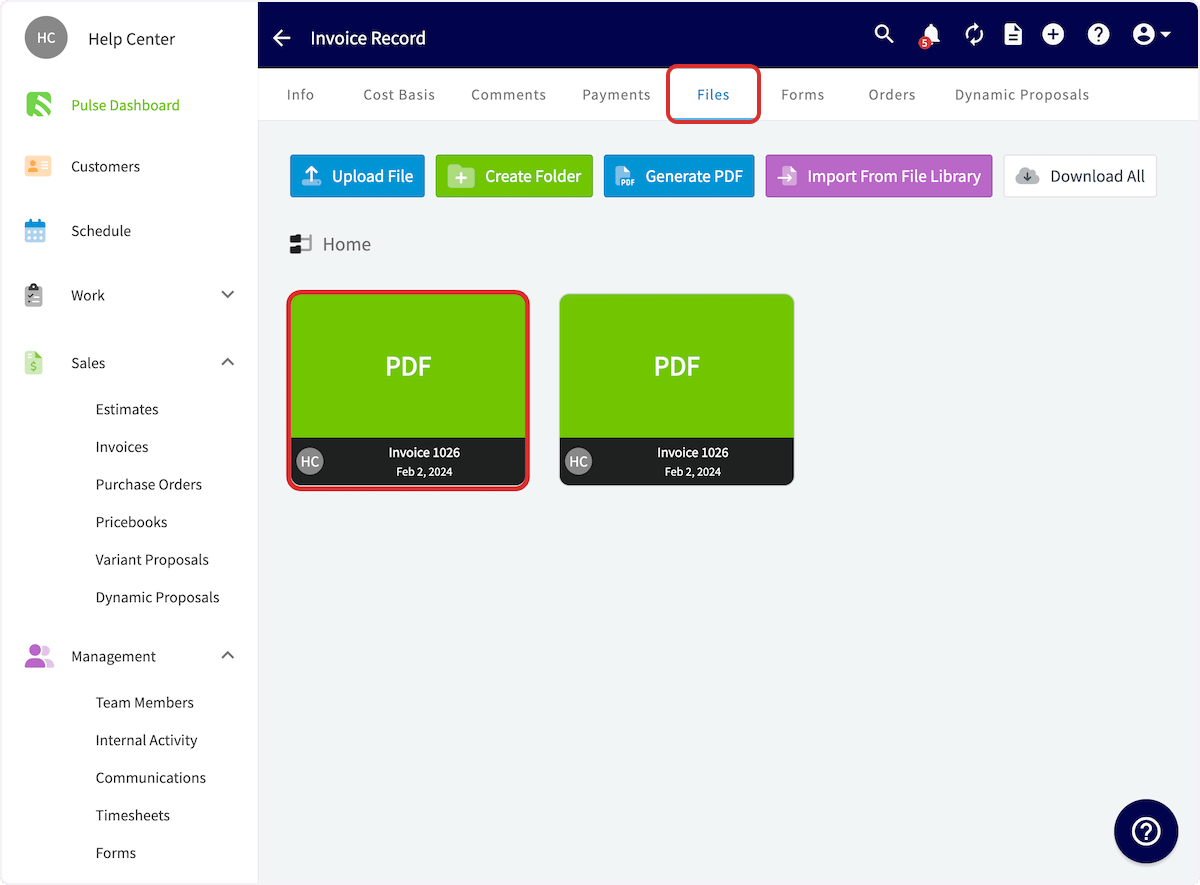
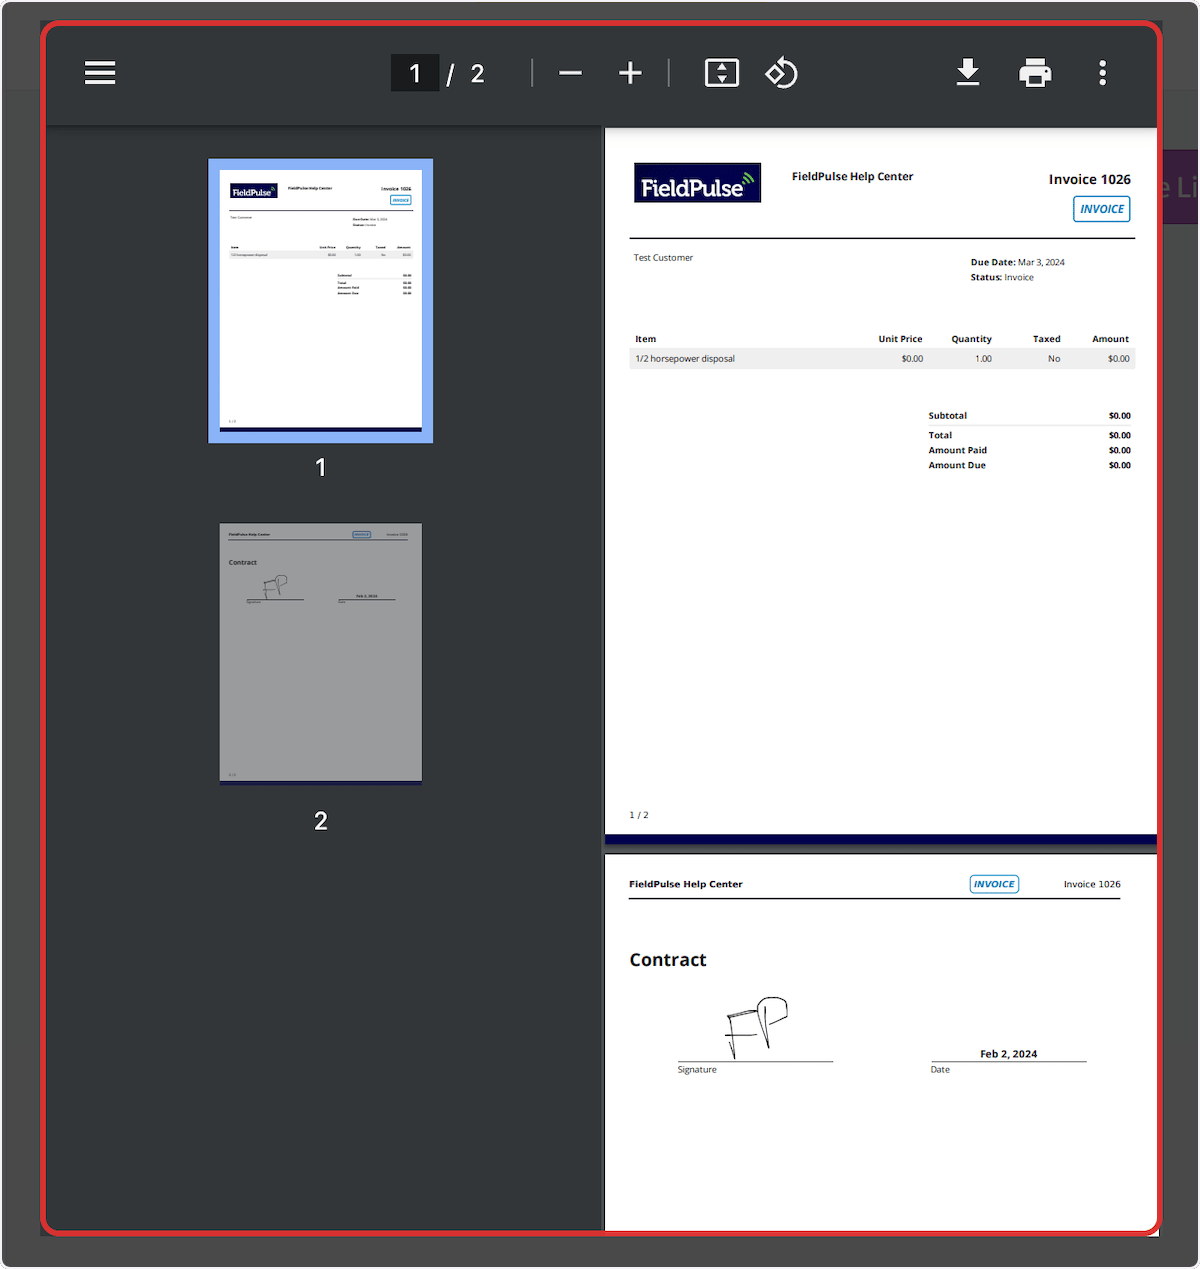
There are two ways to request a customer signature. Turn on the default signature setting to add a signature field to every new estimate and invoice, or include a signature request on one estimate or invoice when you email it. When the customer opens the emailed record, they select Sign and Accept, draw or type their signature, and add it. FieldPulse then saves the signed PDF under Files on the estimate or invoice record.Video walkthrough
Video walkthrough: requesting a customer signature
Before you begin
- Decide whether you want a signature on every estimate and invoice or only on specific ones. The default setting covers the first case, and the per-record signature request covers the second.
- Create the estimate or invoice you want signed. The signature request goes out with the email, so the record has to exist first. See How to Create an Estimate or How to Create an Invoice.
- Set up the contract you want attached before you send, if you plan to collect a signature on a contract at the same time.
Setting a default signature request
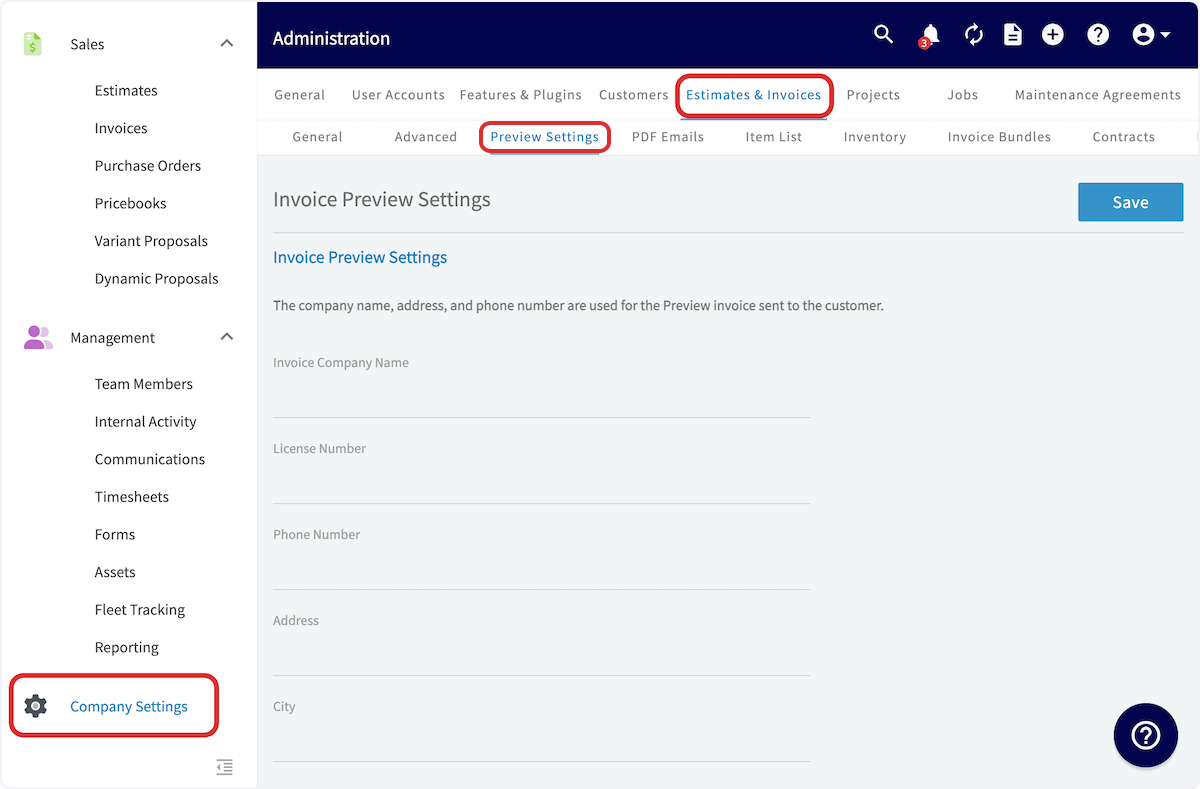
Turn on the default signature request if you plan to collect a signature on every estimate and invoice. As with other default settings, you can still change the setting on an individual estimate or invoice later.- Select Company Settings in the left menu.
- Select Estimates & Invoices in the header.
-
Select the Preview Settings tab.
-
Scroll down and toggle on Default Display Signature Button.

- Scroll back to the top of the screen and select Save.
Requesting a signature on a single estimate or invoice
-
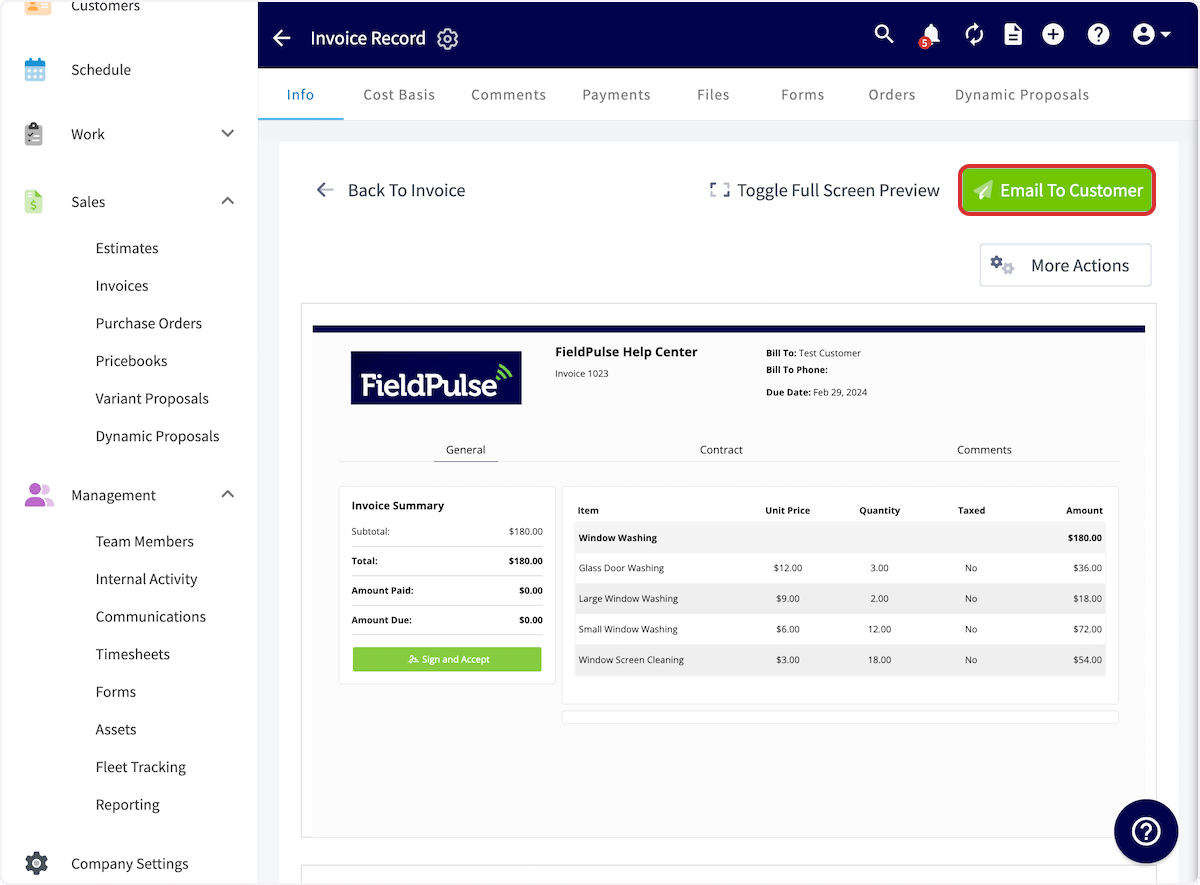
Open the estimate or invoice, preview it, and select Email To Customer in the top-right corner.
-
In the email window, scroll down and toggle on Include Signature Request.
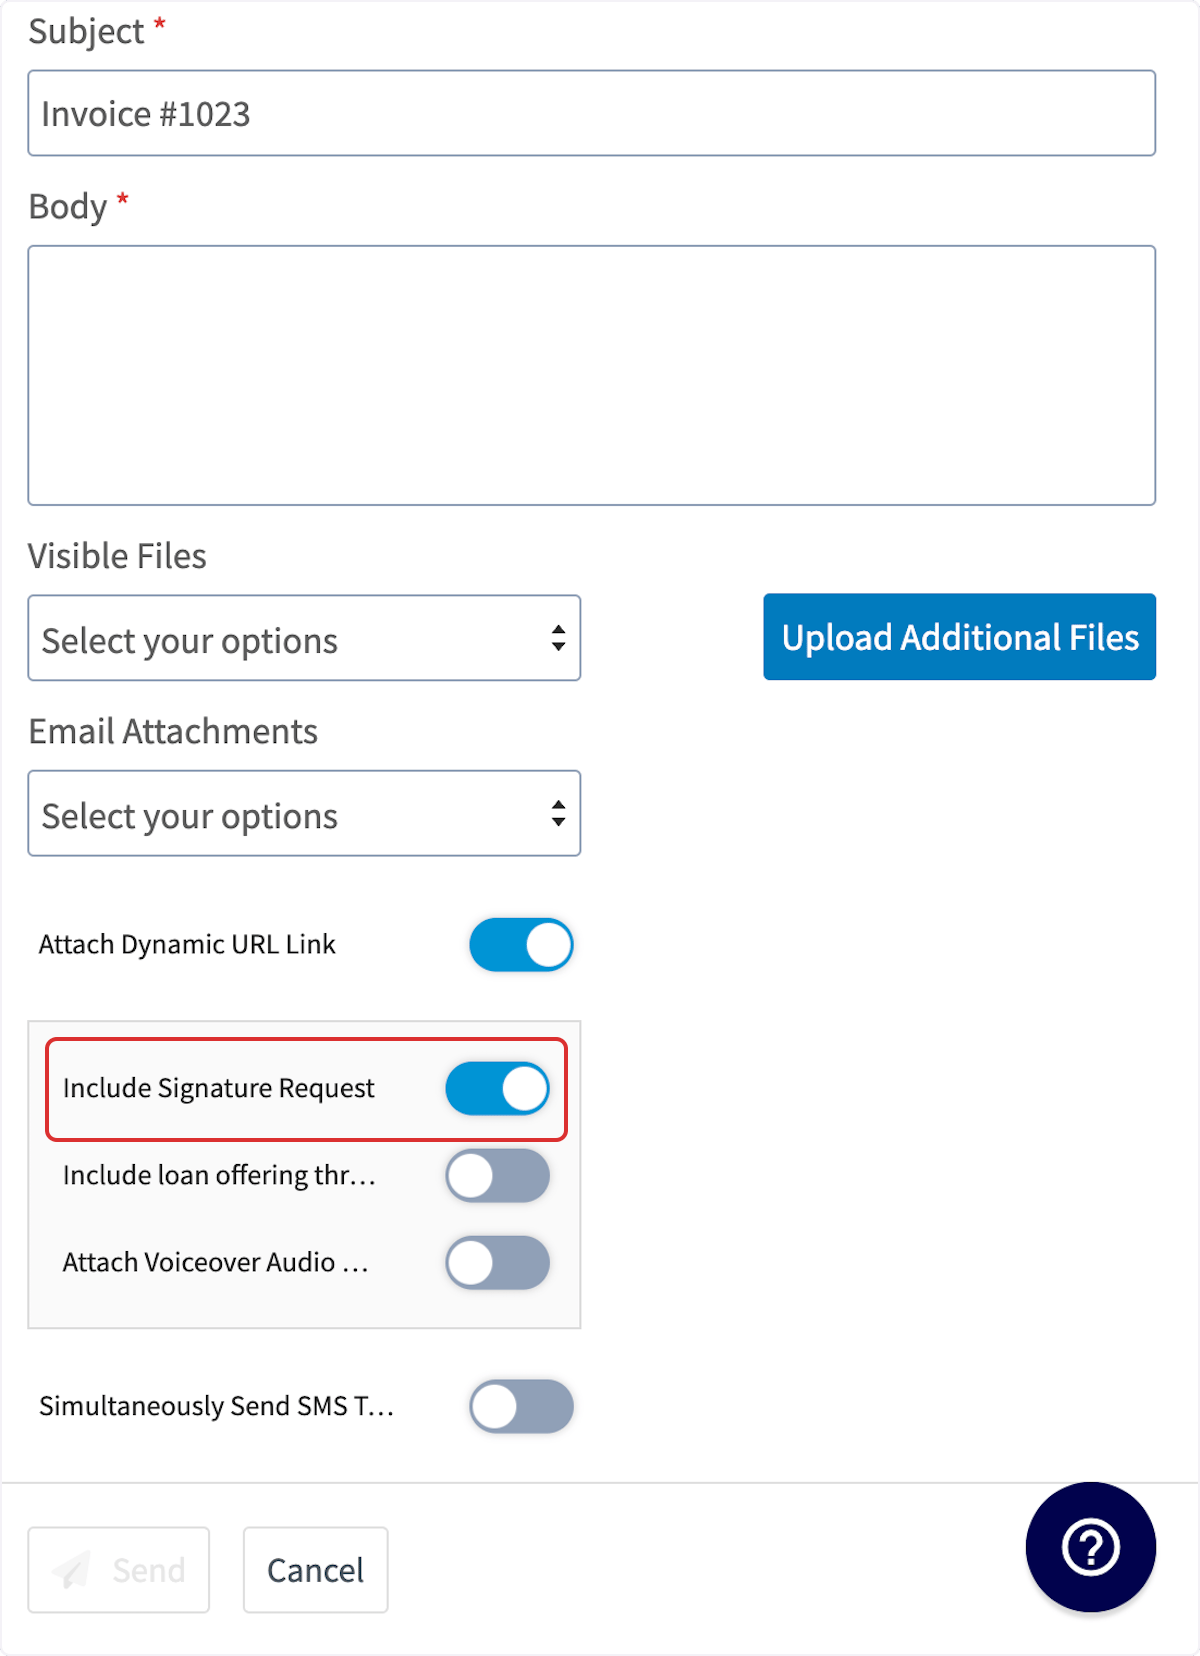 Include Signature Request is already turned on for you when a contract is attached to the estimate or invoice. It only turns on by itself when a contract is on the record — with no contract attached, turn it on manually.
 -
If no contract is attached, a Contract Selection pop-up opens. Search for the contract you want and attach it, or select Go Without Contract.
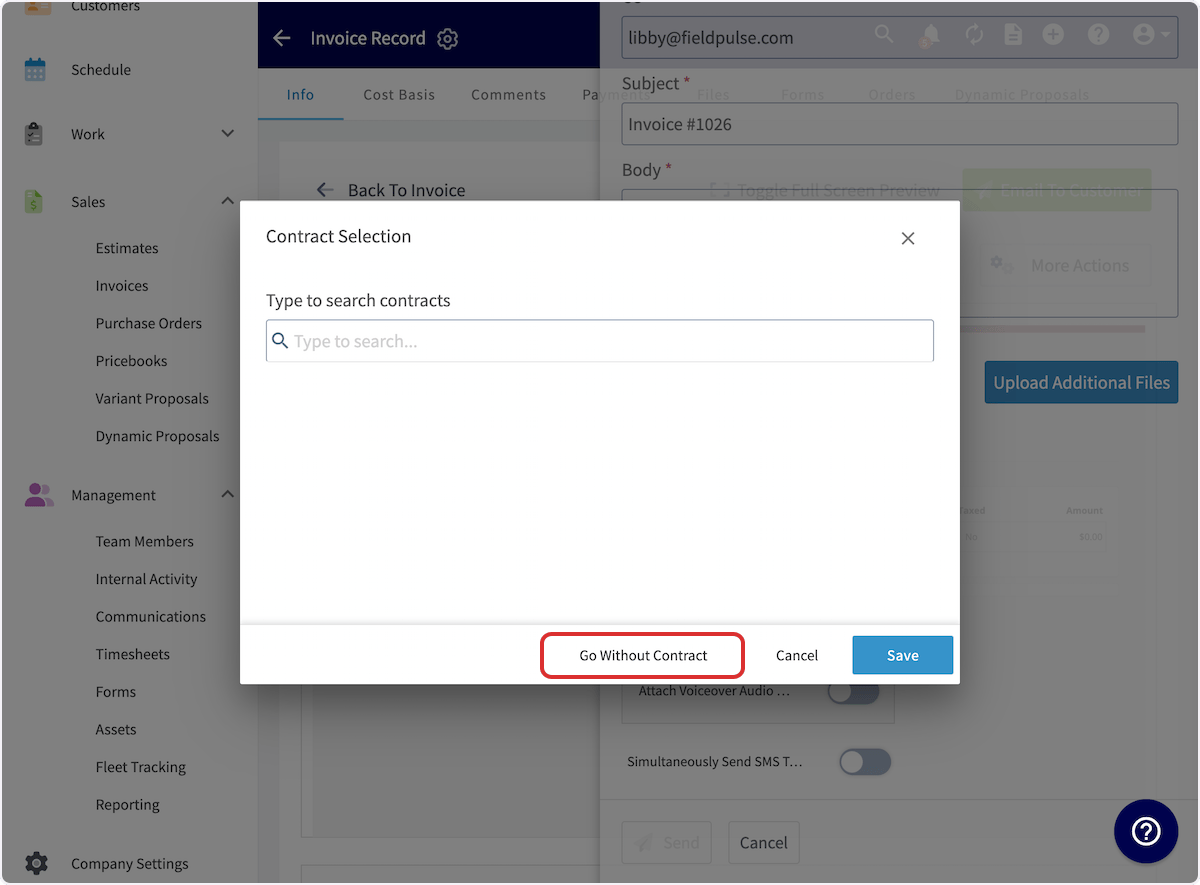
- Select Save, then send the estimate or invoice to your customer.
How the customer signs
-
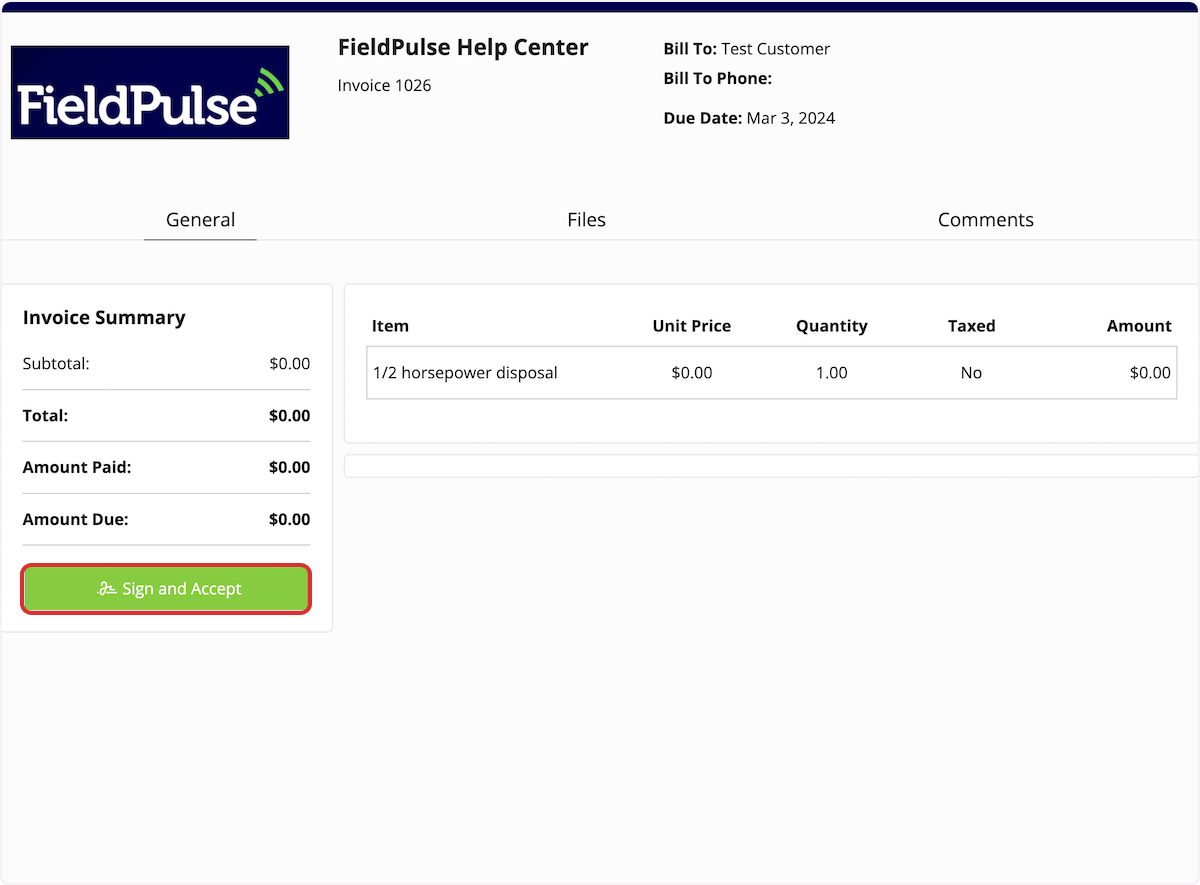
The customer opens the emailed estimate or invoice and selects Sign and Accept.
-
The customer draws or types their signature in the Sign Now window, then selects Add Signature.