Overview

Pricebook is a flat-rate sales tool that trade businesses can use to supercharge their sales process and increase revenue. Build and deploy your own custom pricebooks with ease, create tiered pricing with our ‘Good, Better, Best’ variant proposal options, and even take signatures and payments. Our pricebook helps turn your technicians into full-fledged salesmen, making upsells and boosting your customer satisfaction easier than ever.

Benefits Include

  • Showcase price integrity to customers.
  • Create custom tailored pricebooks catered to your business.
  • Instantly view costs and profitability on jobs.
  • Automate your estimate and invoicing process in seconds.

Prerequisites

Before you can use Pricebook, make sure the following is in place:
  • Pricebook is enabled in your account

On Web: Admin Experience

Finding Pricebook

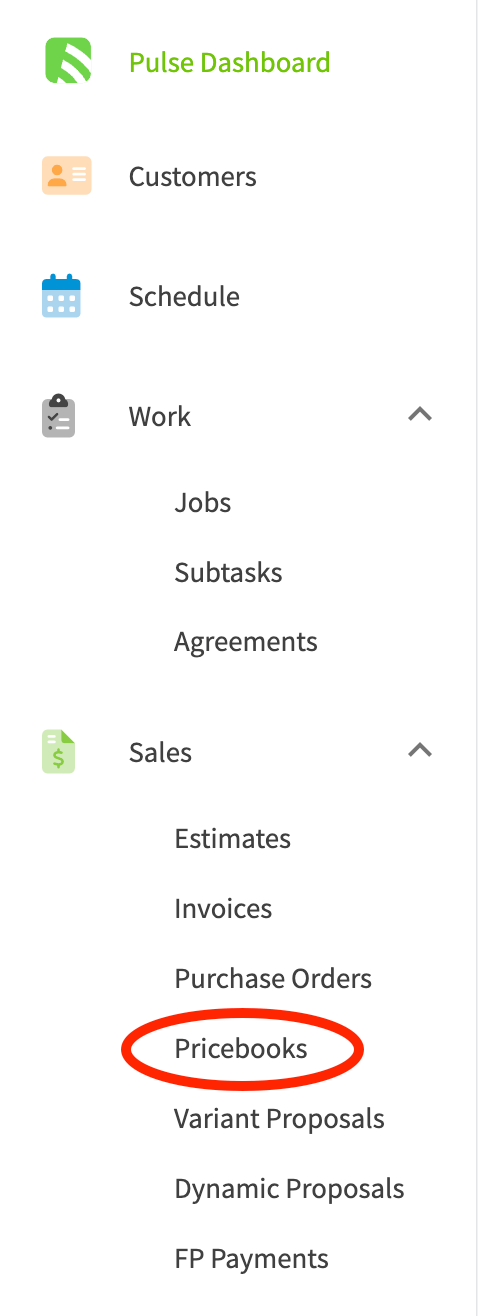
Once Pricebook has been enabled, you’re ready to begin exploring! Pricebook will appear under the Sales section, and can be used through the FieldPulse web app or through the FieldPulse mobile app. Pricebook listed under the Sales section of the FieldPulse menu
Ways to Create a Pricebook in FieldPulse

  1. To create a brand new pricebook, select the + Create Pricebook button to begin entering your information. The Create Pricebook button for starting a new pricebook

  2. You can import an external pricebook into your FieldPulse account by using our pricebook import.
    1. how to import a pricebook to learn more.
  3. If you’d like to build from a FieldPulse pricebook template, contact us at support@fieldpulse.com or use the Chat feature in the bottom right hand corner of your screen to have this imported into your account.

Basic Info & Set-Up

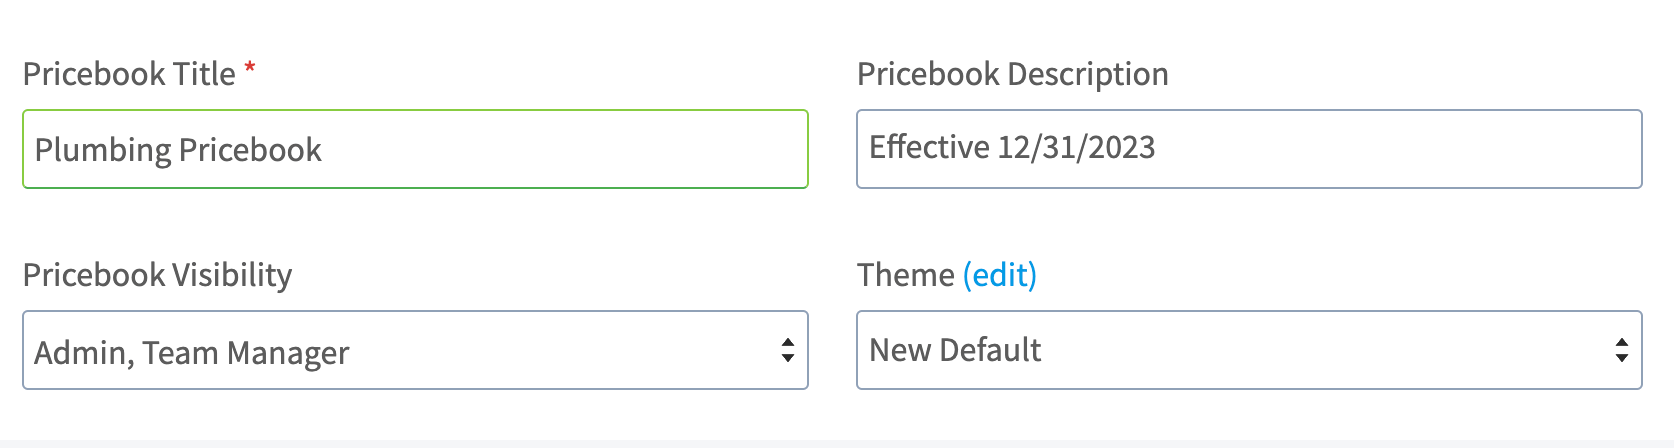
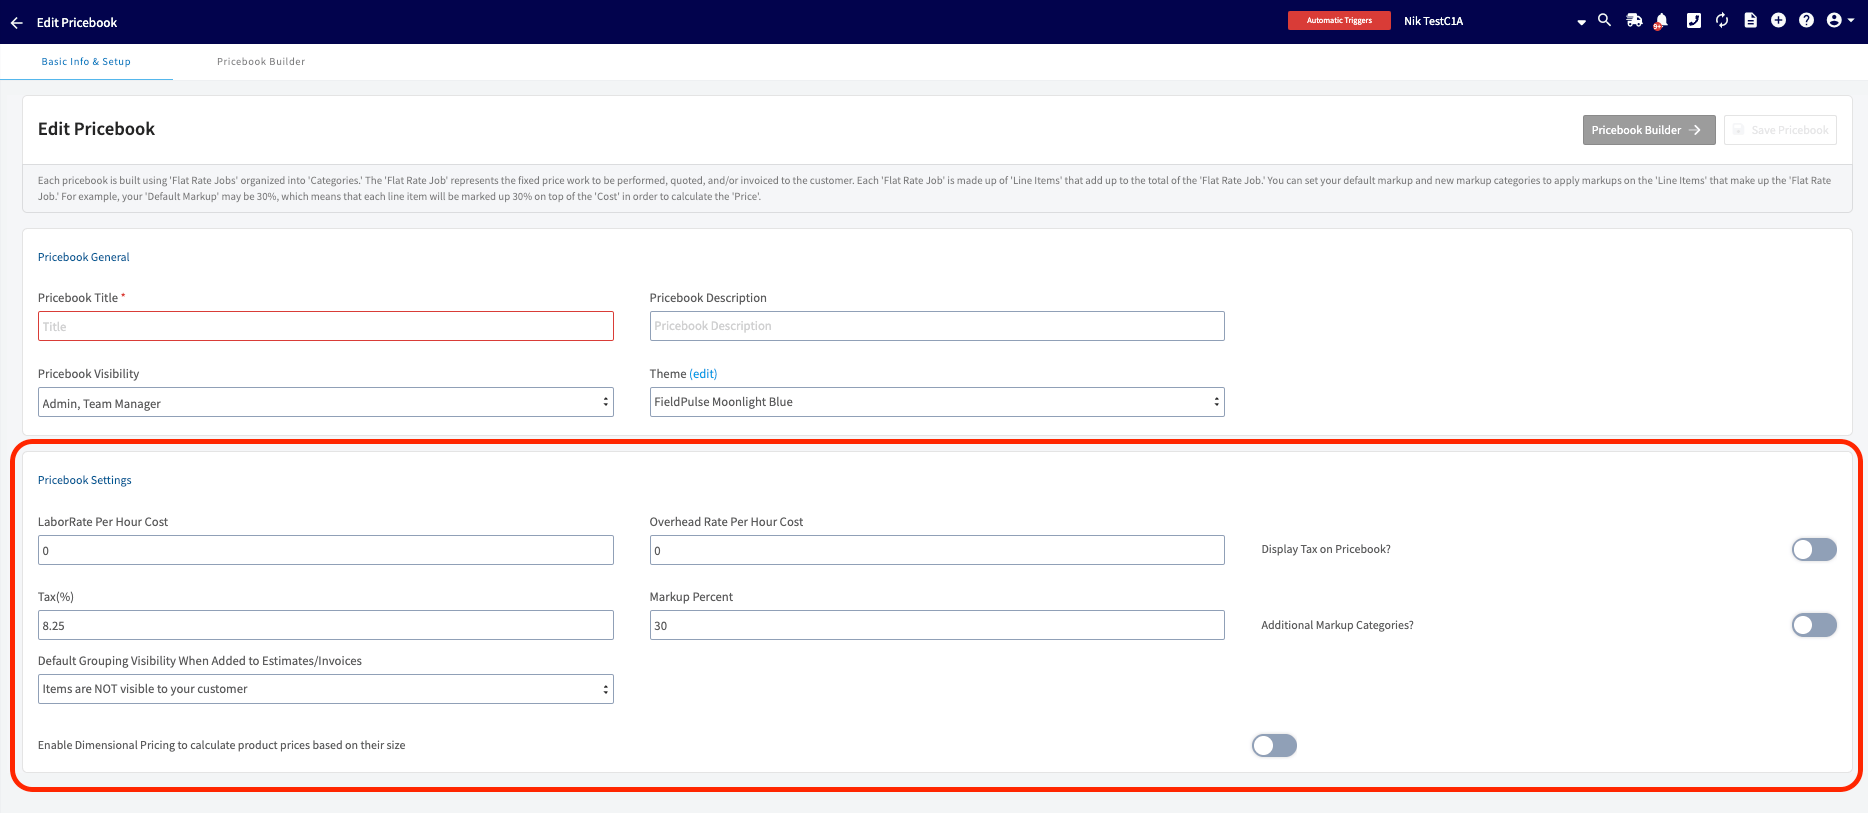
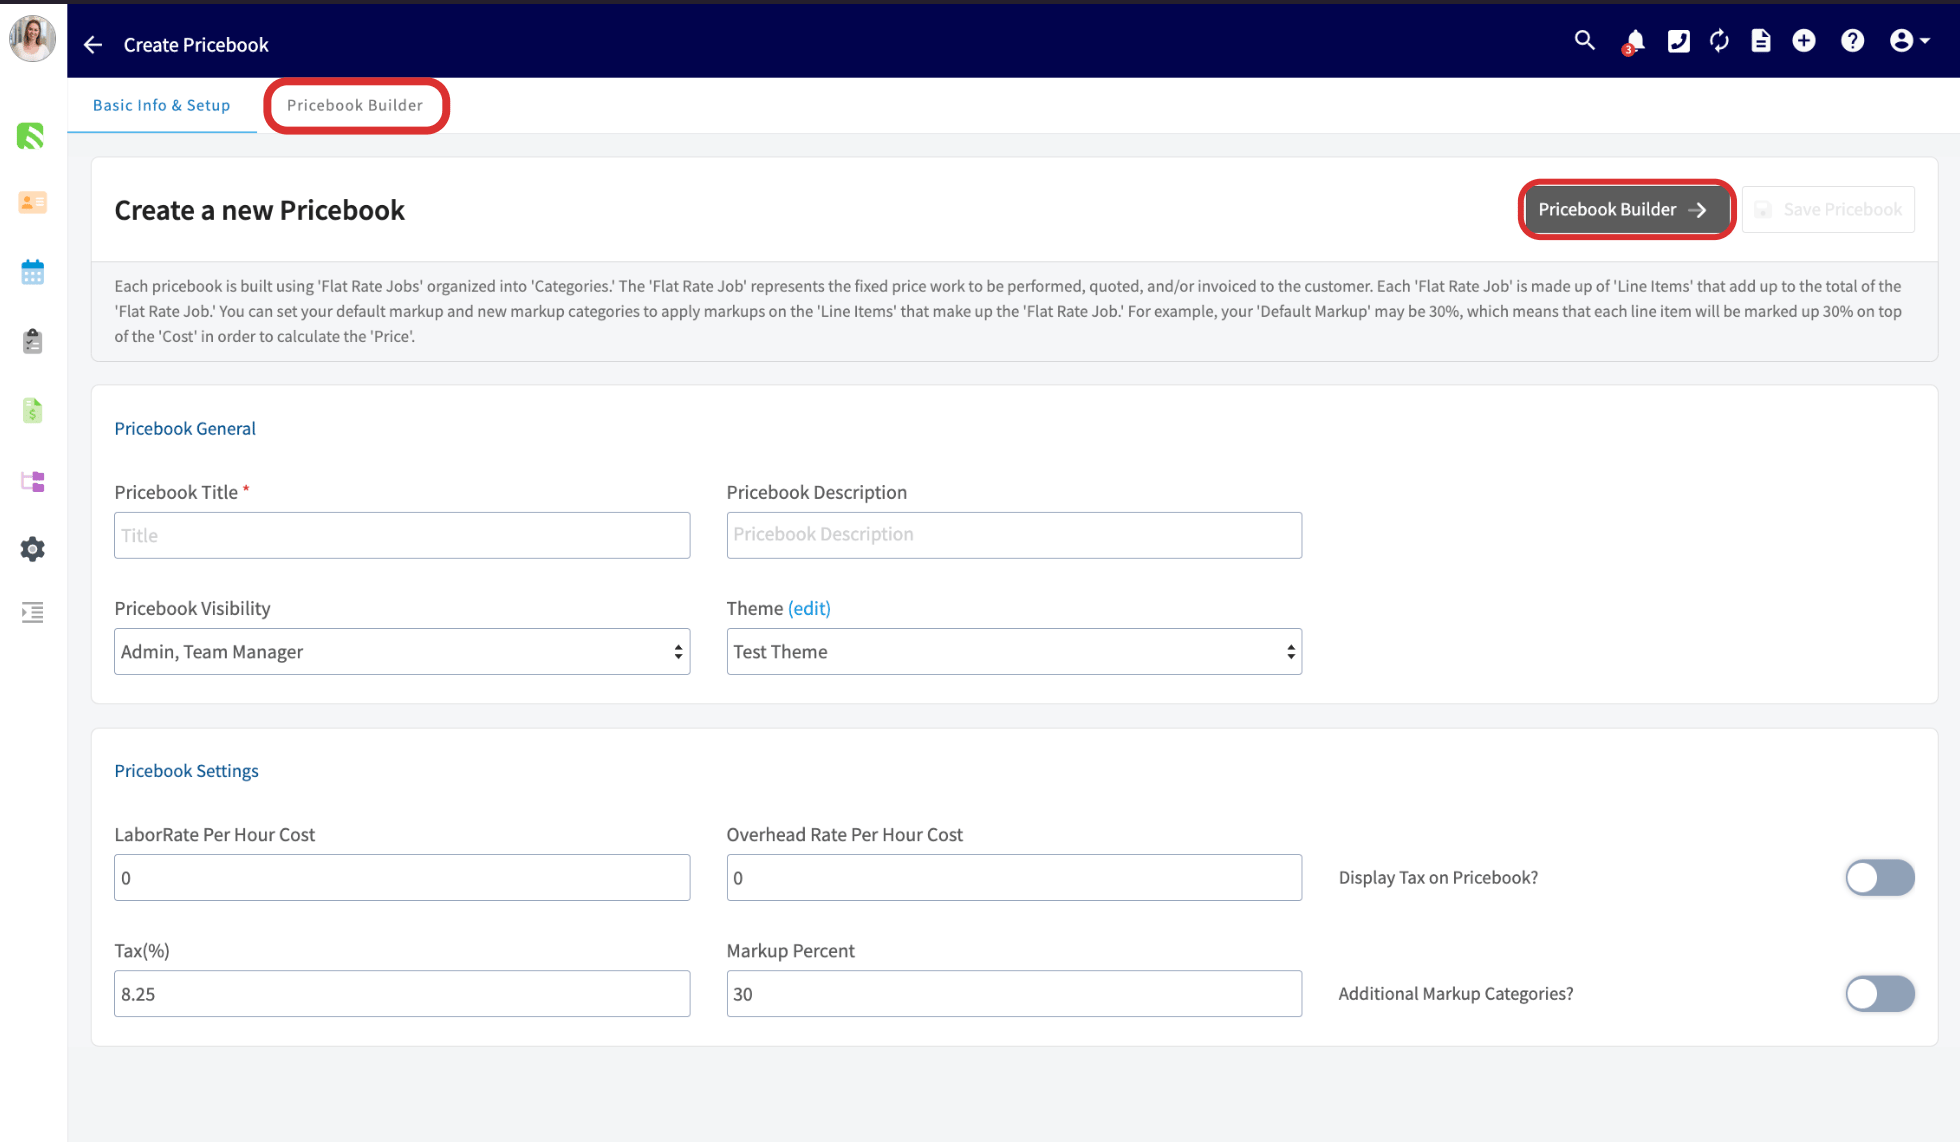
Once you create, import, or select a pricebook, you will be able to change the pricebook’s name and add a description. In this section, you’ll also be able to adjust which roles within your team have access to view the pricebook. Lastly, you can edit your pricebook theme to match your company’s brand. Pricebook Basic Info settings for name, description, role access, and theme Labor Rate per Hour Cost: This is where you will enter the cost to you of labor on an hourly basis. Remember, this is not the price you charge customers, but what it costs you. Overhead Rate per Hour Cost: This is where you will enter your overall overhead costs on an hourly basis. This number may take some calculations for you to identify, but entering your hourly overhead costs will help ensure that you make a profit on every job listed in your pricebook. Markup Percent: Markup percent is where you will enter your default markup rate for all labor, supplies, and equipment. You will be able to customize your markup percentages in the next section, Markup Categories, but your default markup will be set here. Markup Categories: Markup categories allow you to customize your markups. For example, you may set a markup rate for labor, a markup rate for supplies costing $1-$50, or a markup rate for all stainless steel items. Simply select Add Markup Category and enter a title and markup percentage. You can create as many categories as you need – just don’t forget to press + Save after each addition. Default Grouping Visibility When Added to Estimates/Invoices: This feature allows you to define the default grouping visibility at the Pricebook level, with the option to override it for individual flat rate jobs when adding them to estimates or invoices. A pop-up message in the app will prompt you to either update the default for future use or apply it to all existing jobs within your Pricebook. Markup percent and markup categories fields in Pricebook setup
Pricebook Builder

When you’re ready to begin creating categories, flat rate jobs, add-ons, and more, select Pricebook Builder. The Pricebook Builder option for creating categories and flat rate jobs
Categories

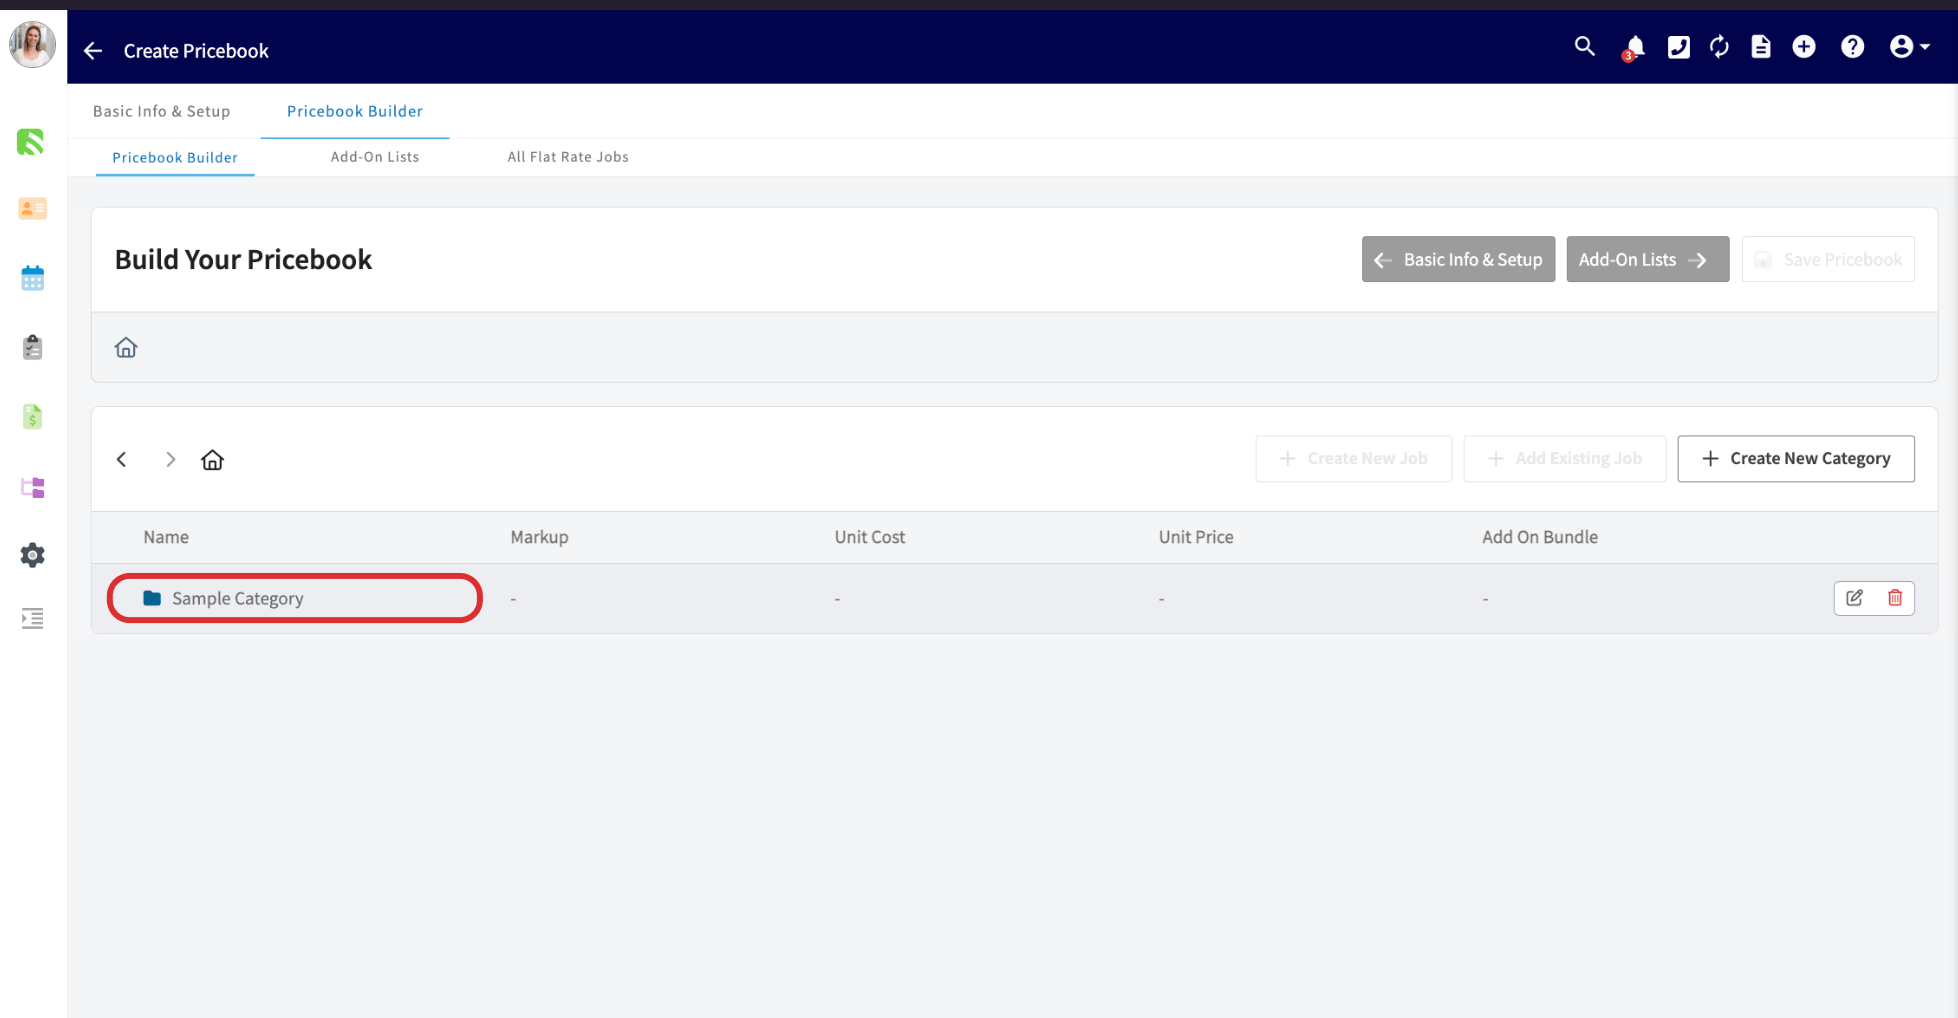
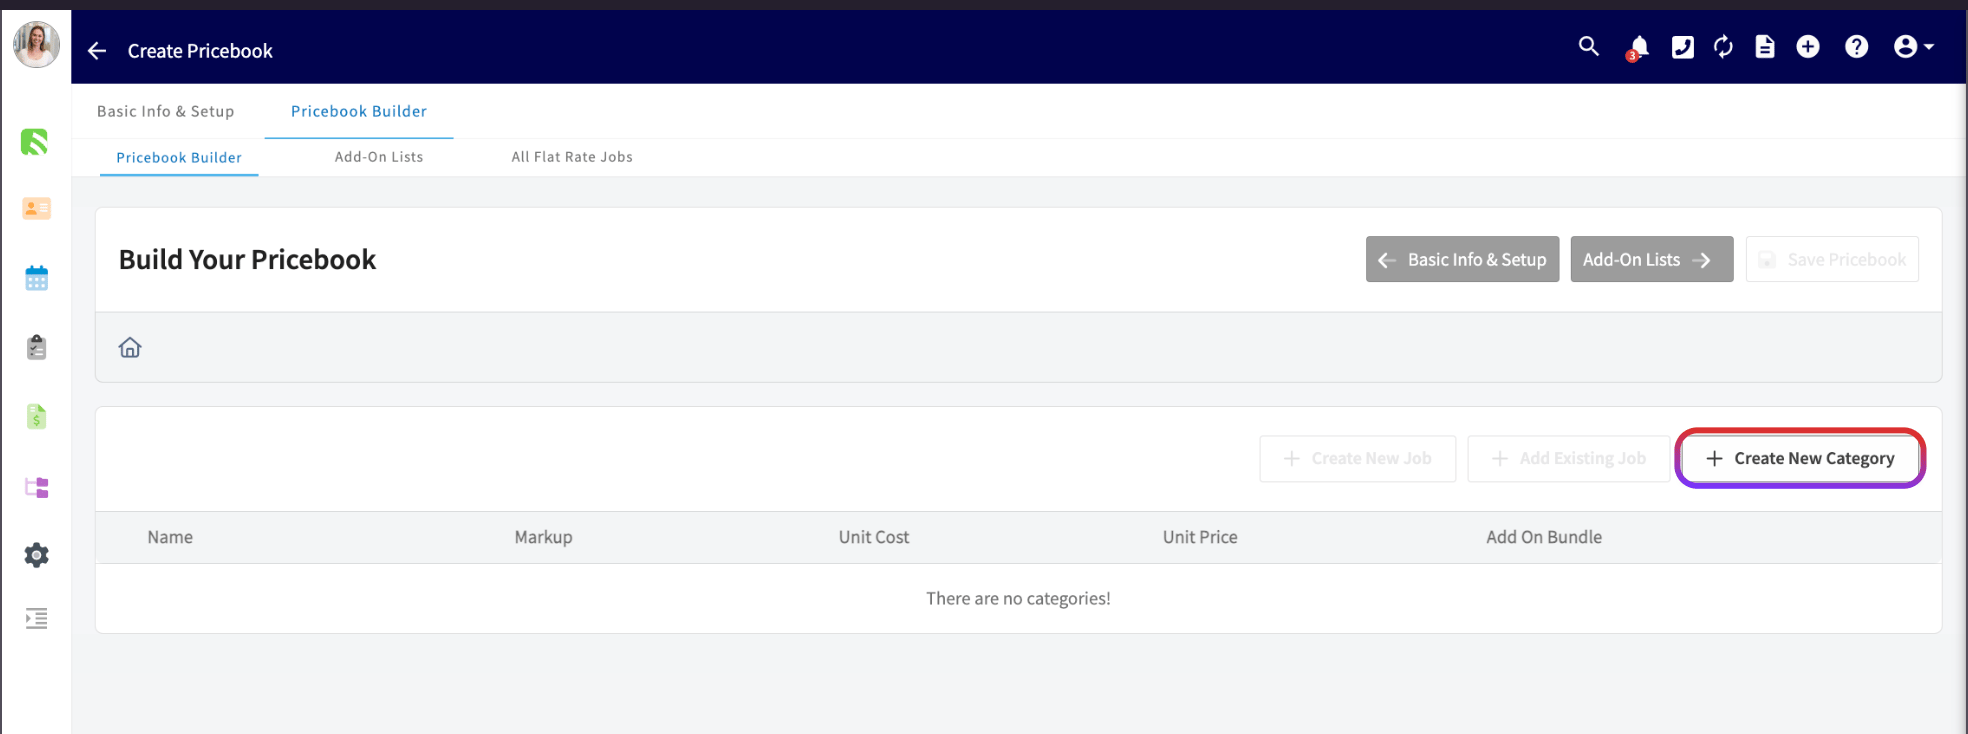
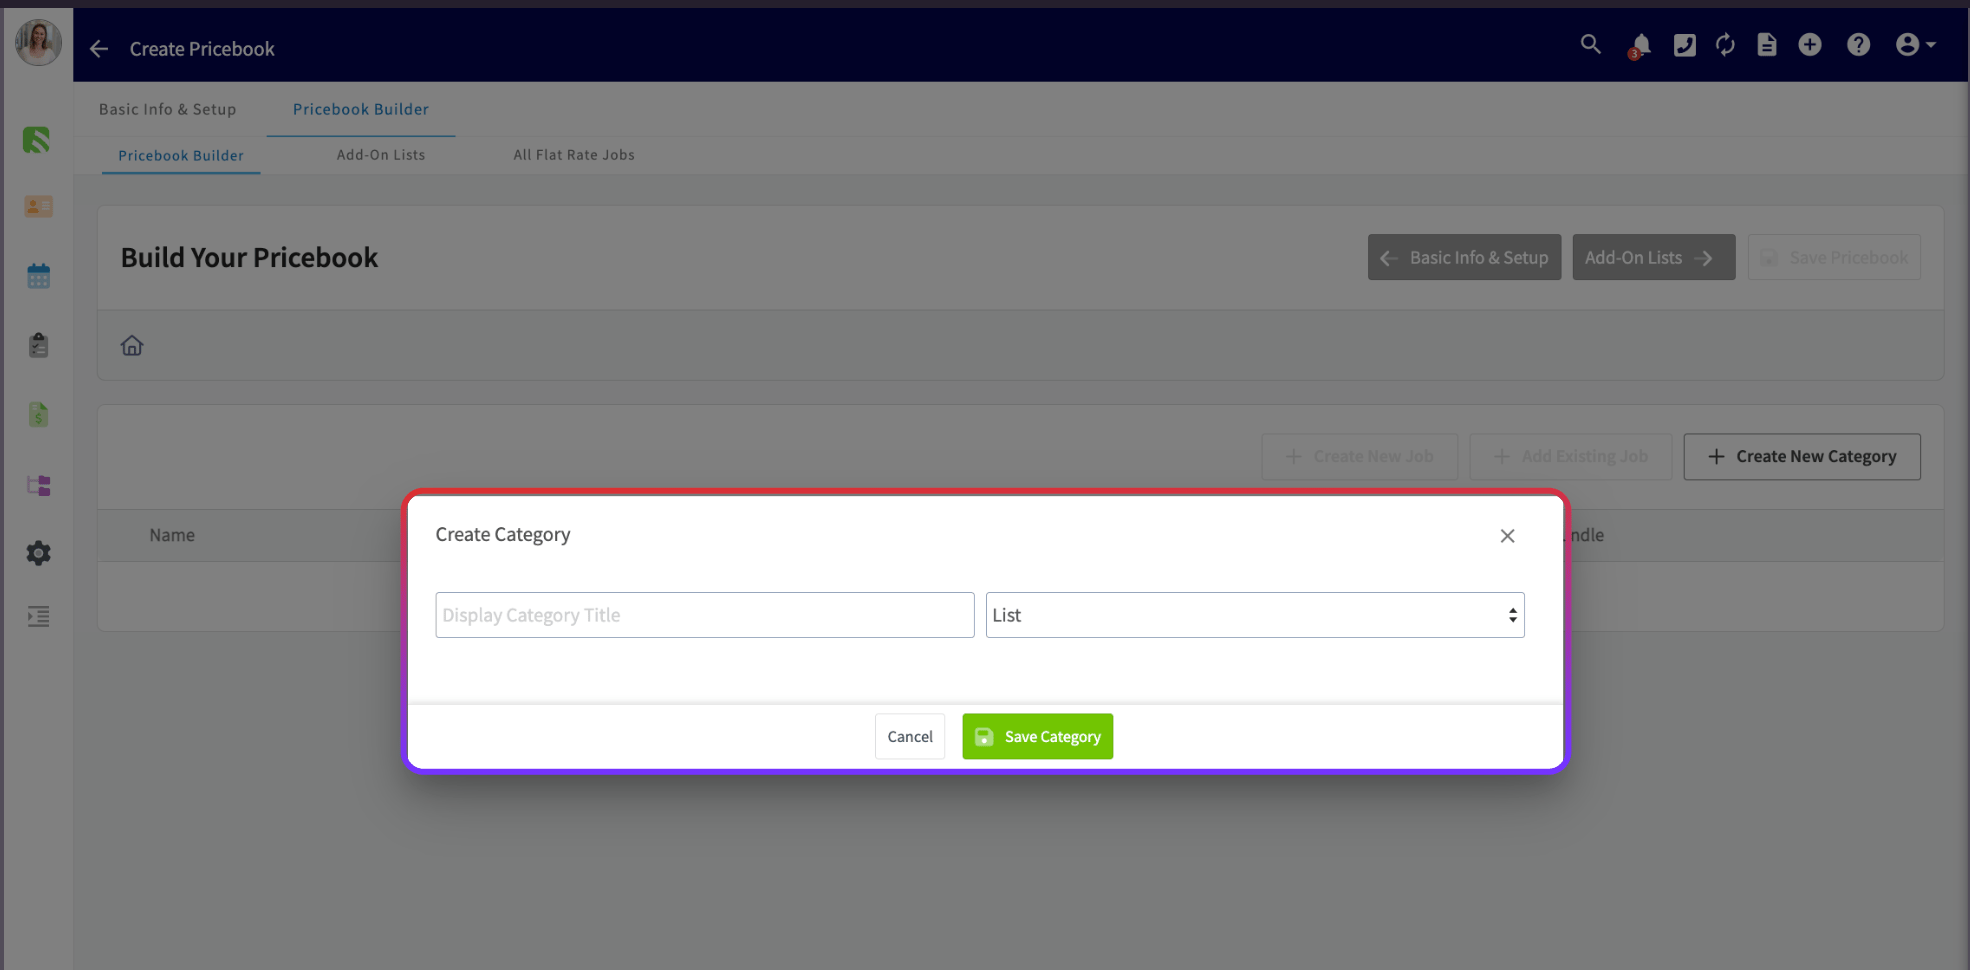
This tab allows you to create categories to organize your flat rate jobs. Begin by selecting Create New Category. The Create New Category button in the Pricebook Categories tab Enter your display category title then select whether you’d like the jobs in this category to appear as a list, or in a Good/Better/Best format. If you aren’t sure which display method you’d like to use, it can always be changed later. To add this display category, click Save Category. Category setup with title and list or Good/Better/Best display options Some examples of display categories include:
  • Diagnostic/Evaluation
  • Gas Furnace
  • Heat Pump Systems
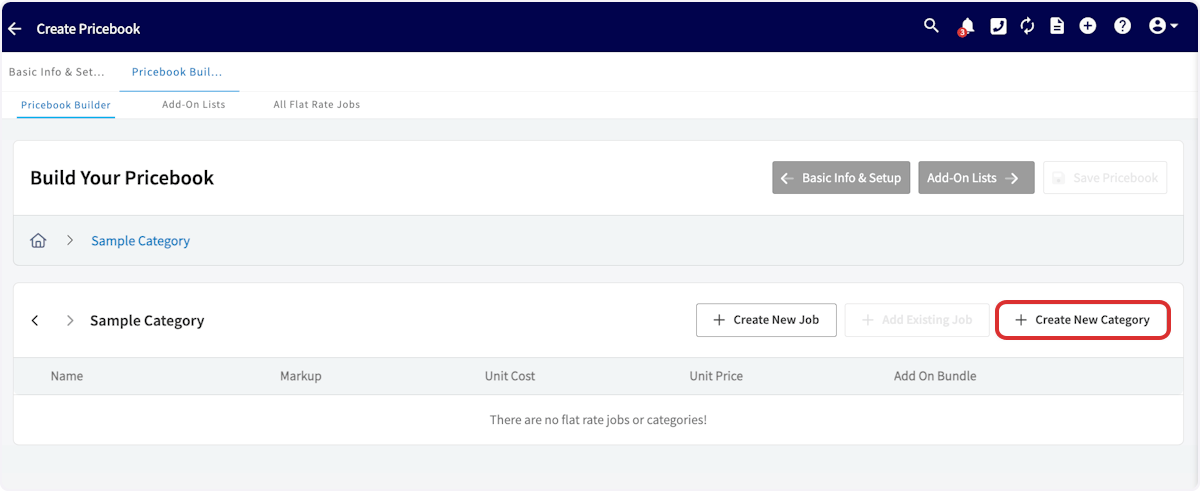
Next, you can add additional sub-categories under each category to further organize your jobs. Click on the category under which you’d like to create a sub-category, then press Create New Category. Creating a sub-category under an existing pricebook category Click on Create New Category You can navigate back to the list of display categories at any time by selecting the home icon.

Add-On Lists

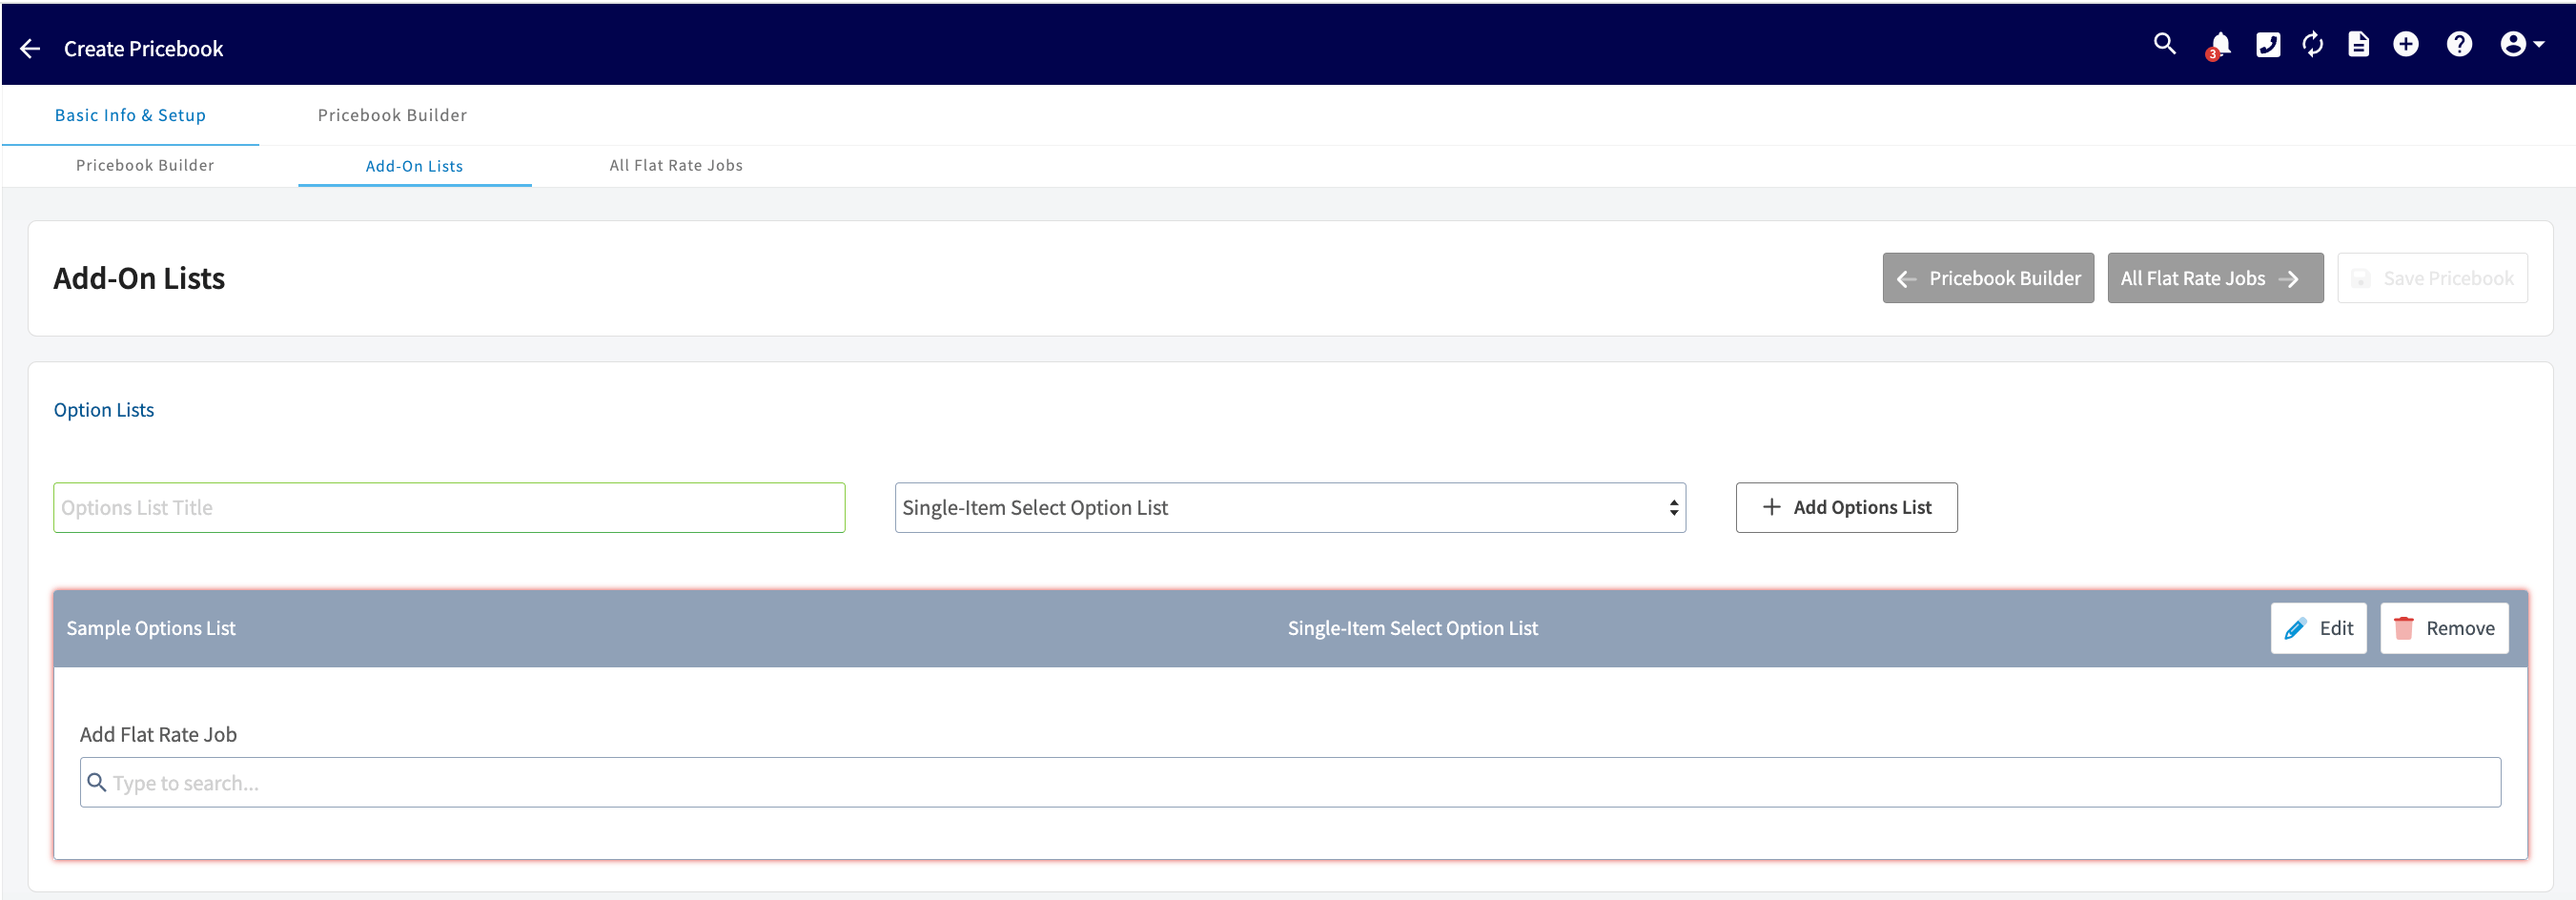
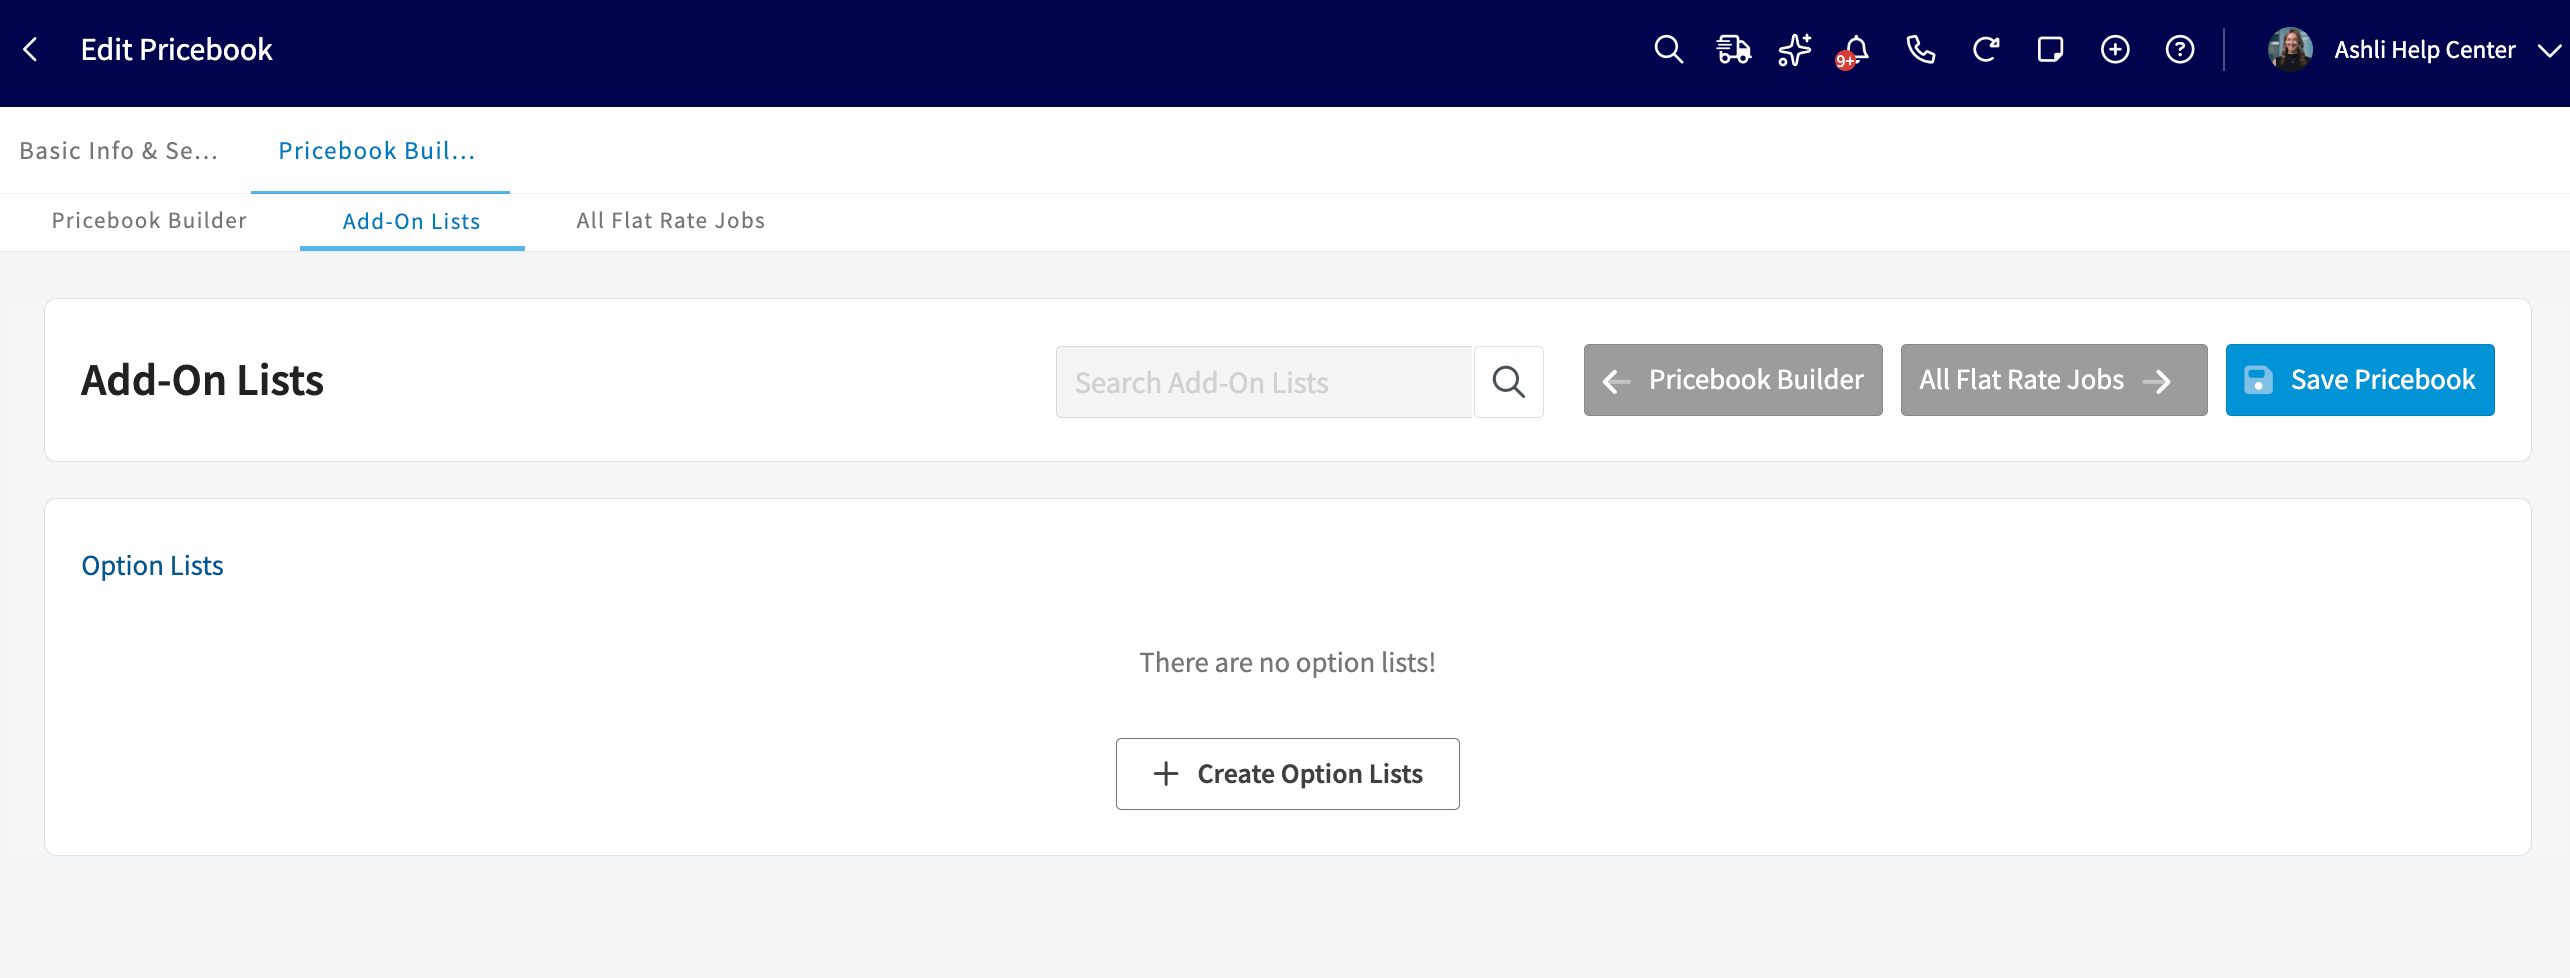
Next, select Add-On Lists, then click Create Options List. The Add-On Lists tab with the Create Options List button Add-On Lists allow you to create add-on options which can later be linked to flat rate jobs. Begin by creating new options lists, then indicate whether you would like to have this options list be single-item select or multiple-item select.
  • Single-item select: Allows you or your customer to only choose one item from each options list
  • Multiple-select: Allows you or your customer to choose as many items as desired.
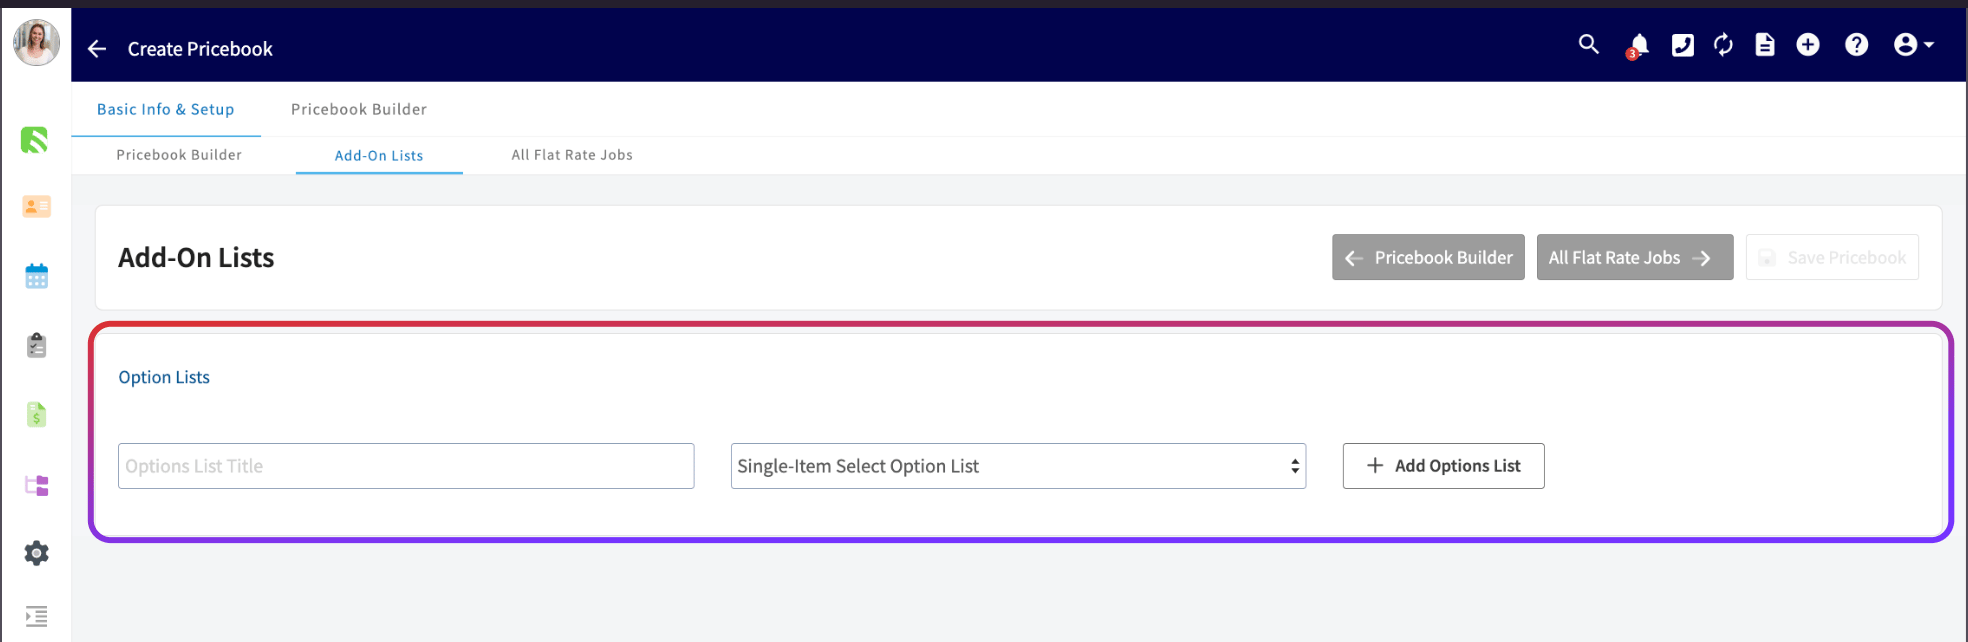
(Note: If you aren’t sure which item selection method you’d like to use, it can always be changed later.) Choosing single-item or multiple-select for an add-on options list Some examples of option list titles include:
  • Condenser Coil Add-Ons
  • Washing Machine Extended Warranties
  • Thermostat Upgrades
After creating your options list title, search to enter each flat rate job you’d like to be housed under this options list. Flat rate jobs can be listed under multiple options lists. Adding flat rate jobs to an add-on options list

All Flat-Rate Jobs

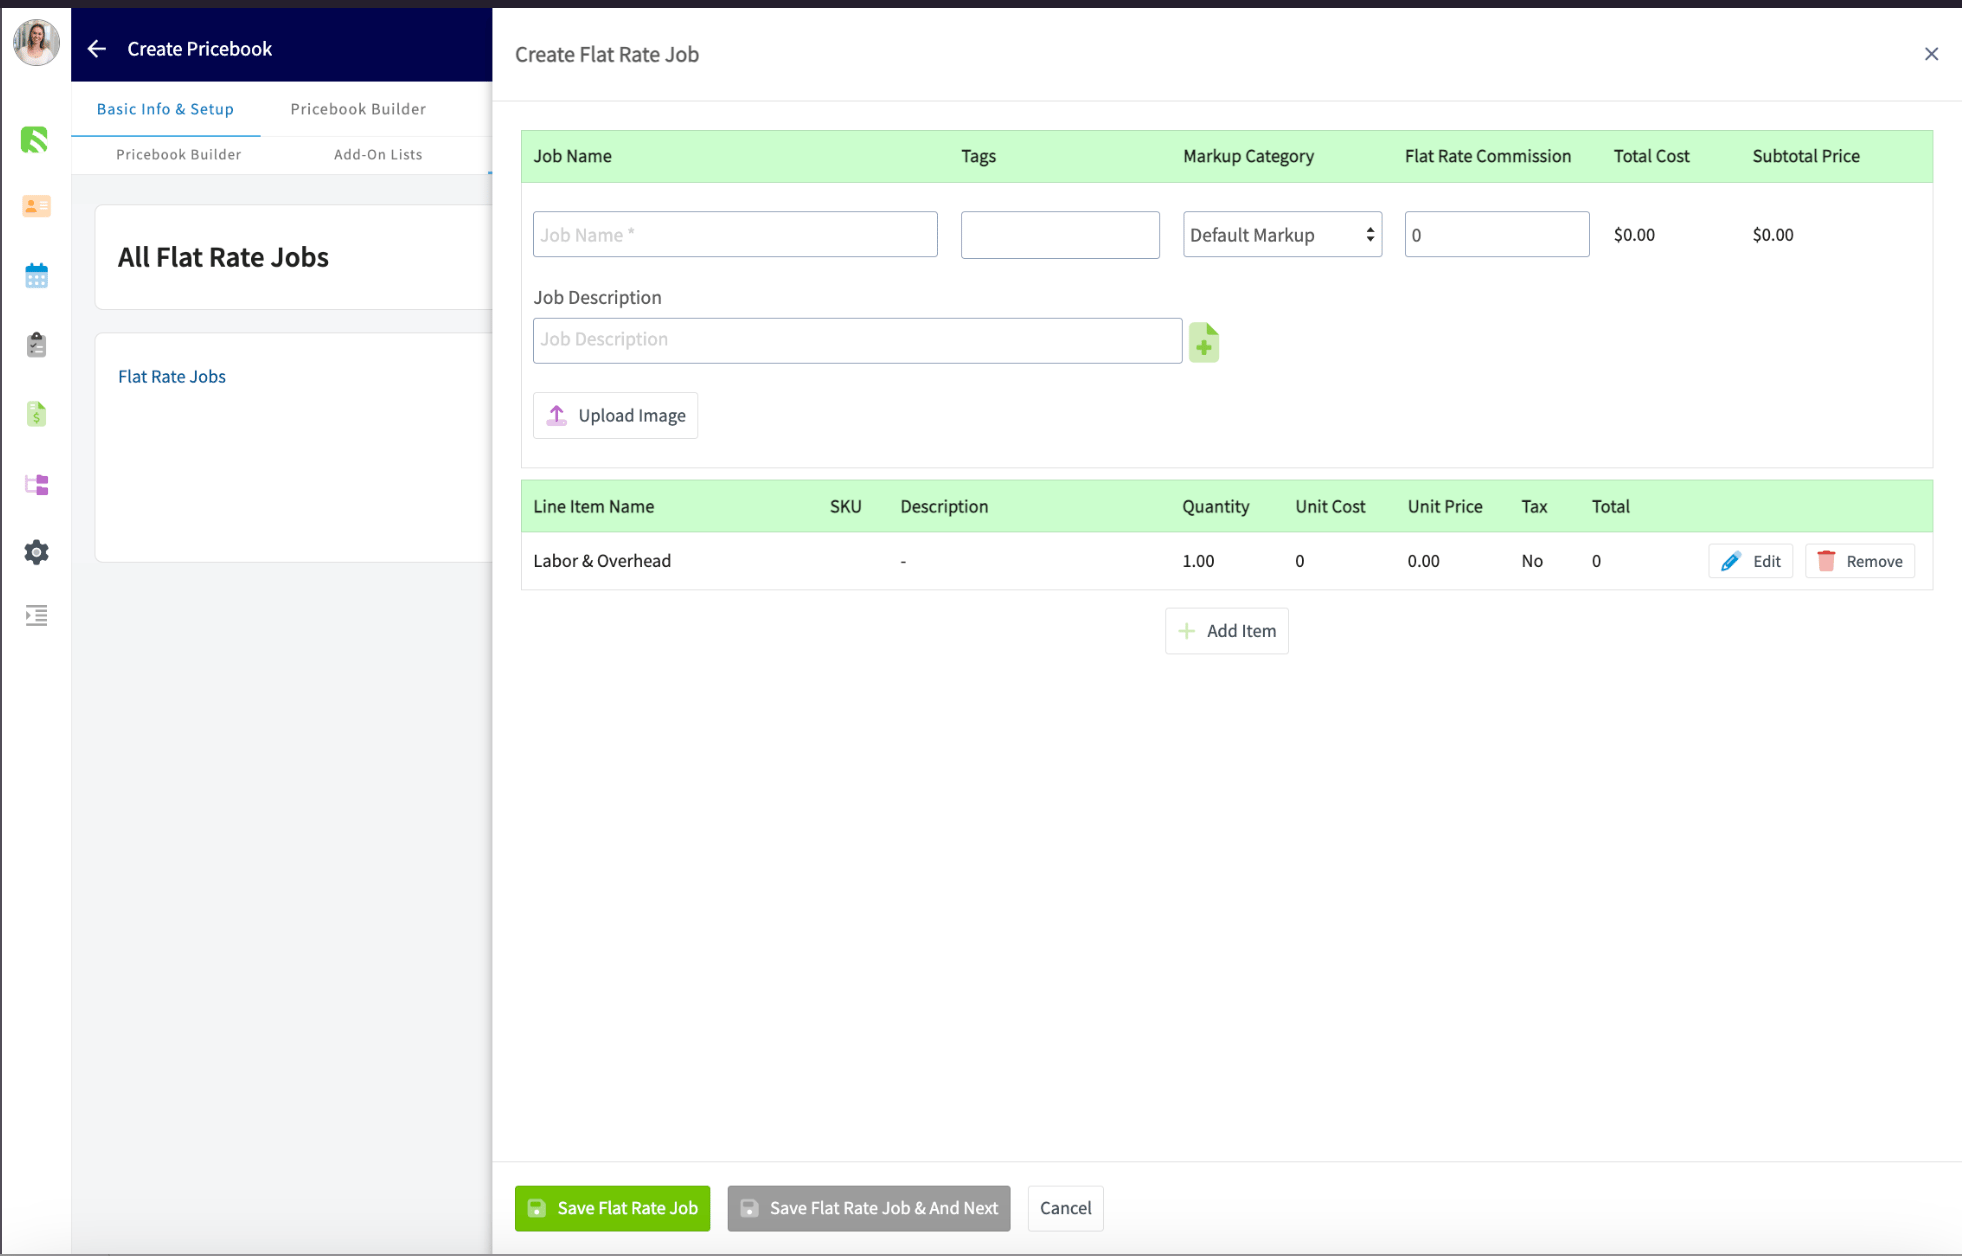
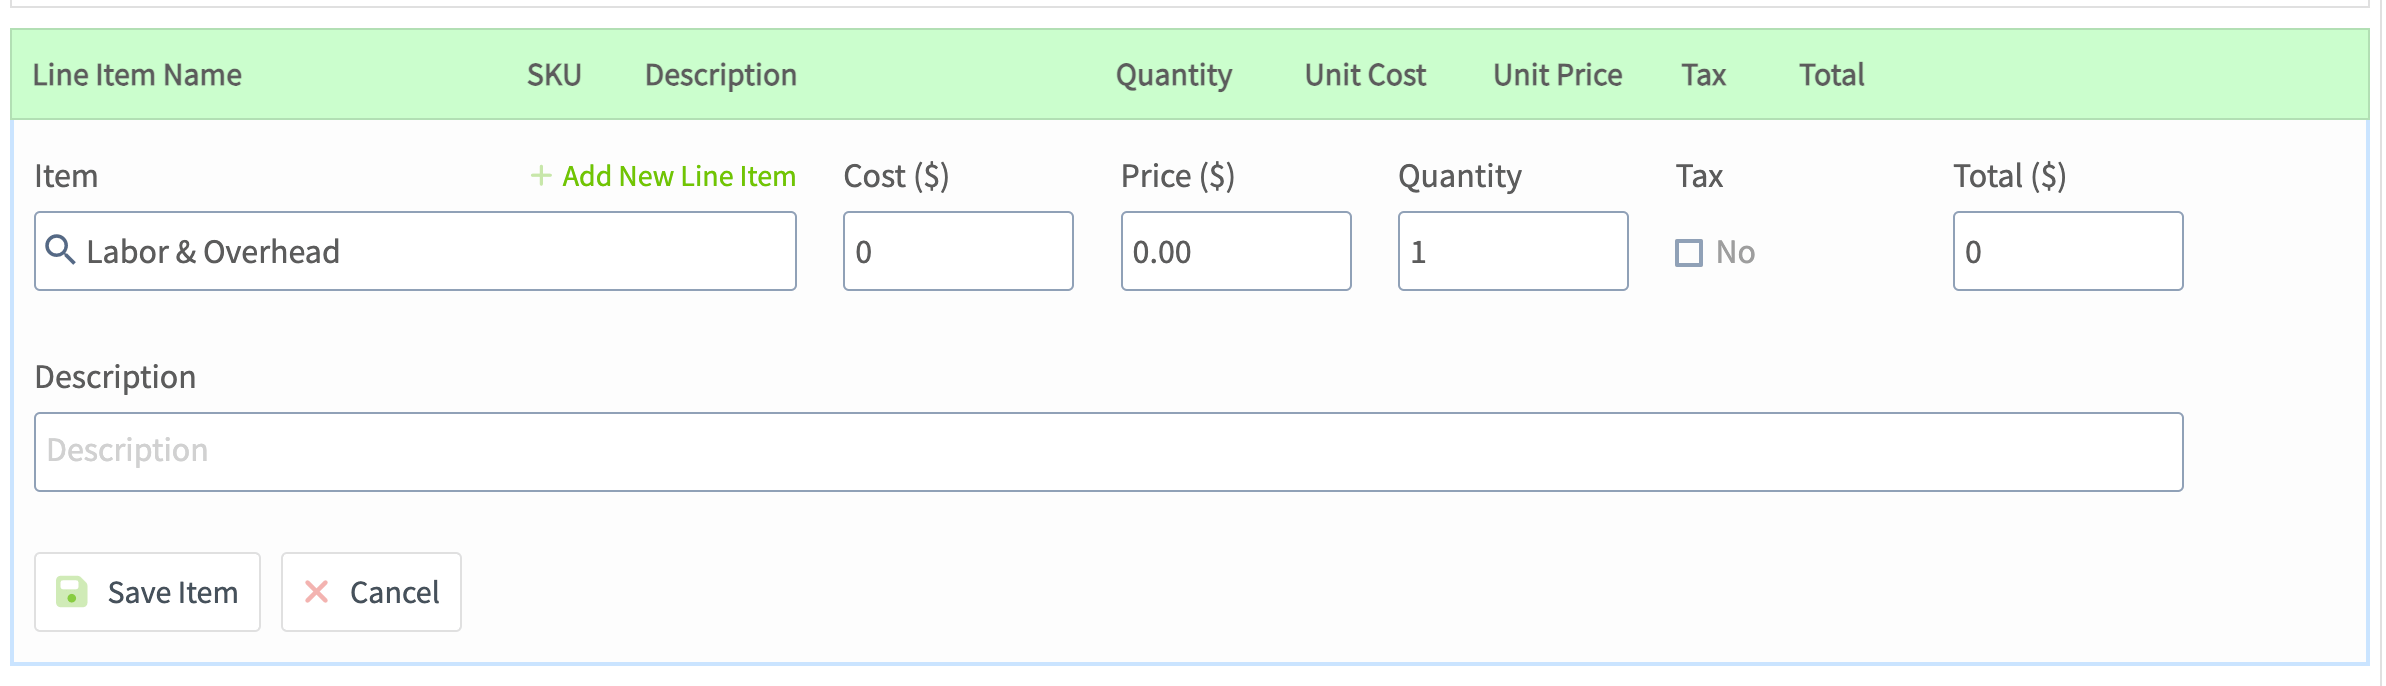
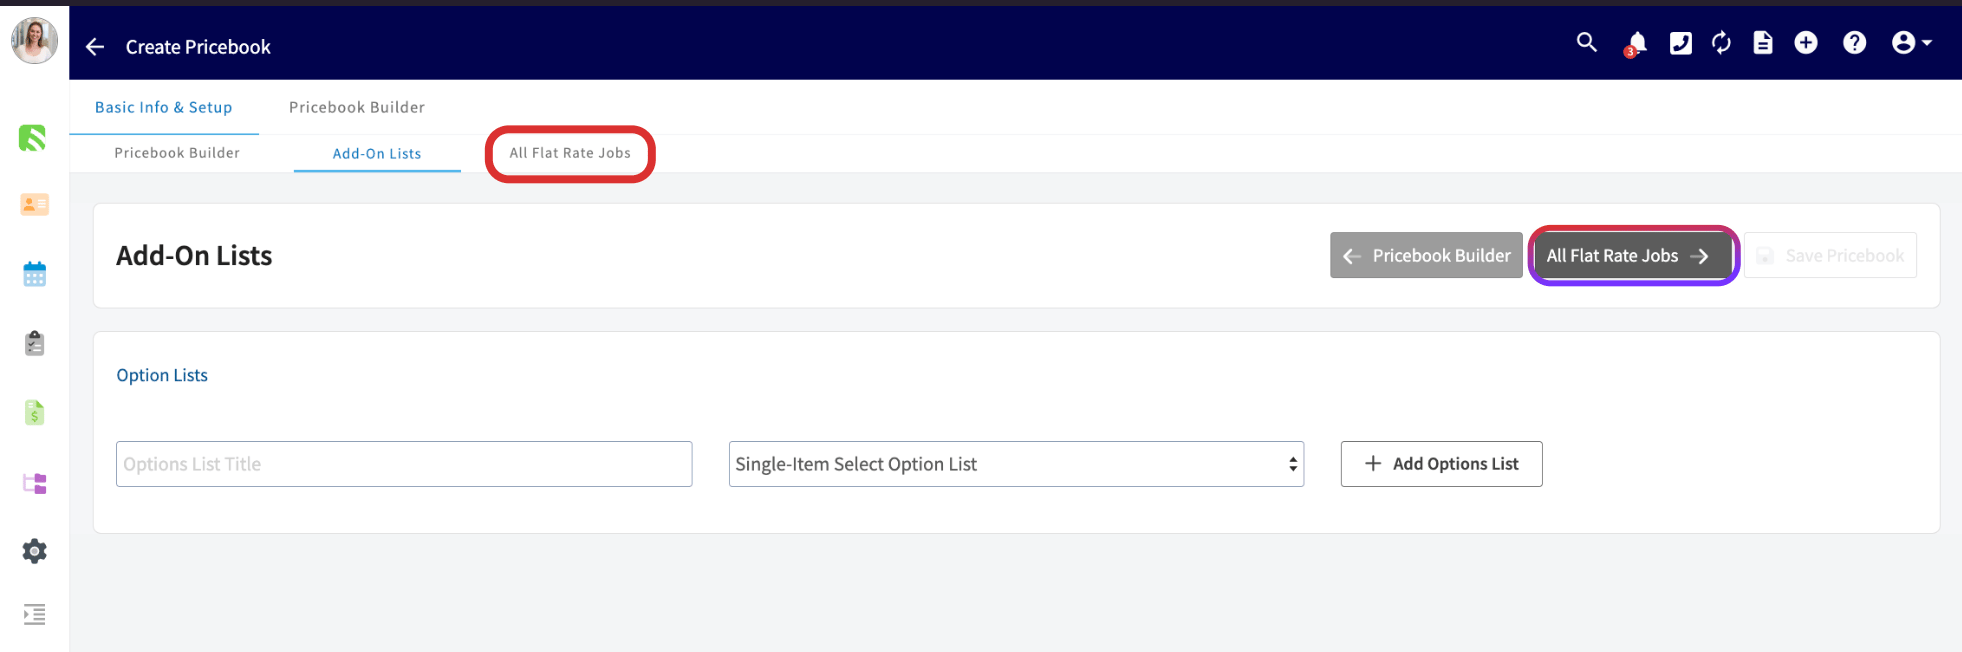
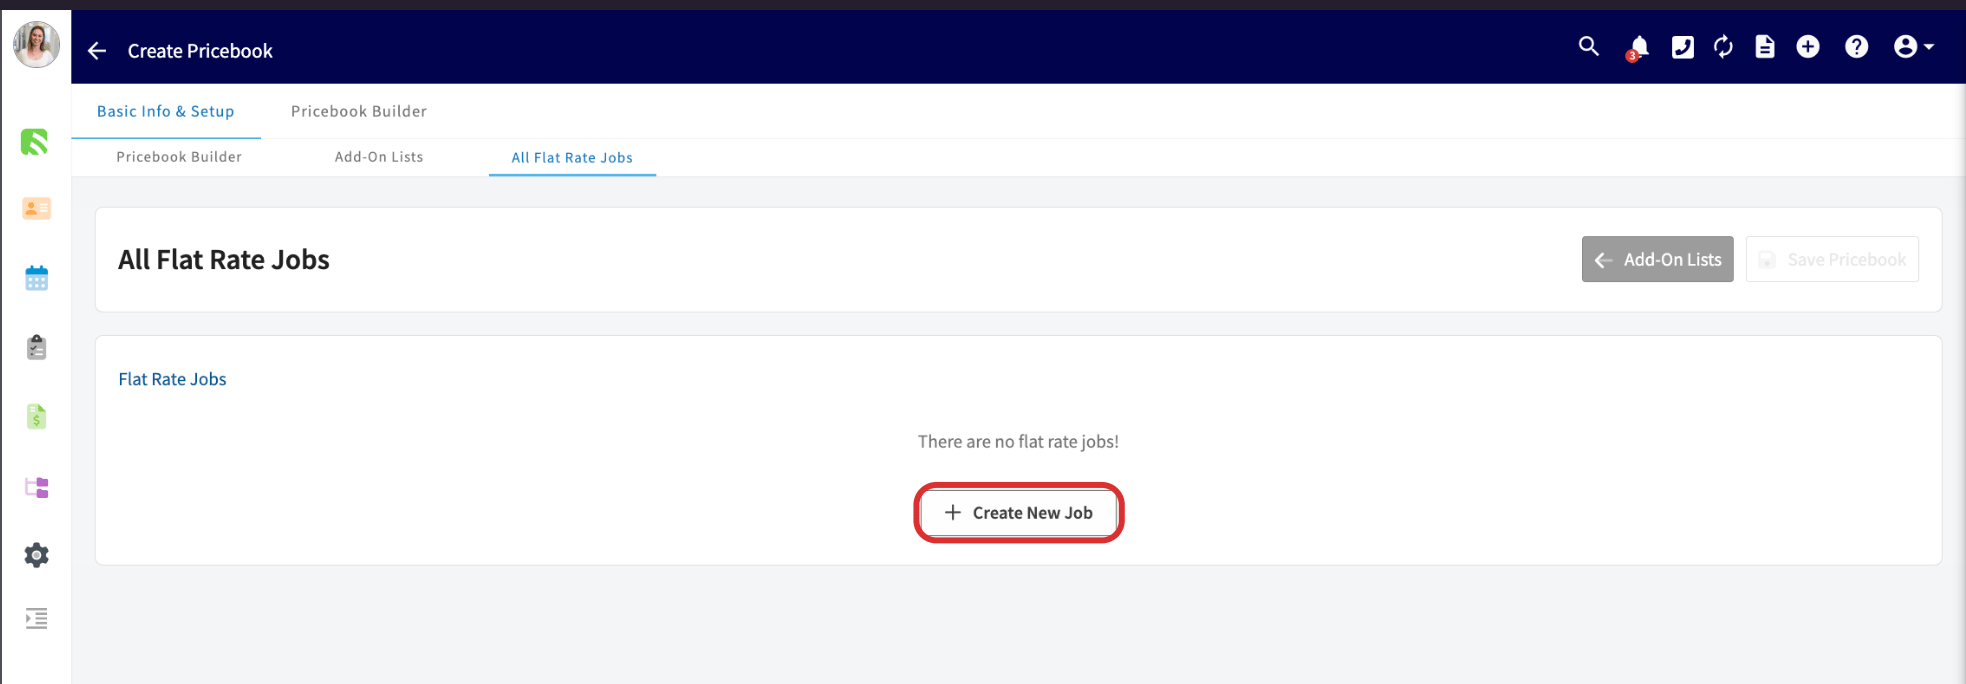
Next, select All Flat-Rate Jobs, then click Create New Job. The All Flat-Rate Jobs tab with the Create New Job button New flat rate job form with name, description, image, and tags fields Now you will need to enter a job name, and you can also add a description, an image, and tags. You should also select your markup category for this job from the dropdown menu. You can use the default markup you set above, assign unique markups by item, or use the unique markup categories you created. Selecting a markup category from the dropdown for a flat rate job Once these details have been added, go ahead and adjust the labor and overhead by pressing Edit. Here you can enter the quantity of hours required for this job and include a description. Press Save Item to complete your changes. Editing labor hours and overhead for a flat rate job Next, press + Add Item for every item you will need for this job. Your pricebook will pull from your item list or you can create a new line item. Your cost, price, and description will automatically apply once you select an item, but you can always make changes to these fields, as well as adjust the quantity of each line item. To add additional flat rate jobs, simply begin the process again by clicking Create New Job. Be sure to press Save Pricebook when you’re finished making changes. To change the order of your line items, click and hold the six-dot icon to the left of any line item and drag it to the position you want. The updated order will apply to any future estimates or invoices generated from this flat rate job.
On Mobile: Field Experience

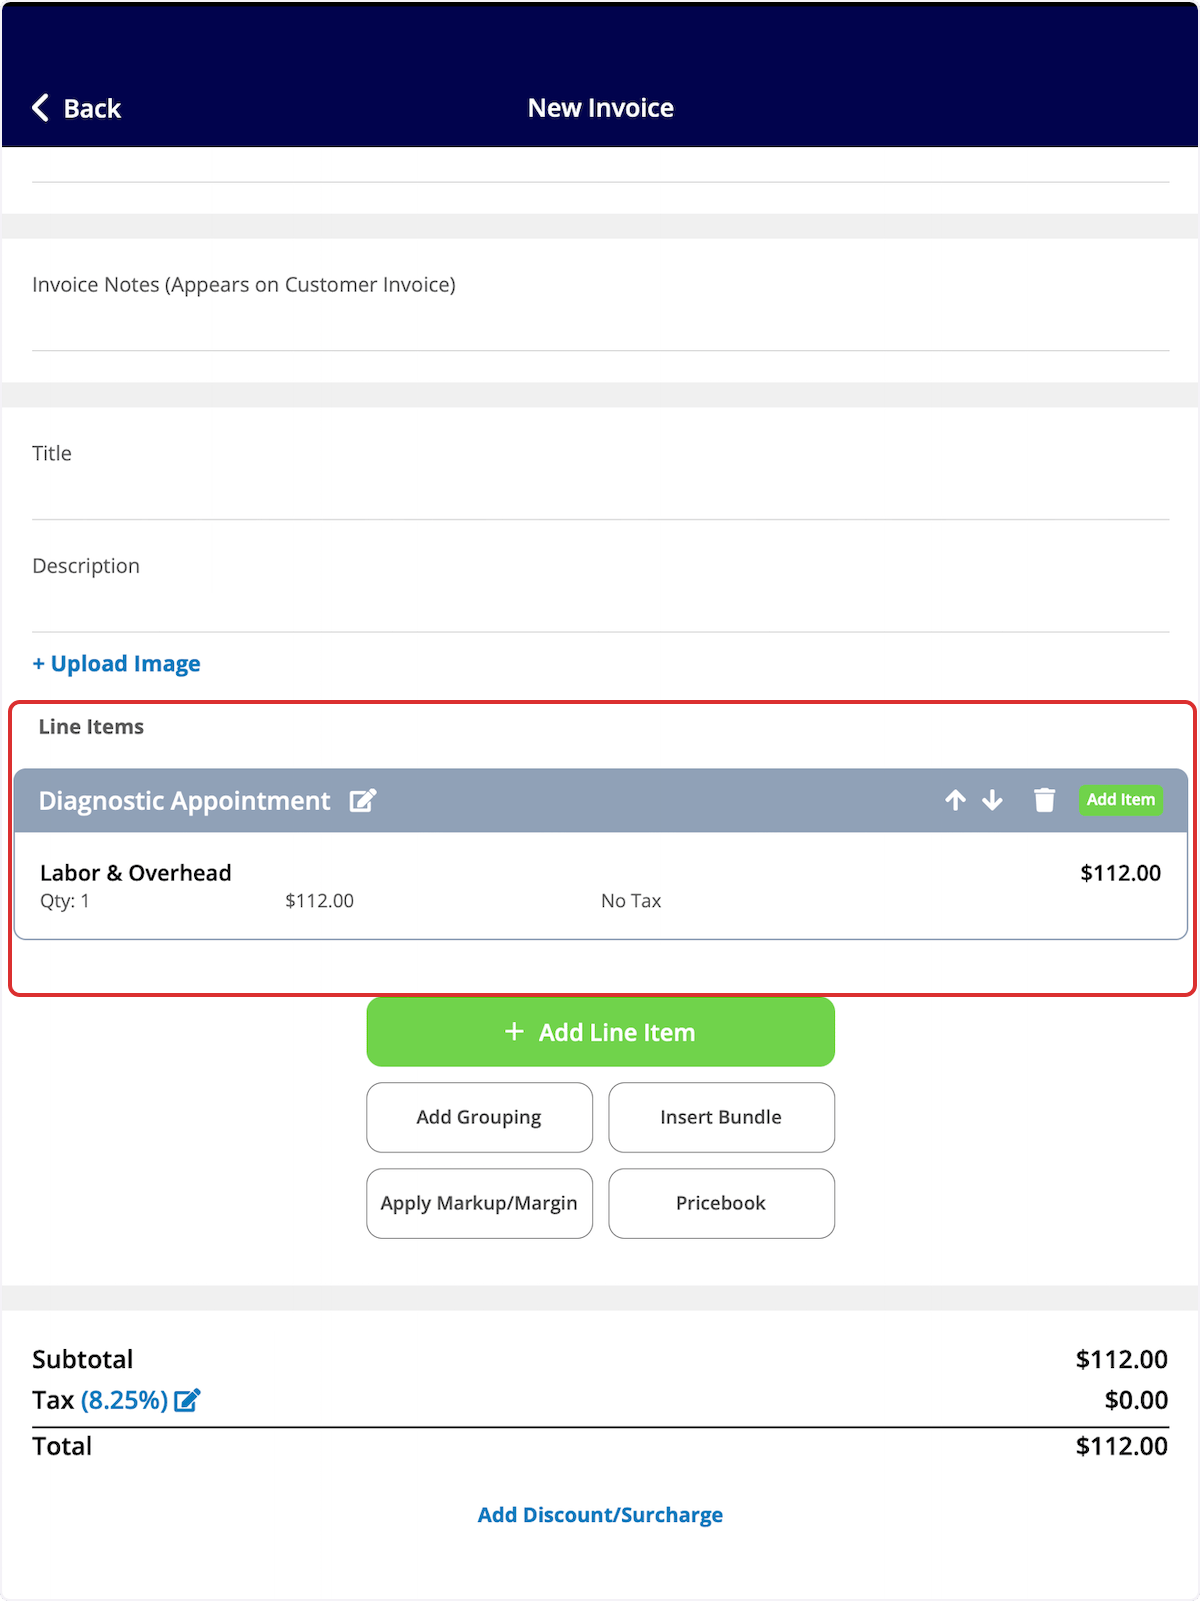
Use Pricebook in the field to easily generate estimates, invoices, and variant proposals. Present your customer with clear pricing and offer add-ons all at once!

Accessing Your Pricebooks

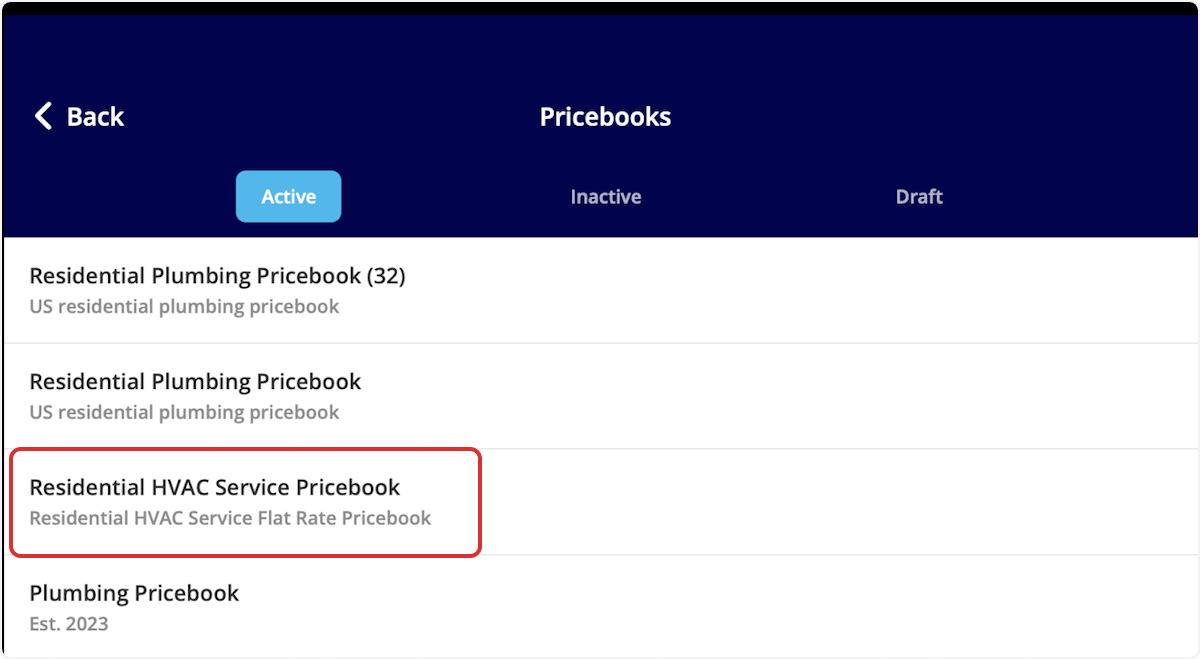
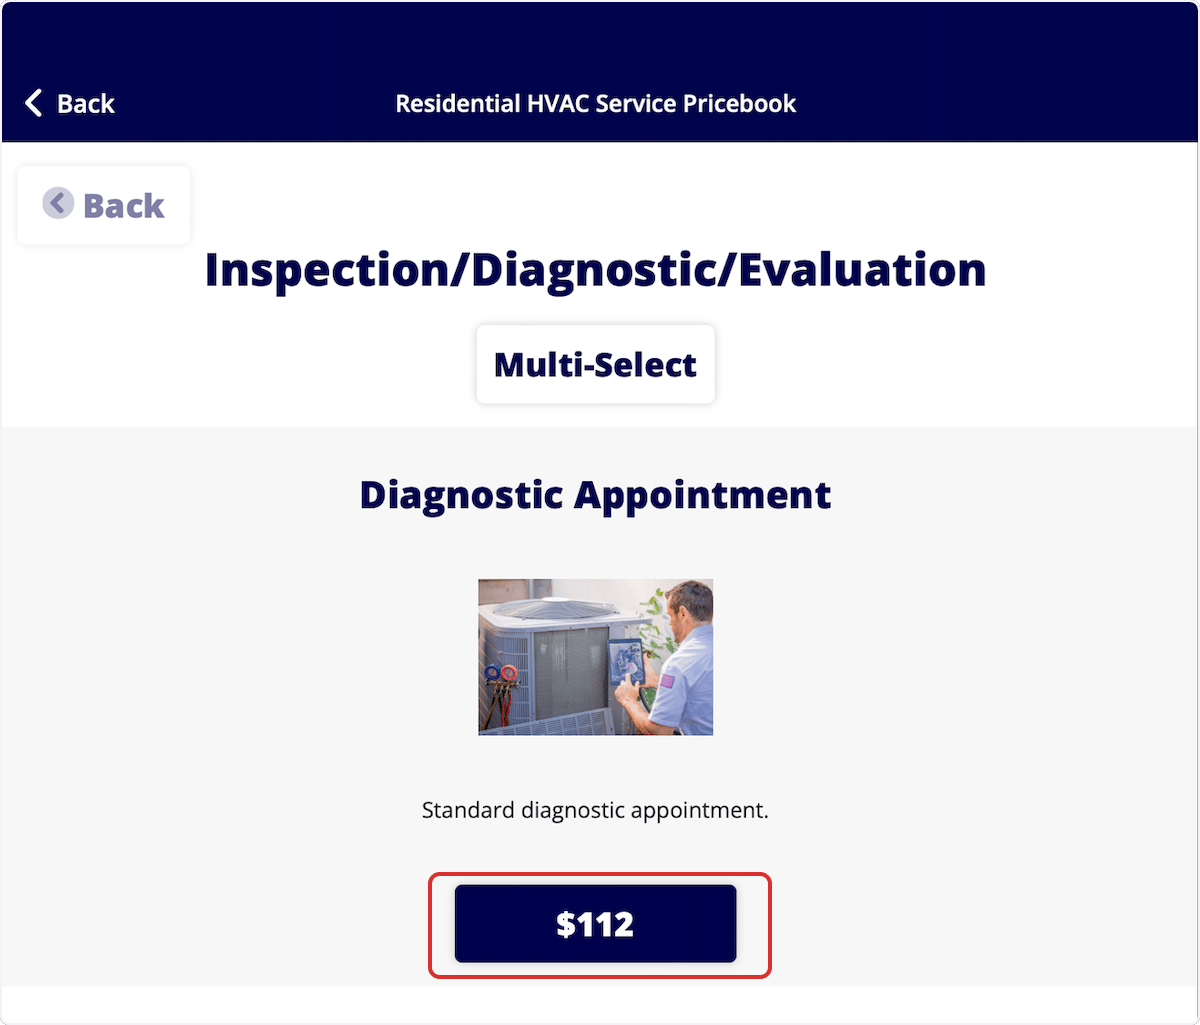
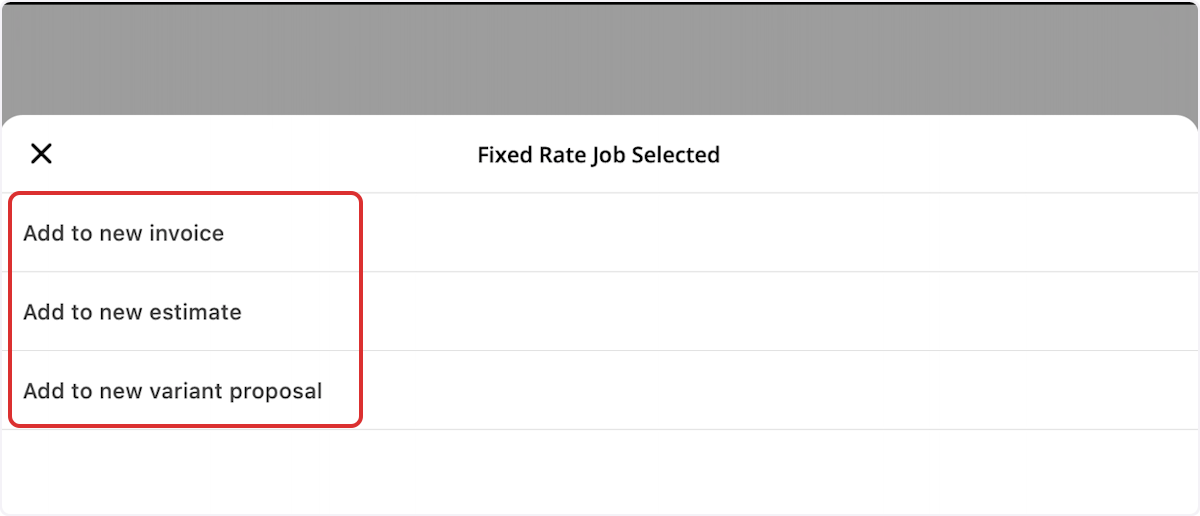
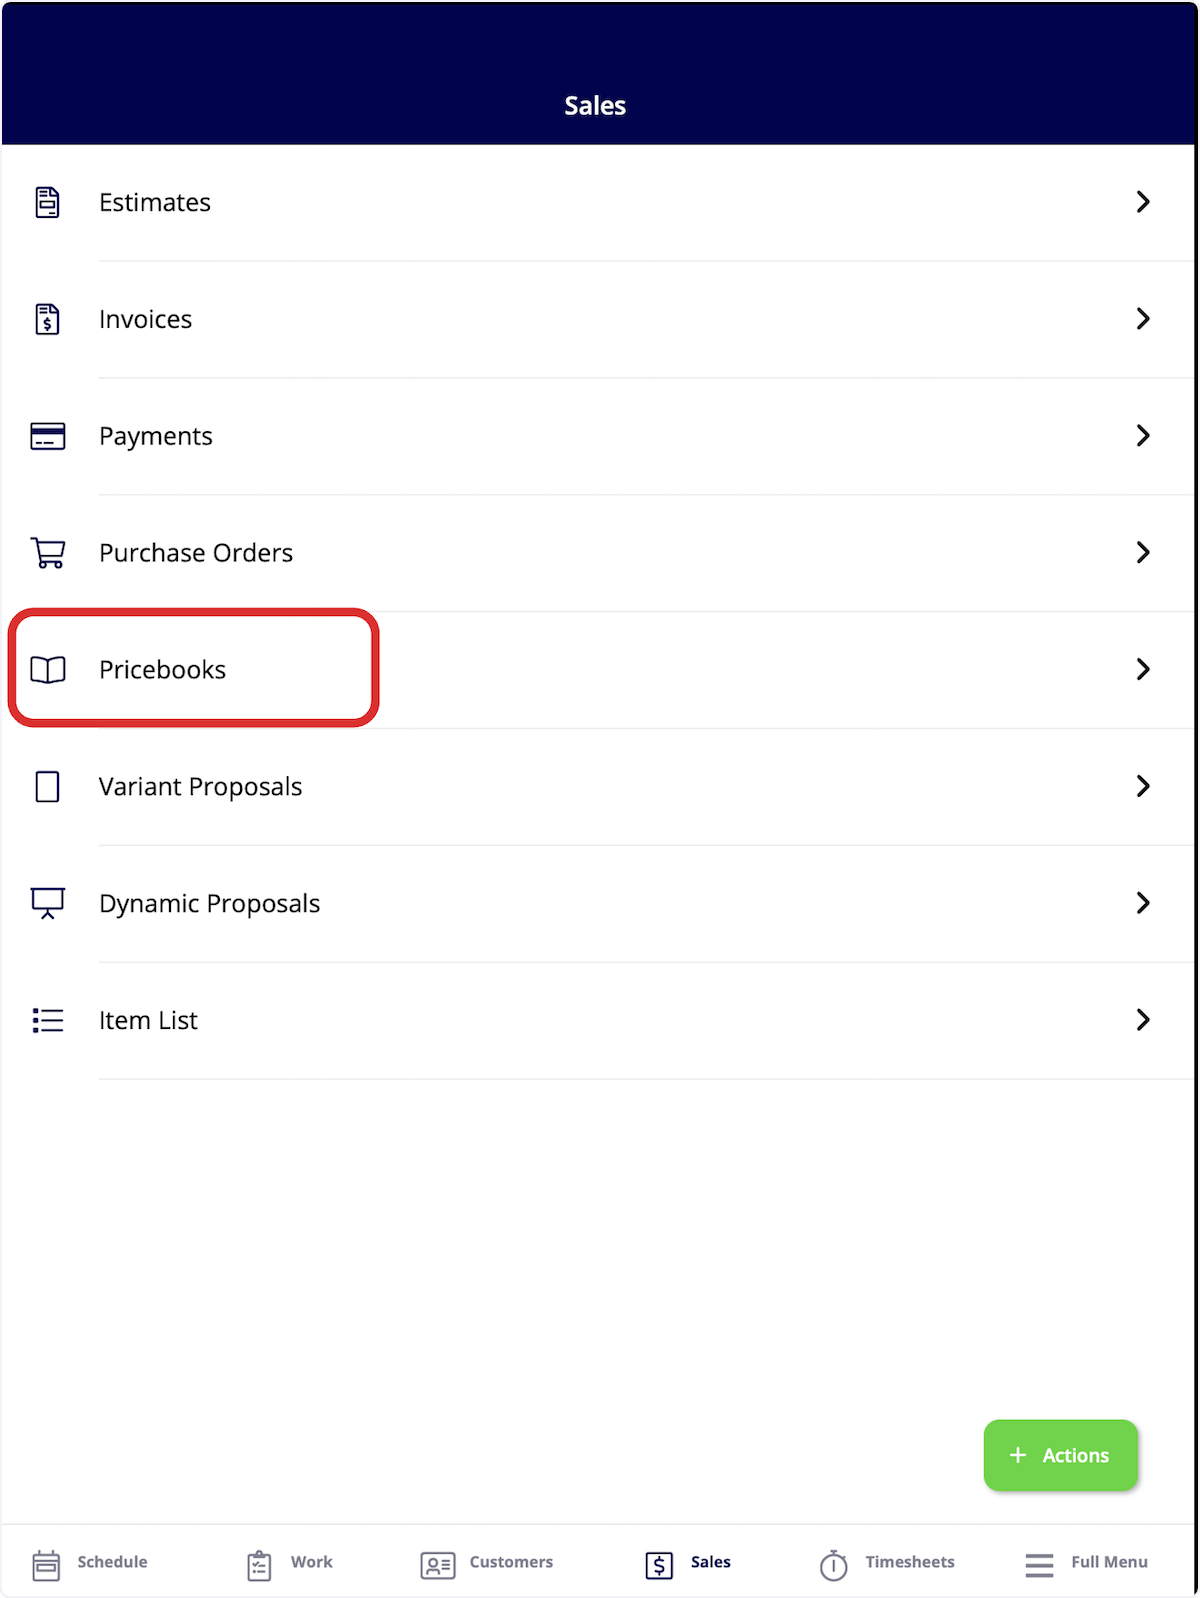
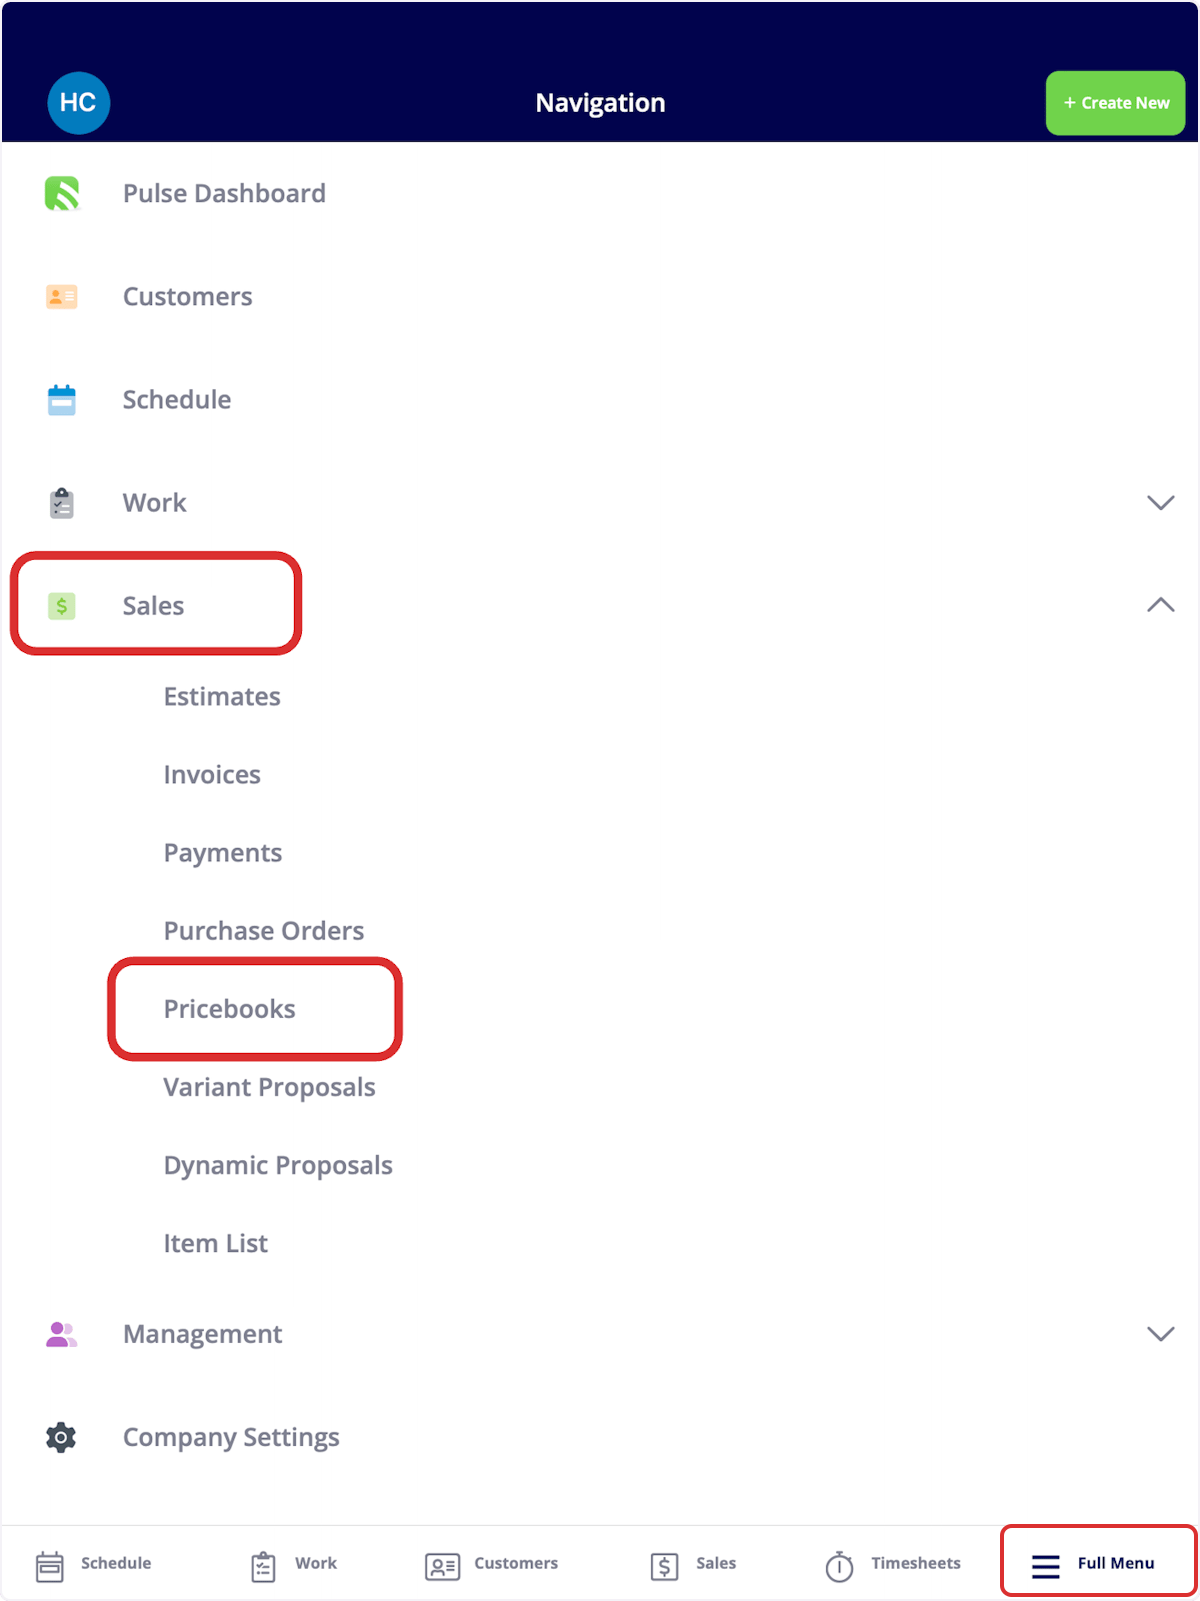
To begin, navigate to the Sales tab on the bottom of your screen and select Pricebooks. Untitled step Alternatively, you can select Full Menu > Sales > Pricebooks. Untitled step Once viewing your active pricebooks, click on the pricebook you’d like to use. Untitled step Select the category under which your desired job(s) are listed. At this point, click Multi-Select if you are selecting multiple flat-rate jobs from the Pricebook, or click the price listed if you are selecting a single flat-rate job. Untitled step FieldPulse will now present you with a few options: you can add your flat-rate job(s) to a new invoice, estimate, or variant proposal. For this example, we will select an invoice. Untitled step Once you select either invoice, estimate, or variant proposal, the pricing and item details will be auto-populated into your invoice/estimate/variant proposal! Simply add your customer details and any other key information you’d like to capture, then send it to your customer, show them on-site, or collect payment. Untitled step
Video Tutorials

Web App

Mobile


Have additional questions? Contact us at support@fieldpulse.com or use the chat feature in the bottom right corner of your screen.