
Who uses this: An Admin enables material lists for the account, then grants each user — Admin, Team Manager, Service Agent, or Limited Agent — access with the Is Material List Enabled? permission in Company Settings > User Accounts. Availability: All regions · included in the FieldPulse subscription, no add-on required.A material list records the materials a job needs and what the crew actually used, so a tech arrives with the right parts and nothing gets billed twice or missed. You build the list once against a customer, then move its items into an estimate or invoice, a purchase order, or a job instead of typing the same line items again.
Overview
A material list is a FieldPulse record that tracks what a job or project requires and how much of it the crew used. The level of detail is up to you. A list can stay narrow — only the items headed for the estimate or invoice — or cover the whole job: primary materials such as pipes, fittings, and fixtures; tools such as wrenches, pipe cutters, and plungers; consumables such as Teflon tape, sealants, and joint compound; and specialized equipment such as pipe inspection cameras or drain snakes. Material lists fit two common patterns:- A tech visits the site and lists everything the work needs, so your team knows exactly what to buy.
- Your office builds the estimate first, and the tech fills in the material list afterward with what the job needed or what was actually used.
Material lists work on the FieldPulse mobile app as well as on web. See How to Use Material Lists on the Mobile App for creating, viewing, and pinning lists from the field.
Video walkthrough
Watch the material lists in Offline Mode walkthrough for a run-through of building and editing a material list from the field with no signal. The written steps below cover every stage on their own.Before you begin
- Enable the feature. Material lists are off by default — an Admin turns them on for the account, and the steps are below.
- Have the customer ready. Every material list links to a customer. You can select an existing customer or create the customer while you build the list.
- Save your reusable items first. Items saved in your item list can be searched and added in a couple of clicks instead of typed from scratch — see Setting Up Item List & Inventory.
How it works
Material lists follow one path: enable the feature, create a list against a customer, fill it with line items, then move those items onto the records that need them — an estimate, an invoice, a purchase order, or a job. The sections below walk through each stage, then cover templates, printing, permissions, and offline use.Enable material lists
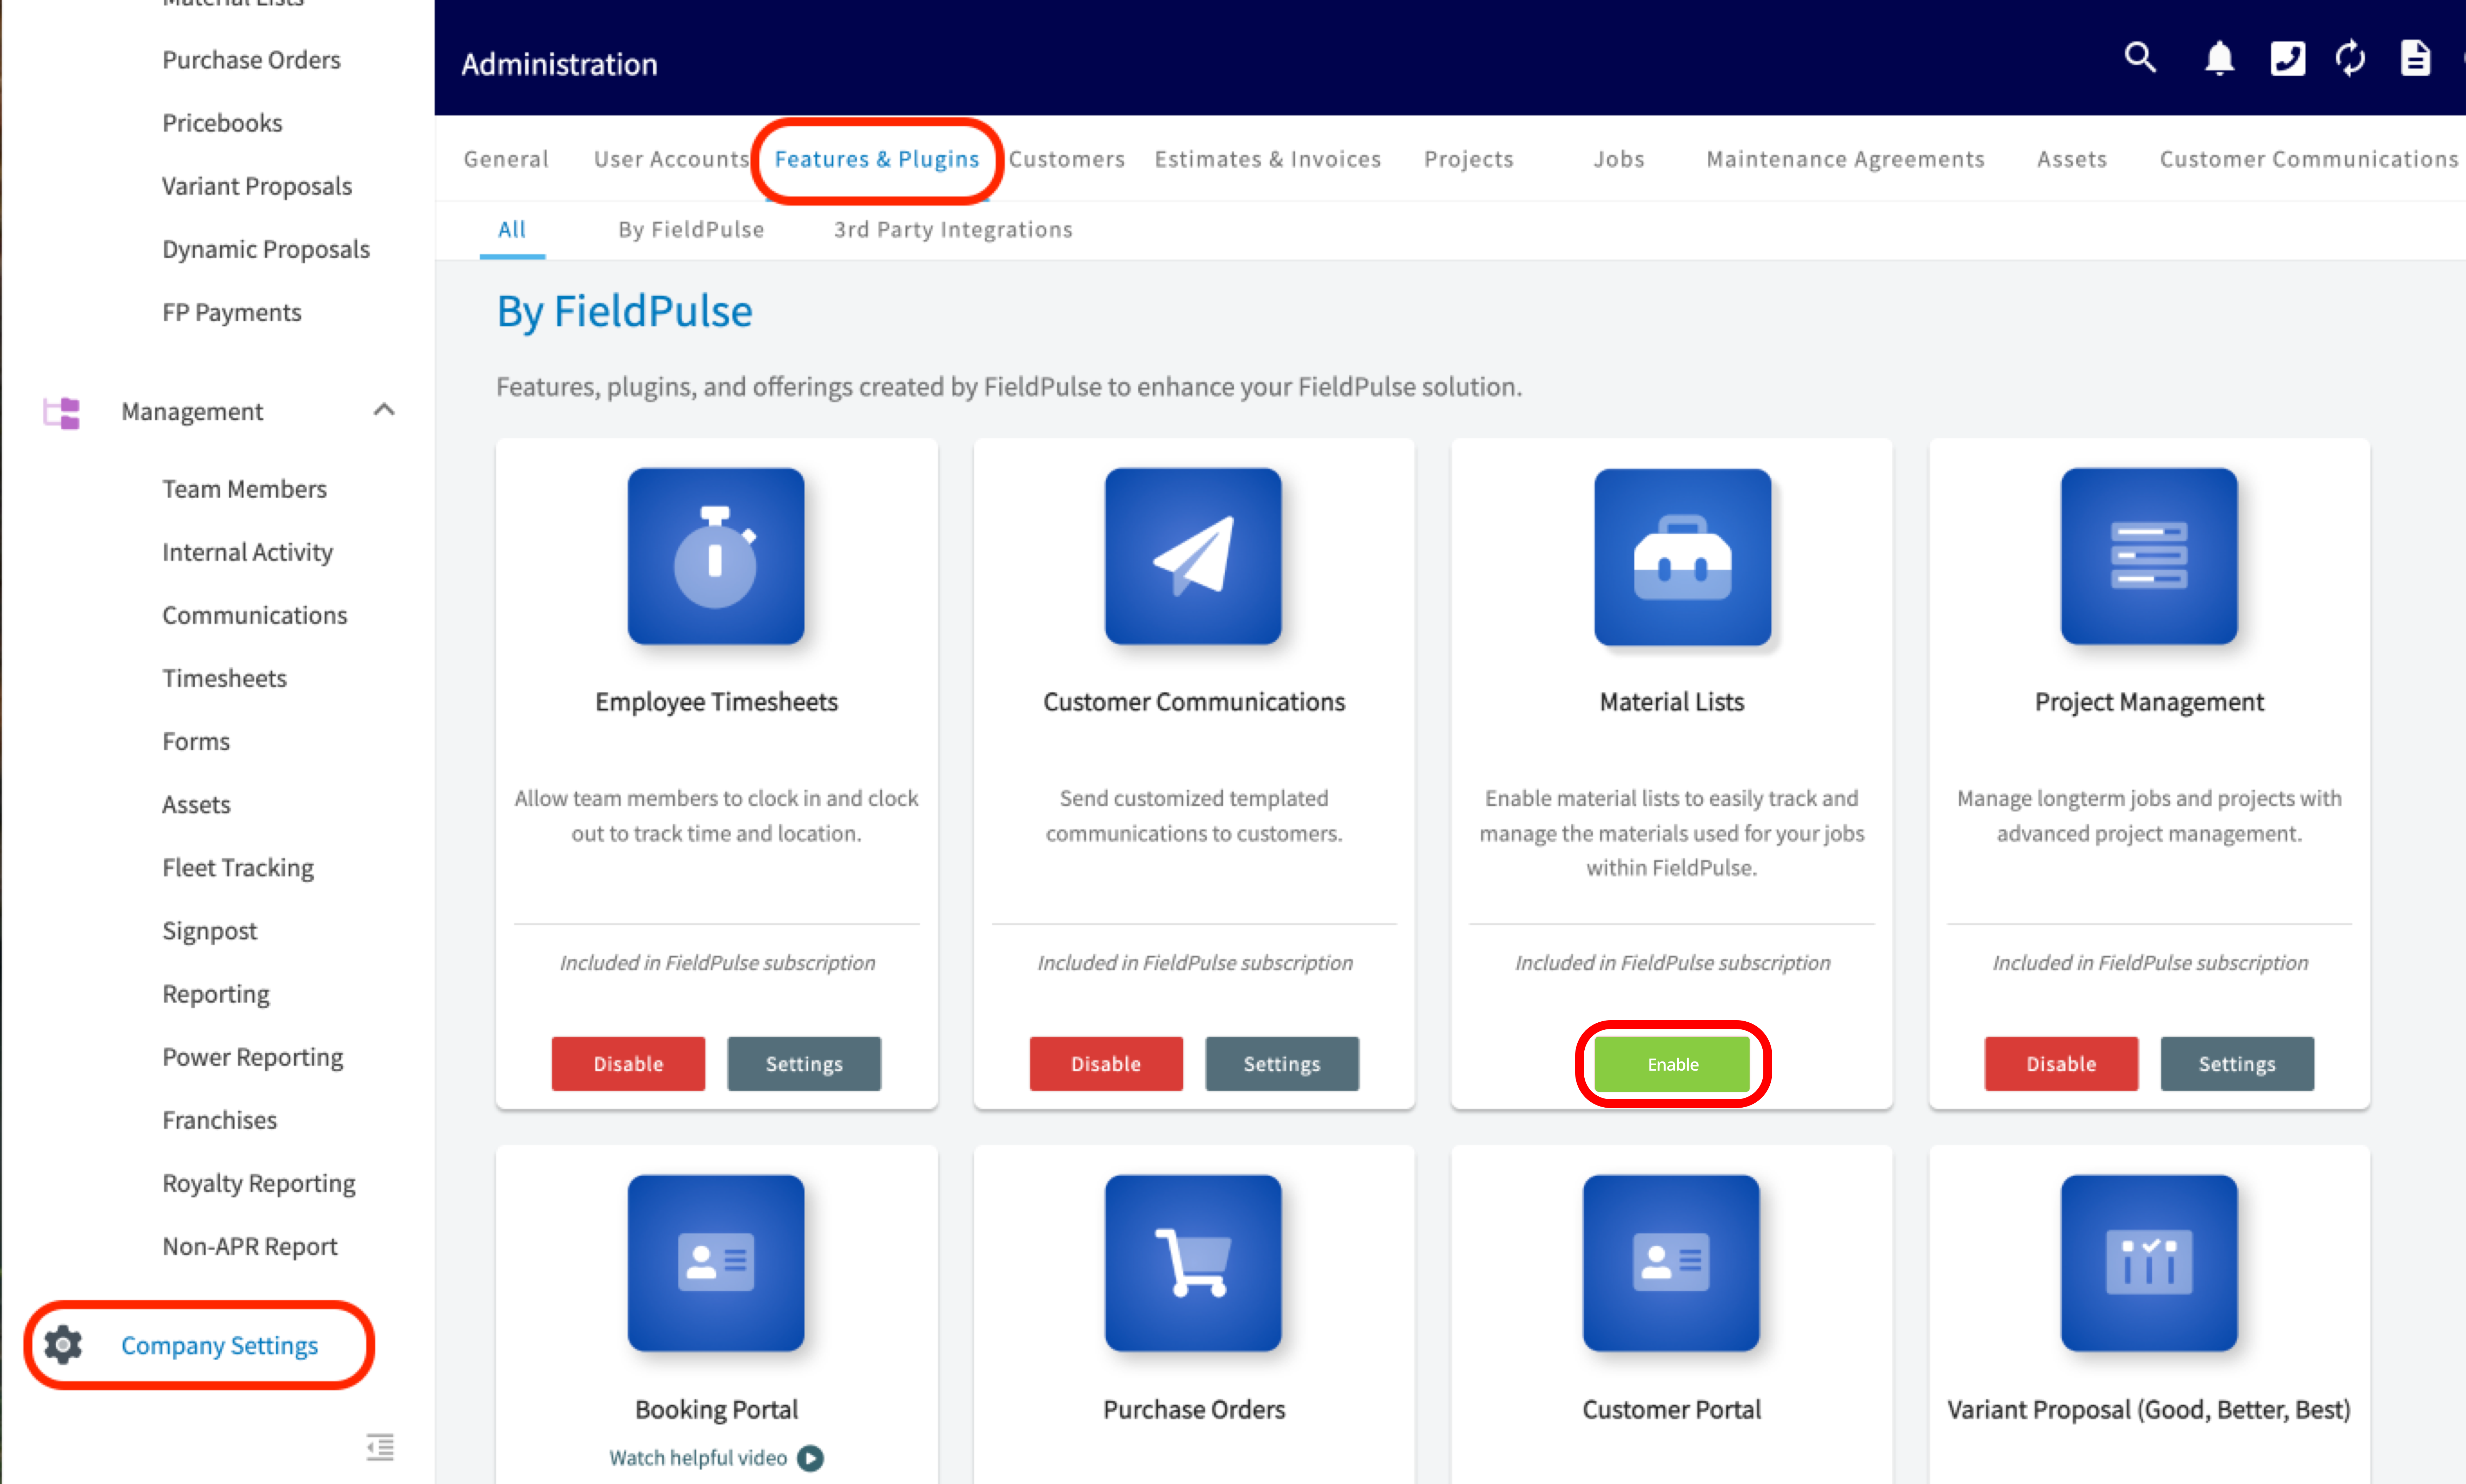
- Select Company Settings in the left menu.
- Select Features & Plugins.
-
Find the Material Lists card and select Enable.
Create a material list
-
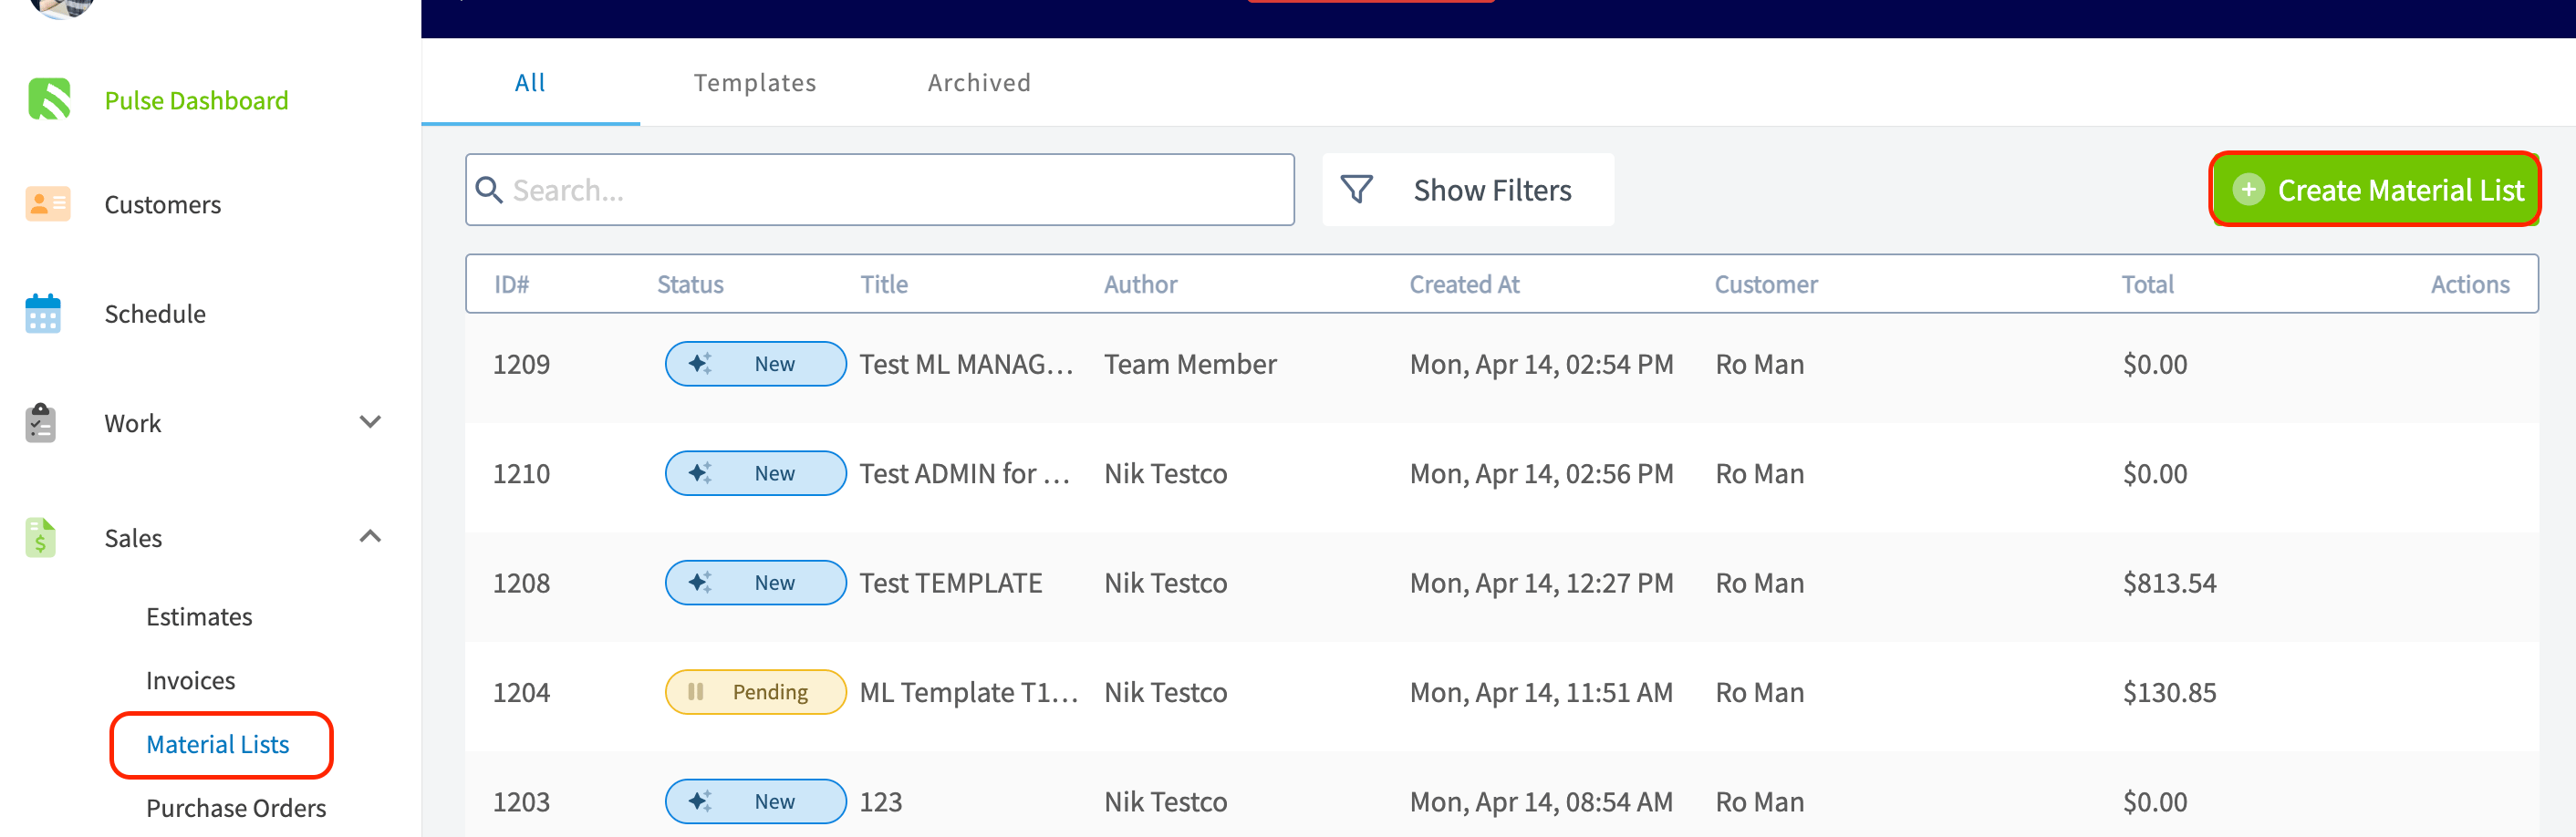
Select Material Lists under Sales in the left menu, then select the green Create Material List button.
- To start from a saved layout instead of a blank list, select Import Template and choose a template.
-
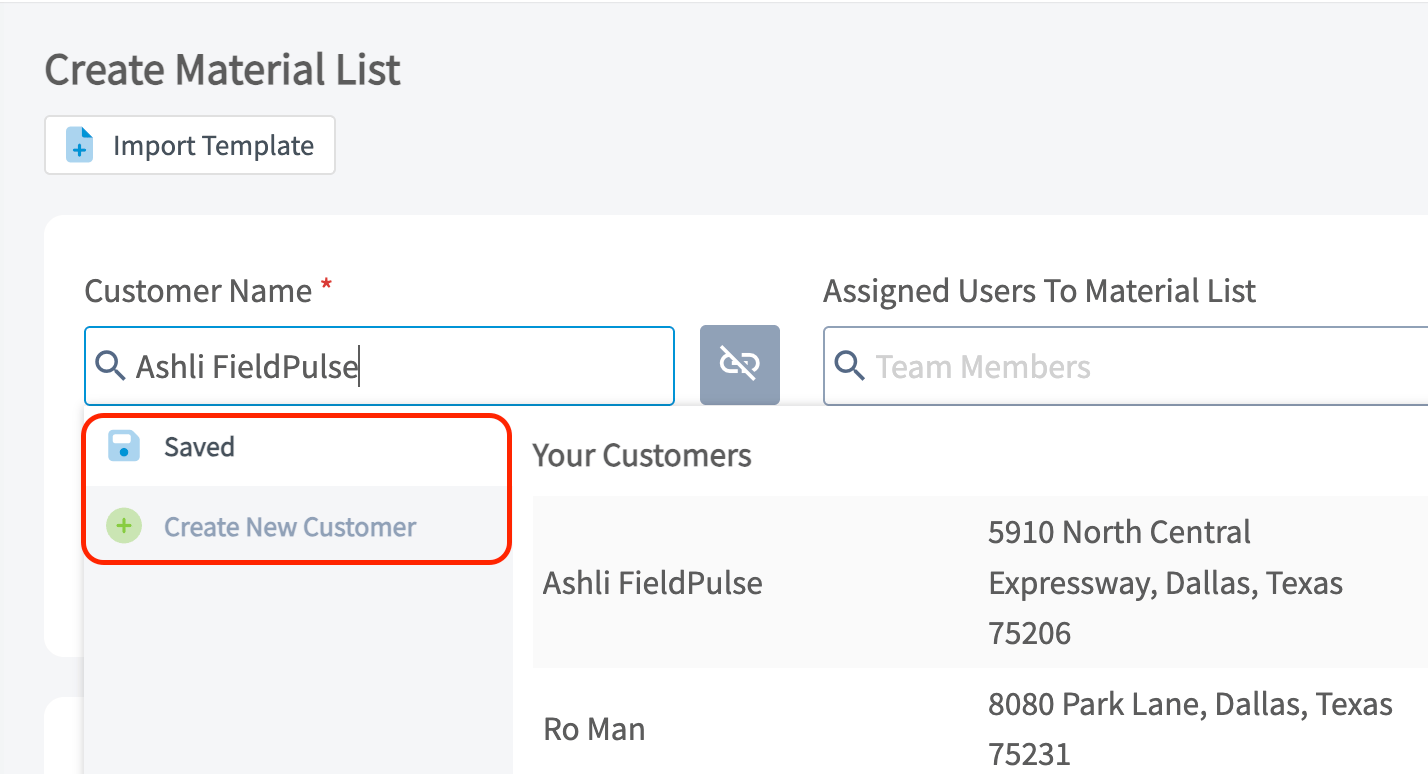
Link a customer. Search the Customer Name field and select a saved customer, or select Create New Customer.
-
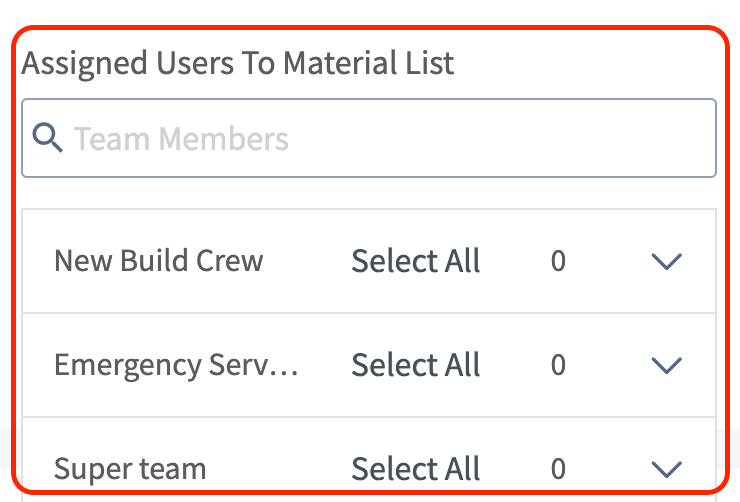
Assign the list to individual users or to teams from the Assigned Users To Material List field.
-
Give the list a unique Title, and select a Status Workflow if your account uses them. Material list statuses are internal — a customer never sees a material list — and each material list workflow is built in Company Settings > Material Lists > Custom Status. See Workflow Design Overview for how statuses are built.
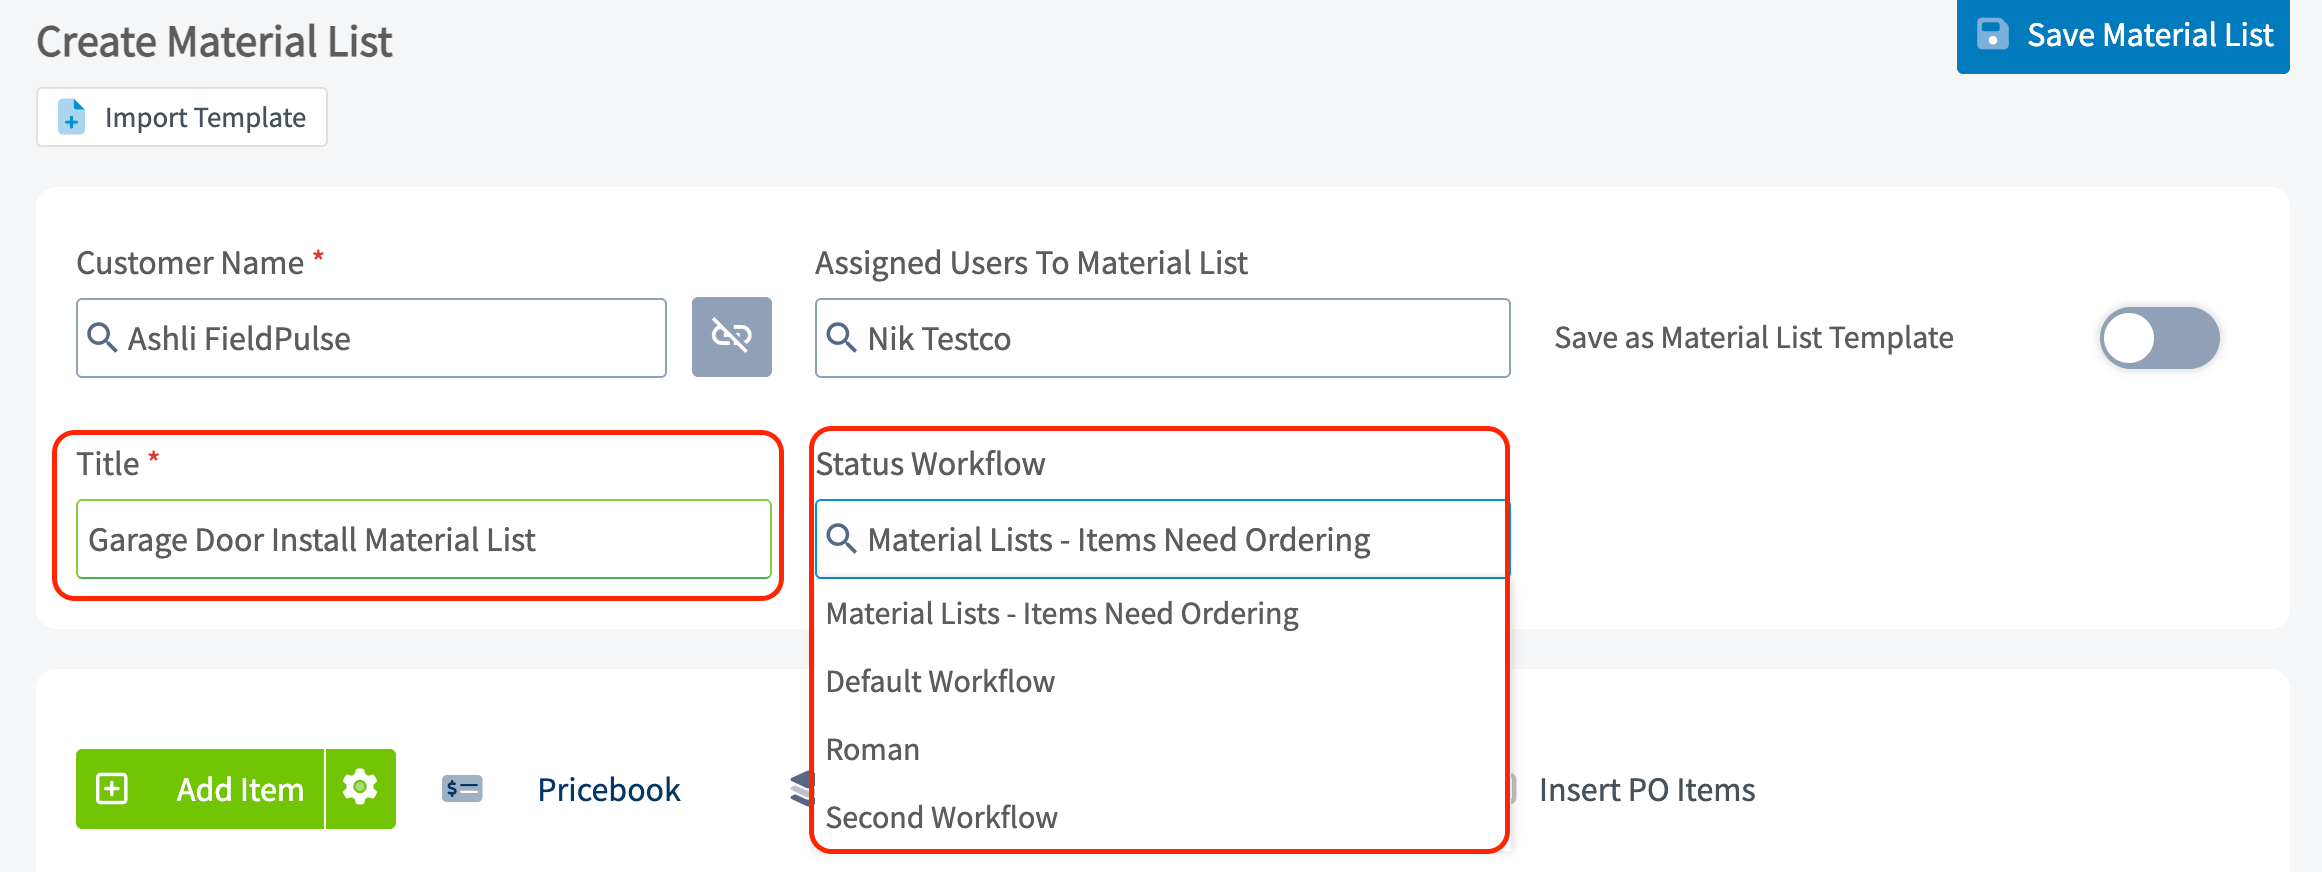
- Add line items, tags, and notes as described below, then select Save Material List.
Add line items
Line items are the materials, tools, and consumables that make up the list.-
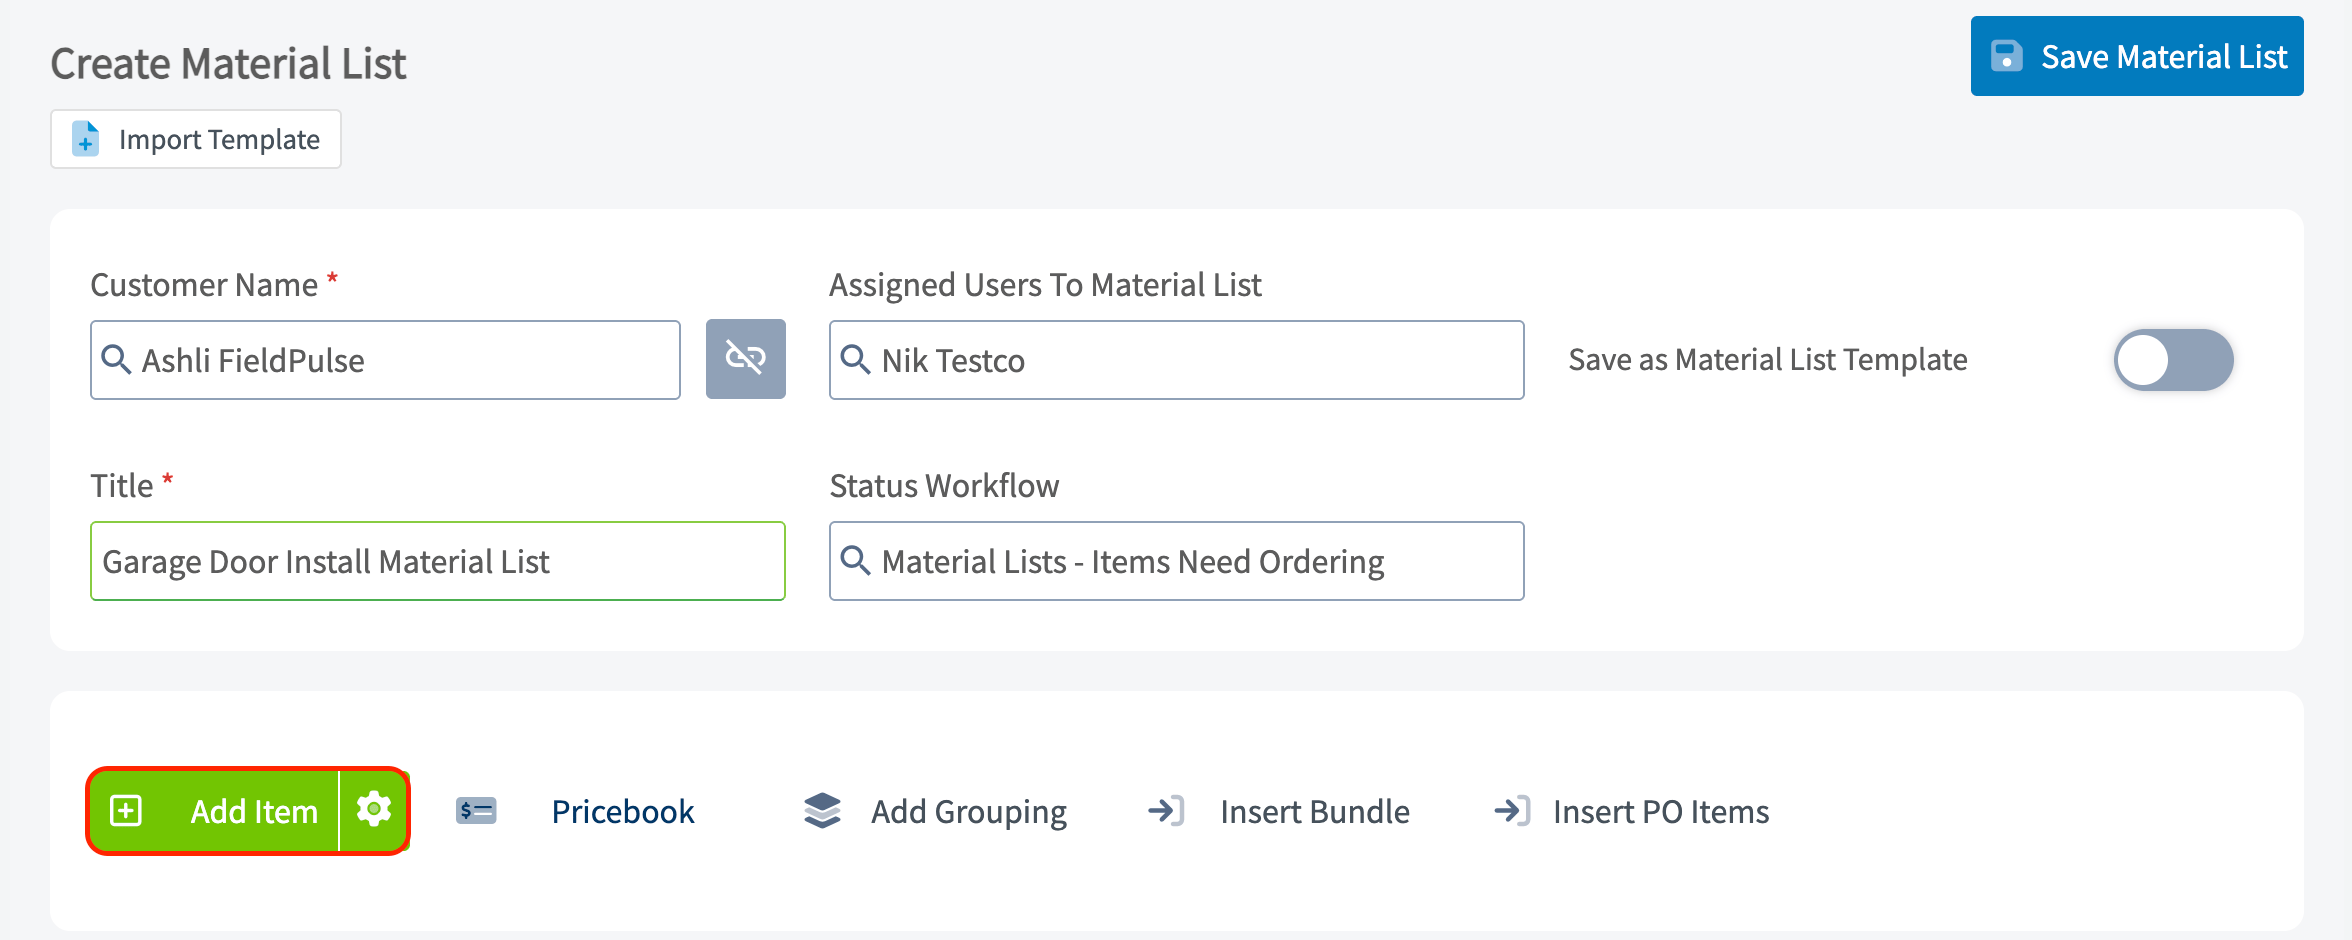
Select the green Add Item button. A panel opens on the right side of the screen. The same row also offers Pricebook, Add Grouping for organizing items into groups, Insert Bundle, and Insert PO Items.
-
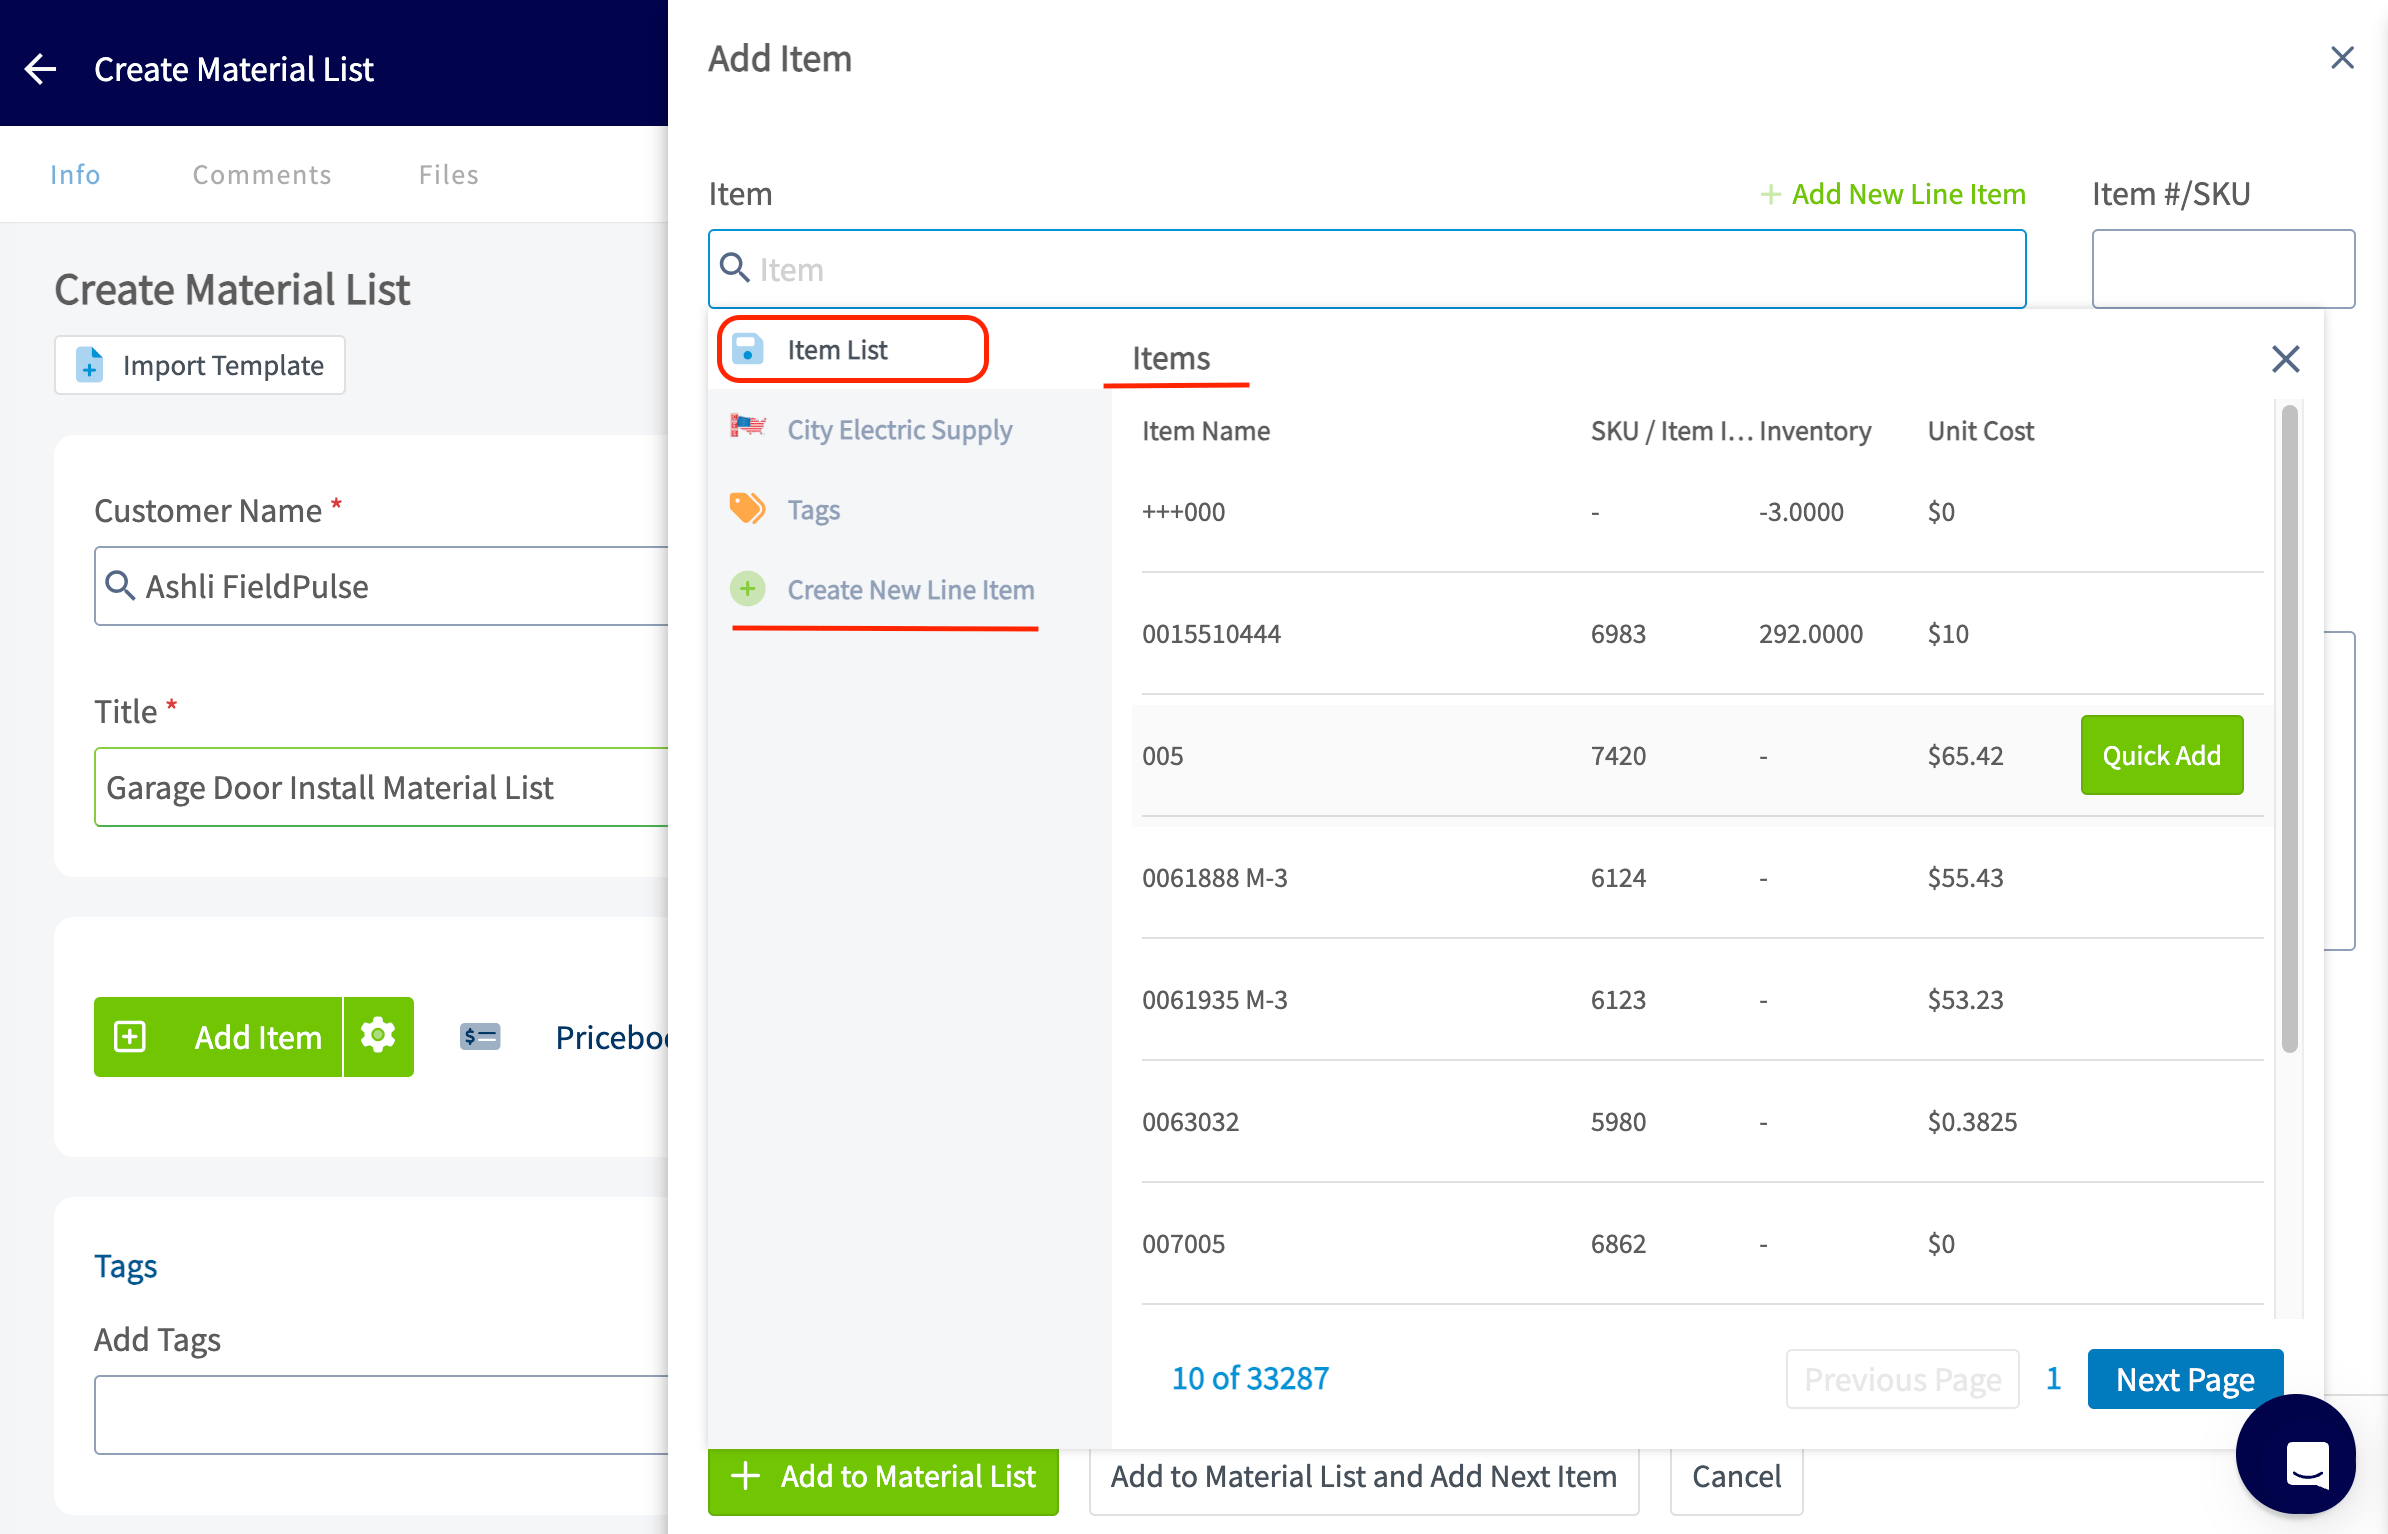
To add an item you already saved, search your item list in the panel and select the item.
-
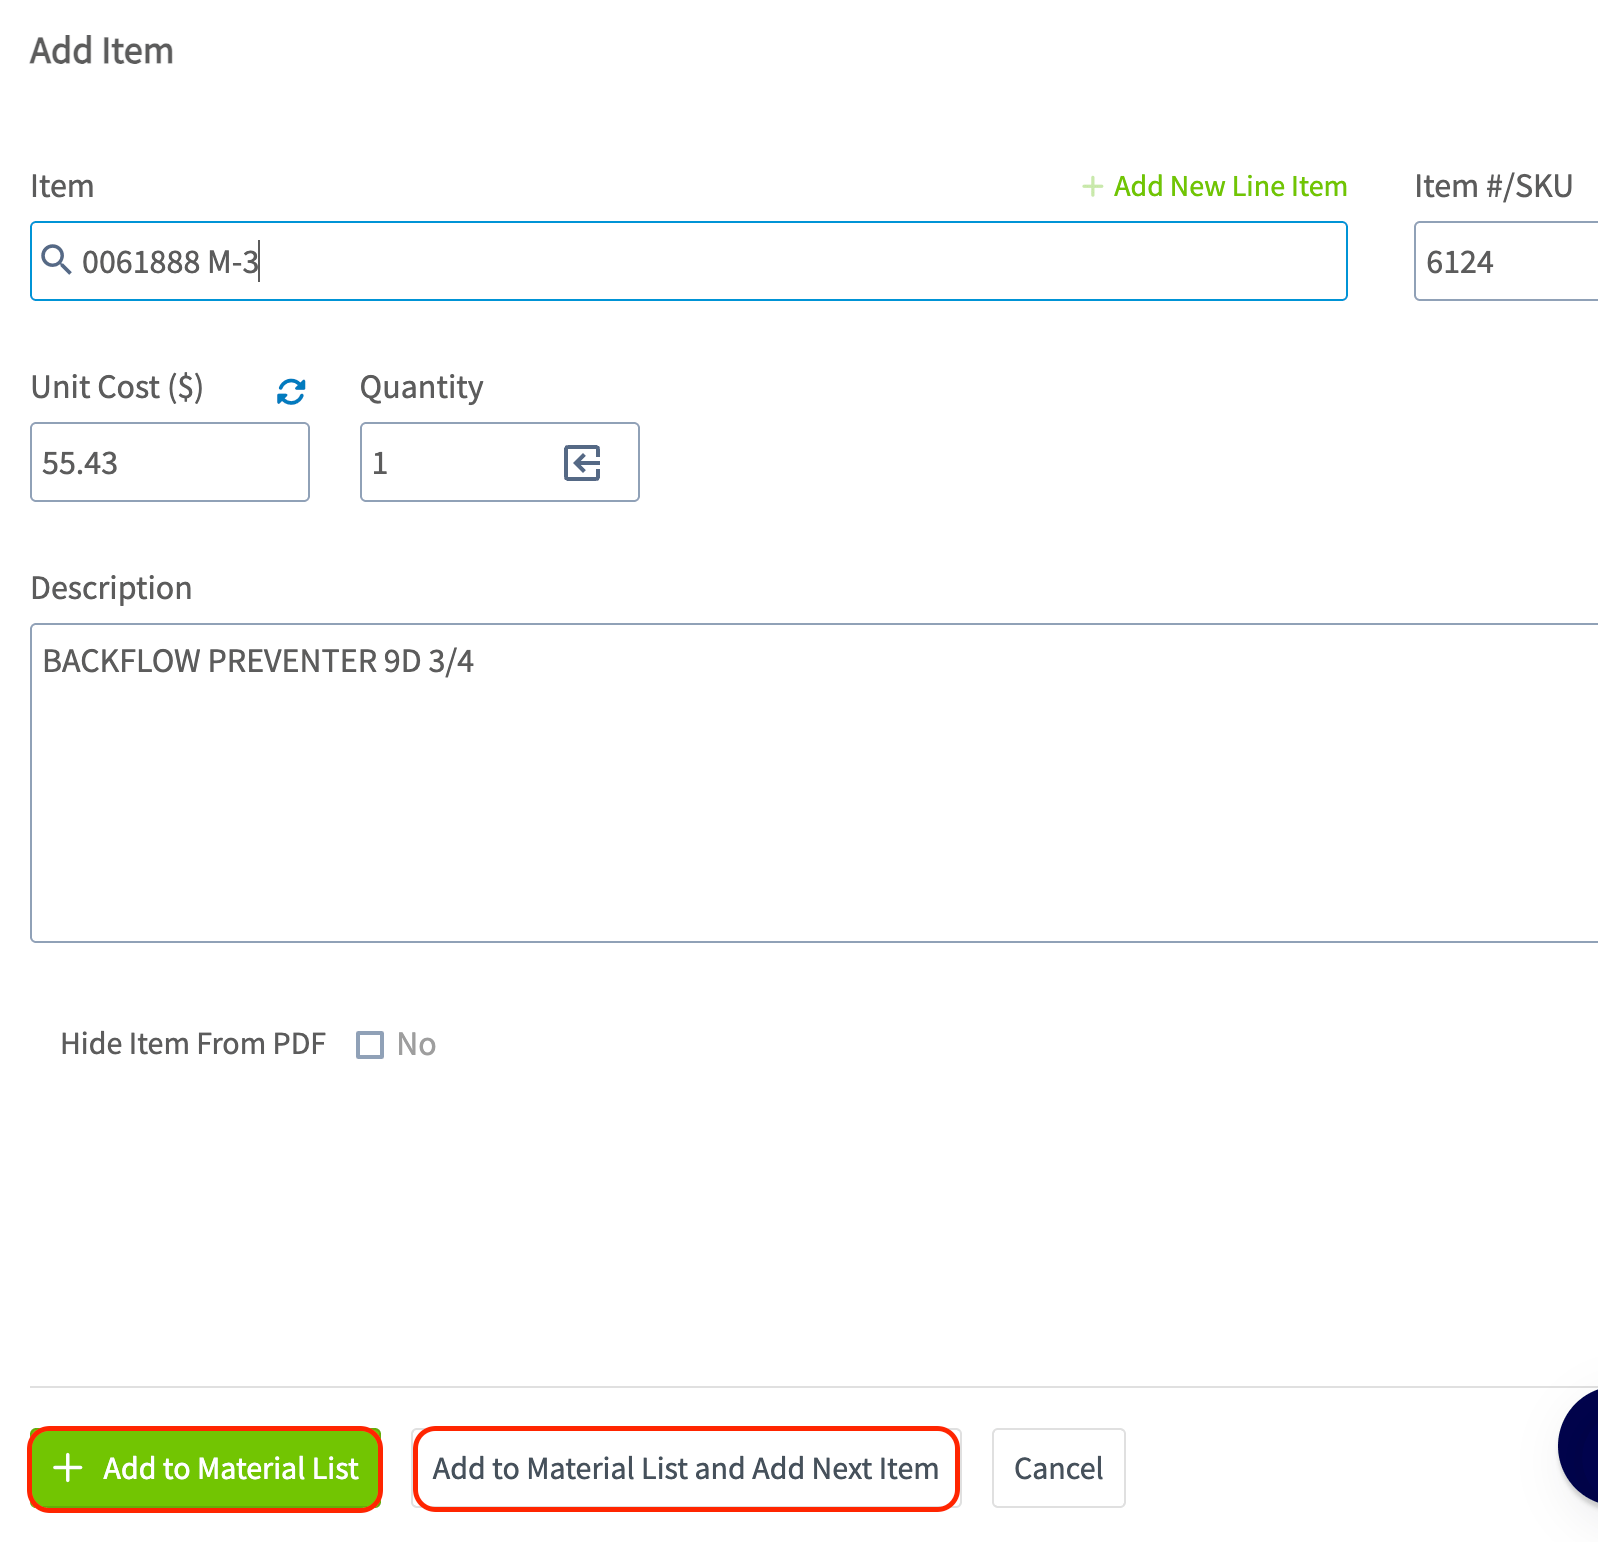
Select Add to Material List and Add Next Item to keep adding, or Add to Material List if it is the last one.
- To create an item that is not saved yet, select Add New Line Item in the panel and fill in its details. The line-item form matches the one on an estimate — see the Line items section of How to Create an Estimate for how to build a new line item.
Add tags, notes, and files
-
Add tags so you can filter or report on the list later. Search for an existing tag, or type a new one and press Enter to create it.

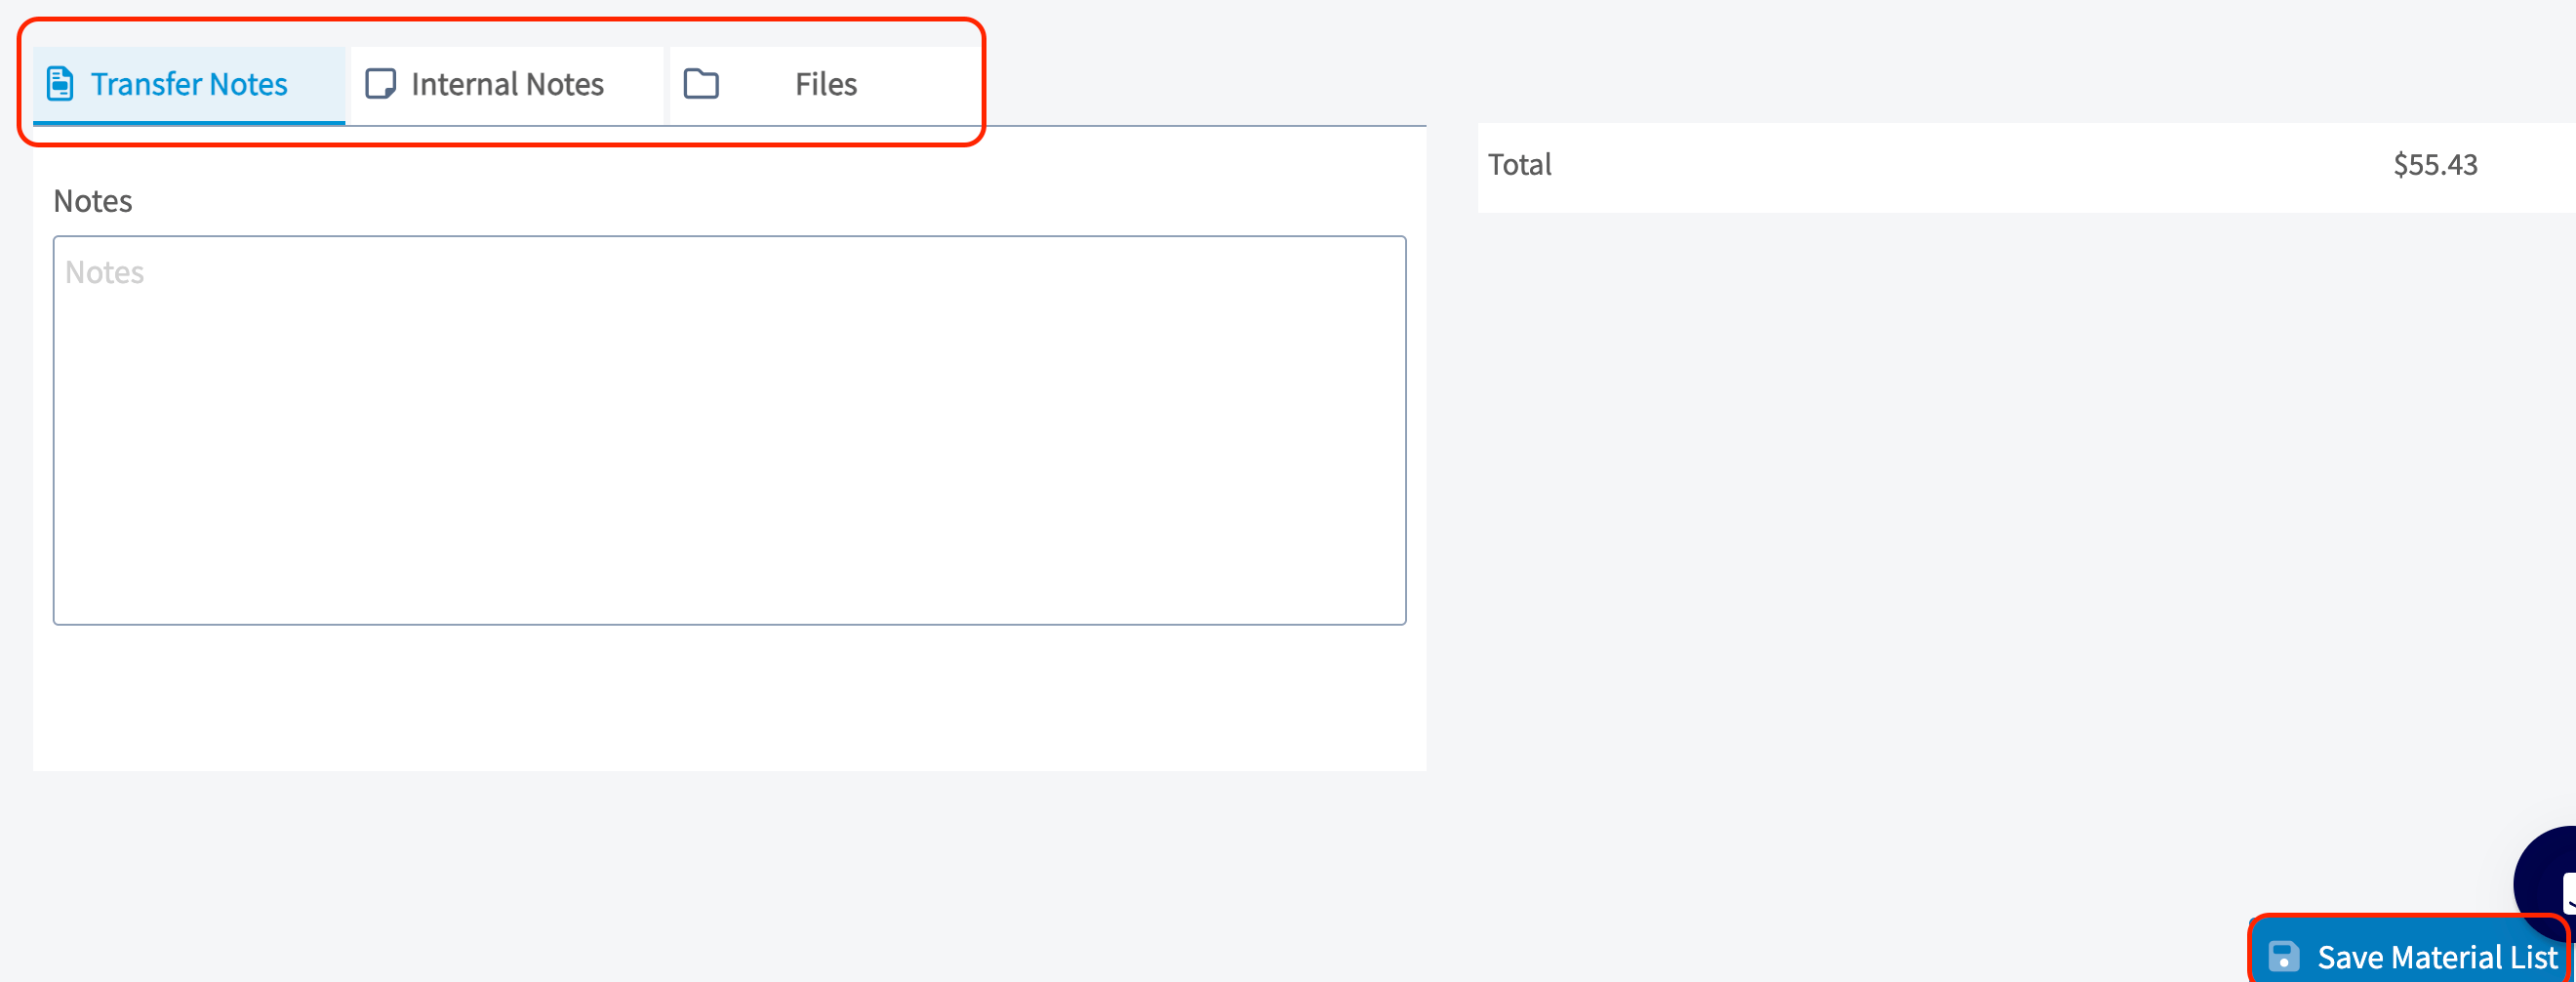
- Enter notes in Internal Notes or Transfer Notes. Notes in Transfer Notes carry over to any related record the material list is attached to; internal notes stay on the material list.
- Attach any relevant files from the Files tab.
-
Select the blue Save Material List button.
Save and reuse a material list template
A material list template is a saved list you can insert on any job, project, purchase order, estimate, or invoice, so a recurring job type does not get rebuilt from scratch each time. To save a list as a template, toggle on Save as Material List Template while you create it.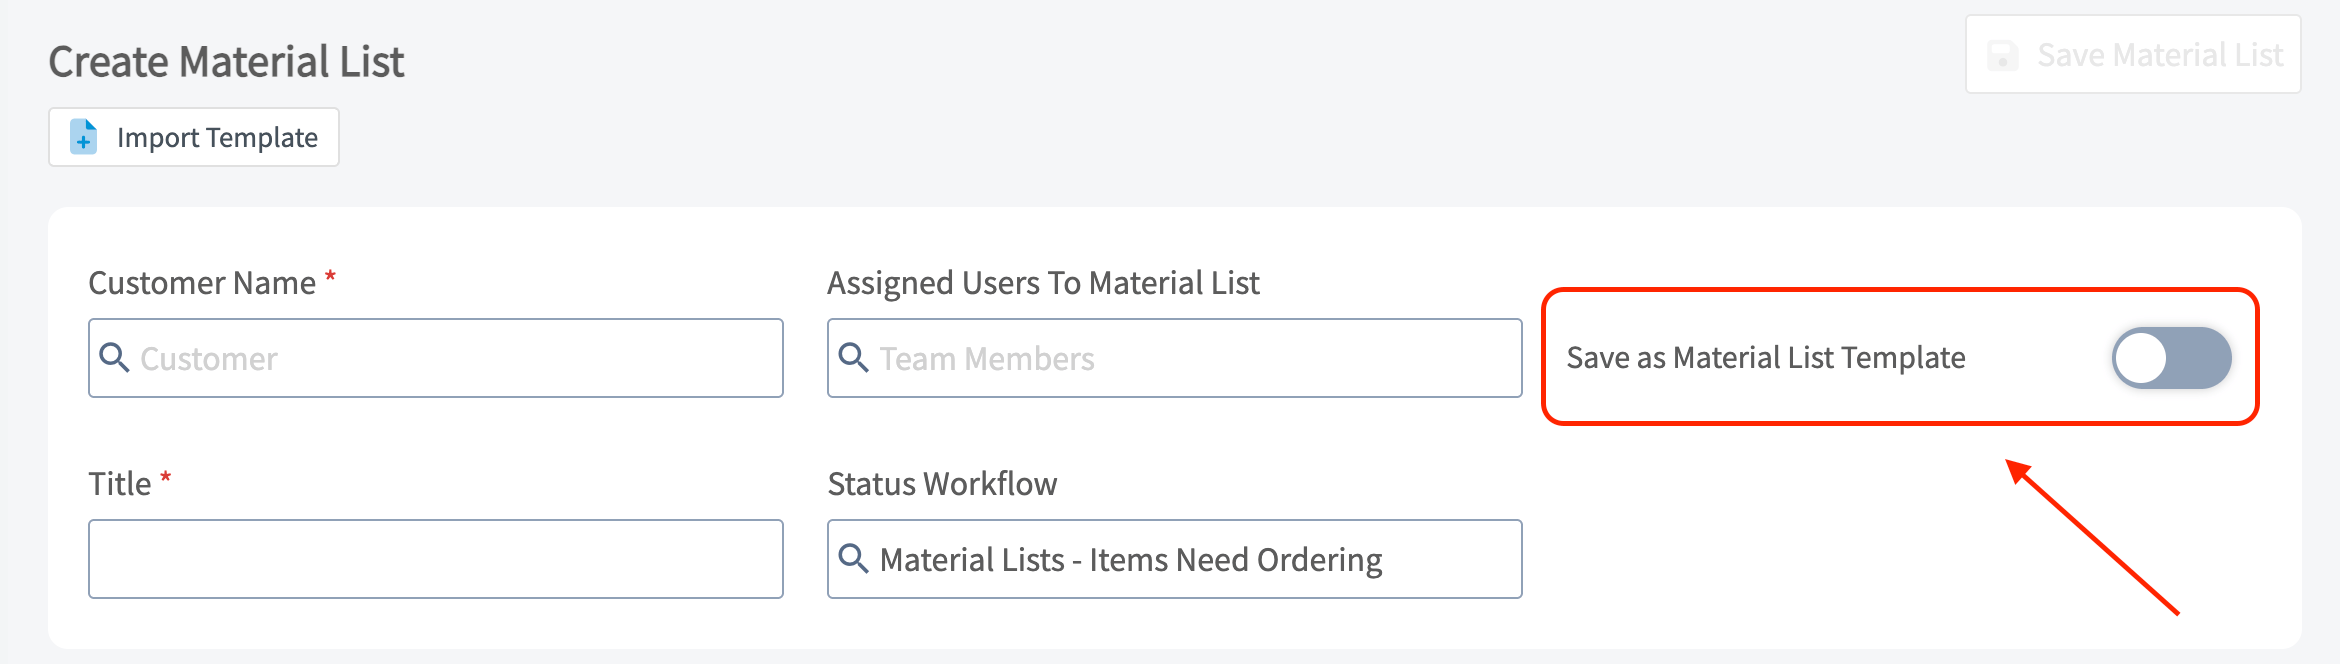
-
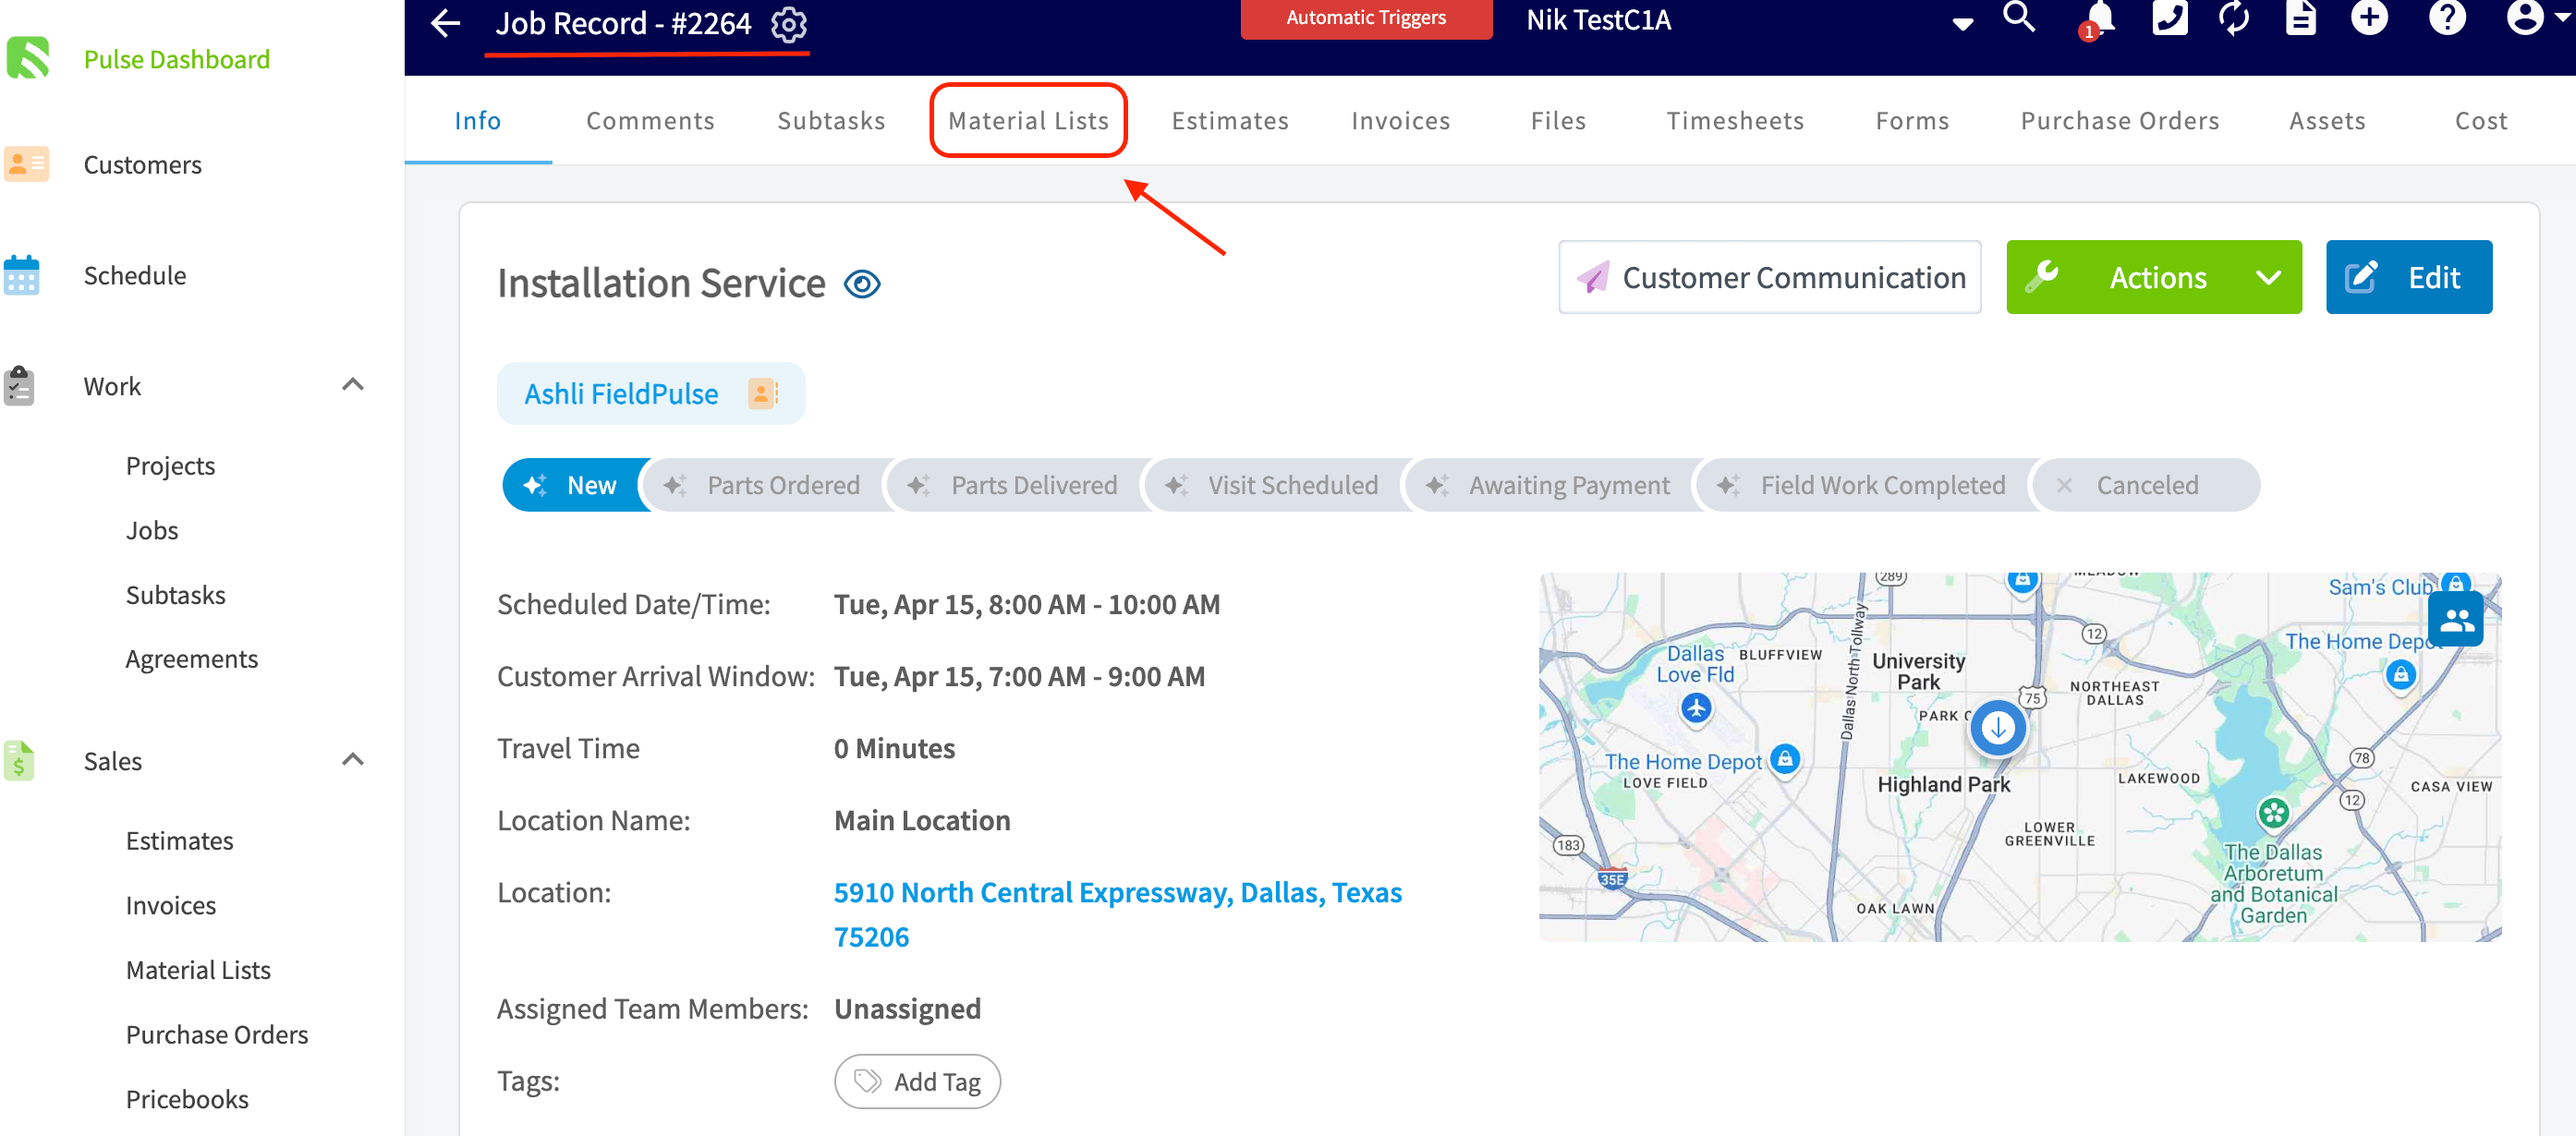
Open the job record and select the Material Lists subtab at the top.
-
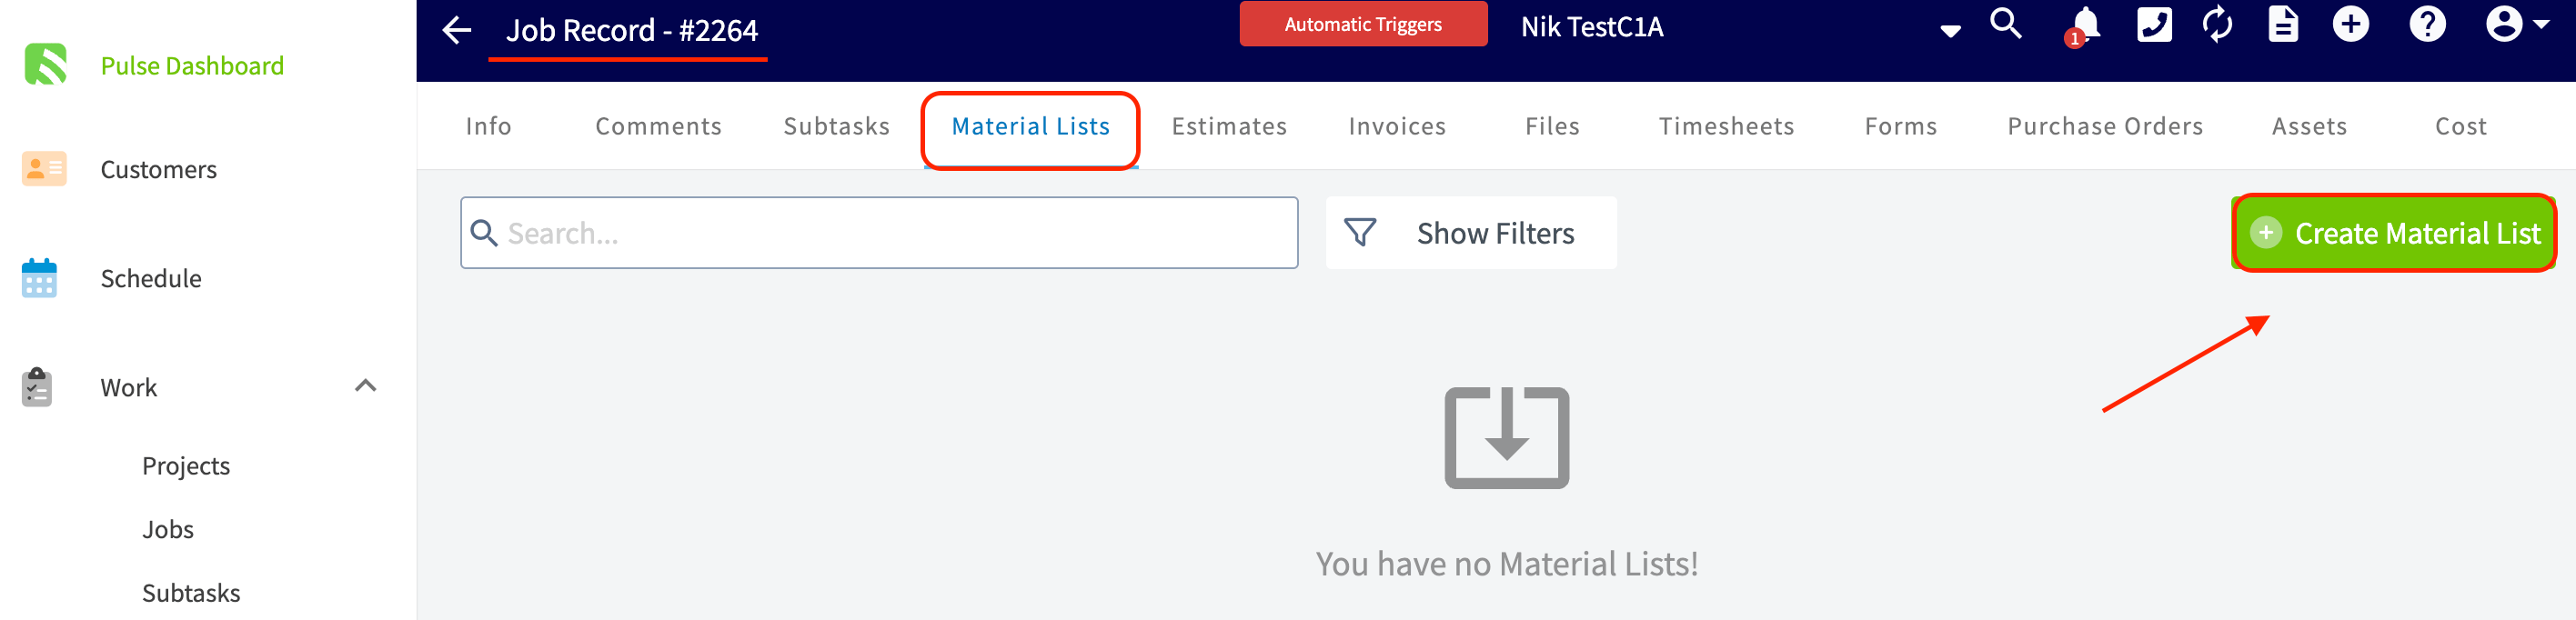
Select the green Create Material List button.
-
Select the Import Template button near the top left of the screen.
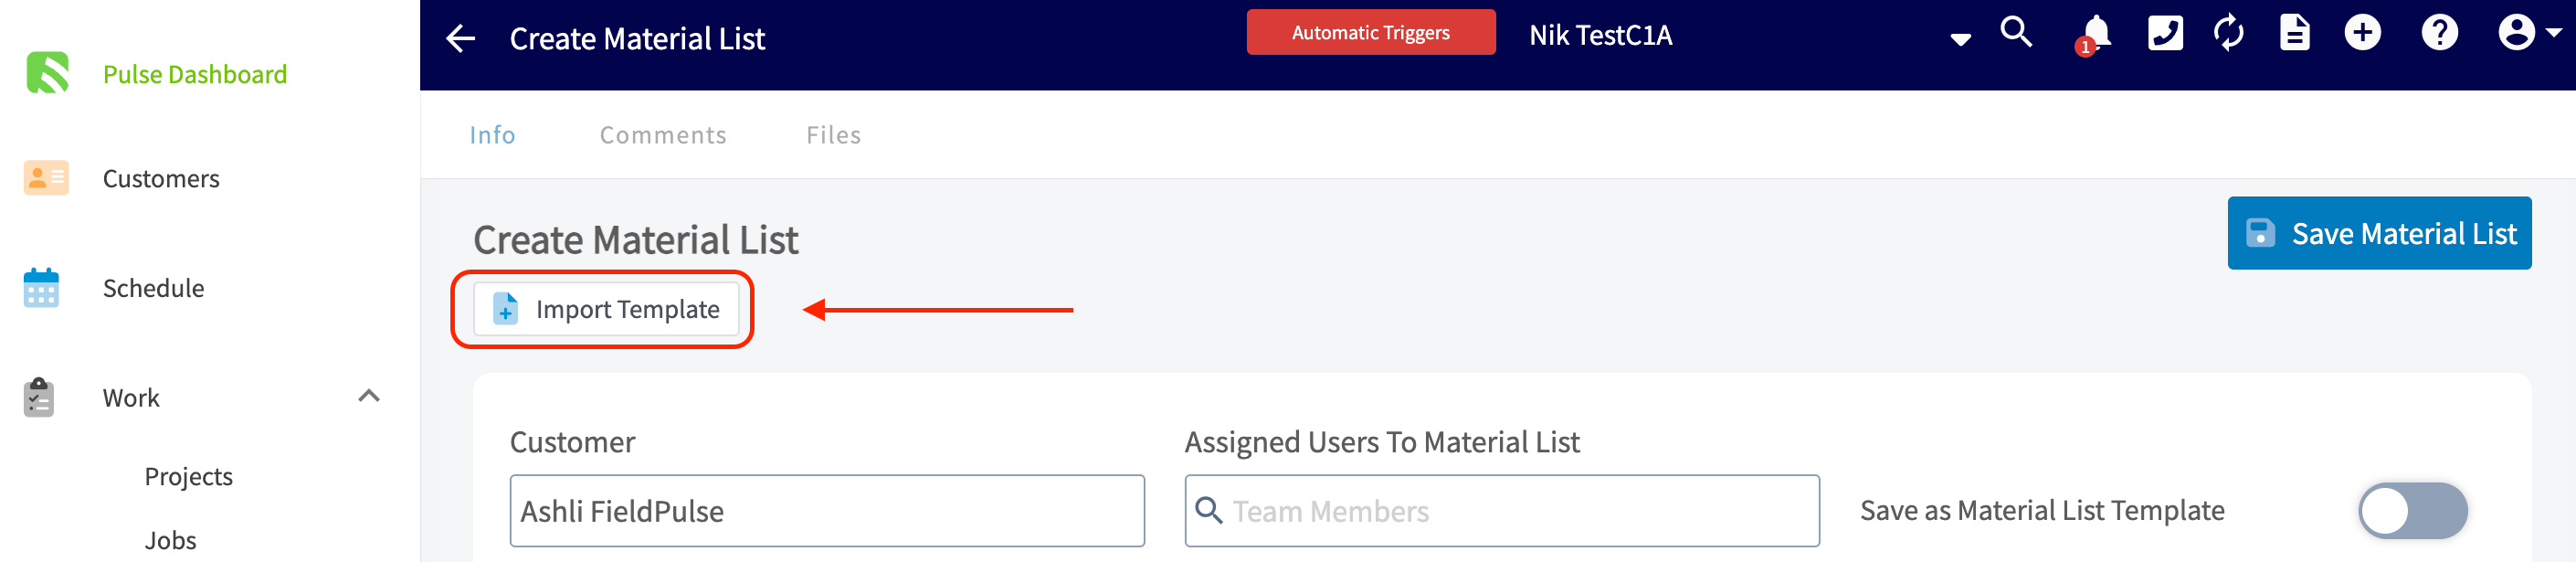
- Choose the template from the dropdown, make any changes or additions, then select the blue Save button.
Add material list items to a new record
From a saved material list, select Add Items to New and choose the record type: Estimate, Invoice, Purchase Order, Material List, or Job.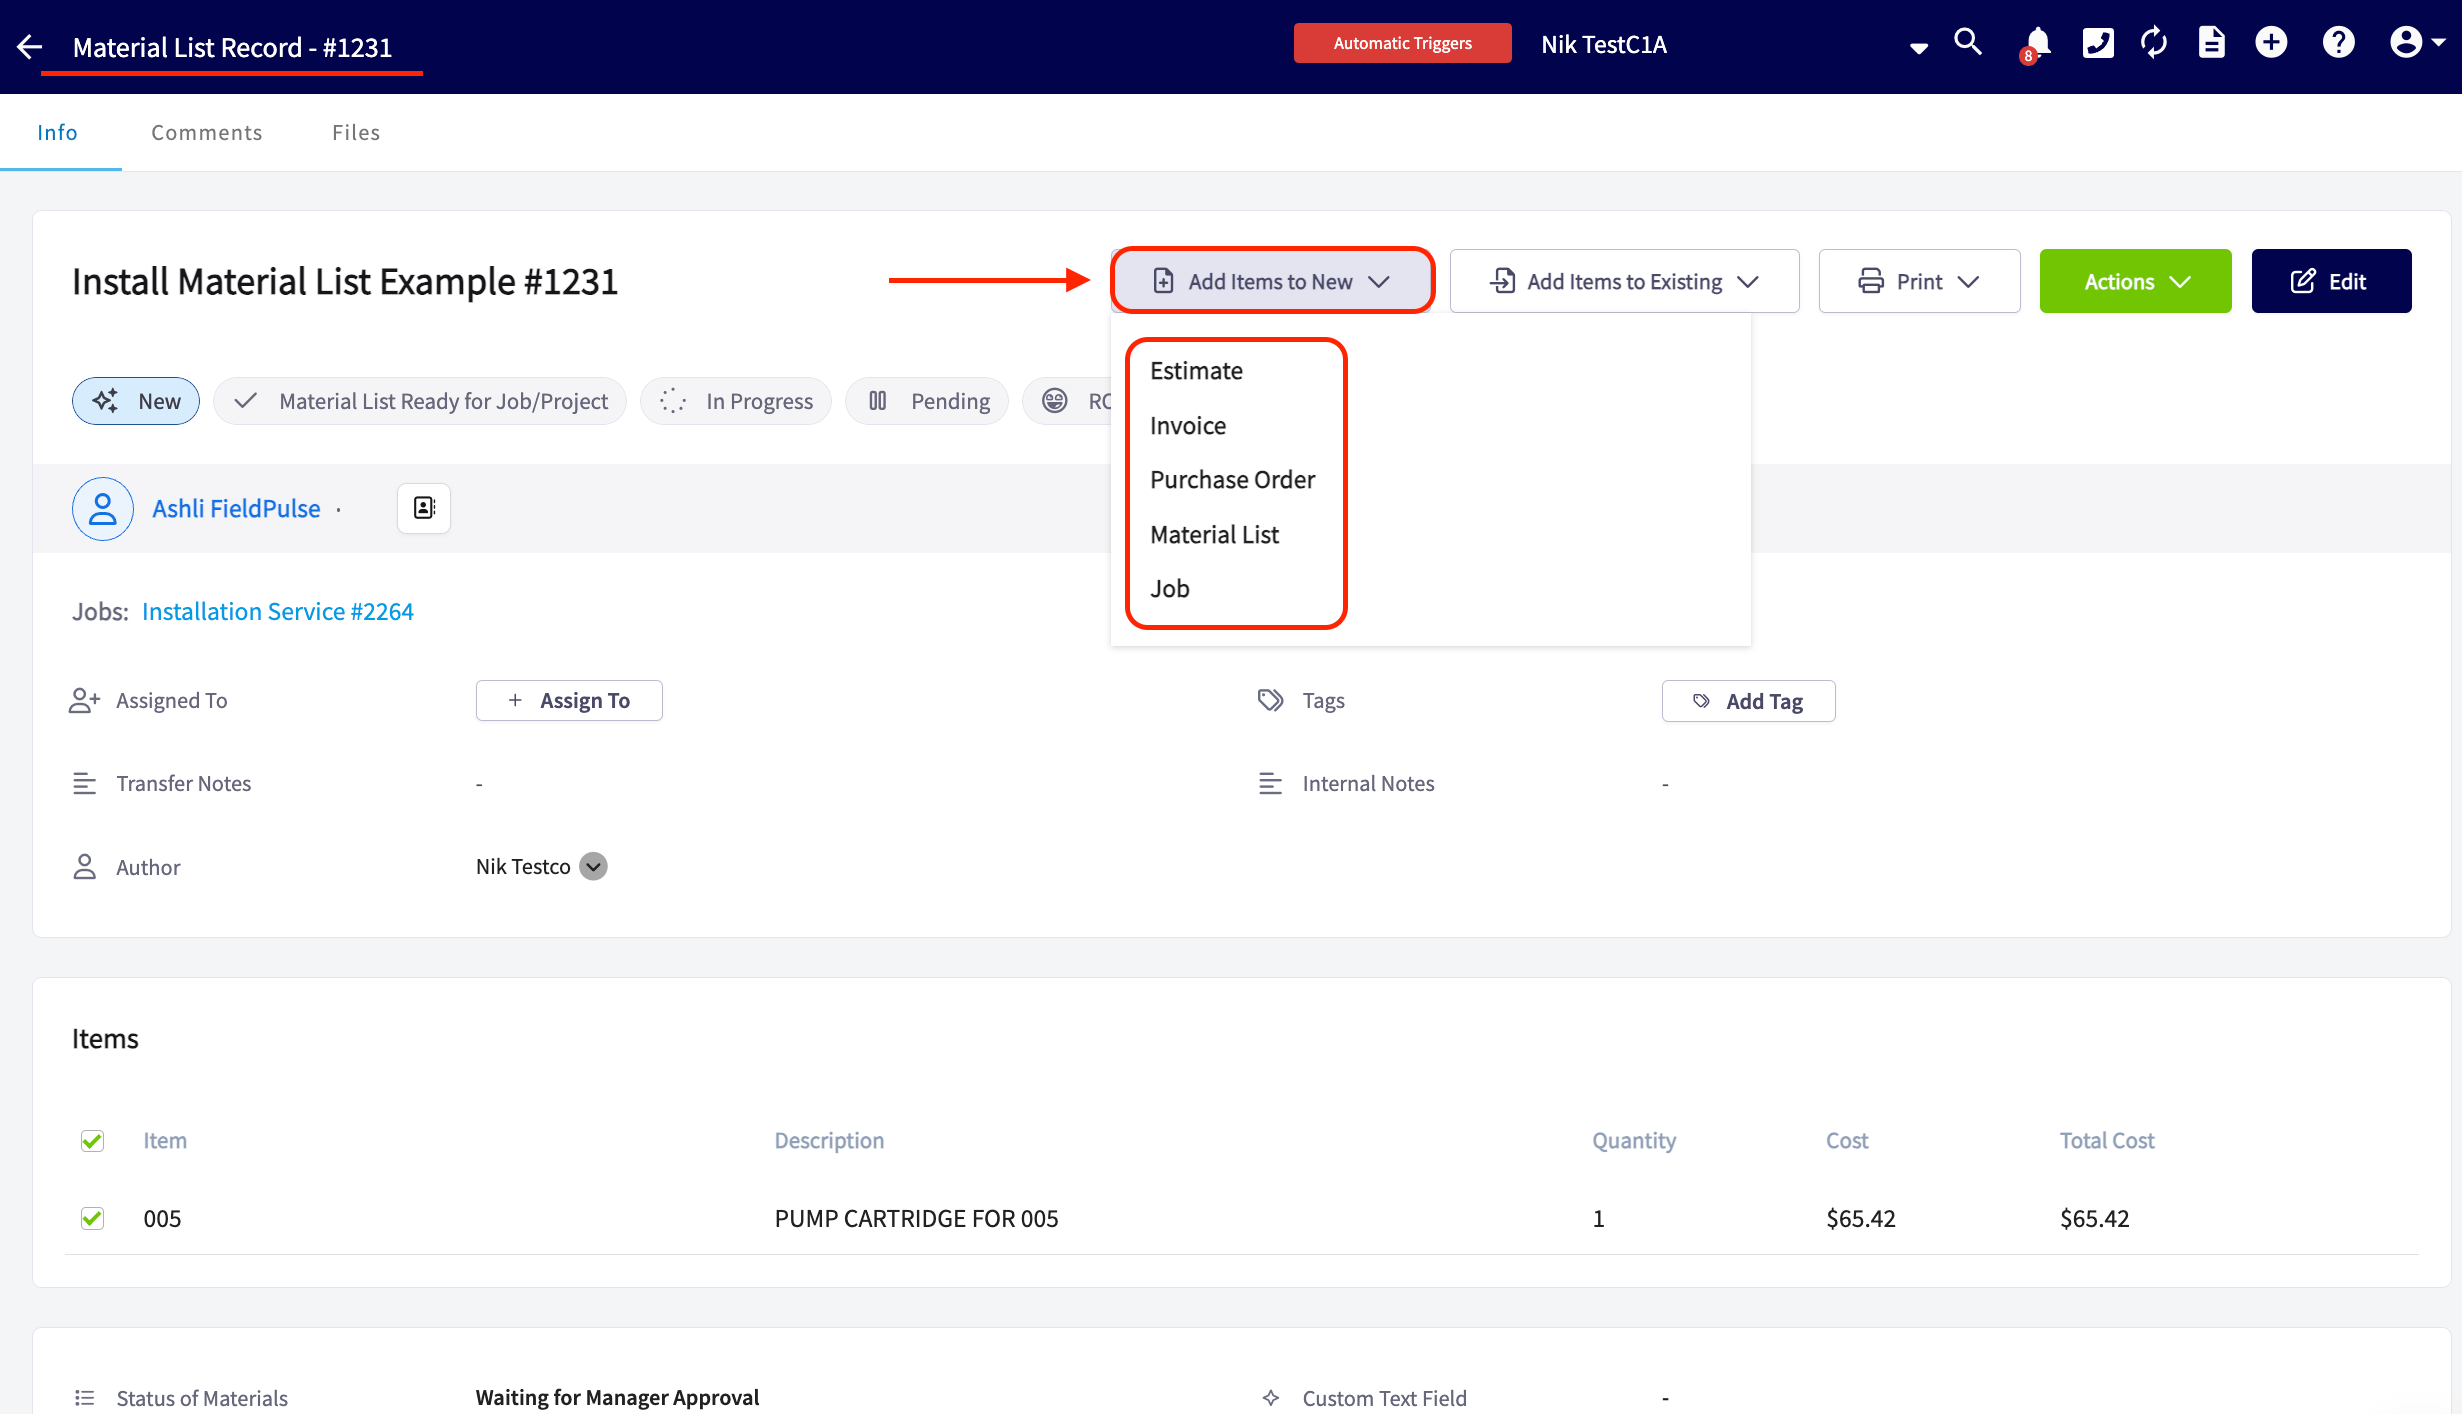
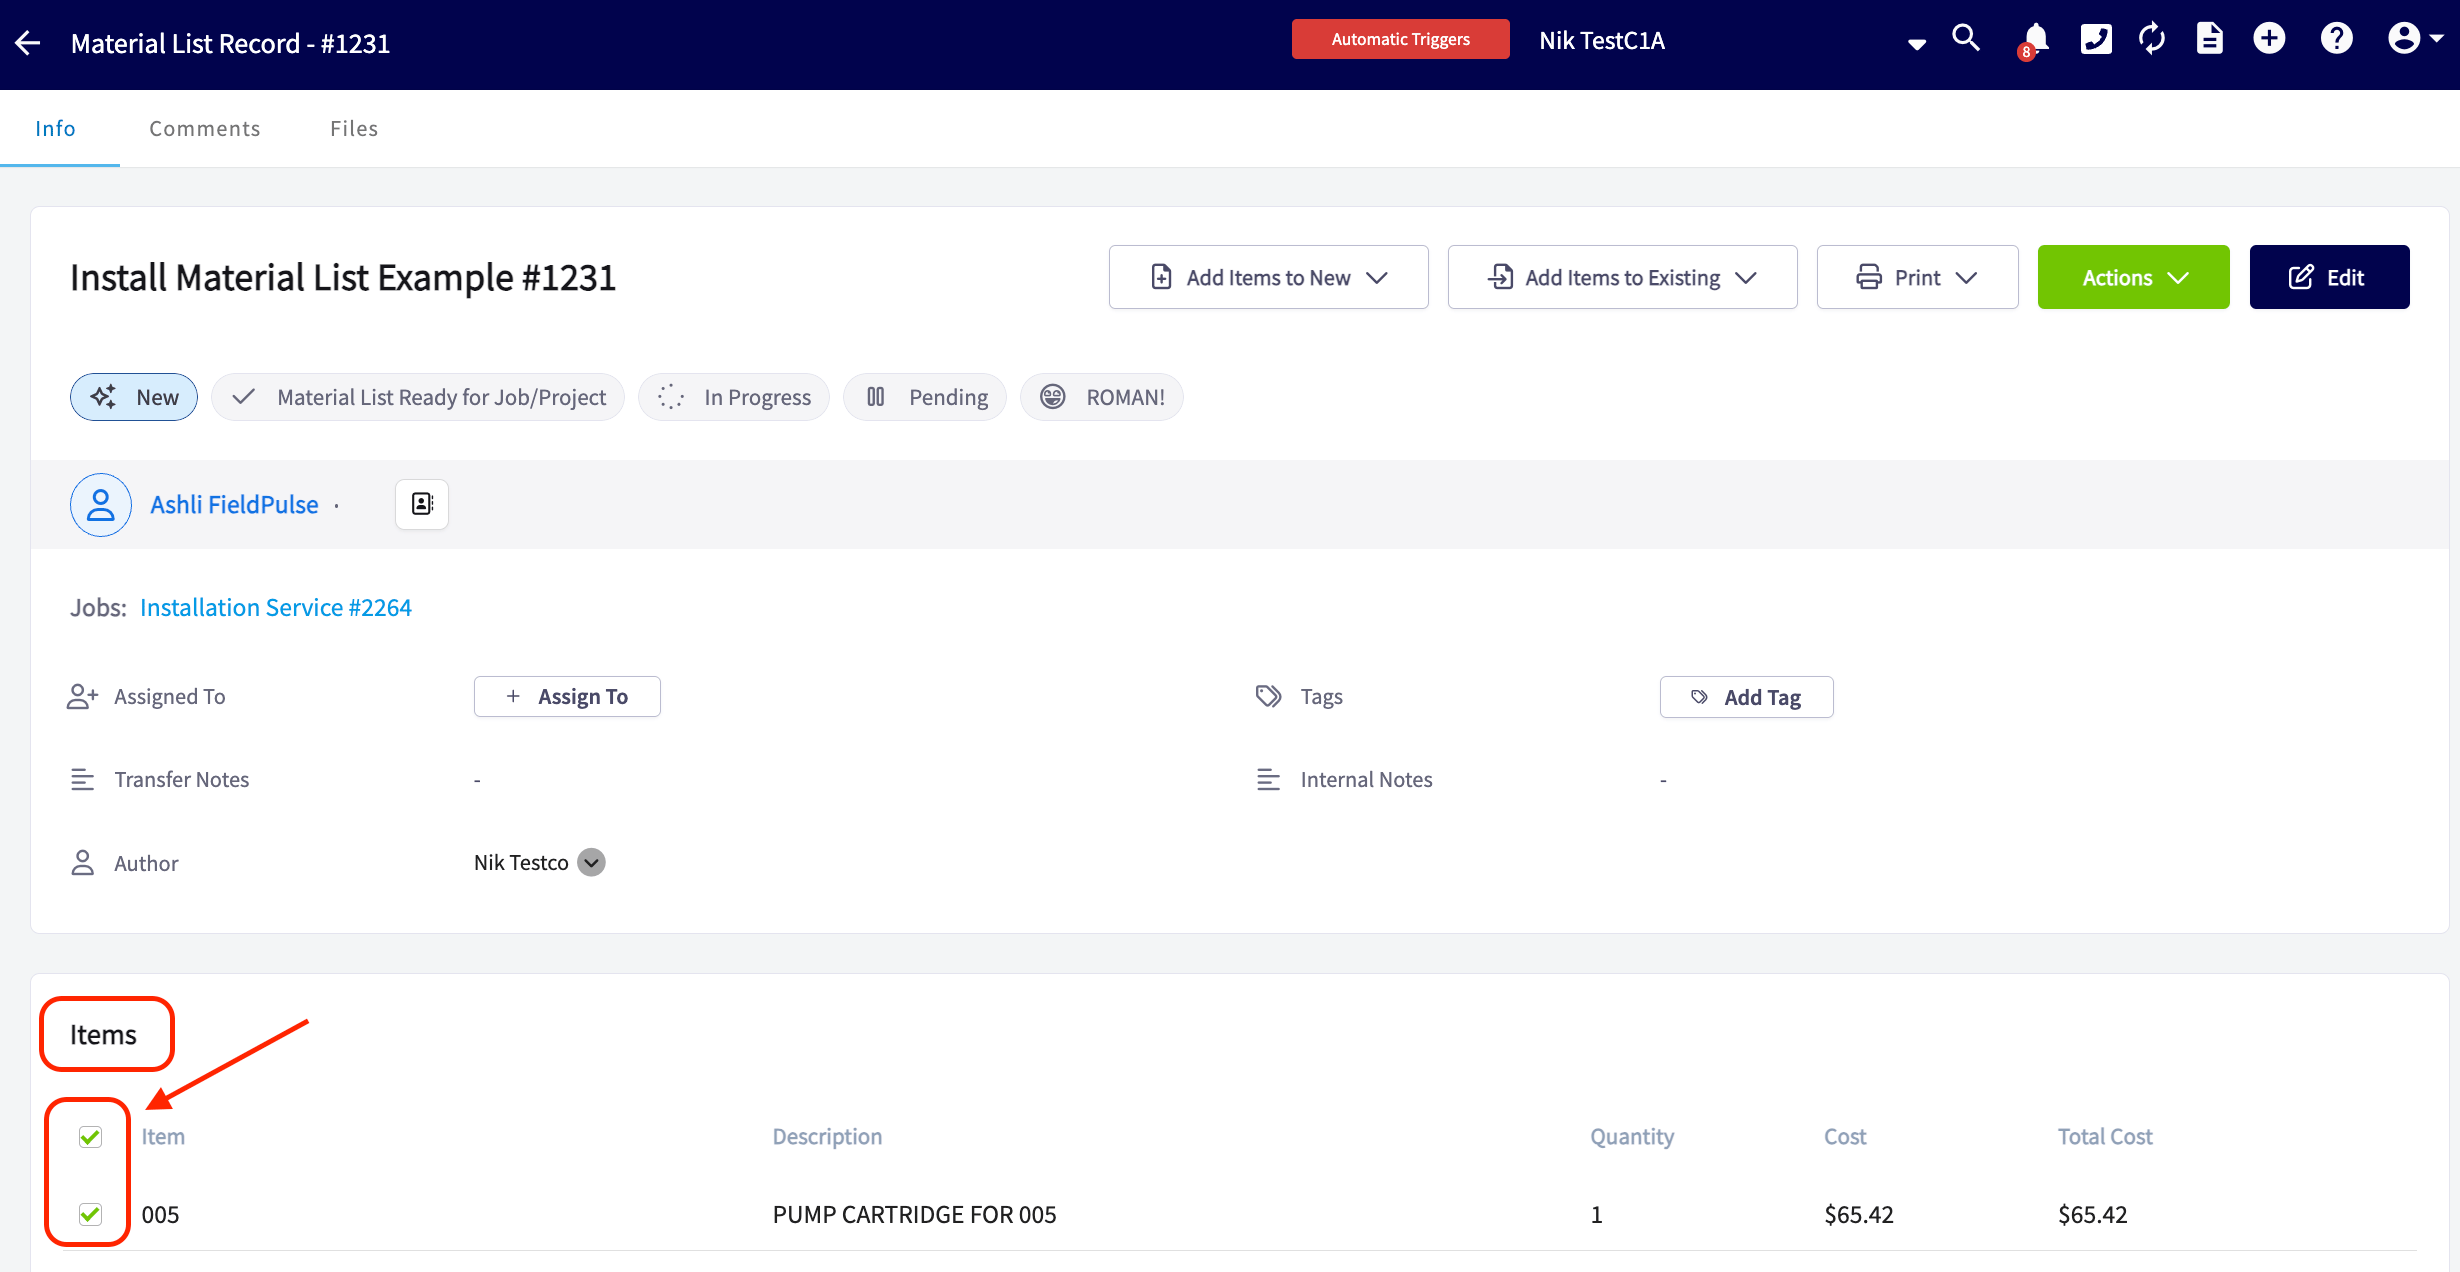
Add material list items to an existing record
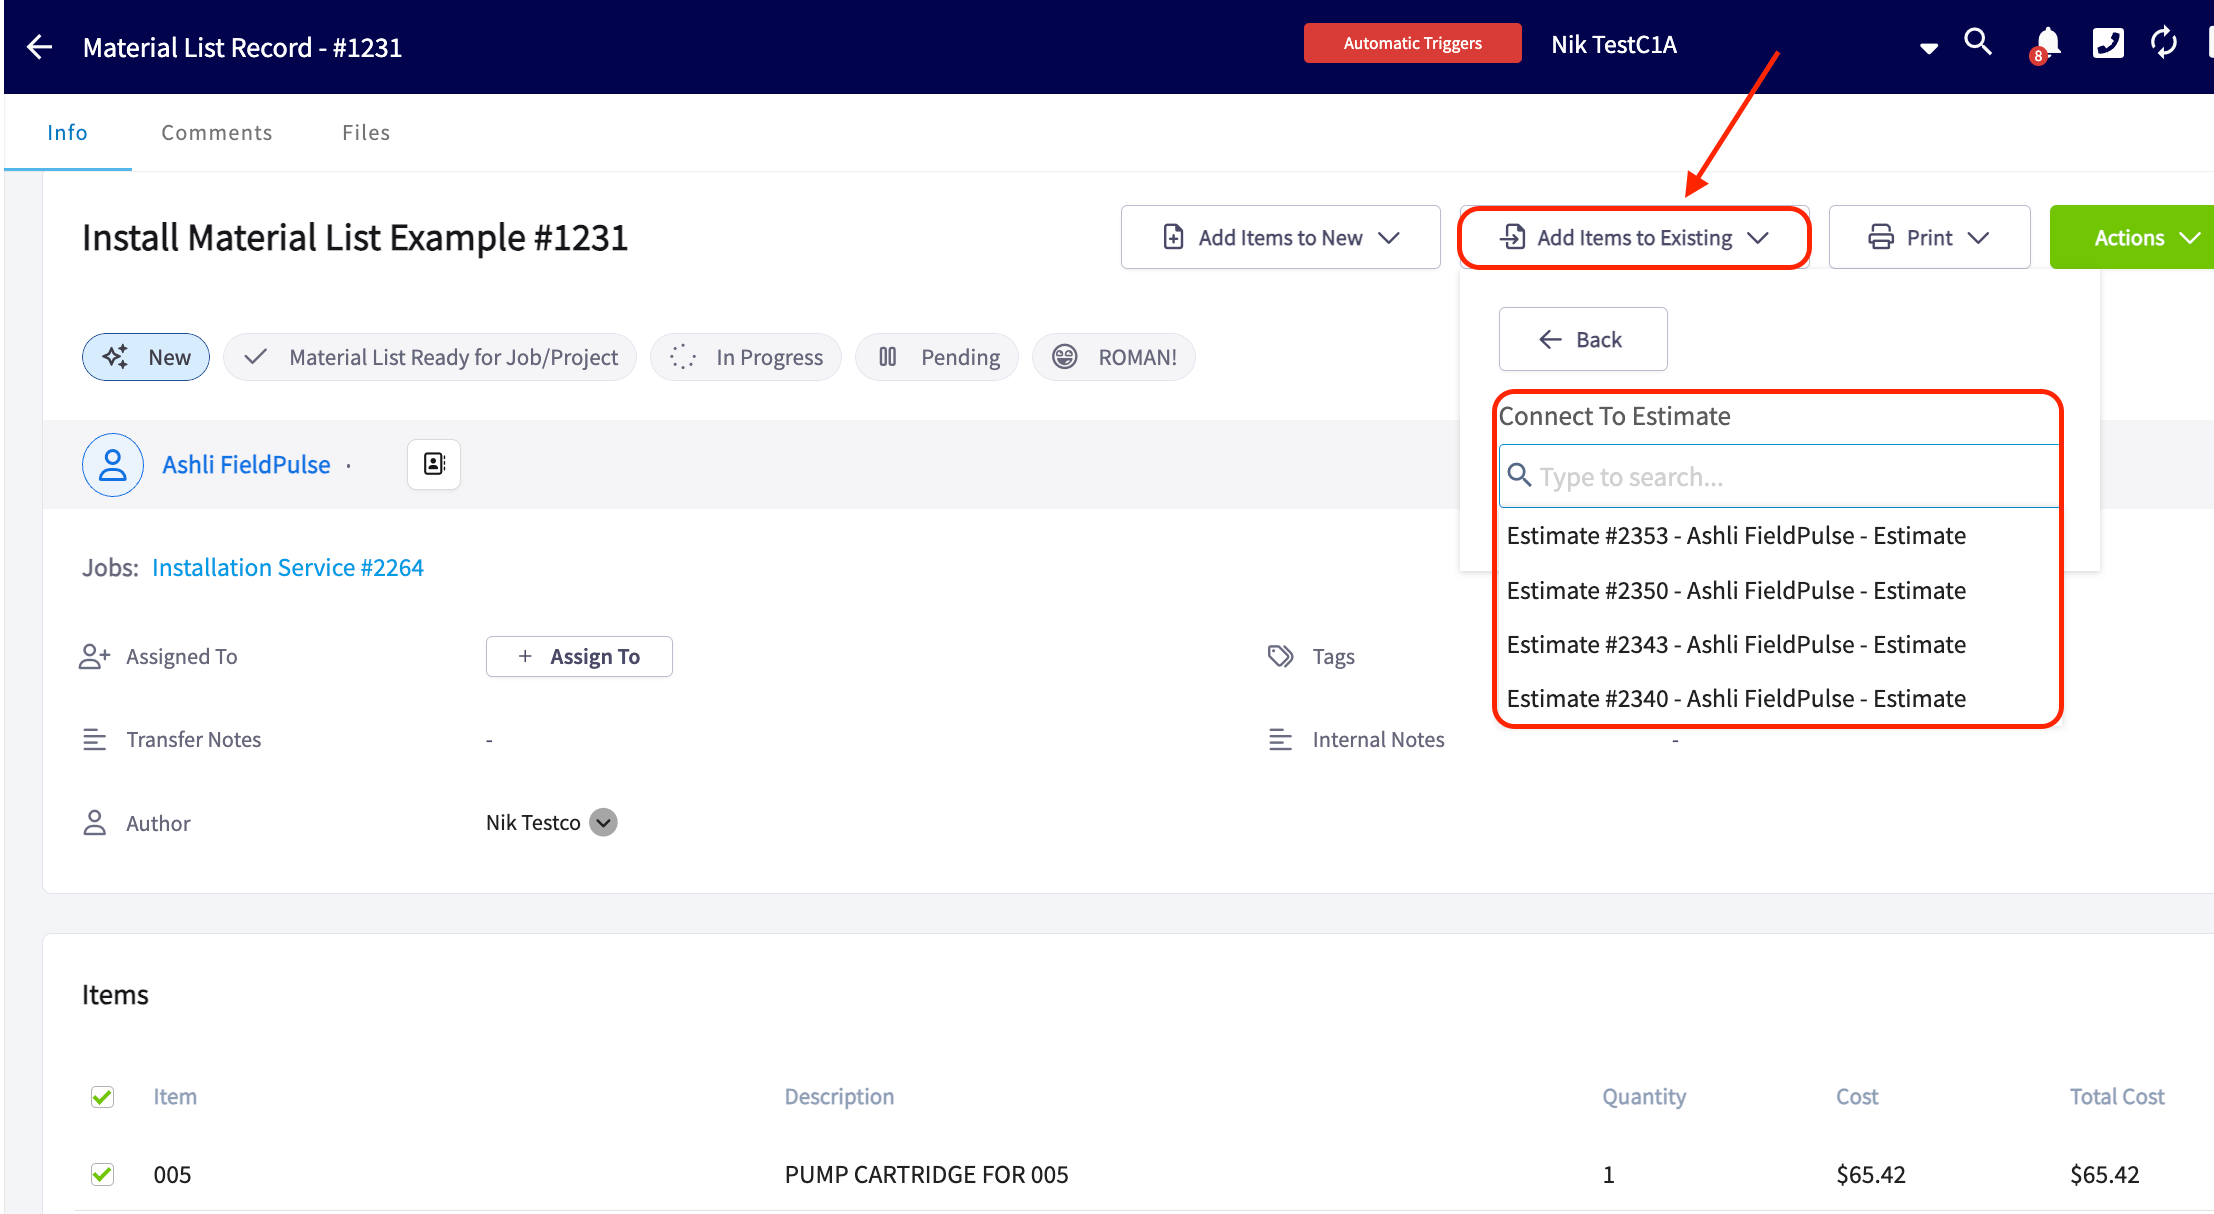
From a saved material list, select Add Items to Existing and choose the record type: Estimate, Invoice, Purchase Order, or Job.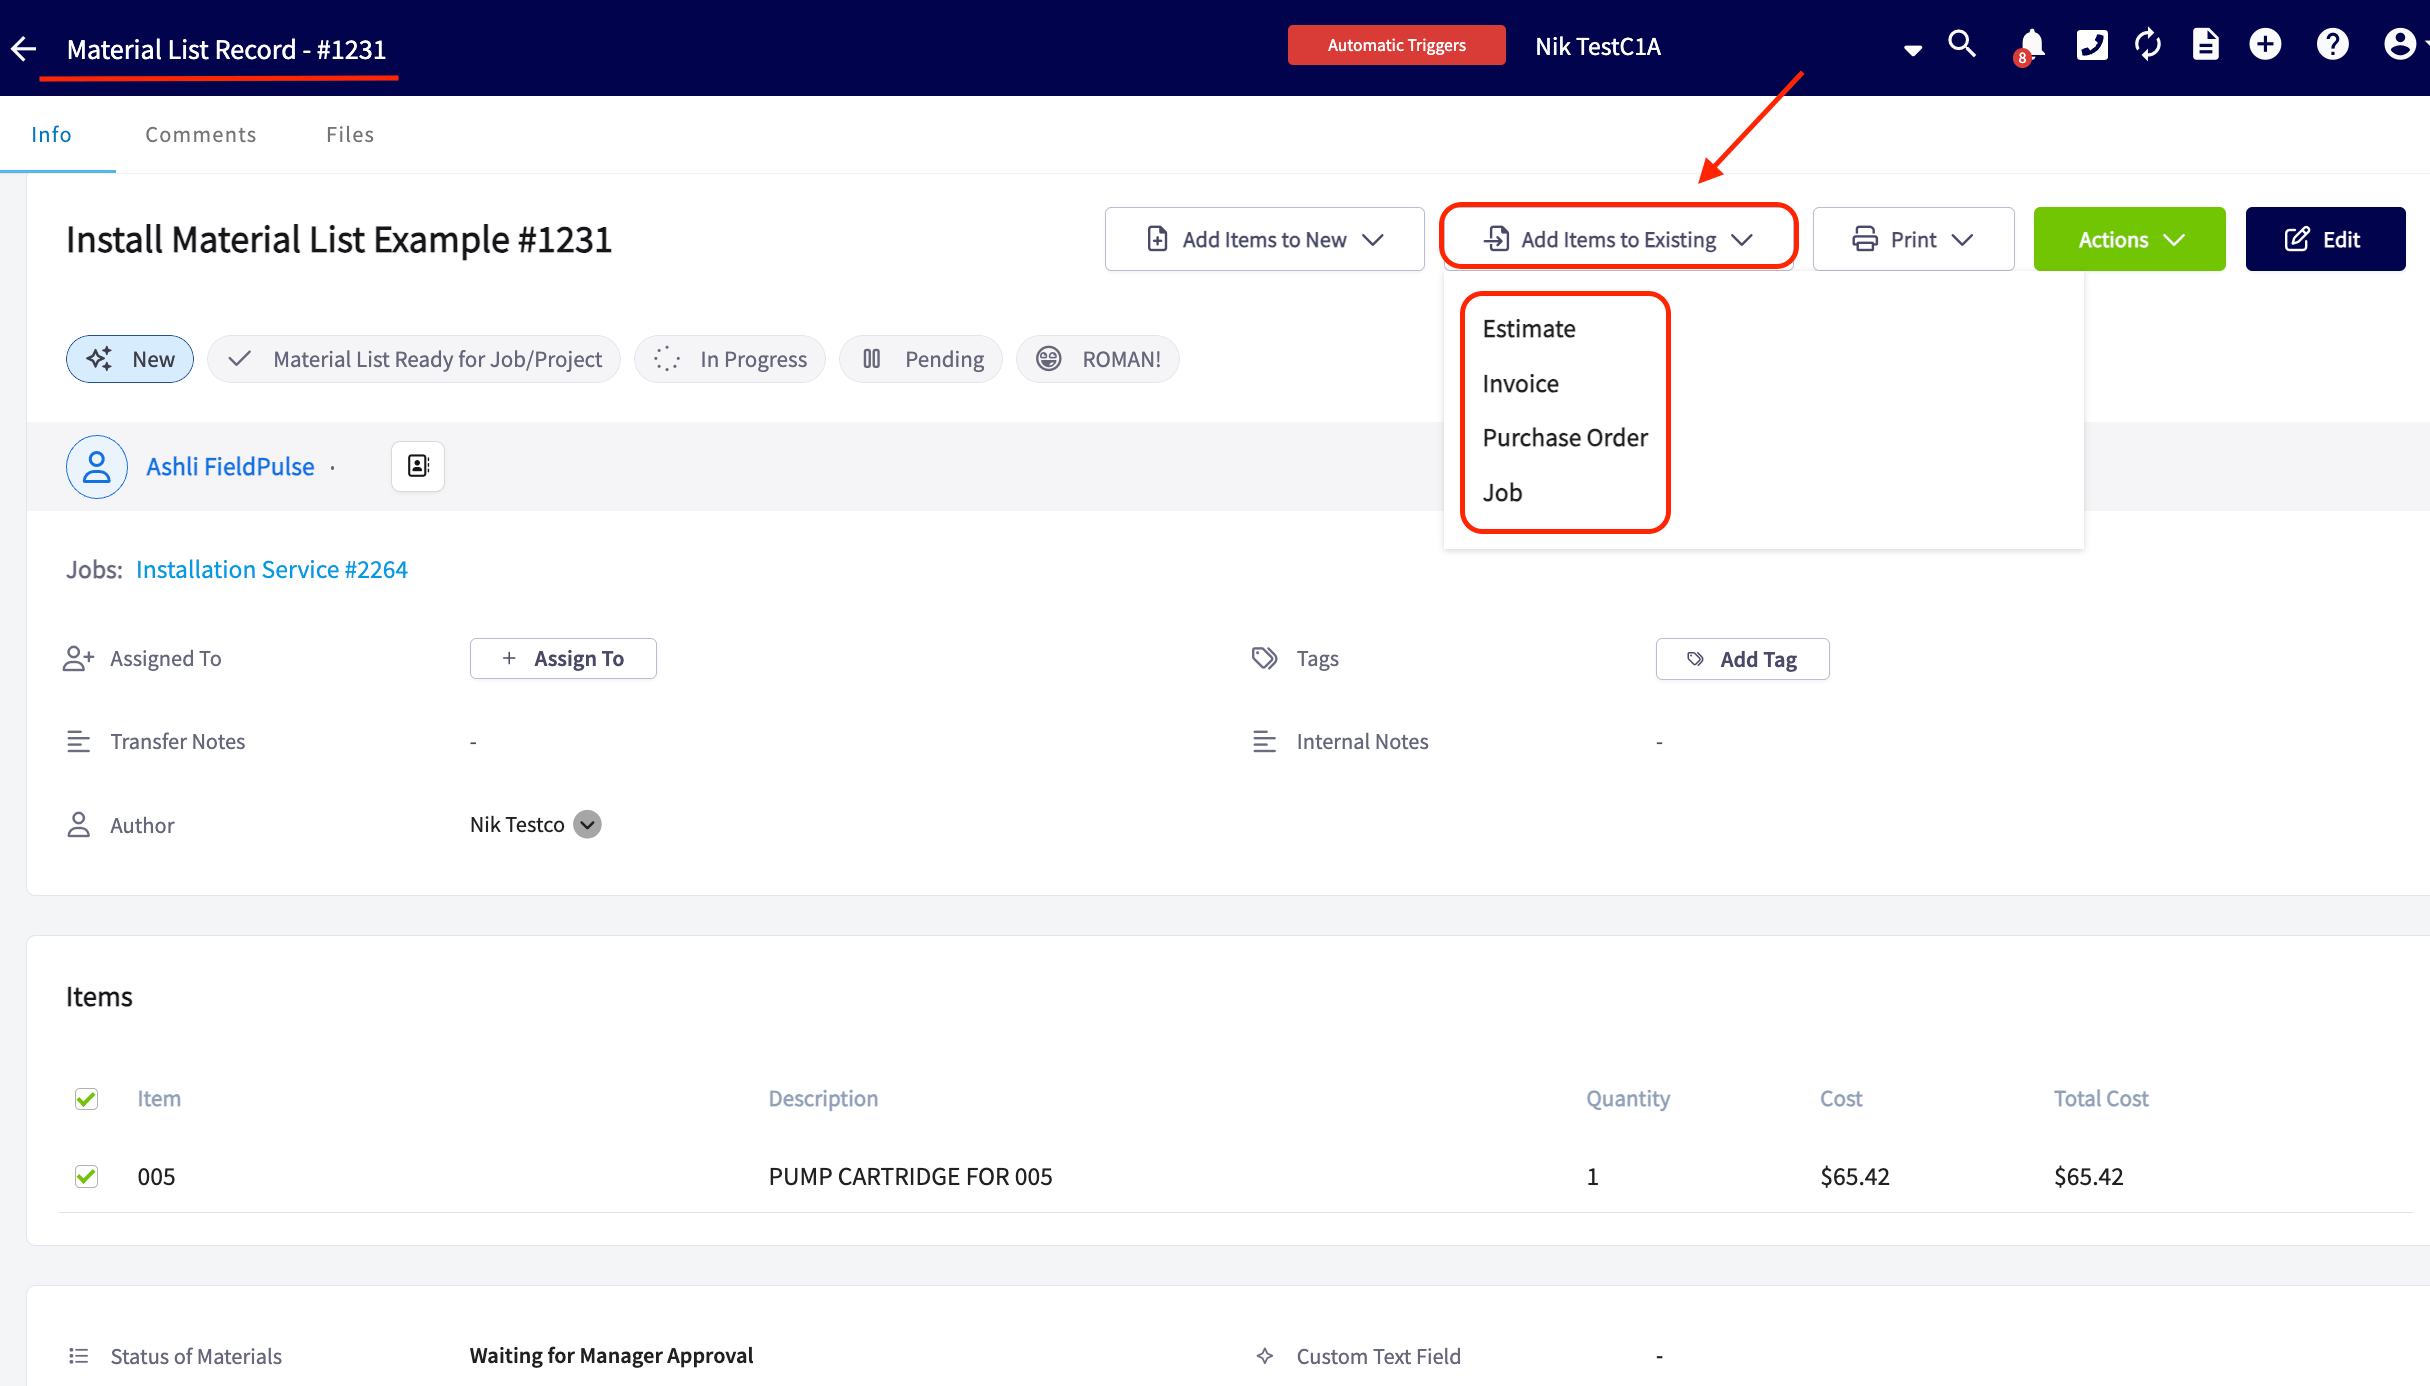
See the records a material list is linked to
Any record a material list is connected to appears on the material list itself as a blue link. Select a link to open that record’s details.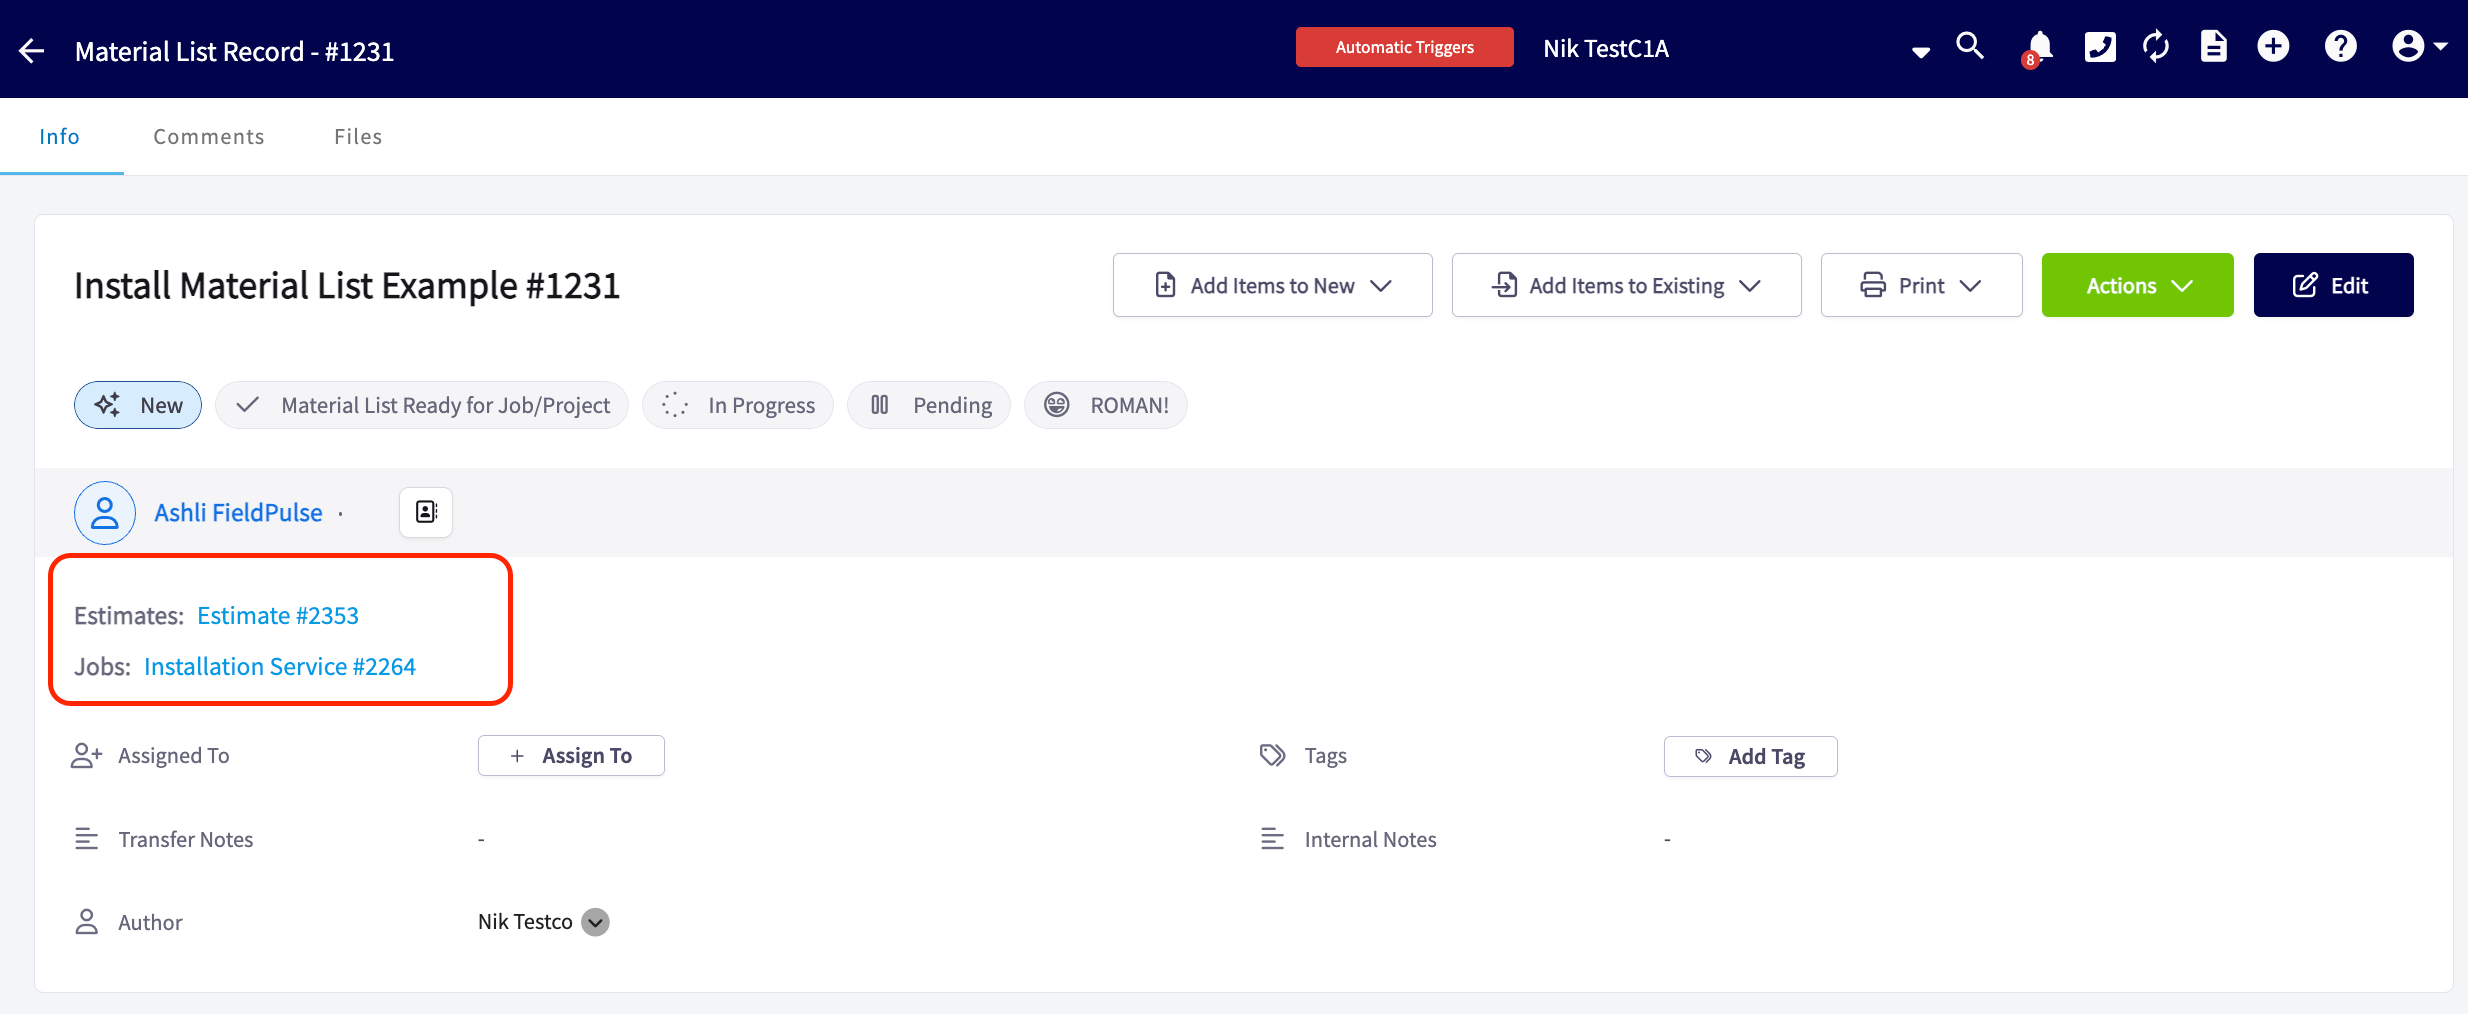
Print a material list
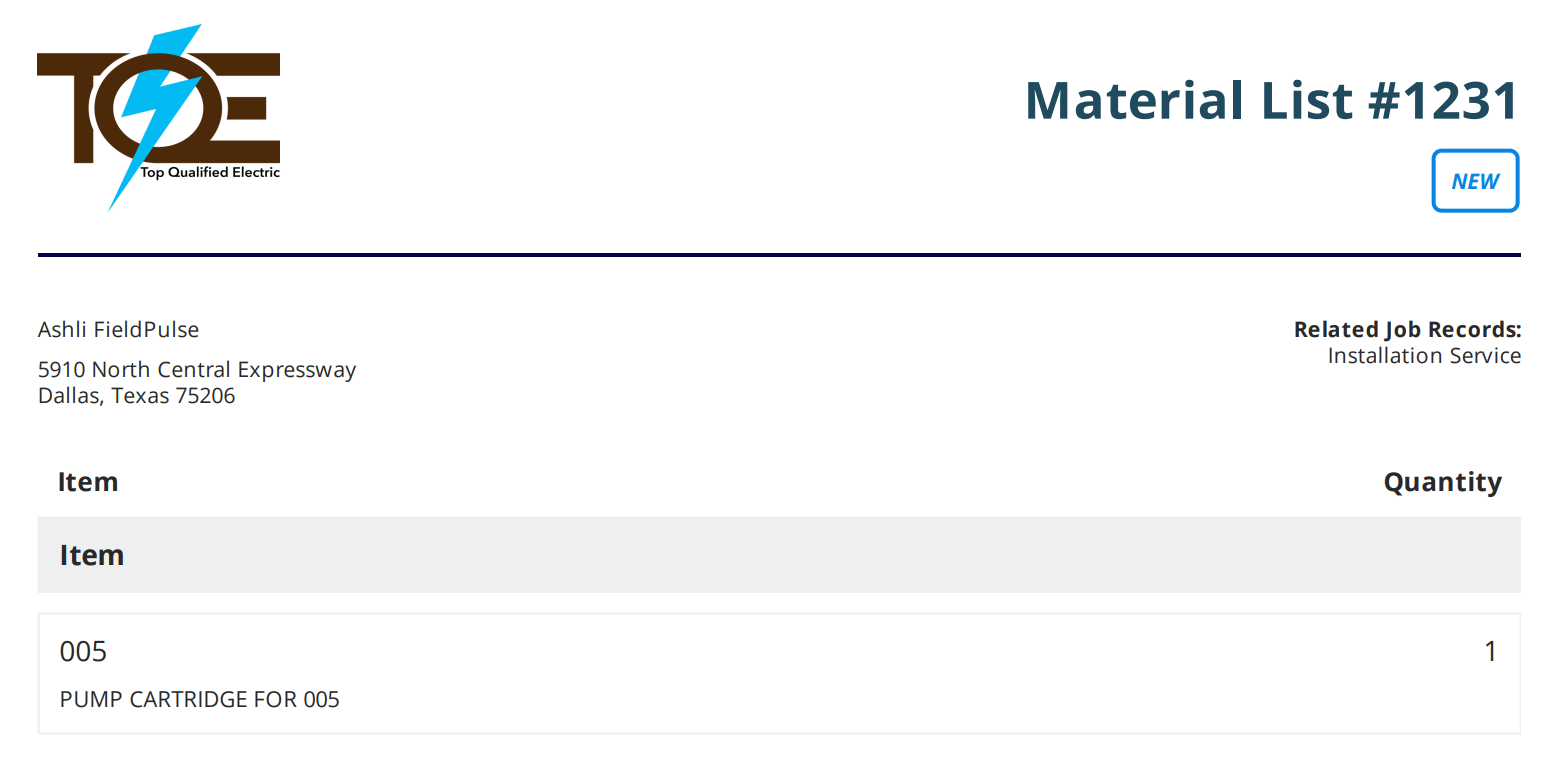
Print a material list to carry a clean, organized copy while you load the truck. Select Print on the material list record, then choose whether to include cost details — so you can hand a tech the materials without exposing pricing. With costs. The printed list shows cost, quantity, and total for every item.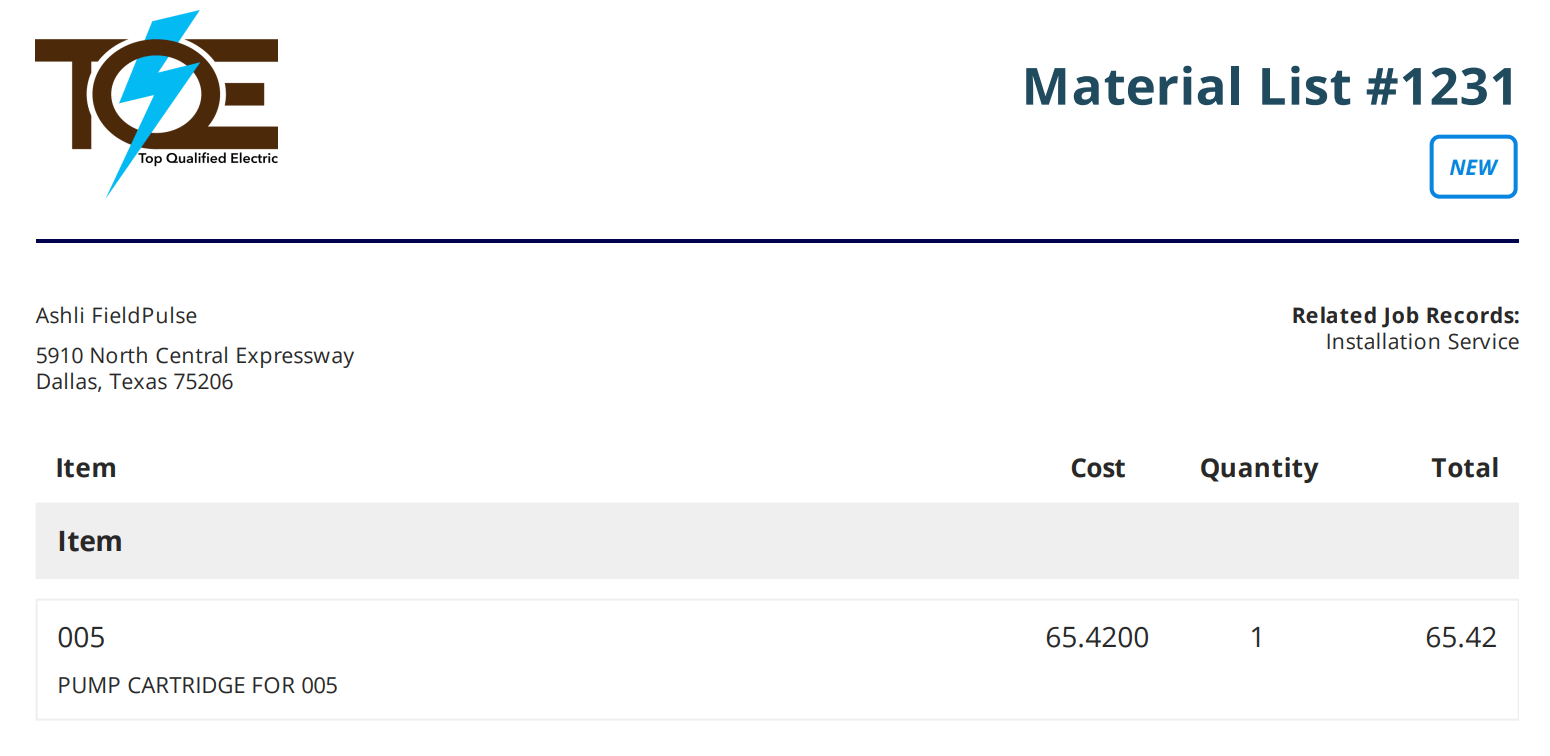
Set material list permissions
Material list access is set one user at a time in Company Settings.- Select Company Settings in the left menu, then select User Accounts.
- Select the Users tab and select the user you want to adjust.
-
In the Material List section, turn Is Material List Enabled? on or off, and choose that user’s access level from the dropdown.
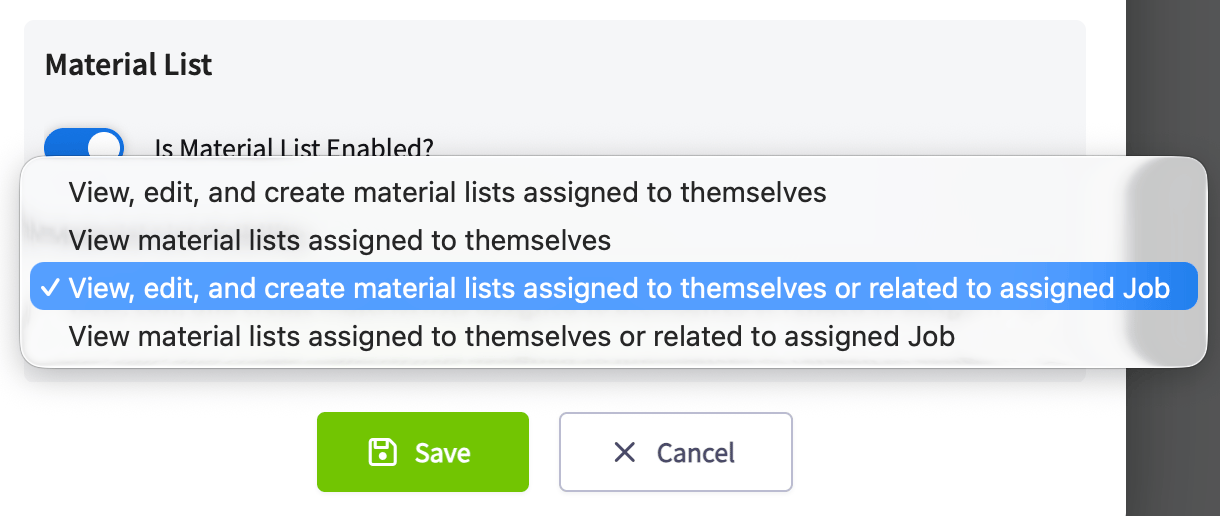
- View, edit, and create material lists assigned to themselves
- View material lists assigned to themselves
- View, edit, and create material lists assigned to themselves or related to an assigned job
- View material lists assigned to themselves or related to an assigned job
-
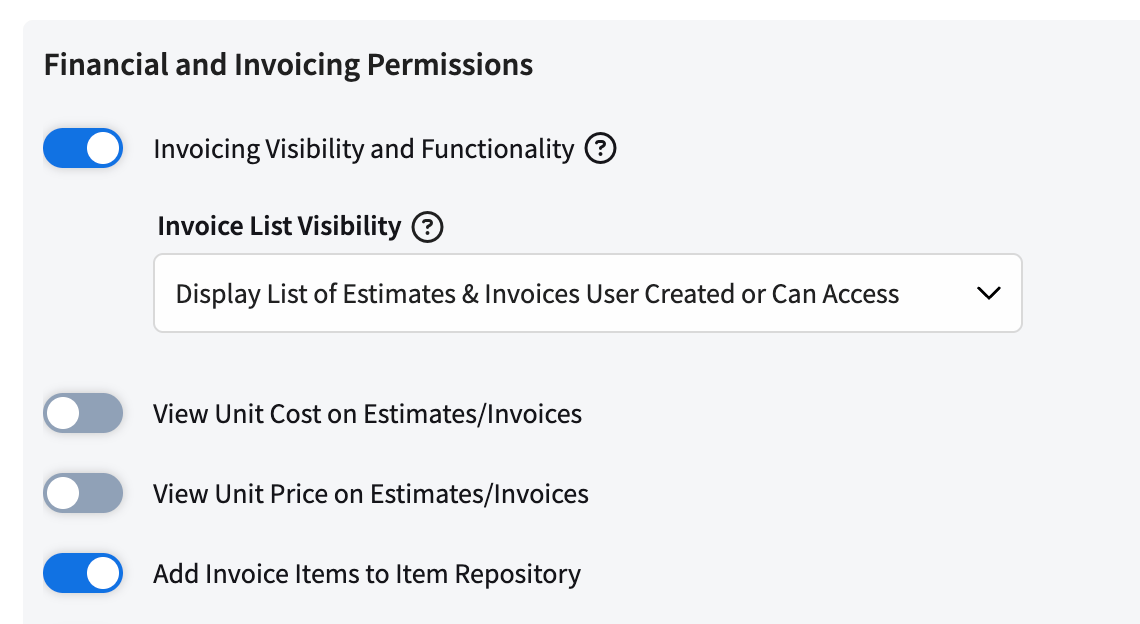
Under Financial and Invoicing Permissions, set View Unit Cost on Estimates/Invoices and View Unit Price on Estimates/Invoices to control whether that user sees the cost and price of line items on the estimates and invoices they create.
- Select Save.
Work with material lists offline
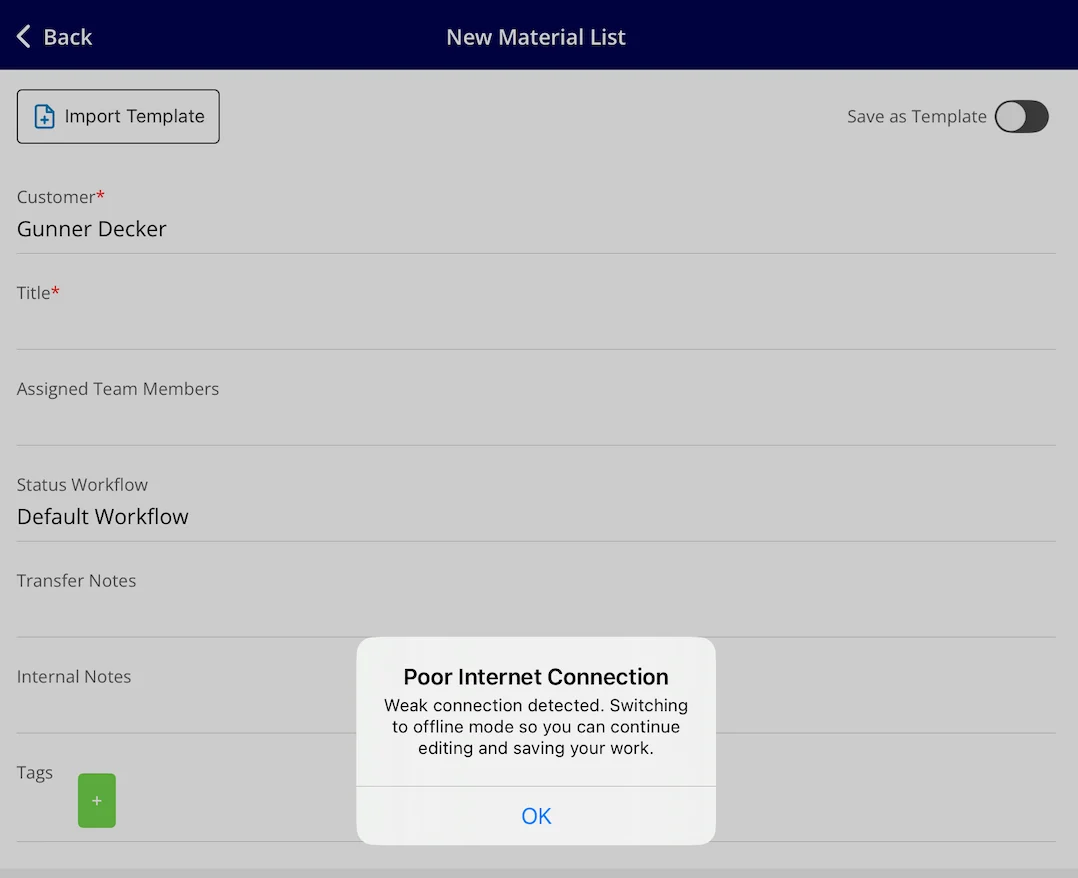
The FieldPulse mobile app keeps material lists working when a tech loses signal in a basement or mechanical room. Offline Mode is available in the mobile app only, and it requires material lists to be enabled on your account and the FieldPulse mobile app to be installed and up to date. FieldPulse detects when the device goes offline and prompts the tech to switch to Offline Mode. Everything entered offline syncs to your account automatically once the device reconnects, with no extra steps.-
Tap to switch to Offline Mode when the prompt appears. A material list already in progress carries over automatically — nothing is lost.
-
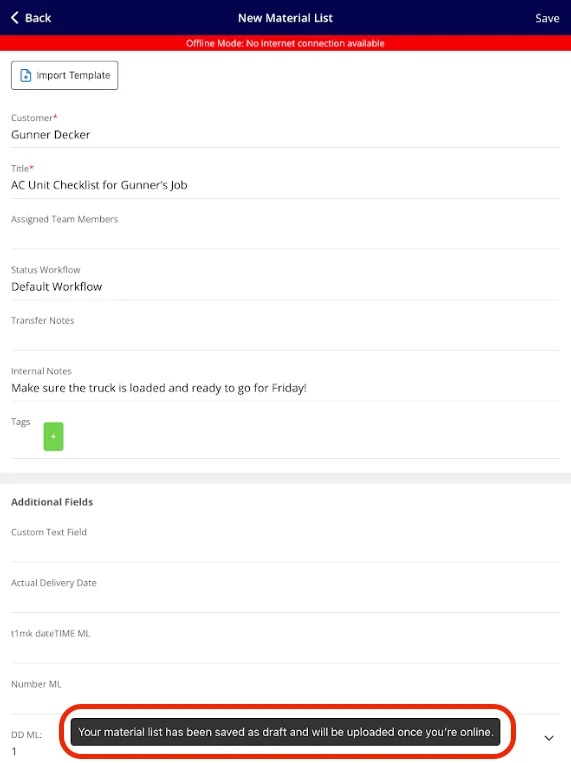
Keep working as normal — add line items, update details, and make changes. FieldPulse saves the material list as a draft and uploads it once the device is back online.
-
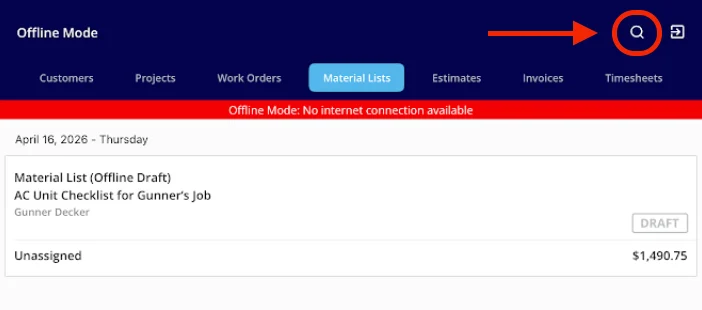
To open an existing record, use the search bar in the list view to find it by title, ID, or customer name.
-
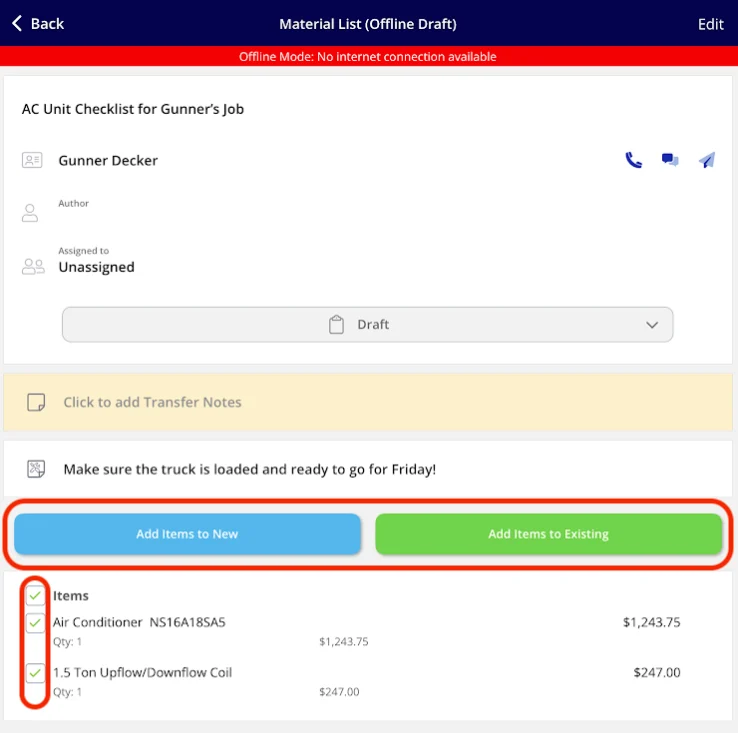
Add material list items to a new or existing estimate or invoice with Add Items to New or Add Items to Existing.
With no connection, a tech can:
- Create new material lists linked to cached customers, jobs, or projects
- Edit the cached material lists
- Search records by title, ID, or customer name
- Add internal notes and transfer notes
- Add tags
- Build lists from cached line items and cached bundles
- Create groupings
- Import material list templates
- Update statuses on material lists
- Add material list items to a new or existing estimate or invoice