Who uses this: Admins for the Company Settings work — enabling purchase orders, setting purchase order defaults, and managing the supplier list. Availability: All regions.A purchase order is the record you send a supplier to order parts and materials. FieldPulse builds the order, emails it to the supplier when you send it, drafts restock orders for your review as items run low, and pulls several orders into one estimate or invoice for your customer — so the supplier, the linked job, and the cost of the parts all sit on one record.
Overview
Purchase orders let you generate an order for a supplier, send it by email, track inventory replenishment, and combine multiple purchase orders into a single estimate or invoice for your customer. A purchase order gets created in one of two ways:- Manually — you build the order on the web app or the mobile app and email it to the supplier.
- Automatically — you set an auto re-order level on an inventory item, and FieldPulse creates the purchase order when the quantity on hand reaches that level.
Video walkthrough
Video walkthrough: purchase orders in FieldPulse
Before you begin
- Purchase orders must be enabled on your account before the Purchase Orders tab appears. Enabling it is the first task below.
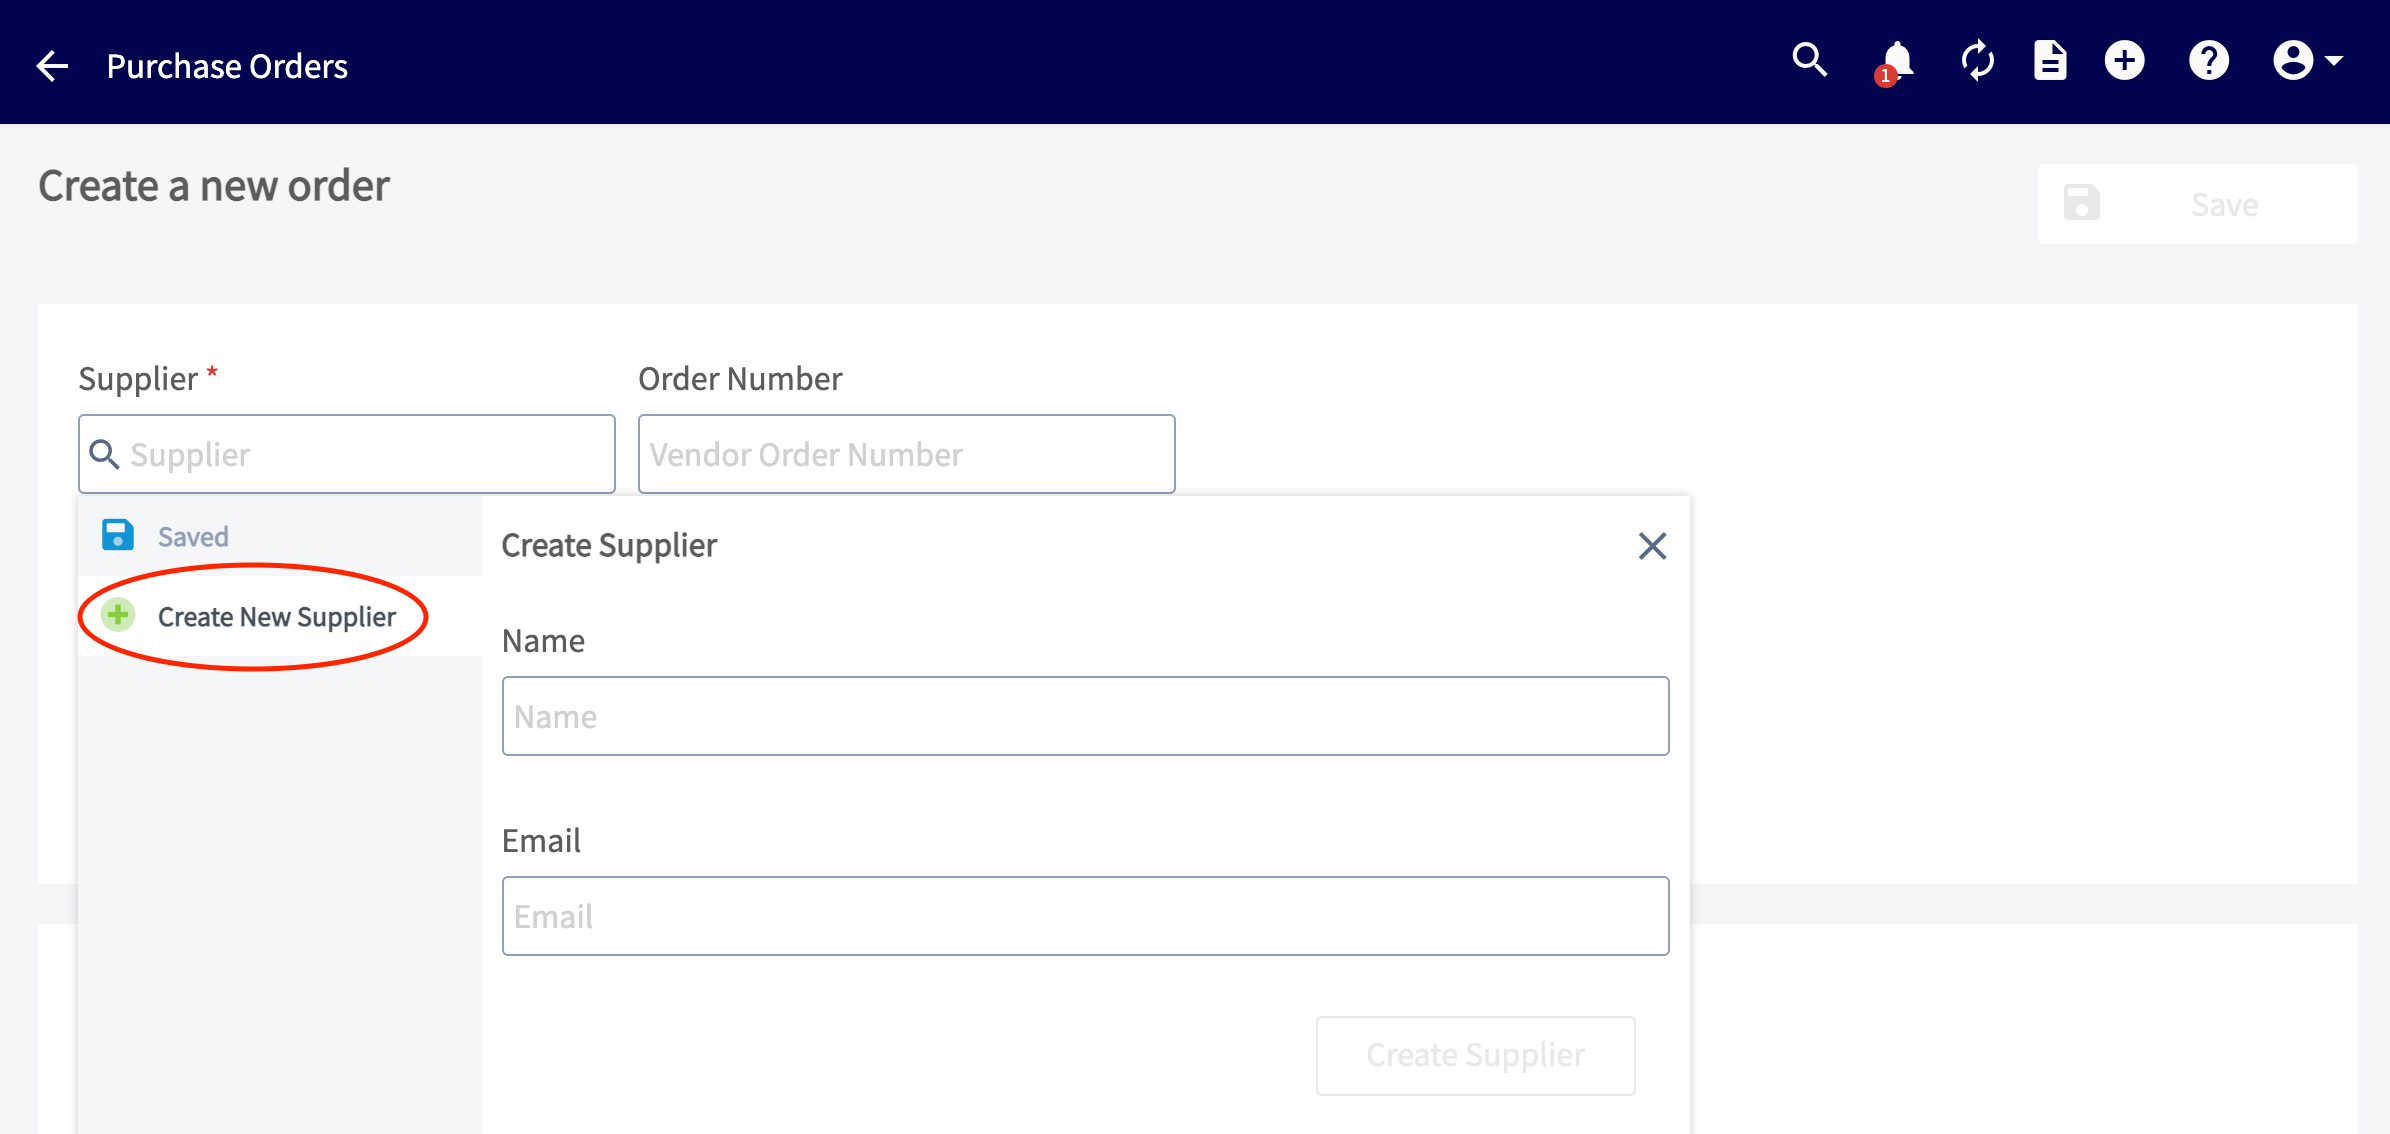
- Every purchase order needs a supplier. Add suppliers in Company Settings ahead of time, or create one while you build the order.
- For automatic replenishment, set up inventory tracking on your items first. See Setting Up Item List & Inventory.
- Set your purchase order defaults before you start ordering if you want new orders to fill in the delivery address, contact details, and display number for you.
On web
Enable purchase orders
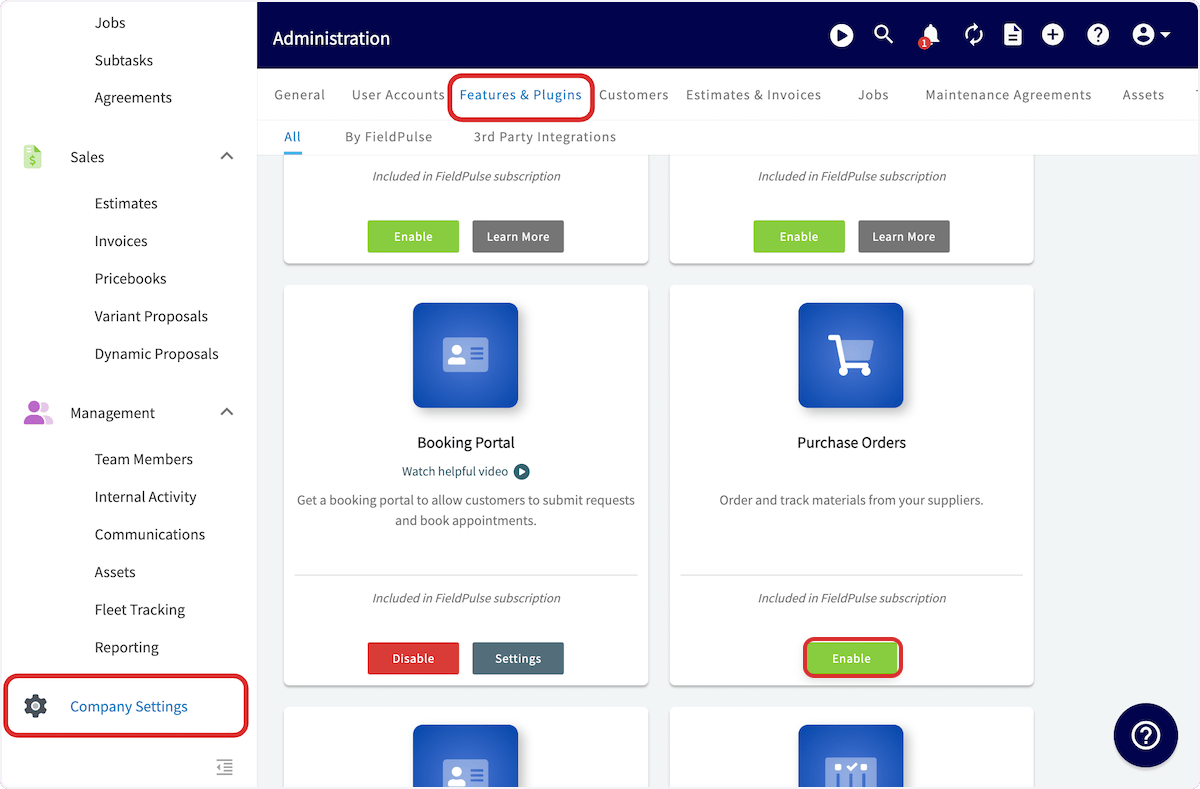
Purchase orders are turned on from the plugin list in Company Settings.- Select Company Settings in the left-side menu, then open the Features & Plugins tab.
- Find the Purchase Orders tile and select Enable.
Set purchase order defaults
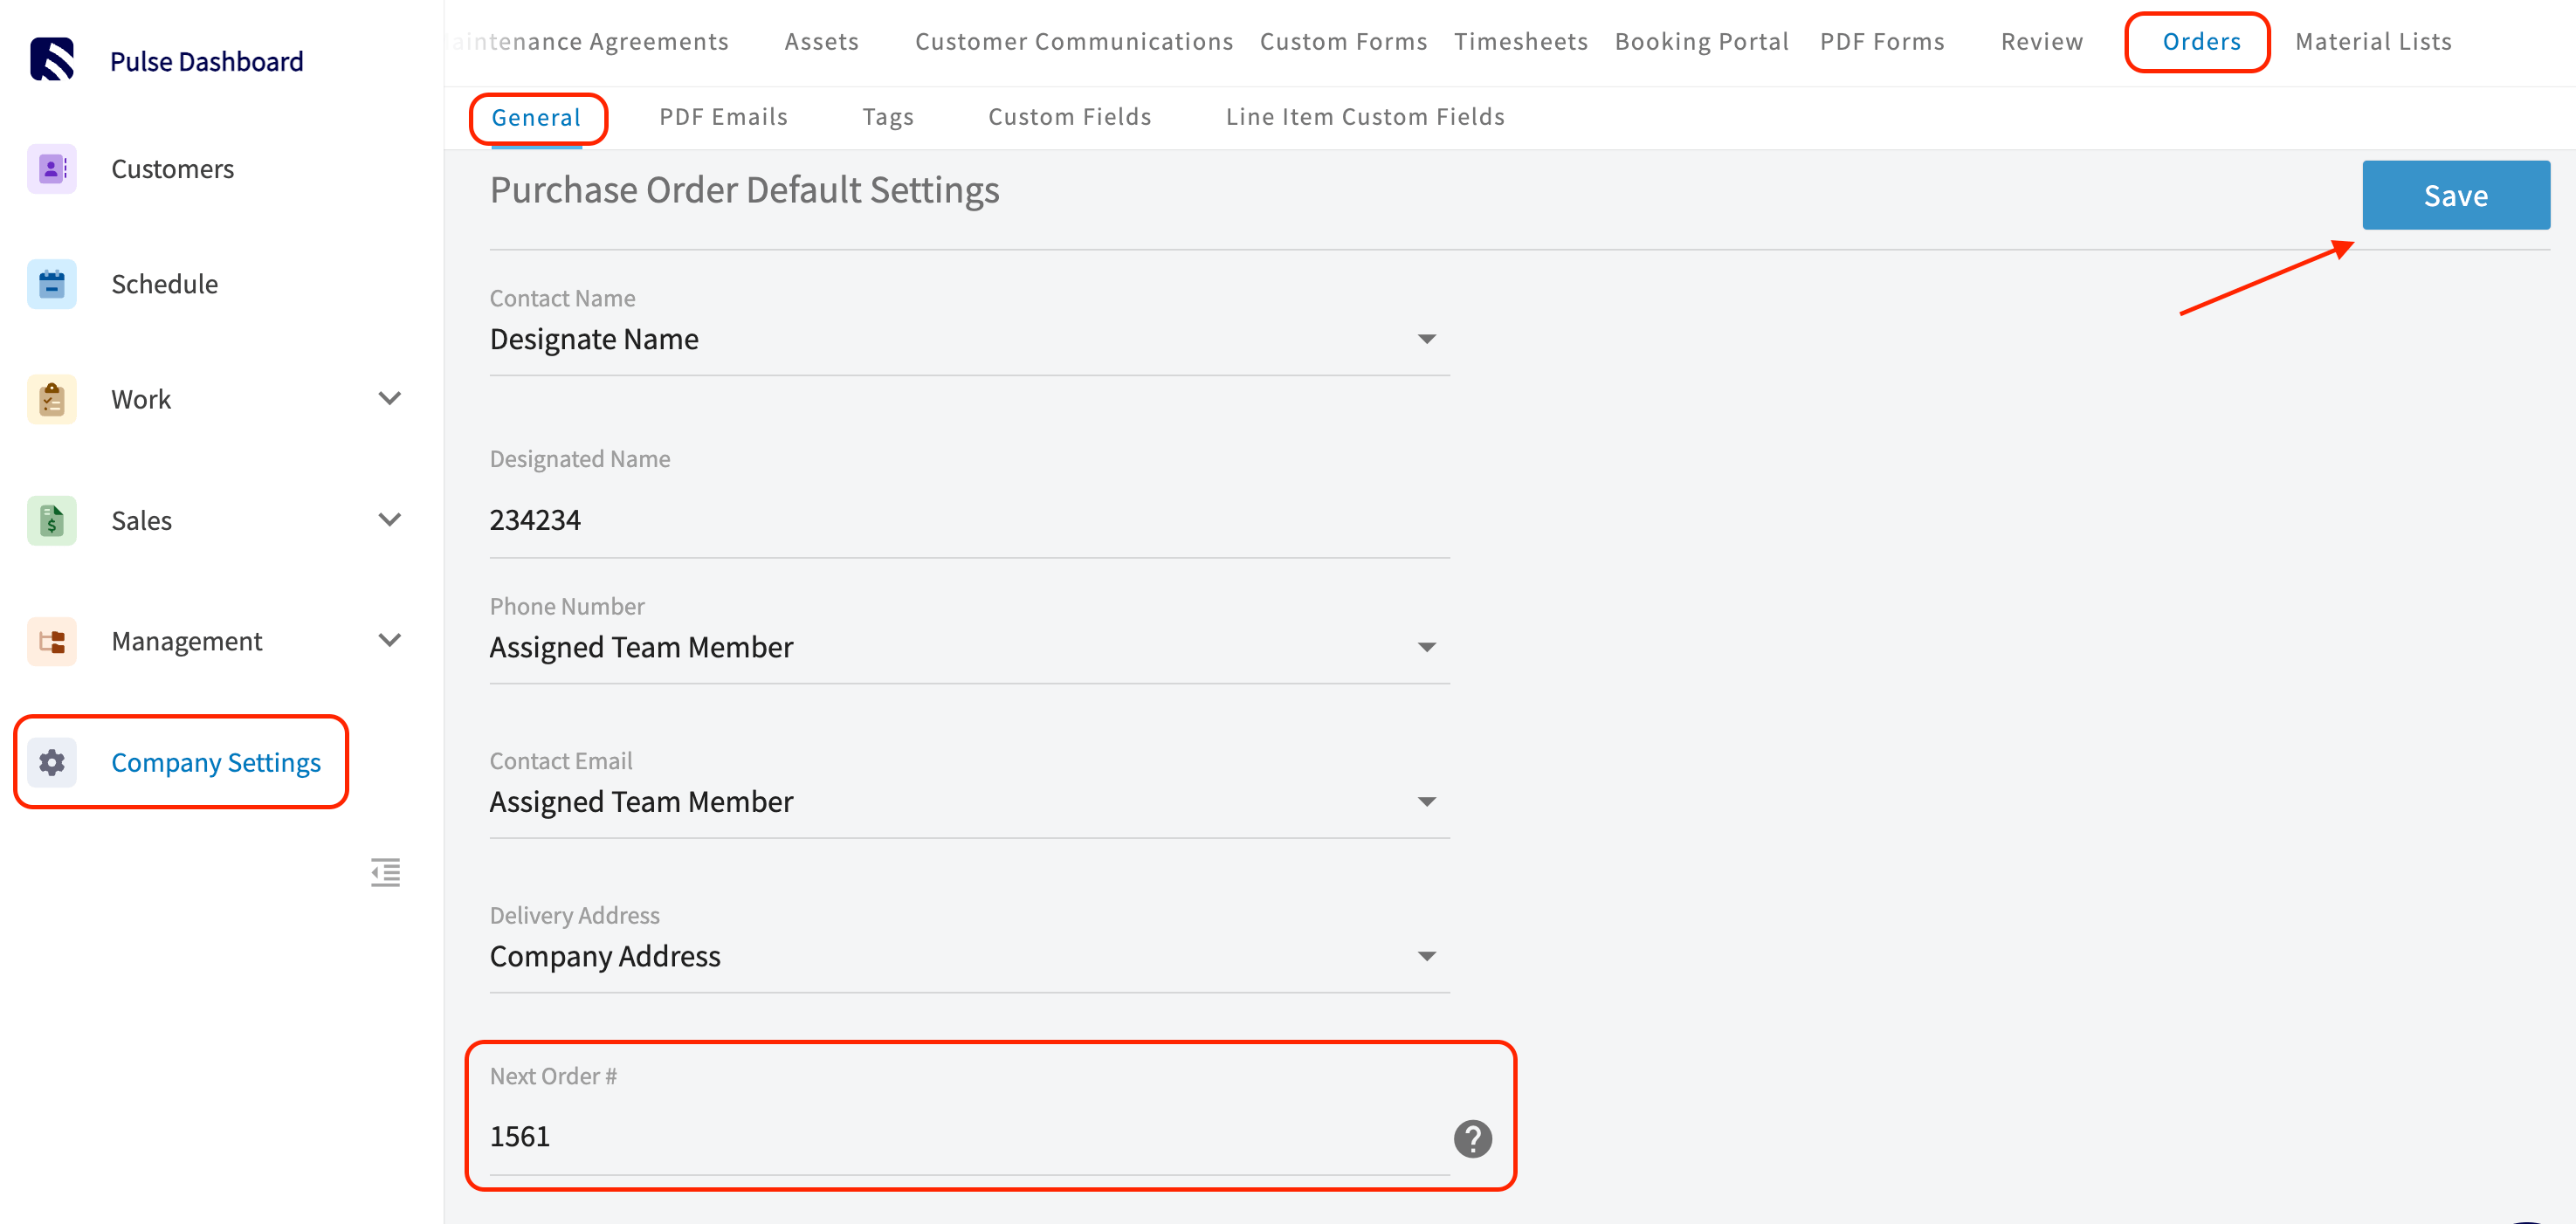
Purchase order defaults fill in key fields on every new order, so there is less to enter by hand and less to get wrong.- Select Company Settings in the left-side menu, then open the Orders tab and the General subtab.
- Set each default under Purchase Order Default Settings, then select Save.
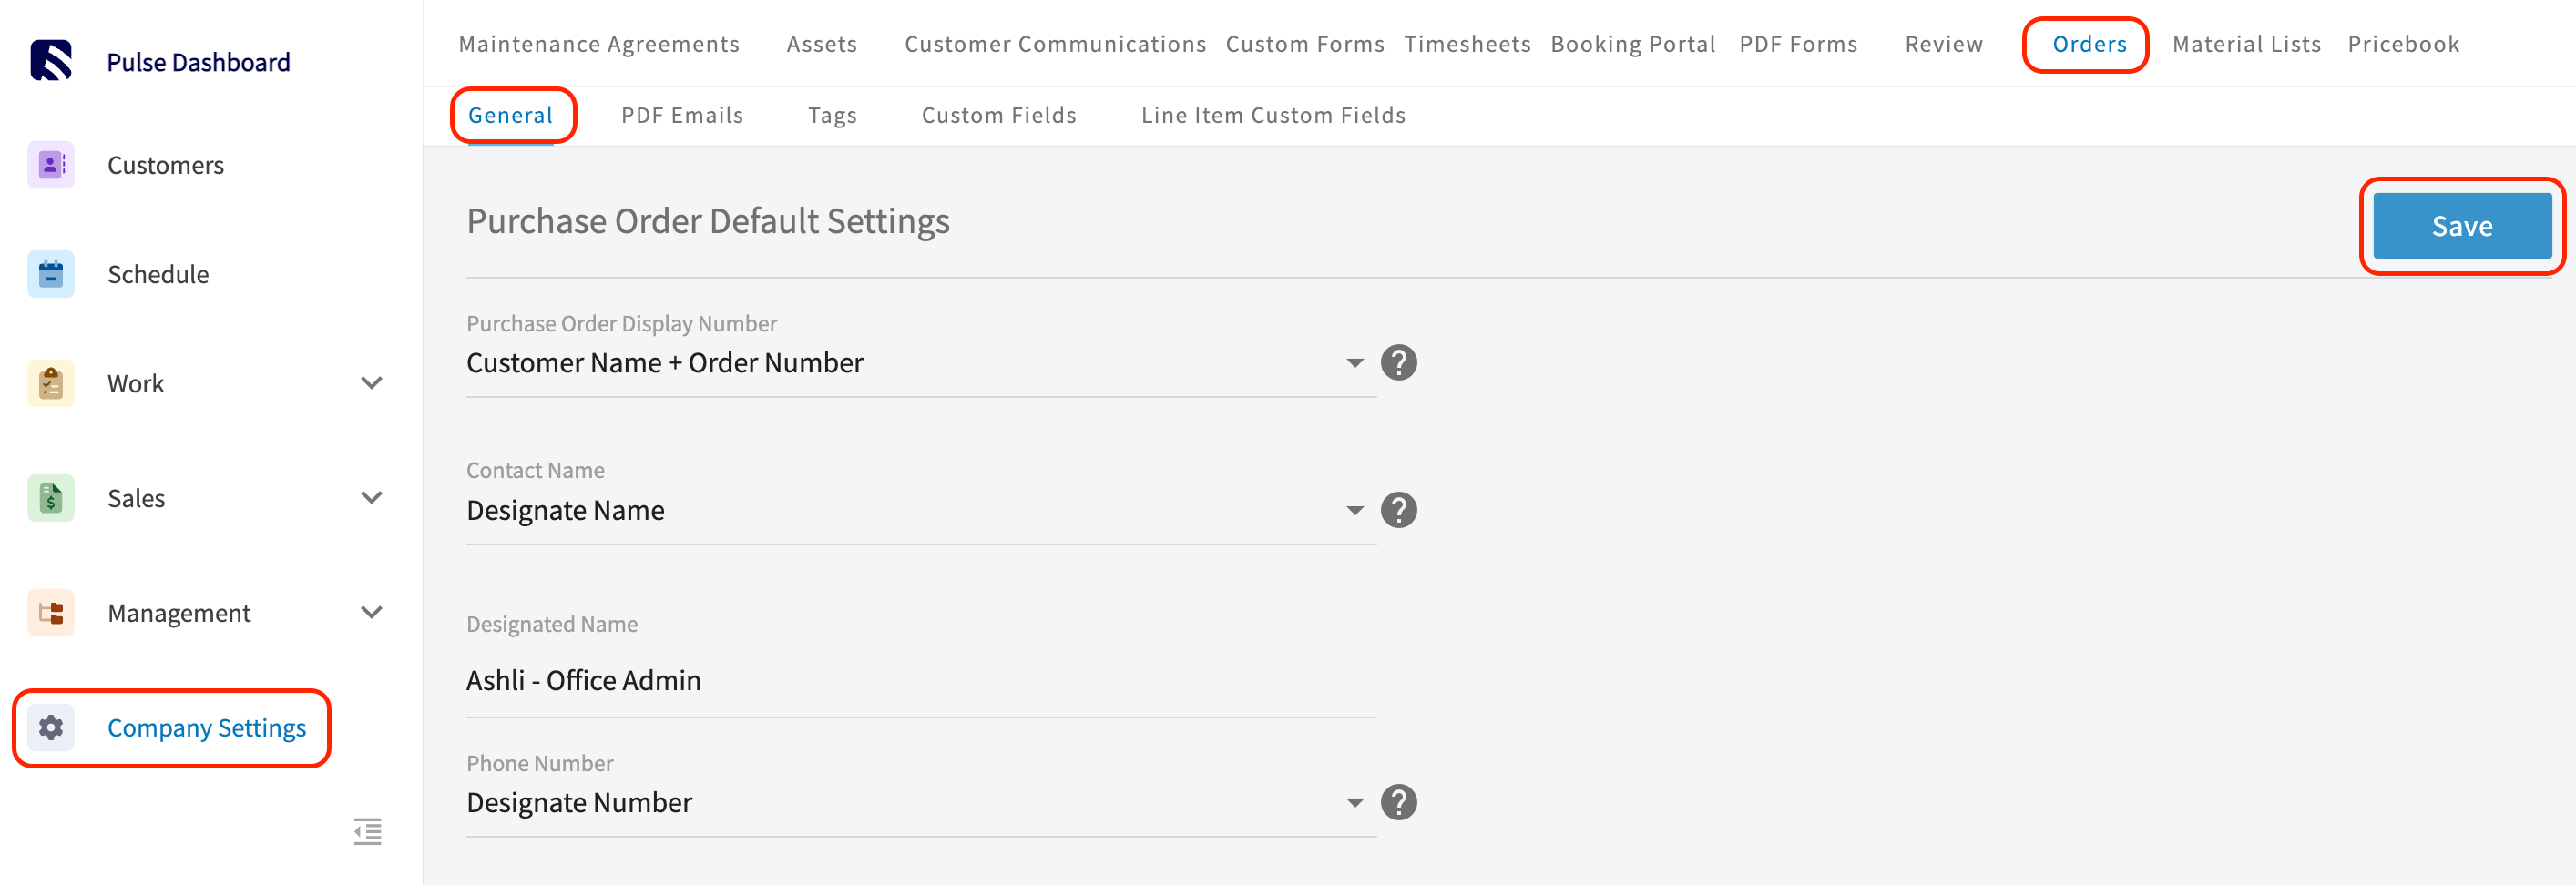
The Phone Number, Contact Email, and Delivery Address defaults apply to new purchase orders going forward, and you can still change them on any individual order.
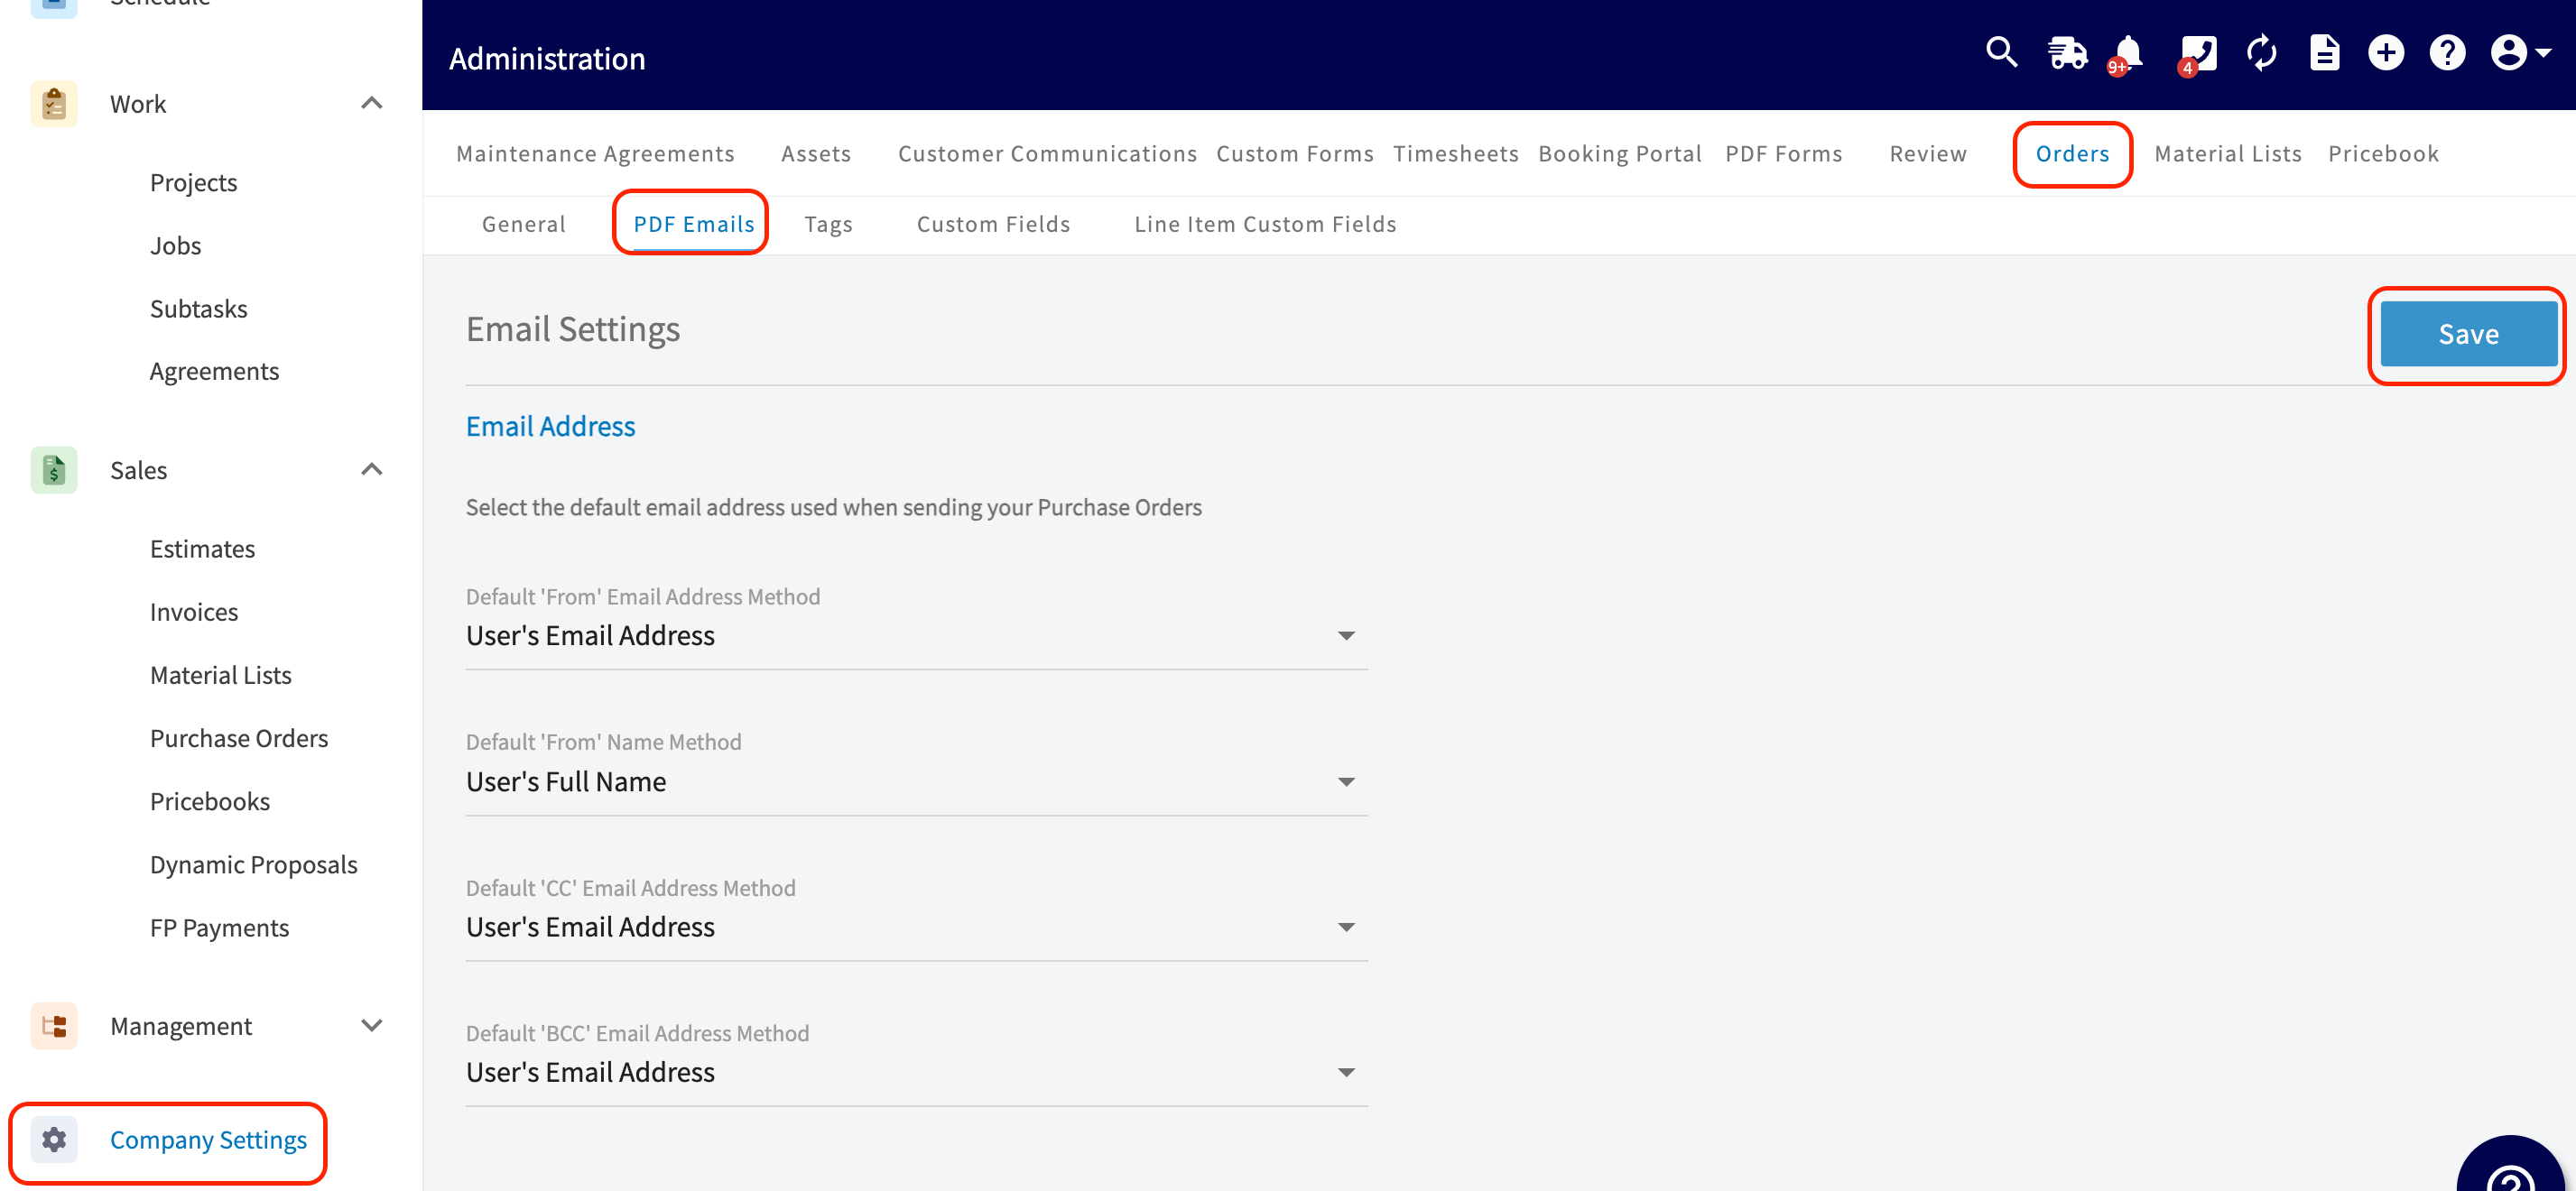
To choose the email address used when purchase order records are sent, open the PDF Emails subtab on the same Orders tab and set the default From, From Name, CC, and BCC methods.
Manage your suppliers
Your supplier list lives in Company Settings, so you can view, add, edit, archive, and import suppliers in one place without opening a purchase order first. To get there, select Company Settings, open the Orders tab, then select the Suppliers subtab.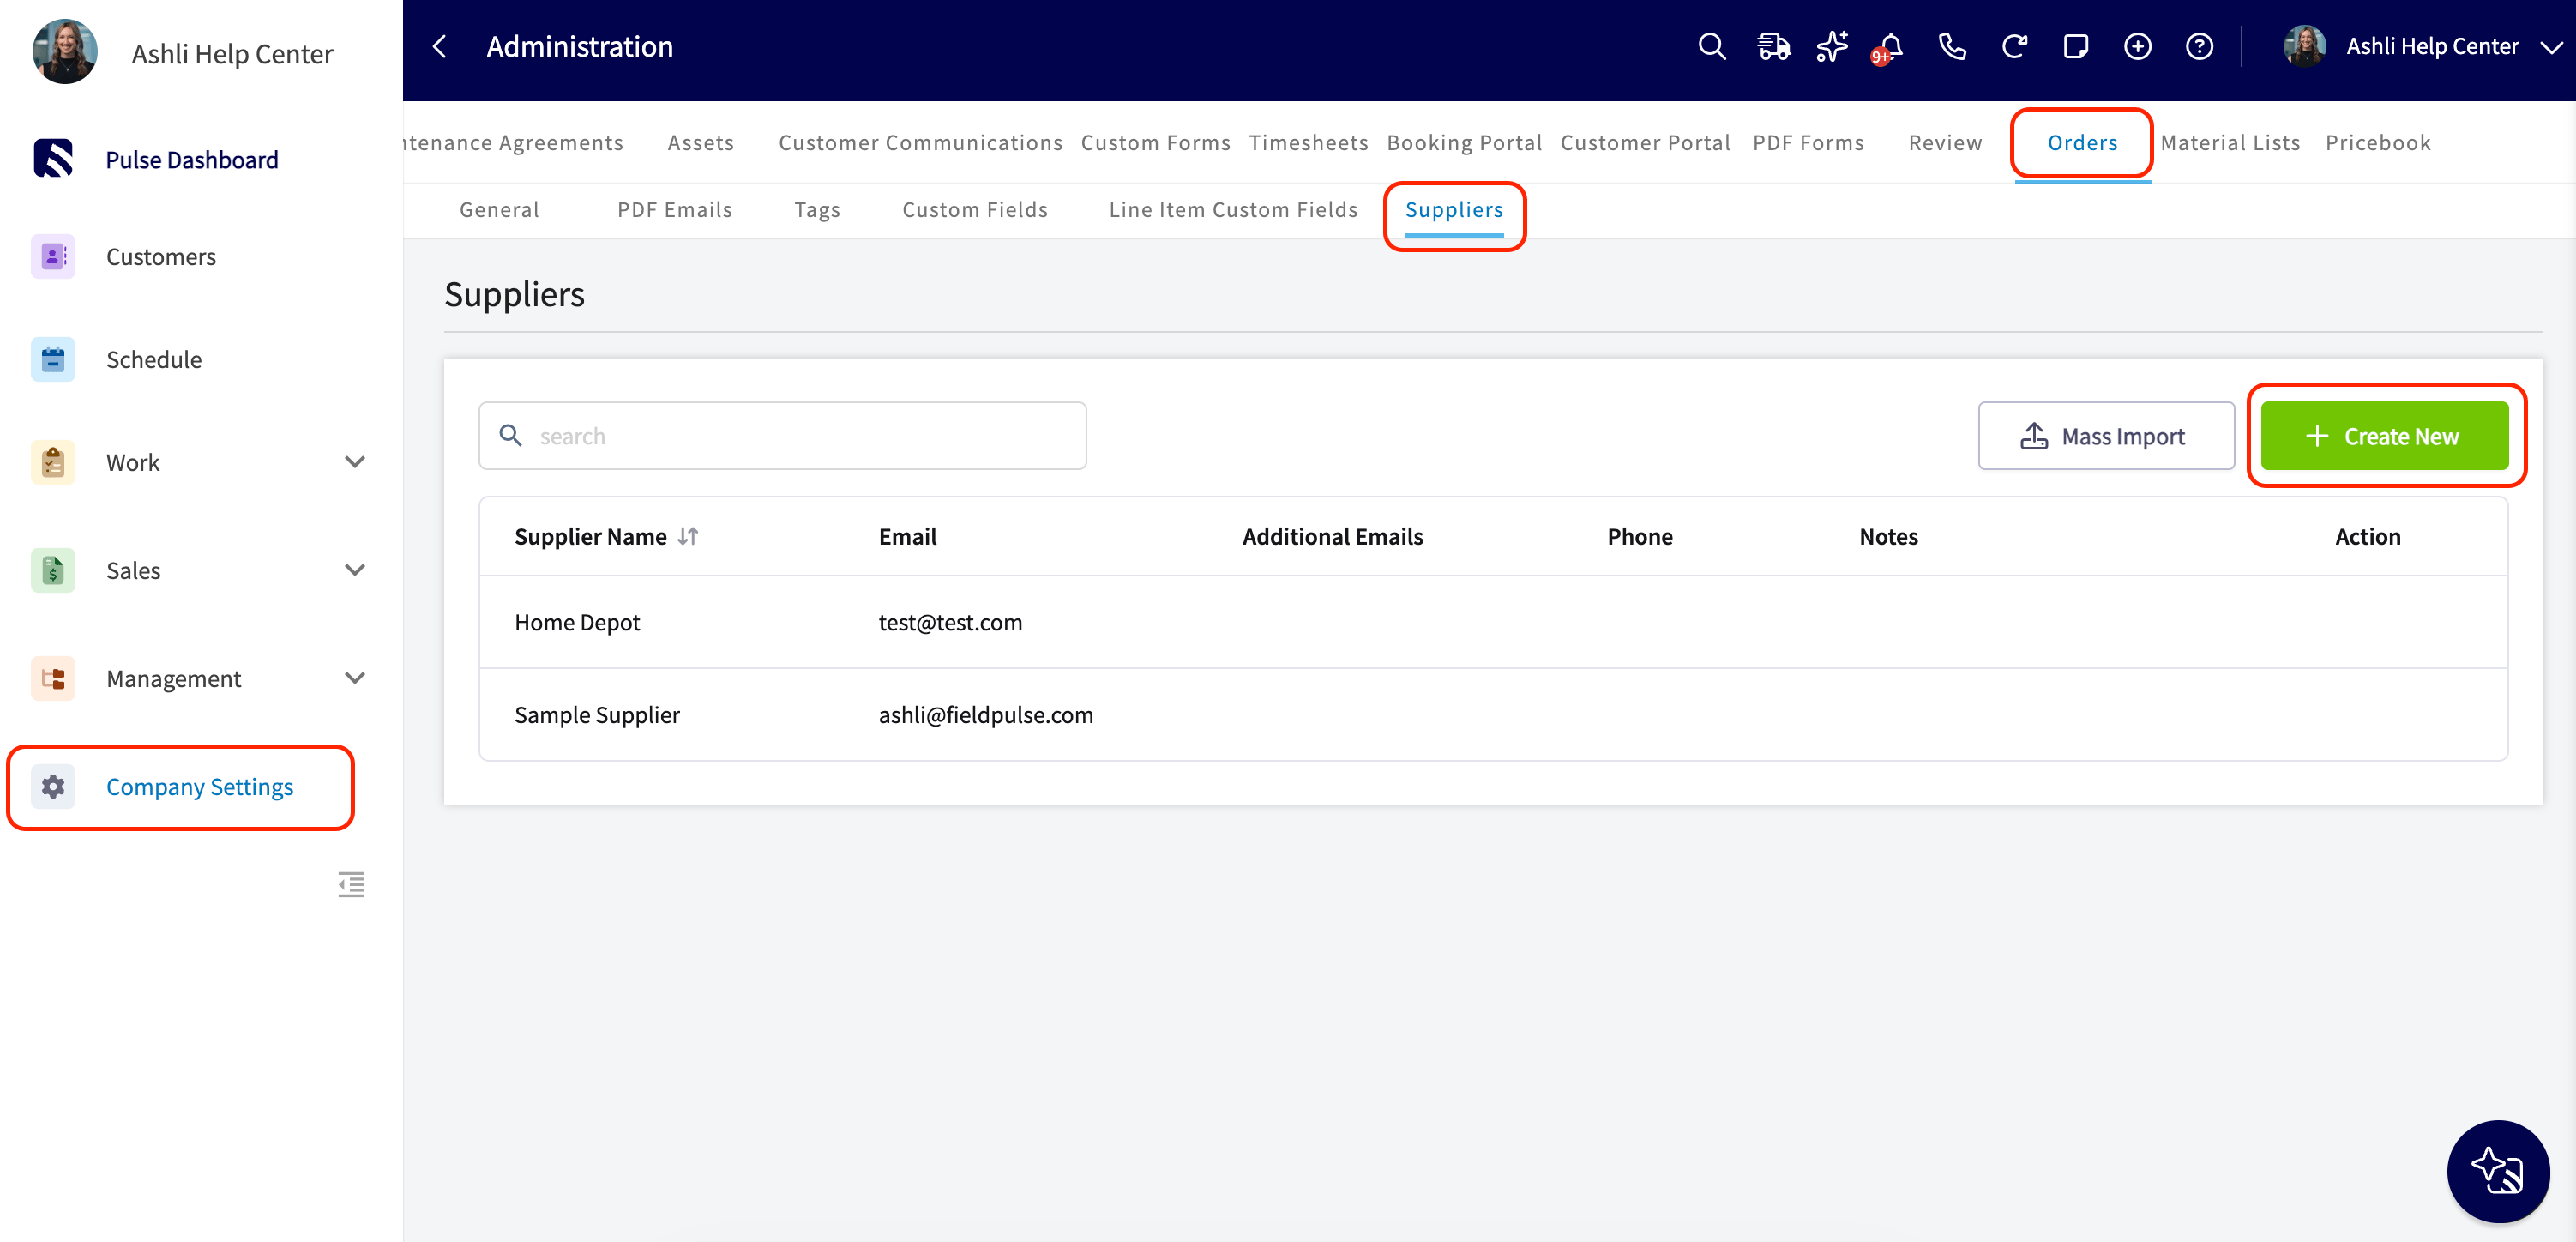
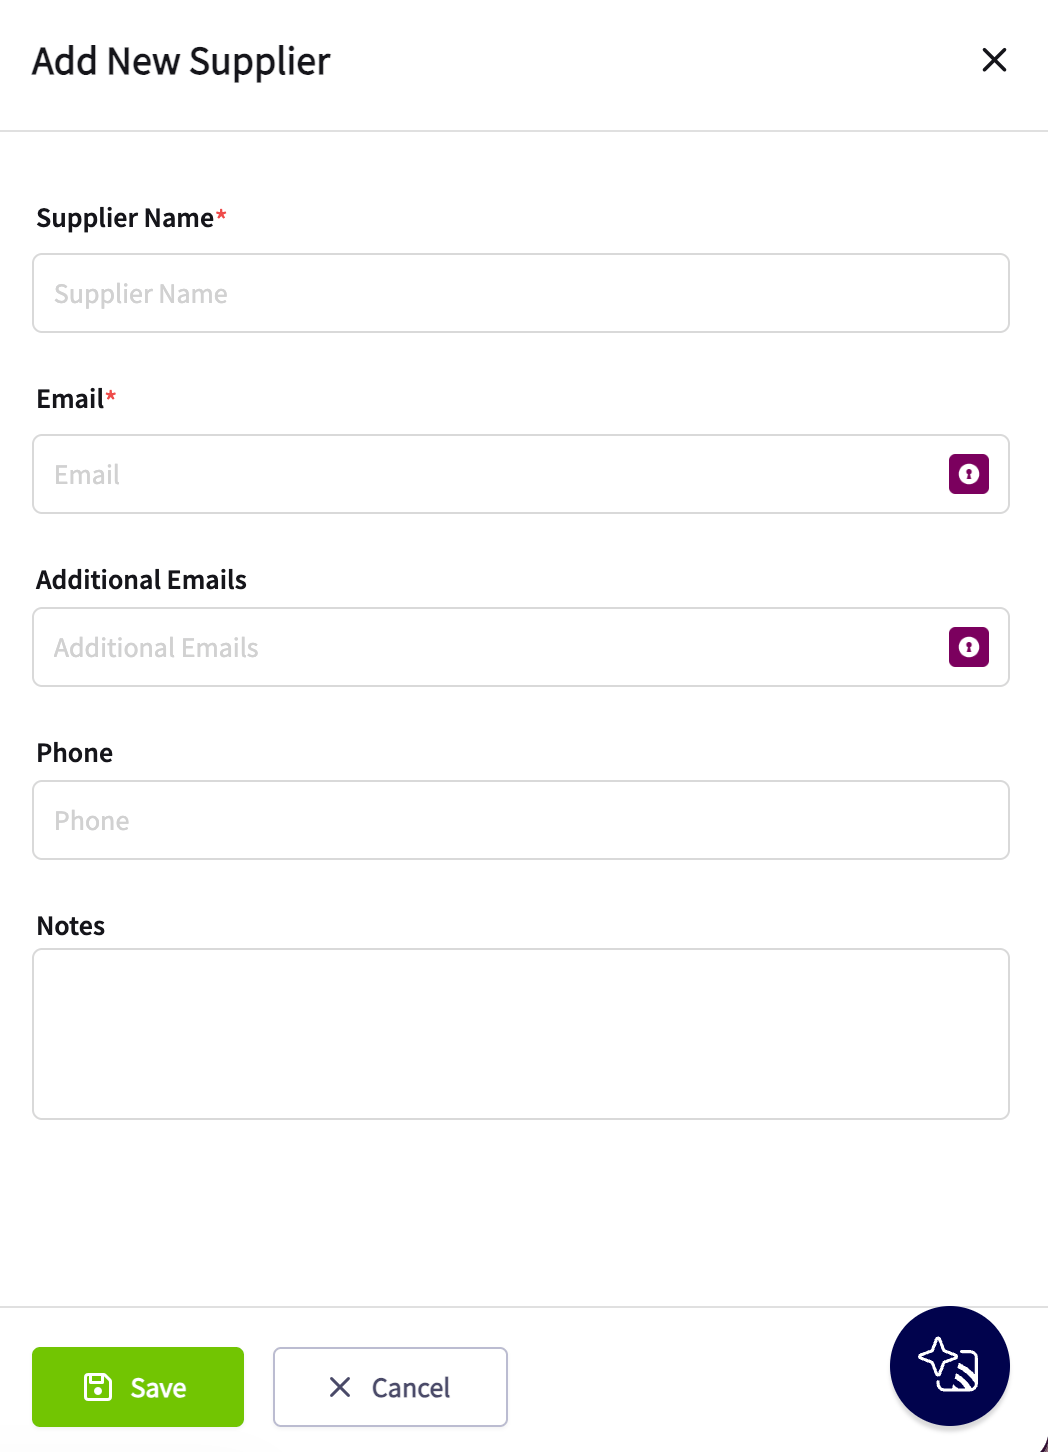
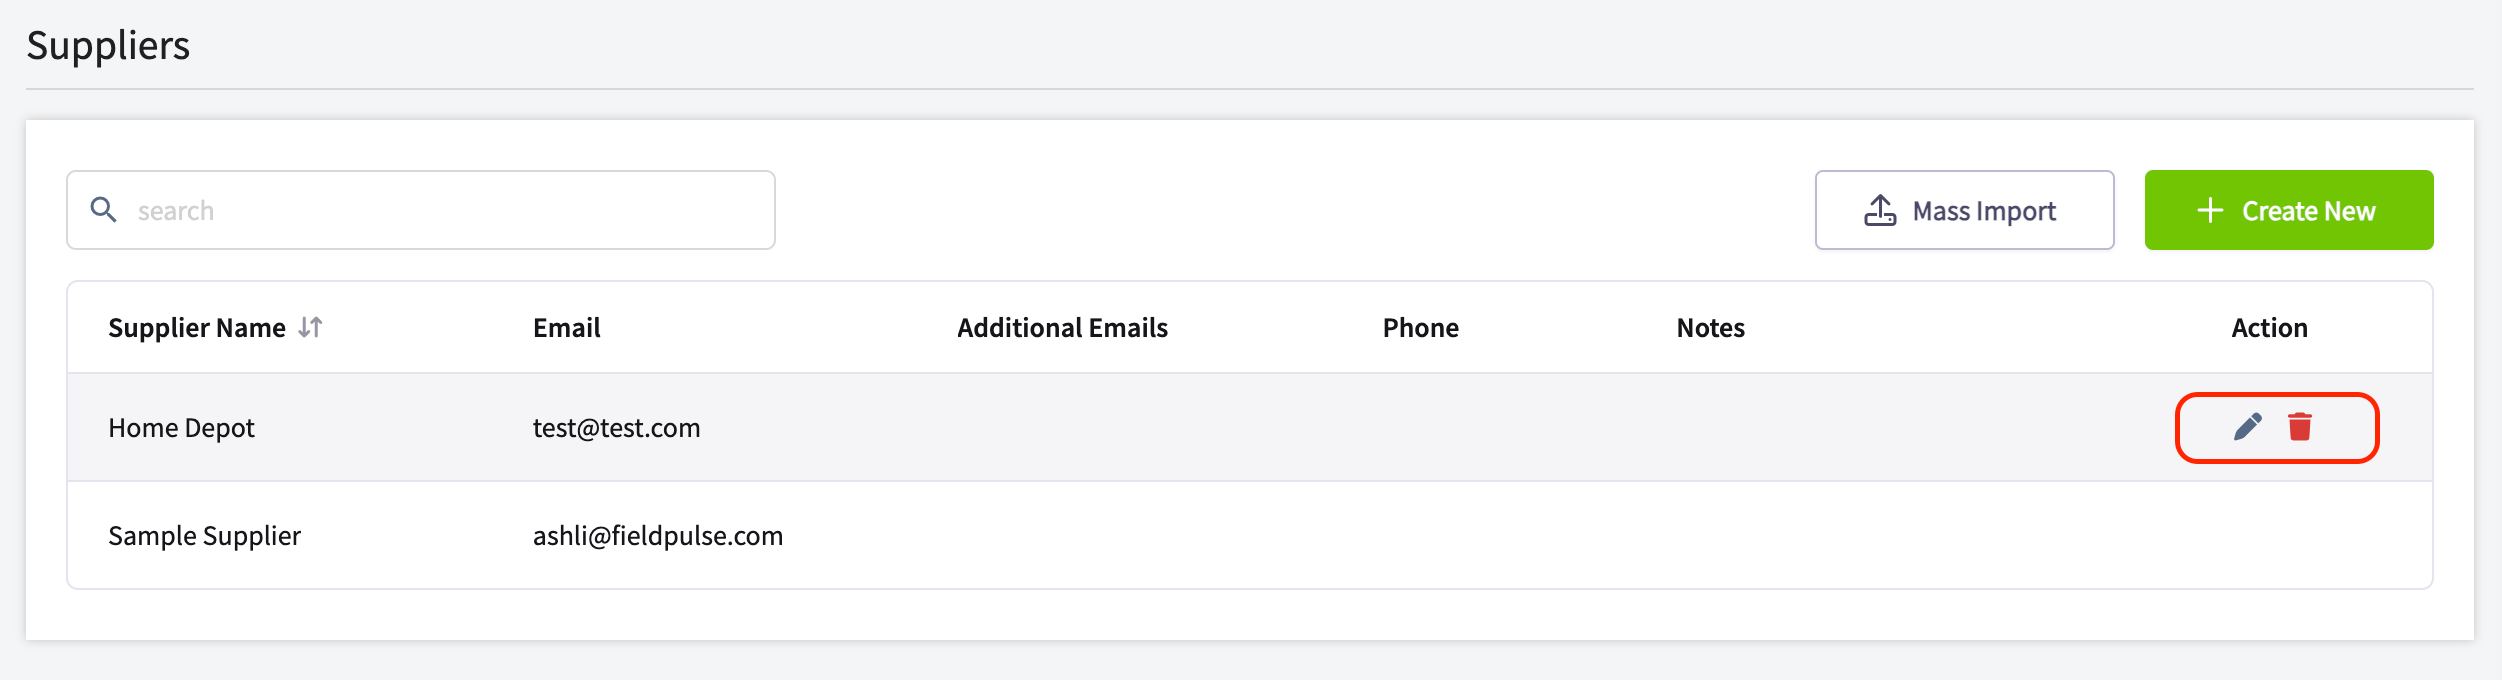
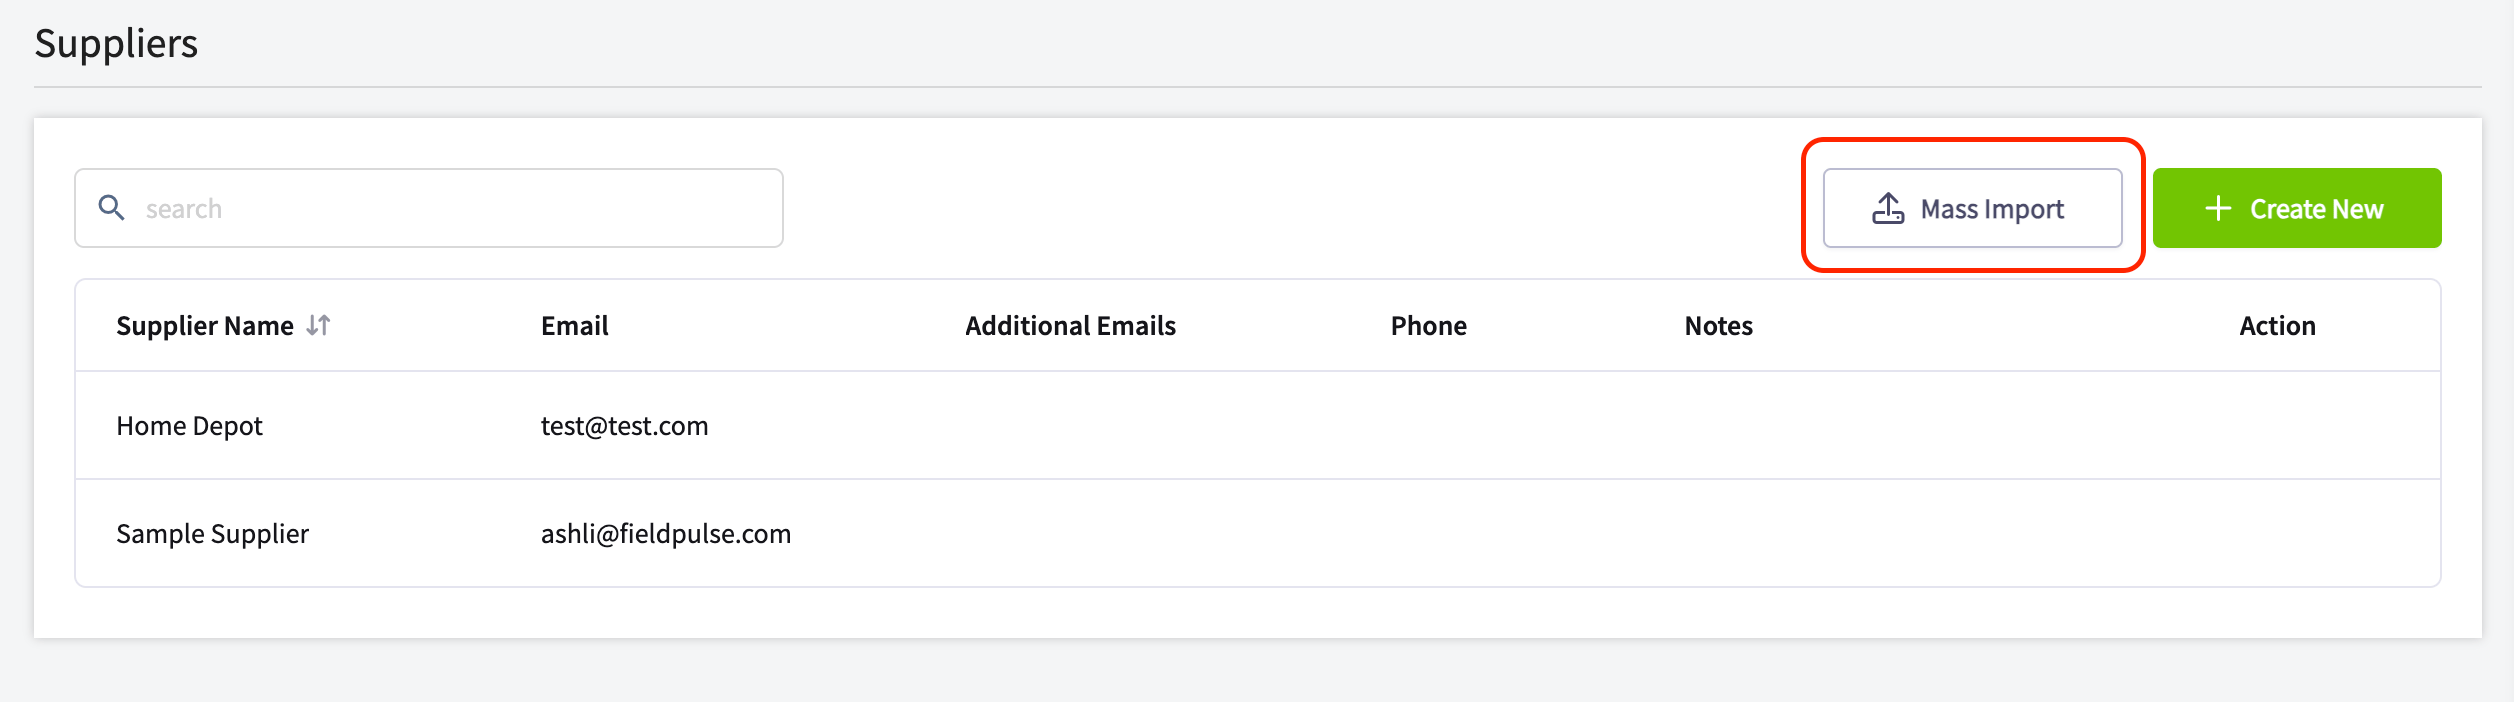
If you have active supplier integrations (like Reece, The Granite Group, or City Electric Supply), those suppliers appear automatically in the list as read-only entries.
Create and send a purchase order
-
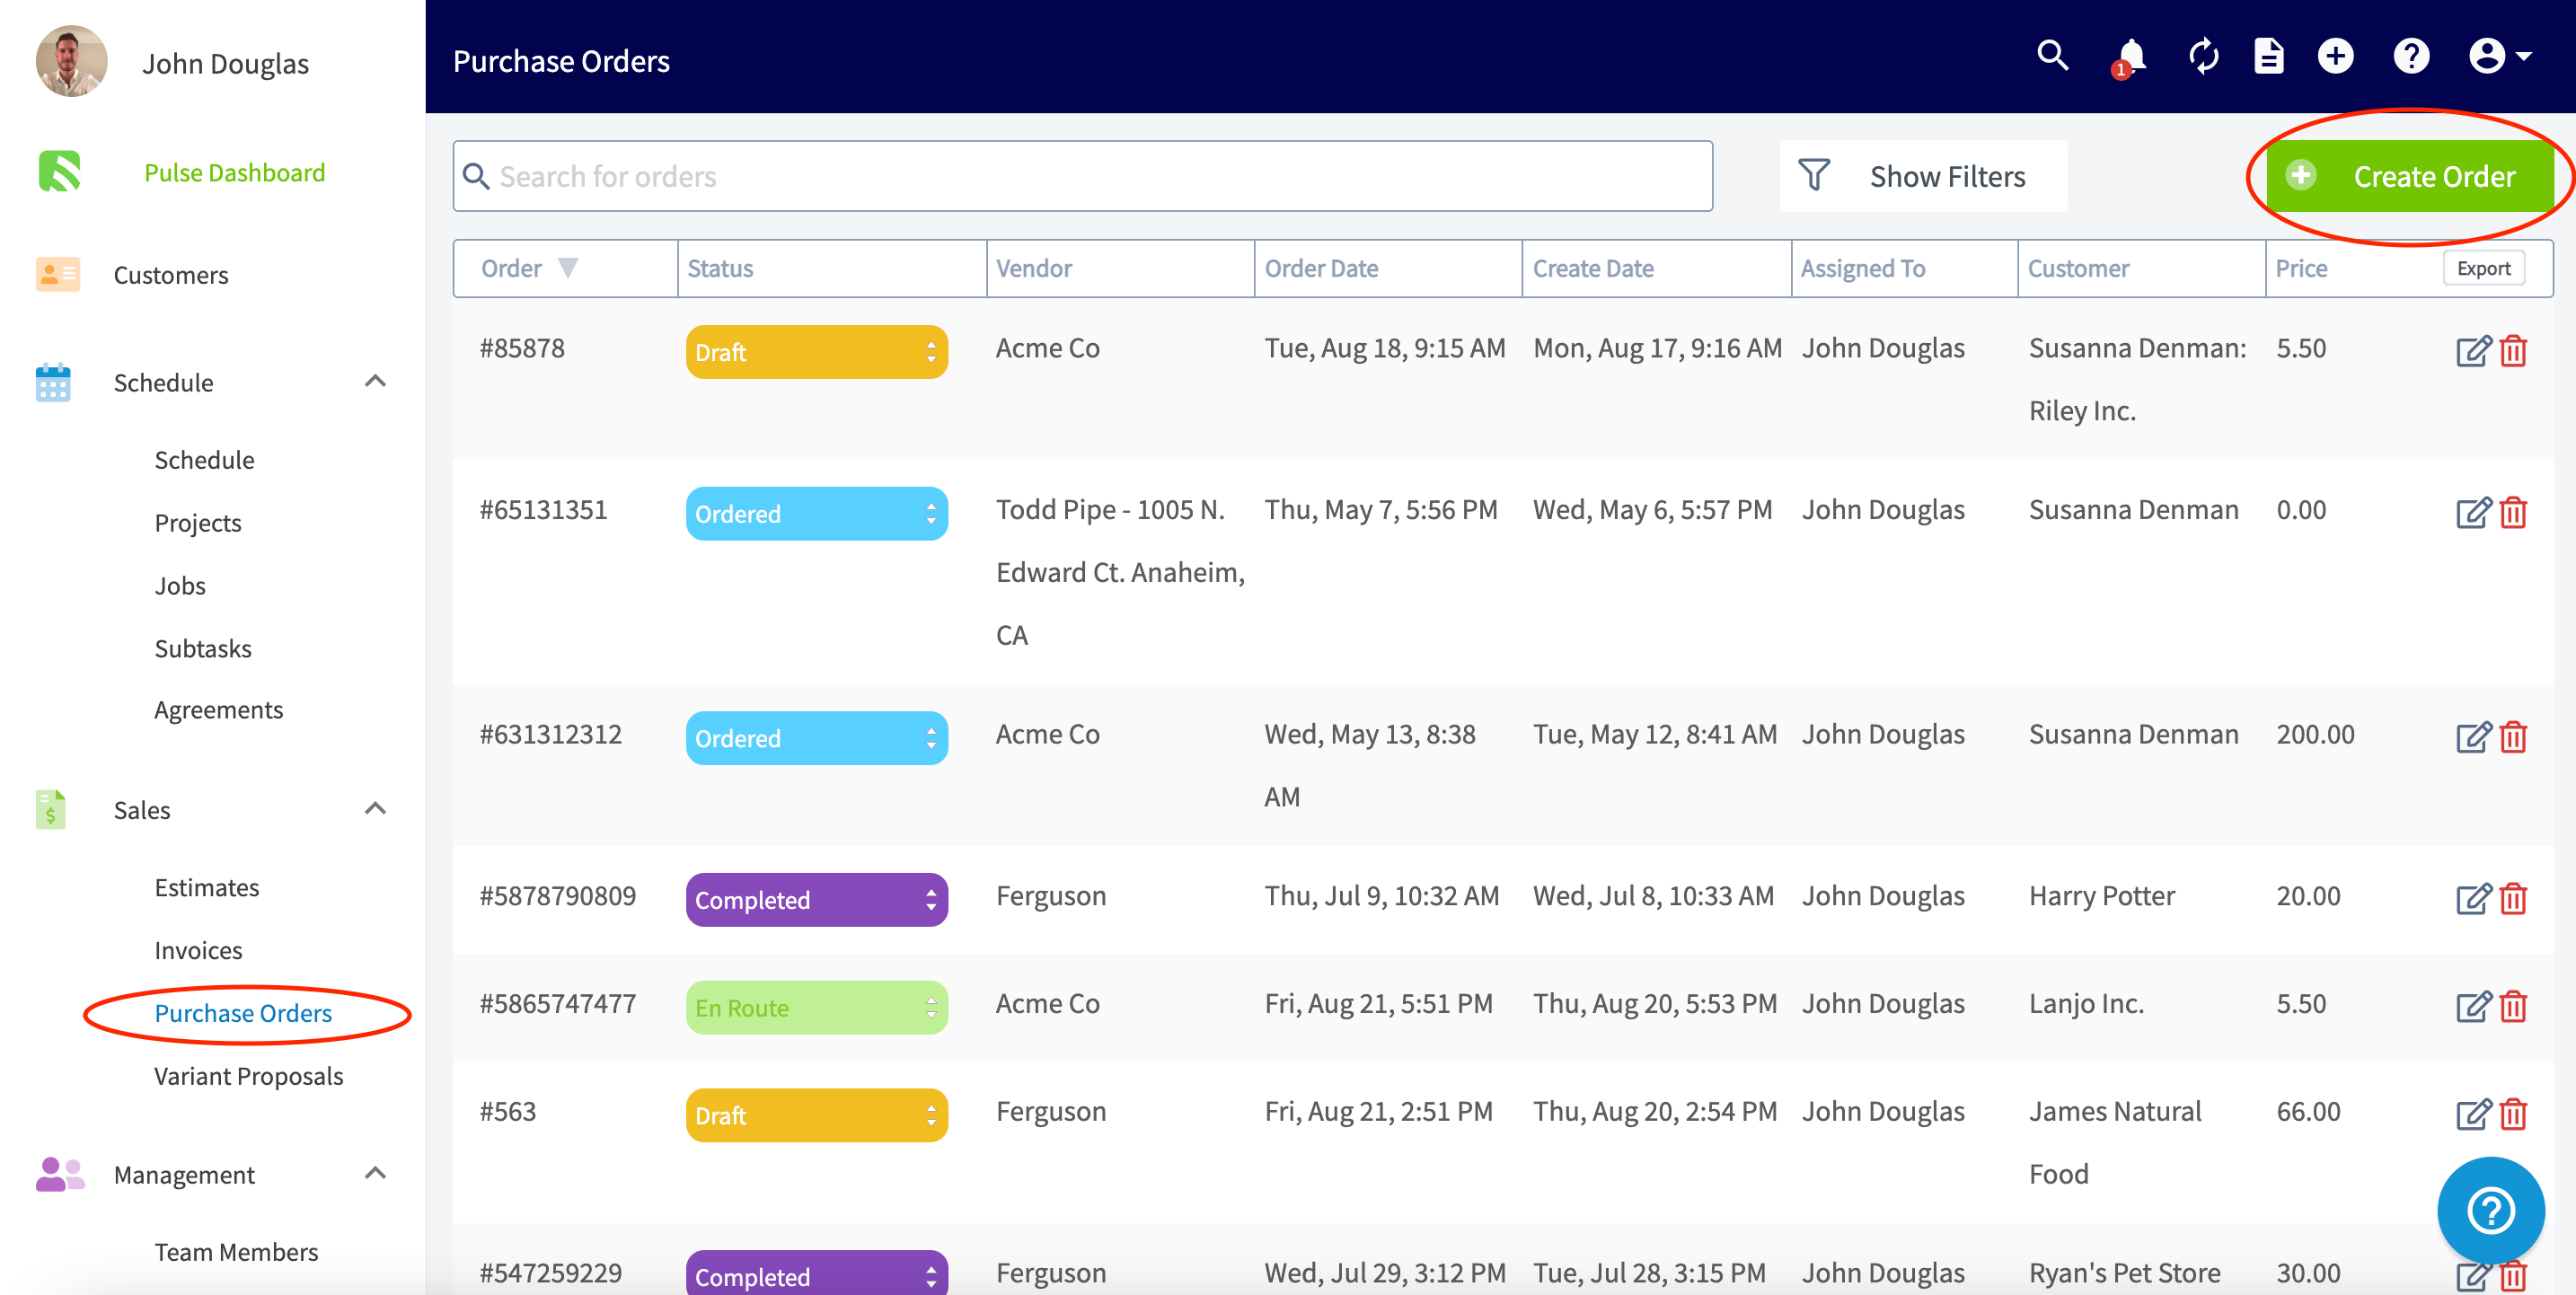
Select the Purchase Orders tab in the left-side menu, then select Create Order.
-
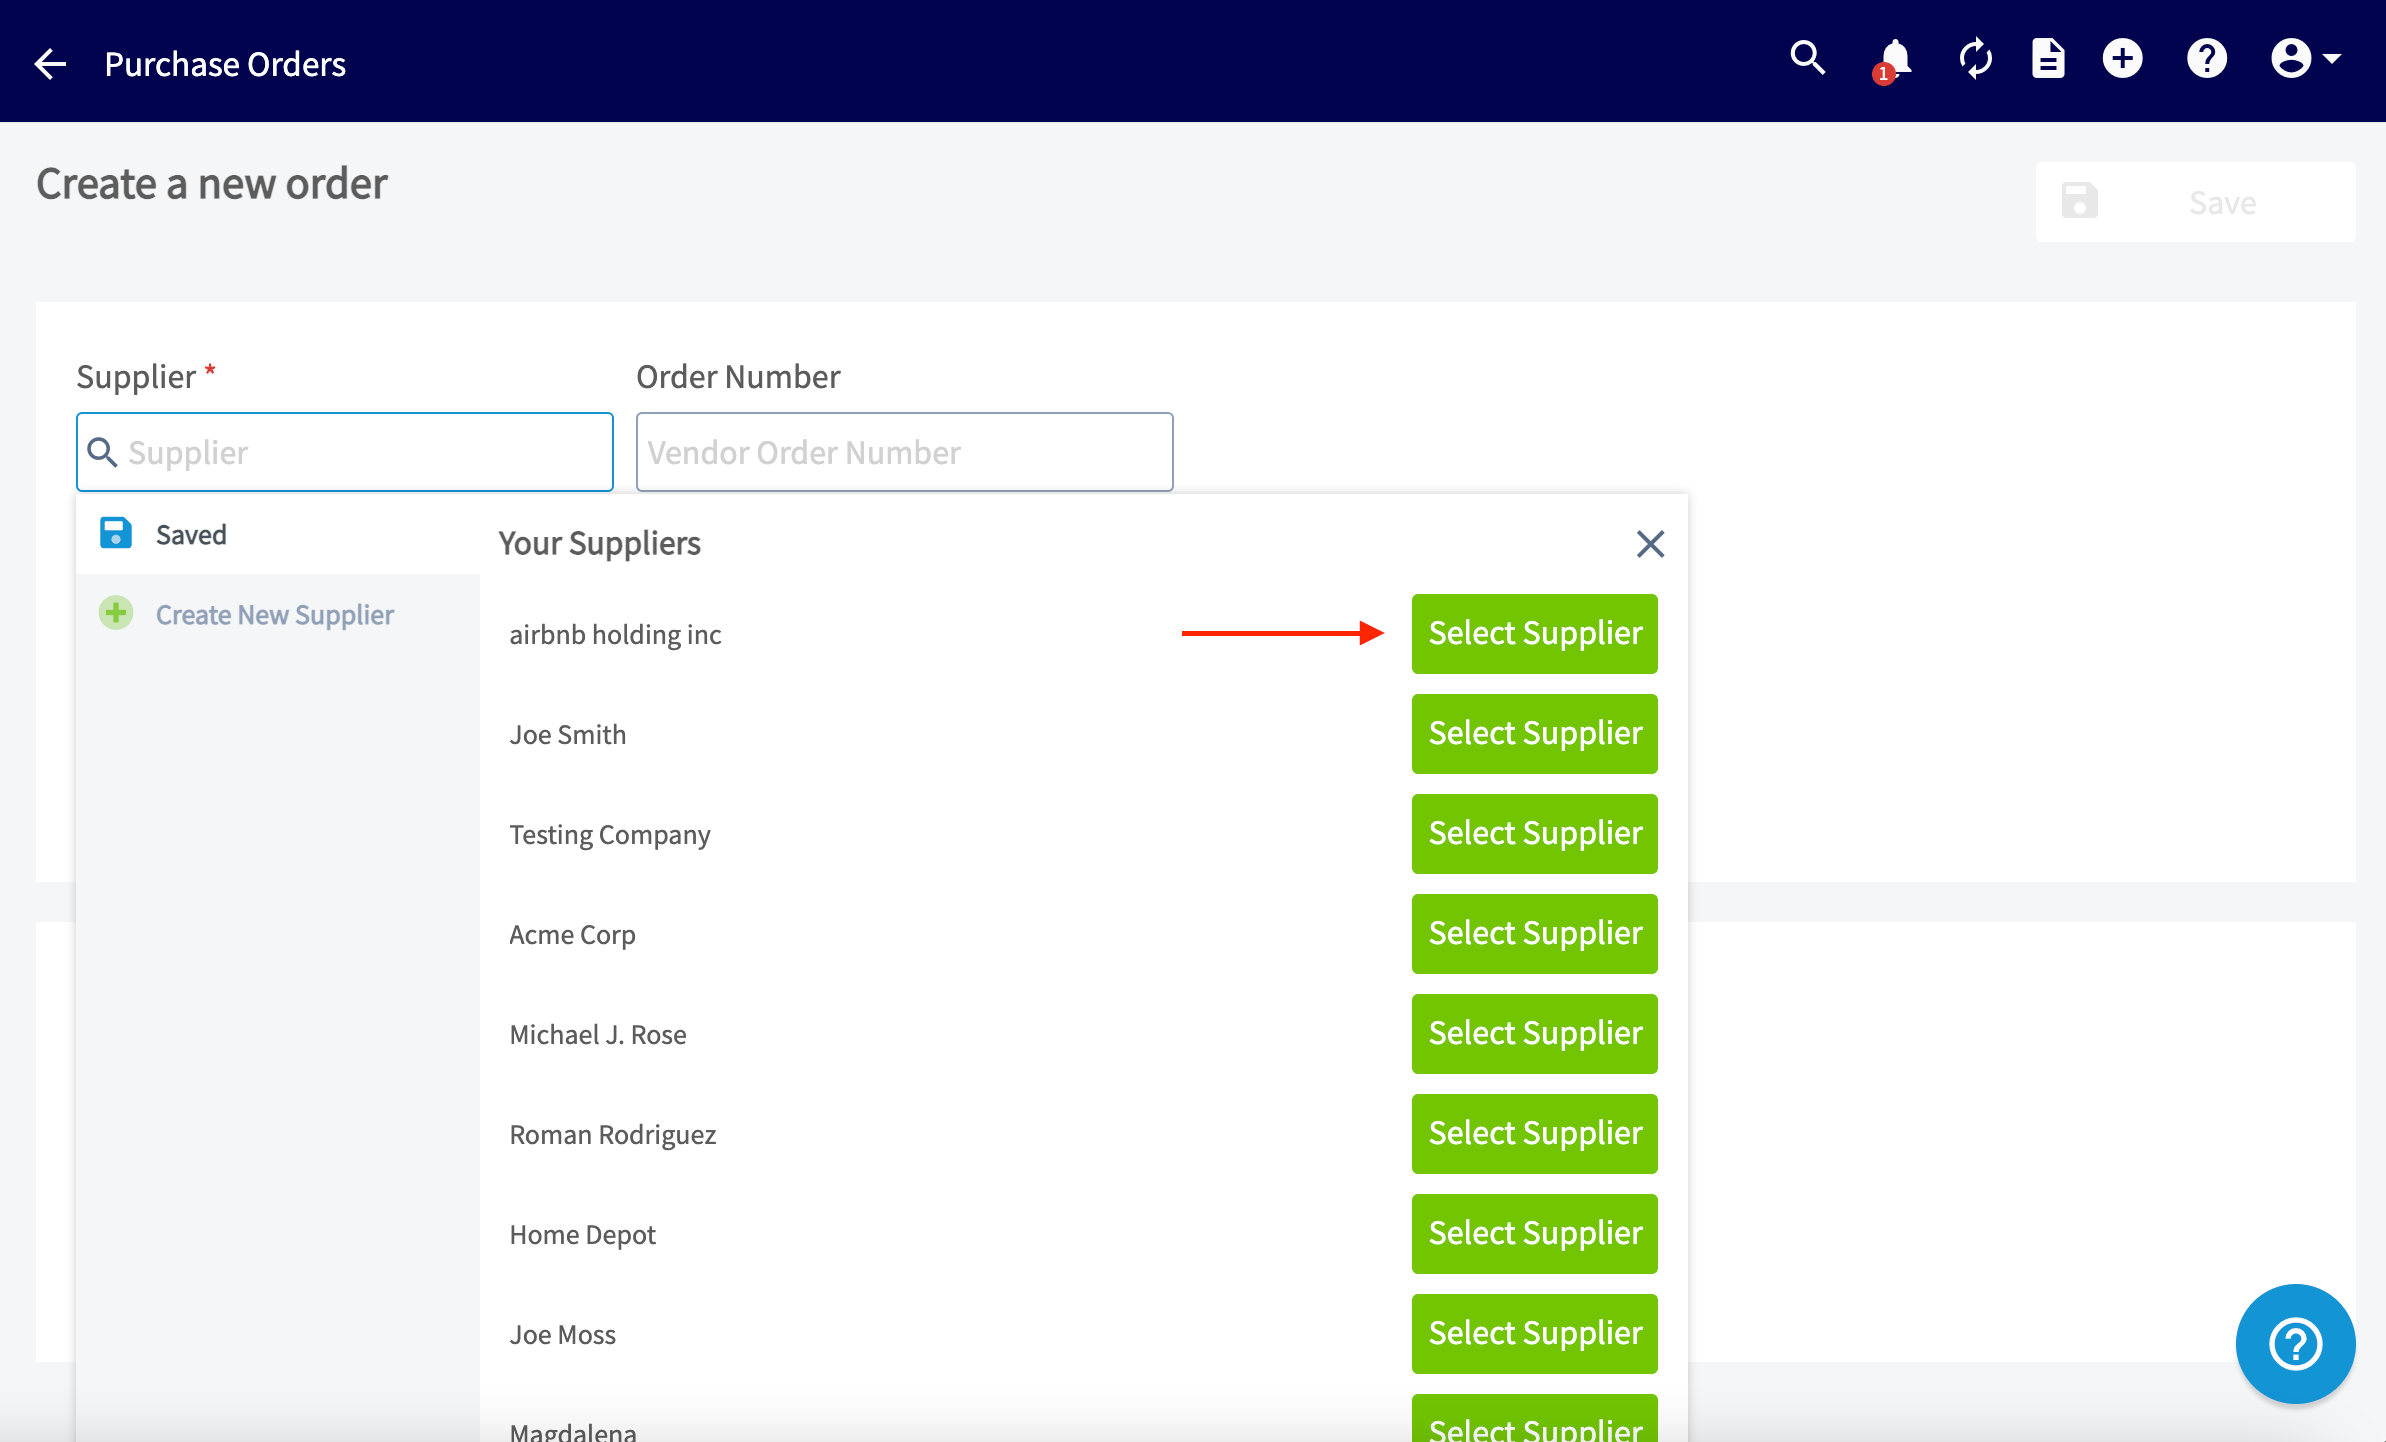
Add a supplier. Select the Supplier search box to see your saved suppliers, find the one you want, and select Select Supplier.
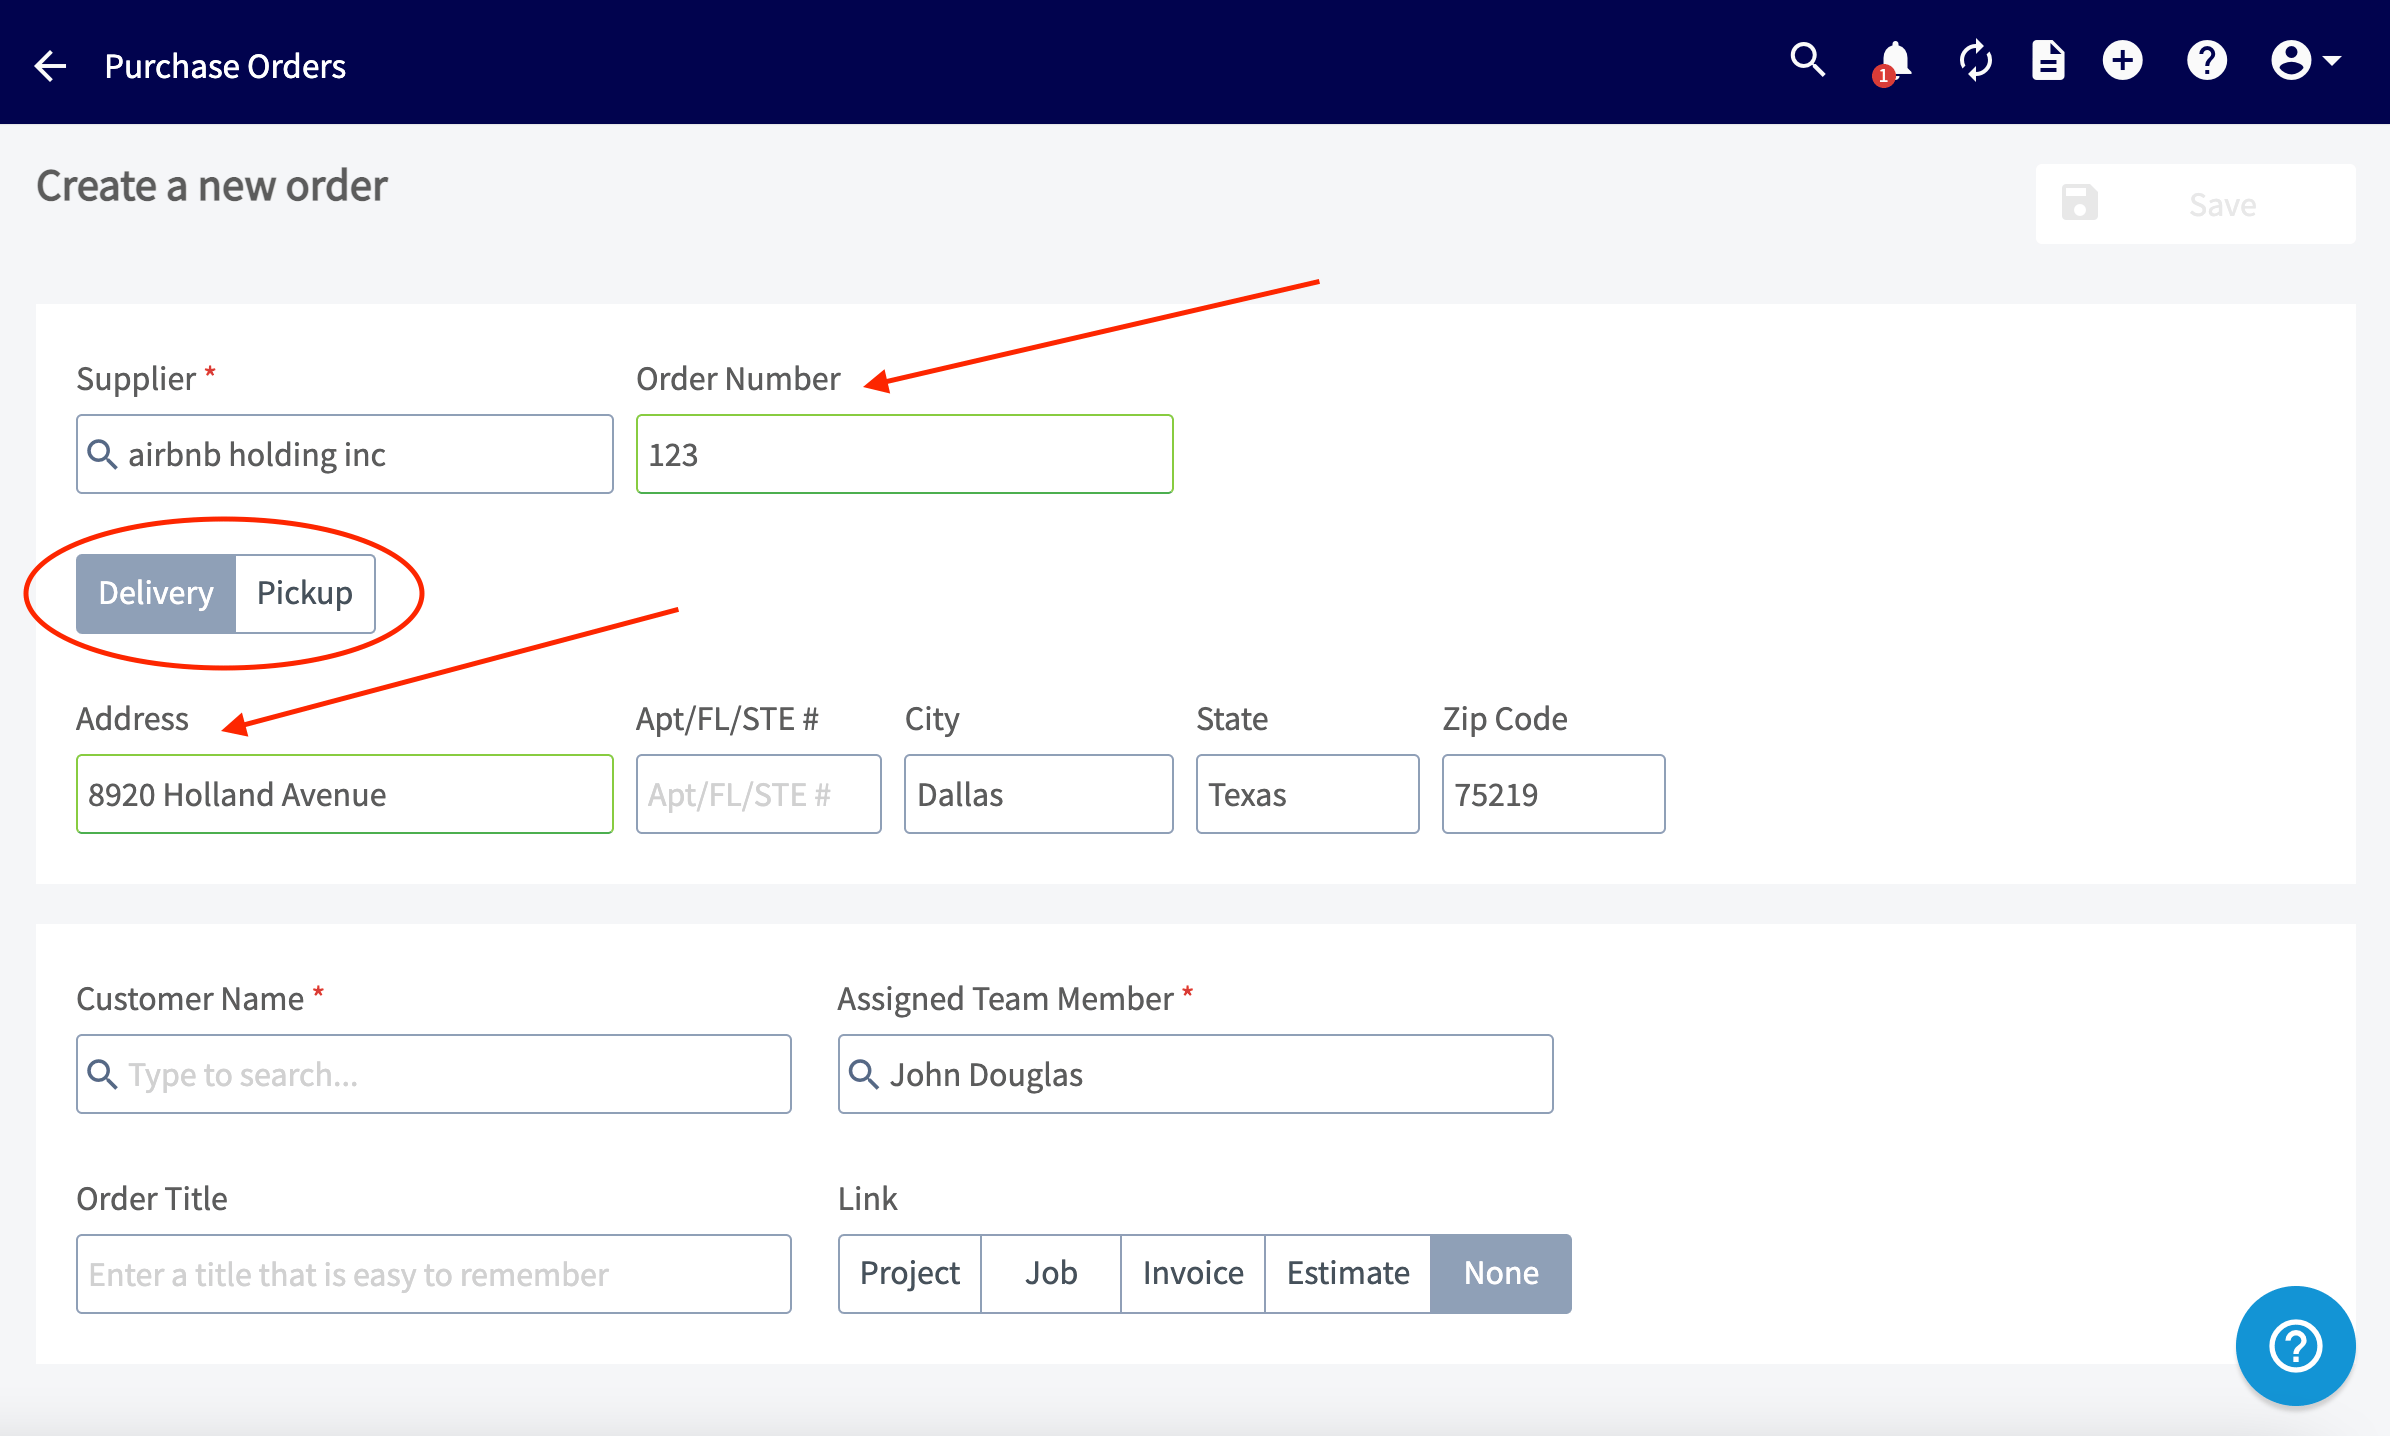
- Enter the vendor’s order number in Order Number.
-
Choose Delivery or Pickup, then enter the address.
- Set the Expected Delivery Date to at least 2 hours from the current time. FieldPulse will not save the purchase order until a later date and time is set.
-
Select the Customer Name field and choose an existing customer, or select Create New Customer to build one.
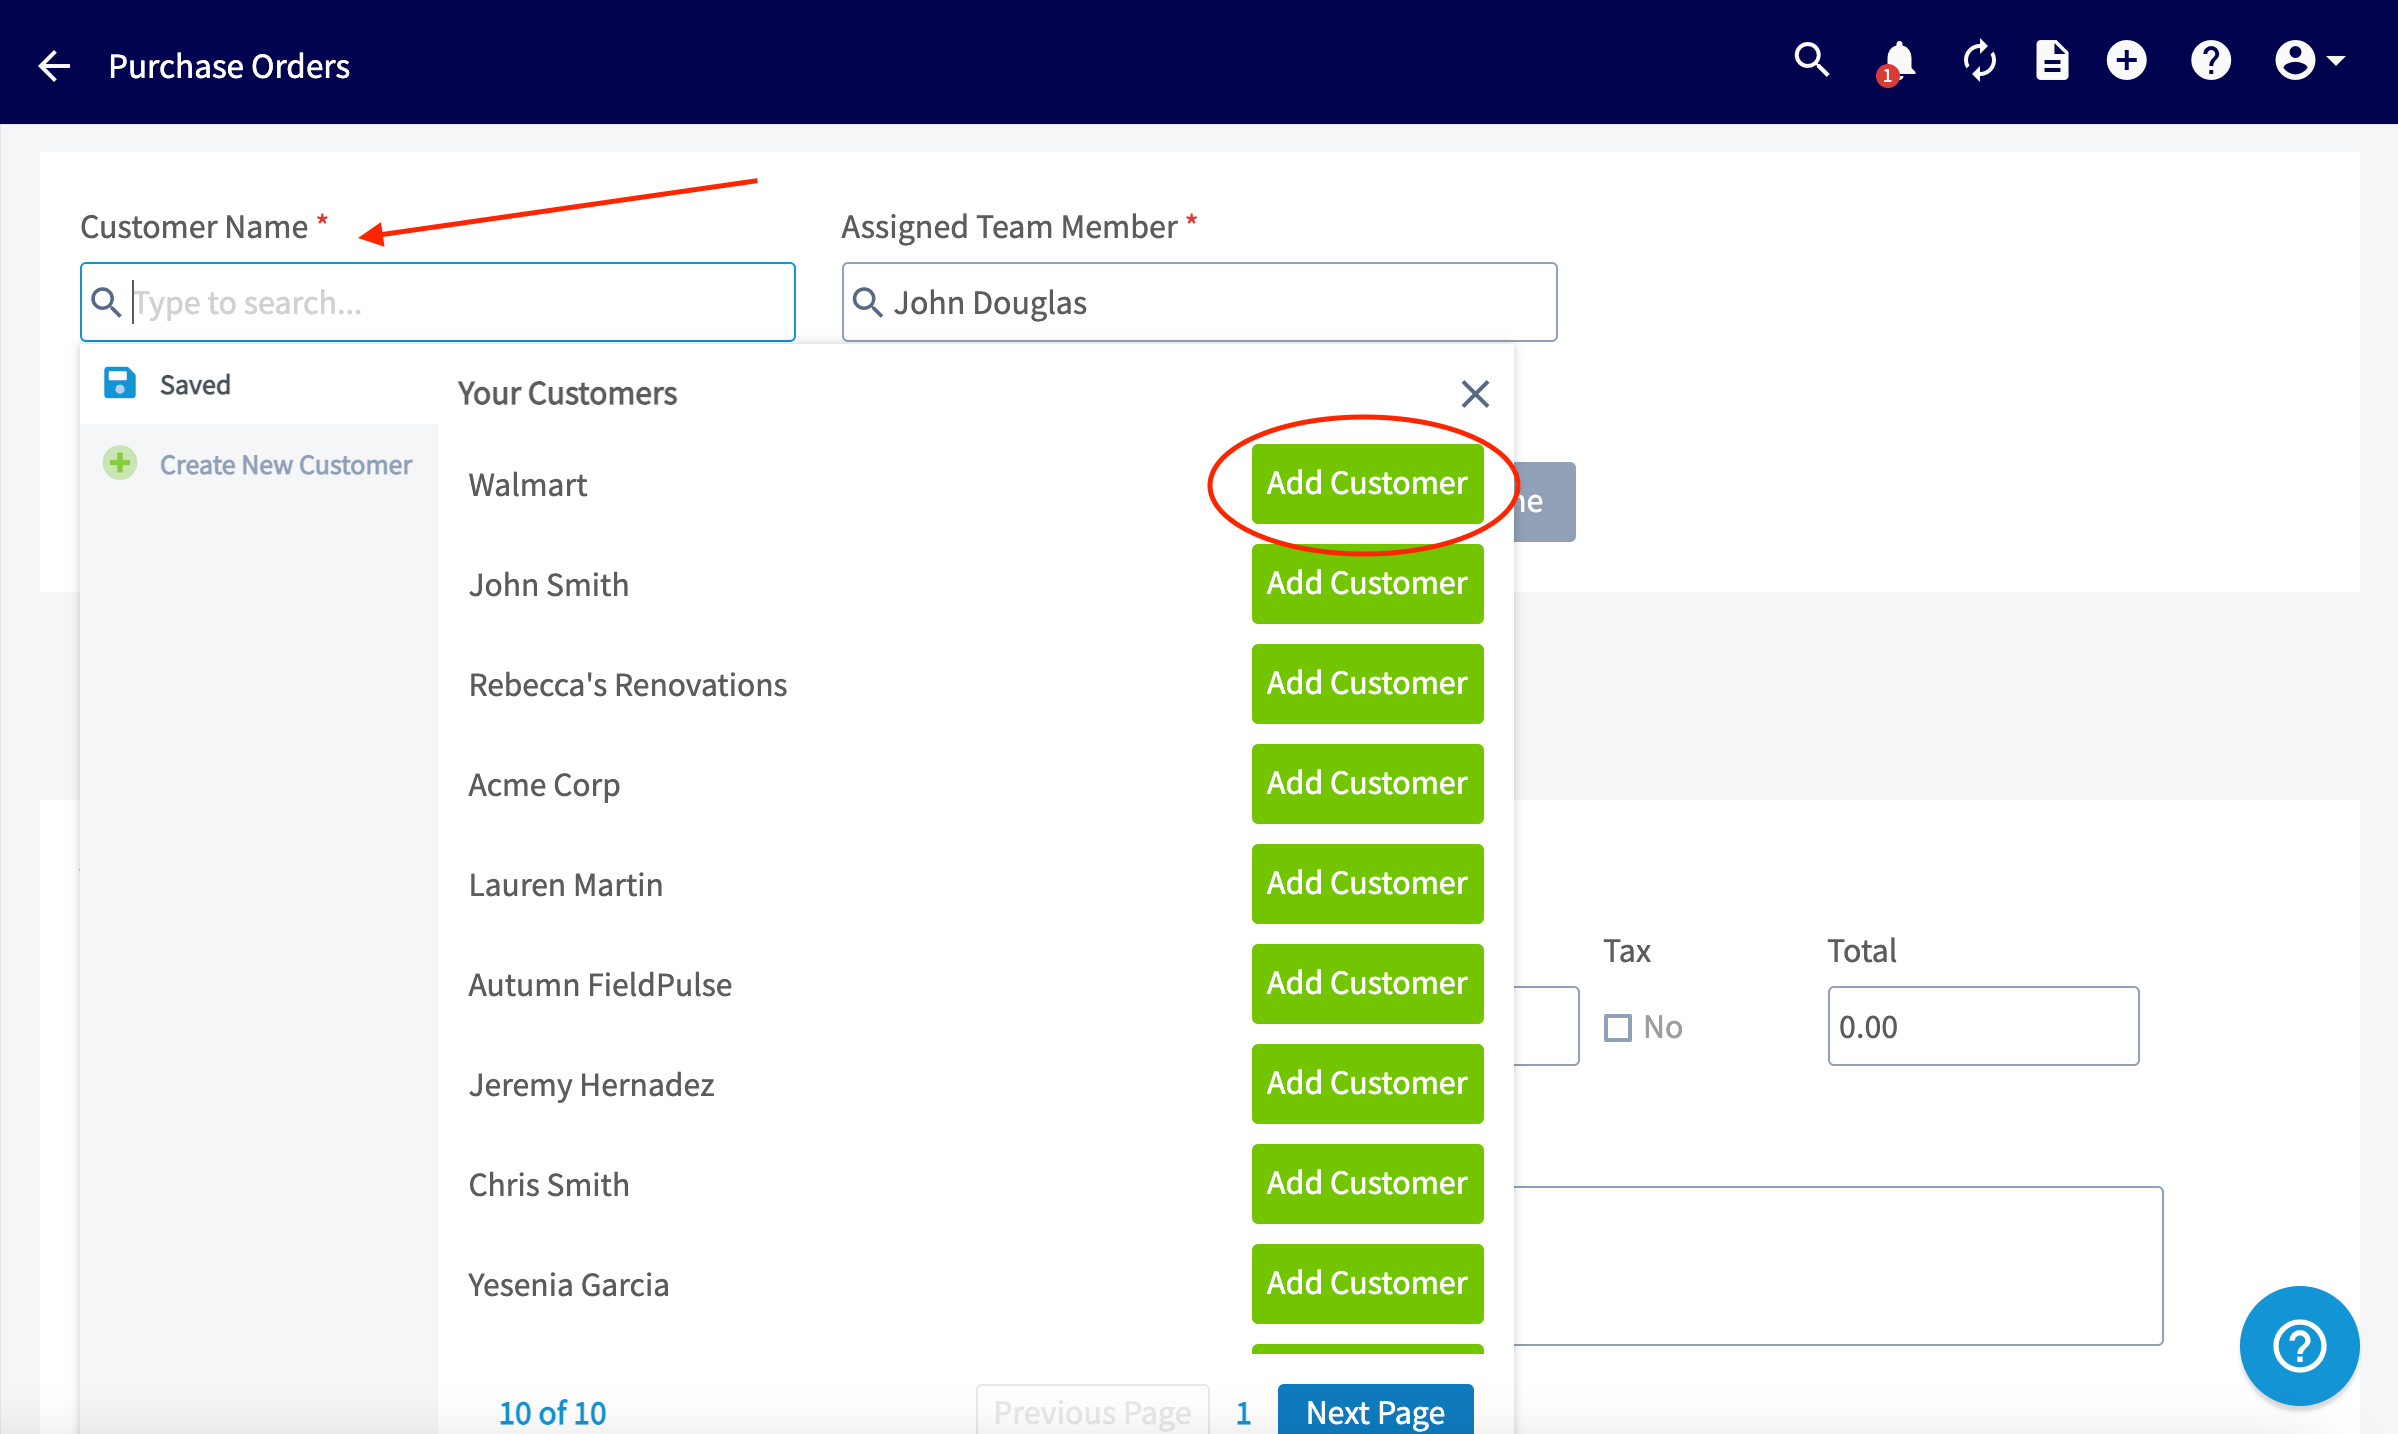
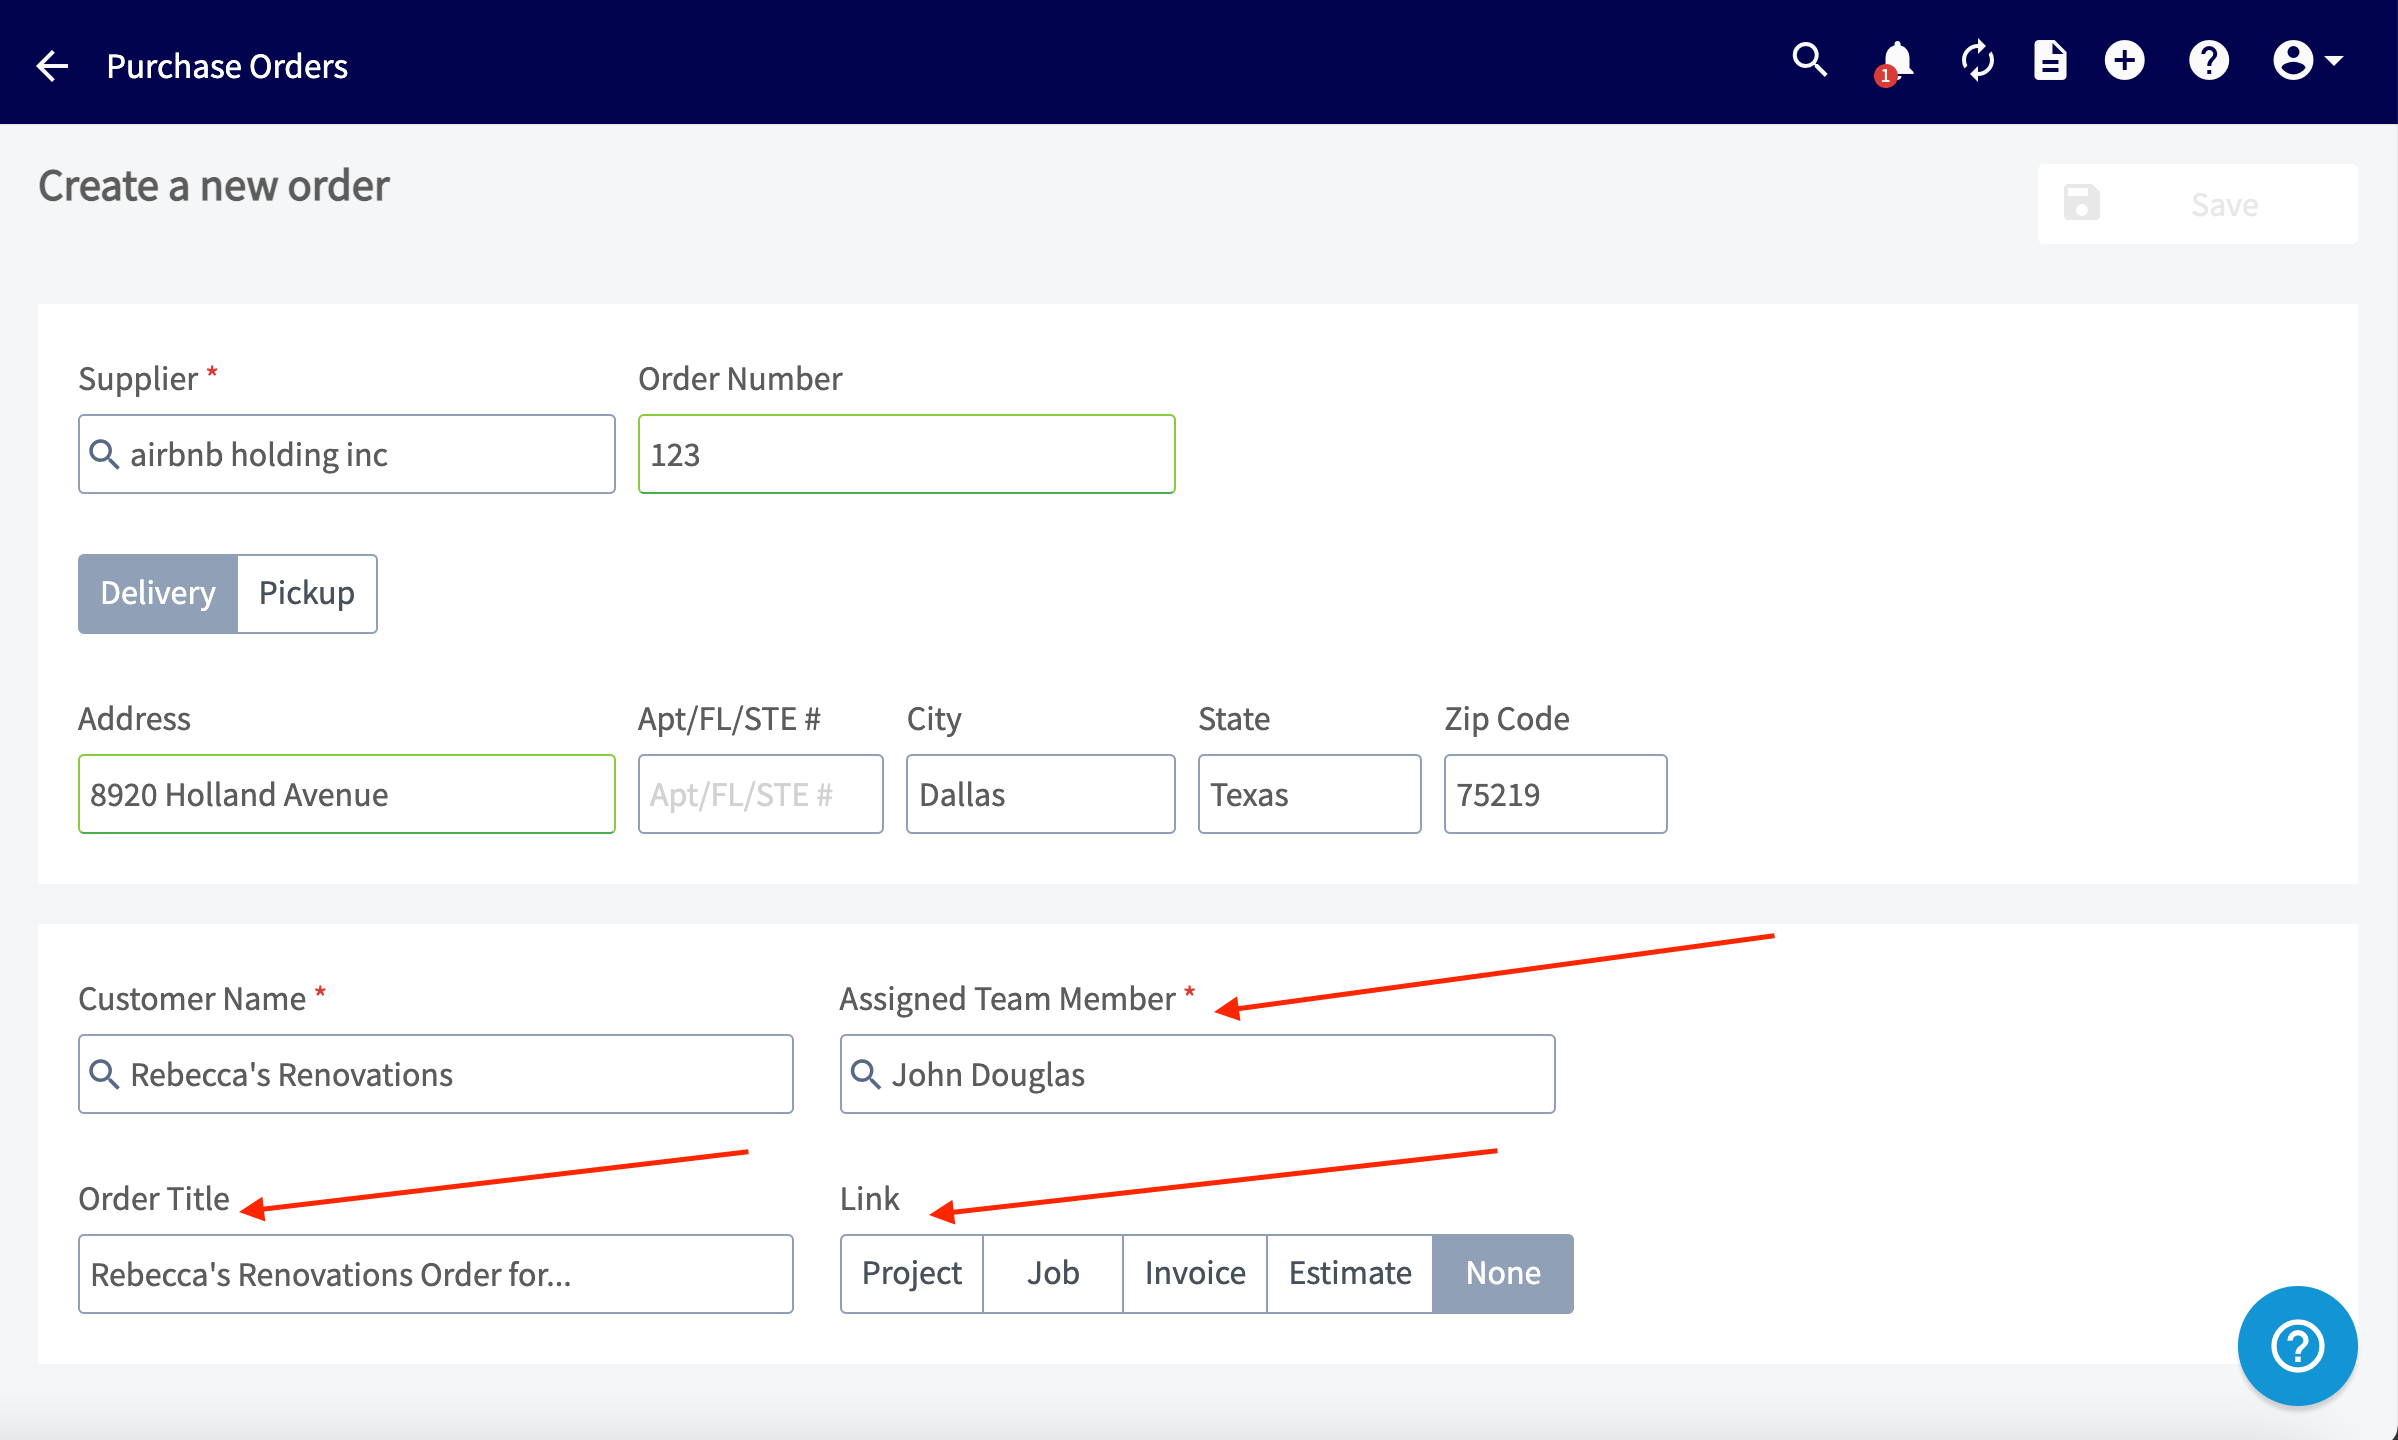
- Set the Assigned Team Member. This field defaults to whoever is creating the purchase order.
- Enter an Order Title.
-
Under Link, connect the order to an existing Project, Job, Invoice, or Estimate, or select None to create it as a standalone order.
-
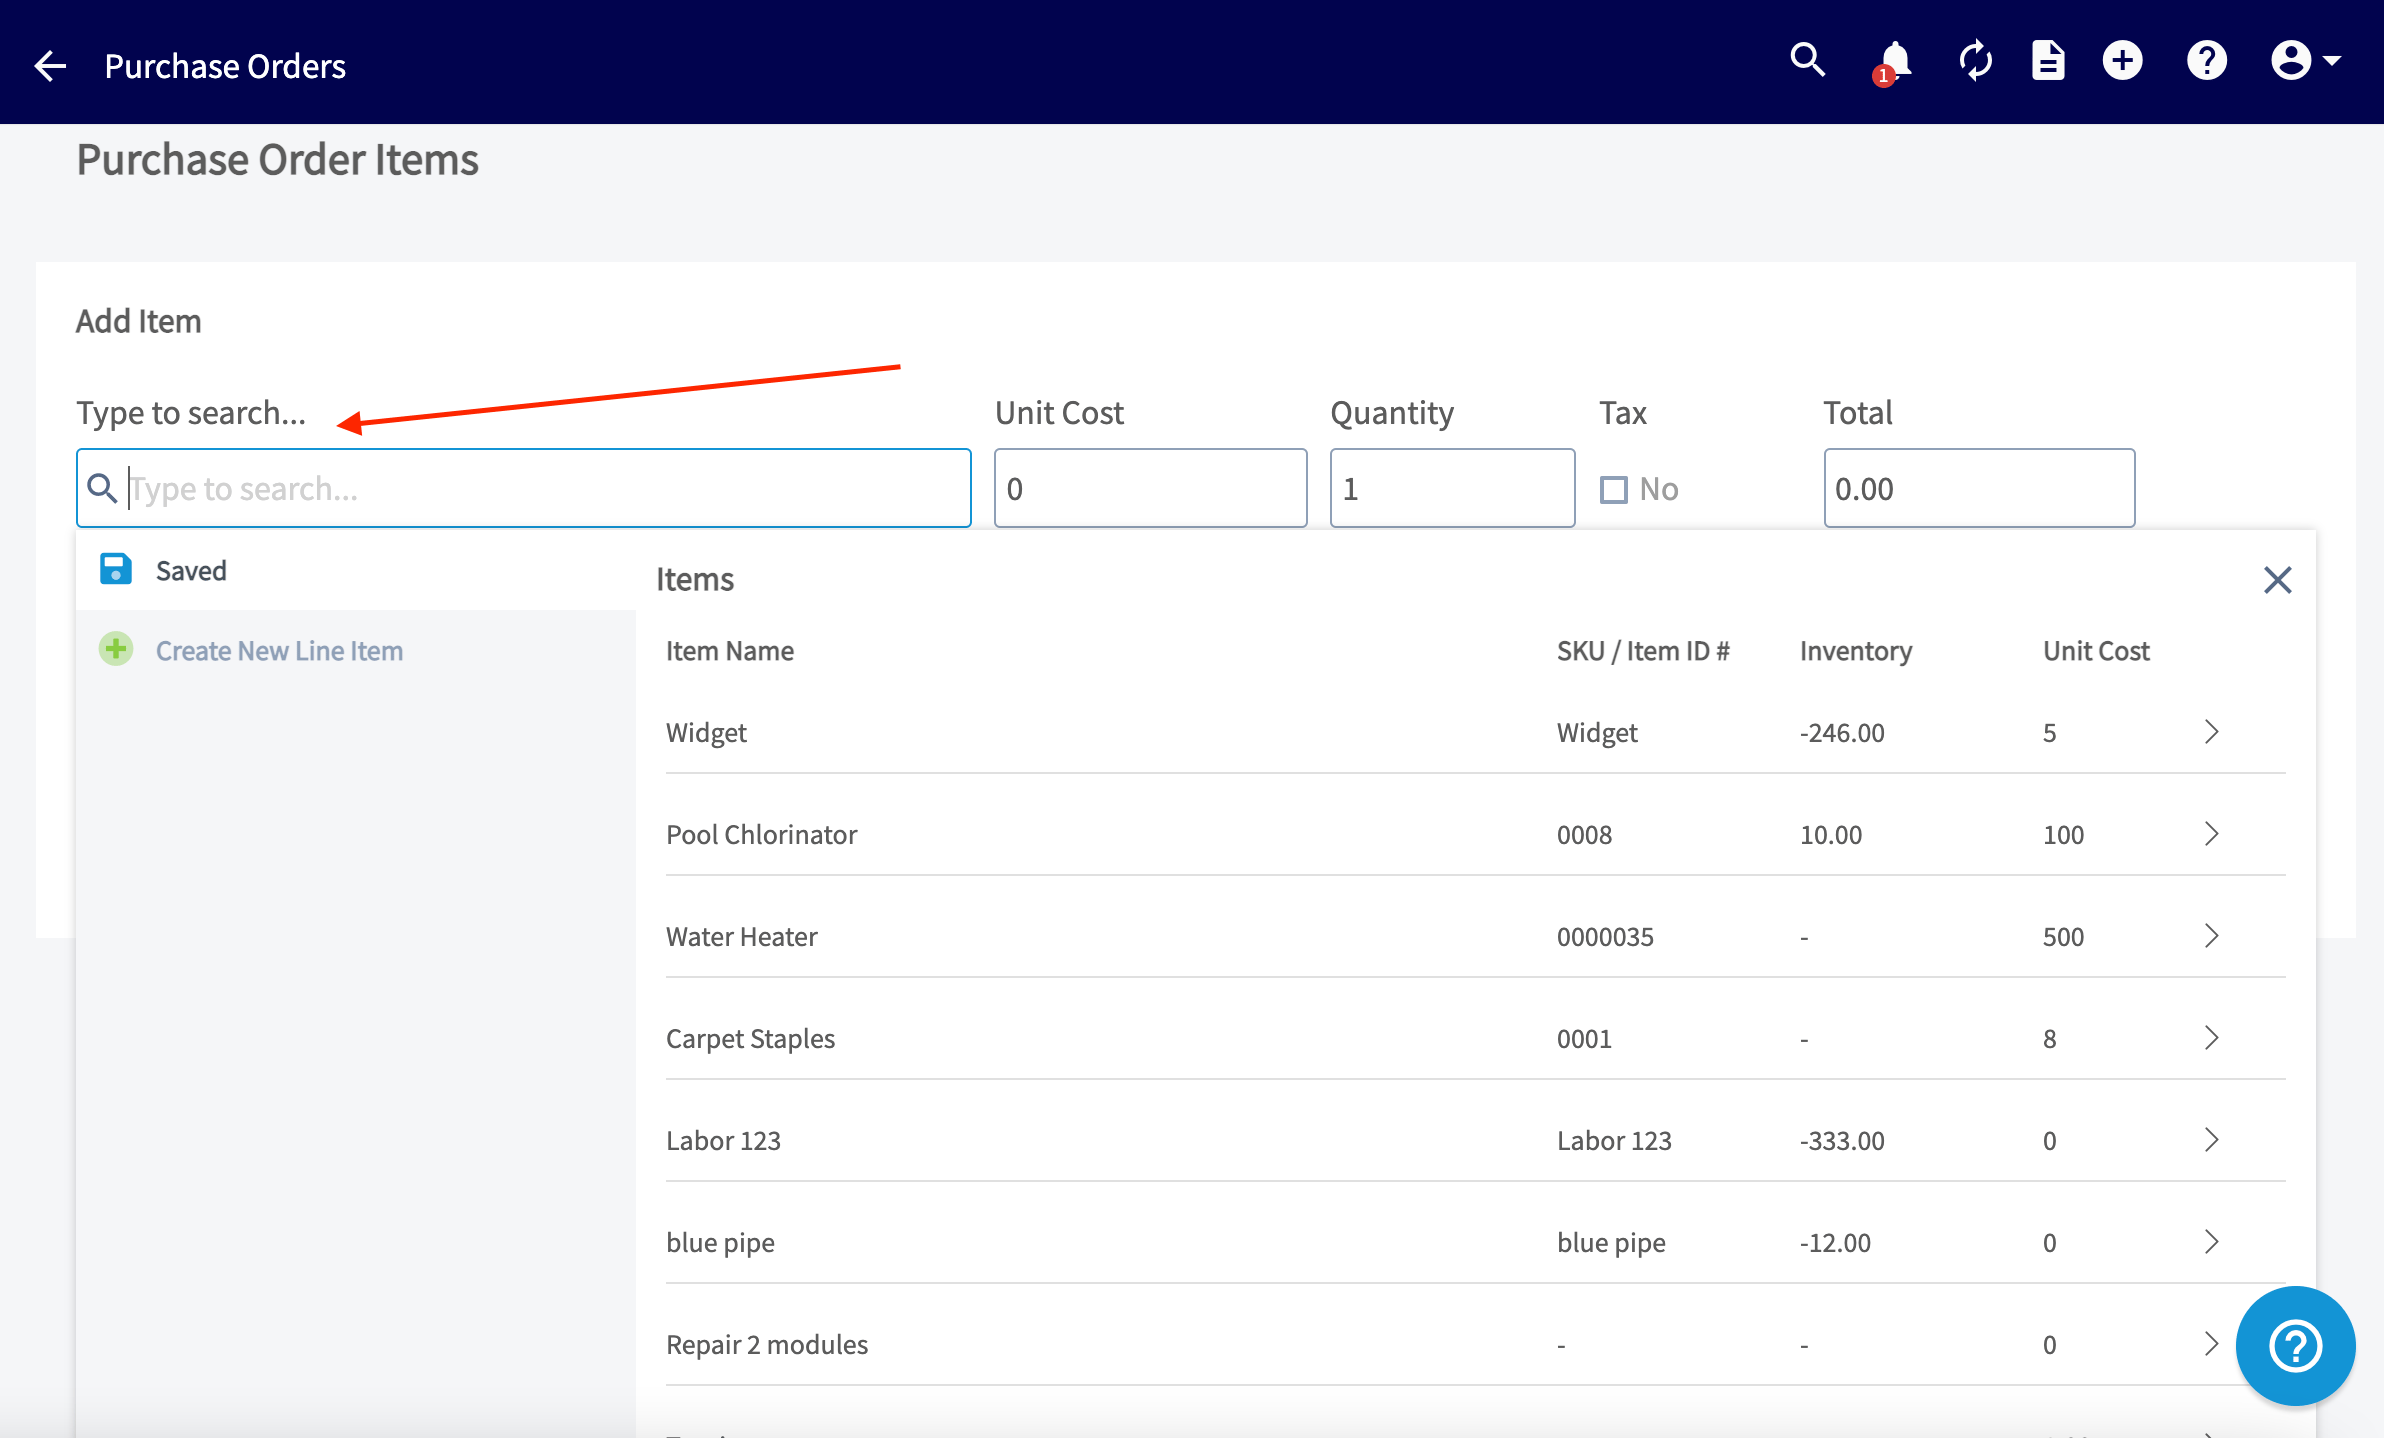
Add your items. Select the item search bar to add items already in your system, or select Create New Line Item for an item that is not. Repeat for every item on the order.
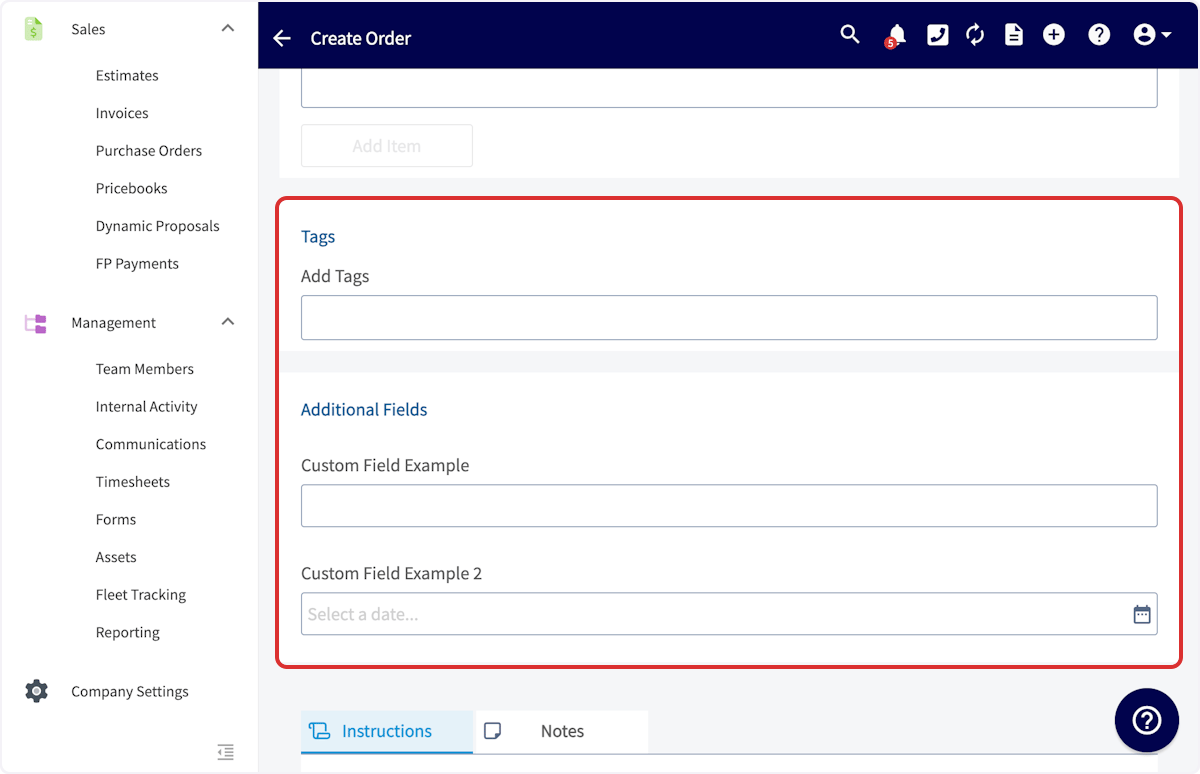
- Add tags under Add Tags if you use them. Type a custom tag and press Enter to create it, set its color if you want one, or pick a previously used tag. Any tags you add also appear alongside the purchase order details on the purchase order list view.
-
Complete any purchase order custom fields under Additional Fields.
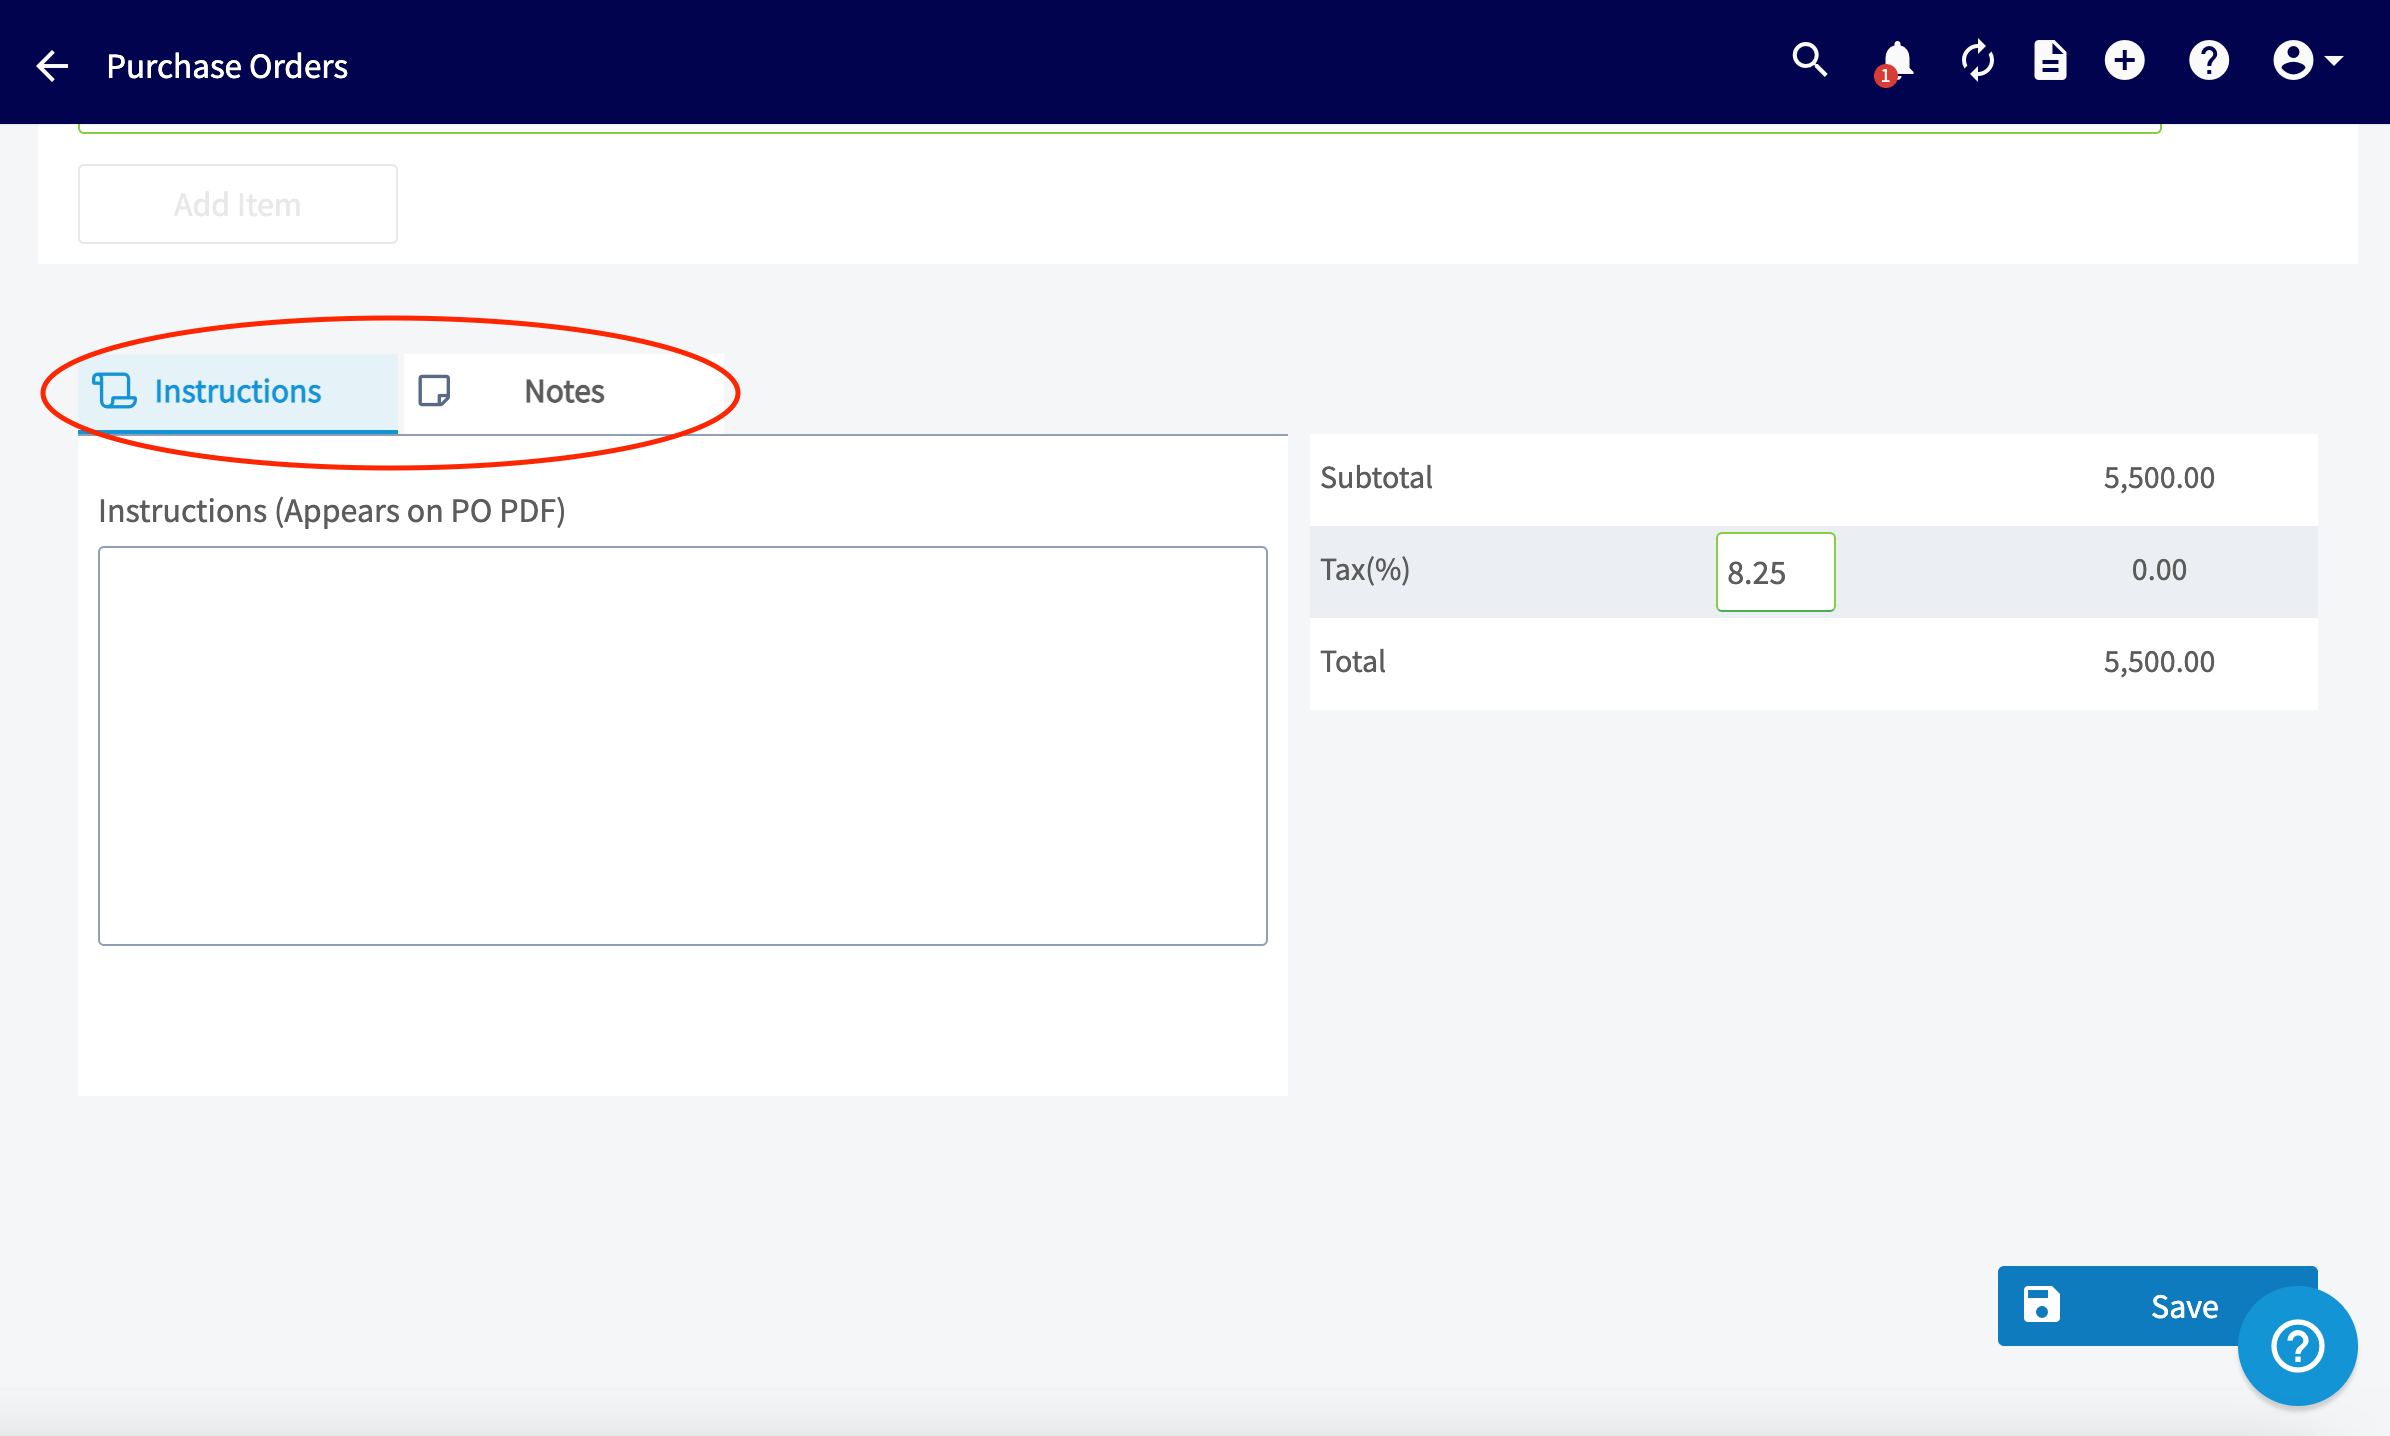
- Enter anything the supplier needs to know on the Instructions tab at the bottom of the page. Instructions appear on the purchase order PDF.
-
Add internal notes on the Notes tab (the mobile app labels this field Notes (Internal)).
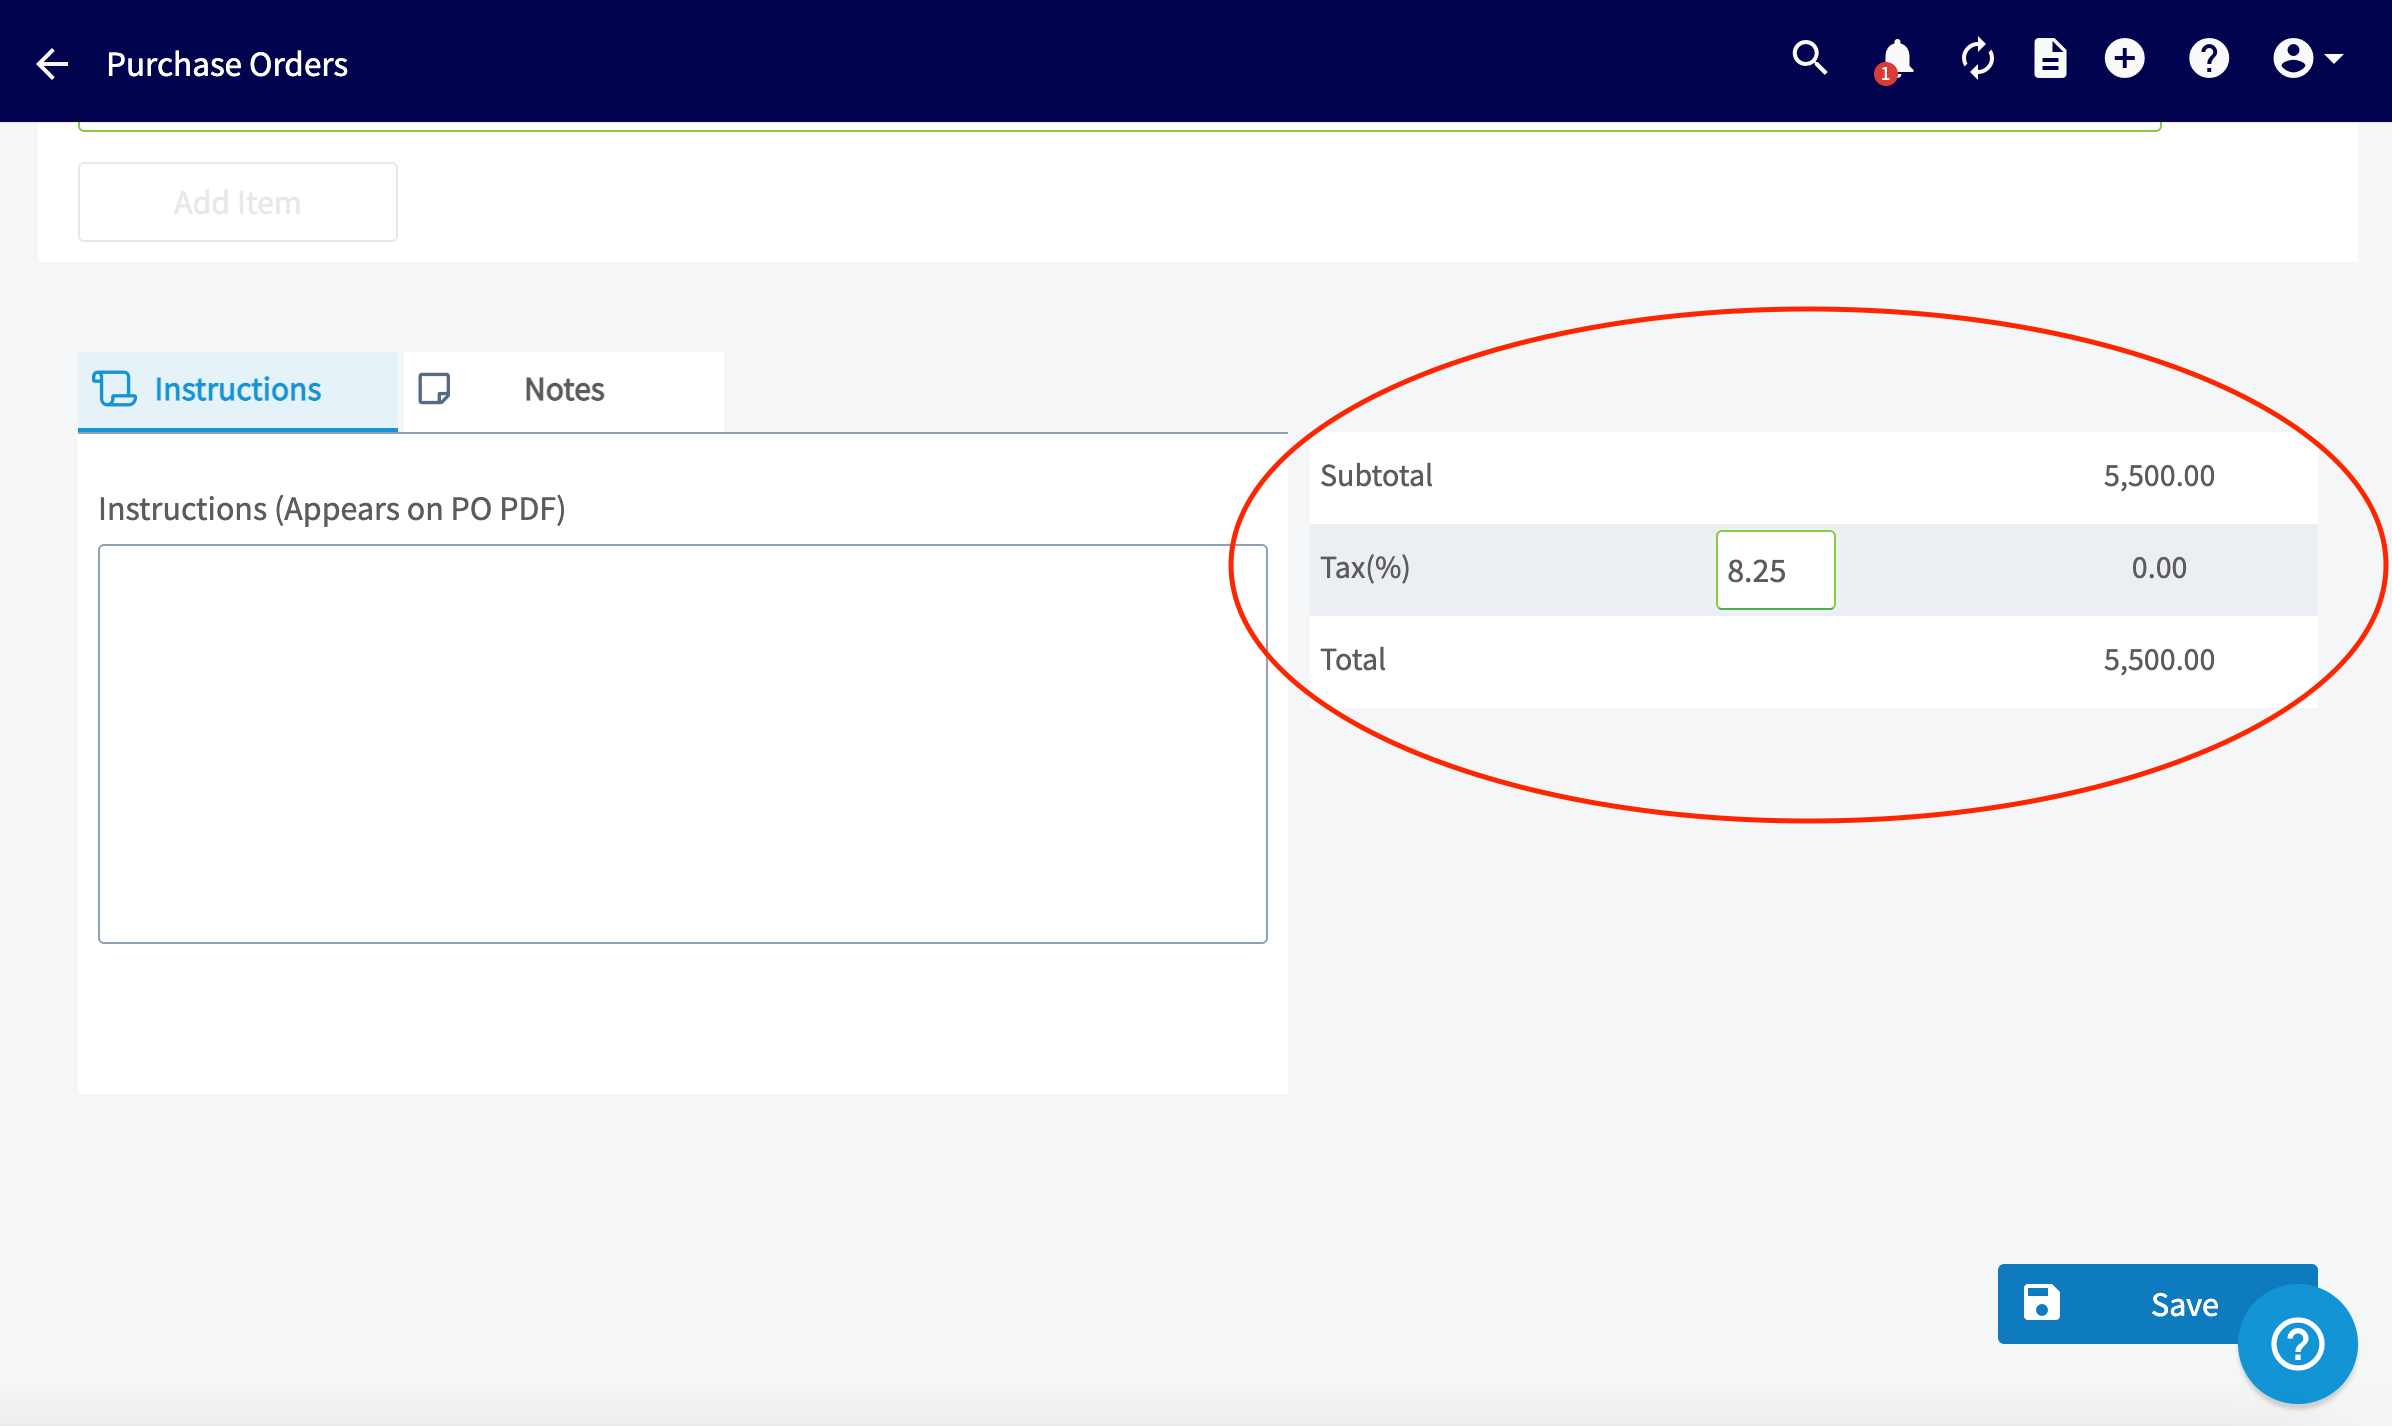
- Review the subtotal and total on the right, and adjust the Tax(%) rate if you need to.
-
Select Save.
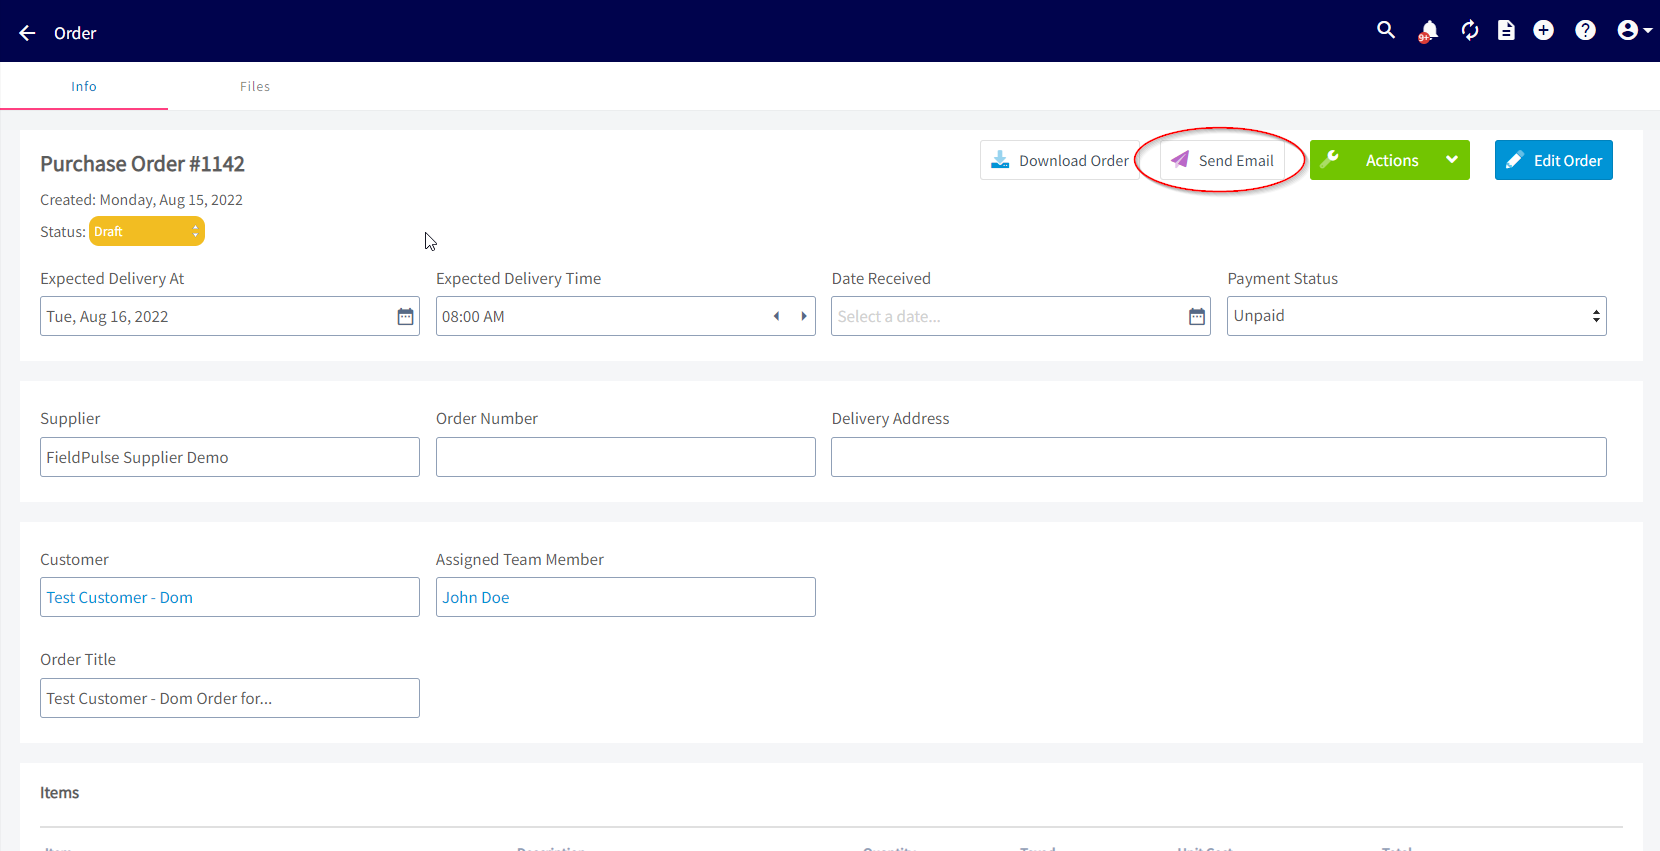
- Check the details on the order record and edit anything that needs changing.
-
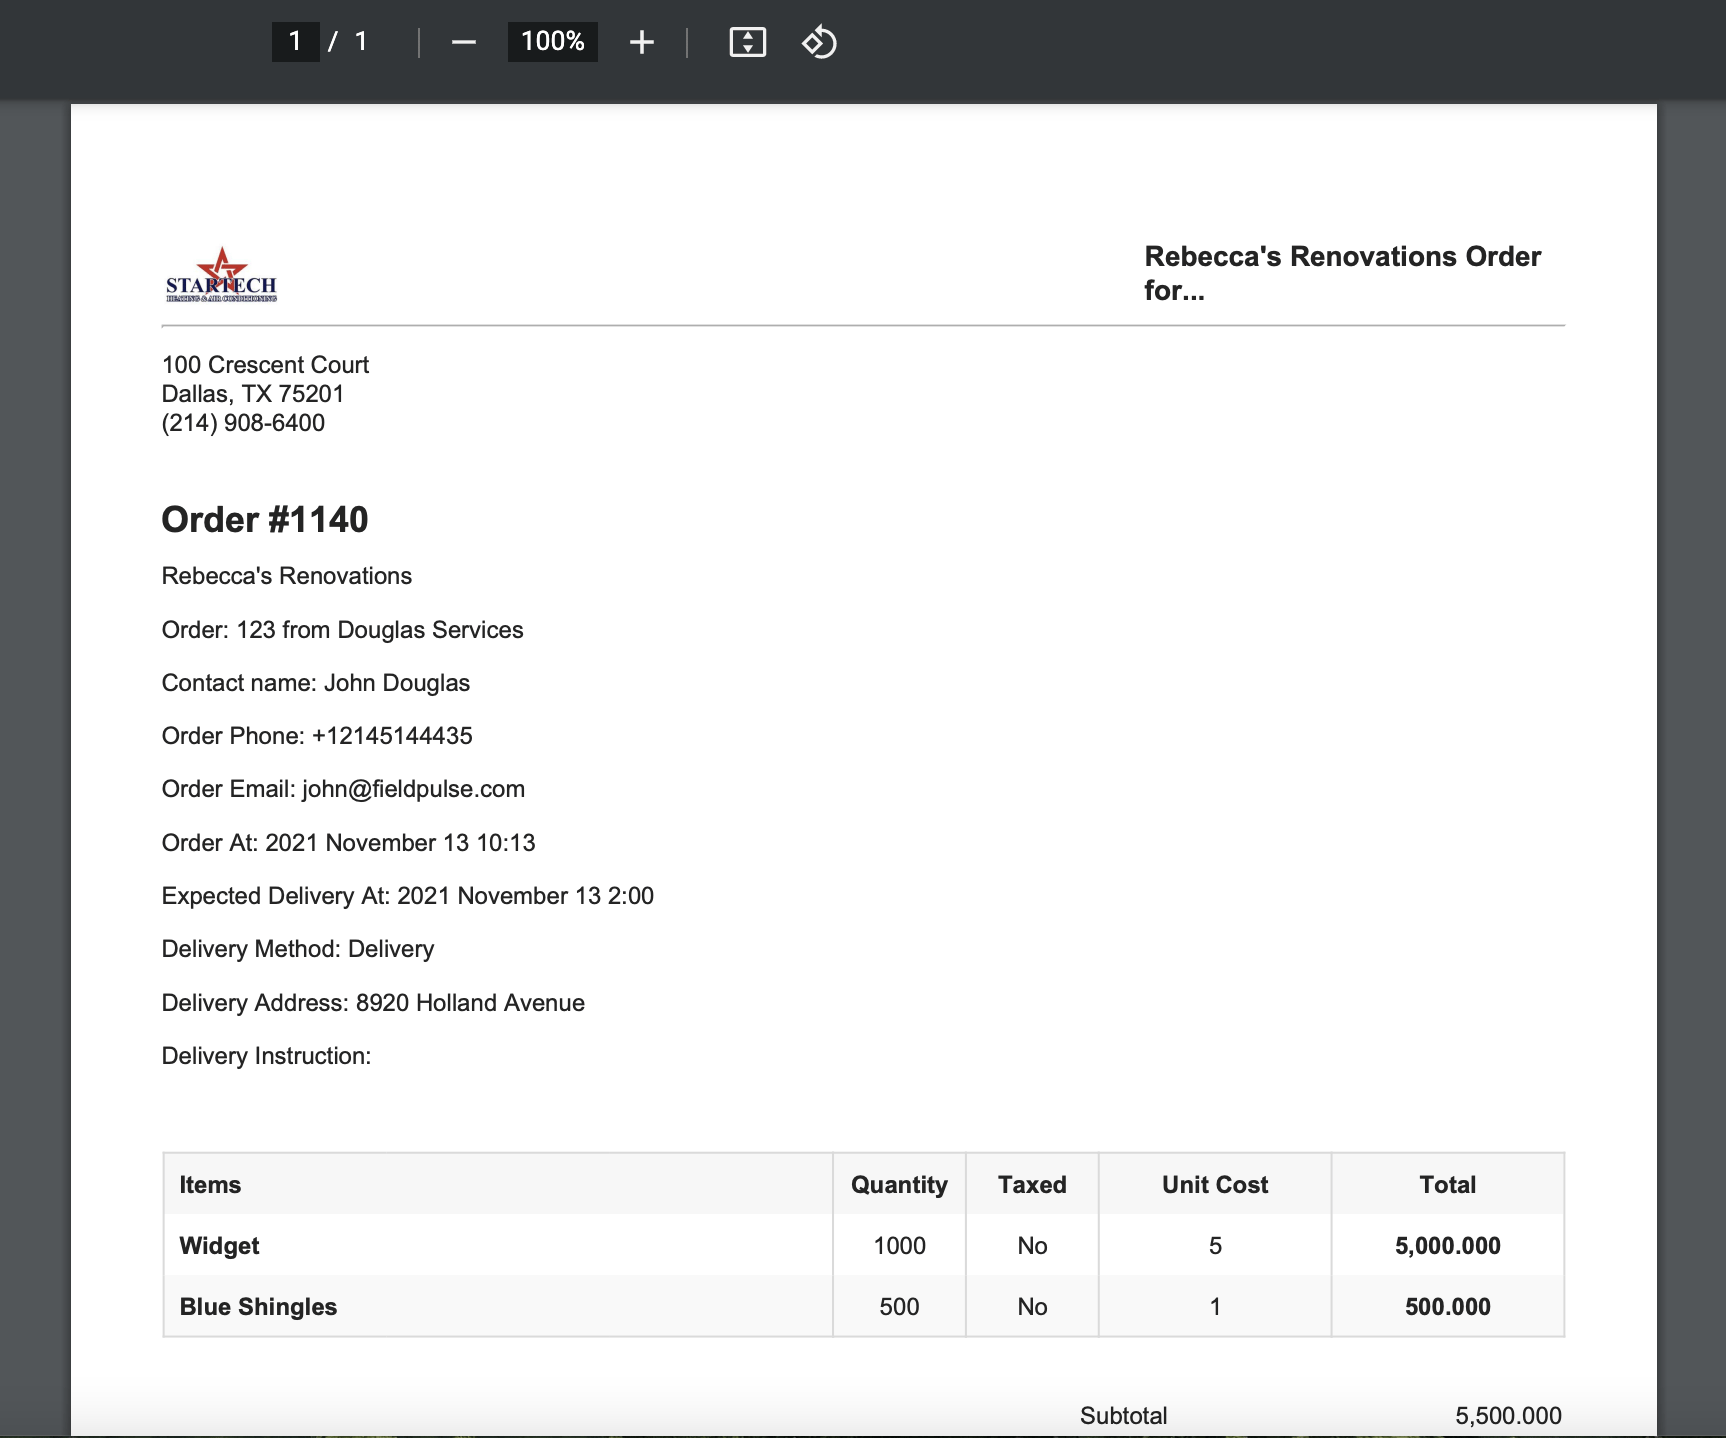
When the order is ready, select Send Email to send it to your supplier.
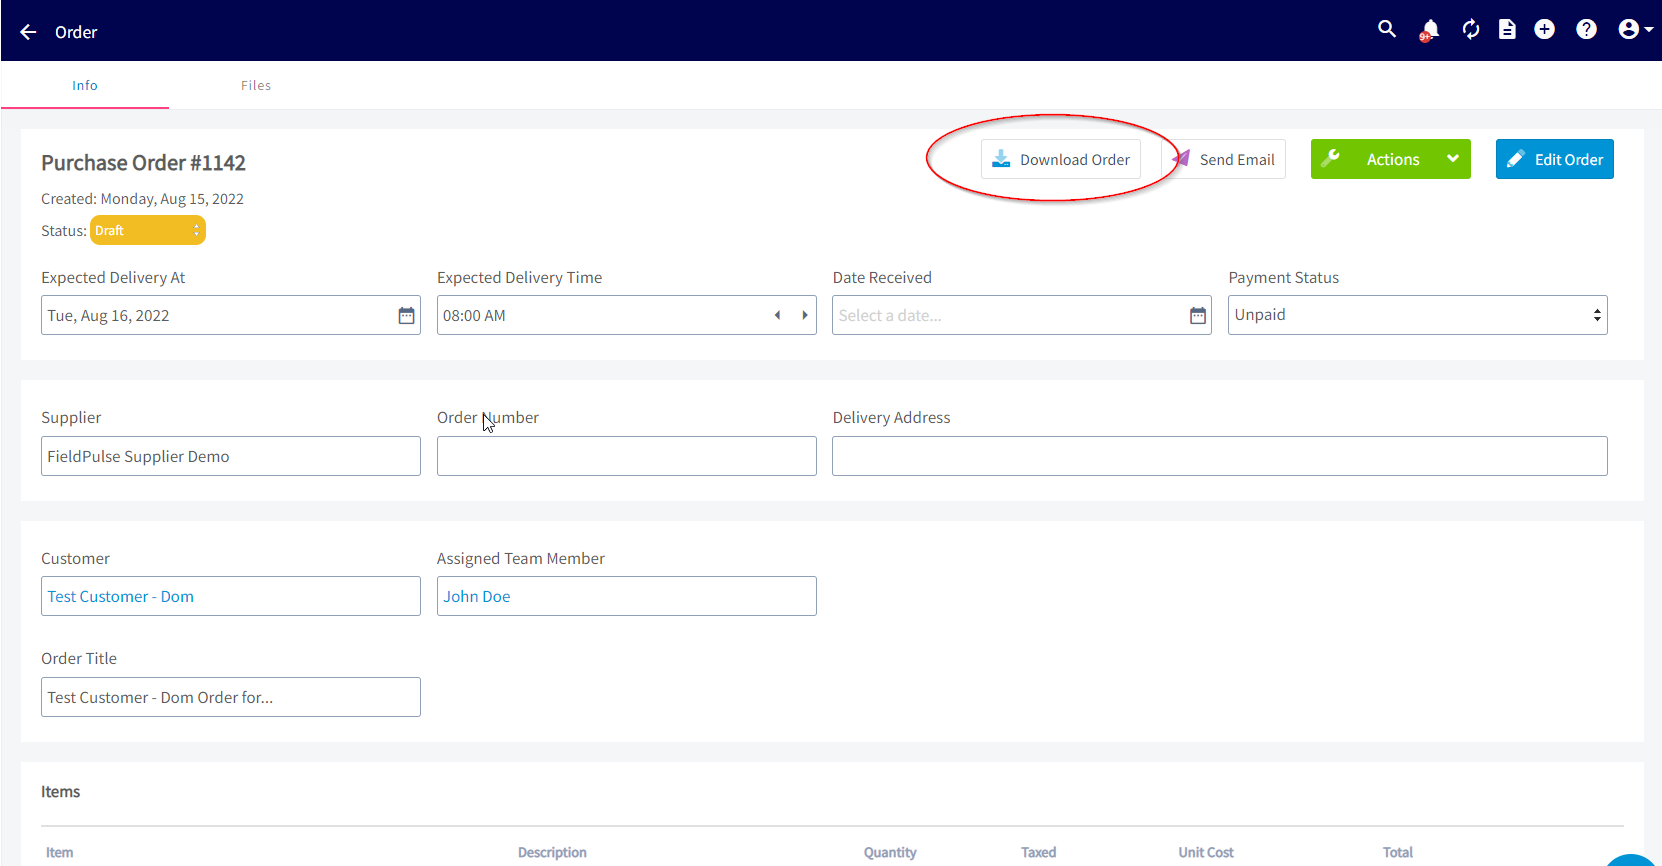
- To keep a copy, select Download Order.
Set the order date
The Order Date field pre-populates with today’s date when you create a purchase order. The field is optional — while you are still drafting the order, select the X next to the date to clear it and save the record without it. You do not need to enter the Order Date by hand when you are ready to send. FieldPulse stamps it with the current date the moment you either select Send Email to send the order to your supplier, or change the purchase order status to Ordered. The Order Date therefore reflects when the purchase was dispatched rather than when the draft was created.Print receiving labels
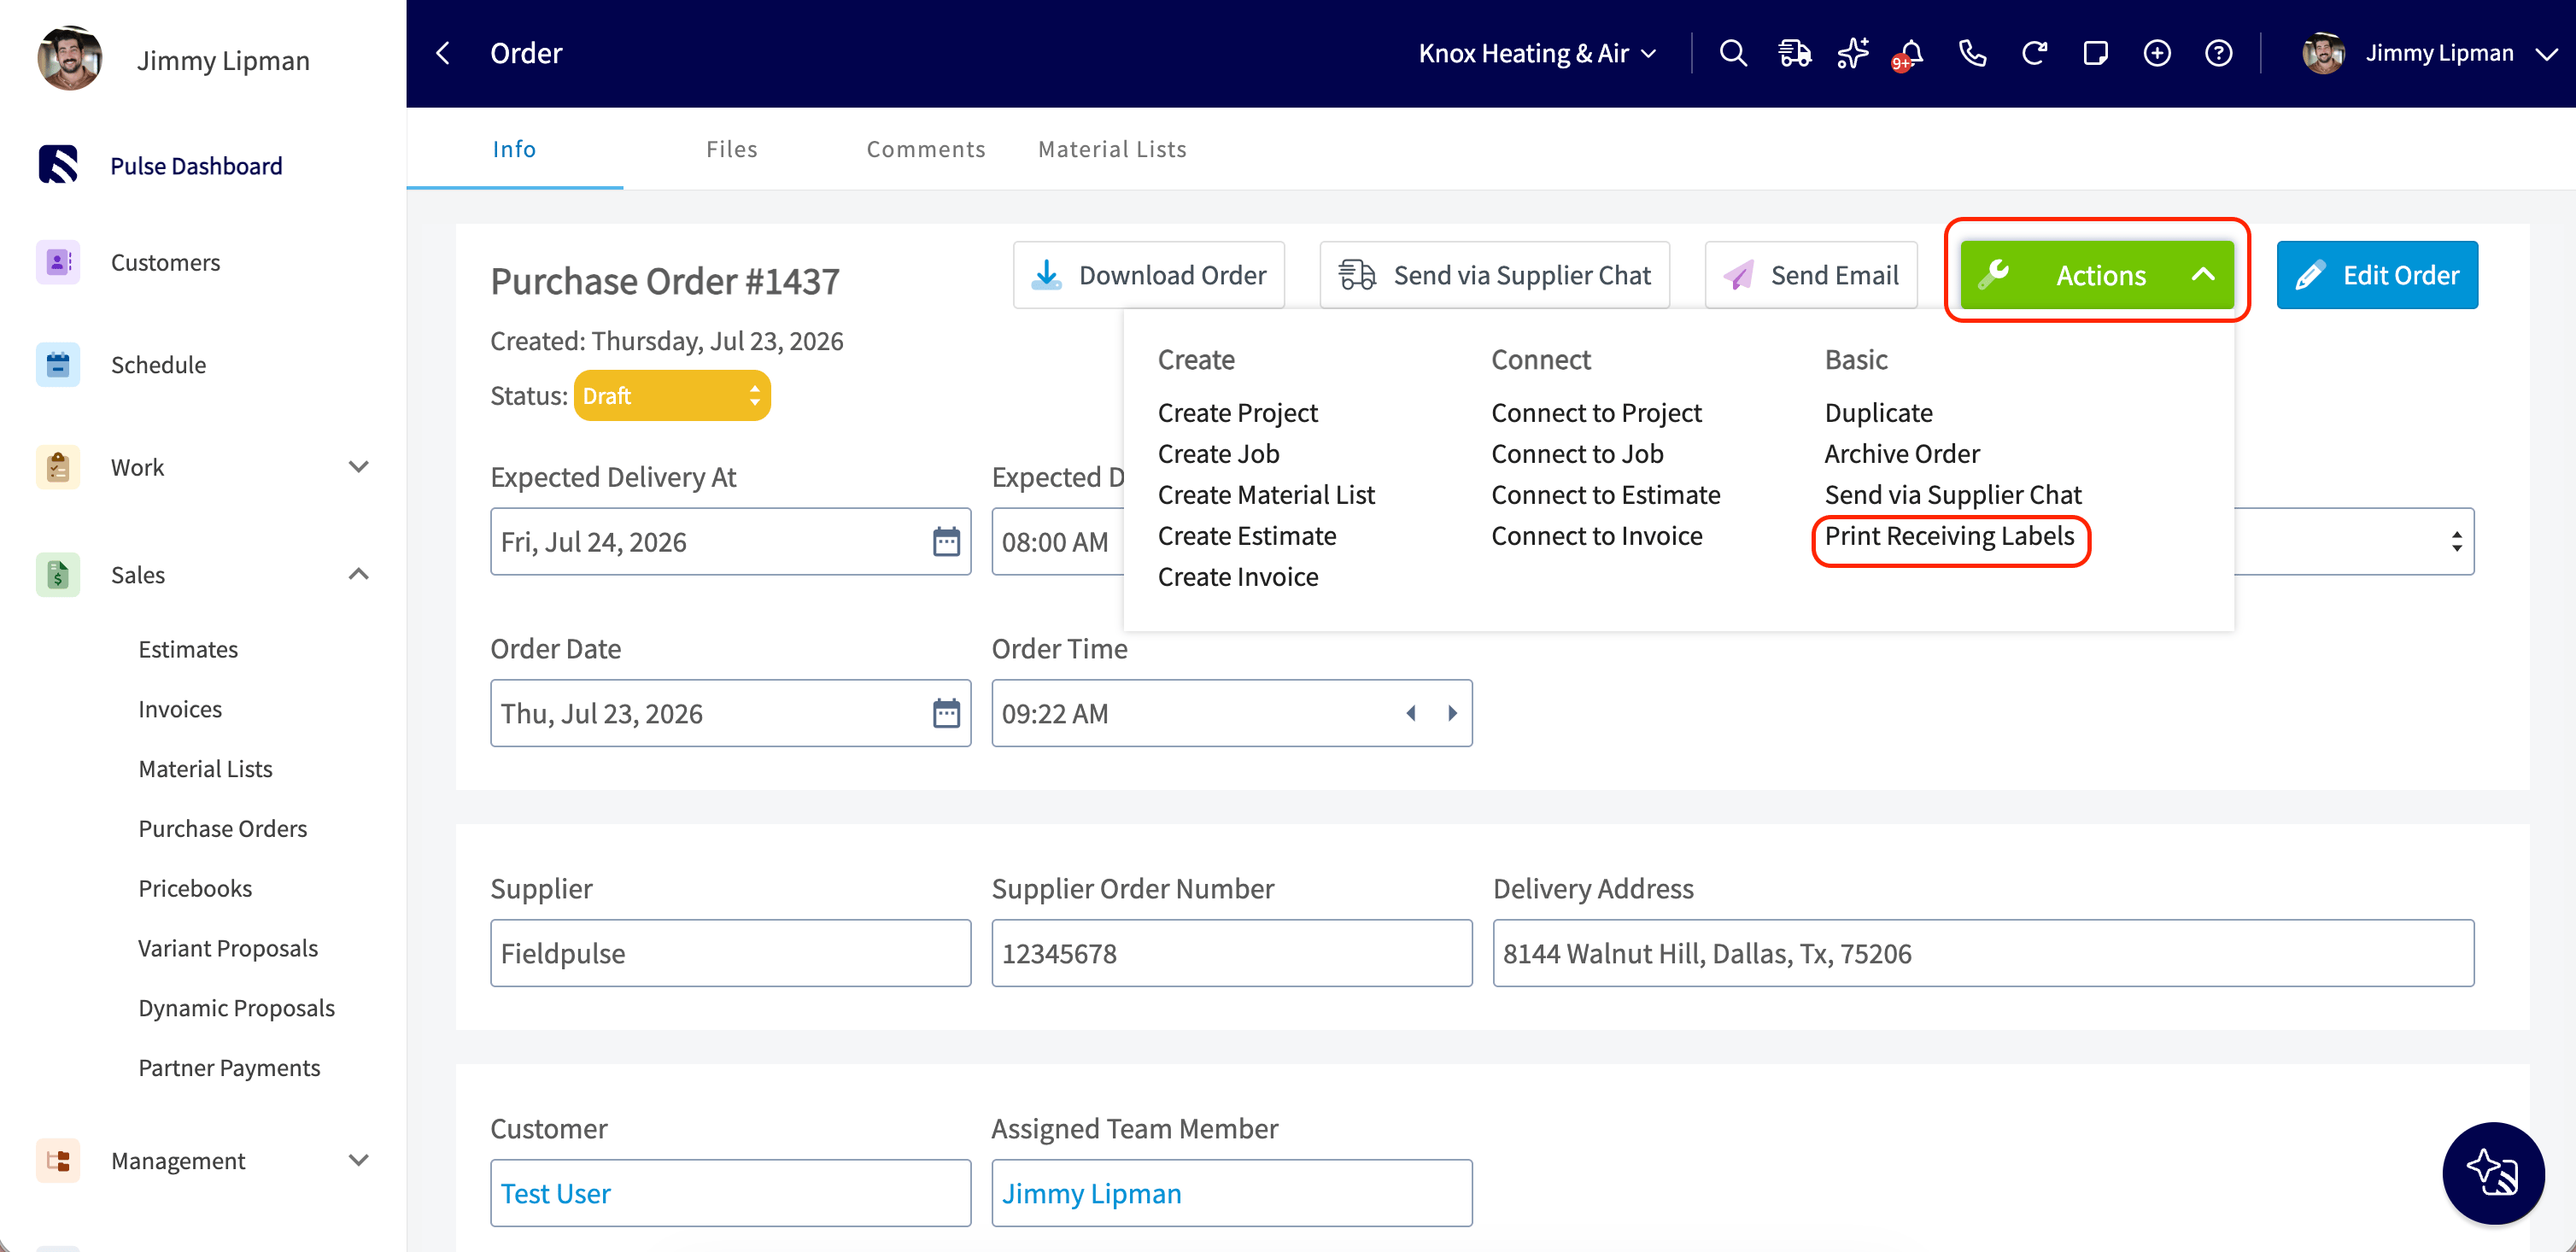
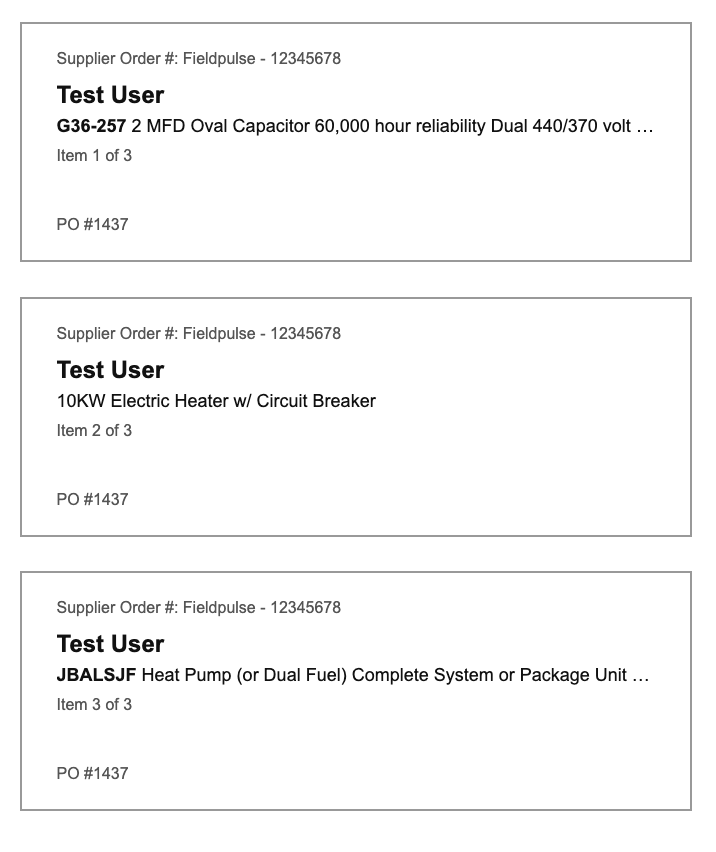
Receiving labels route each part to the right tech as it arrives.- Switch the Received toggle on for each line item as it comes in.
- Open the Actions menu on the purchase order and select Print Receiving Labels. FieldPulse prints one label per received line item.
Set up automatic replenishment
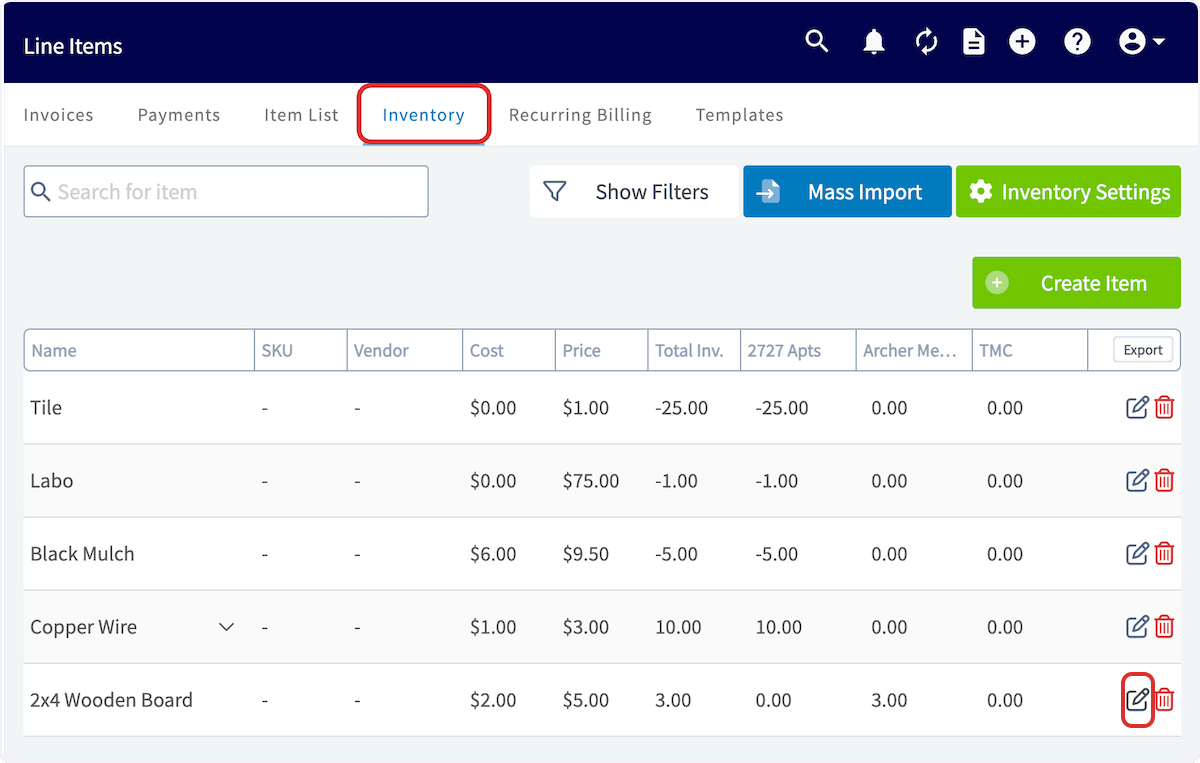
Automatic replenishment creates a purchase order for you when an item’s quantity on hand reaches the level you set.- Select Invoices in the left-side menu, then open the Inventory tab.
-
Select the pencil icon next to the inventory item you want to replenish automatically.
-
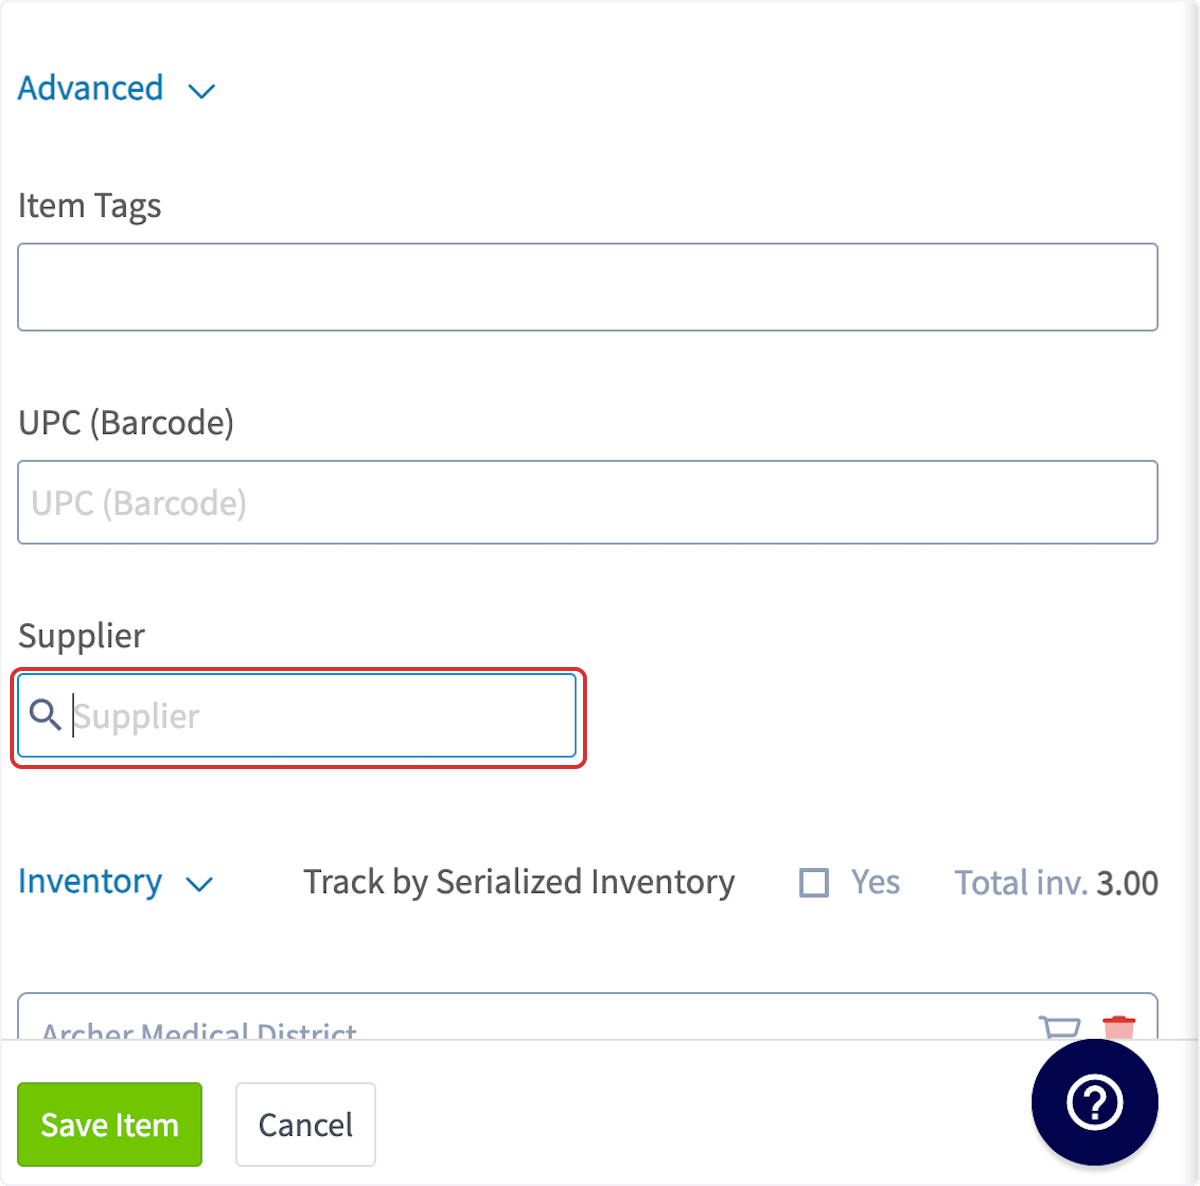
Open Advanced on the item and select the Supplier field.
-
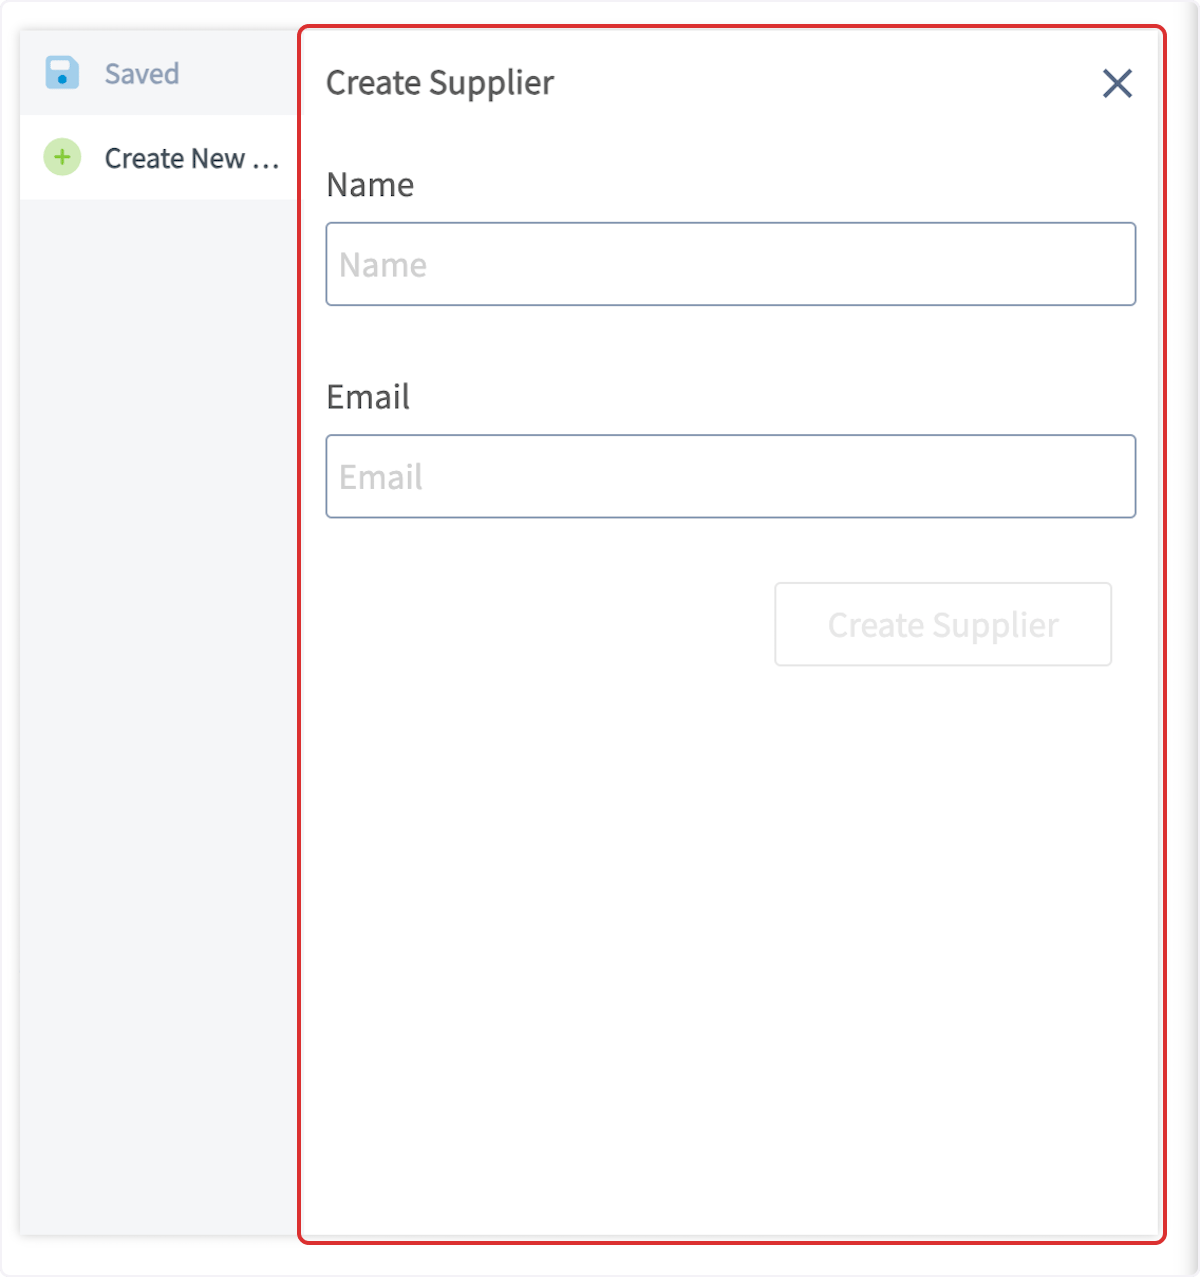
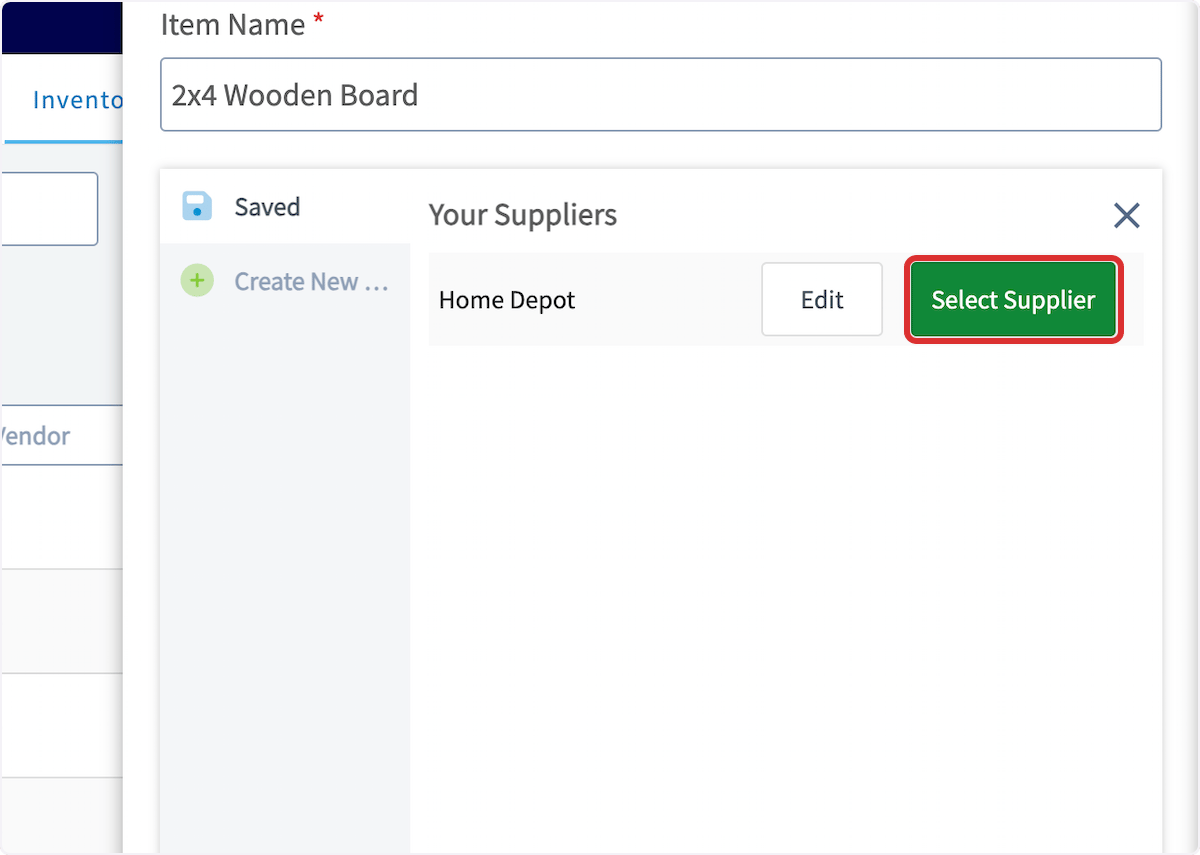
Create a new supplier, or select an existing one.
-
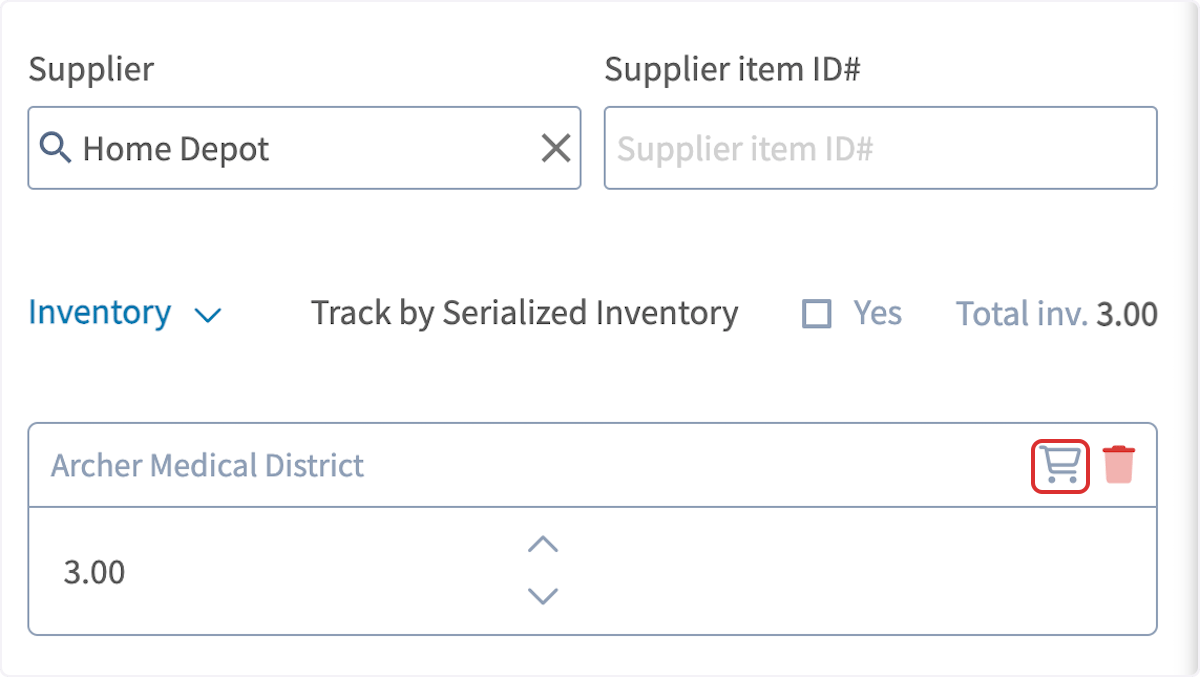
Select the shopping cart icon next to the hub you want to replenish. If you use multiple hubs, repeat this for each hub.
-
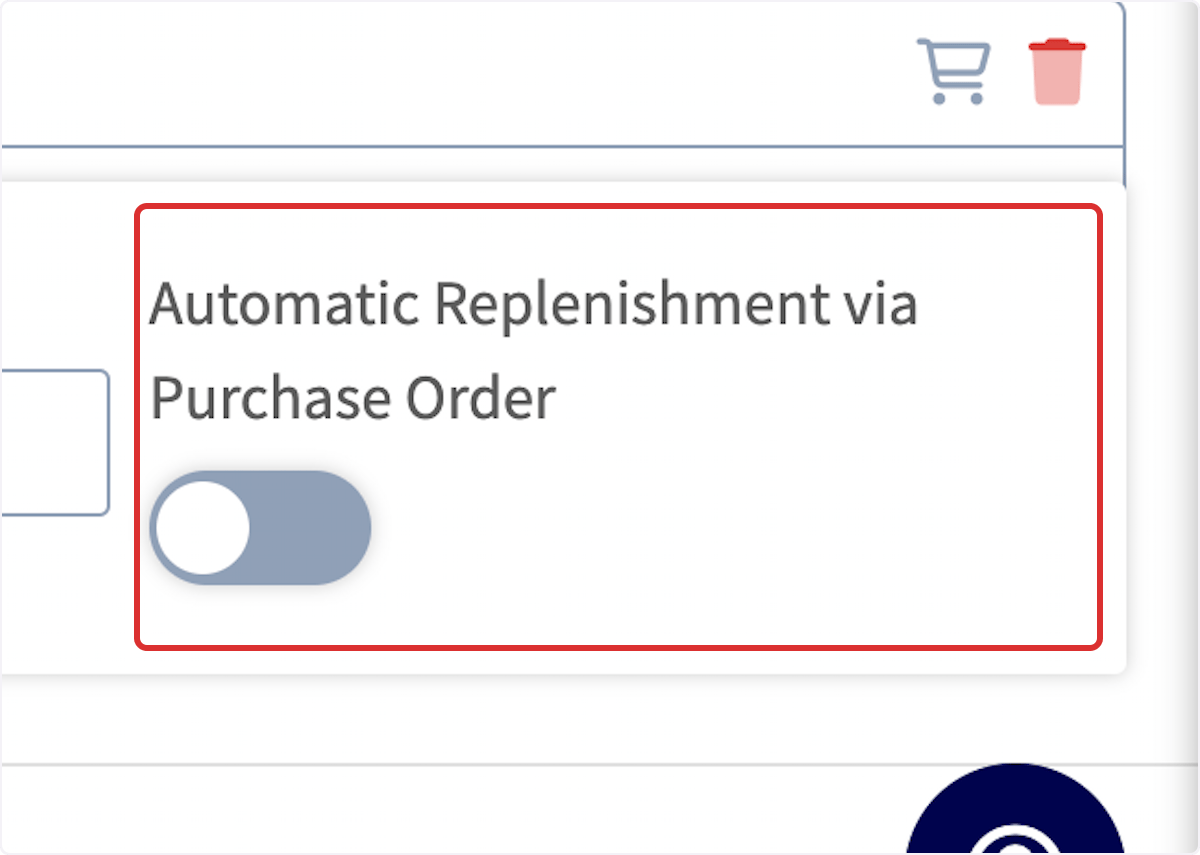
Switch on Automatic Replenishment via Purchase Order.
-
Set the two levels that control reordering. The panel also shows your current inventory in that hub, or your overall inventory if hubs are not enabled.
- Auto Re-order Level (Quantity On Hand) — when the Inventory On Hand quantity reaches this number, FieldPulse initiates an automatic replenishment purchase order.
- Replenishment Level — the Inventory On Hand quantity the automatic purchase order restocks up to.
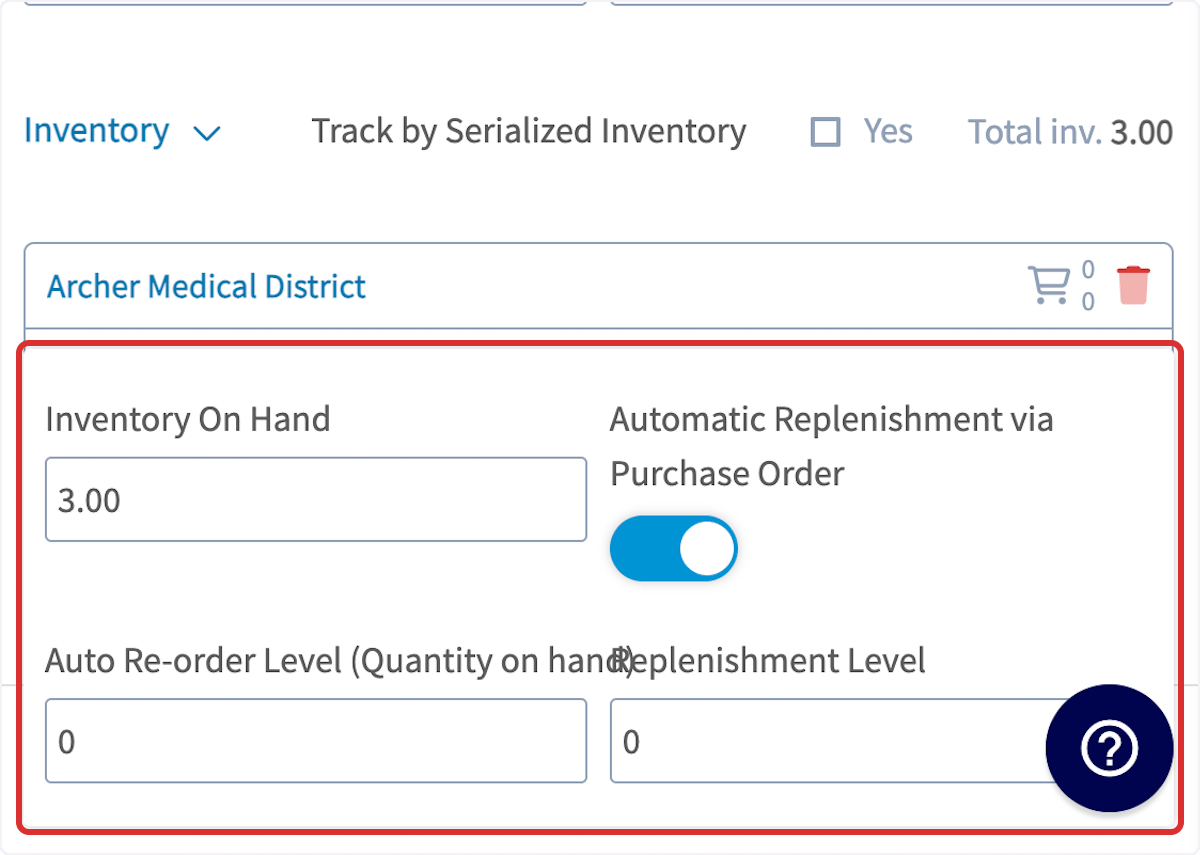
Example — Inventory On Hand: 4 units. Auto Re-order Level: 5 units. Replenishment Level: 12 units. Because the Auto Re-order Level is set at 5 units and Inventory On Hand has fallen below 5 units, FieldPulse automatically creates a draft purchase order ready for your review before you decide to send off and reach the Replenishment Level of 12 units.
Turn on auto-replenishment notifications
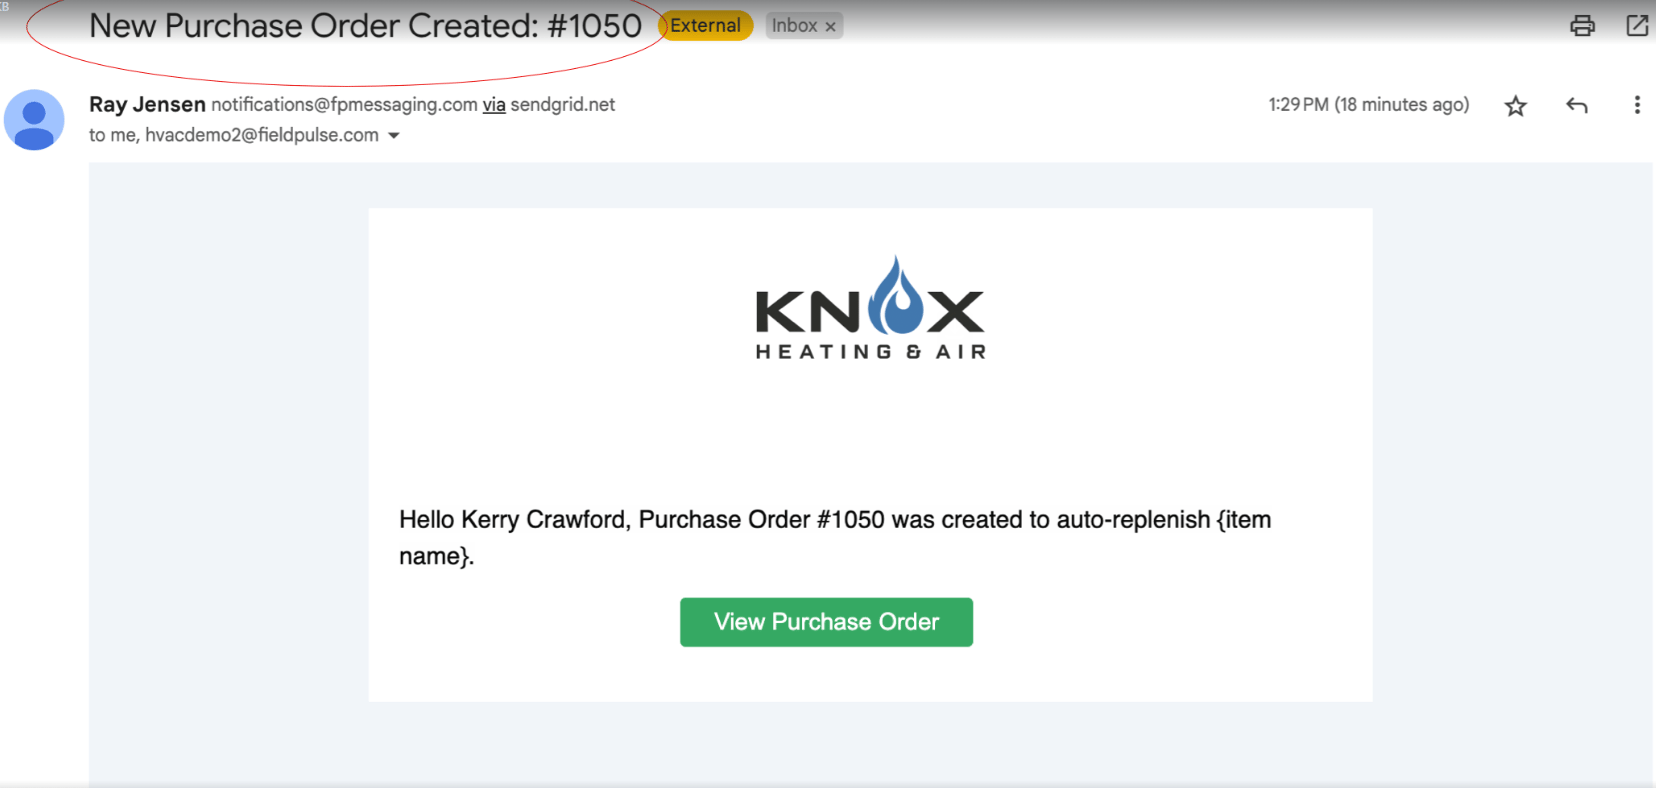
Admins can receive a real-time email, an in-app notification, and an optional push notification when auto-replenishment creates a purchase order. The email includes a direct link to the new purchase order, so you can open it right away.- Select the profile icon in the top-right corner, then select My Settings.
- Set the Email, In-App, and Push options on the Auto Replenishment Purchase Order Created row.

Combine purchase orders into one estimate or invoice
You can pull multiple purchase orders into a single estimate or invoice, so your customer receives one organized document instead of several. Reece maX users in Australia can pull in supplier invoices the same way — see Reece maX (ANZ) Overview.-
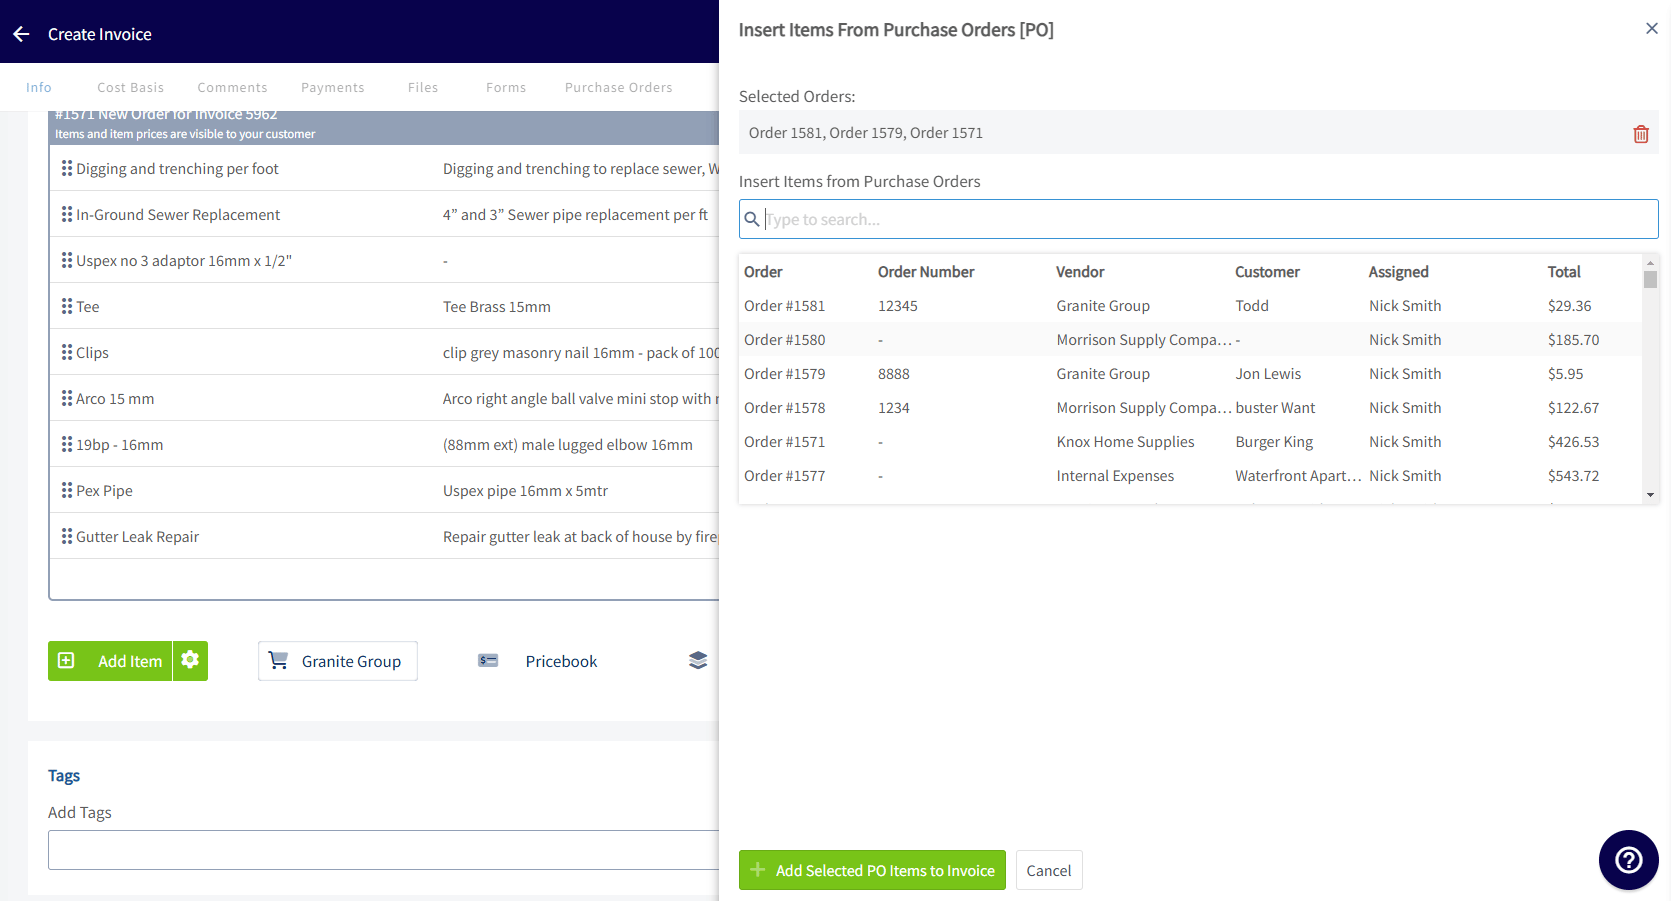
While in Edit Mode on an estimate or invoice, select Insert PO Items.
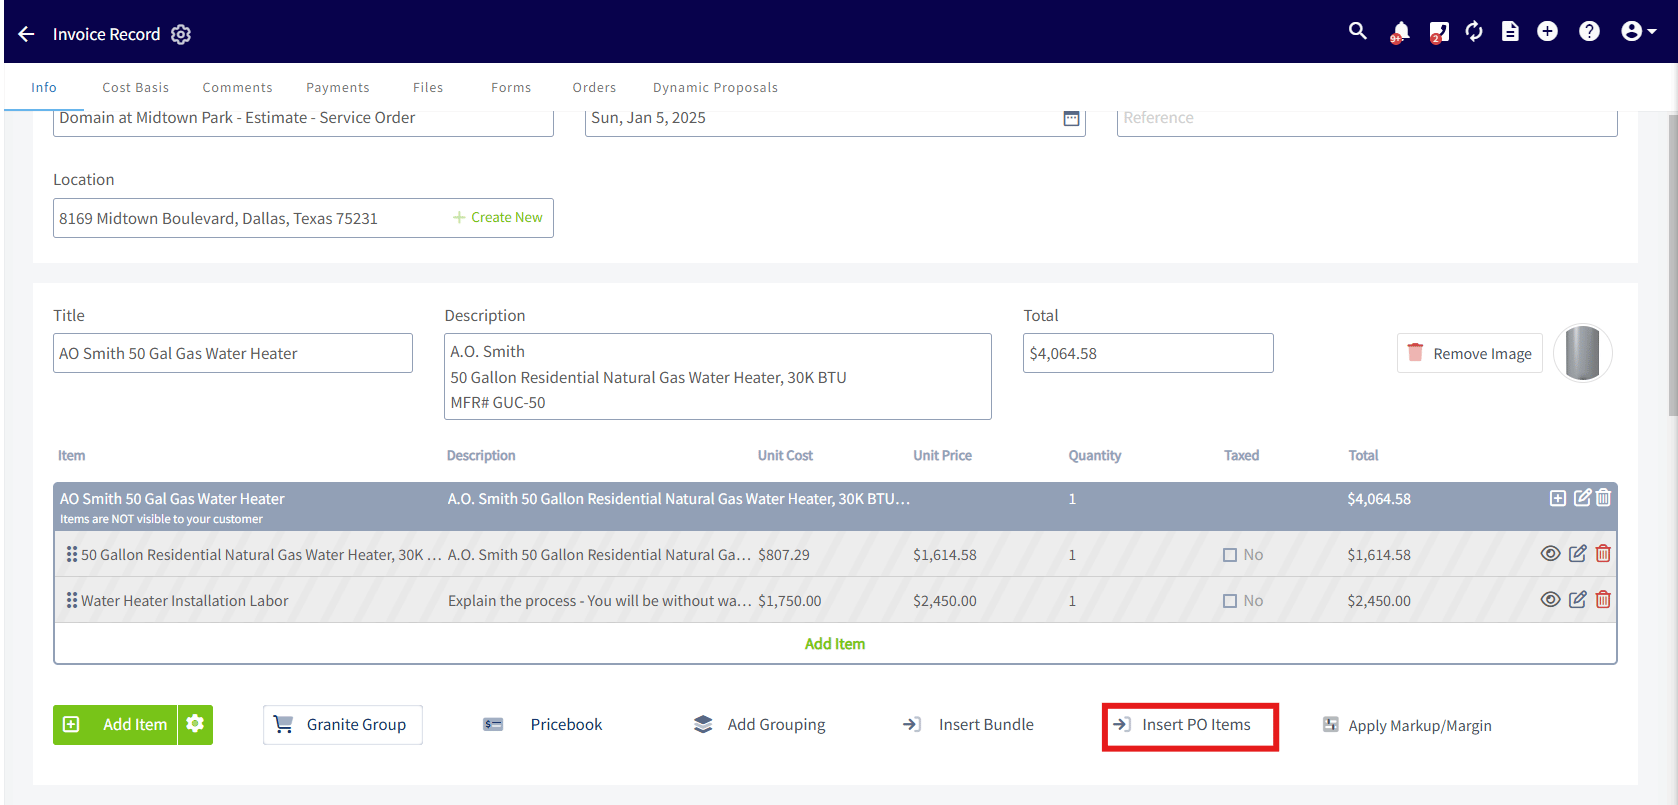
- Search for the purchase order by connected customer, purchase order number, order title, connected estimate or invoice number or title, or connected job or project number or title.
-
Select each order you want, then select Add Selected PO Items to Invoice.
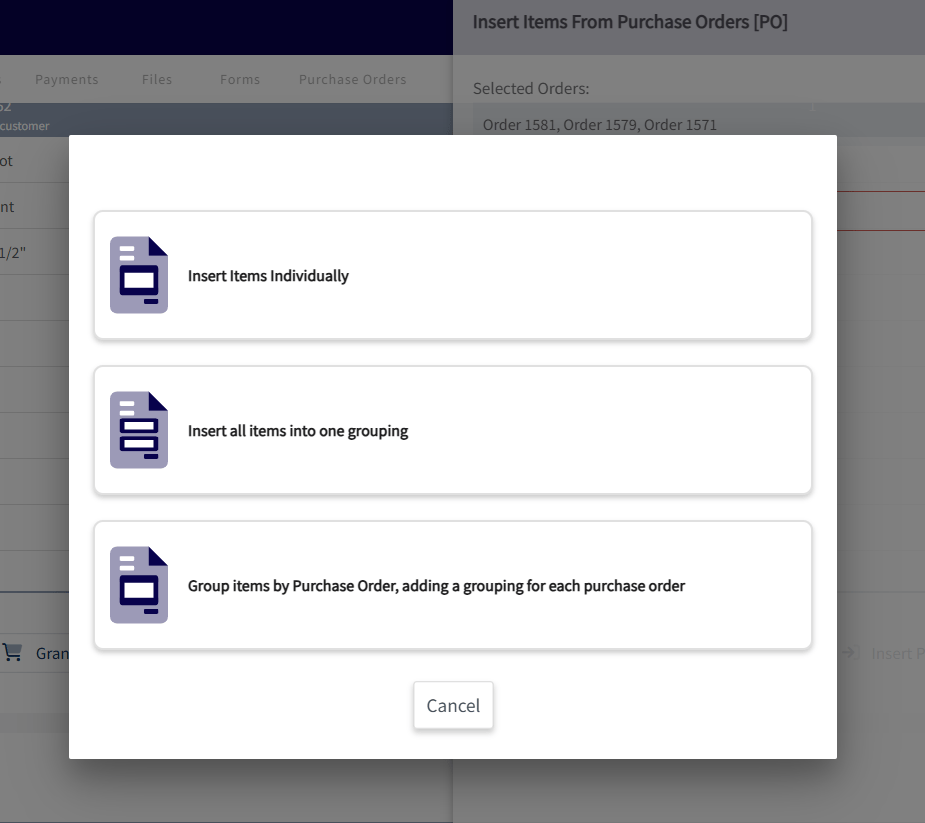
- Choose how the items are laid out — Insert Items Individually, Insert all items into one grouping, or Group items by Purchase Order, which adds a grouping for each purchase order.
On mobile
Create and send a purchase order
-
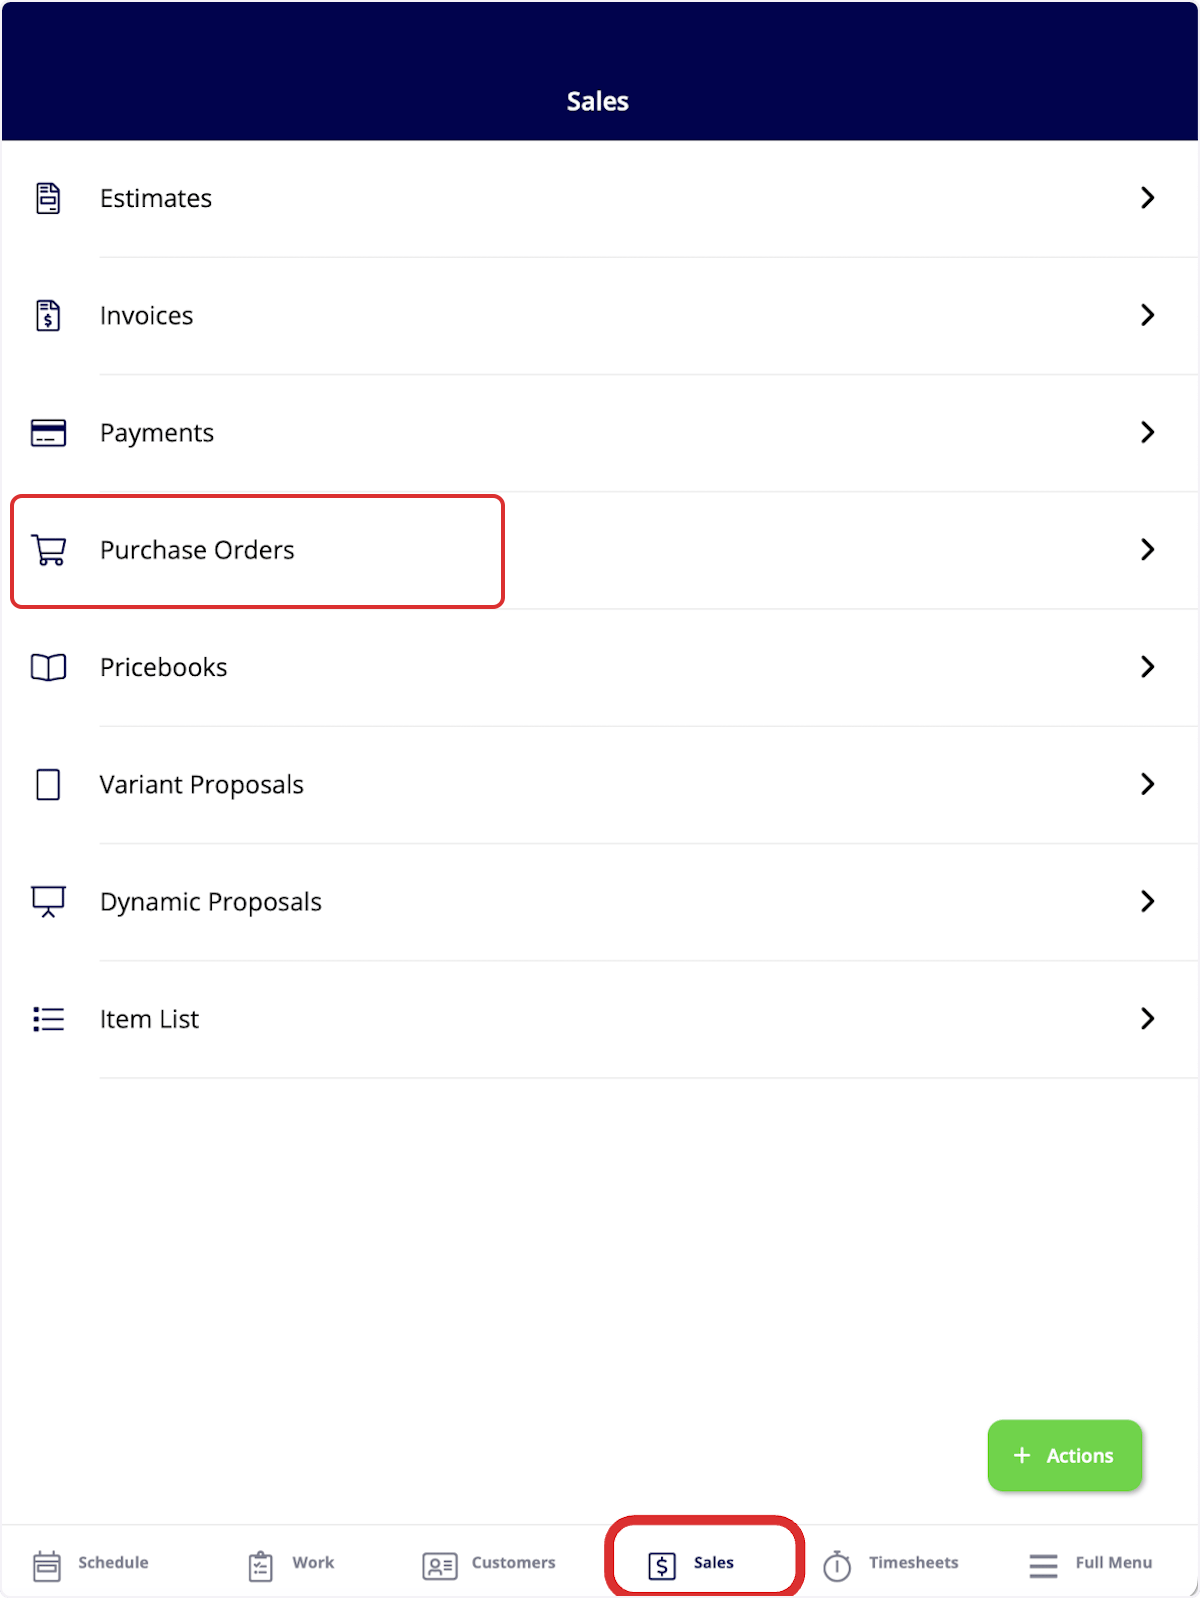
Select the Sales tab at the bottom of the screen, then select Purchase Orders.
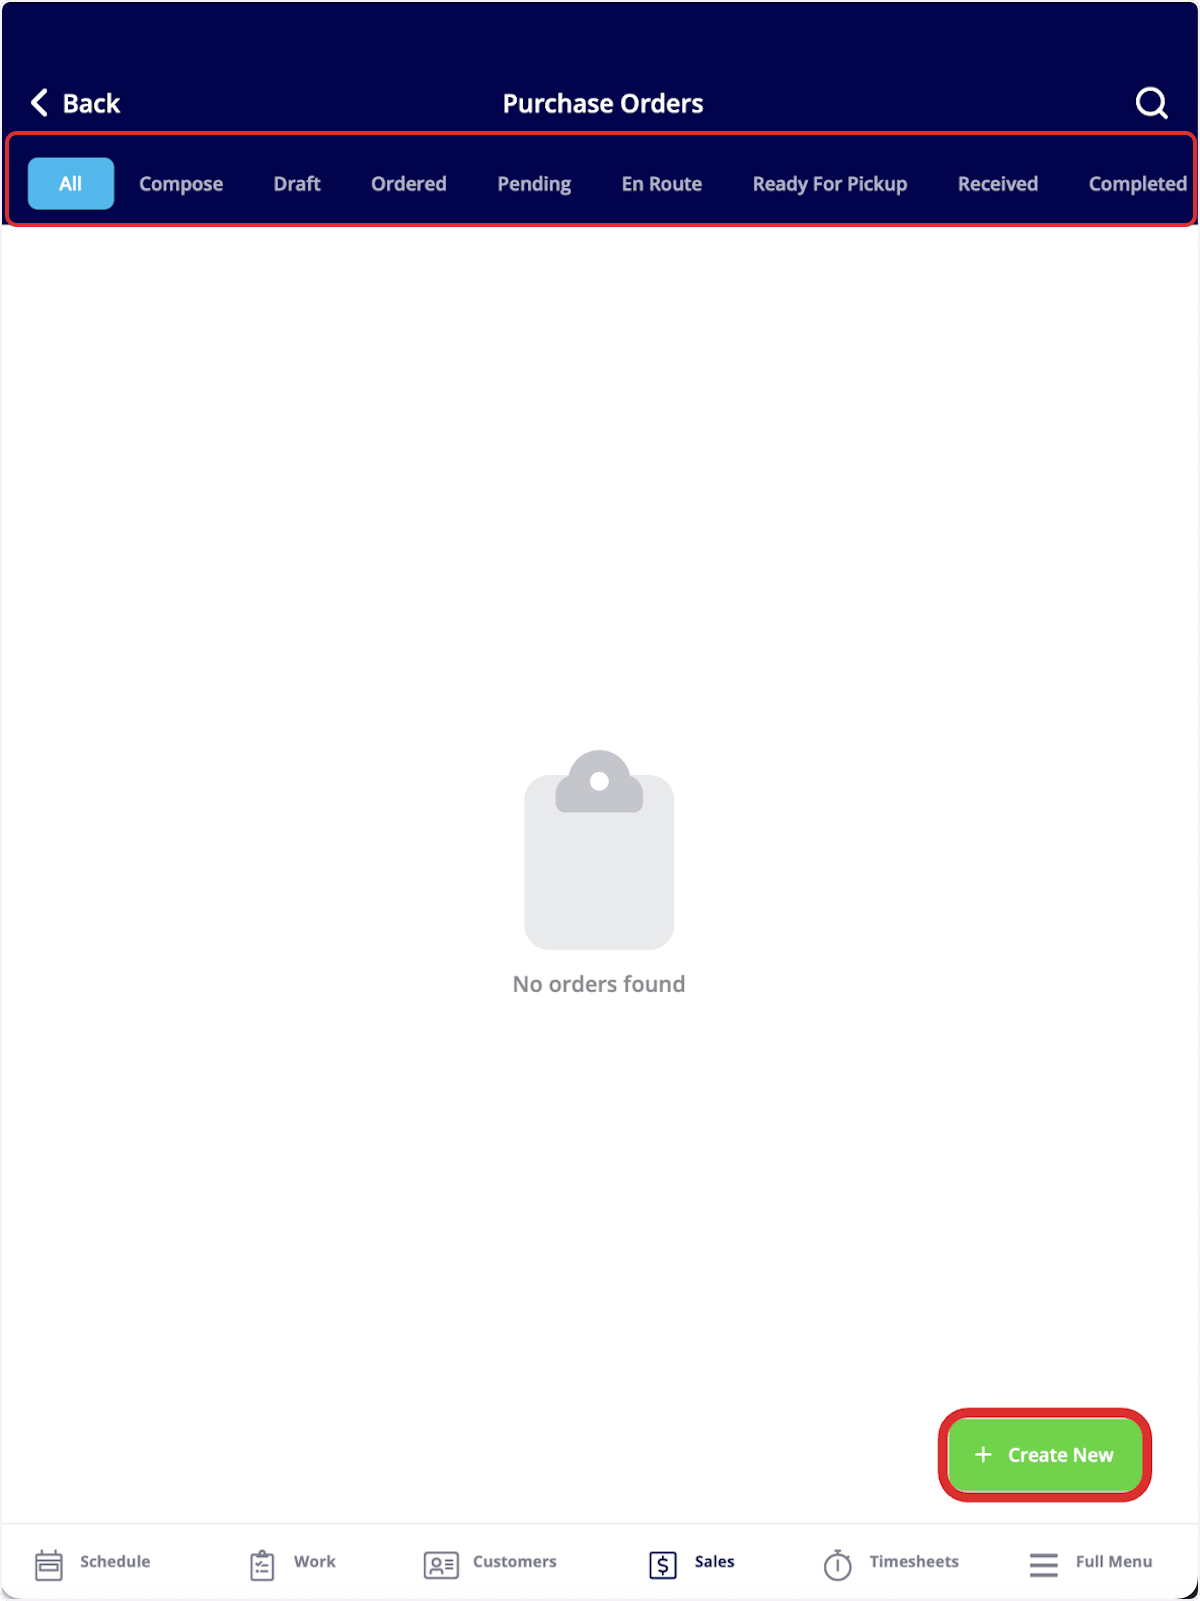
- Sort existing purchase orders with the status tabs at the top: All, Compose, Draft, Ordered, Pending, En Route, Ready For Pickup, Received, and Completed.
-
Select Create New to start a new order.
-
Fill in the order details and attach an existing supplier, or create a new one with the + button next to Supplier.
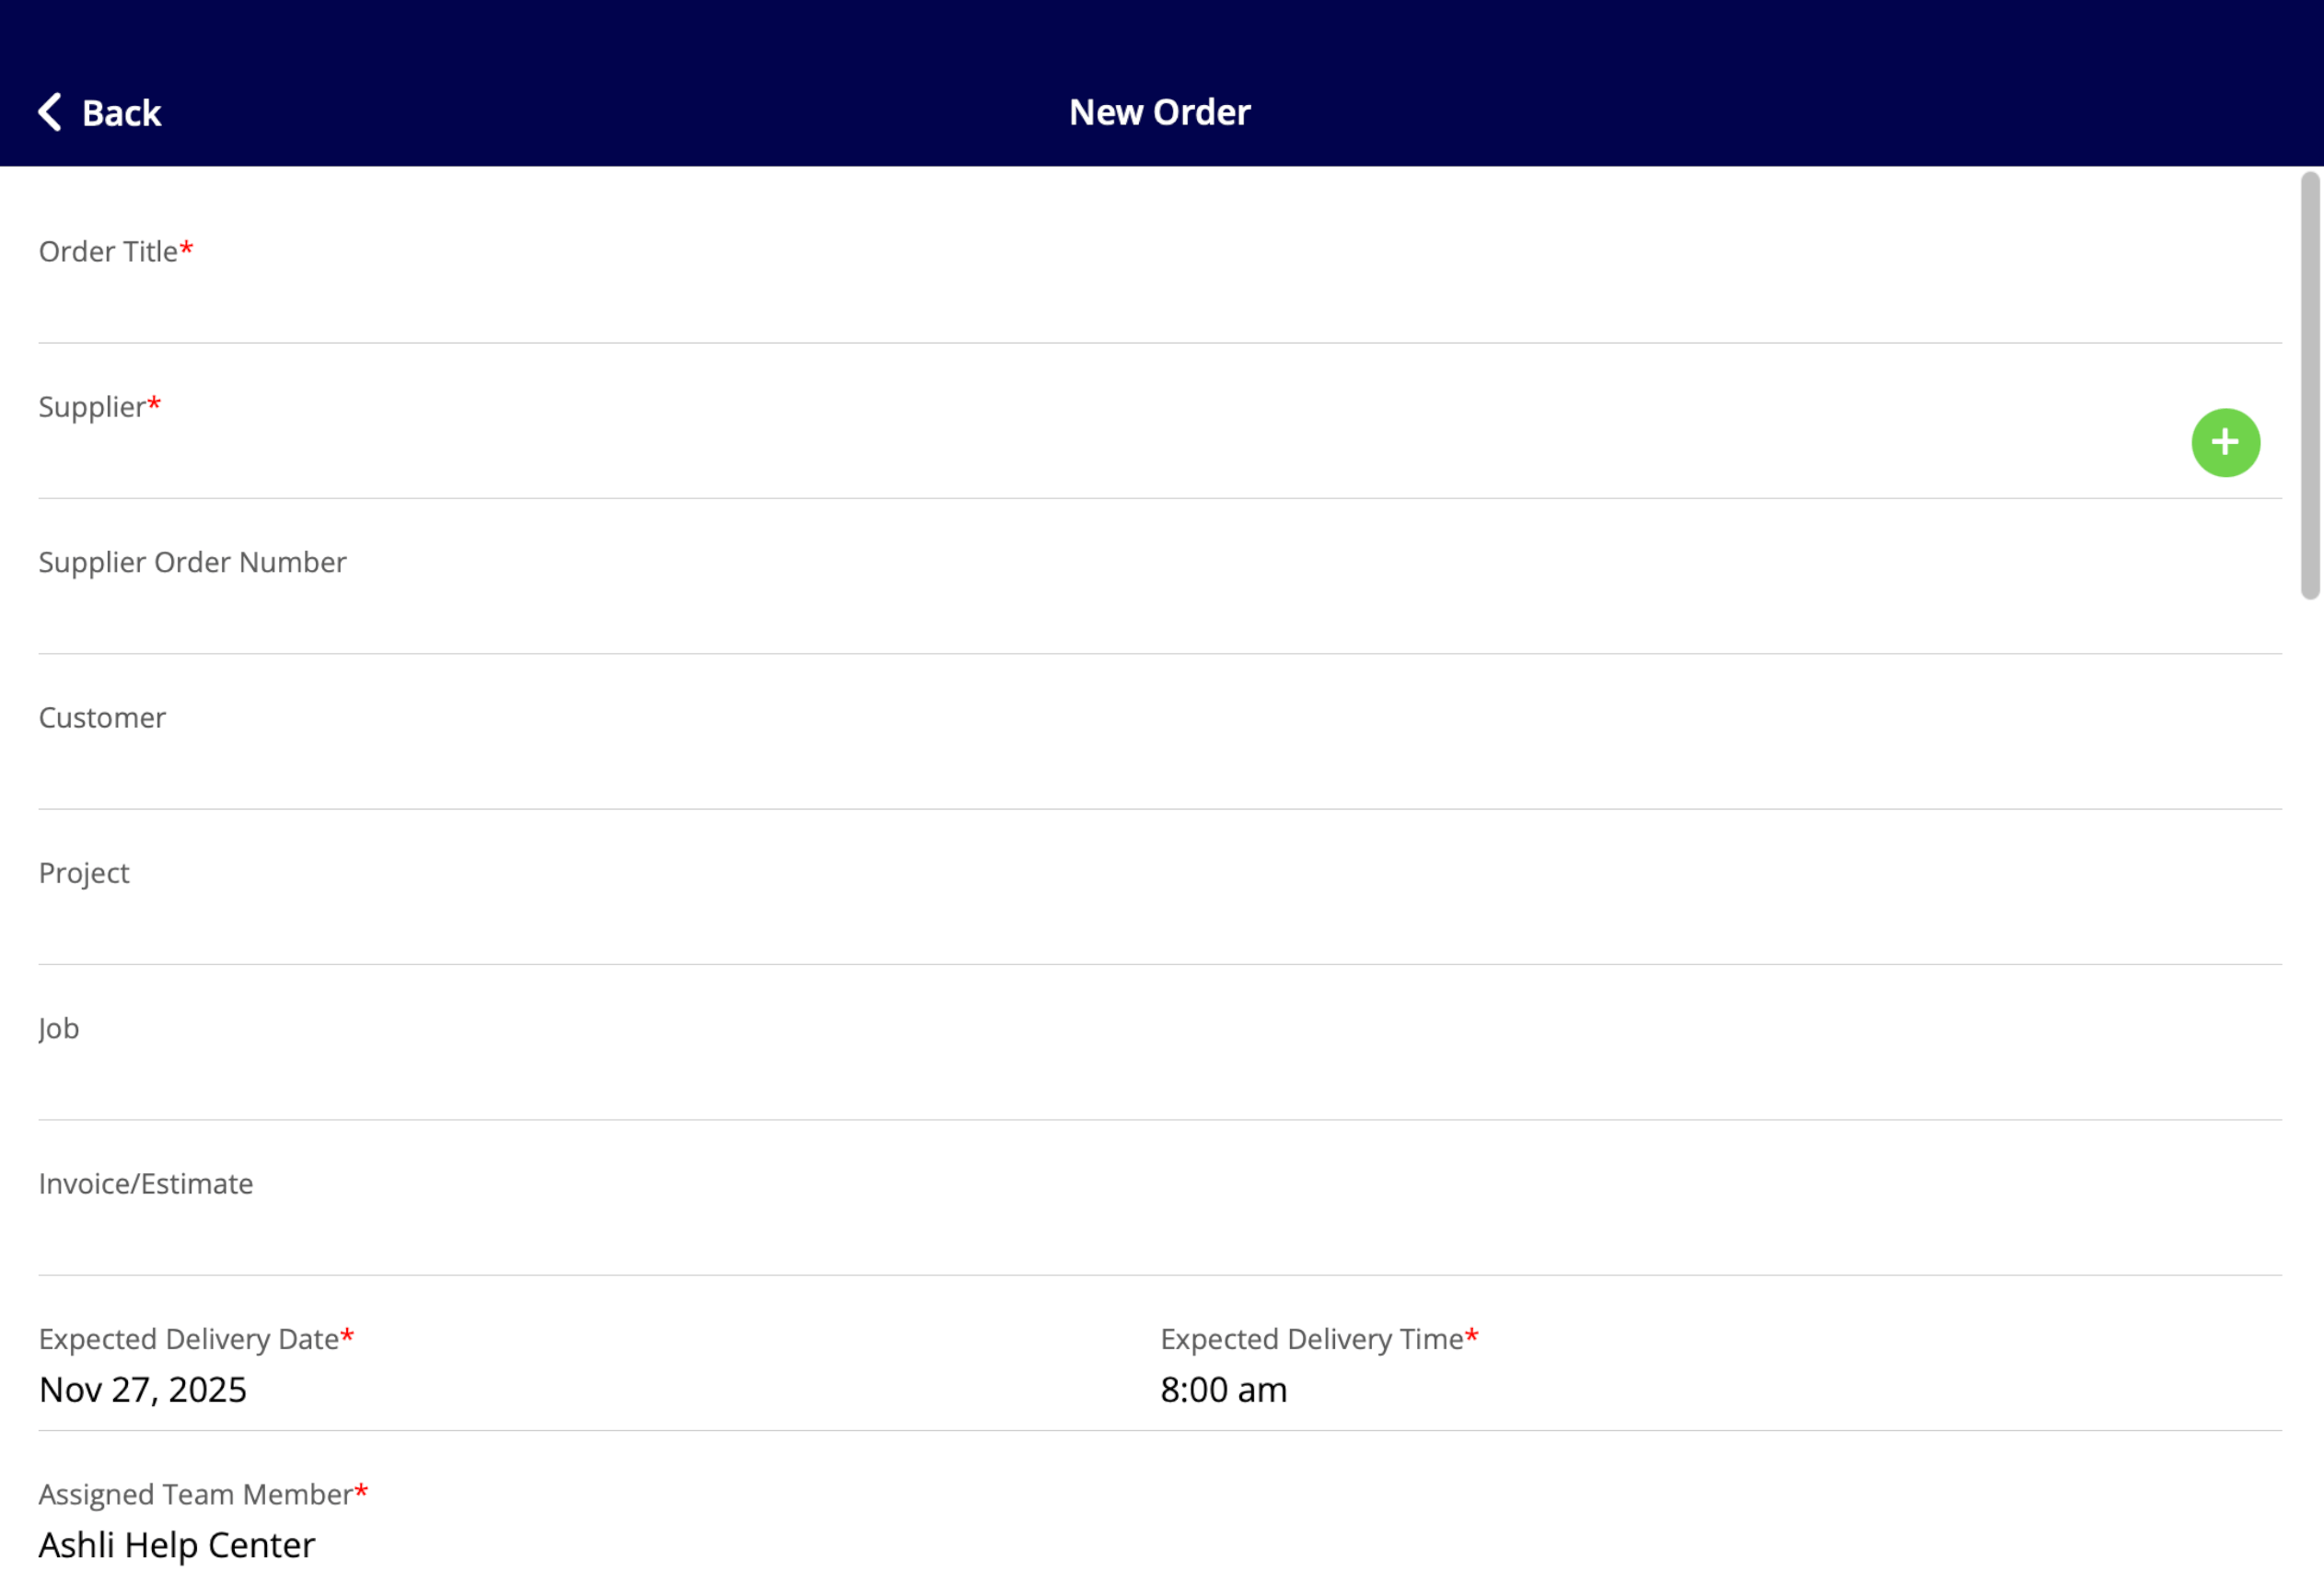
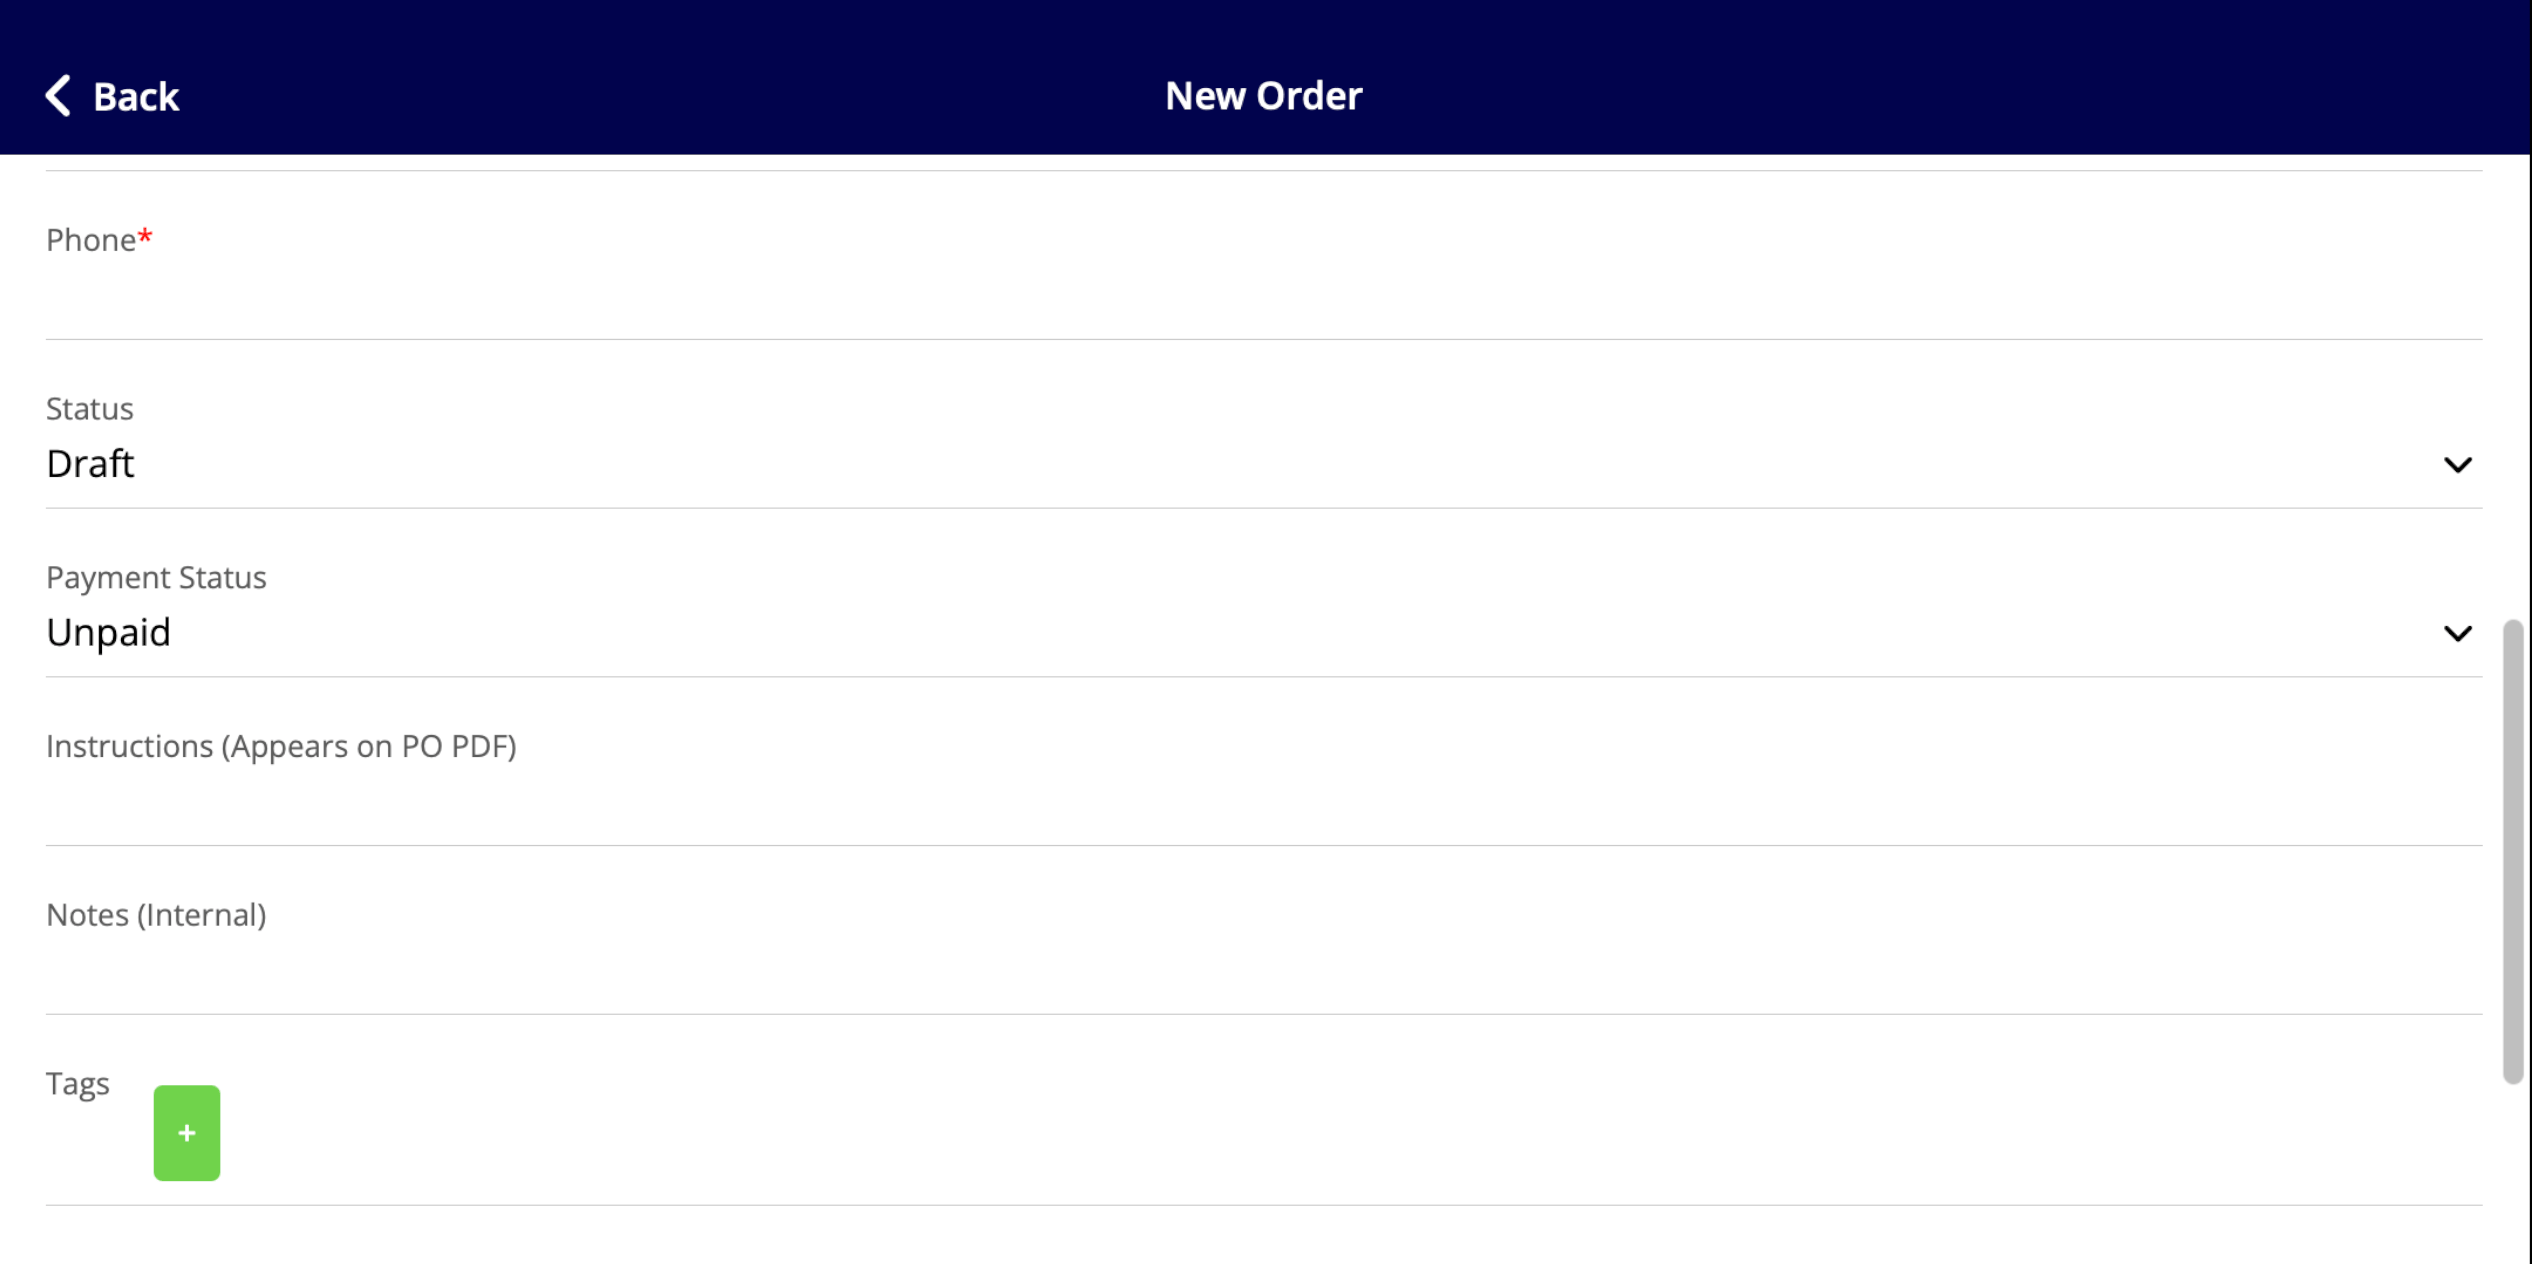
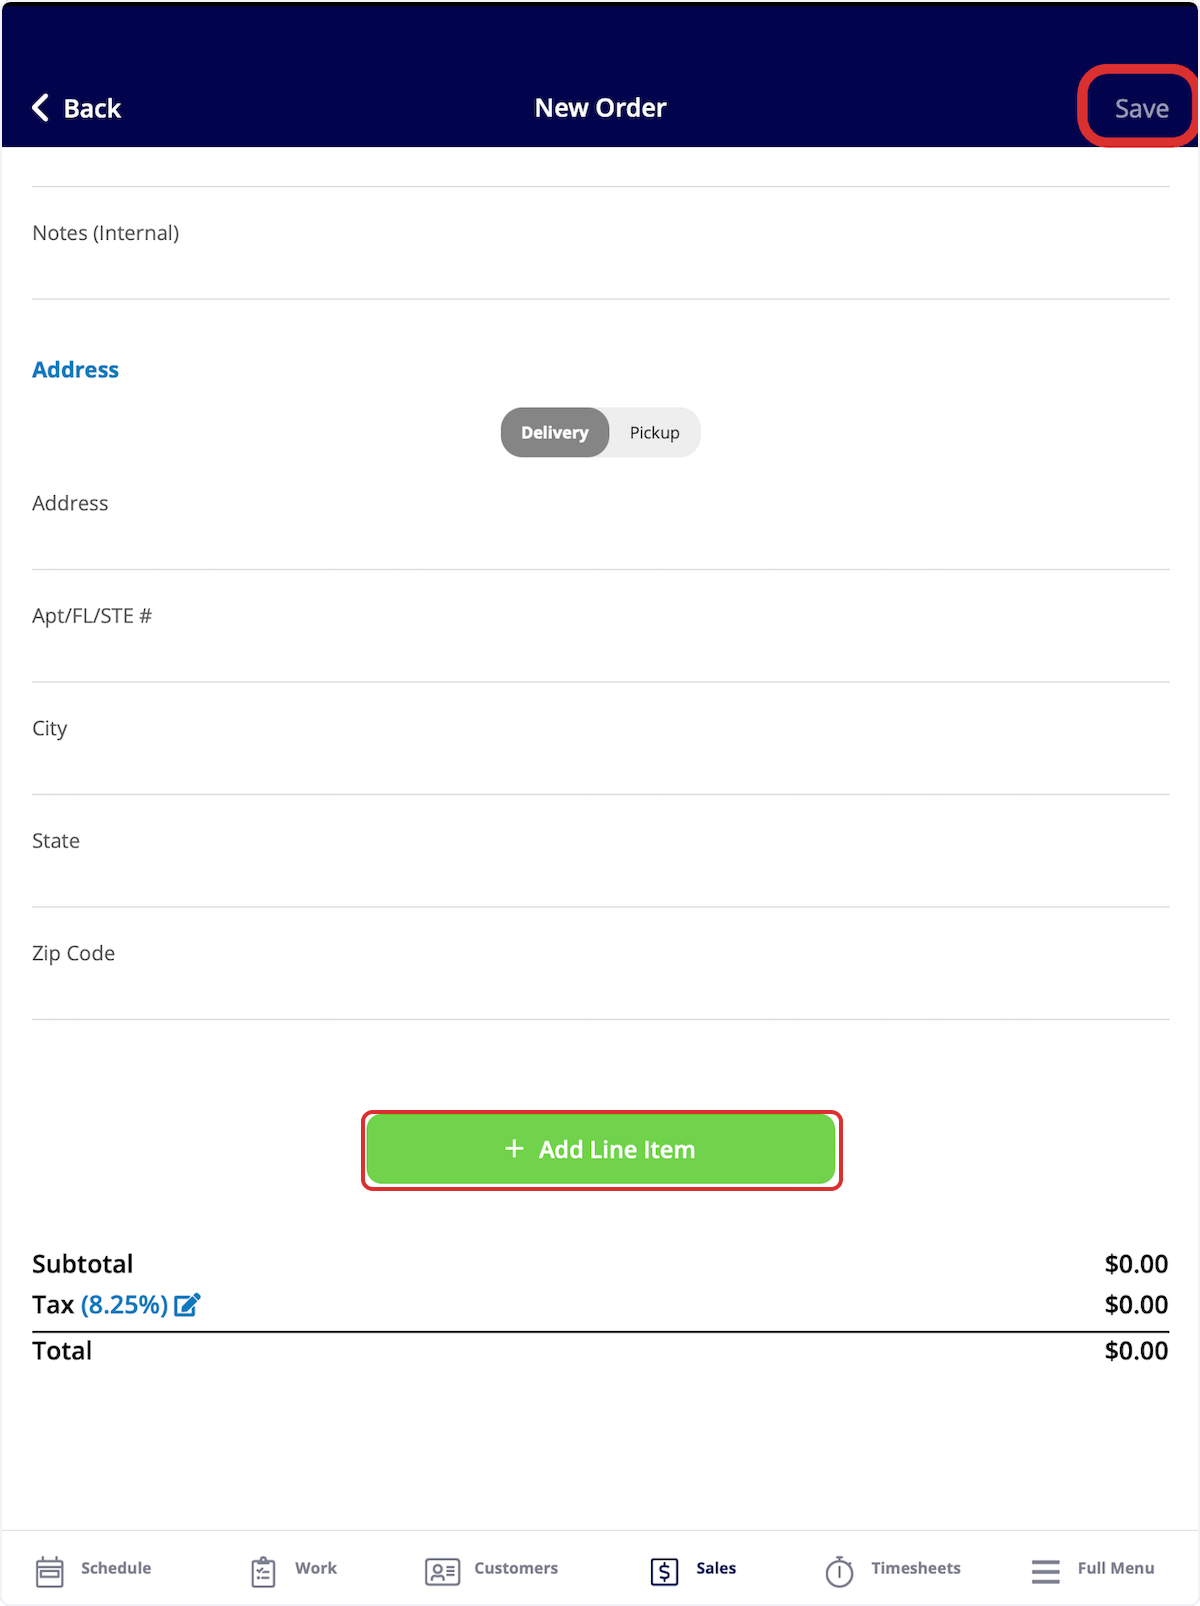
- Select Add Line Item to add items to the order.
- Select Save in the top-right corner to send your purchase order.
FAQs
Can I resend a purchase order to a supplier after it has already been sent? Yes. For Reece, The Granite Group, and City Electric Supply the order is integrated directly into the supplier’s system, so contact that branch directly if you need to change an order. For a supplier without a purchase order integration, edit the order, change its status back to Draft, and resend it — confirm with the supplier first, because resending can leave them with two separate orders to fulfill. Can I manually change the next number of my purchase orders? Yes. Go to Company Settings > Orders > General, edit the Next Order # field, and save — the next purchase order you create uses that number, and numbering auto-increments from there.