
Who uses this: Administrators only — enabling the feature happens in Company Settings, which only Administrators can reach. Availability: All regions. Custom Forms has to be enabled under Company Settings > Features & Plugins — contact FieldPulse for pricing.Custom Forms lets your team build the checklists, inspection sheets, and intake forms they already use, then attach them to jobs, estimates, invoices, and customers. The feature has to be enabled before anyone can build or attach a form, and an Administrator turns it on once for the whole account from Company Settings.
Overview
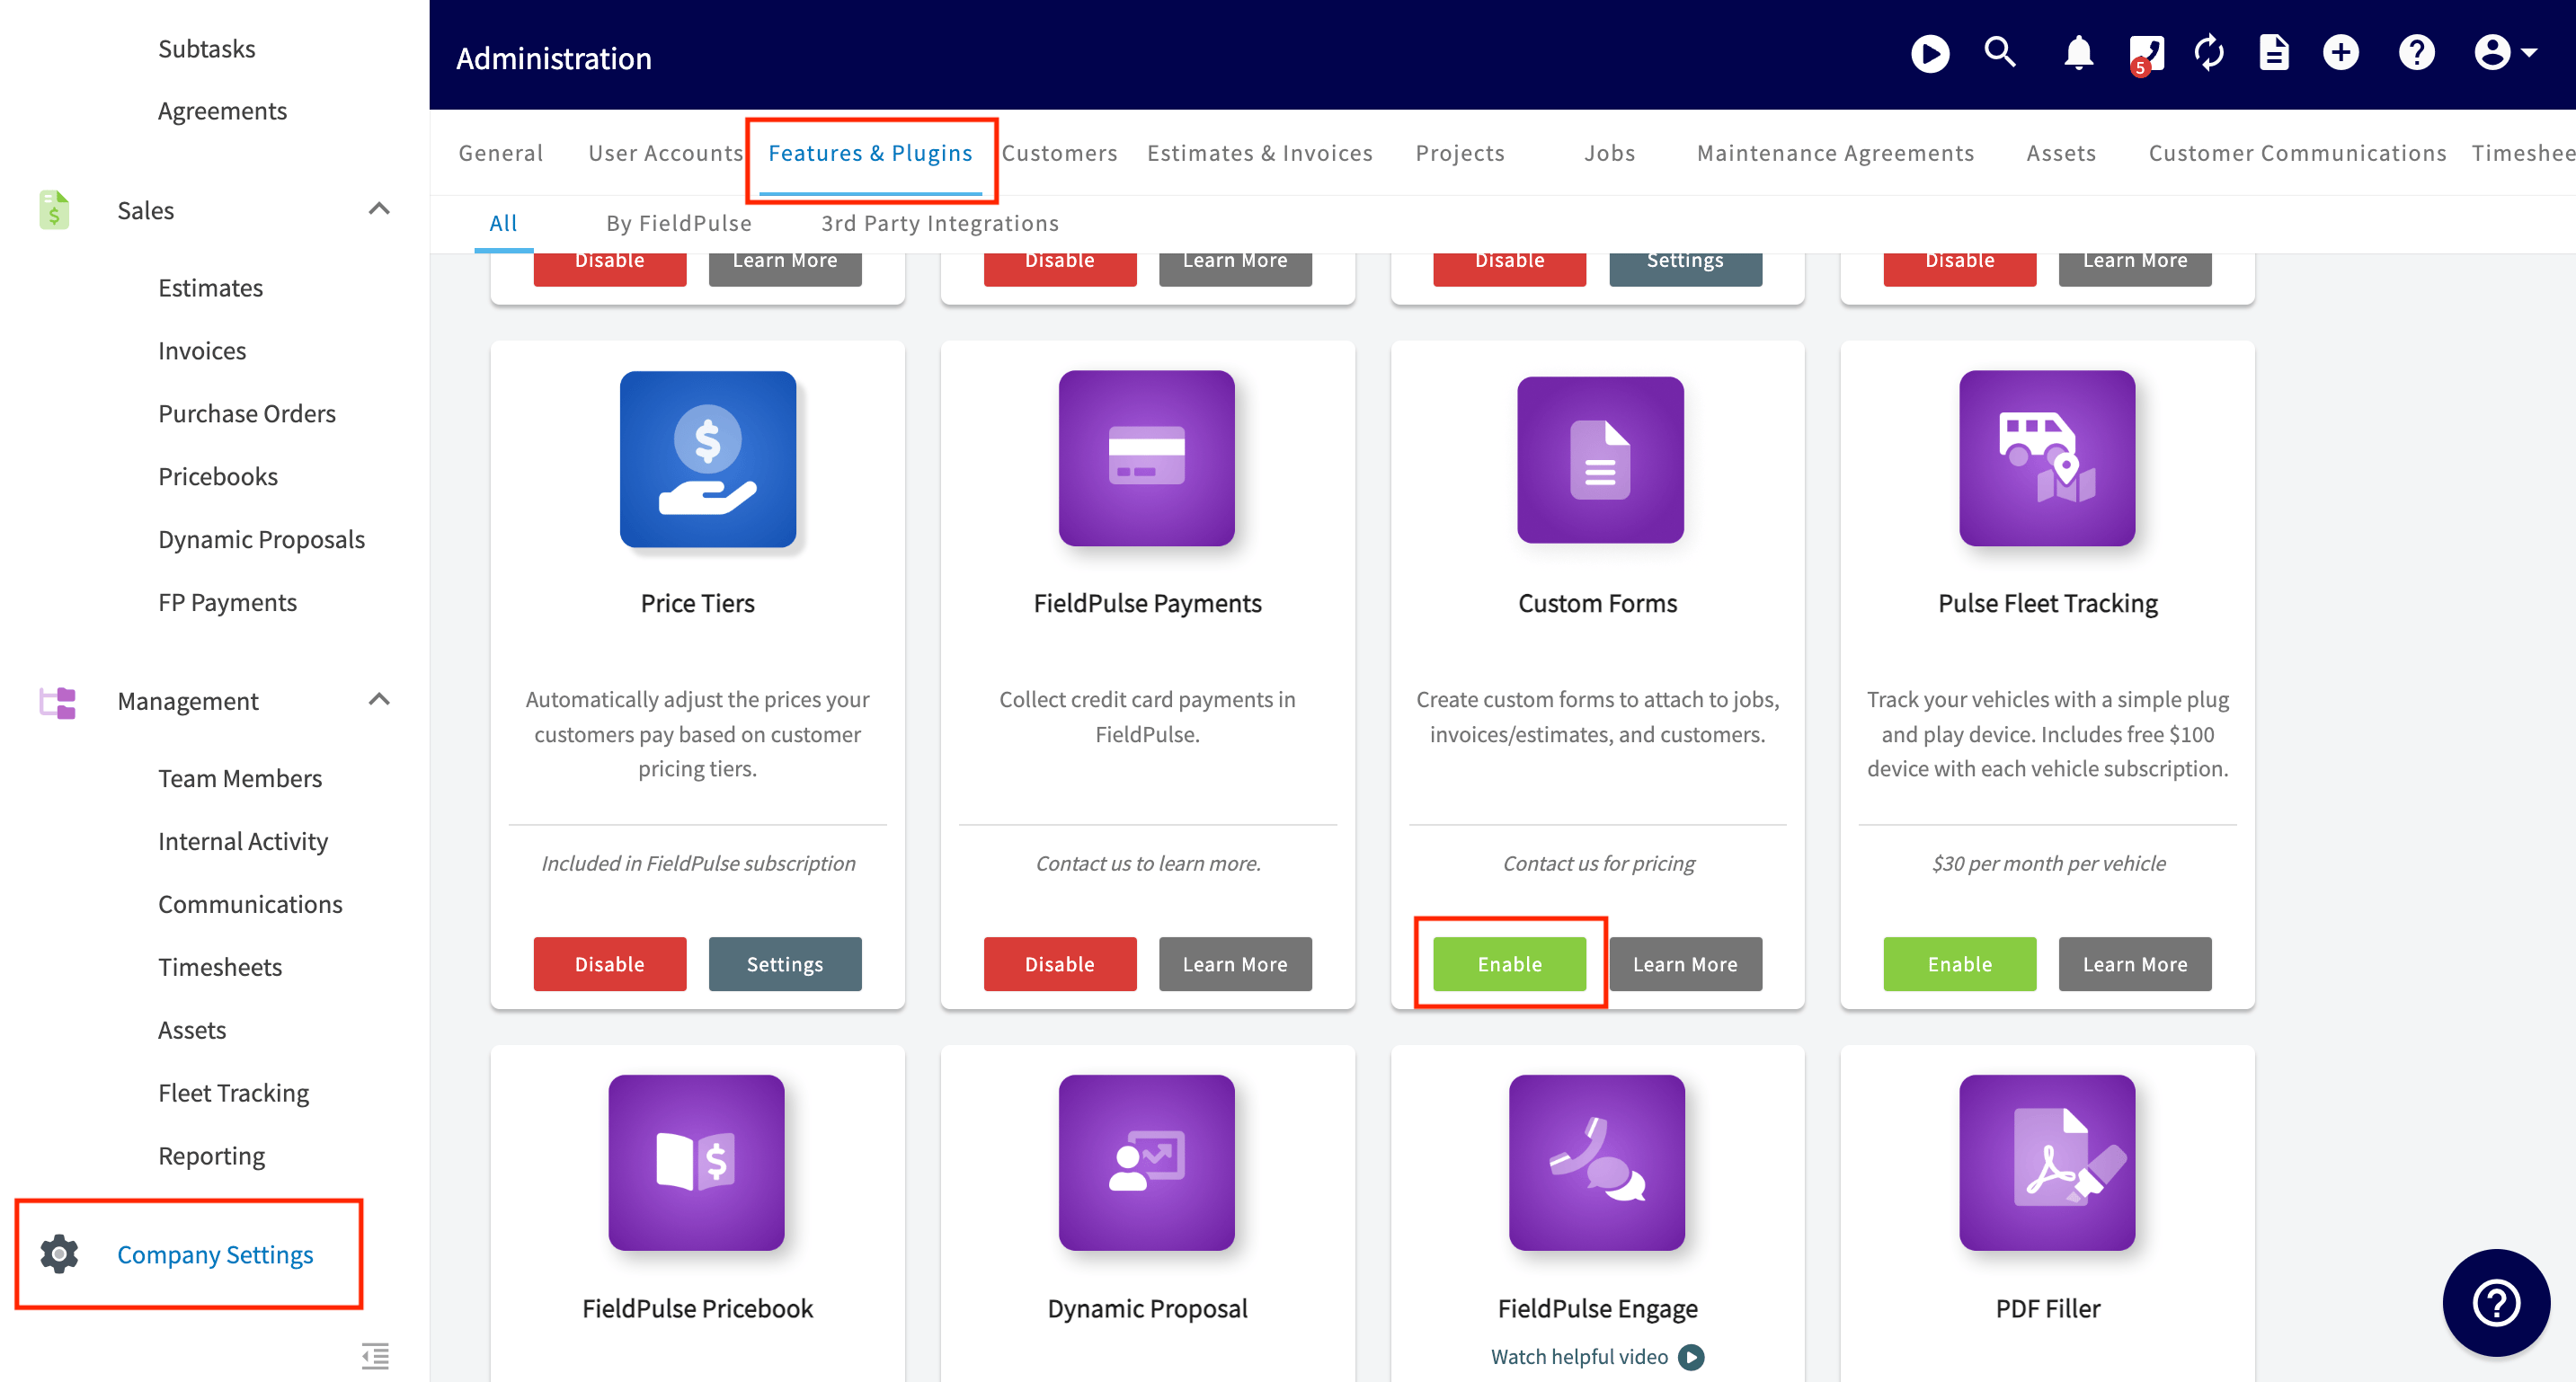
Enabling Custom Forms is a one-time step an Administrator takes in Company Settings > Features & Plugins. Find the Custom Forms tile on that page and select Enable. Once the feature is on, Custom Forms appears in the top menu of Company Settings, and that is where you build and manage your form templates. The Custom Forms tile reads Contact us for pricing, so contact the FieldPulse team for pricing before you turn the feature on.Before you begin
- You need Administrator access to FieldPulse. Company Settings is Administrator-only — see User Roles and Permissions Details.
- Get pricing first. Contact the FieldPulse team at support@fieldpulse.com or through the chat feature in the bottom-right corner of your screen.
Step-by-step setup
- In the left-hand menu, select Company Settings.
- Select the Features & Plugins tab.
- Find the Custom Forms tile and select Enable.
For a full breakdown of every setting available on a form, see Custom Form Settings Details.
Related articles
- Custom Forms Overview
- How to Create a Custom Form
- Custom Form Settings Details
- Custom Form Field Types and Formulas Details
- How to Use the PDF Form Filler
- Custom Forms FAQs