
Who uses this: PDF forms are built in Company Settings, and each form attached to a file library names the roles allowed to import it. Availability: All regions. The PDF Form Filler is turned on by request — email FieldPulse support to enable it.The forms your team carries into the field — the inspection checklist, the county-required permit, the customer sign-off — don’t have to be printed, filled in by hand, and scanned back at the end of the day. The PDF Form Filler, part of custom forms, takes a PDF you already have, lets you drop fillable fields onto it, and keeps the completed copy on the record it belongs to.
Overview
The PDF Form Filler turns an existing PDF into a form your team fills out inside FieldPulse. You import the PDF in Company Settings, drag fillable elements onto the page, save the form, and attach it to a customer, job, project, or invoice. Forms are filled out and signed in both the FieldPulse web app and the mobile app, and the finished copy is stored on the record for anyone who needs it later. PDF forms support e-signatures, attaching a form to customer communications, saving to customer and job records, and full integration with FieldPulse for smart fill. Custom field types include short answer, paragraph, multiple choice, checkboxes, dropdown, and file upload. You can also import a PDF that already contains fillable fields, so a form you bring from another platform doesn’t have to be rebuilt from scratch.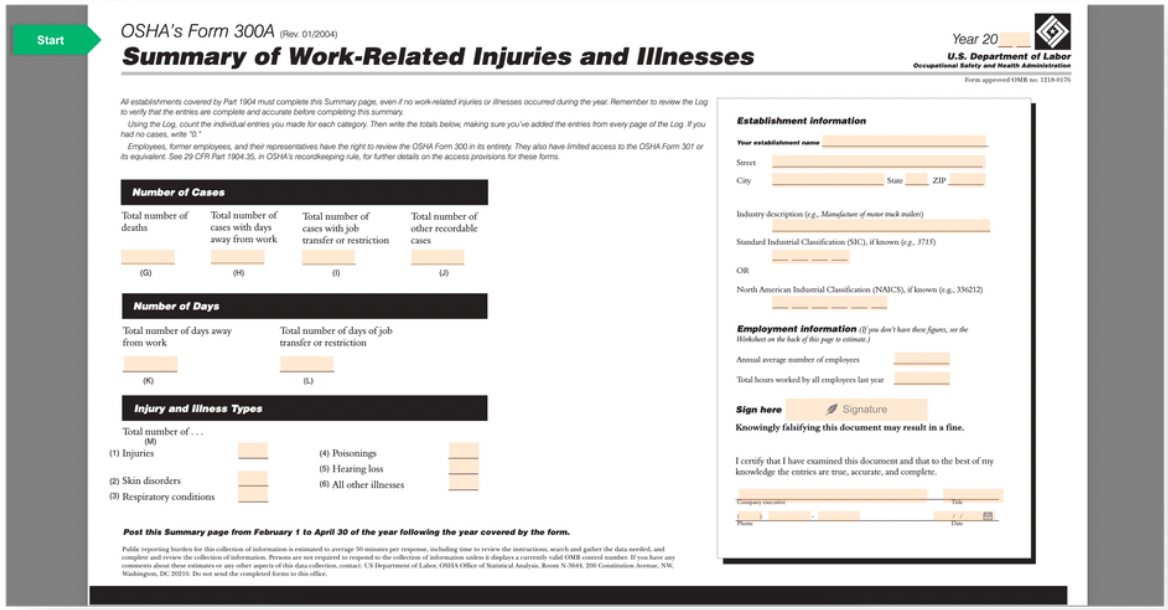
Video walkthrough
Video walkthrough: using the PDF Form Filler in FieldPulse
Before you begin
- The PDF Form Filler has to be enabled for your account. Email support@fieldpulse.com or use the chat feature in the bottom-right corner of your screen to request it.
- Have the PDF you want to build on ready to upload.
Creating a PDF form
Import and name the PDF
-
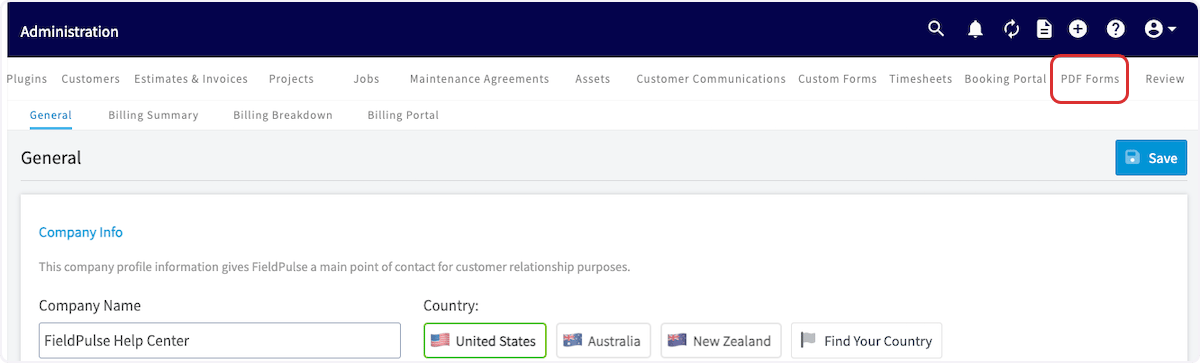
Go to Company Settings and select PDF Forms from the top menu.
-
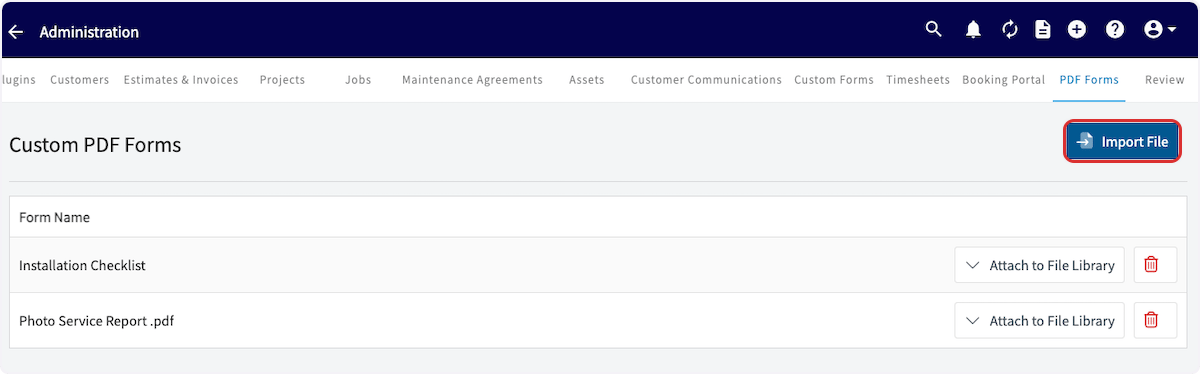
Select Import File and choose the PDF you want to build on.
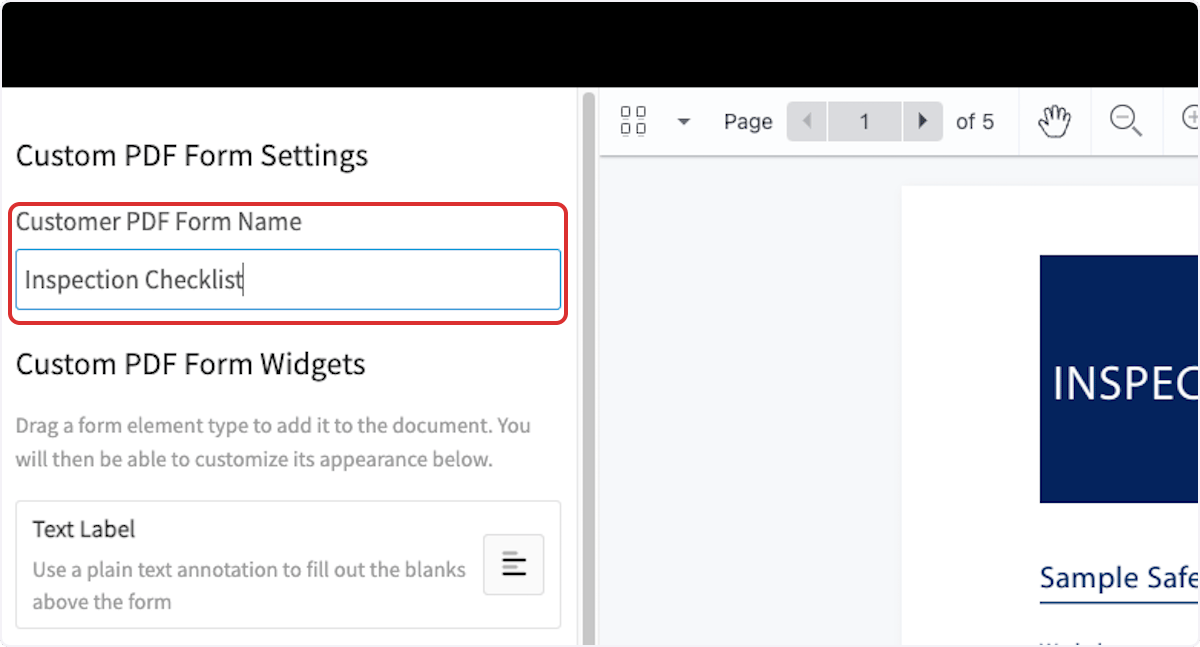
- Enter a clear name in Customer PDF Form Name so your team can find the form later.
Add form elements
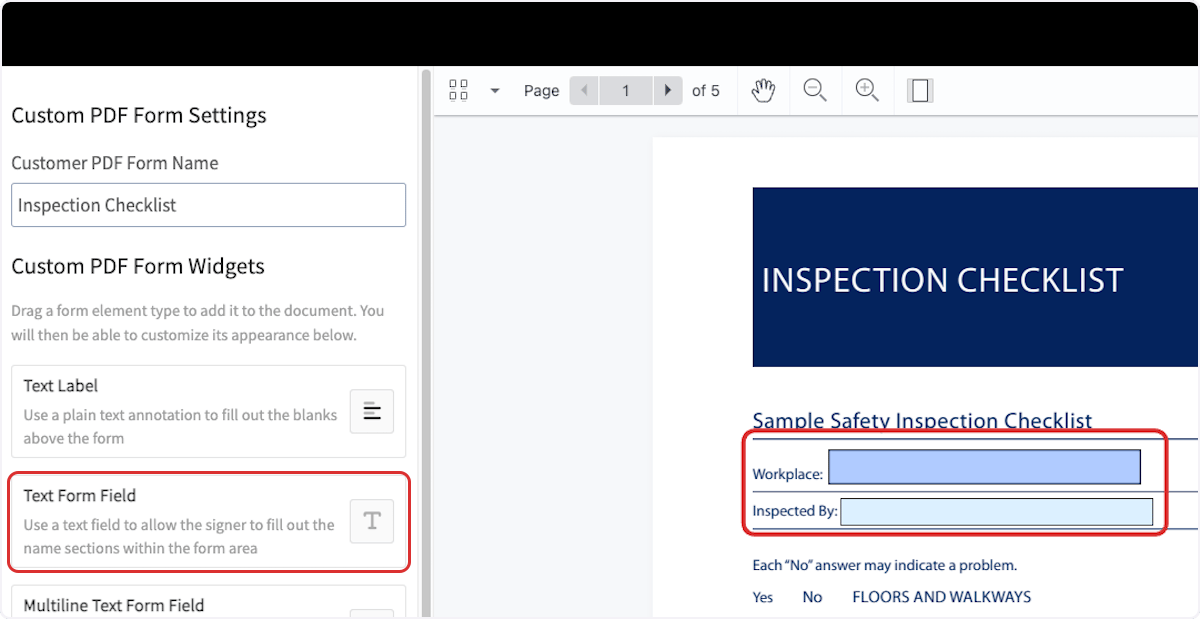
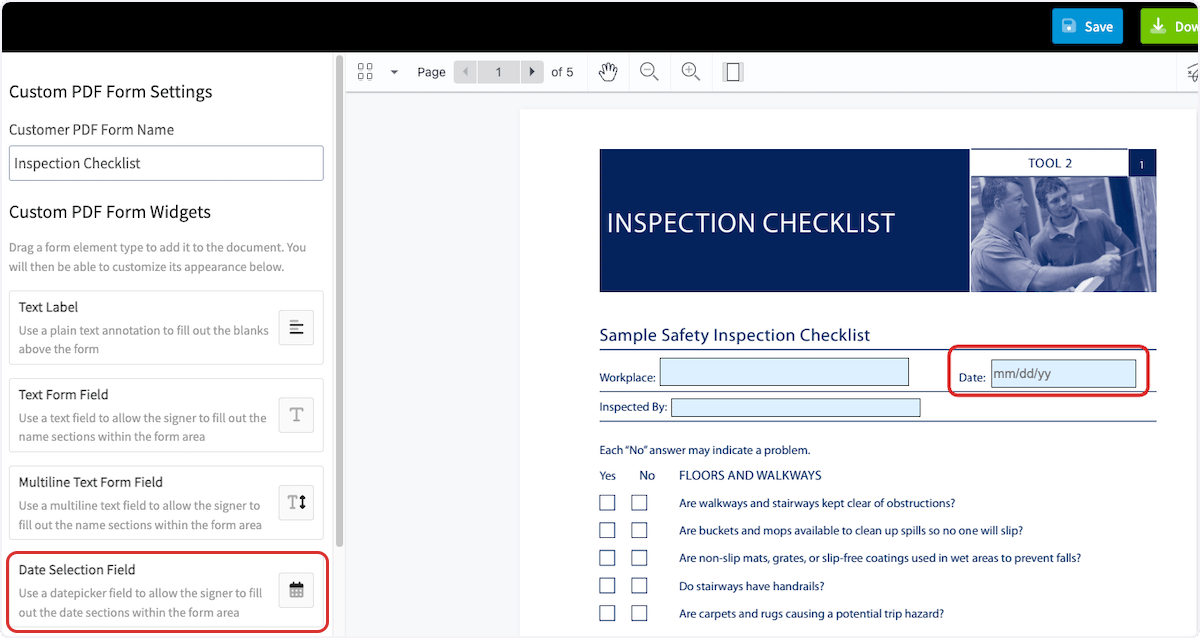
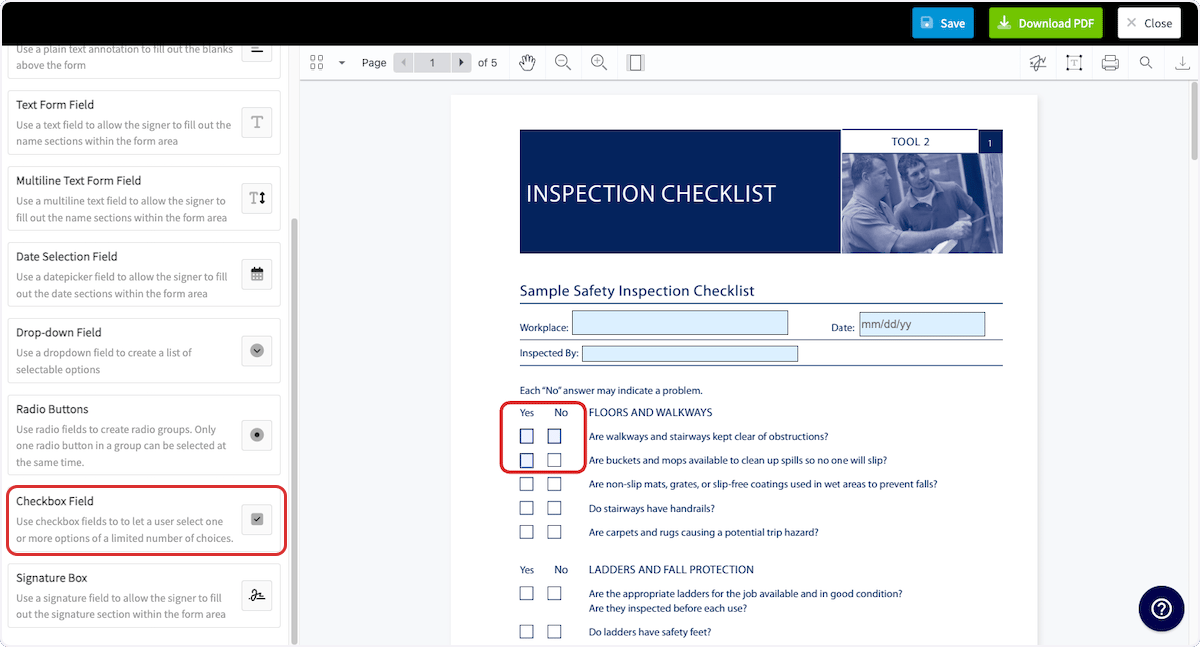
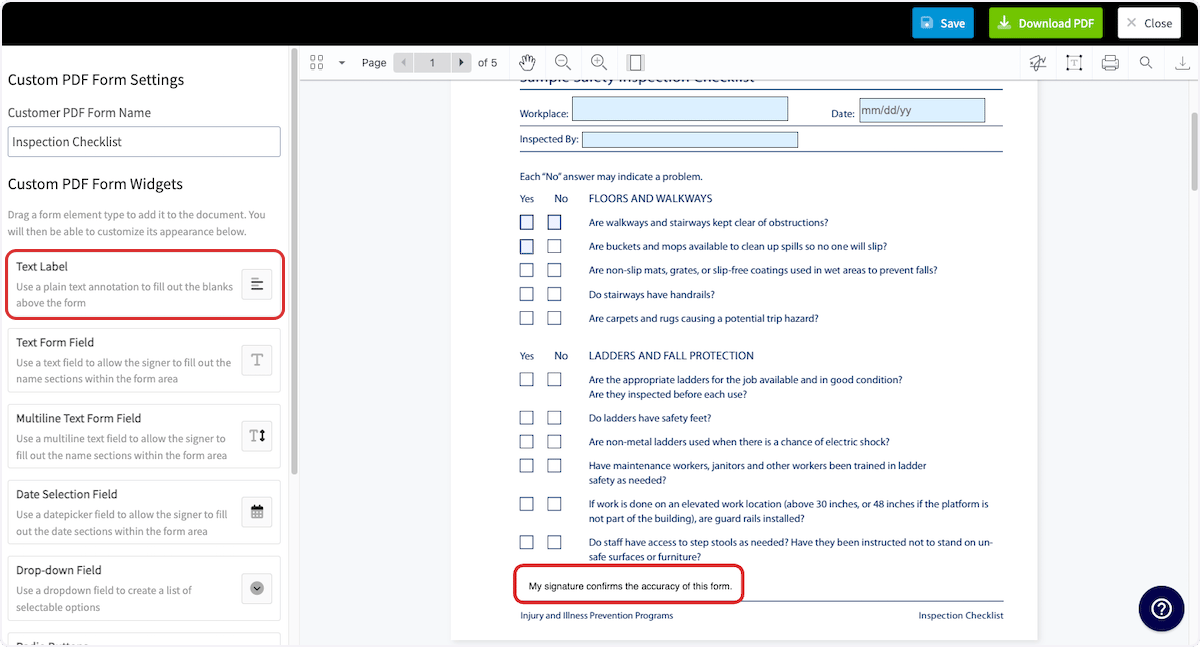
Drag an element from the Custom PDF Form Widgets menu on the left onto the PDF. Once an element is placed, you can resize it and adjust its appearance.
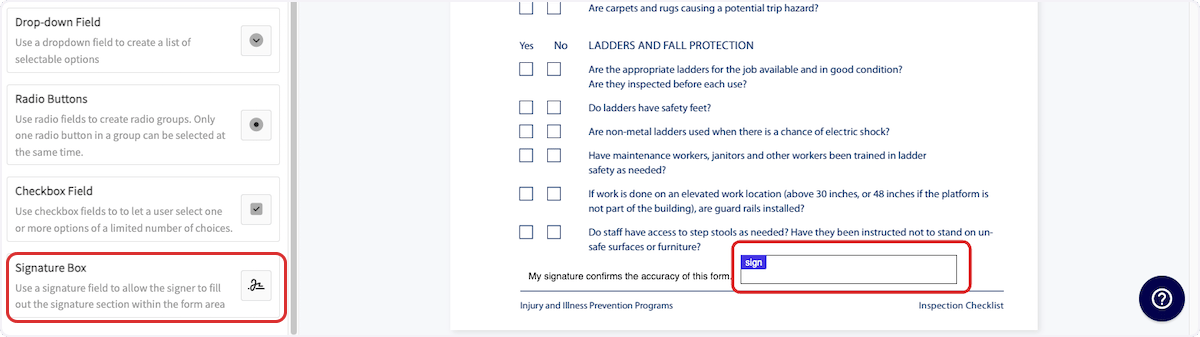
The examples below show a text form field, a date selection field, checkboxes, a text label, and a signature box placed on a safety inspection checklist.
 |
|  |
A Signature Box drops onto the signature line, where the person completing the form writes or types a signature.
|
A Signature Box drops onto the signature line, where the person completing the form writes or types a signature.
Save the form and choose where it lives
-
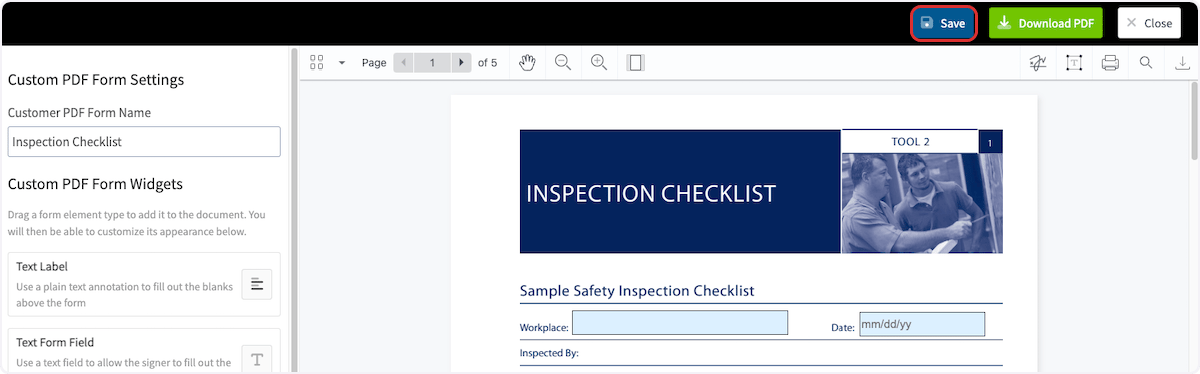
Select Save once your elements are placed.
-
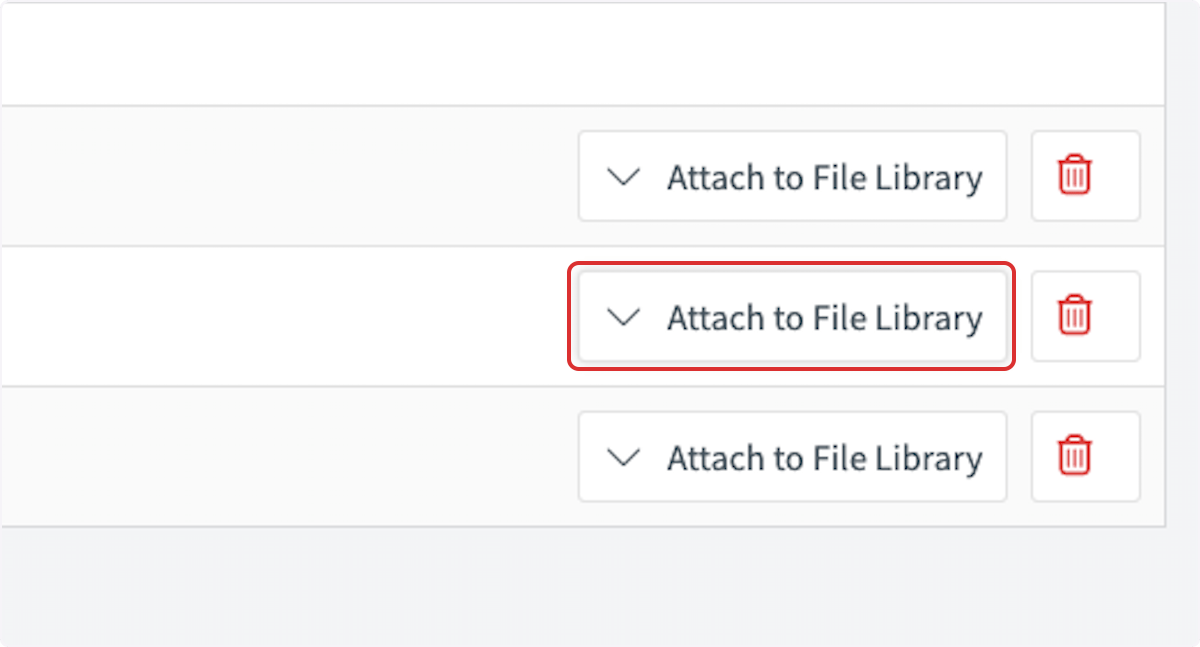
Select Attach to File Library next to the name of your new PDF form.
-
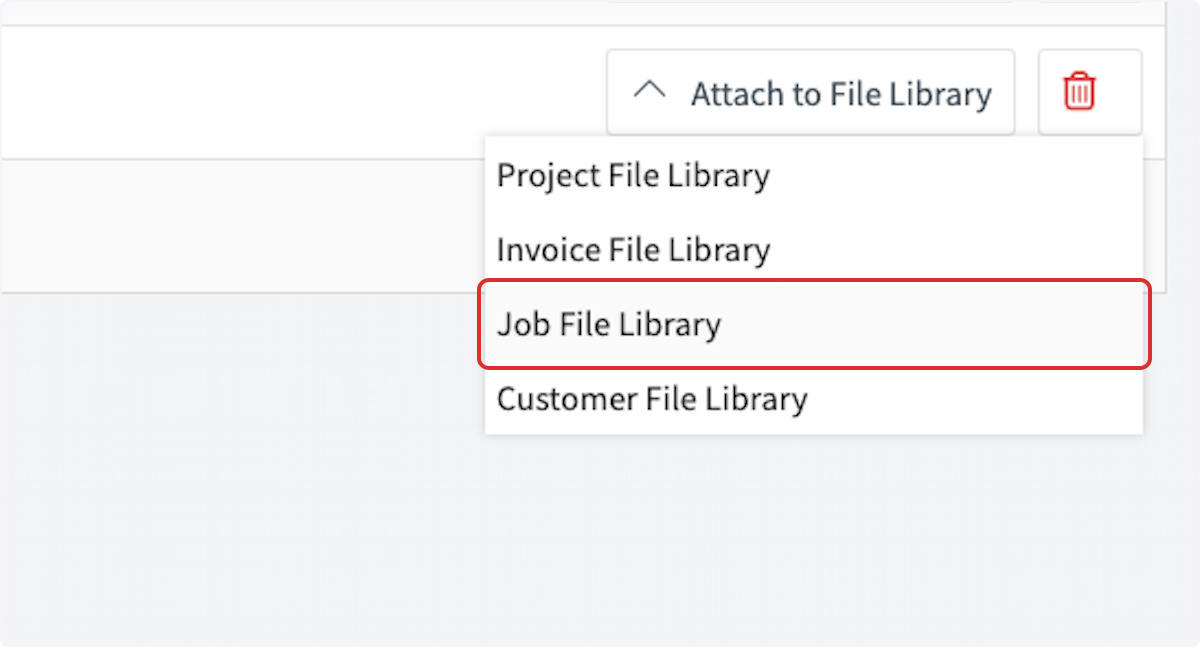
Select the library where you want to store the form — Project File Library, Invoice File Library, Job File Library, or Customer File Library.
- Select the roles allowed to import the file onto records in the File Import Permissions window, then select Save.
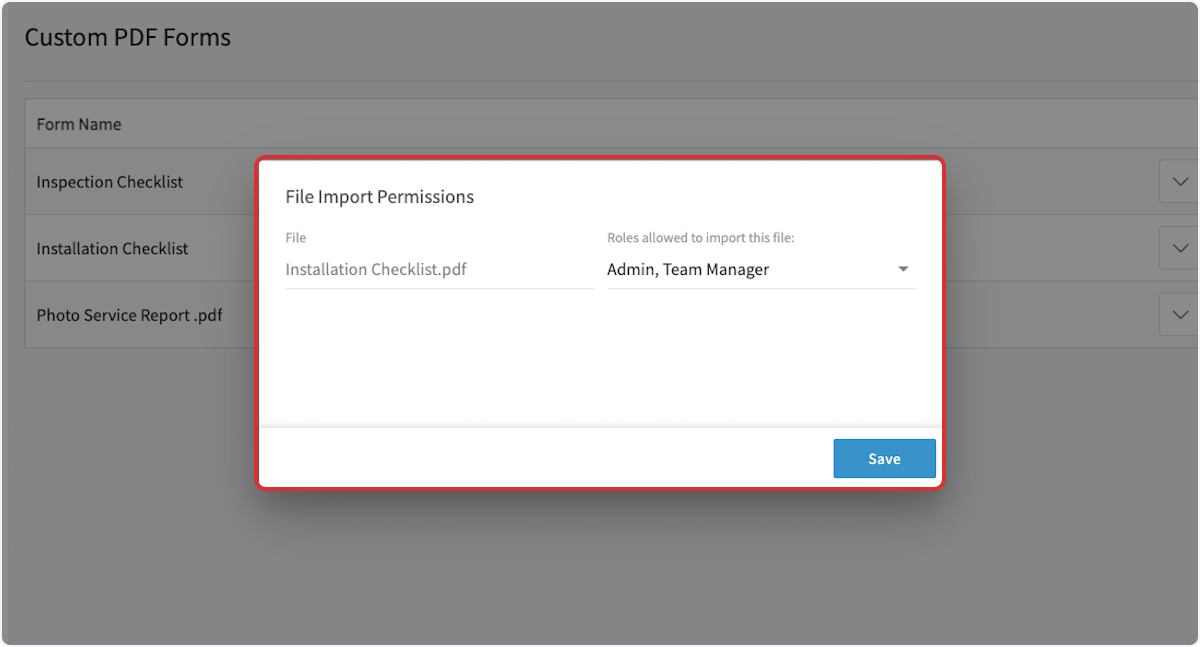
Store a form in a specific file library when the form pertains directly to that library’s records.
Attaching a PDF form to a record
PDF forms can be attached to customers, jobs, projects, invoices, and more. The steps below use a job record as the example.-
Open the record you want to attach the form to.
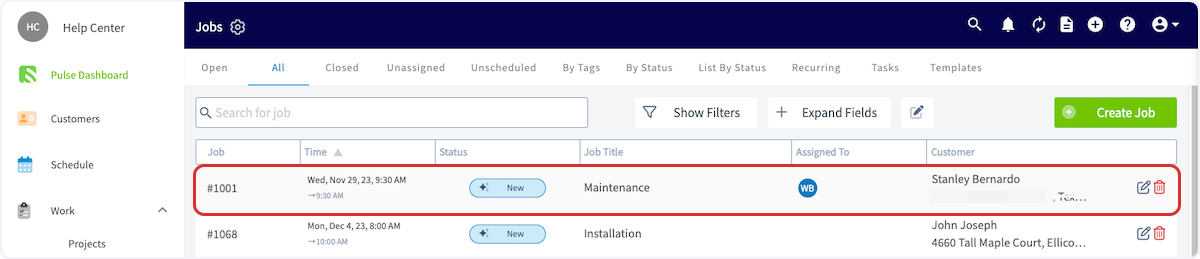
- Select Files from the menu at the top of the screen.
-
Choose where to pull the form from:
- Import From File Library — shows only the PDF forms added to the library that matches the record you have open. On a job record, that is the forms in the Job File Library.
- Import From PDF Library — shows every PDF form in your account.
-
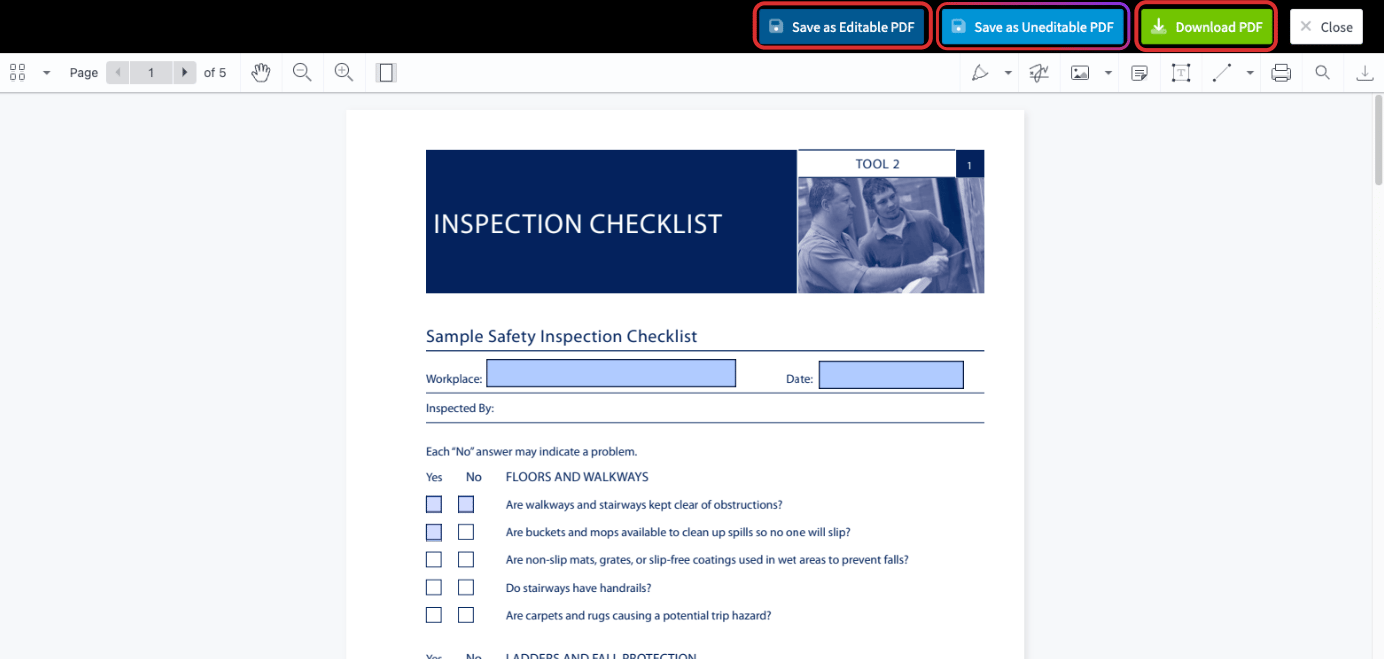
Preview the PDF, then choose how to save it from the options at the top of the screen:
- Save as Editable PDF — saves the form with its fields still fillable.
- Save as Uneditable PDF — saves the form with its fields locked so they can’t be filled out.
- Download PDF — downloads the PDF to your device.
Still need help?
Reach the FieldPulse support team at support@fieldpulse.com or through the chat feature in the bottom-right corner of your screen.Related articles
- Custom Forms Overview
- How to Create a Custom Form
- How to View Photos and Files on Form PDFs
- How to Import and Export Custom Form Templates
- Custom Forms Offline Mode Details
- Custom Forms FAQs