
Step 1
Ensure that your phone and its records are backed up to avoid losing access to any important information.Step 2
Make sure your Yealink phone is powered on/plugged in.Step 3
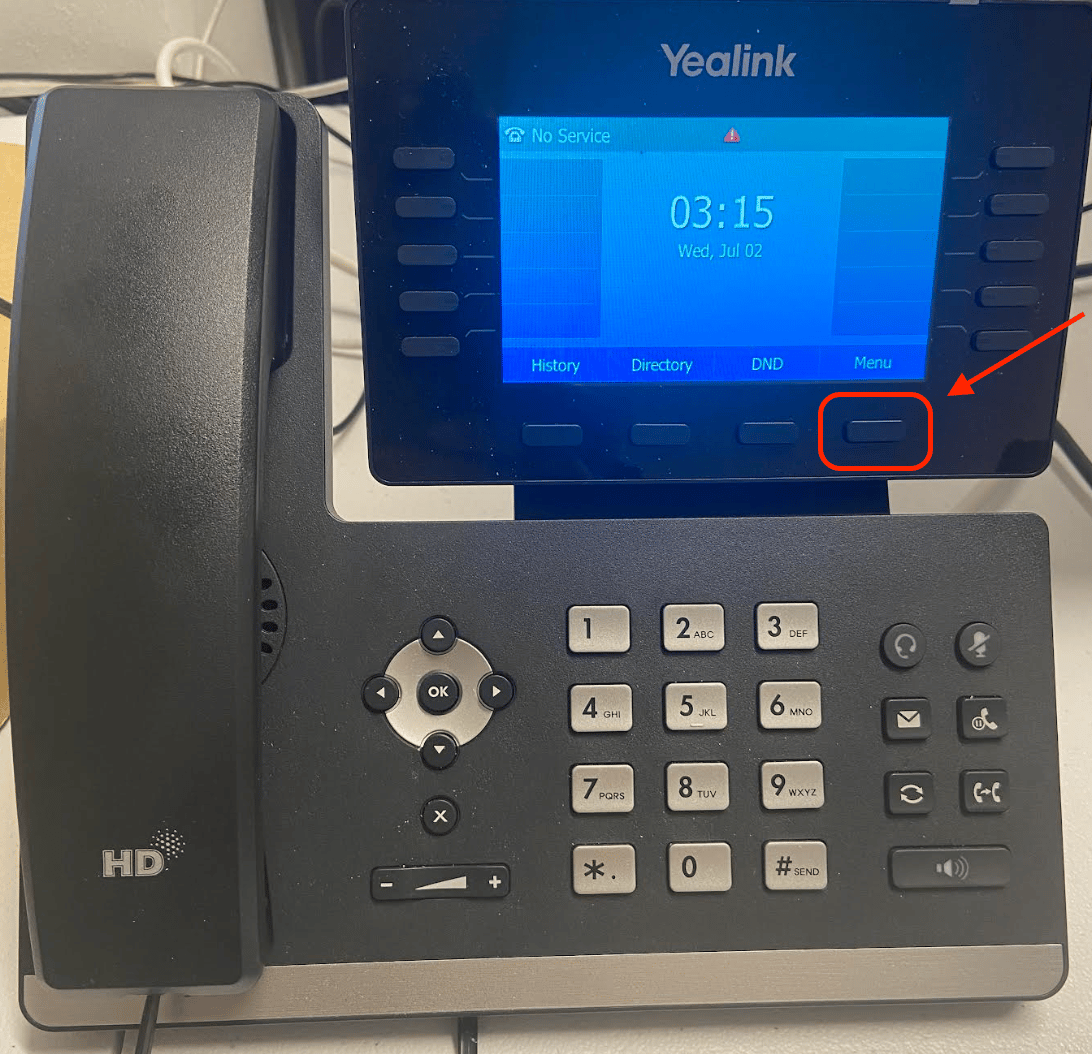
Locate the IPv4 address on your Yealink phone- On your Yealink phone, select the Menu option by clicking the button on the bottom right hand corner of the phone screen (shown in the picture below with model # T-54W)
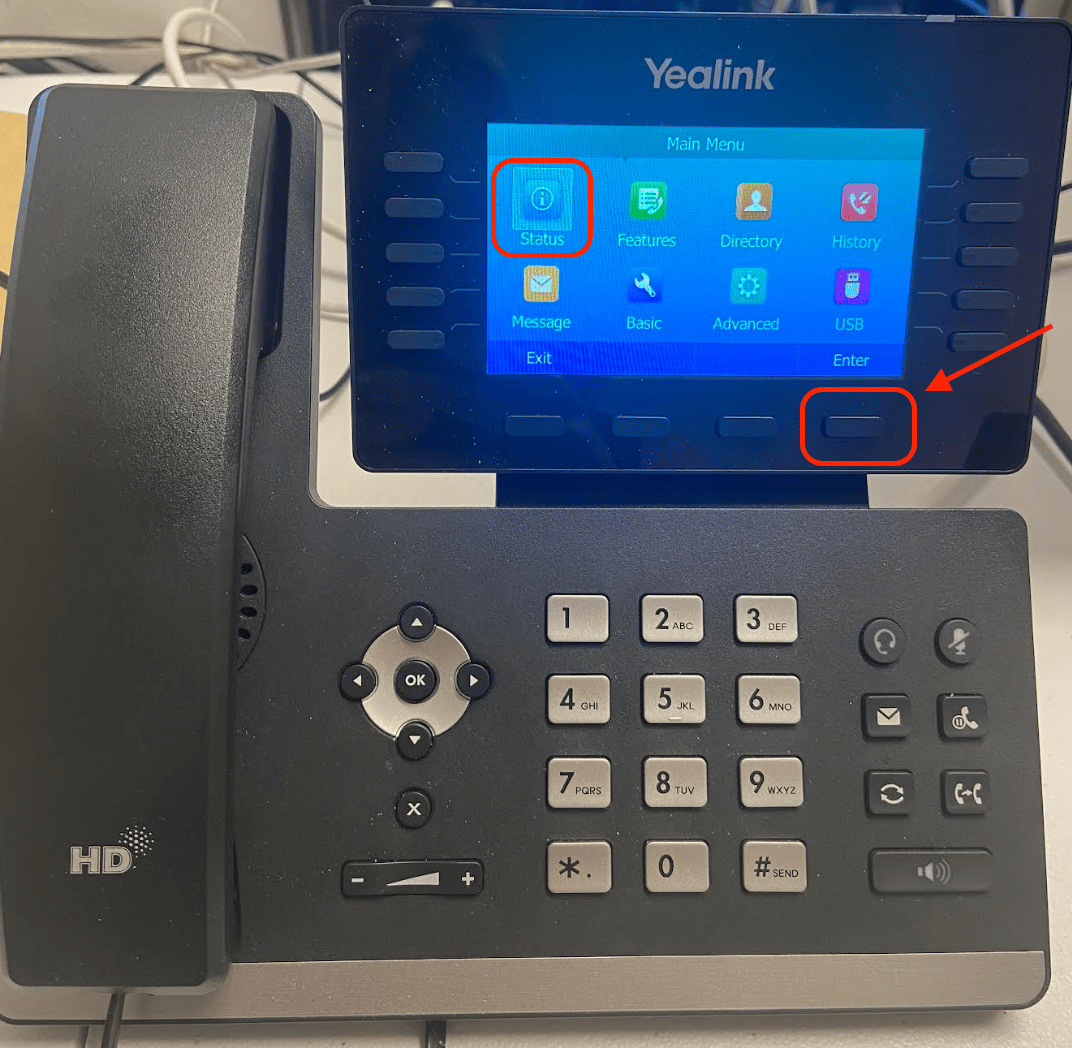
- Select the Status icon by clicking the button on the bottom right hand corner of the phone screen (shown in the picture below with model # T-54W)
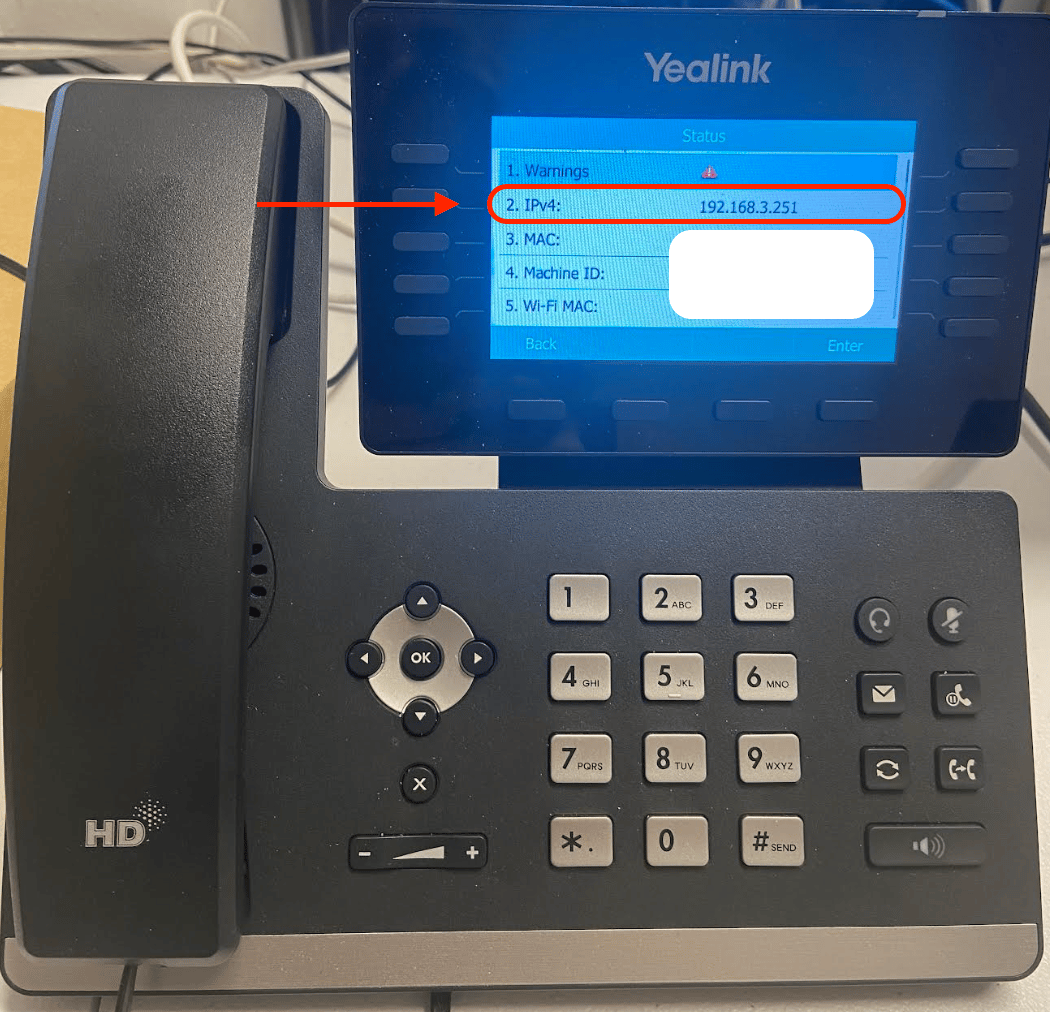
- Now you will see the IPv4 address for your Yealink phone
Step 4
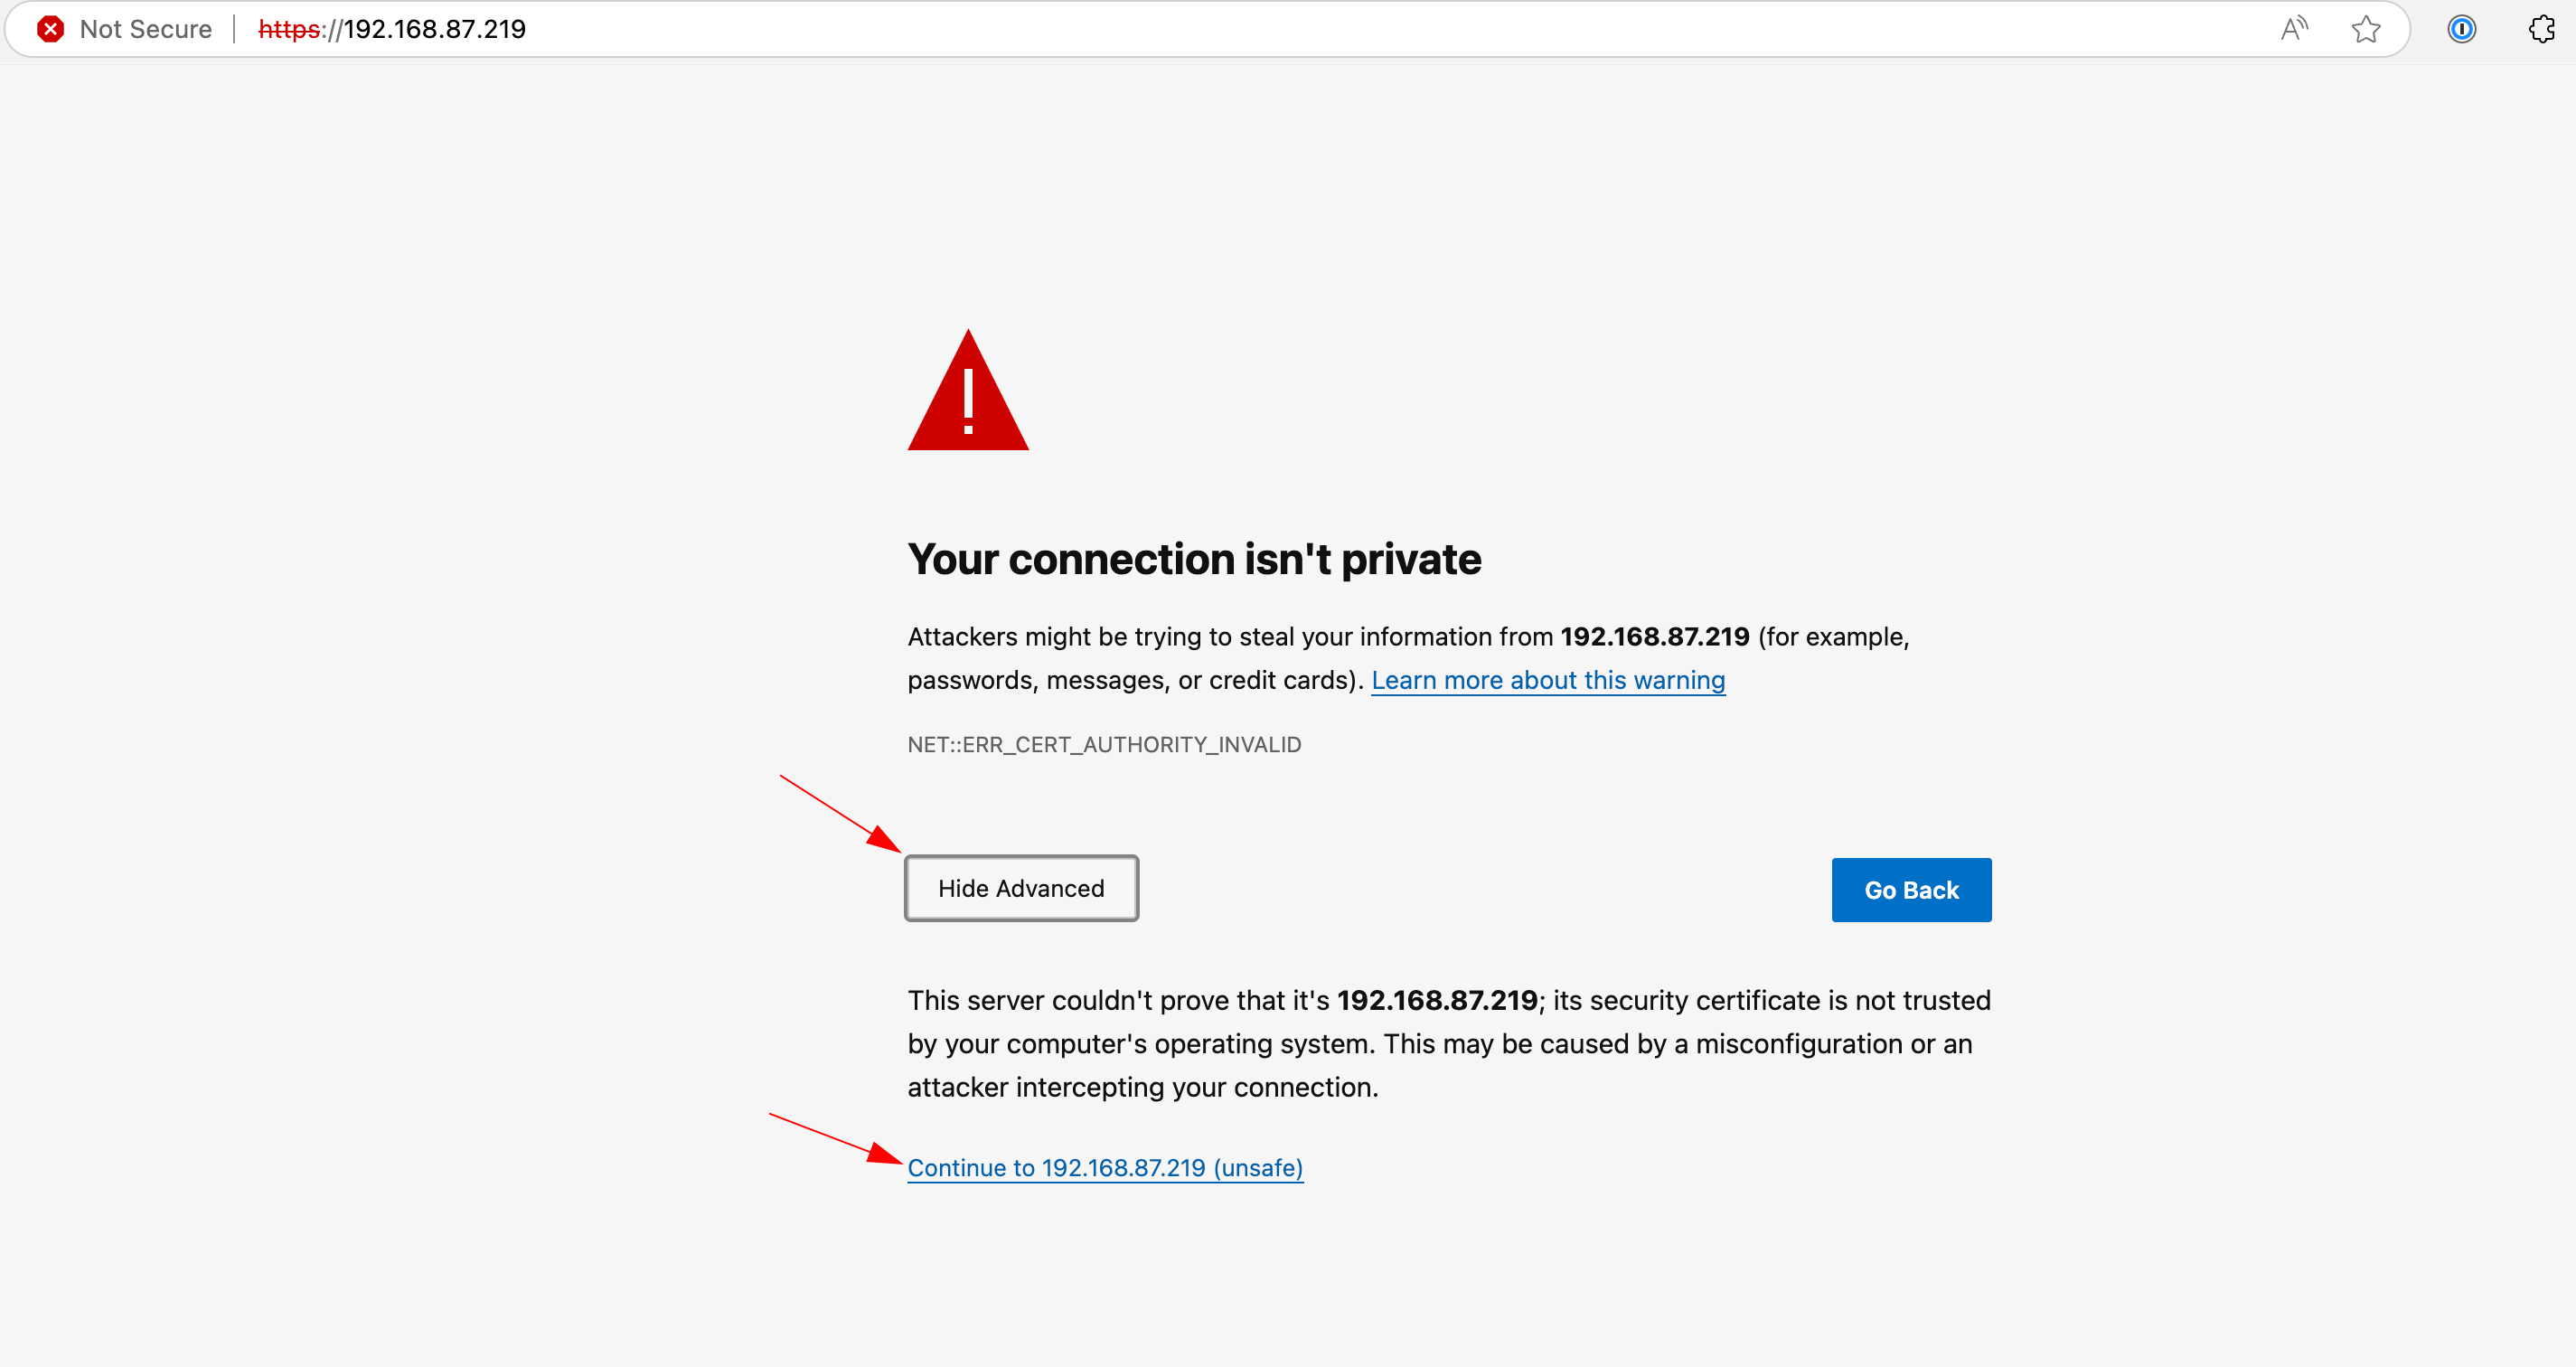
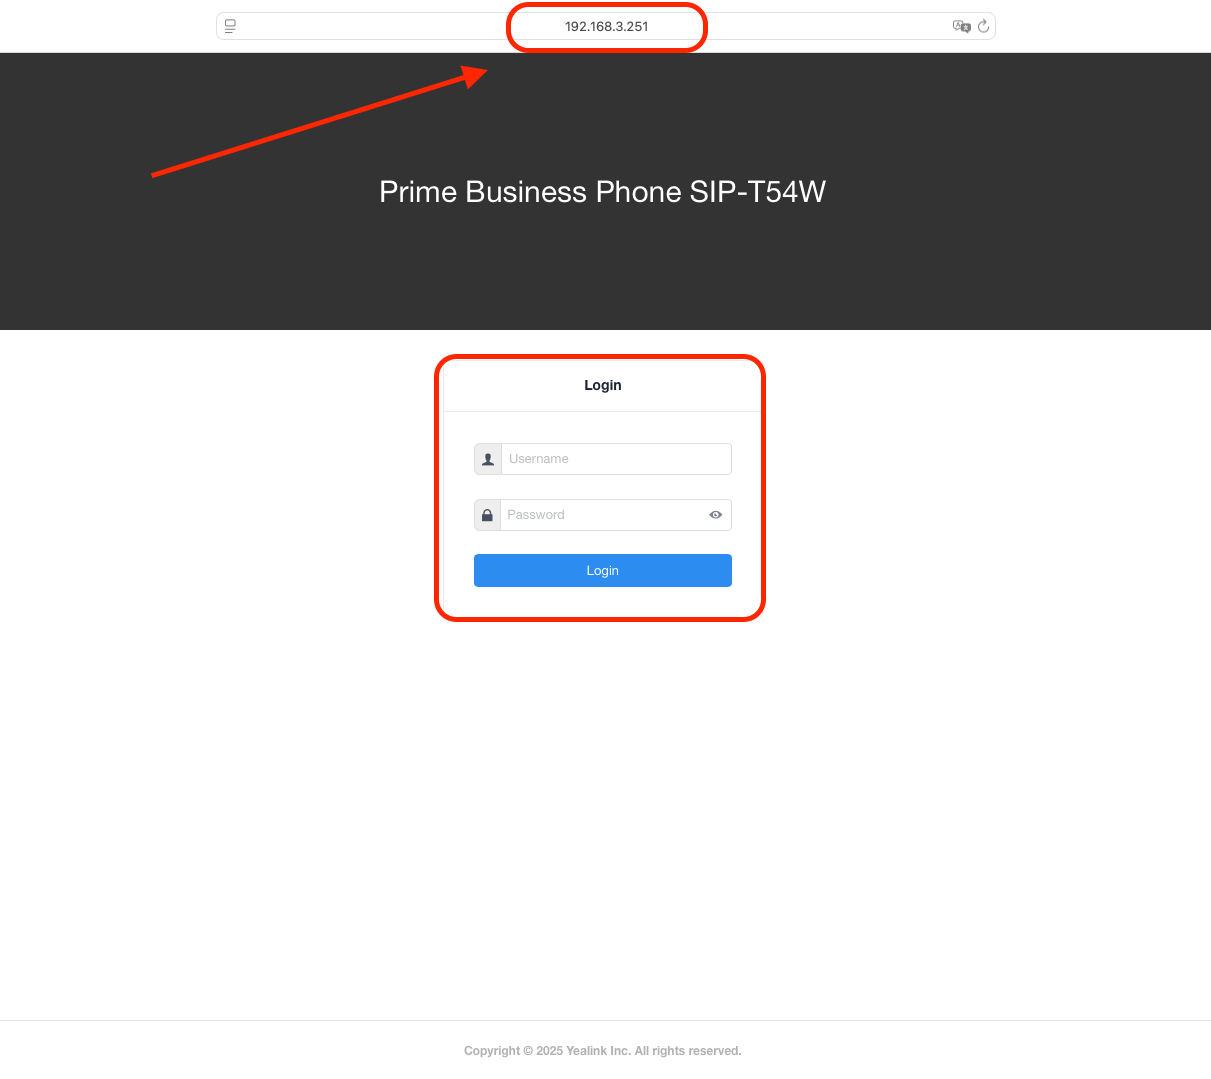
Use the IPv4 address to log into the Yealink interface via a web browser. Apple Safari and Mozilla Firefox are recommended for this.
Step 5
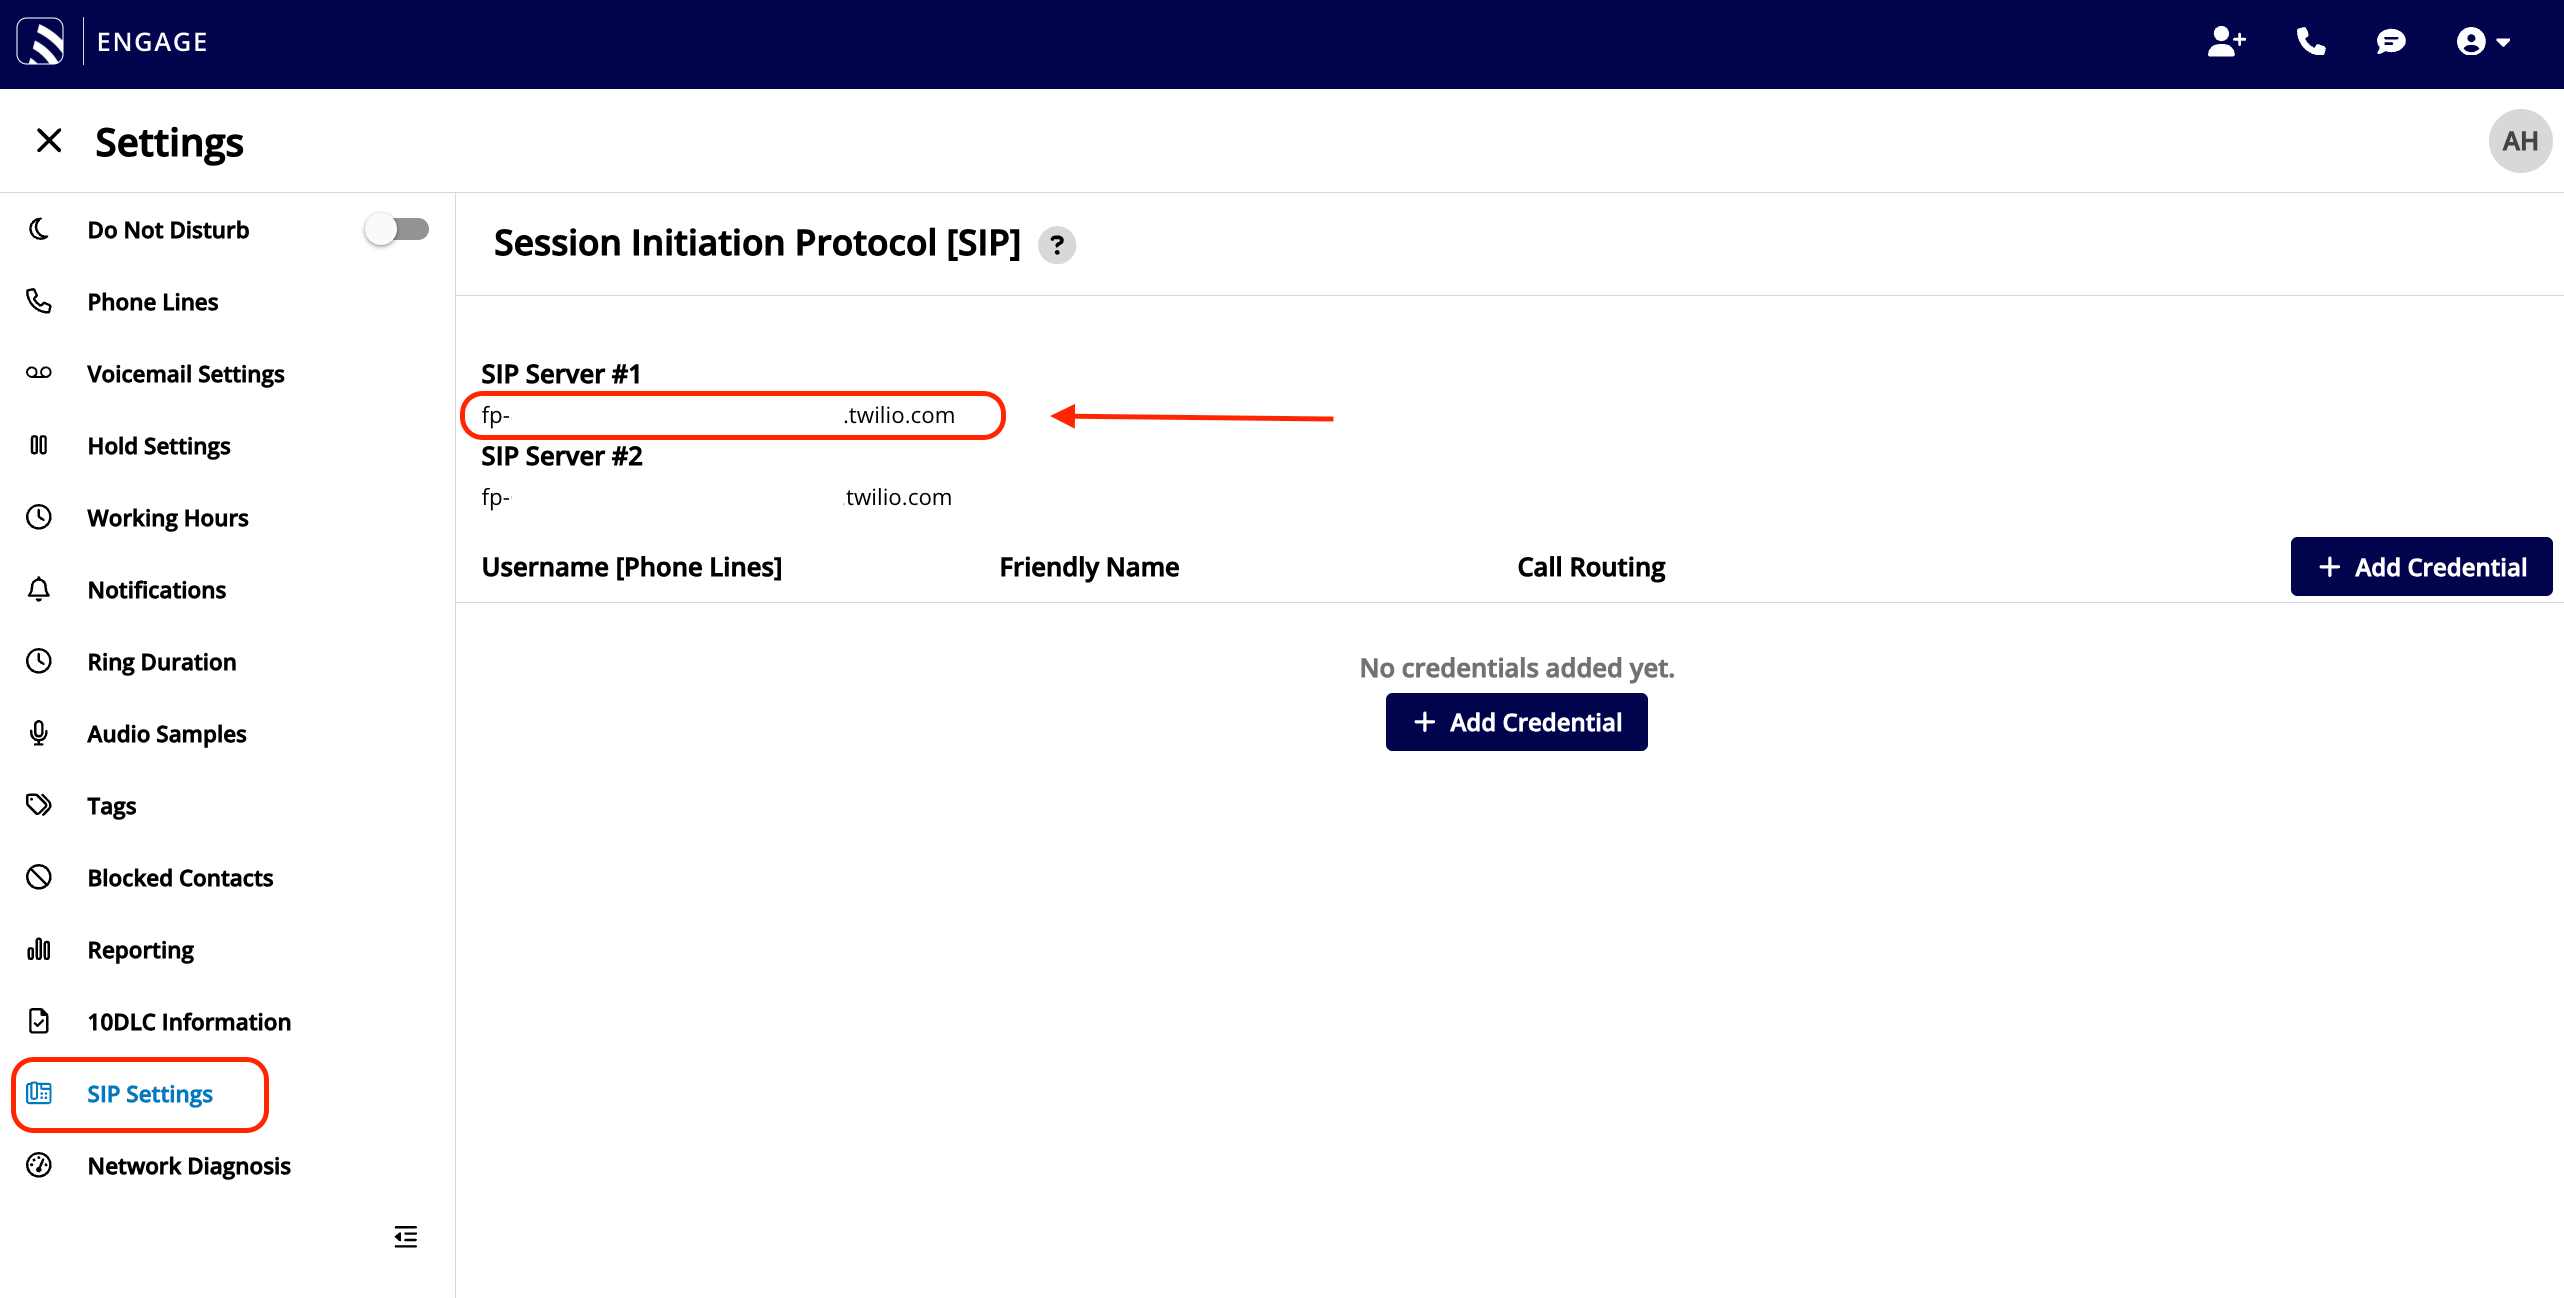
After logging in, click on the Account tab from the menu on the left side of your screen, then select the Register subtab. Under the SIP Server 1 heading, in the Server Host field is where you will enter the SIP Server #1 information from your Engage Settings.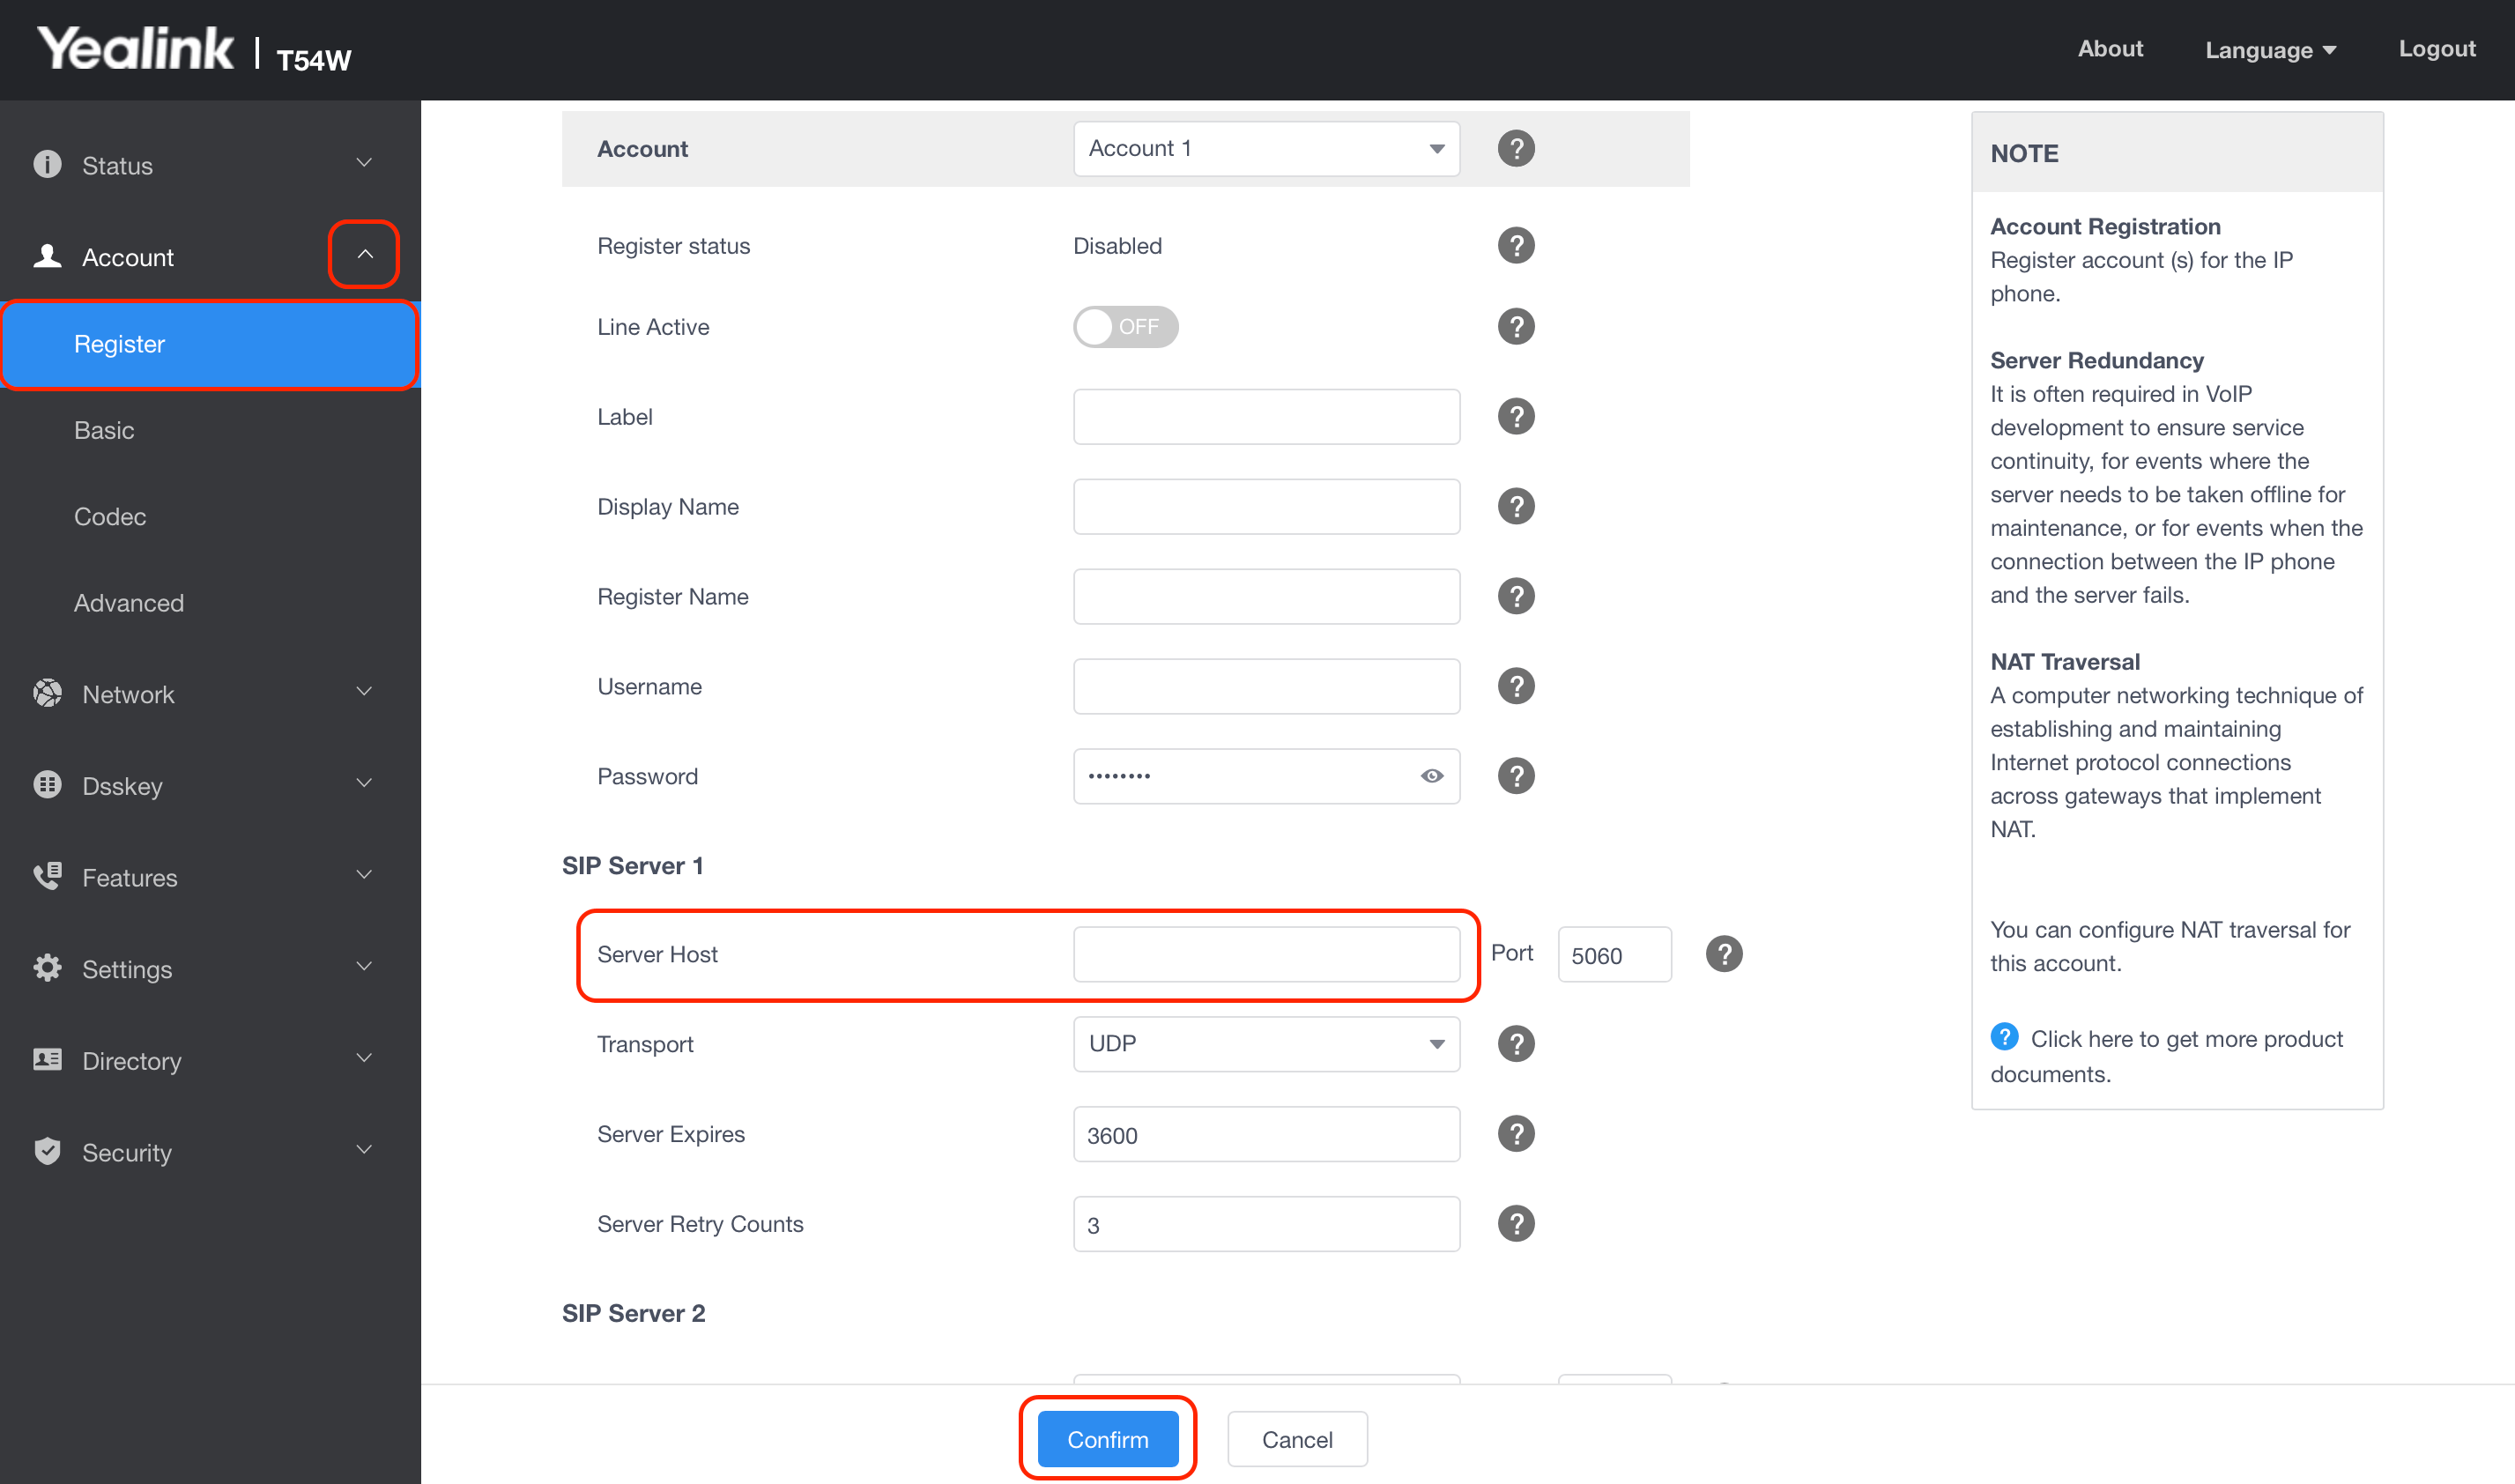
Step 6
Also, input the SIP Server #1 information from your Engage Settings in the Outbound Proxy Server 1 field.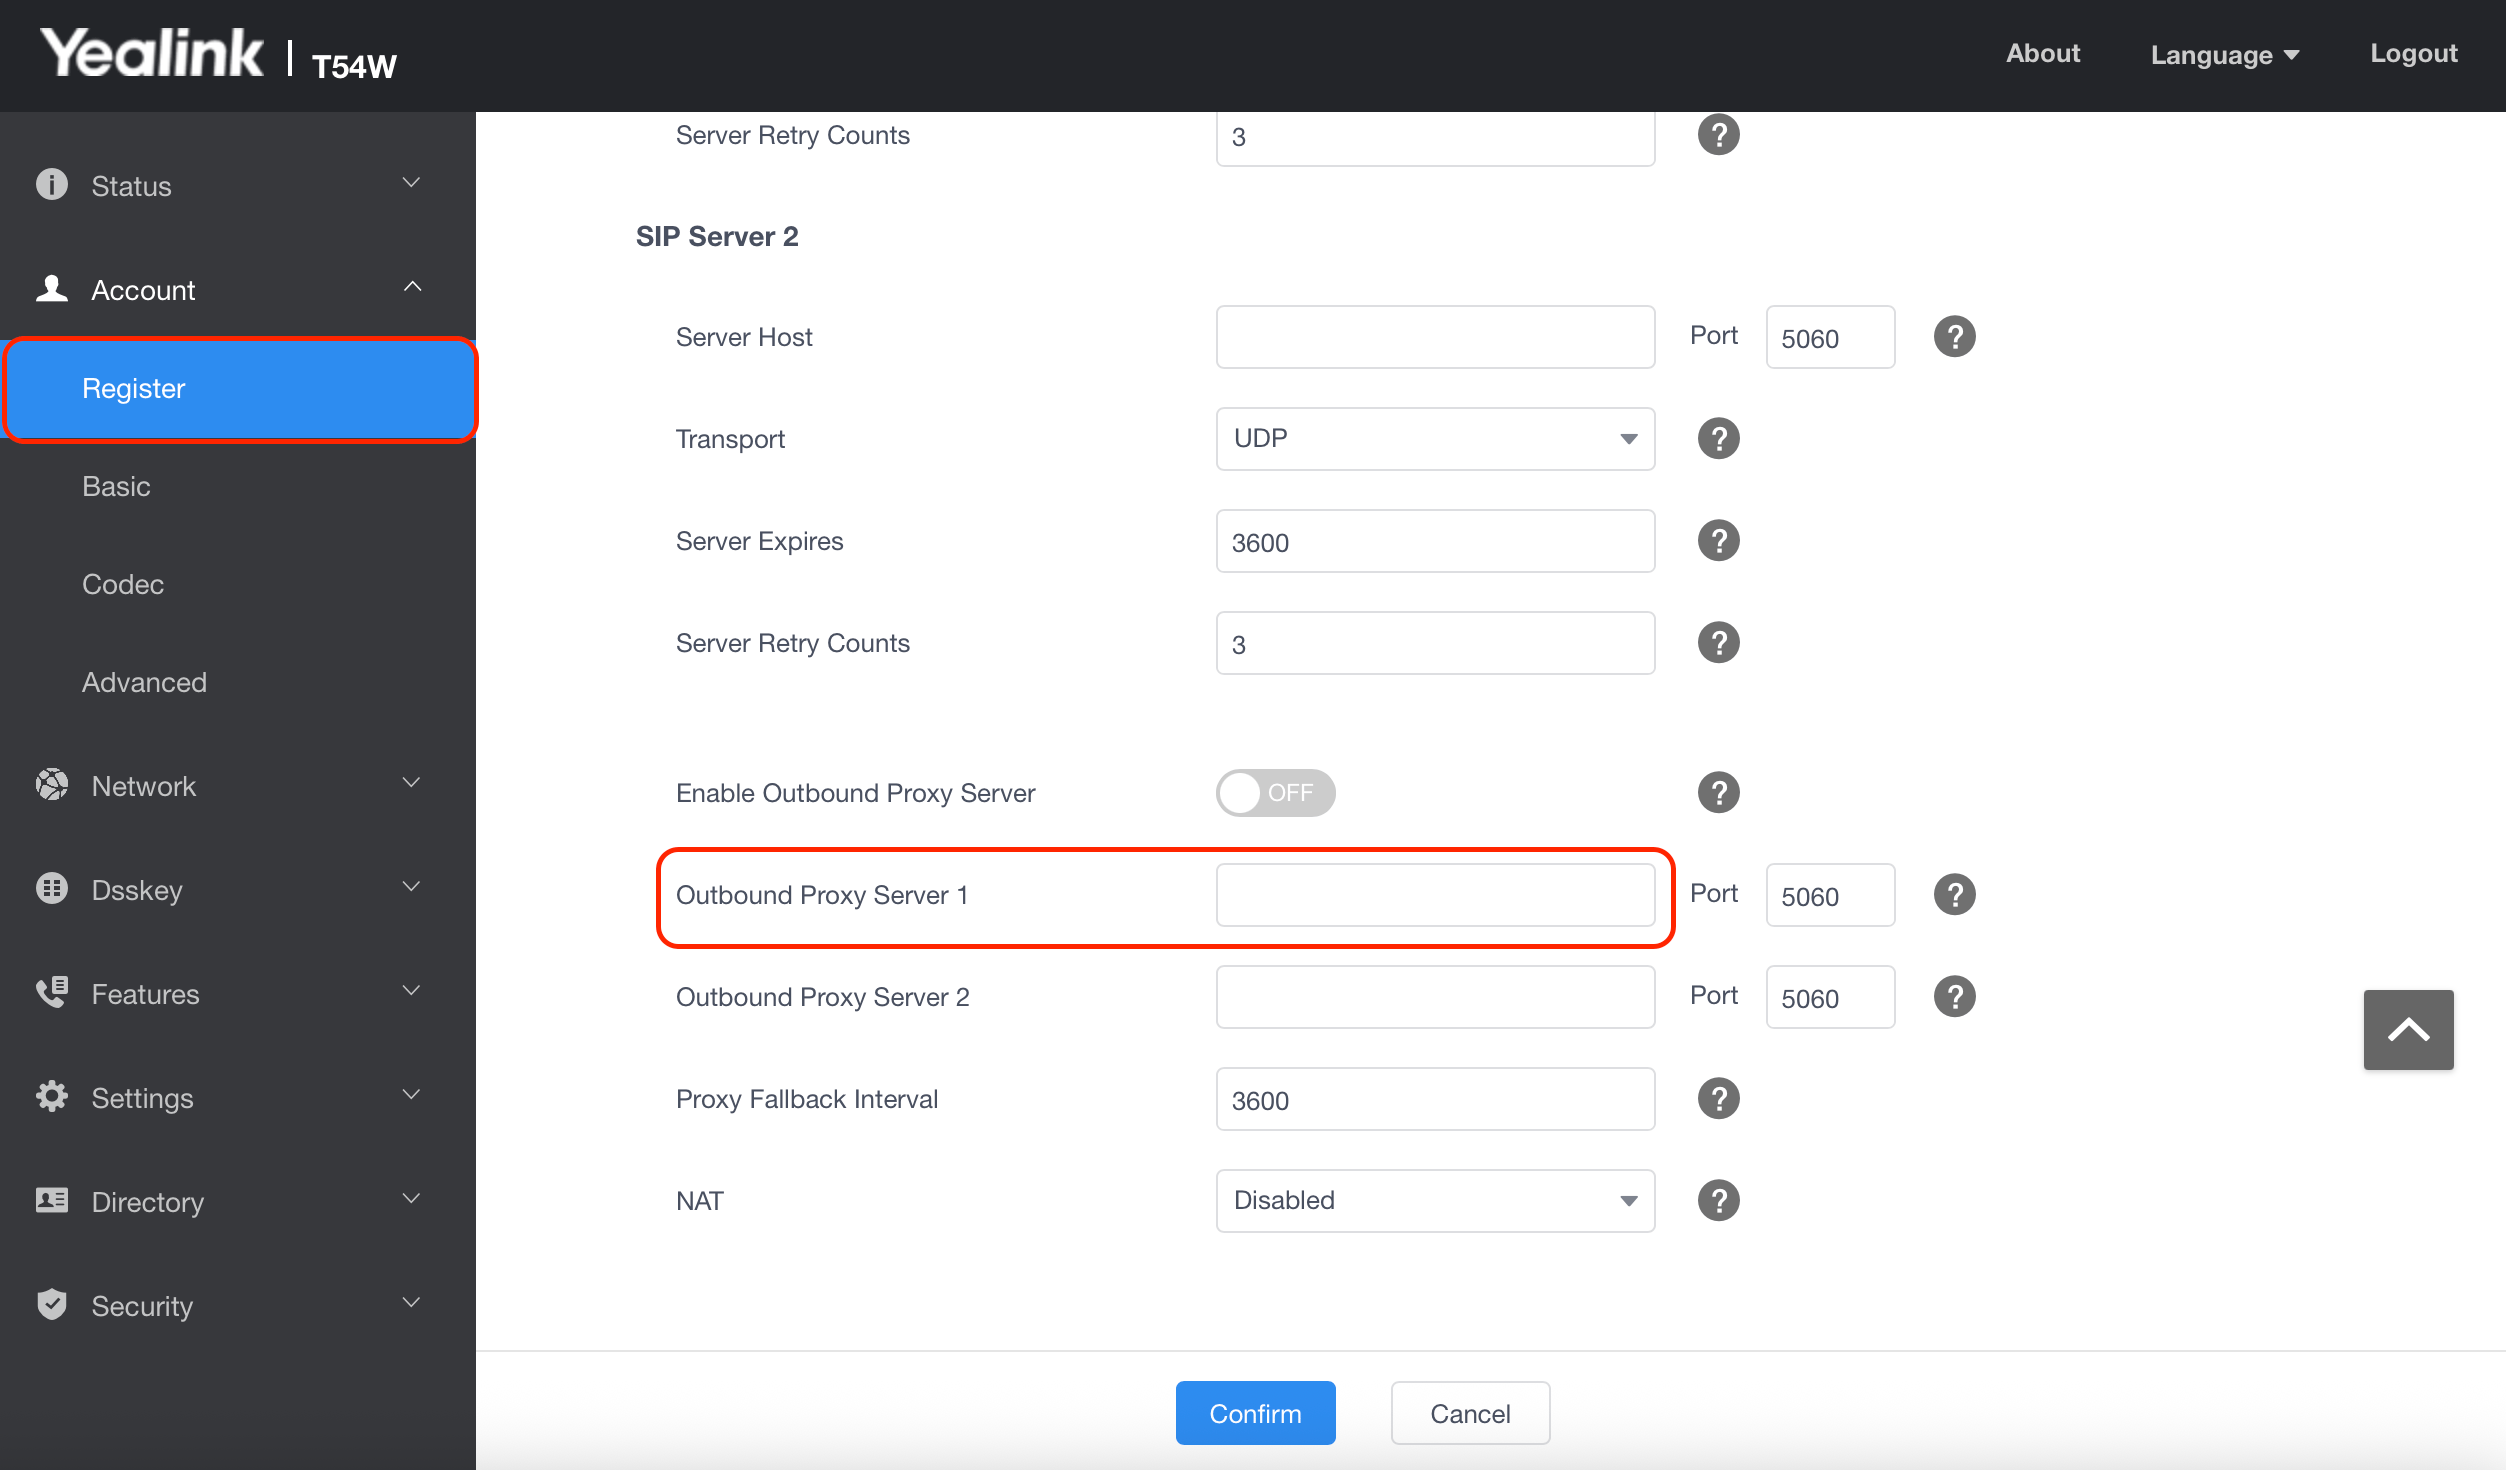
Step 7
While in the Register subtab, under the SIP Server 2 heading, in both the Server Host field and the Outbound Proxy Server 2 field is where you will enter the SIP Server #2 information from your Engage Settings. Also, be sure to toggle on the Enable Outbound Proxy Server option. In the NAT field, you will need to click into the drop down menu and select STUN.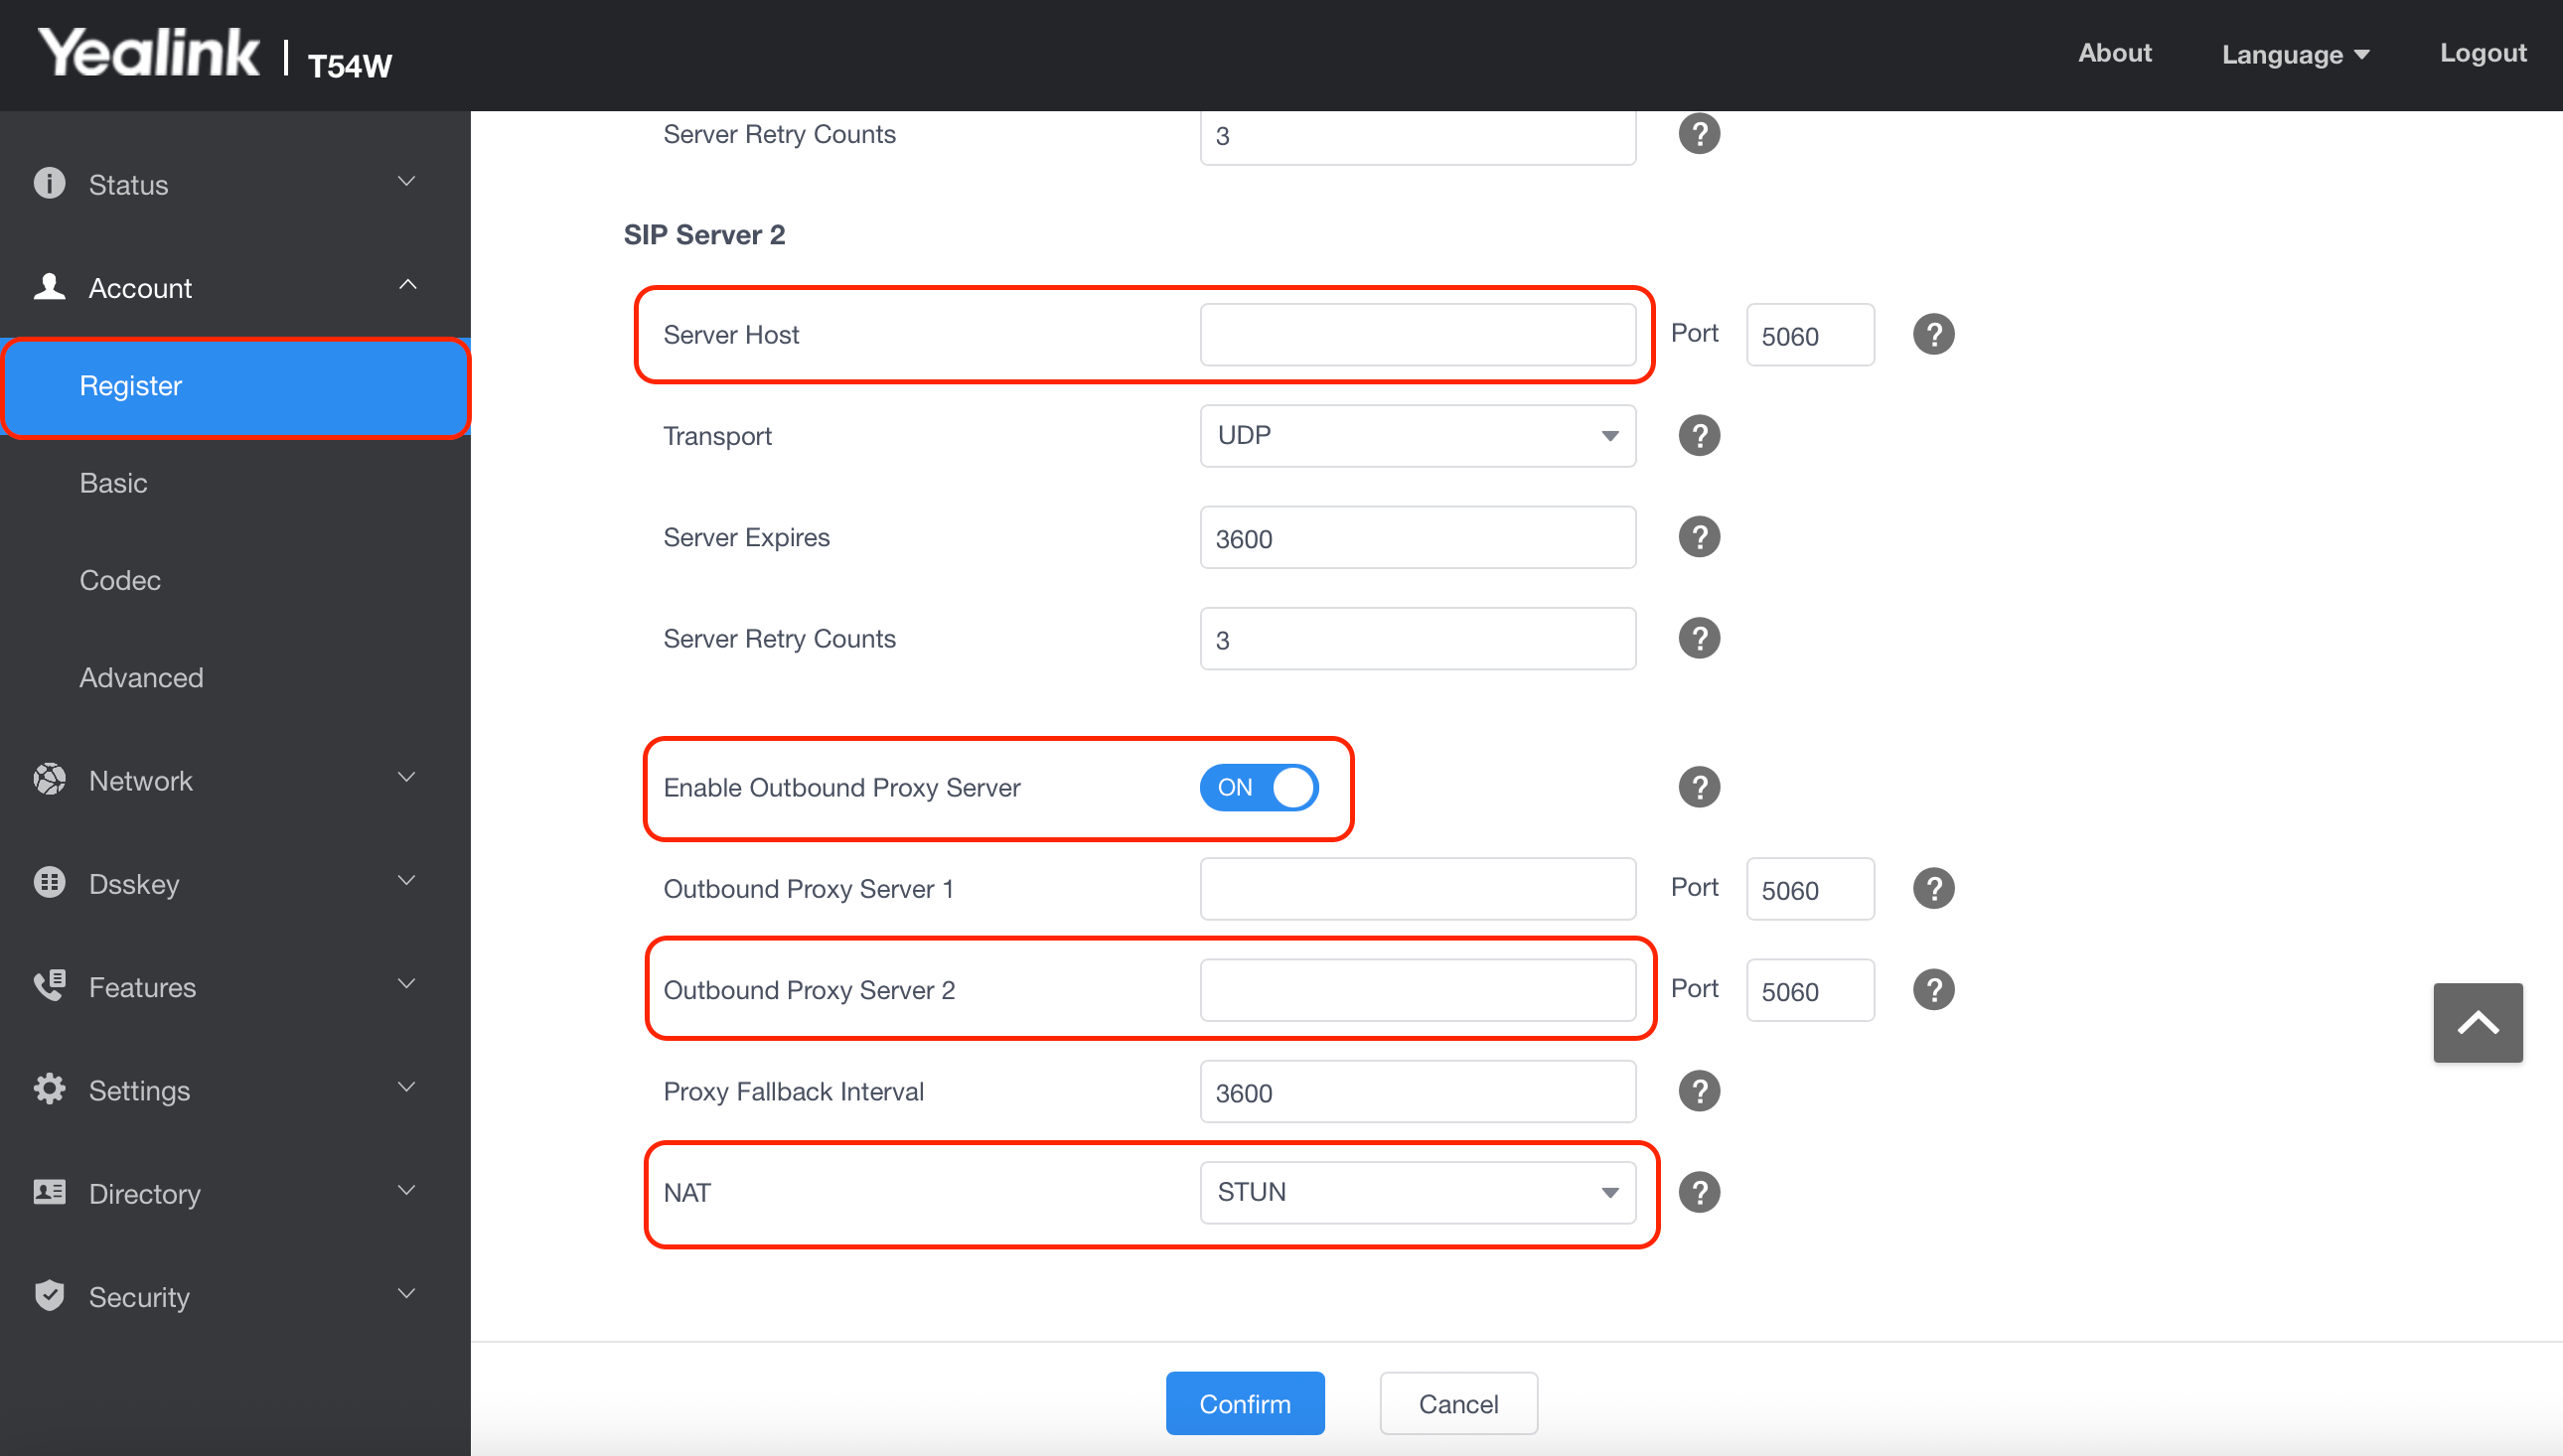
Step 8
To export the information from your browser prior to uploading it onto your VoIP phone, navigate to the Settings tab from the menu on the left side of your screen, then select the Configuration subtab. Under the CFG Configuration heading, ensure that All Settings is selected in the drop down menu next to the Export CFG Configuration File field then press the blue Export button.⭐ FieldPulse Pro Tip: Please ensure that each configuration file you export is named specifically according to the model of the VoIP phone you are using. This will assist both you and our team in easily identifying and managing these files. (Example:
Yealink_T-54W_YOUR COMPANY NAME_DATE)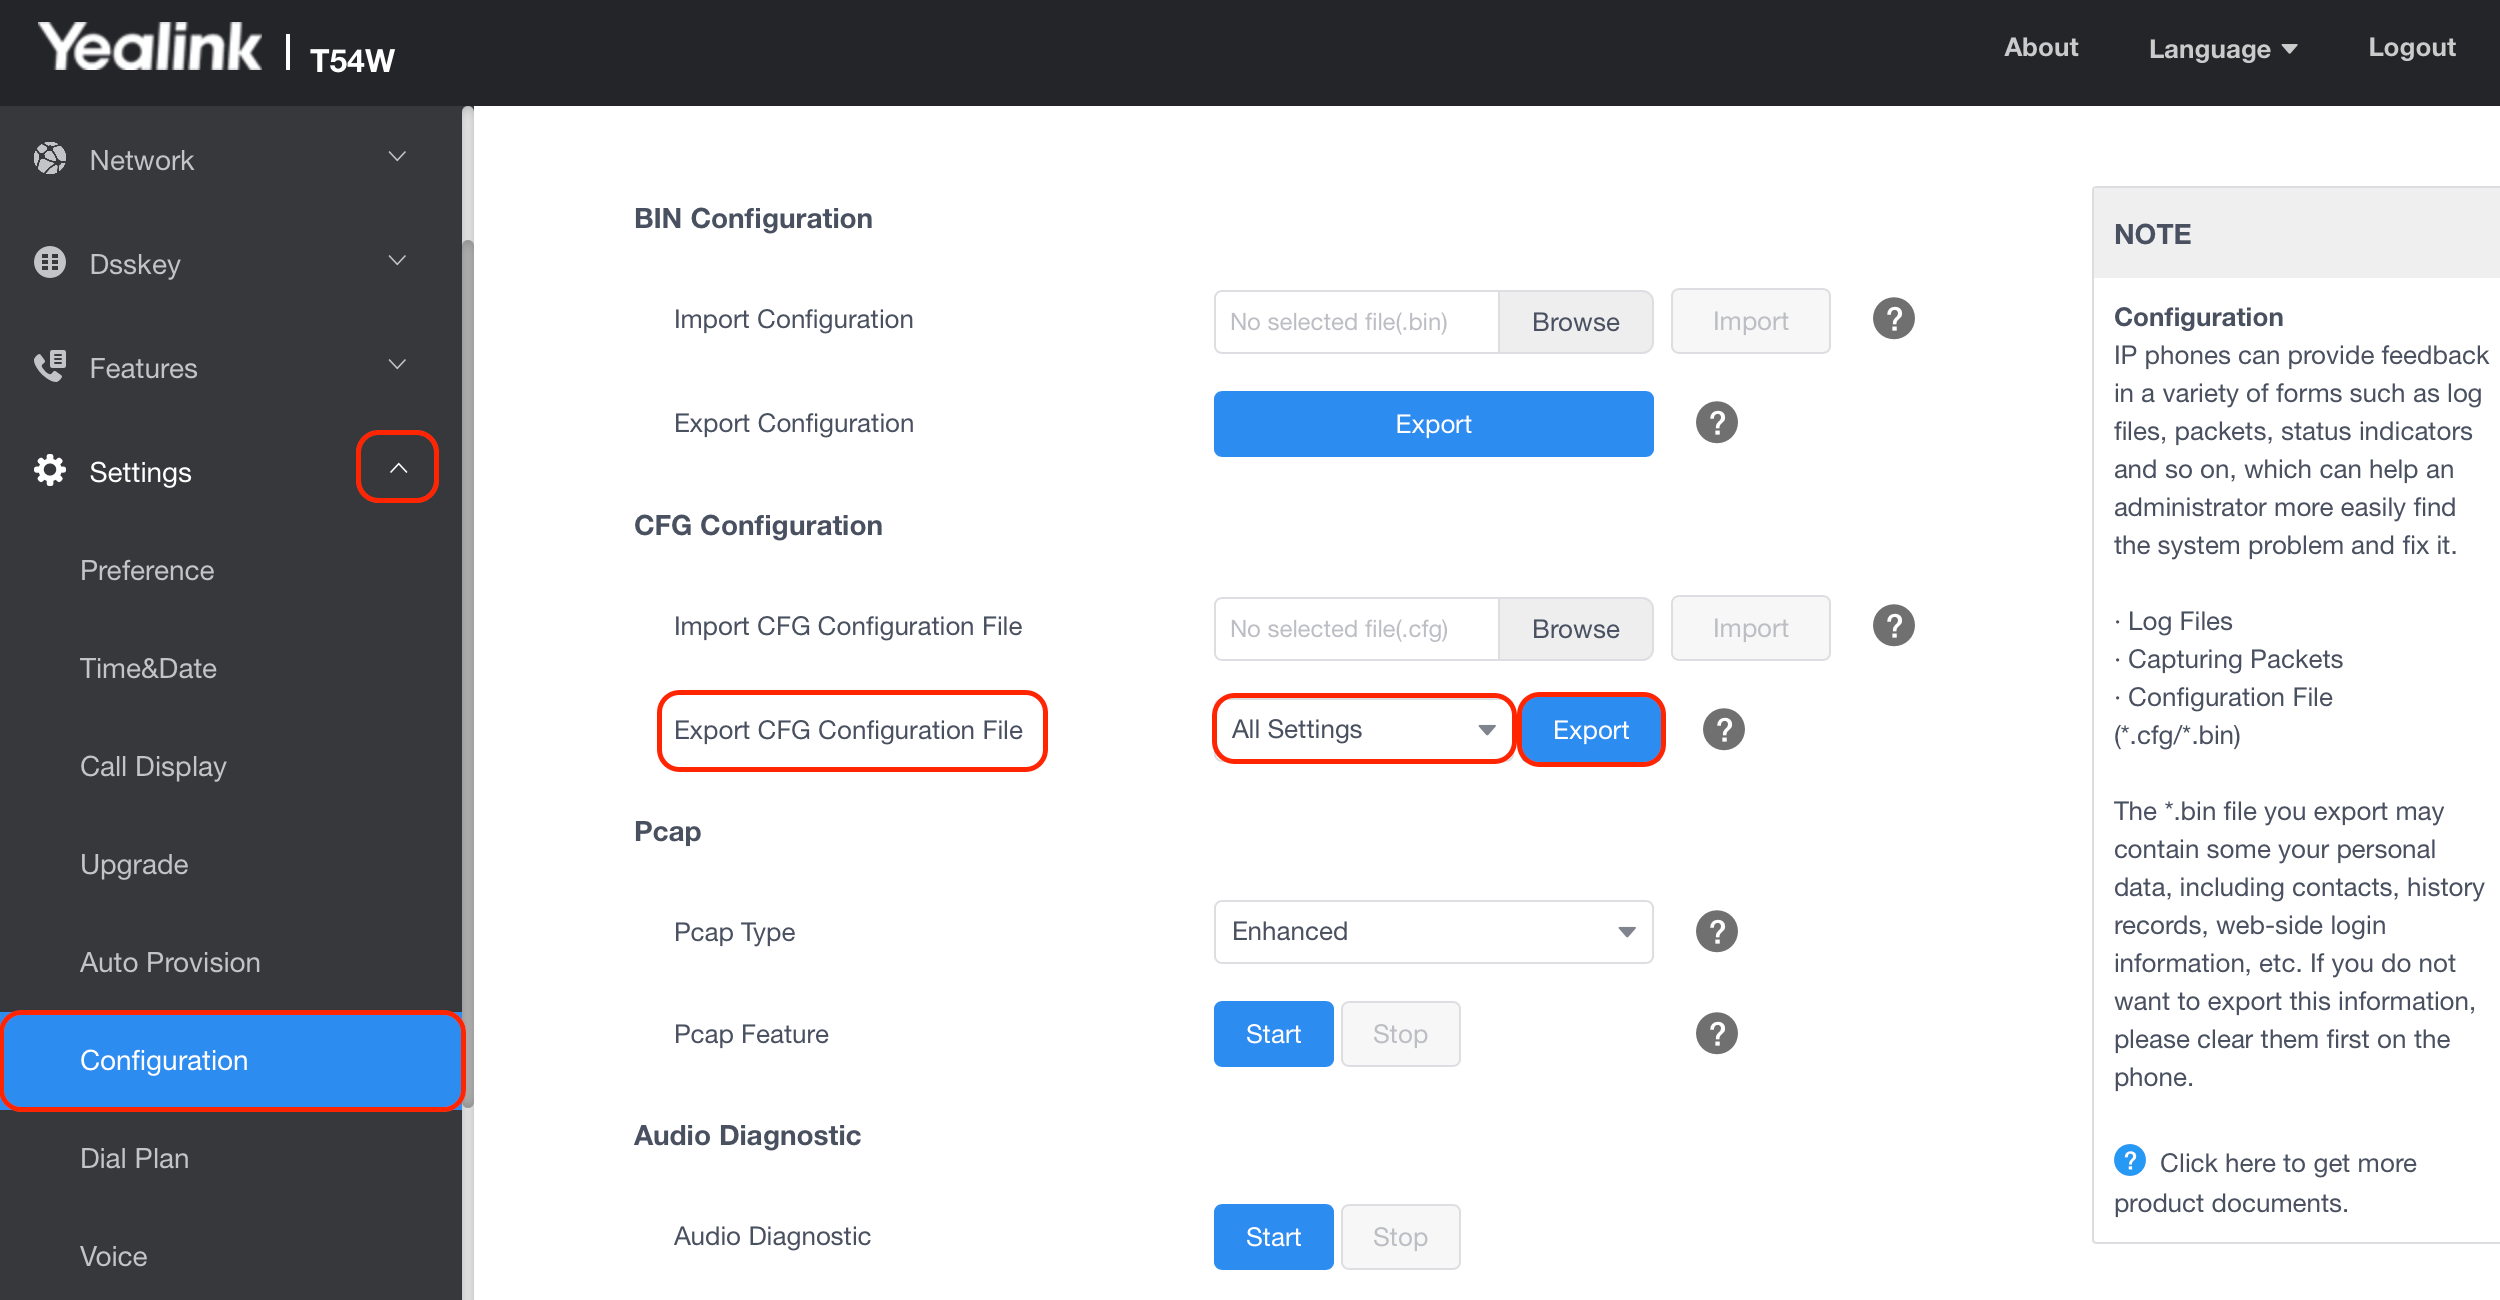
Step 9
To import the information onto your VoIP phone, navigate to the Settings tab from the menu on the left side of your screen, then select the Configuration subtab. Under the BIN Configuration heading, in the Import Configuration field attach the file you exported above in step 7. Then press the blue Import button.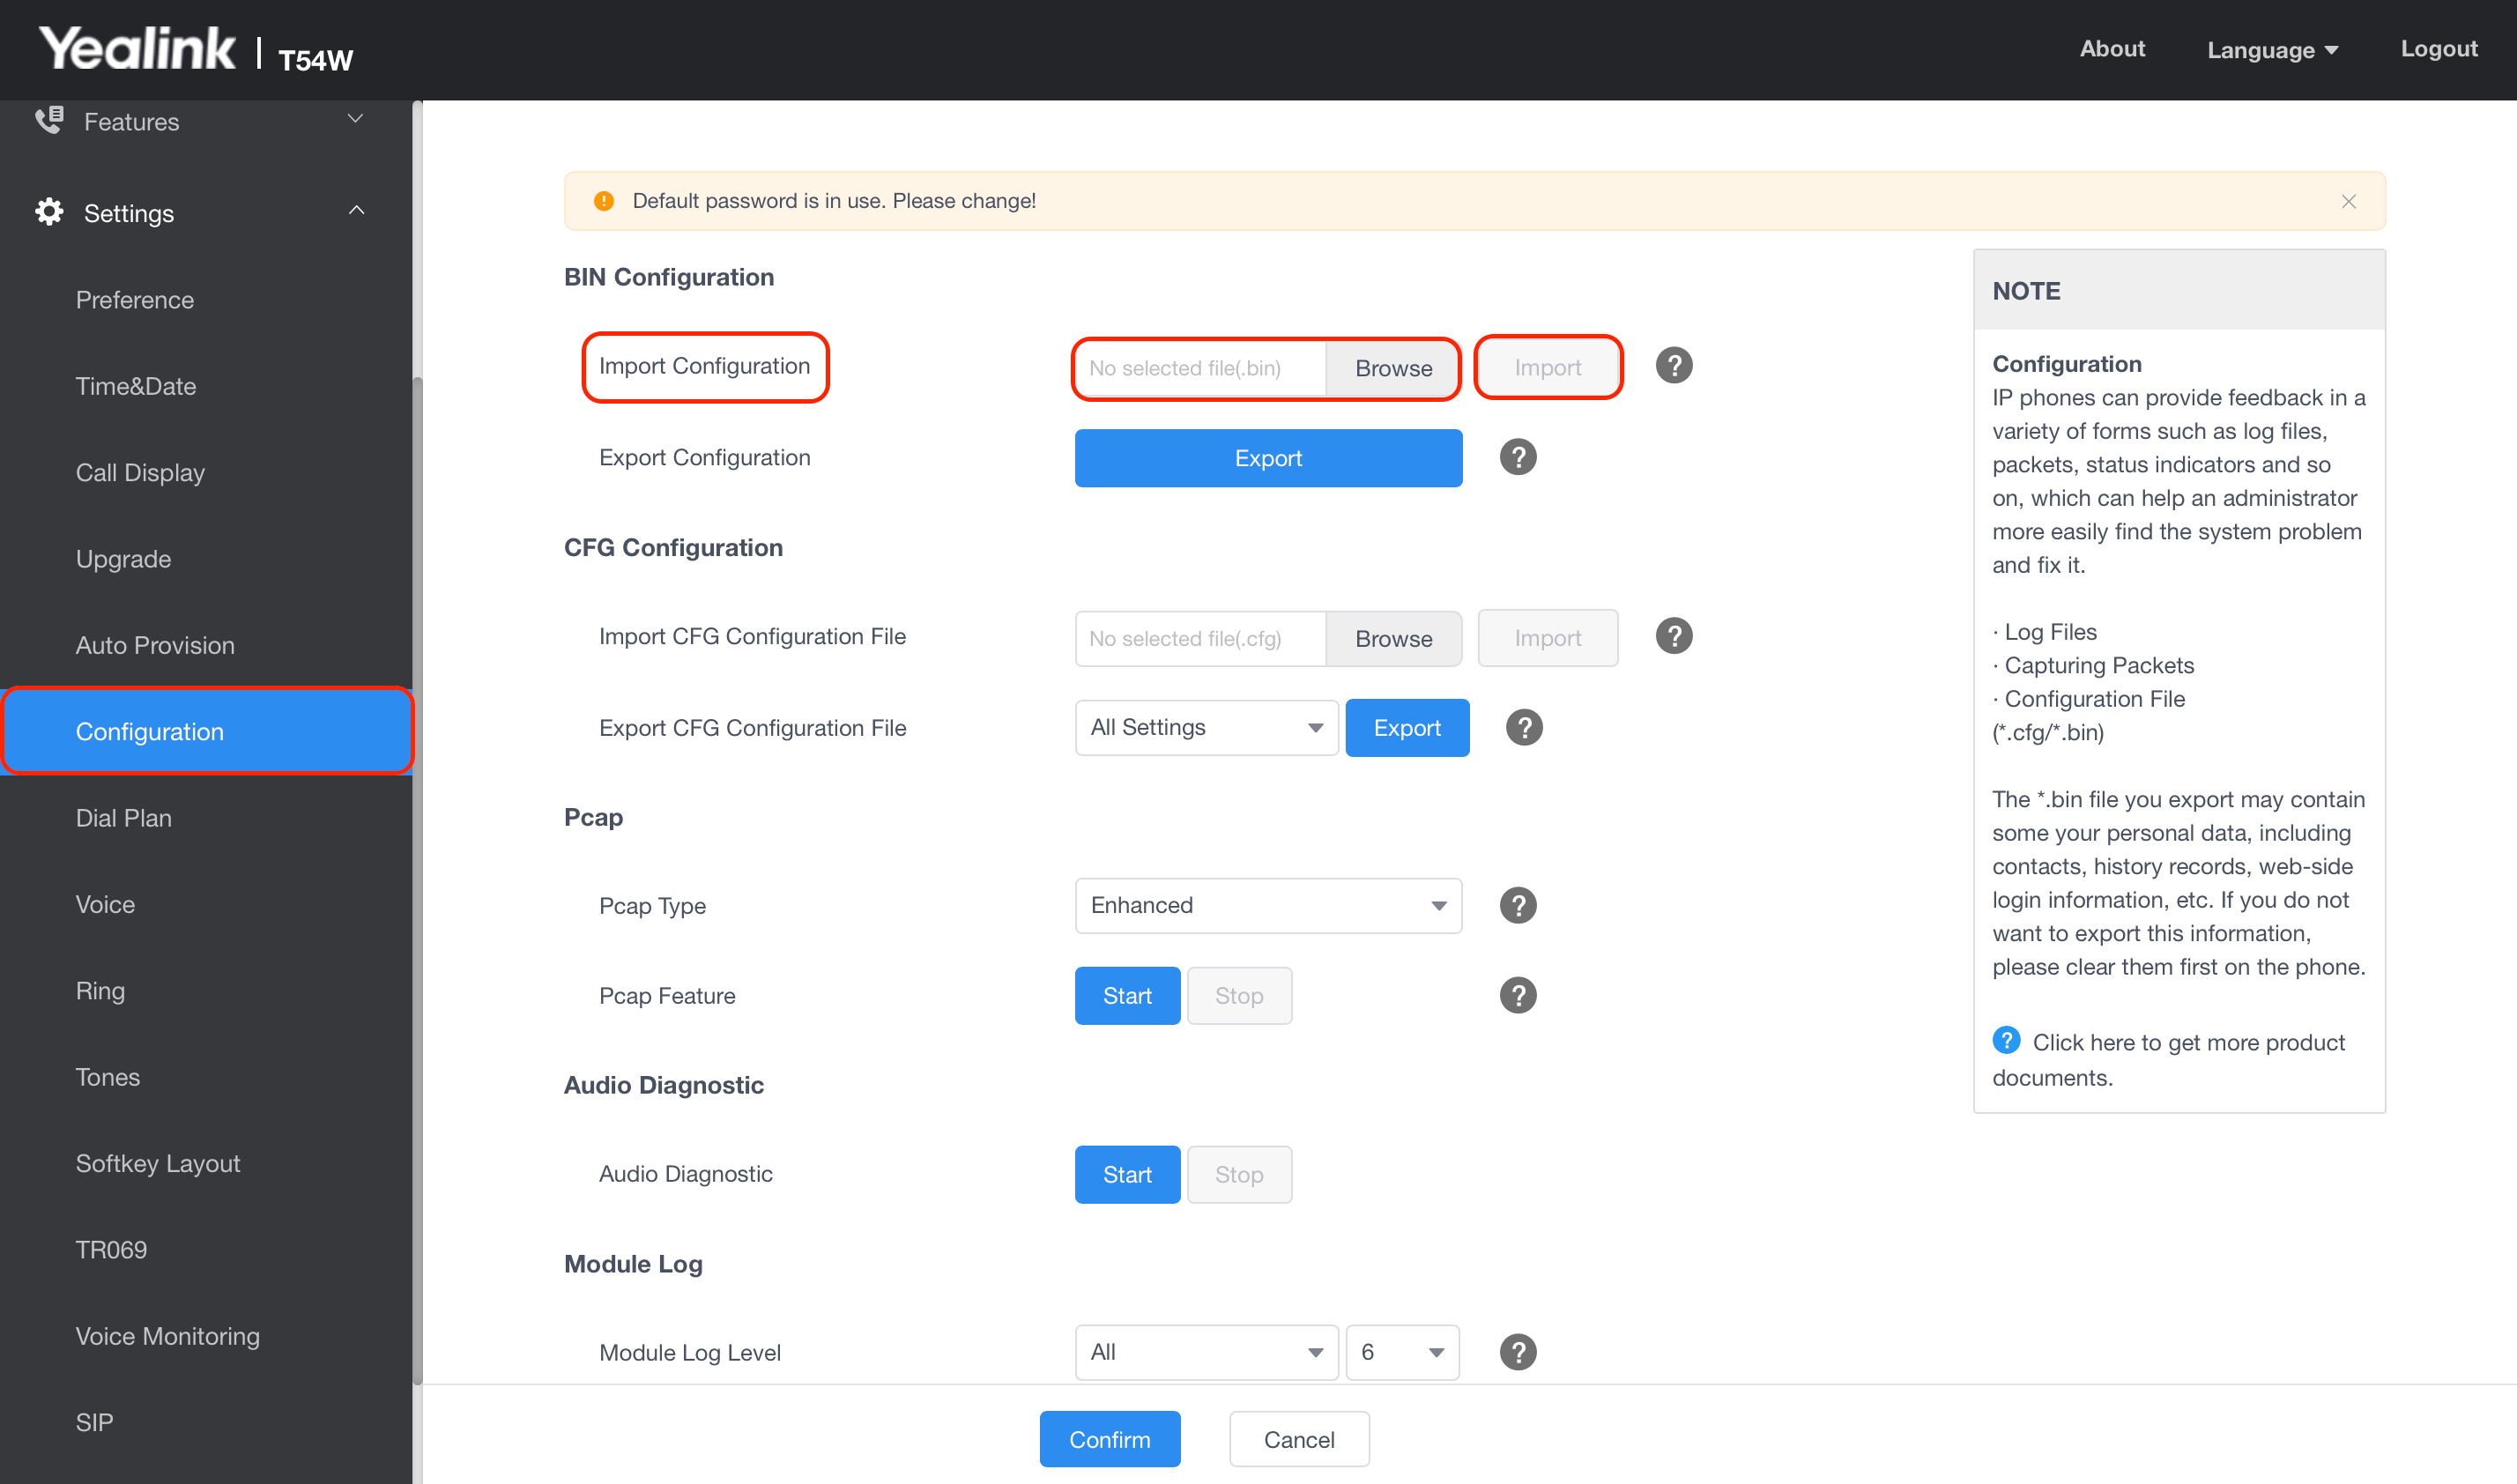
Have additional questions? Contact us at support@fieldpulse.com or use the chat feature in the bottom right corner of your screen.