Who uses this: Team members who work from a record list in FieldPulse. Availability: All regions.Filters narrow a record list down to the records you want to see, so finding one job or one customer does not mean reading past everything else on the list. The filters on offer vary between record types, but the way you apply a filter, save it, and pull it back later is the same wherever you are.
Overview
Filtering answers the long-list problem. When every job or customer sits in one list, finding the handful that need attention today means scanning past the ones that do not. A filter cuts the list to the records that match, and a saved filter brings that same view back without setting every field again. FieldPulse offers filtering on record lists in two places:- Show Filters — the filter panel on a record list, covering statuses, method, team member, tags, customer, and custom fields.
- Filters on the Jobs and Projects tabs — an Apply Filters panel that slides open on the right side of the screen with job- and project-specific options and saved views.
Before you begin
- The filters you see depend on the record list you are on — a Jobs list offers different options than a Customers list. The steps below cover the filter qualities common across record types, plus the Jobs and Projects panel.
On web
Filter a record list
-
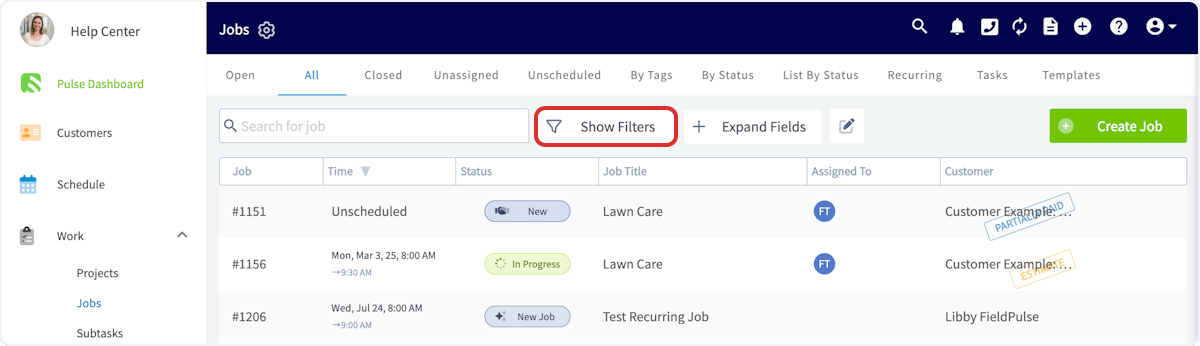
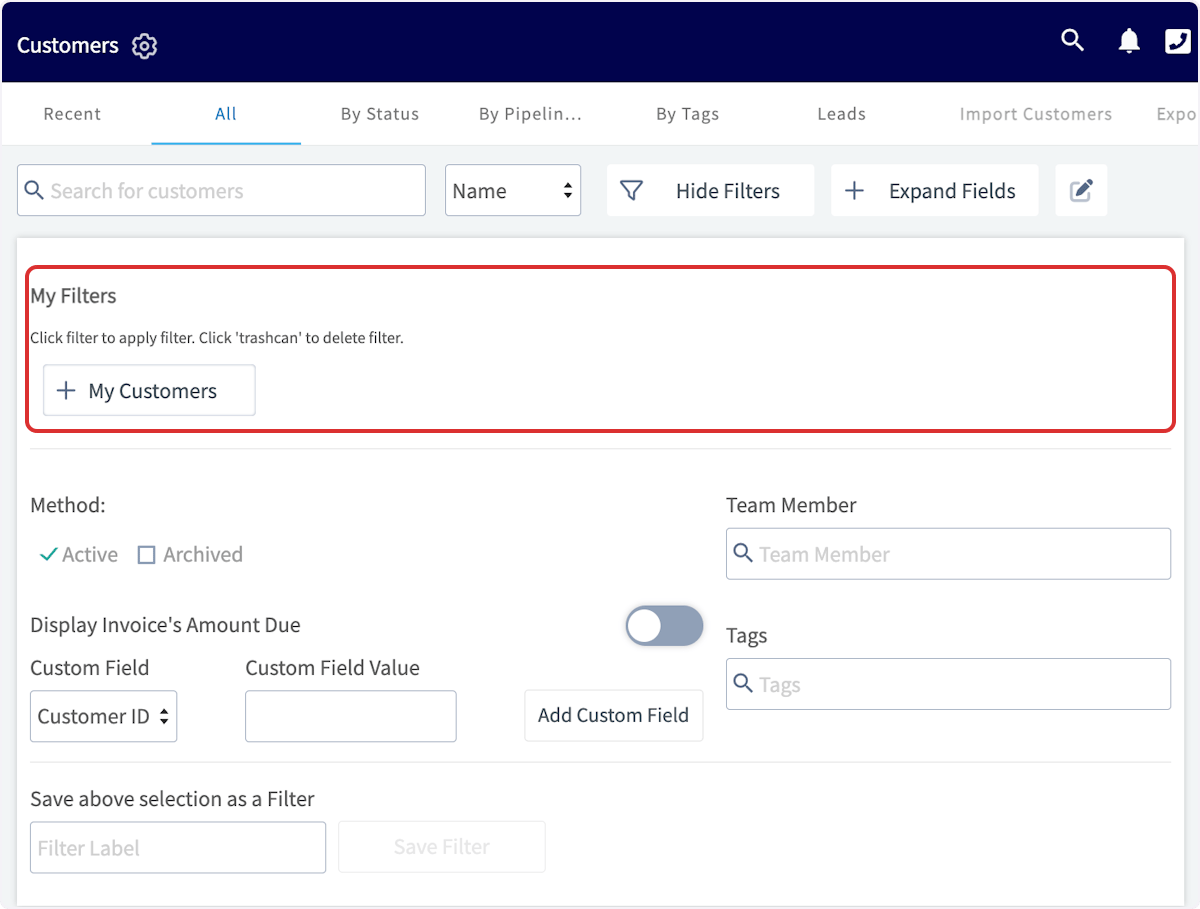
Open the record list you want to filter, then select Show Filters above the list.
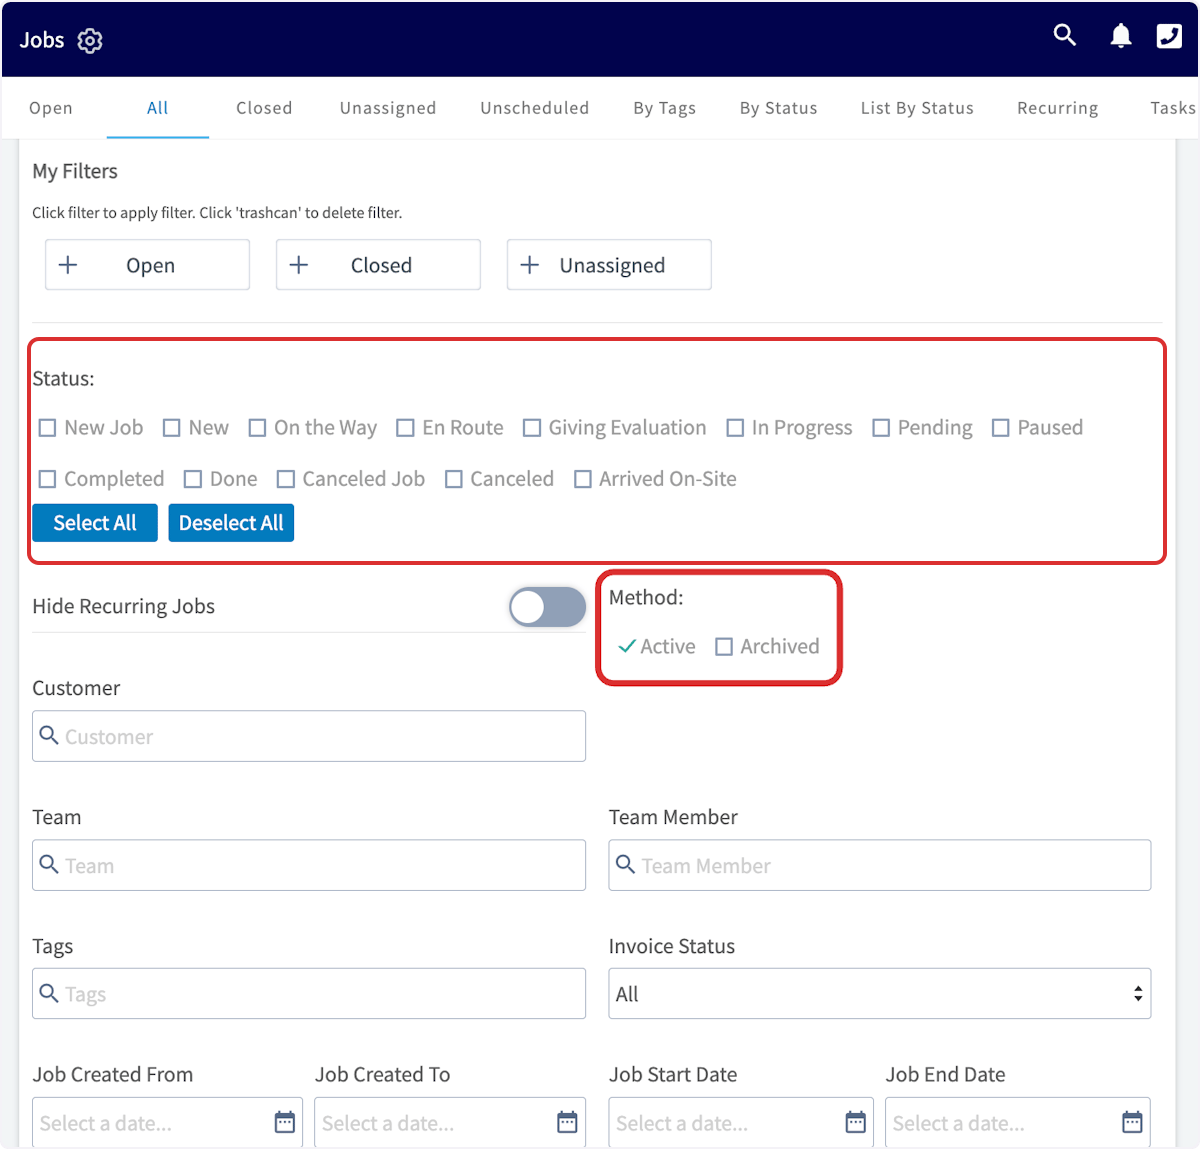
- Under Status, select the statuses you want to include. Under Method, choose Active or Archived.
- Search for and select the other fields you want to filter on, such as Team Member, Tags, and Customer.
Filter by custom fields
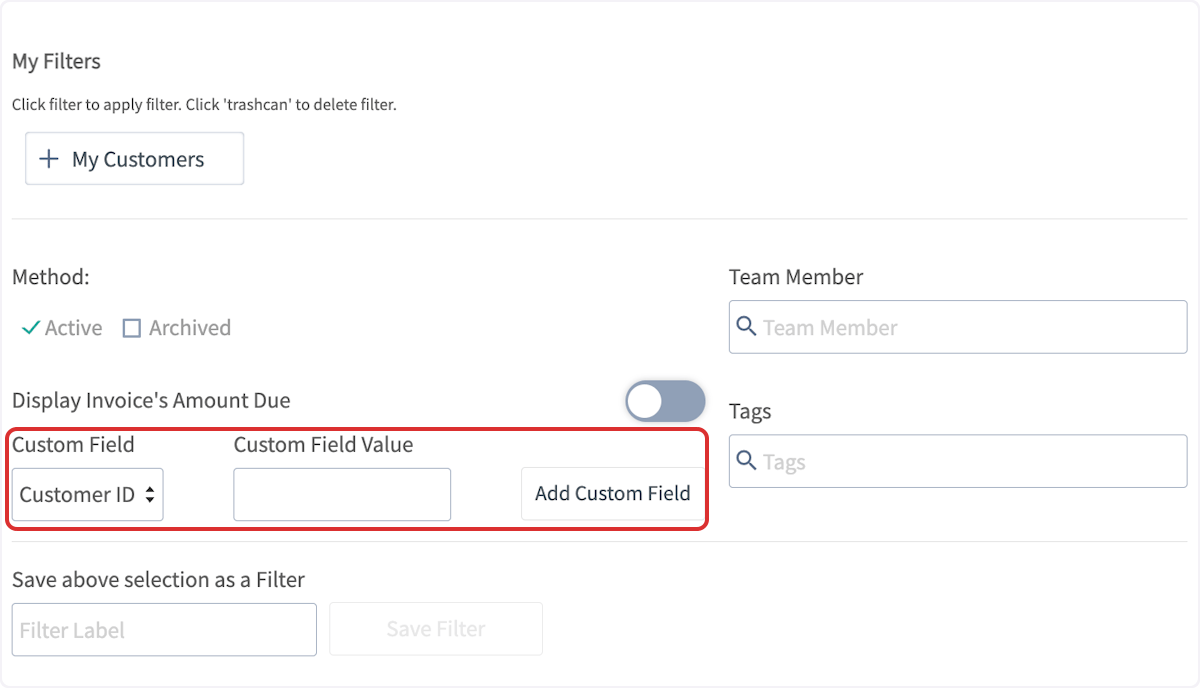
- Under Custom Field, select the custom field you want to filter on.
- Under Custom Field Value, type the contents you want to filter by. Only results that have those contents are shown.
- Select Add Custom Field.
- Repeat with more custom fields until the list is filtered the way you want.
Save a filter and reuse it
- With your filters selected, type a name in the Filter Label box under Save above selection as a Filter.
-
Select Save Filter.
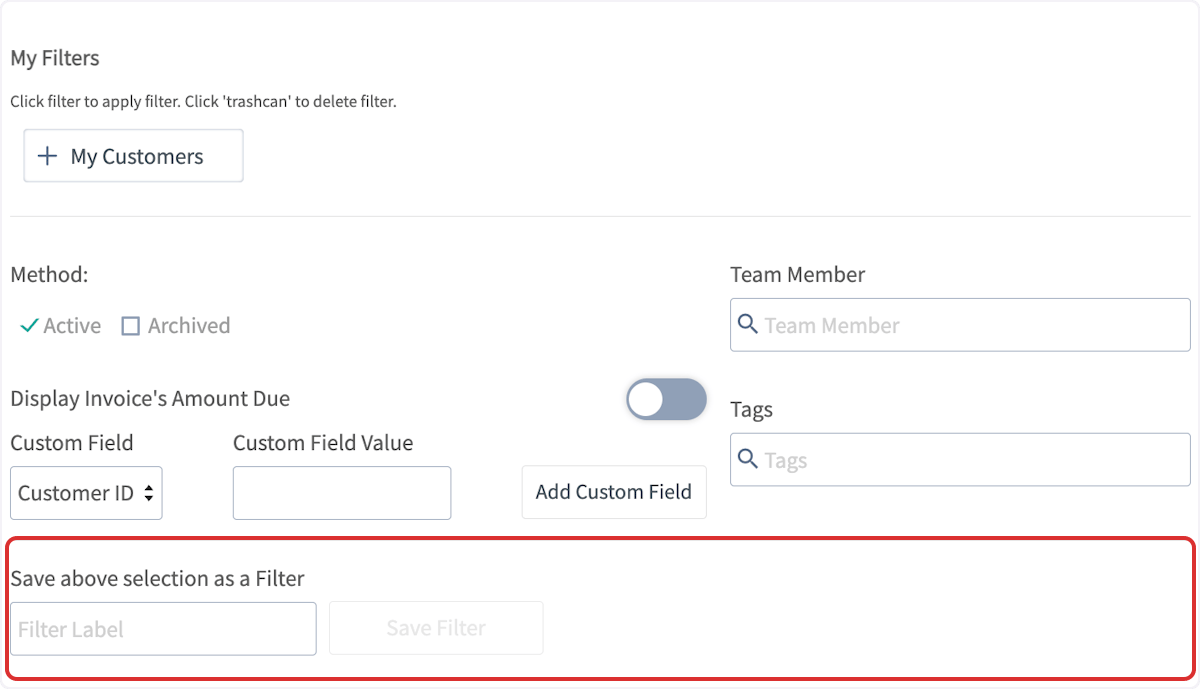
- To use a saved filter again, select it under My Filters at the top of the filter panel. Select the trashcan on a saved filter to delete it.
Filter the Jobs and Projects lists
- Go to the Jobs or Projects tab.
-
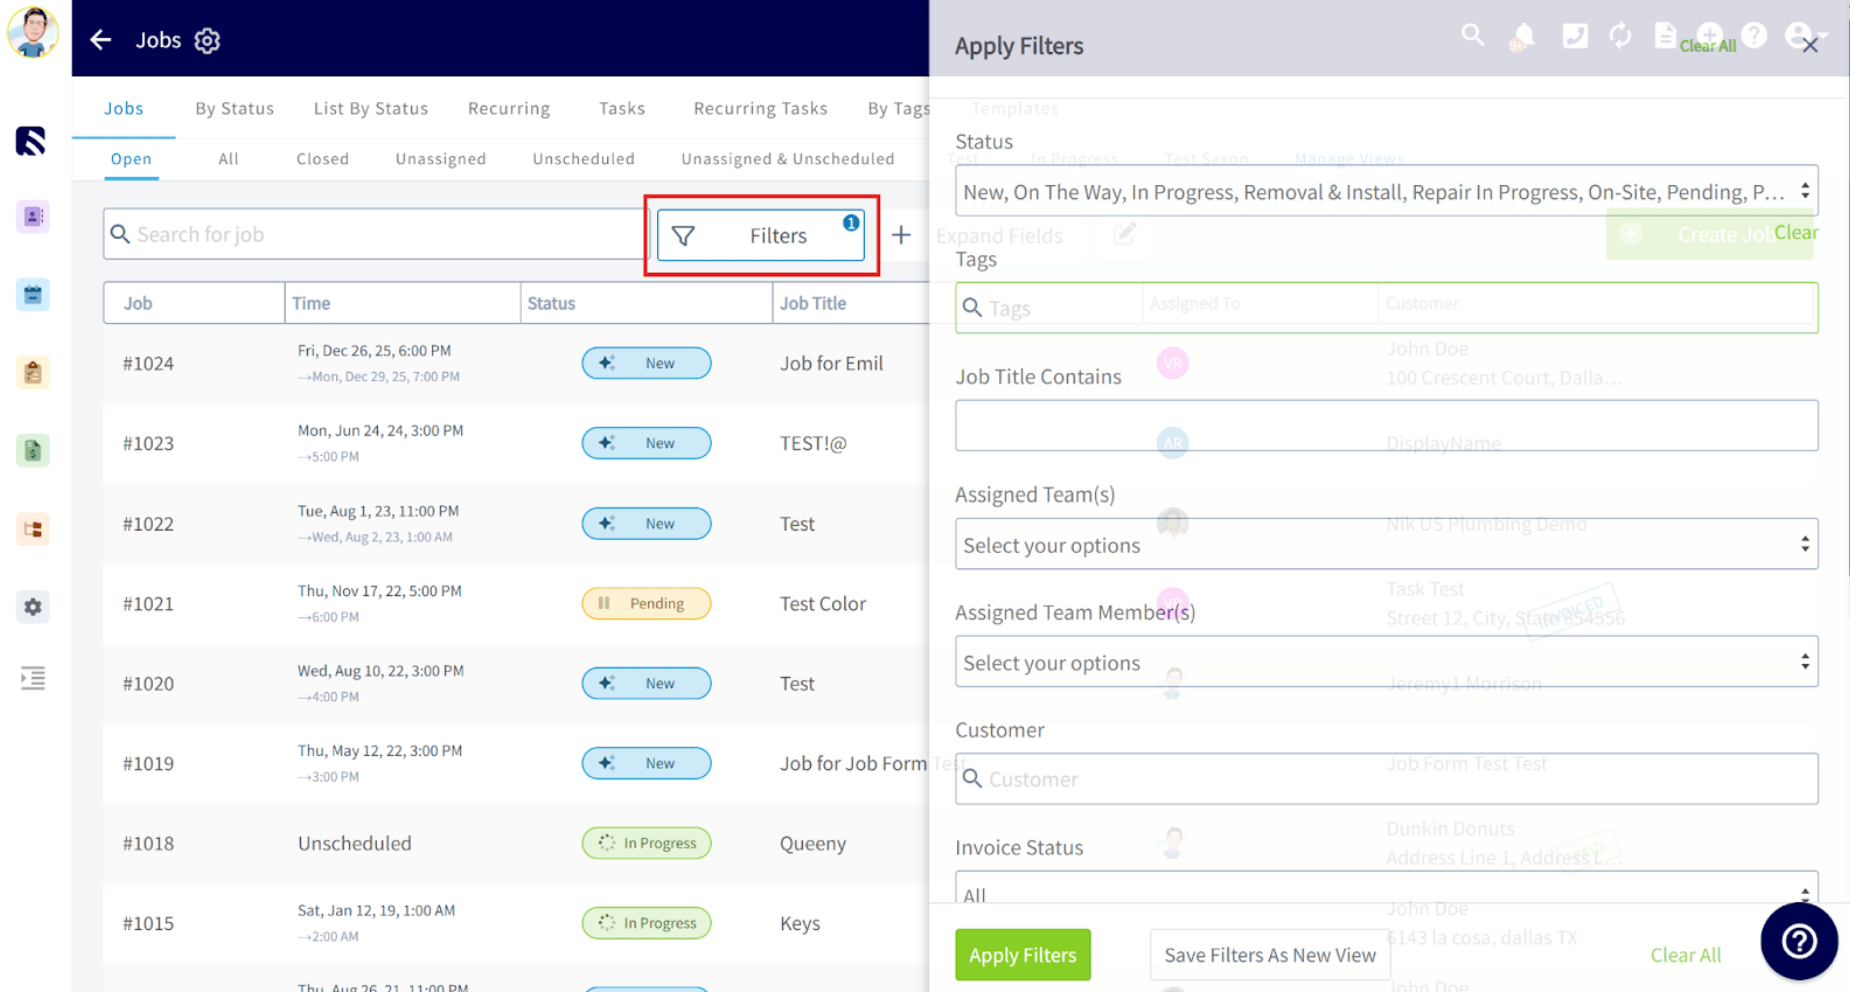
Select Filters. The Apply Filters panel slides open on the right side of your screen.
-
Set any of these filters:
- Select Apply Filters. The Job or Project list updates to match.
Save a filtered view
-
With your filters set, select Save Filters As New View.
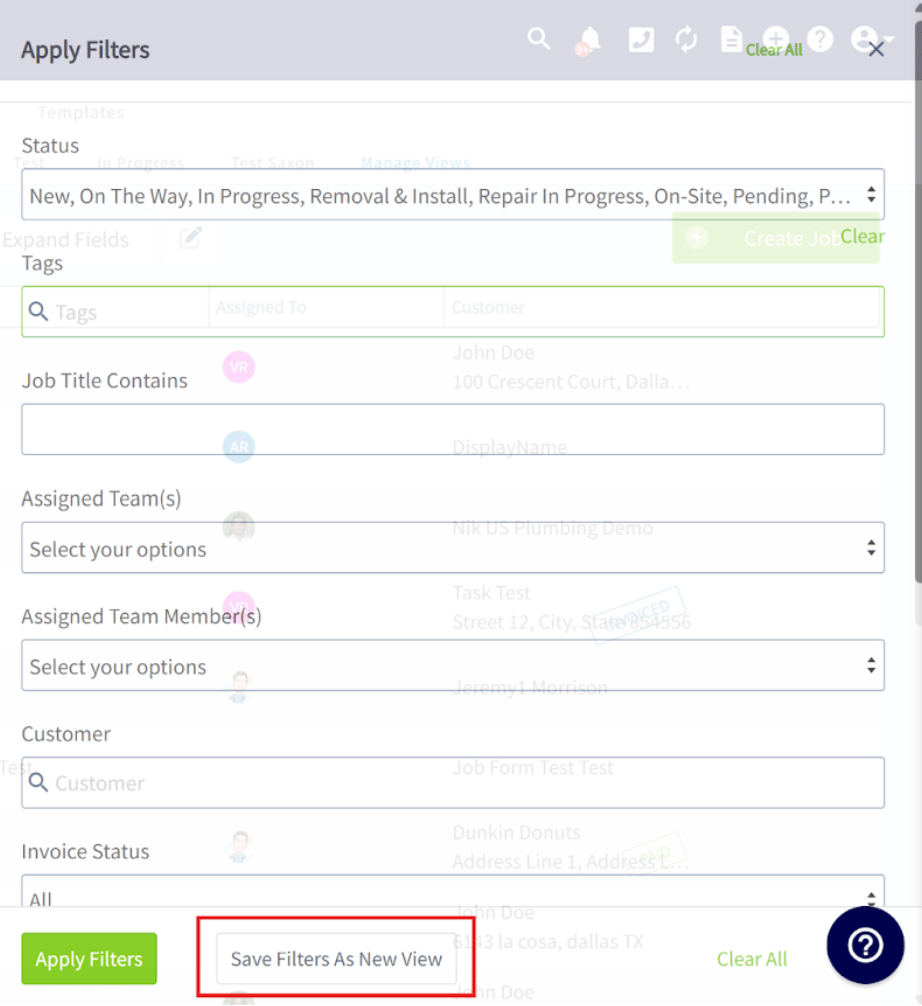
- Name the new filtered view something you will recognize later.
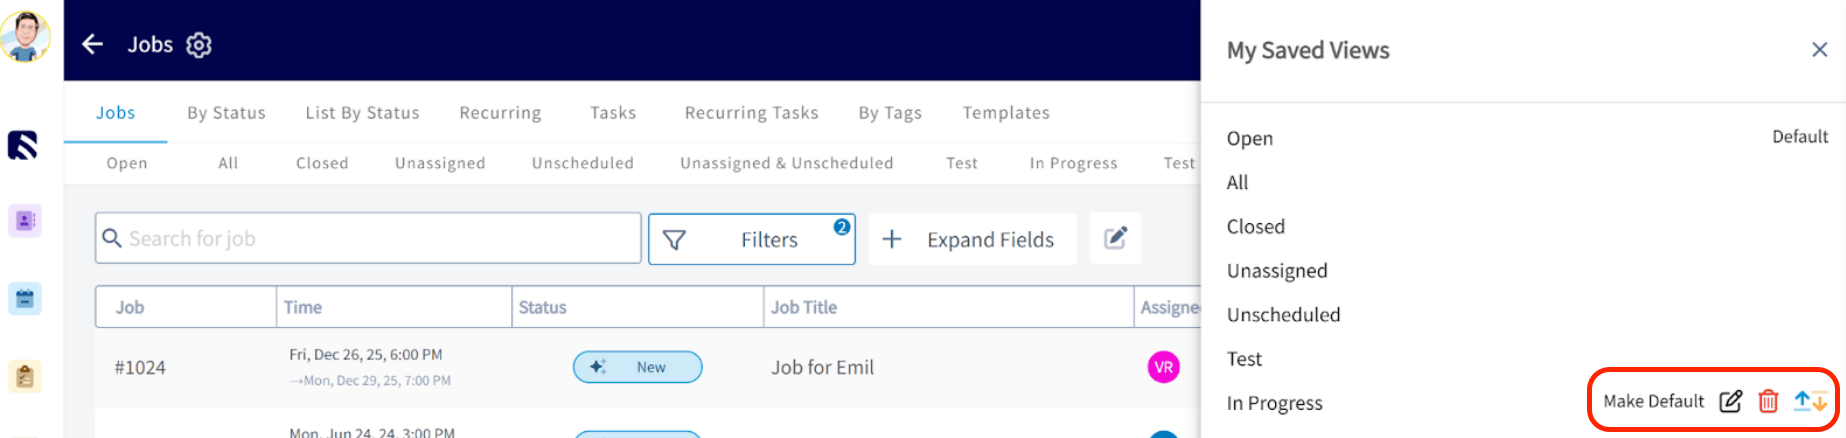
Manage your saved views
- On the Jobs or Projects page, select the Manage Views subtab.

- Adjust the order of your filtered view tabs.
- Rename a saved view for easier identification.
- Delete a saved view you no longer need.