
Who uses this: Price tiers are enabled and built in Company Settings, then assigned on the customer record. Availability: All regions. Included in the FieldPulse subscription — turn it on under Company Settings > Features & Plugins.A price tier is a named set of pricing rules you assign to a customer so that customer’s prices carry a markup or discount automatically. Assign a customer to a tier once, and FieldPulse applies the tier’s adjustment to each line item on that customer’s estimates and invoices and flat-rate jobs — no one re-enters the numbers per record.
Overview
Setting up price tiers takes three moves: turn on Price Tiers in Company Settings, build one tier for each pricing arrangement you offer, and assign a tier to each customer record that should get it. From then on, FieldPulse applies the adjusted pricing on each line item on that customer’s estimates, invoices, and flat-rate jobs. A tier adjusts pricing one of two ways — by a percentage that depends on the item’s price, or by one percentage across every item. You pick the method per tier when you build it. Common uses for price tiers:- Membership discounts — apply a discount to customers by membership level, such as Bronze, Silver, and Gold.
- Wholesale pricing — give wholesalers, resellers, and contractors who buy regularly or in larger quantities their own discounted rates.
- Service agreement discounts — give customers who have signed a service agreement or contract preferred rates on ongoing work.
- Geographical pricing — price by the customer’s location, reflecting different labor, material, or travel costs across regions.
- Manufacturer-recommended markups — apply the markup percentages a manufacturer suggests for specific products or services.
Before you begin
- Plan to work in Company Settings > Features & Plugins — that is where price tiers are turned on and built.
- Decide how each tier should adjust prices — different percentages depending on an item’s price, or one flat percentage across every item.
- Know which customers belong on each tier, so you can assign the tier on their customer records once the tier is saved.
Step-by-step setup
1. Enable price tiers
- Go to Company Settings > Features & Plugins.
-
Find Price Tiers and select Enable.
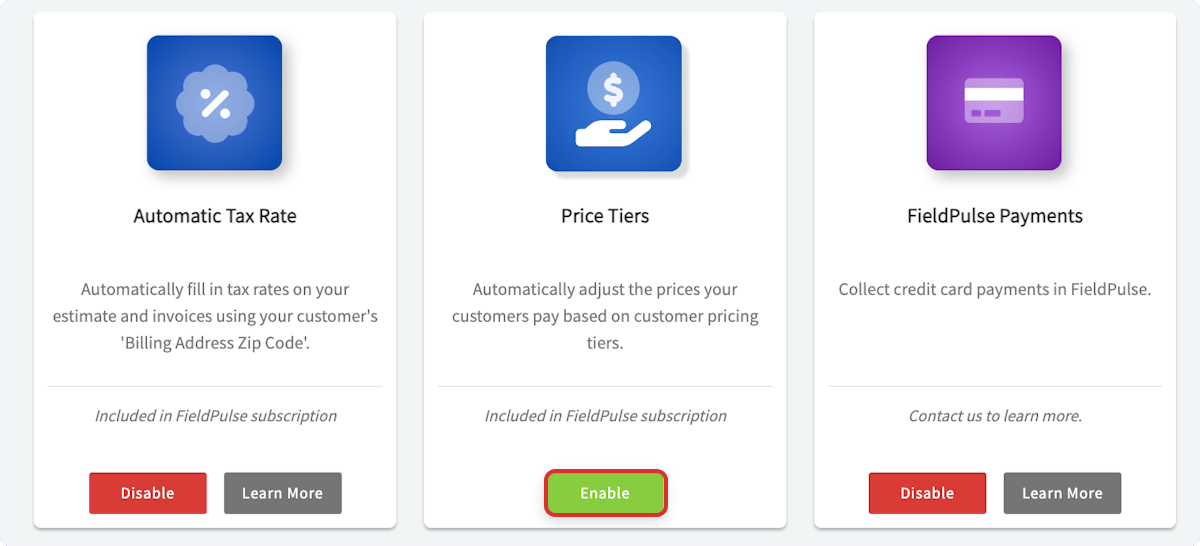
- Select Settings on the Price Tiers tile to open Price Tier Settings.
2. Create a price tier
On the Price Tier Settings page, select Add New Pricing Tier and give the tier a Pricing Tier Name.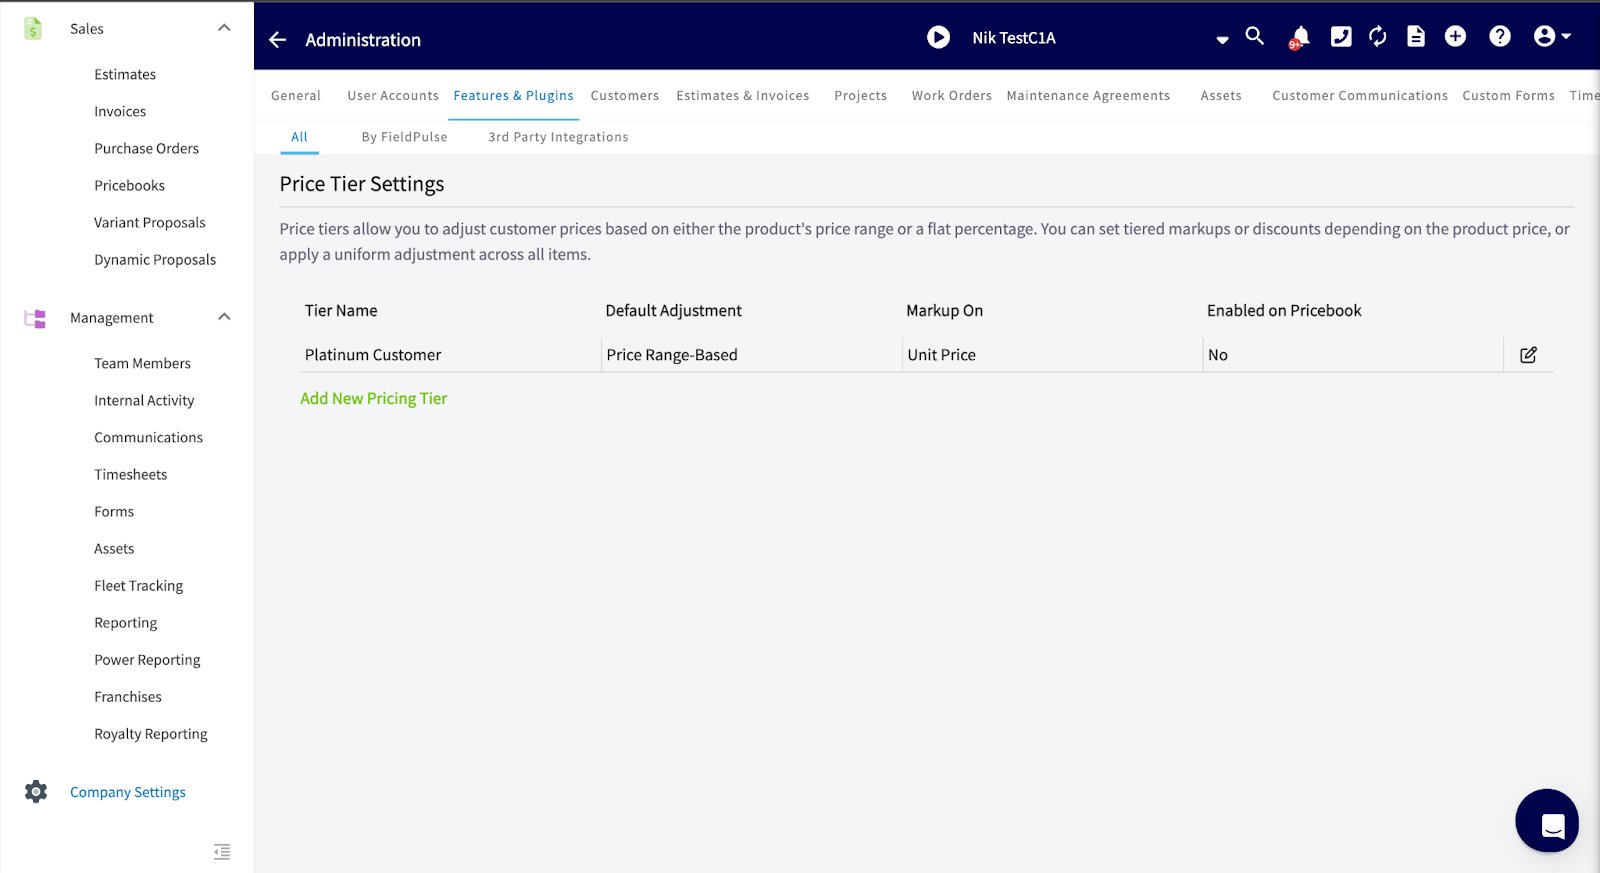
Price tier names are for internal use. Your customers never see them.
3. Set the tier’s markup or discount
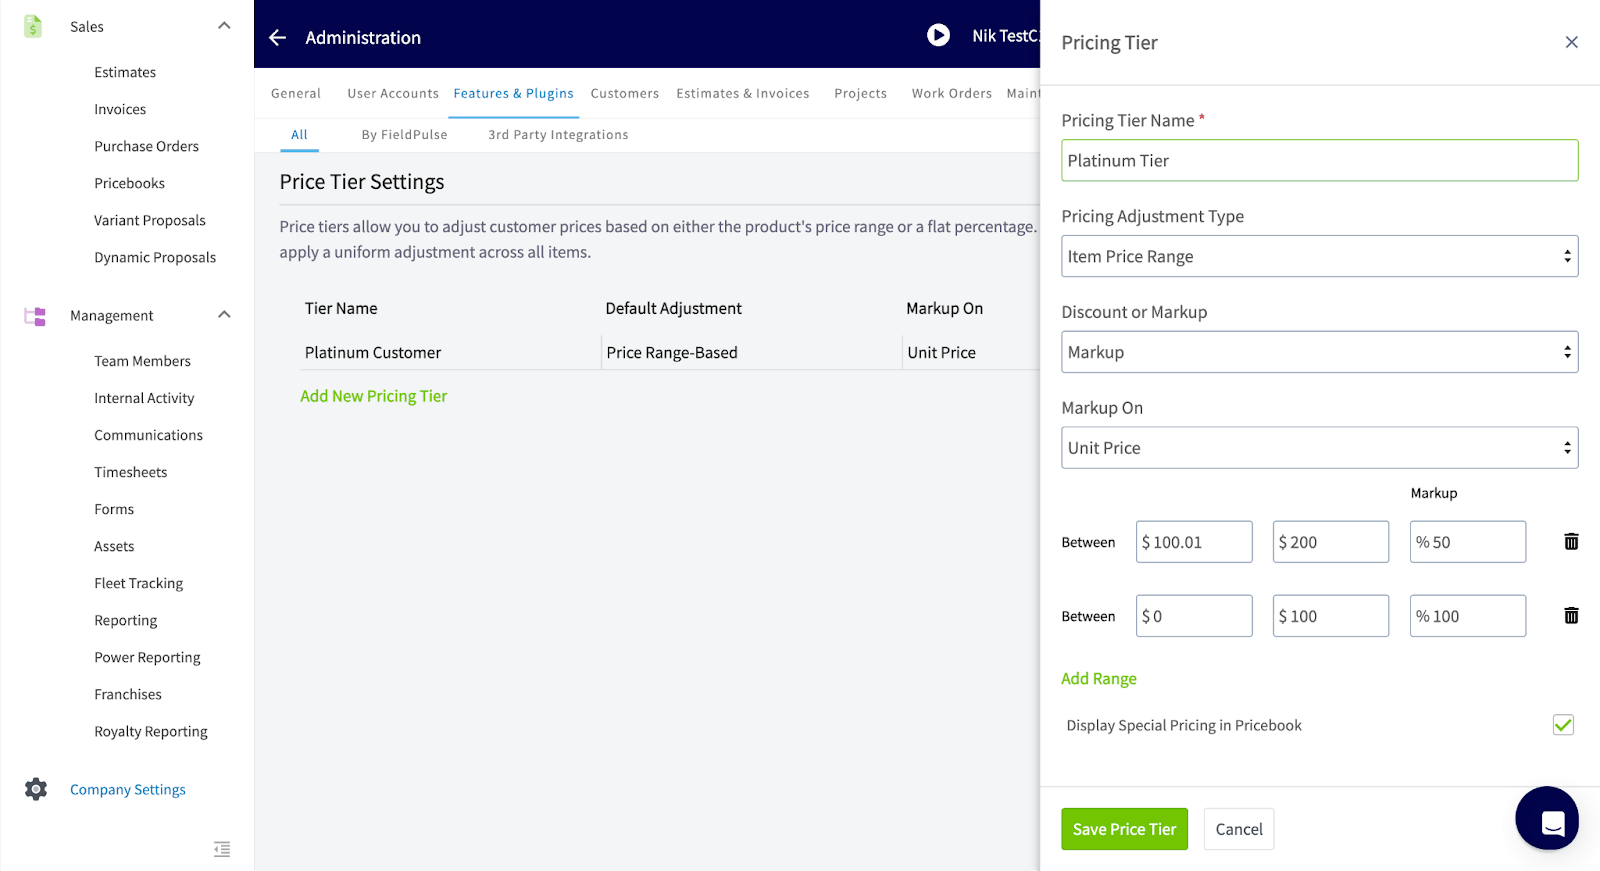
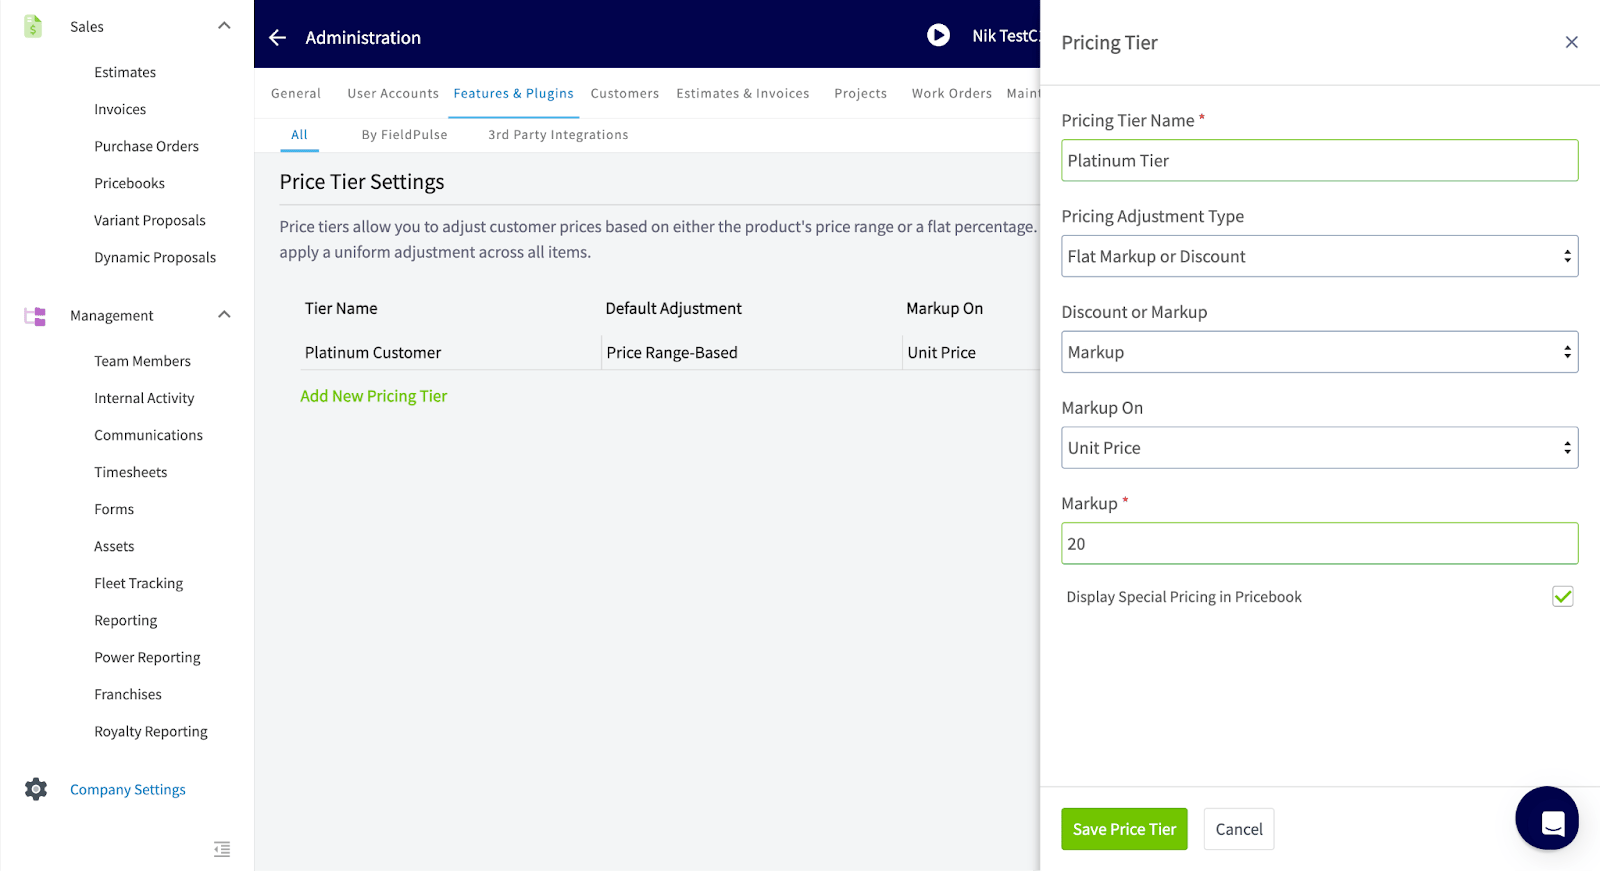
- Choose a Pricing Adjustment Type — Item Price Range to vary the adjustment by the item’s price, or Flat Markup or Discount to apply one percentage to everything.
- Choose Discount or Markup to set whether the tier lowers or raises the price.
- Enter the numbers. On an Item Price Range tier, enter the lower and upper amount of a price band and the percentage that applies inside it, then select Add Range for the next band. On a Flat Markup or Discount tier, enter the single percentage.
- Select Save Price Tier.
4. Assign the tier to a customer
Open the customer record and pick the tier in the Price Tier field. You can also select the price tier while creating a new customer.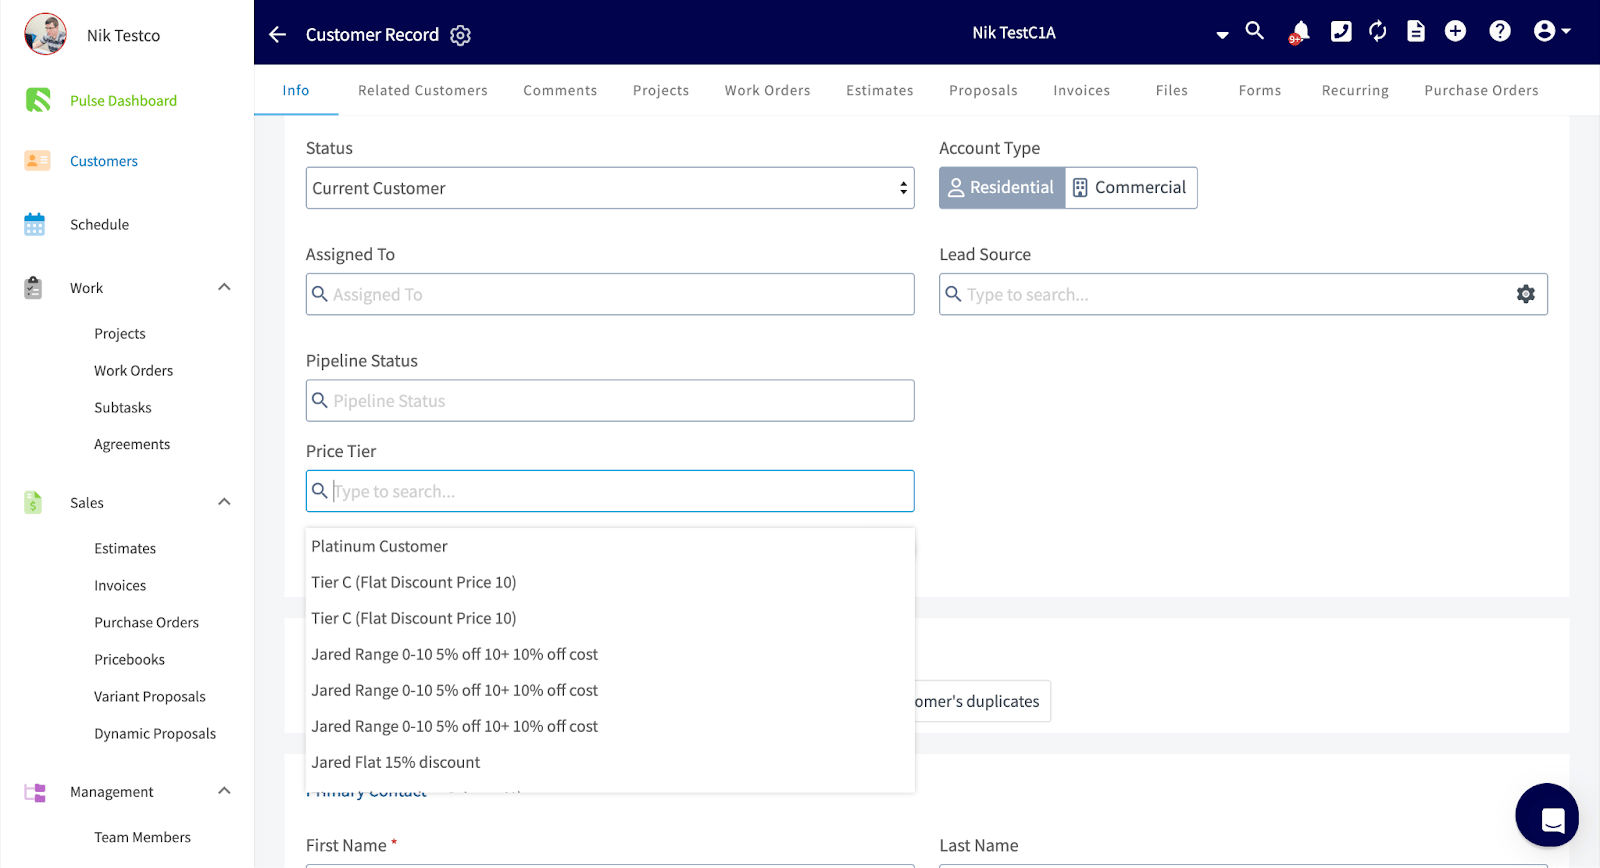
Overriding a price tier on one item
You can override a tier’s pricing for a single item without changing the tier itself. Open the item in your item list and expand Pricing Options. FieldPulse lists every price tier and the price that tier produces for this item, based on your configuration.- Select the arrow on the price tier you want to change.
- Adjust the markup or discount percentage.
- Choose whether the adjustment applies on the Unit Cost or the Unit Price.
- Save the change.
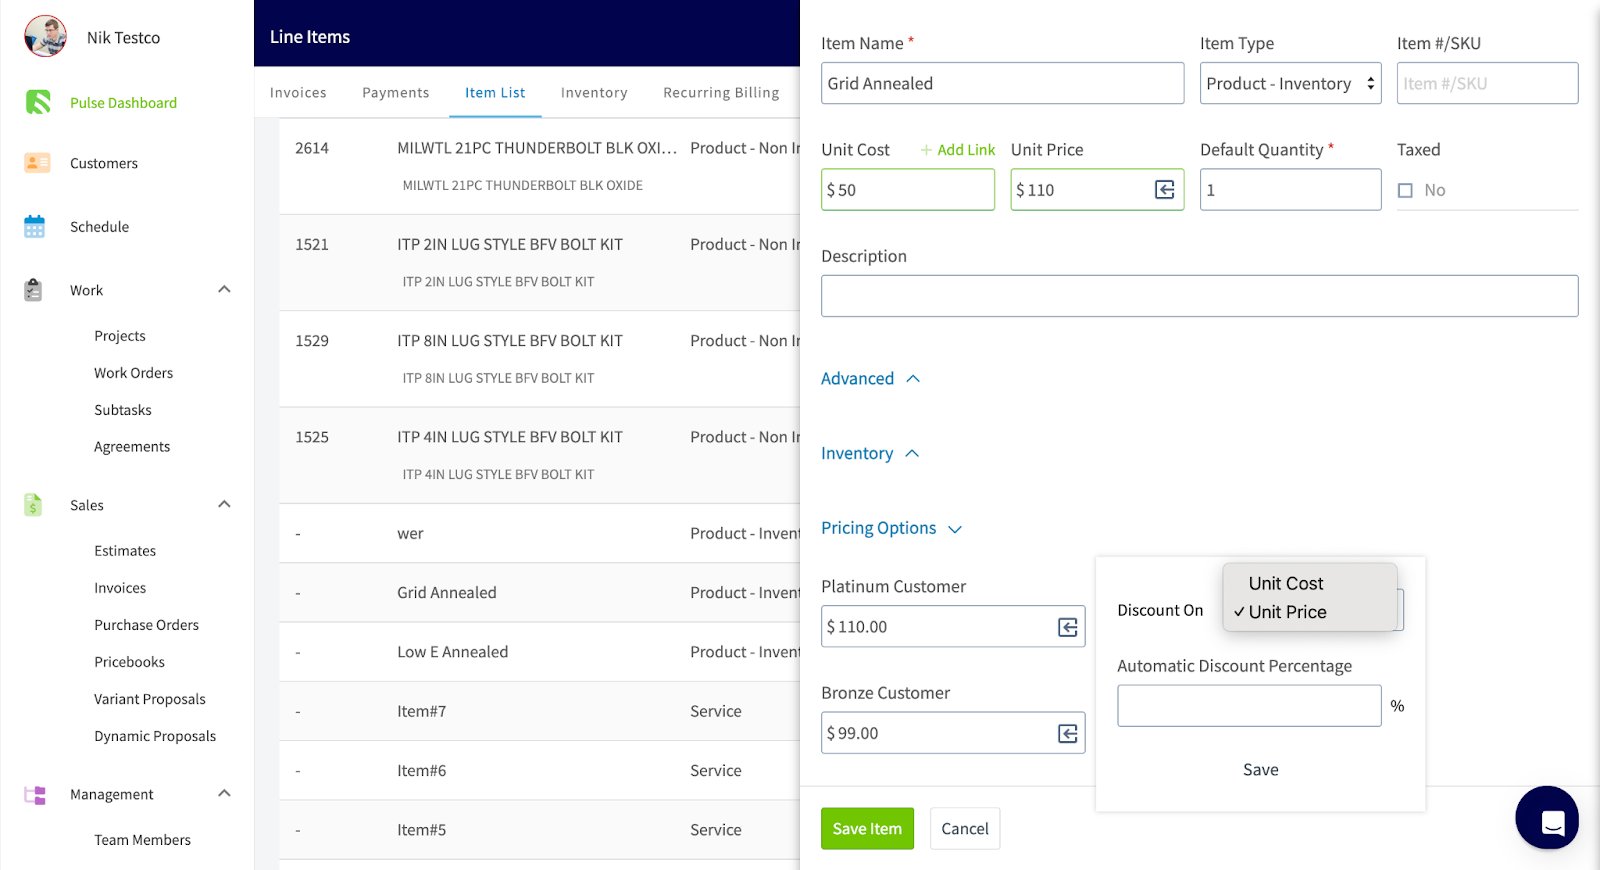
An override changes this line item only. The tier’s own settings, and its pricing on every other item, stay as they are.