
1. Request access to sync with QuickBooks
To connect to QuickBooks Desktop, request access by contacting us at support@fieldpulse.com, or use the chat feature in the bottom right corner of your screen. We will schedule a call with you to initiate the sync.2. Turn on the integration in Company Settings.
Once FieldPulse has enabled you to connect to QuickBooks, go to Company Settings. Find the Features & Plugins tab and navigate until you find the QuickBooks Desktop tile.3. Enter your company name and create a password
FieldPulse will then download a file to your device.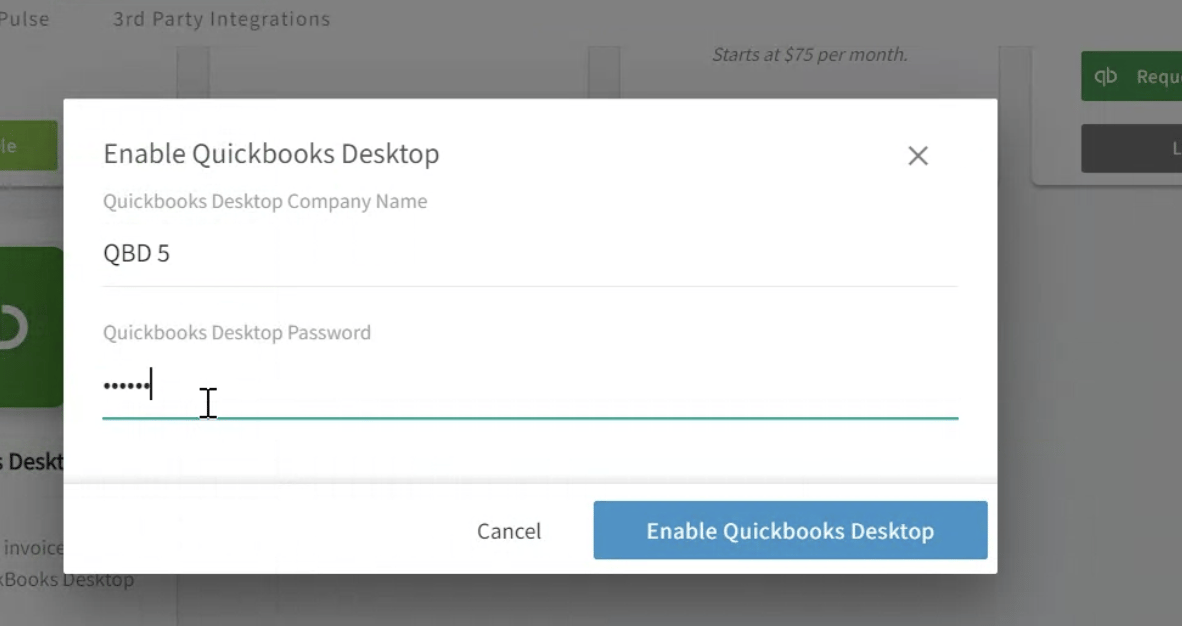
4. Selecting Sync Type and Date Range
Opt between one-way sync (FieldPulse to QuickBooks) or two-way sync for estimates and invoices. Set a specific date or period for data exchange.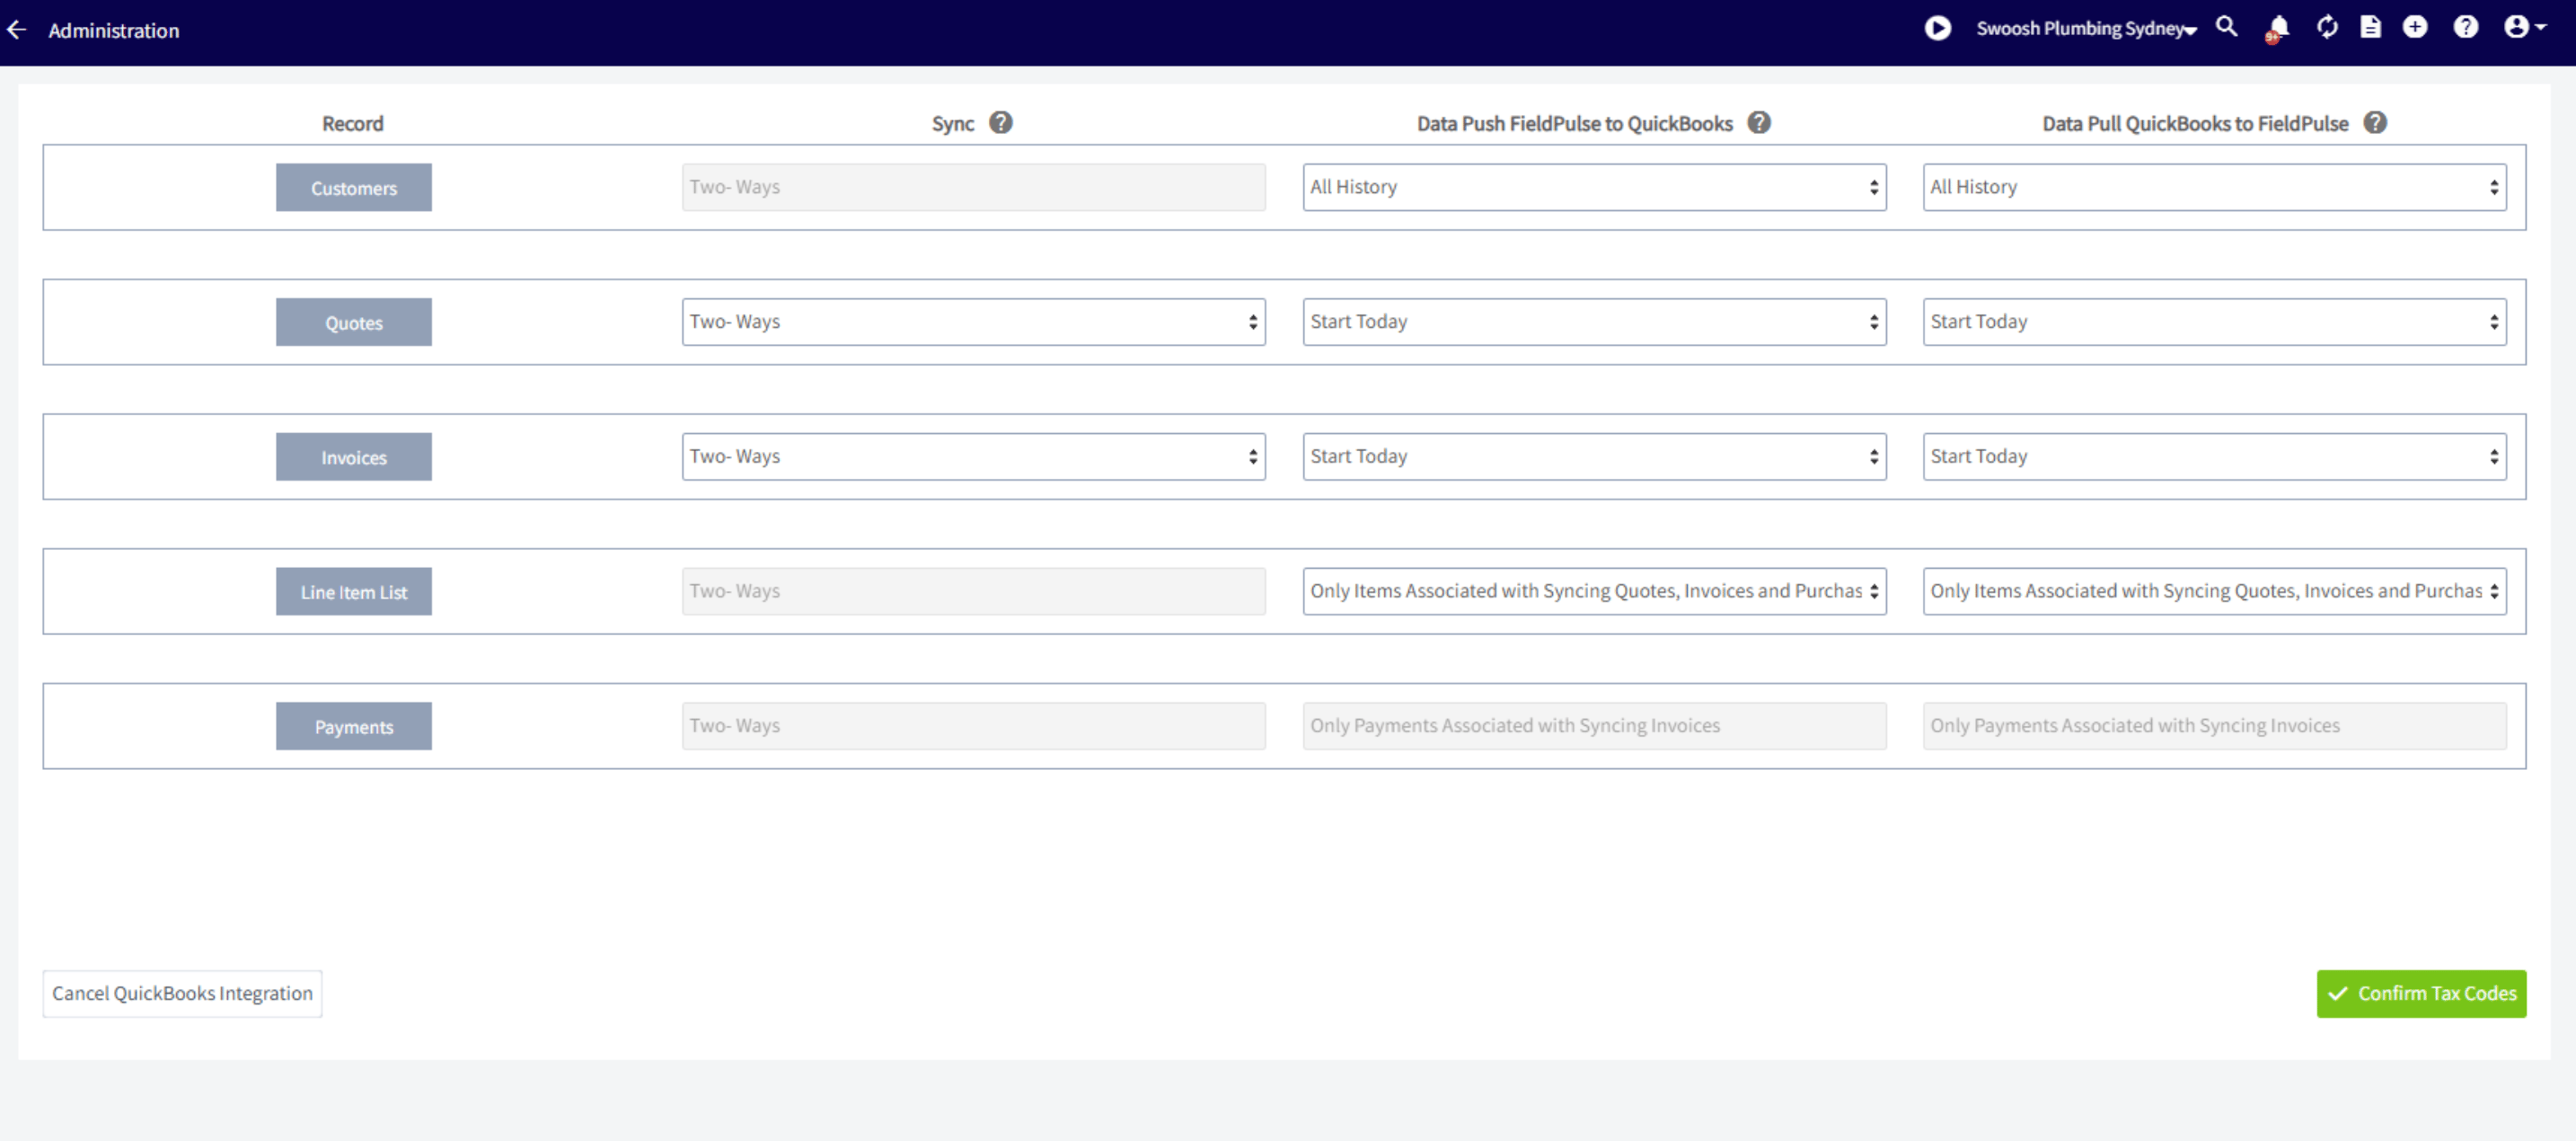
5. Download and start the QuickBooks Web Connector
Select Add an Application, then select the file downloaded from FieldPulse.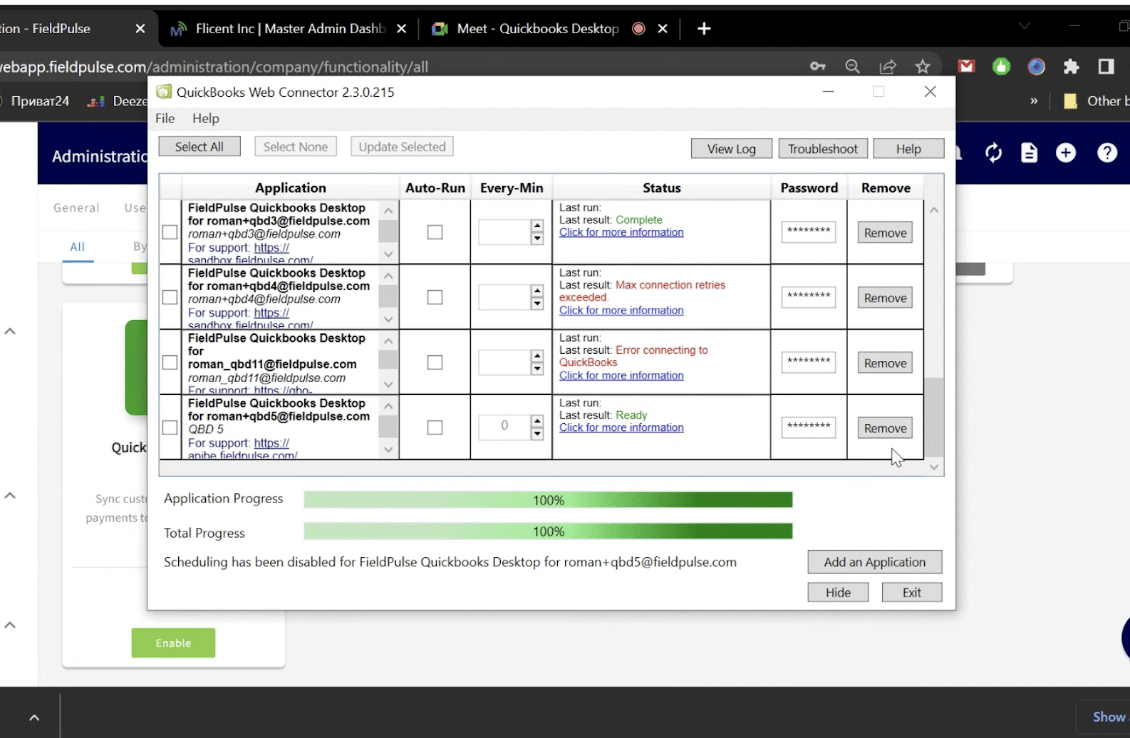
6. Set the sync to auto-run every 1 minute
Press Update Selected after making these changes. The sync will now begin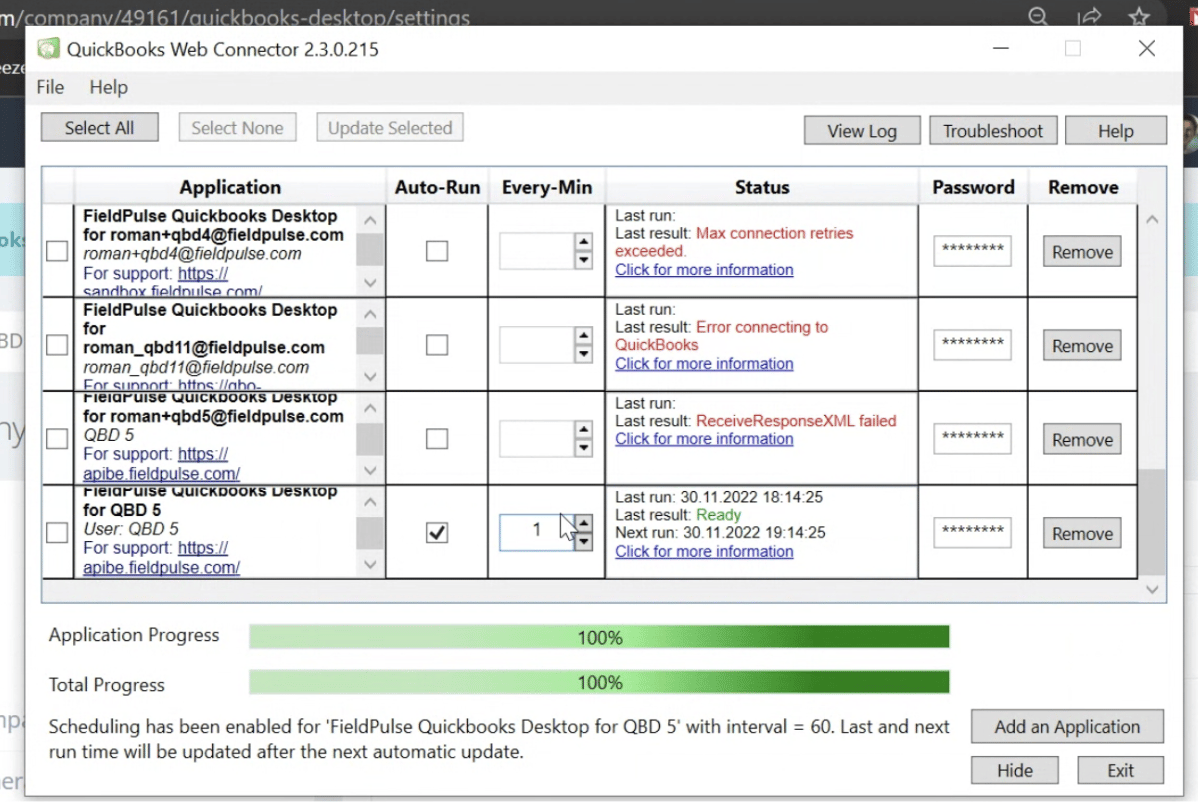
Have additional questions? Contact us at support@fieldpulse.com or use the chat feature in the bottom right corner of your screen.