
Who uses this: Admins create project custom fields in Company Settings and choose which roles see each field. Availability: All regions. Requires Project Management, which is included in the FieldPulse subscription and is enabled in Company Settings > Features & Plugins.Every project carries a detail the standard project fields have no spot for — the original expected completion date, the installer requested to lead the work, a risk assessment for the site. A custom field gives that detail a permanent home on the project record instead of leaving it in someone’s head or a side spreadsheet. You create the field once in Company Settings, choose the kind of data it holds, decide which roles can see it, and choose whether its information also appears on the related jobs, estimates and invoices, and purchase orders.
Overview
A project custom field is a field you define in Company Settings and add to your project records, so you can store and display data that is not part of the standard project fields. You manage these fields on the Custom Fields for Project Records page, under Company Settings > Projects > Custom Fields. Each field carries a name, a data type, the roles that can see it, and the related records that also show its information. Settings reference below covers each of those settings. Common uses include an original expected completion date, a requested primary project lead or installer, and a risk assessment.Before you begin
- Decide which roles should see the field. You set visibility on each field, for Managers and Service Agent.
- Name the field for the data it holds rather than for one project, since you define the field once in Company Settings for your project records.
- Plan the choices for a Drop-down field in advance. You add, name, and save each option while the field is open.
- Decide which related records should carry the field’s information — Job, Estimate/Invoice, or Order.
Step-by-step setup
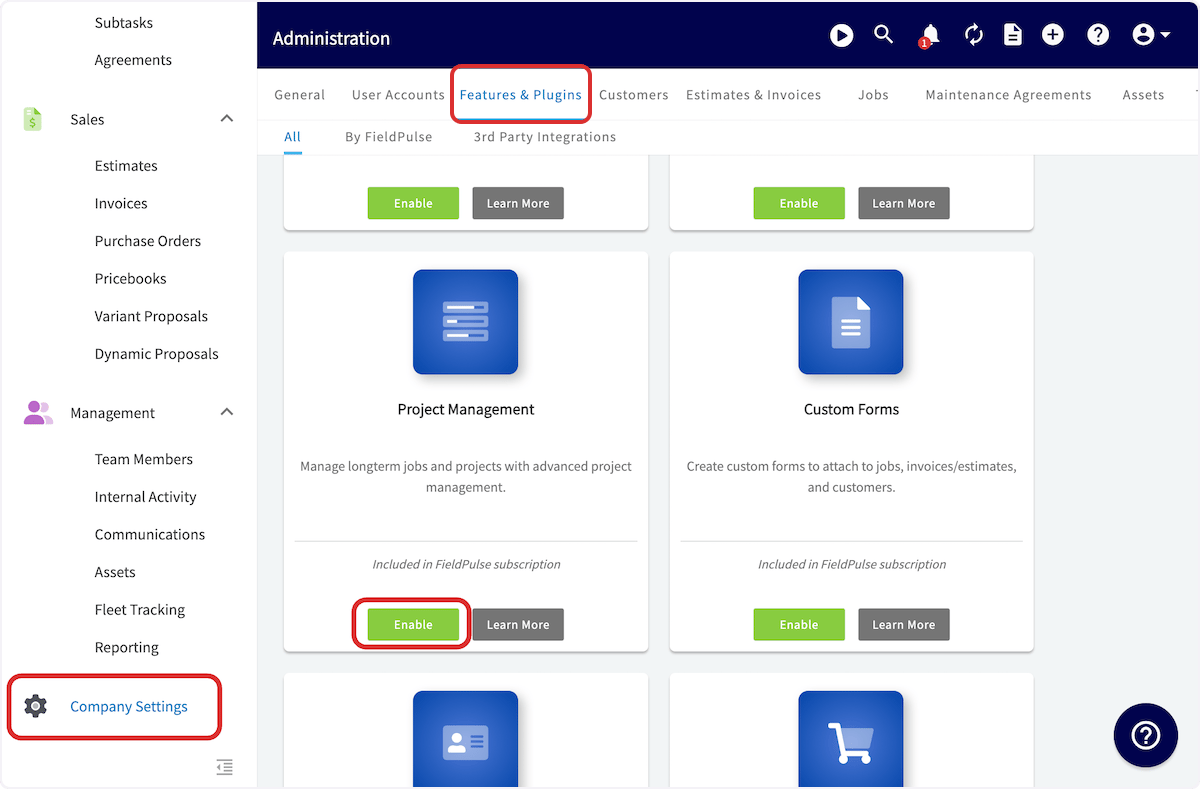
Enable Project Management
Turn on Project Management first. Enabling it lets you create and track projects, along with custom fields that can cascade to your jobs, estimates and invoices, and purchase orders.- Go to Company Settings.
- Select the Features & Plugins tab.
- Find Project Management and select Enable.
Create a custom field
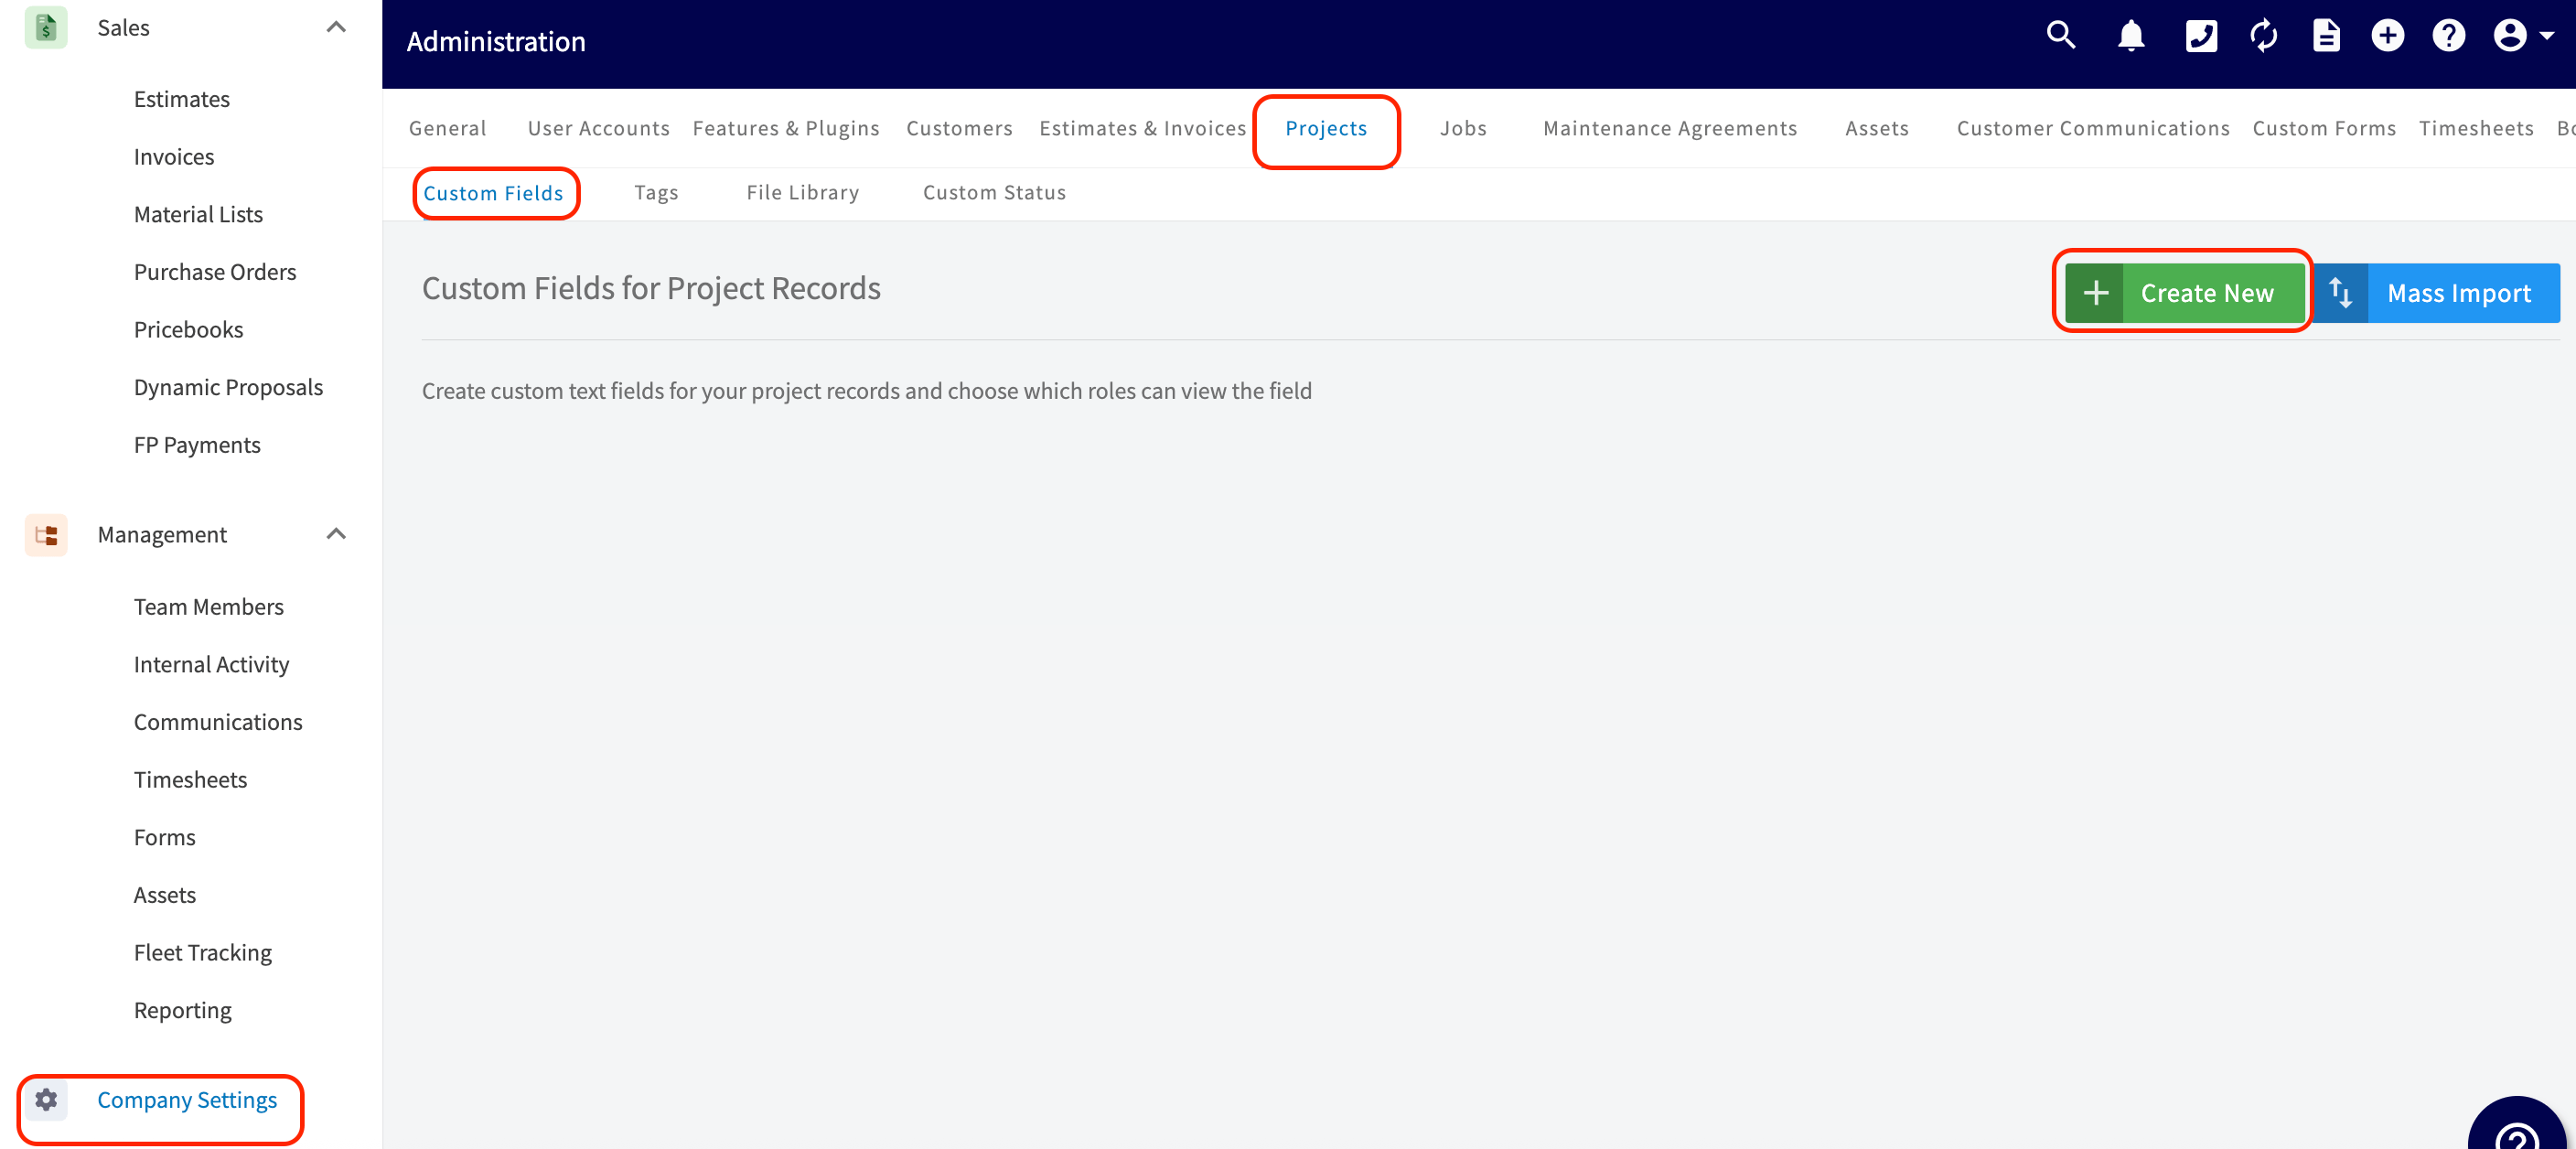
- Go to Company Settings.
- Select the Projects tab, then the Custom Fields tab.
-
On the Custom Fields for Project Records page, select Create New.
-
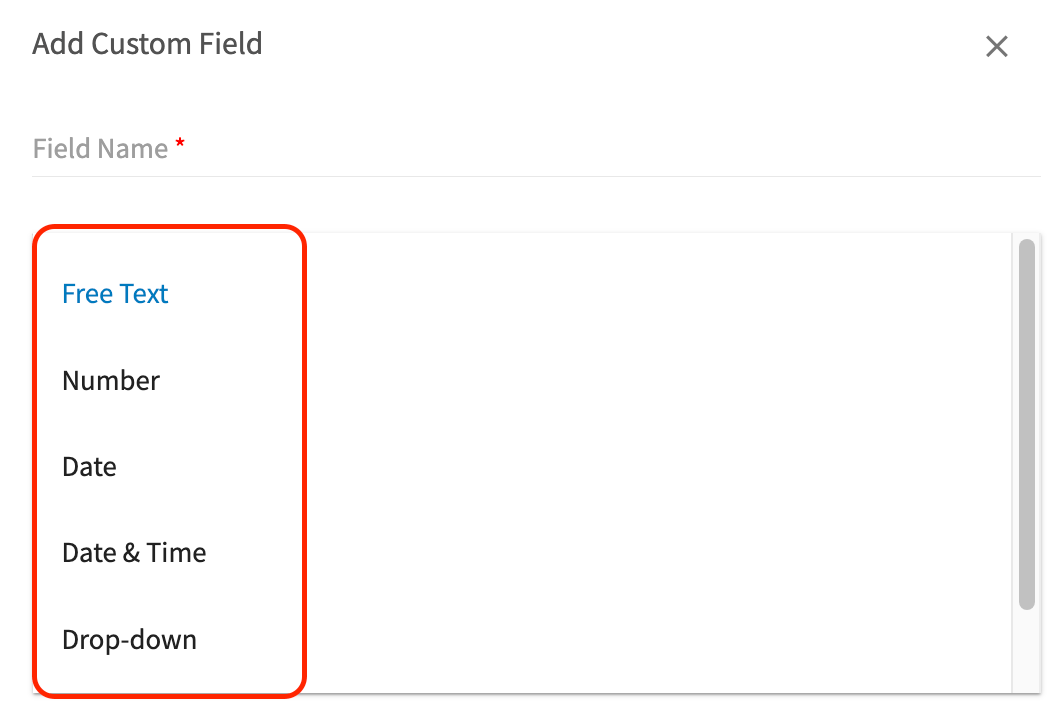
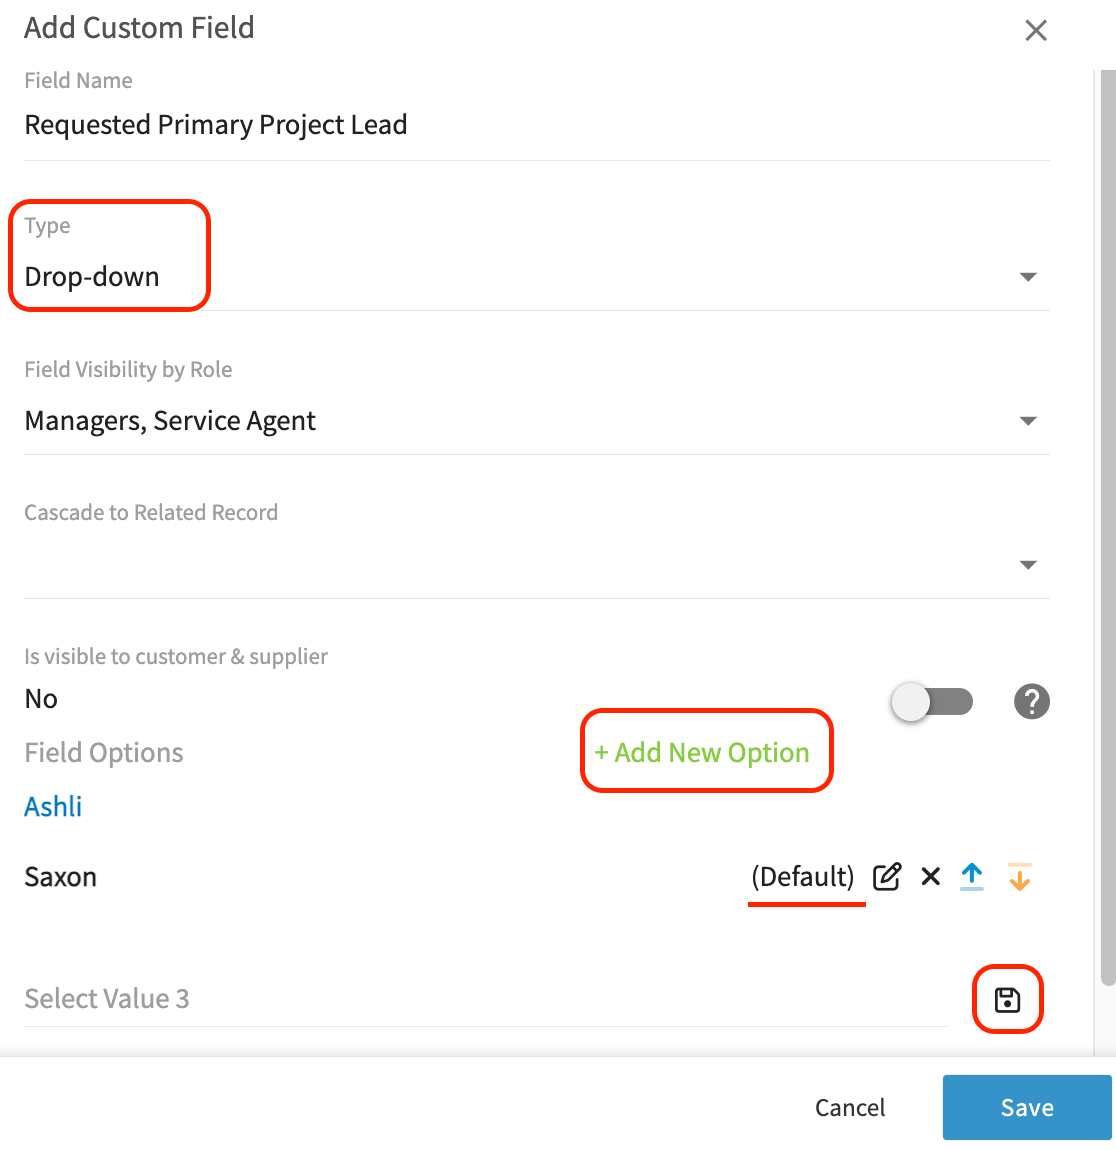
In the Add Custom Field window, enter the Field Name. This is the label your team sees on the project record.

-
Select the Type of data the field holds — Free Text, Number, Date, Date & Time, or Drop-down.
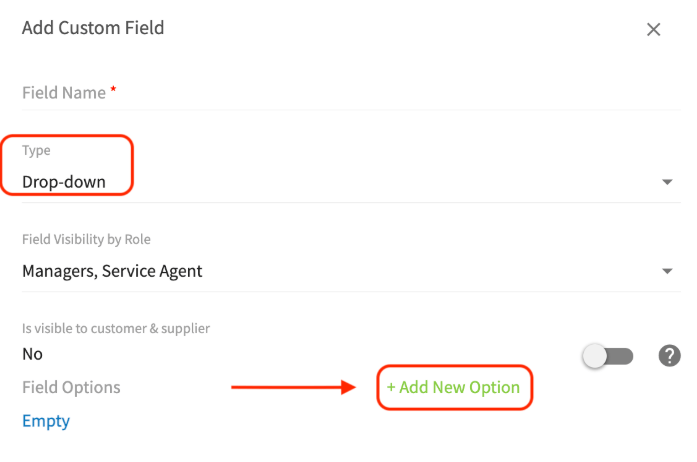
- For a Drop-down field, select + Add New Option.
-
Name the option, then select the save icon beside it. Repeat for every choice you want in the list — your team then picks a single option from that list on the project record.
-
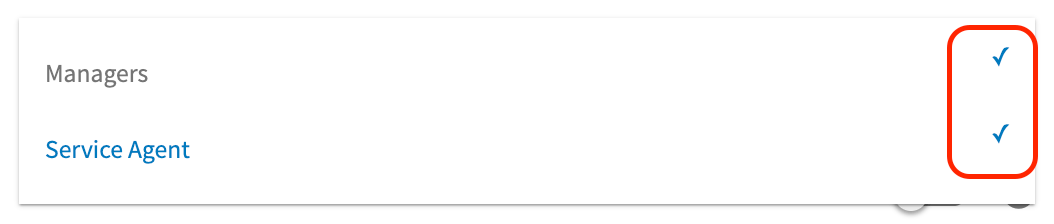
Set Field Visibility by Role. Check or uncheck Managers and Service Agent to control who sees the field.
-
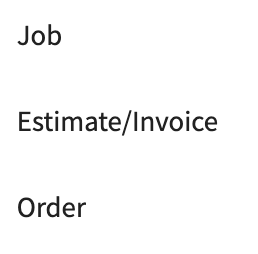
Use Cascade to Related Record to pick the additional records where this field’s information should also appear. Choose some or all of the options — Job, Estimate/Invoice, and Order (purchase orders).
- Select Save.