
Who uses this: Admins — custom field mass imports run from Company Settings. Availability: All regions.Mass import for custom fields updates the custom fields on many records at once from a single spreadsheet, instead of opening and editing every customer, job, or invoice by hand. You download a template, make your changes in Excel or Google Sheets, and upload the file back to FieldPulse.
Overview
Mass import edits the custom fields on records that already exist in FieldPulse. It covers customers, estimates, invoices, work orders, maintenance agreements, assets, and purchase orders — the record types that let you create and attach custom fields. Each record type has its own import screen inside Company Settings, and every one of them works the same way: download the template, edit the custom field columns, and upload the file back.Video walkthrough
Watch a short walkthrough of the whole mass import process, then follow the written steps below.Video walkthrough: mass importing custom fields in FieldPulse
Before you begin
The custom fields you want to update must already exist in FieldPulse. Mass import fills in the values for custom fields you have already created — it does not create the fields themselves.
- Create any missing custom fields before you import. Setting Up Customer Custom Fields covers customer records, and Setting Up Custom Fields on Job Records covers jobs.
- The template downloads as an Excel file. If you do not have Excel, open and edit the template in Google Sheets instead — see How to Self-Import Data With Google Sheets.
On web
Open the mass import screen
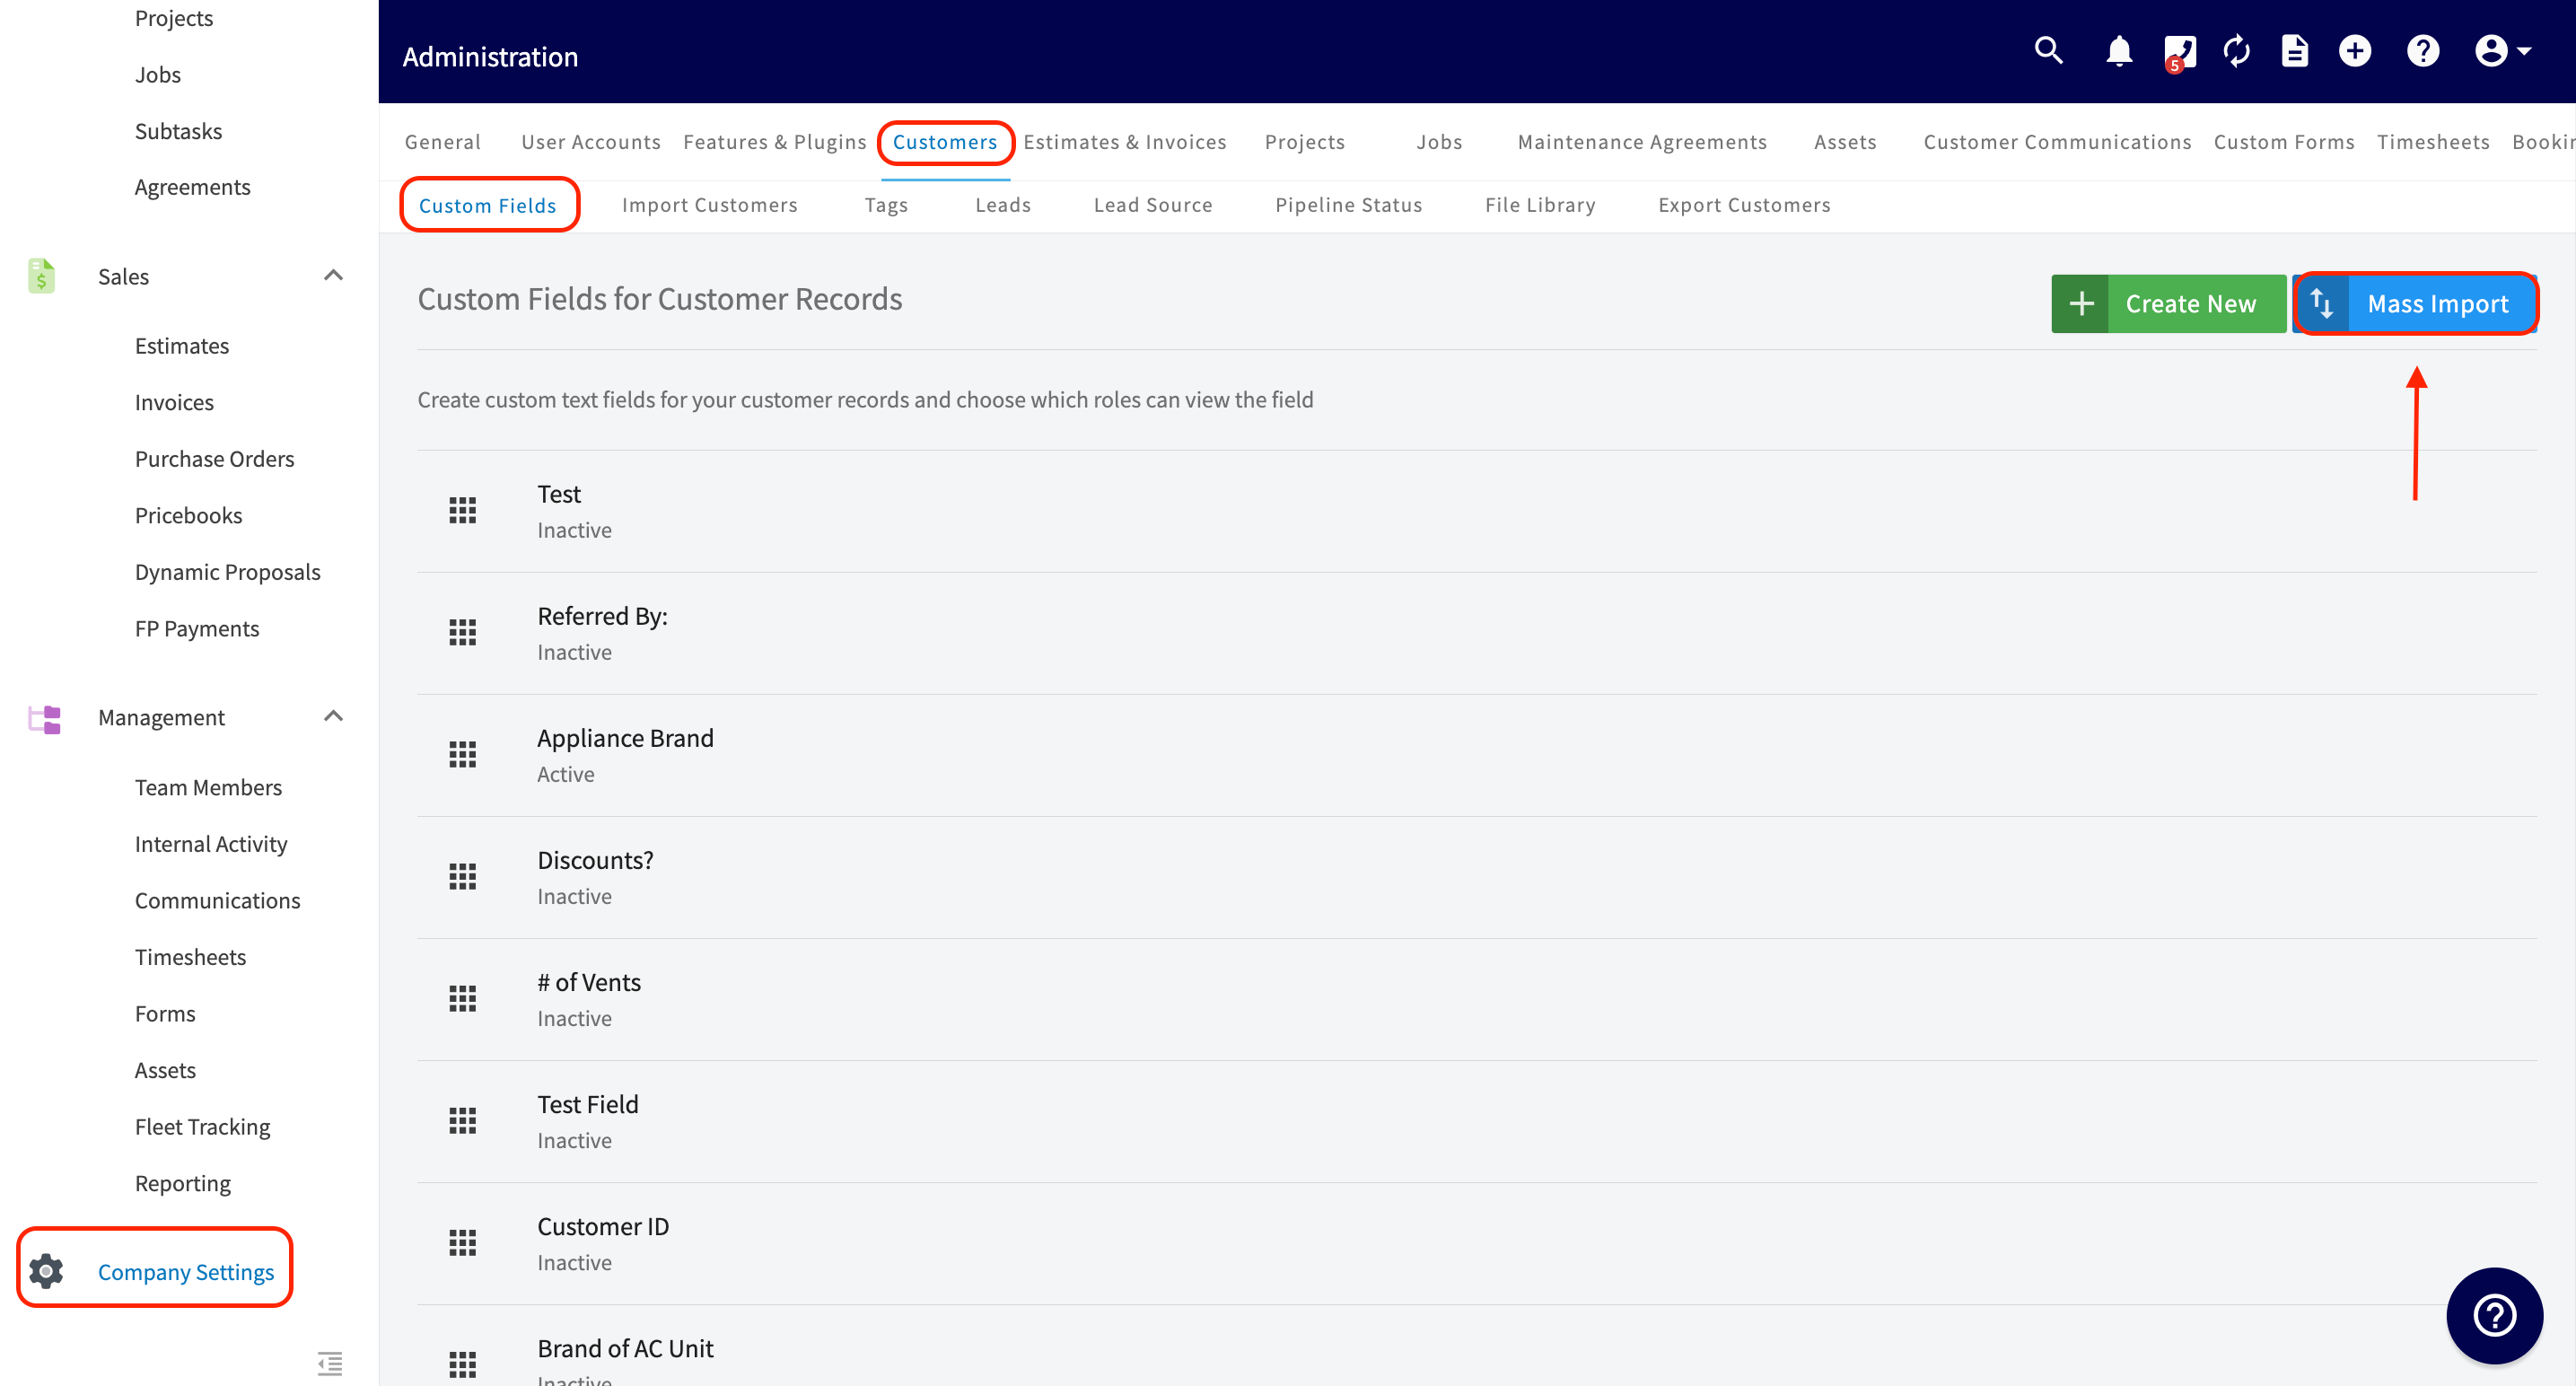
- Select Company Settings in the left-side menu.
- Select the tab for the record type you want to update — Customers, Estimates & Invoices, Jobs, Maintenance Agreements, Assets, or Orders. These tabs hold the records that let you create and attach custom fields.
- Select Custom Fields in the sub-header below the tabs. The screenshot below shows the Customers tab.
- Select the blue Mass Import button in the top-right corner.
Download and fill in the template
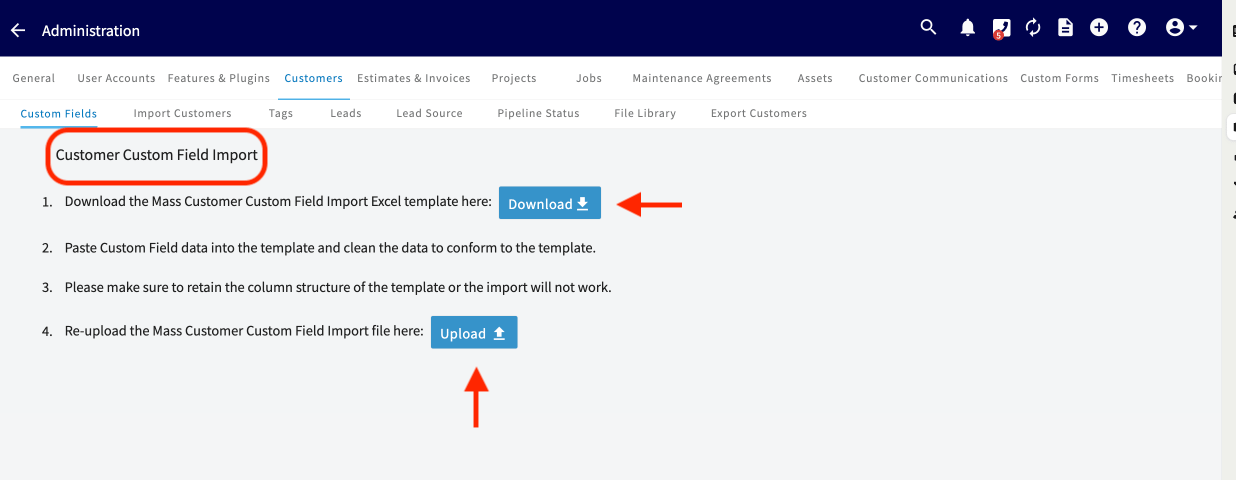
The import screen lists its steps on screen and gives you two buttons — Download for the template and Upload for the finished file.-
Select Download to save the Excel template. On the Customers tab this is the Mass Customer Custom Field Import template.
- Open the template and paste or type your data into the custom field columns.
-
Leave the cells above the red line unchanged — those rows hold the column headers and the per-column instructions. Read the instructions before you edit.
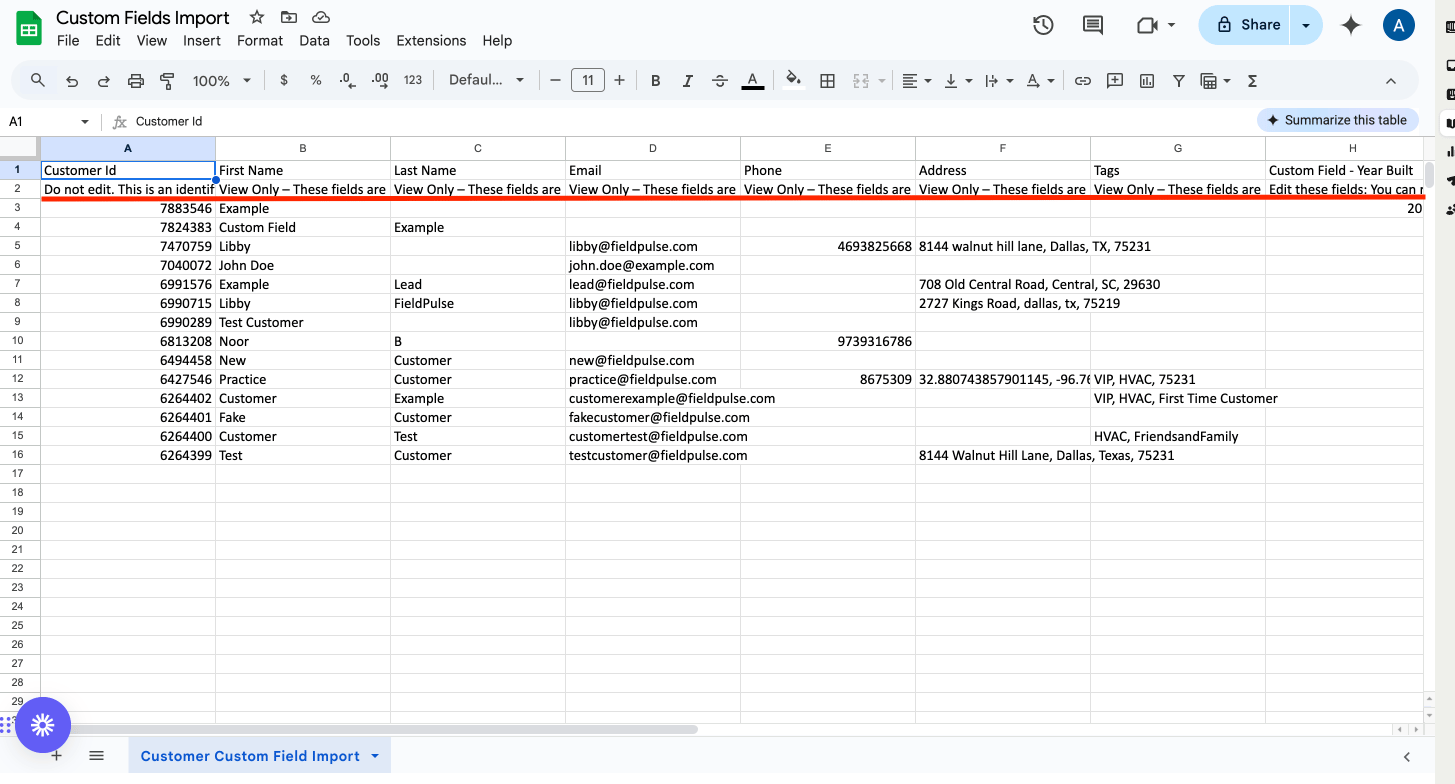
- Keep the template’s column structure exactly as you downloaded it. If the column structure changes, the import will not work.
- Save the file.
Upload the completed file
- Return to the custom field import screen in FieldPulse.
- Select Upload and choose the spreadsheet you saved.