
Who uses this: Anyone who can open and edit an invoice record. Availability: Web app and mobile app — marking a payment does not require FieldPulse Payments.Marking a payment records money your customer has already paid — cash, a check, or any method handled outside FieldPulse — against the invoice it belongs to. The payment record is what moves the invoice to Paid or Partially Paid and keeps the balance due accurate. To take a card or ACH payment through FieldPulse instead of recording one, see How to Collect Payments: 3 Methods.
Overview
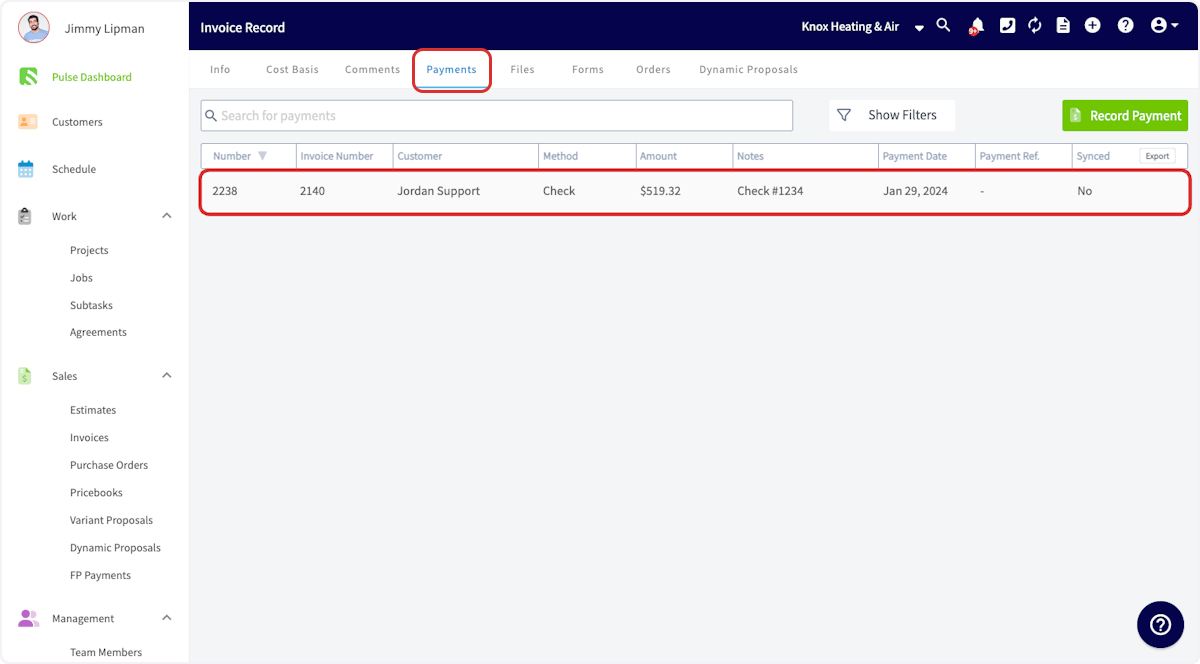
Marking a payment attaches a payment record to an invoice with the payment method, amount, date, and any notes. Payment records are what mark an invoice Paid or Partially Paid — with the full amount recorded the invoice reads Paid, and with part of the amount recorded it reads Partially Paid. Every payment record lives under the Payments tab of the invoice record, in a row that shows Number, Invoice Number, Customer, Method, Amount, Notes, Payment Date, Payment Ref., and Synced. You can mark a payment on one invoice at a time on the web app or the mobile app, or mark several invoices paid at once from the Invoices list.Before you begin
- Collecting a credit card payment, collecting an ACH payment, and sending a payment request all require FieldPulse Payments — see How to Collect Payments: 3 Methods.
- Have the payment method, amount, and date in front of you so the record matches what the customer paid.
On web
Mark a payment on an invoice
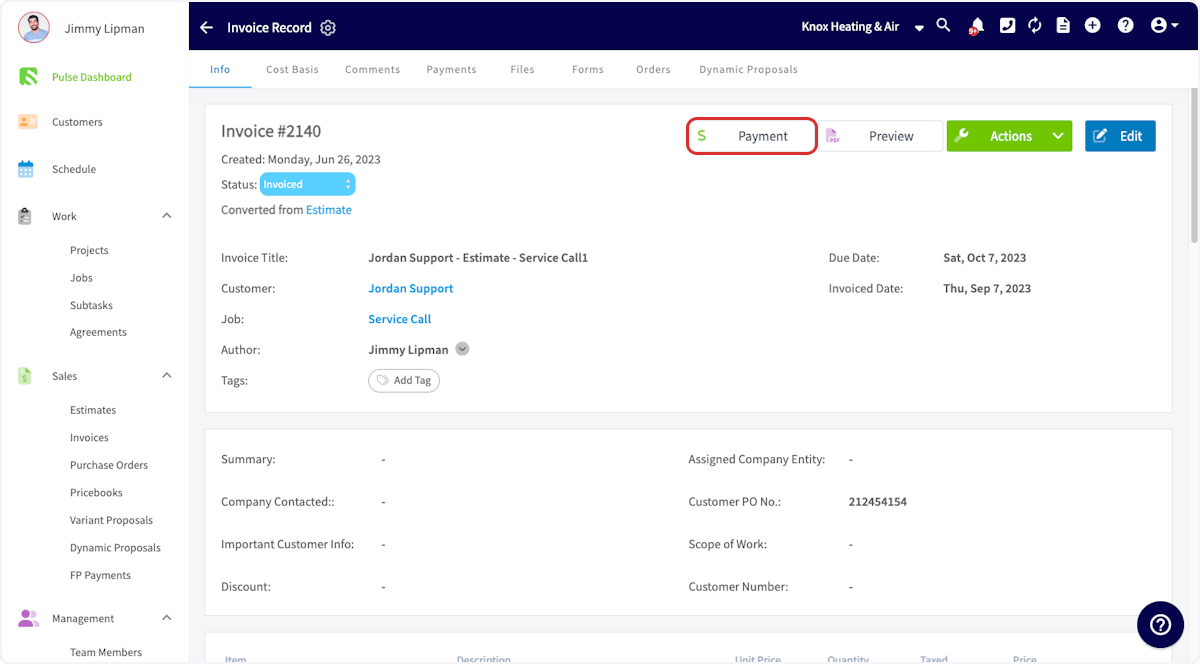
Record the payment on the invoice it belongs to.- Open the invoice record you want to apply the payment to.
-
Select Payment.
-
In the window that opens, select Mark Payment. This is also the window where you process a credit card if you use FieldPulse Payments.
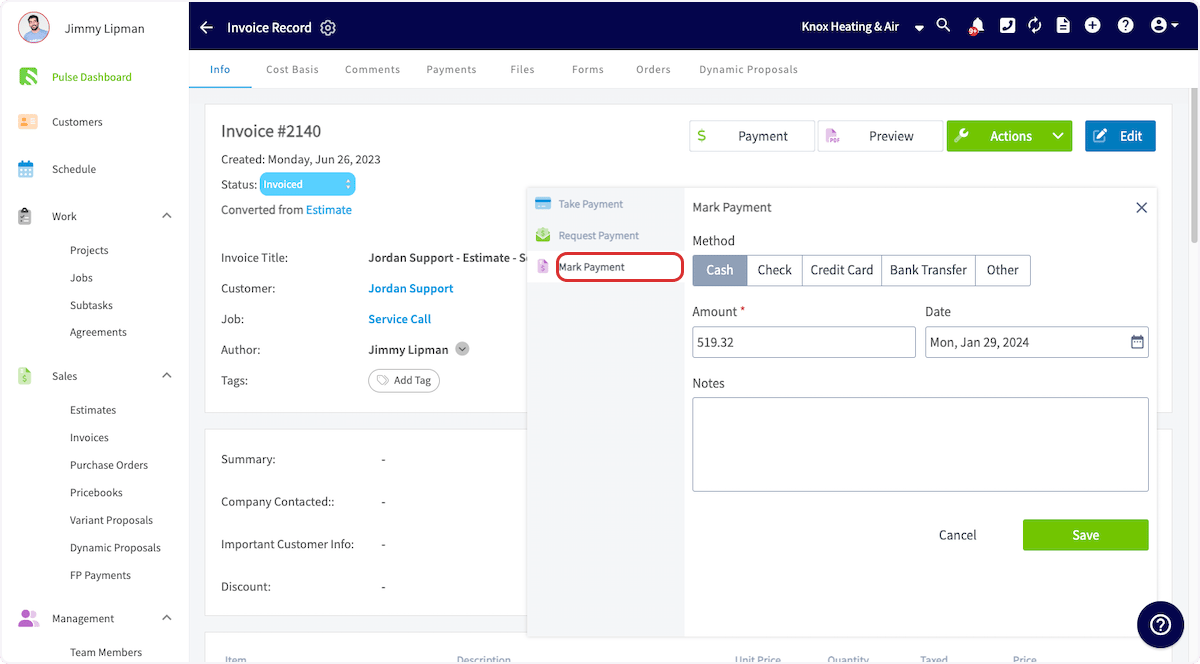
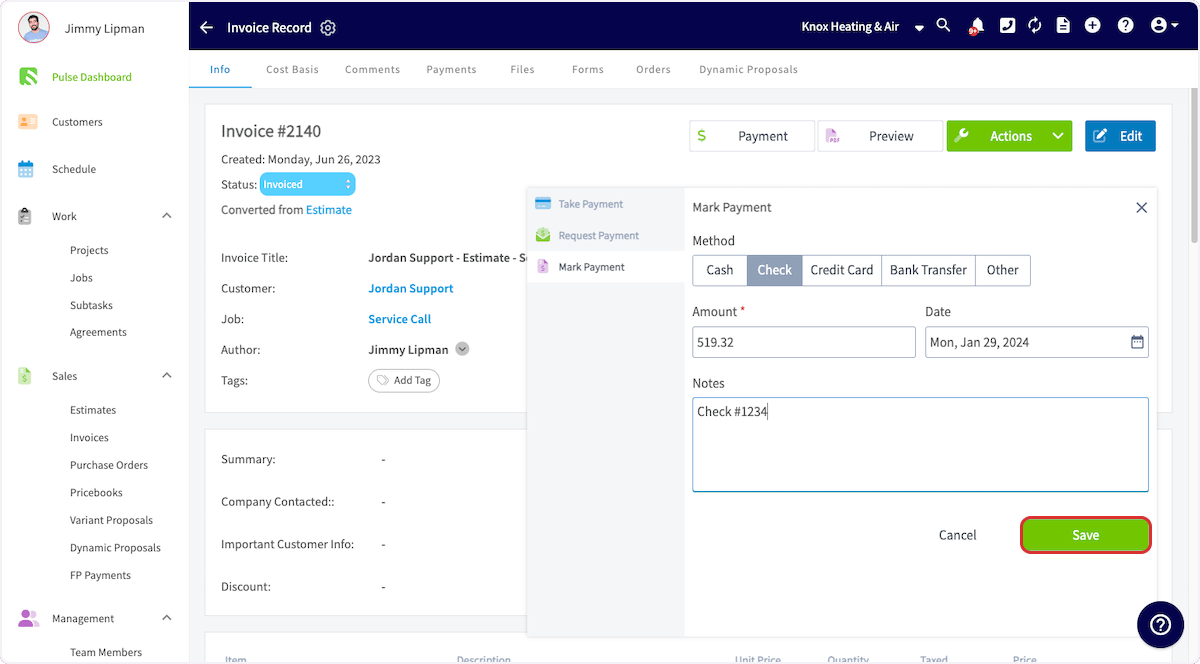
- Choose the Method — Cash, Check, Credit Card, Bank Transfer, or Other.
- Confirm the Amount and the Date.
- Add any Notes.
- Select Save.
Video walkthrough: marking a payment on the web app
Mark bulk payments
Mark several invoices paid in one pass from the Invoices list.- Go to your Invoices list and select the pencil icon.
- Select the checkbox on each invoice you want to mark as paid.
- Adjust the payment method, date, and notes.
- Save the payment record.
Bulk marking records payments only — it does not collect them.
Video walkthrough: marking bulk payments
On mobile
Open the invoice
Start from the invoice record you want to apply the payment to.-
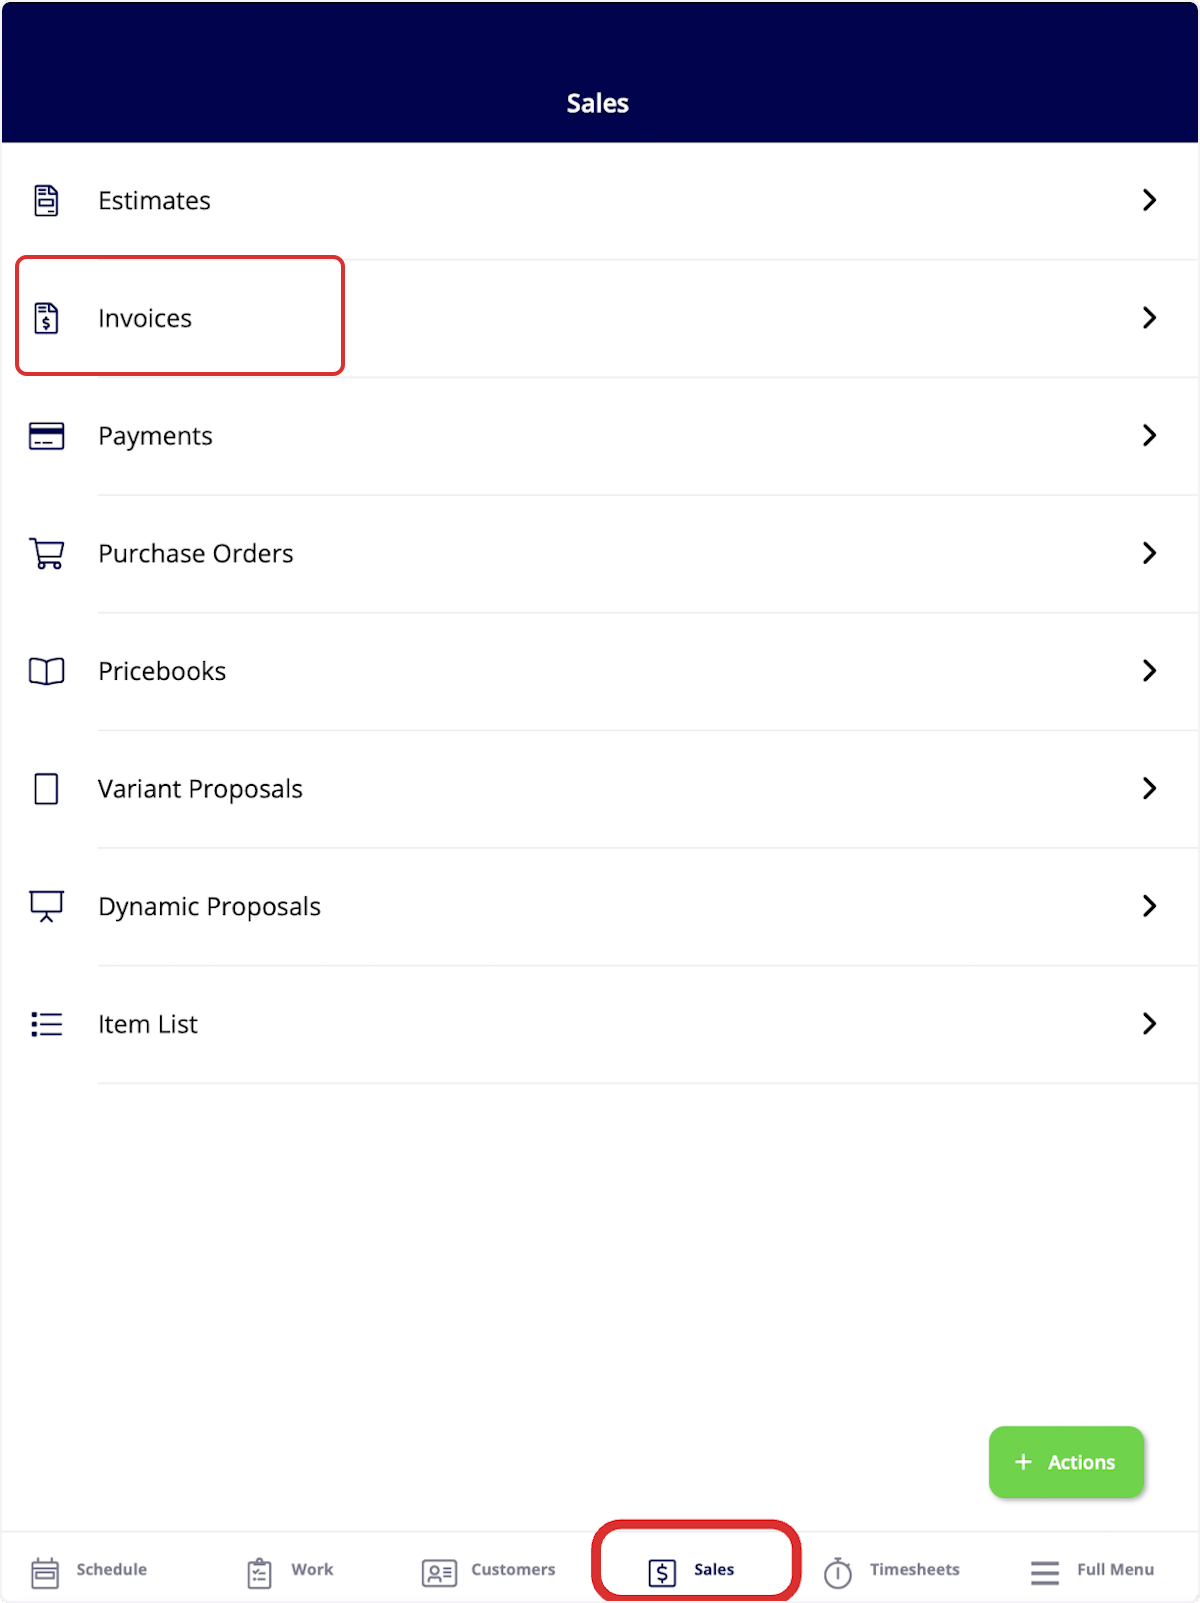
Select the Sales tab at the bottom of your screen, then select Invoices.
-
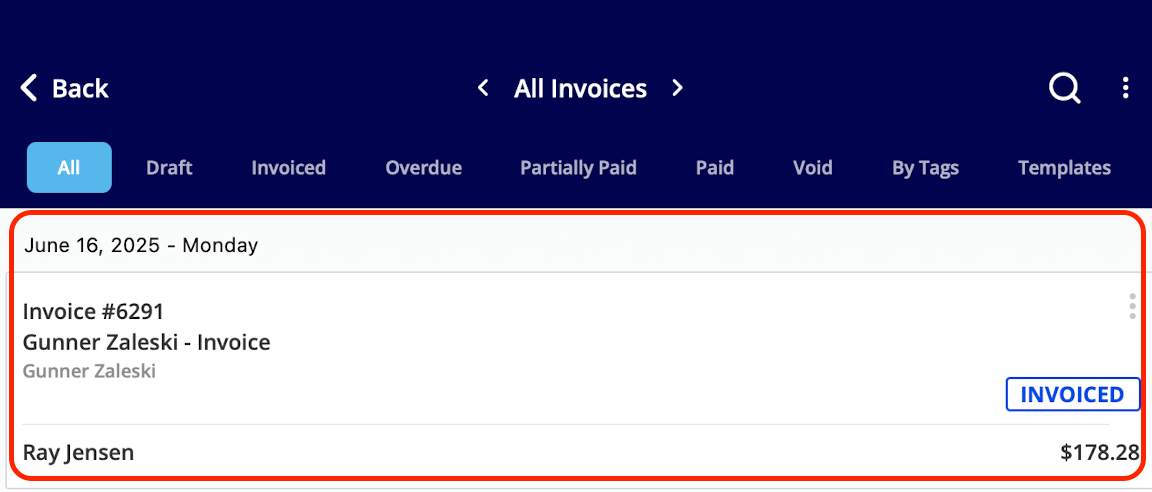
Select the invoice record you want to apply the payment to.
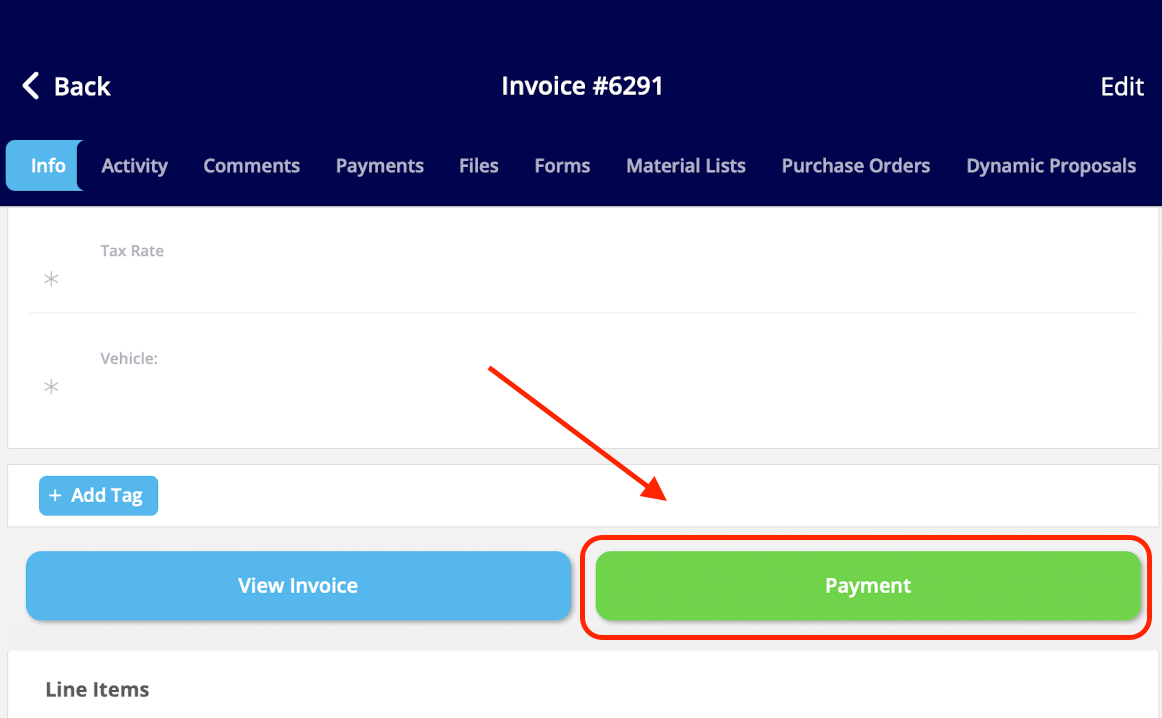
- Select the green Payment button, next to View Invoice.
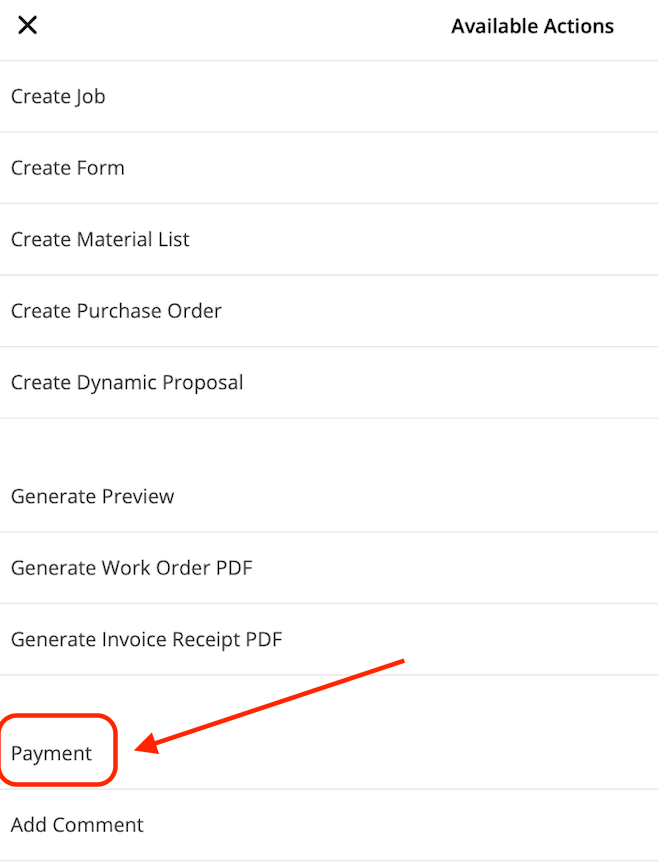
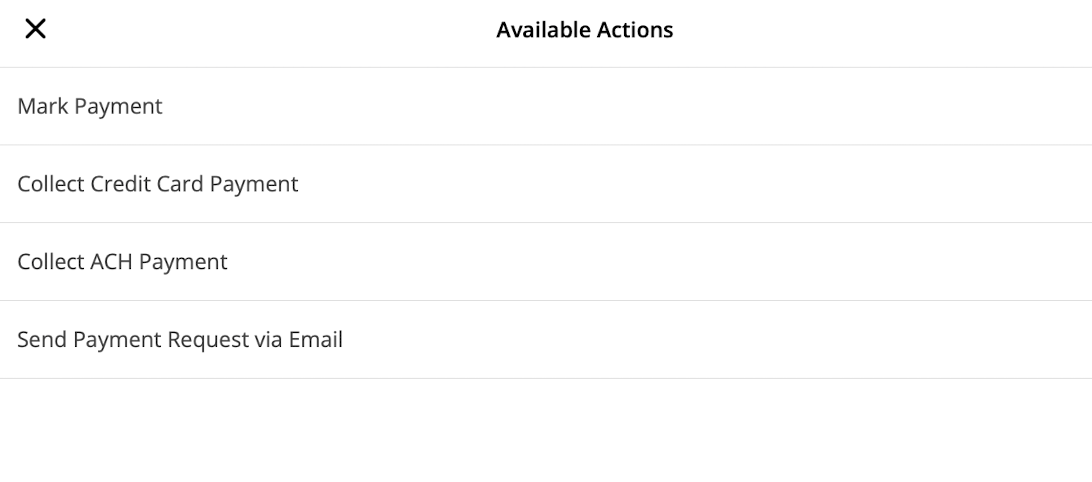
Mark the payment
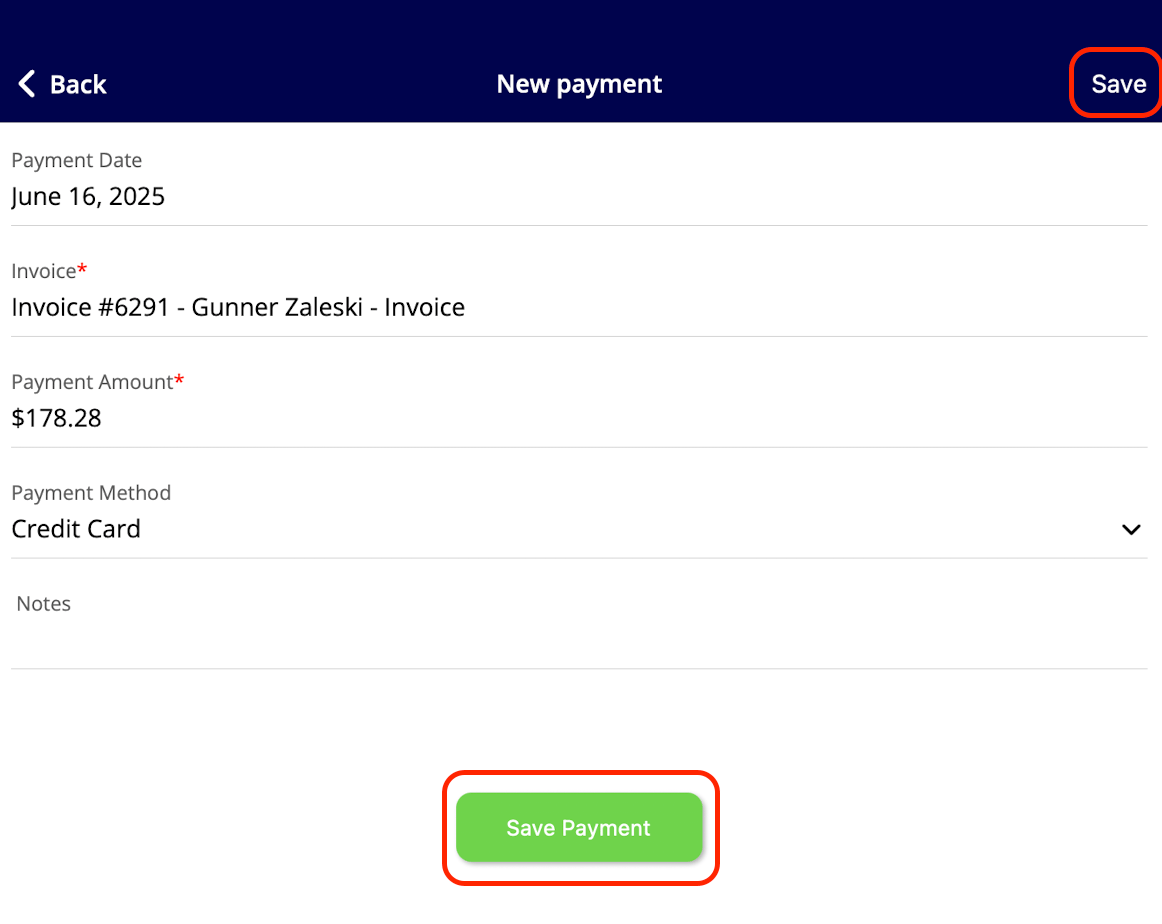
Record what the customer paid on the New payment screen, which also shows the payment date and the invoice the payment applies to.- Select Mark Payment.
- Adjust the Payment Amount and the Payment Method.
- Add any Notes.
- Select Save Payment, or Save in the top-right corner.
Video walkthrough: payments on the mobile app