
Who uses this: Anyone importing an existing customer list into FieldPulse. Availability: All regions. Self-import is included with your subscription at no extra cost.Importing customers brings an existing customer base into FieldPulse in bulk instead of adding records one at a time. Export your customers from your old system to Excel, Google Sheets, or CSV, drop them into the Mass Customer Import template, and upload the file.
Overview
You import customers from Company Settings > Customers > Import Customers. FieldPulse gives you a template to fill in, flags any errors or missing required fields when you verify the file, and imports the clean records. You can also bulk-import additional contacts and locations onto a customer record, and — on the FieldPulse mobile app — add customers straight from your phone’s contacts.Before you begin
- Have your existing customer data ready in a spreadsheet (Excel, Google Sheets, or CSV) so you can copy it into the template.
- If you don’t have Excel, use Google Sheets instead — see How to Self-Import Data With Google Sheets.
On web
Import your customer list
- Go to Company Settings, then select the Customers tab.
-
Select Import Customers, then select Download to download the Mass Customer Import template.
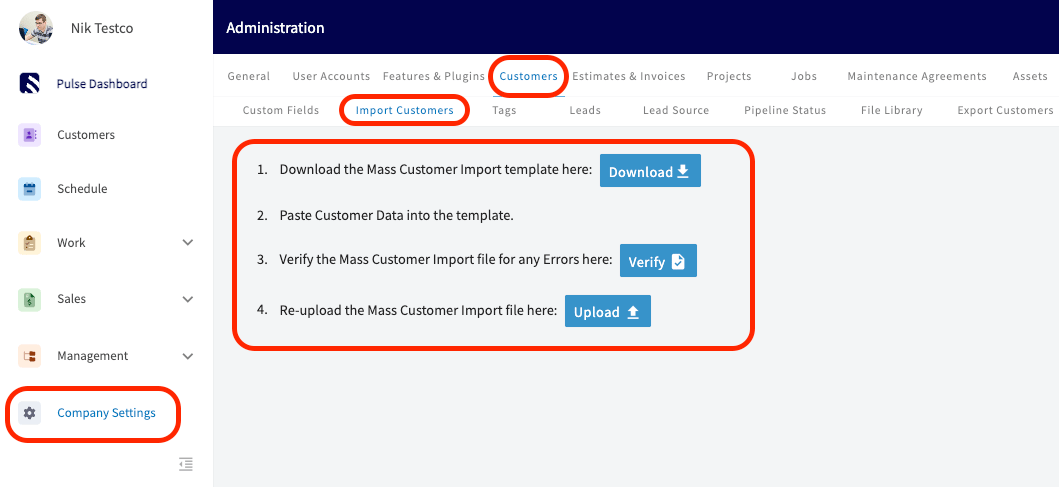
- Fill in the template with your customer data. Keep the column headers and structure exactly as they are so the importer can read your data — do not rearrange or rename columns.
-
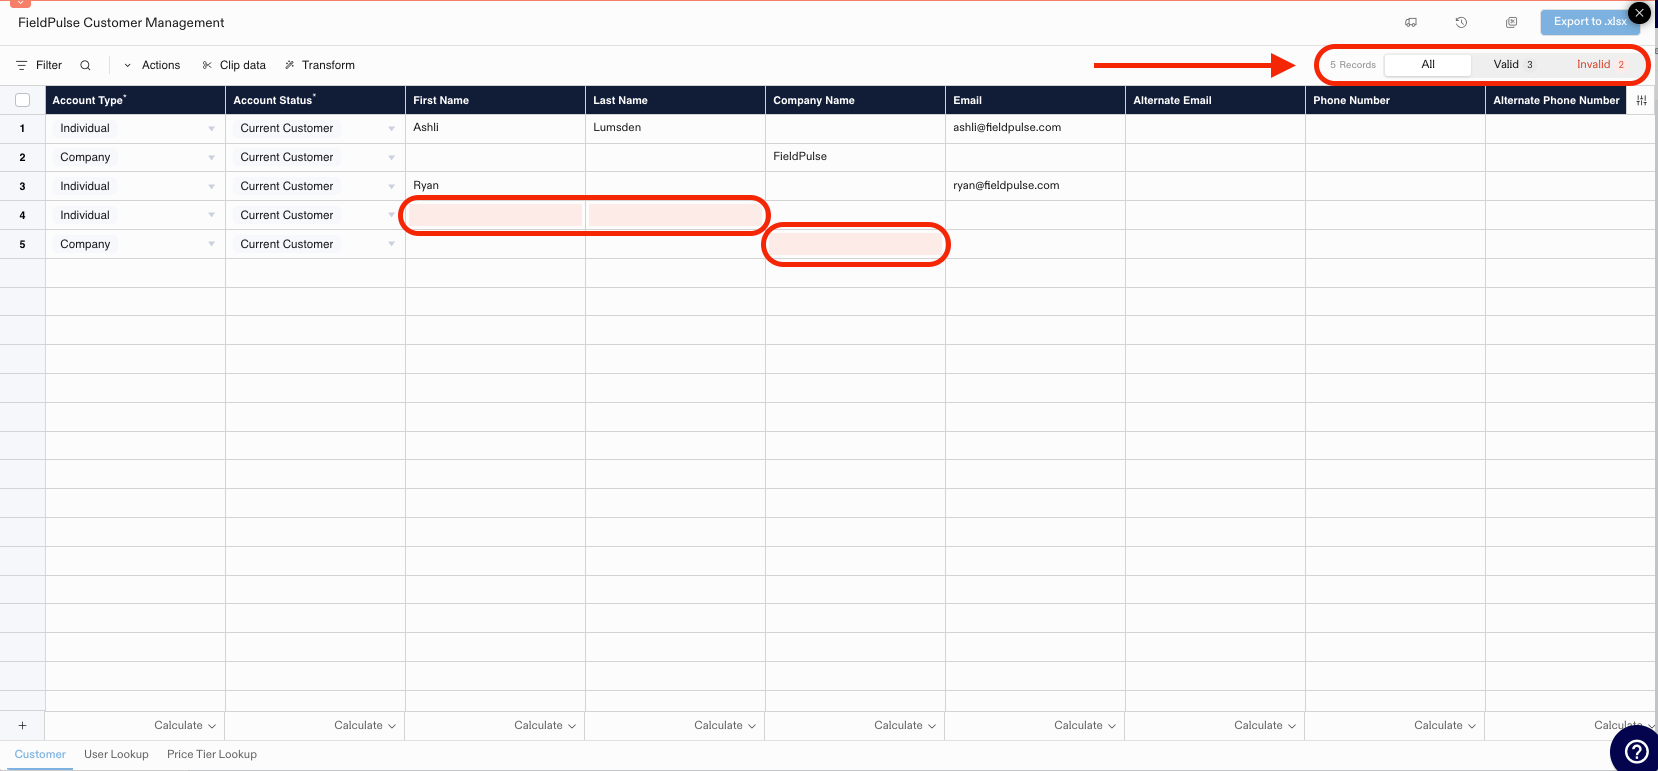
Select Verify. FieldPulse checks every record and flags any errors or missing required fields in red, with a running count of valid and invalid records in the top-right corner.
-
Fix the flagged fields until every record shows as Valid, then select Export to .xlsx.
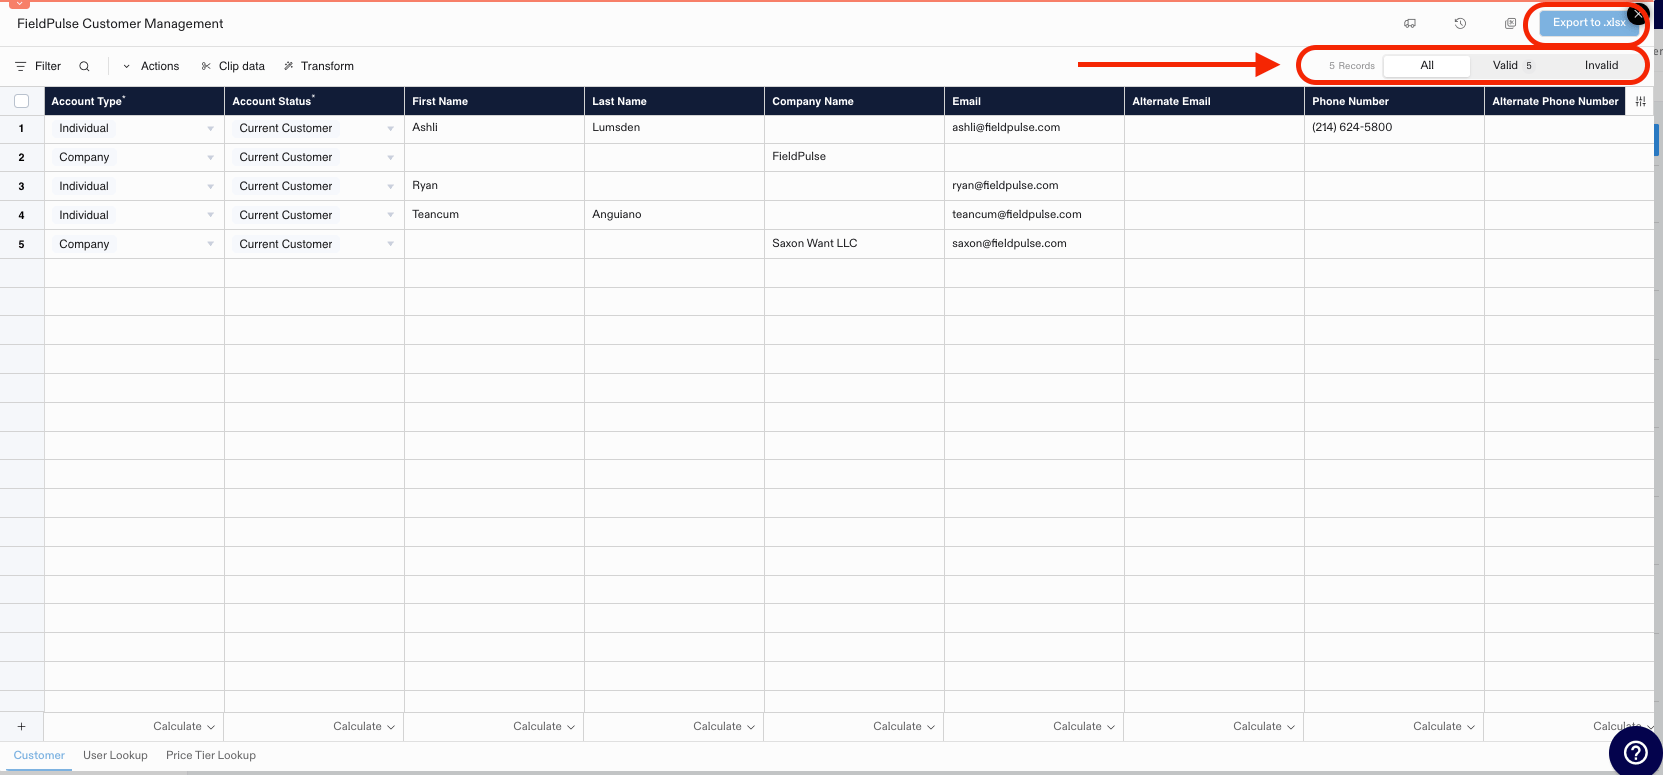
- Re-upload the verified file with the Upload button to finish the import.
Want to click through the process first? Open the interactive customer import demo to explore the customer import feature step by step.
Import additional contacts
You can bulk-import additional contacts directly onto a customer record.-
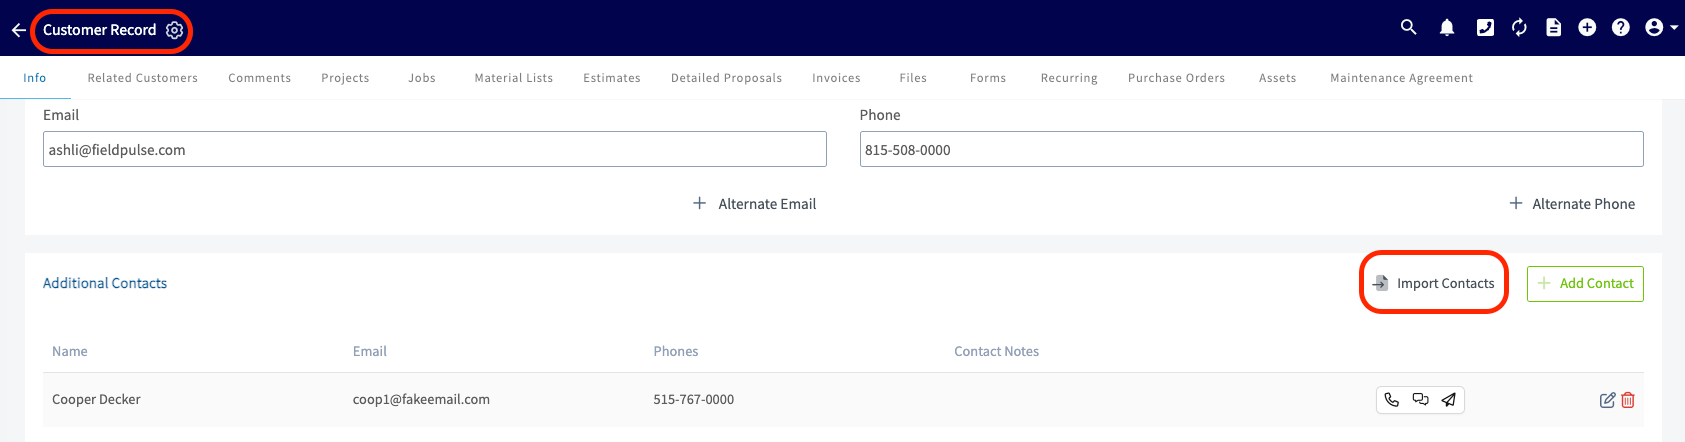
On the customer record, scroll to the Additional Contacts section and select Import Contacts.
-
In the Import Customer Contacts pop-up, select Download Template to download the contacts import template.

- Fill in the template without changing its structure. If you don’t have Excel, fill it in with Google Sheets — see How to Self-Import Data With Google Sheets.
- Select the blue Import button to upload the completed template.

Import additional locations
You can bulk-import additional locations onto a customer record the same way.-
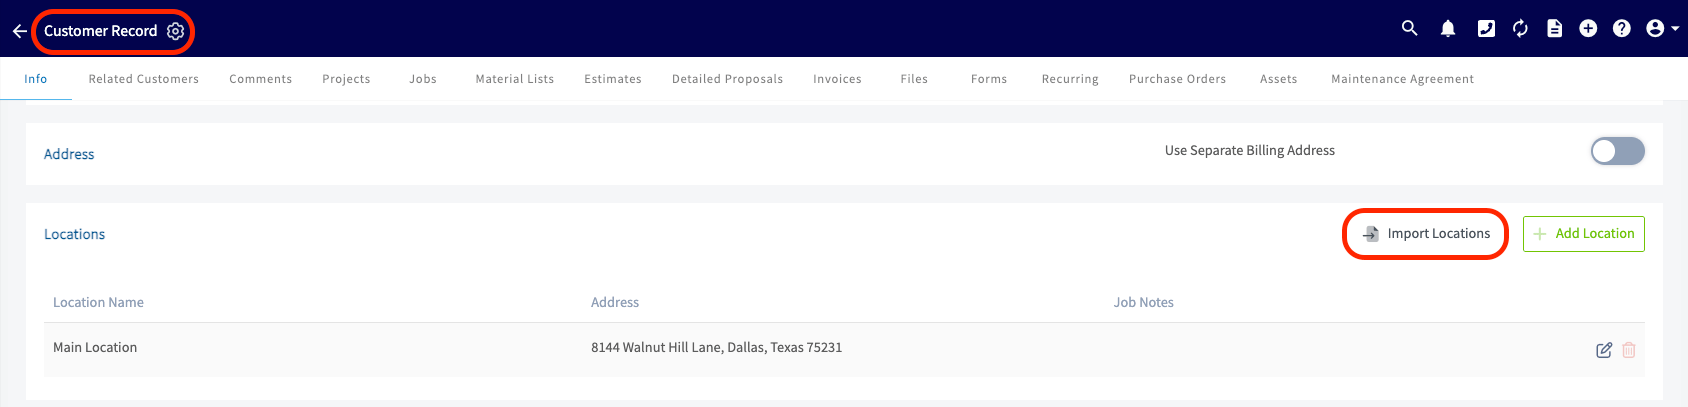
On the customer record, scroll to the Locations section and select Import Locations.
-
In the Import Customer Locations pop-up, select Download Template to download the locations import template.

- Fill in the template without changing its structure. If you don’t have Excel, fill it in with Google Sheets — see How to Self-Import Data With Google Sheets.
- Select the blue Import button to upload the completed template.

Bulk import contacts and locations across many customers
To add contacts or locations to many customers at once, import them from Company Settings instead of opening one customer record at a time.- Go to Company Settings, then select the Customers tab.
- Select Import Customers, then scroll to the Customer Contacts or Customer Locations import block.
- Select Download to download the import template.
- Fill in the template. Keep its structure exactly as it is.
- In each row, enter either the Existing Customer ID or the Existing Customer Email so FieldPulse knows which customer the contact or location belongs to. You only need one of the two.
-
Upload your completed file into step 3 on the import screen, then select Verify. FieldPulse checks each row and flags:
- Blank or missing required fields
- Invalid characters or symbols
- Duplicate entries within the file
- An Existing Customer ID or Email that doesn’t match a customer in your account
- Correct any flagged rows, then download the corrected file.
- Upload the corrected file into step 4 on the import screen, then select Import. FieldPulse adds each row as a contact or location on its matching customer.
On mobile
Import from phone contacts
On the FieldPulse mobile app, you can add customers straight from your phone’s contacts:-
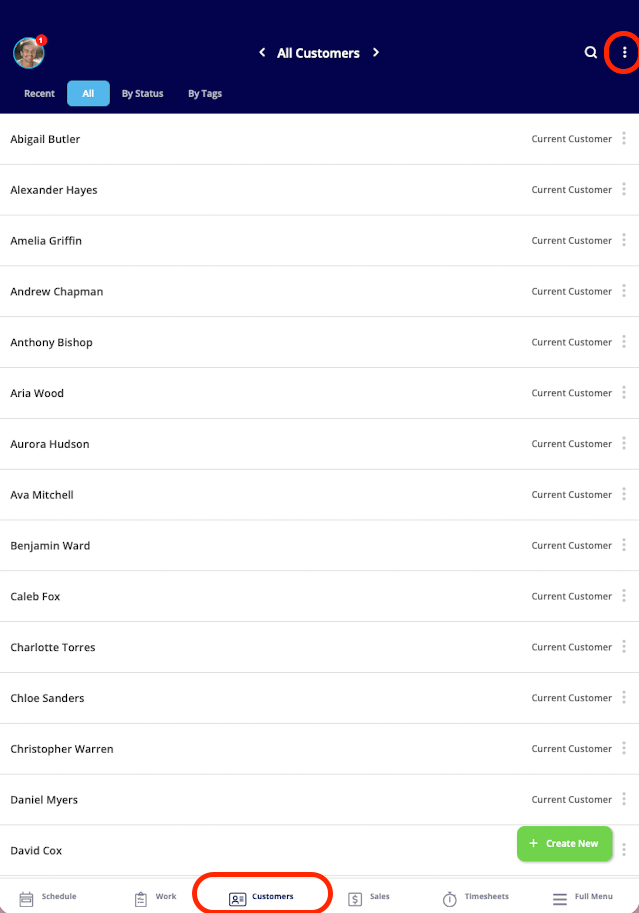
Open the Customer List and tap the three dots in the top-right corner.
-
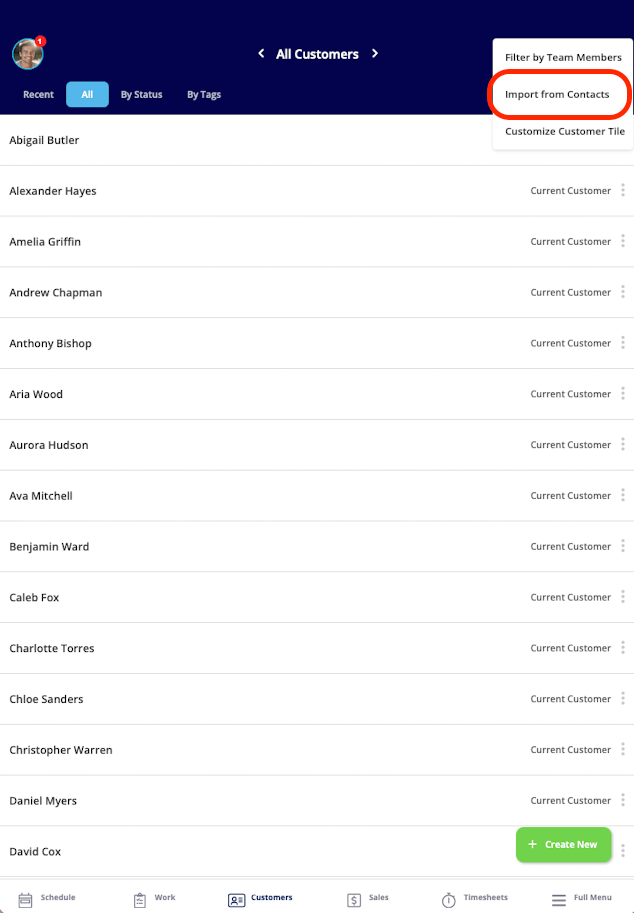
Select Import from Contacts.
-
Use the search bar to find contacts by name.
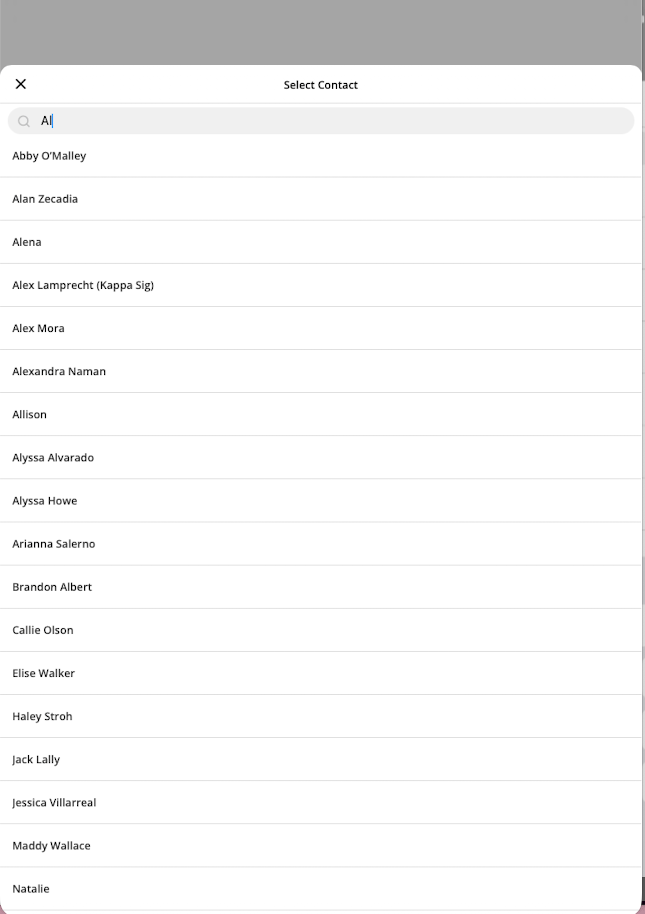
- Select the contacts you want to bring into FieldPulse — they appear in your Customer List.