Overview
Invoices capture line times, materials, and labor and give your customer a clear bill they can pay online or in person. The fastest way to create one is by converting an accepted estimate, but you can also build an invoice from scratch on web or mobile, finalize it, and start collecting payment.On Web: Admin Experience
Converting an Estimate to an Invoice
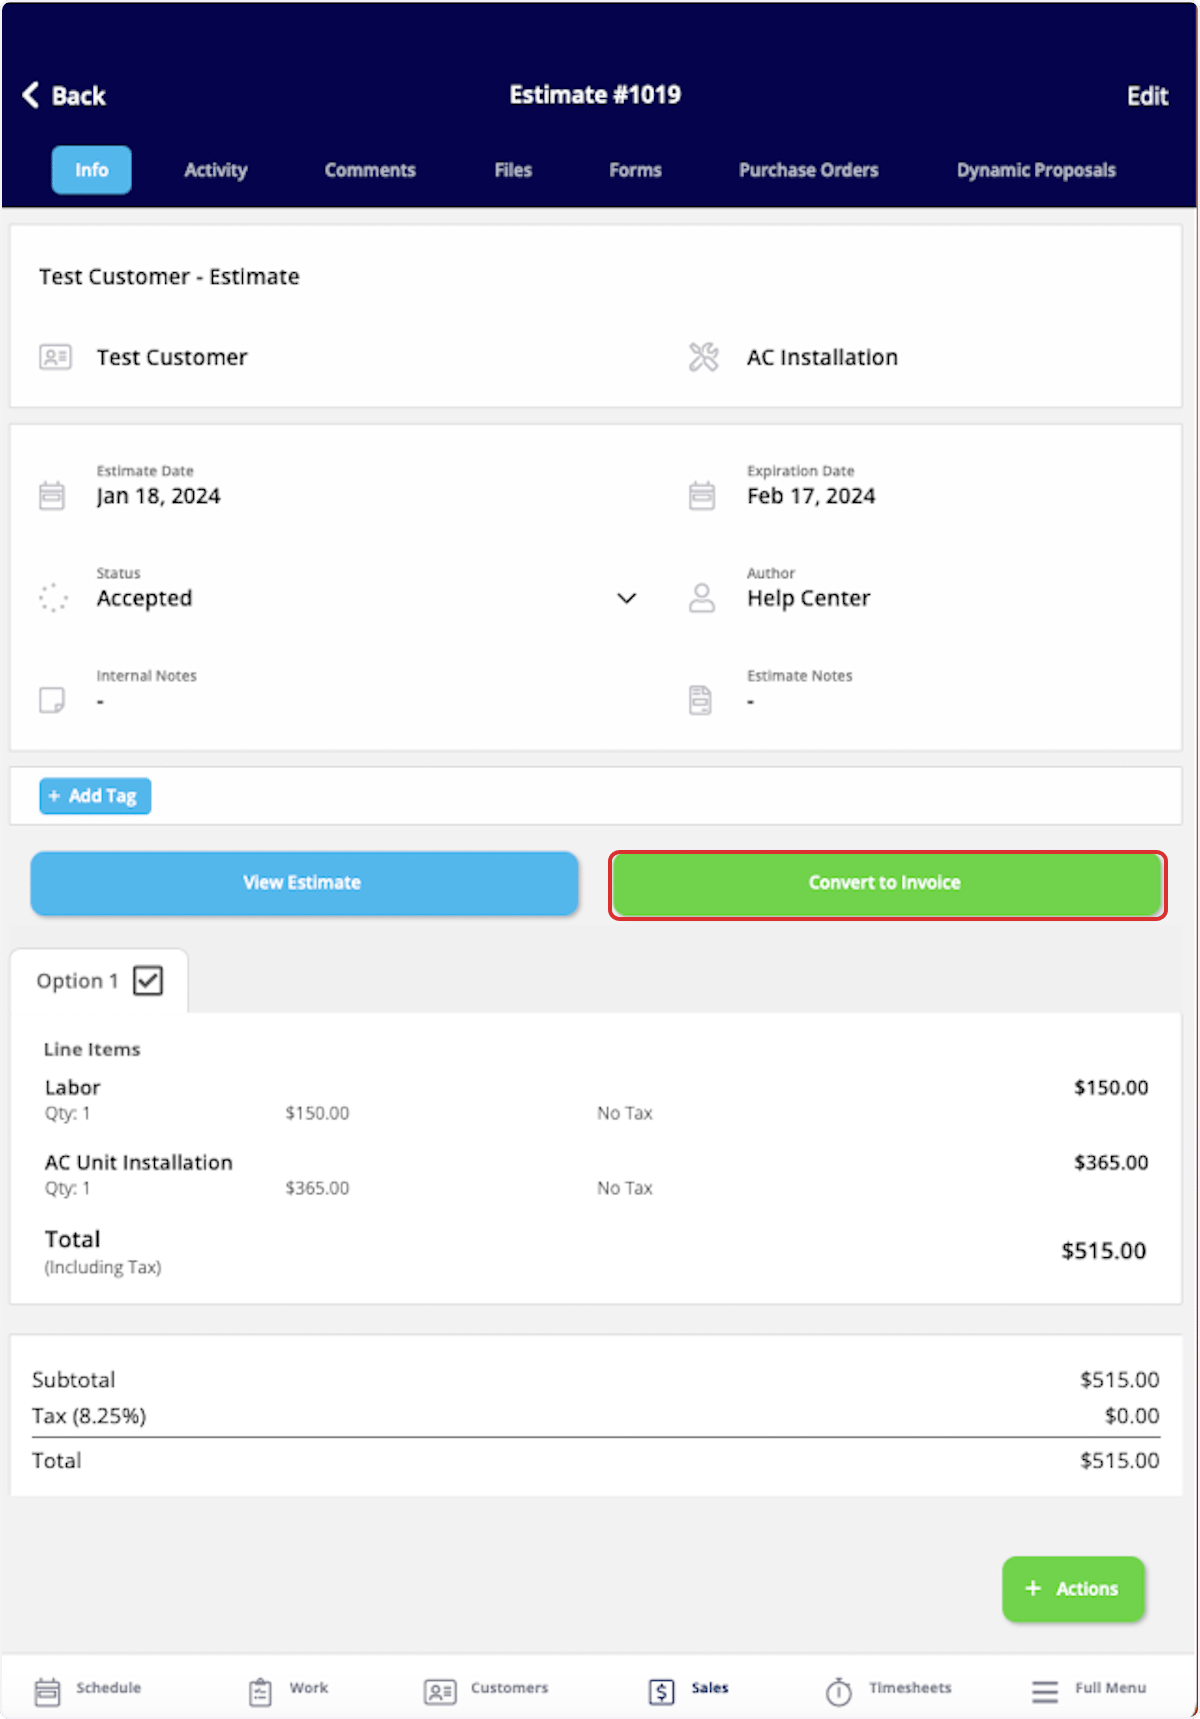
The most efficient method to create an invoice is to convert an existing estimate into an invoice. This will transfer all the customer/job information, as well as all of the line items. To begin, open the estimate record you’d like to convert, then select Convert to Invoice.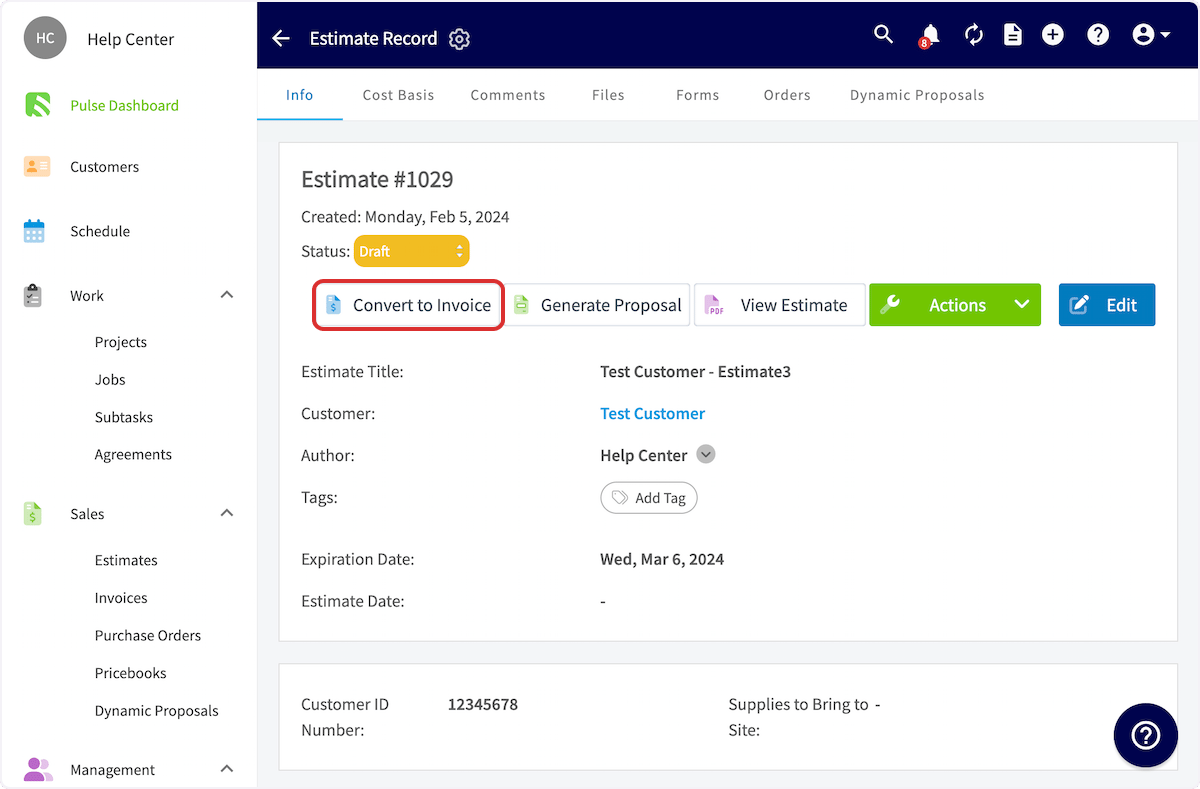
Creating an Invoice
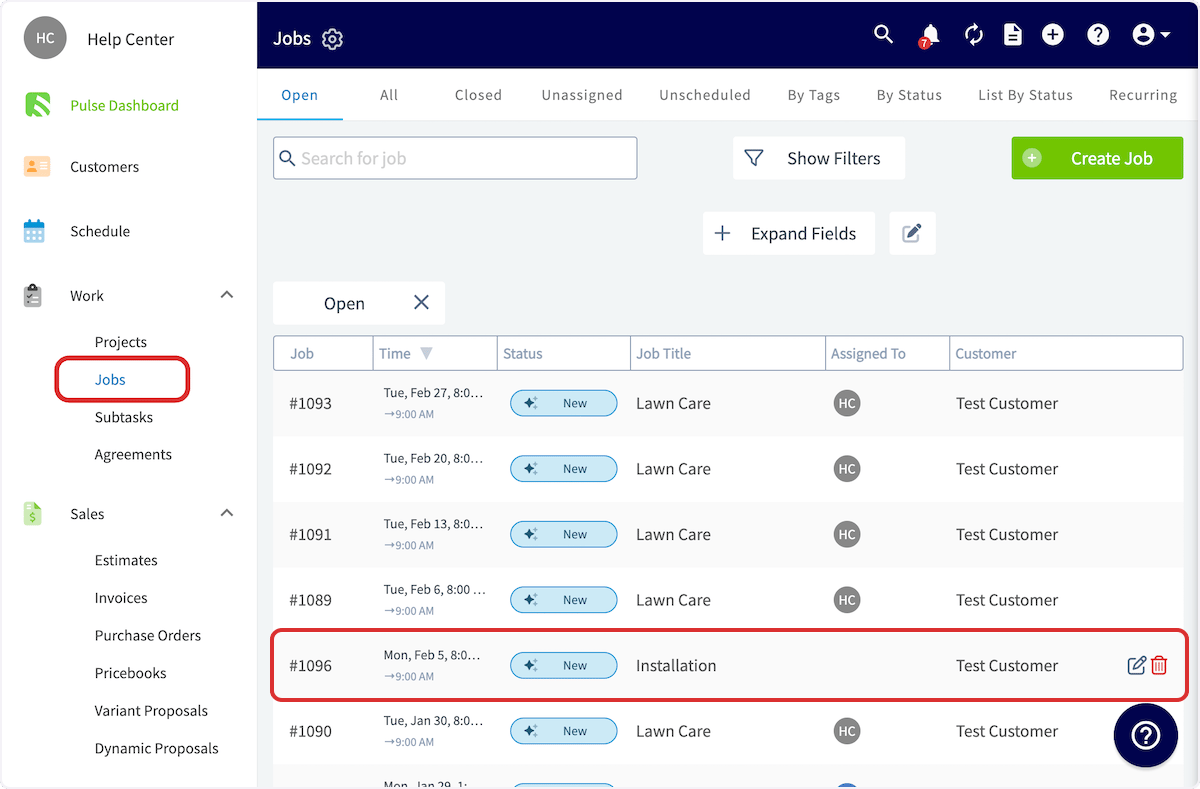
To begin, open the Job Record for which you want to create an invoice. You can do so from the Schedule or Jobs tab in the left-side menu.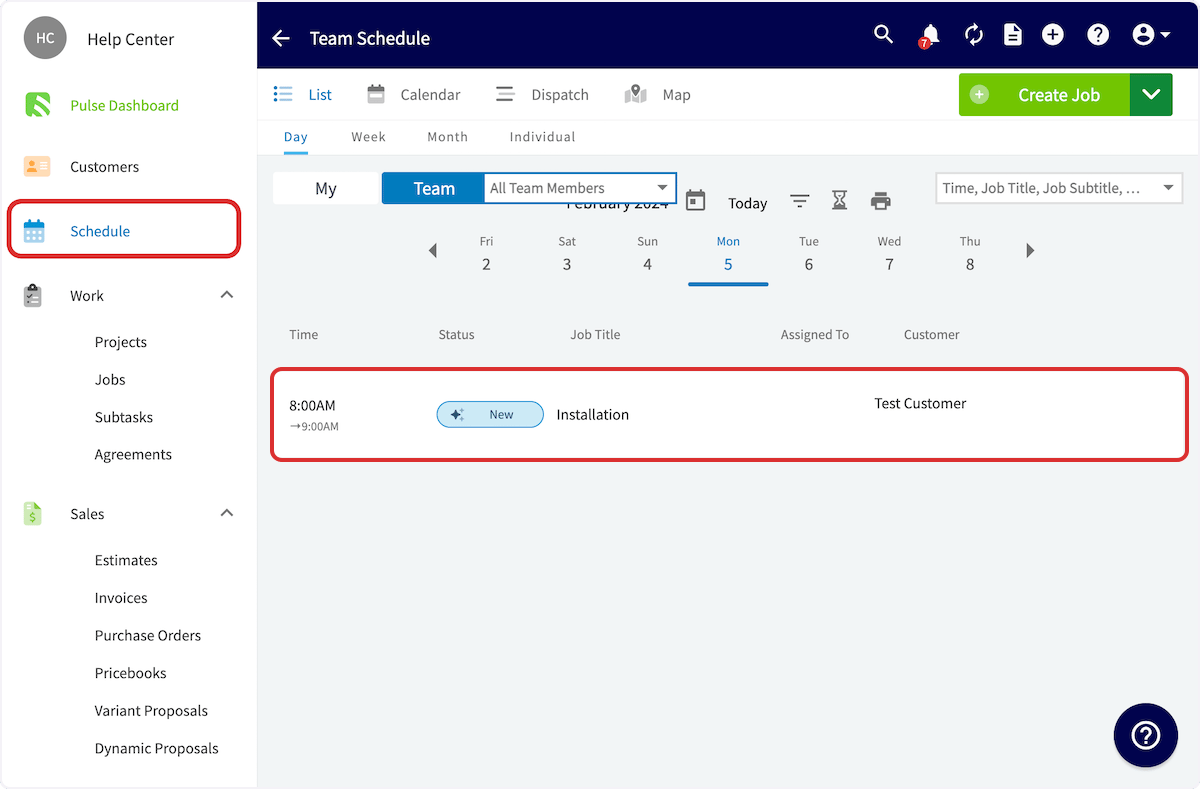


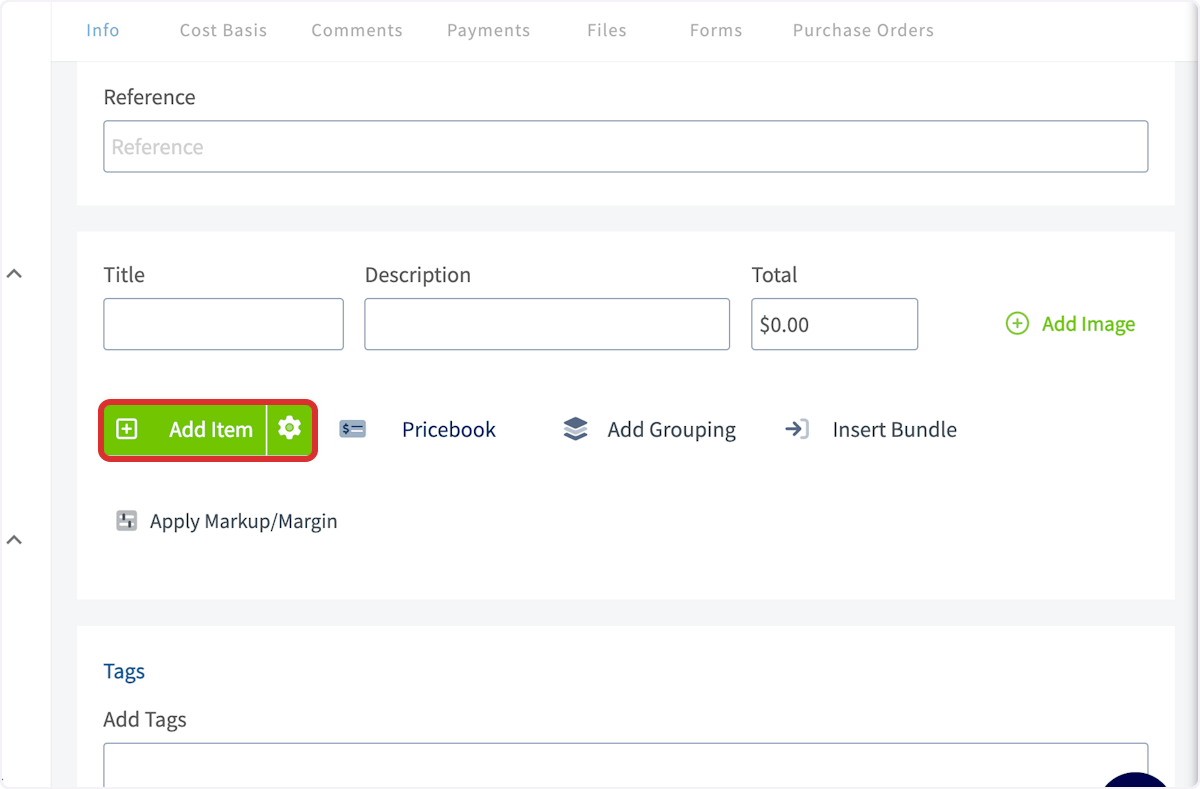
Completing an Invoice
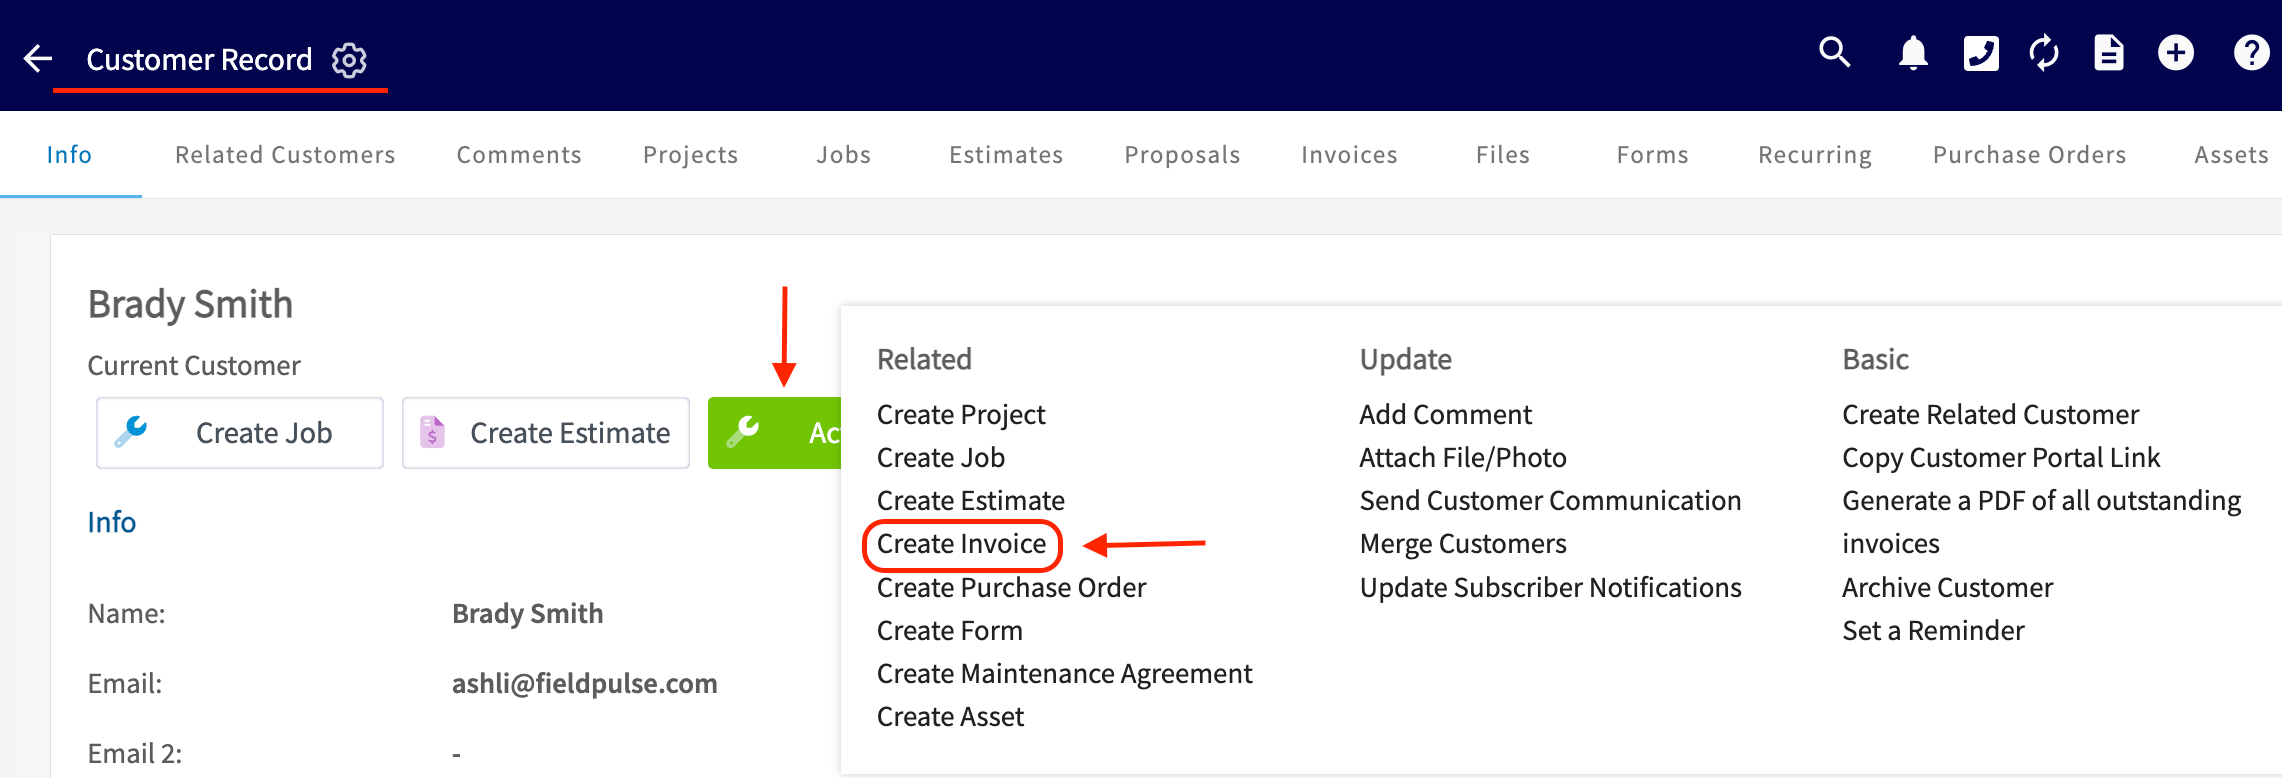
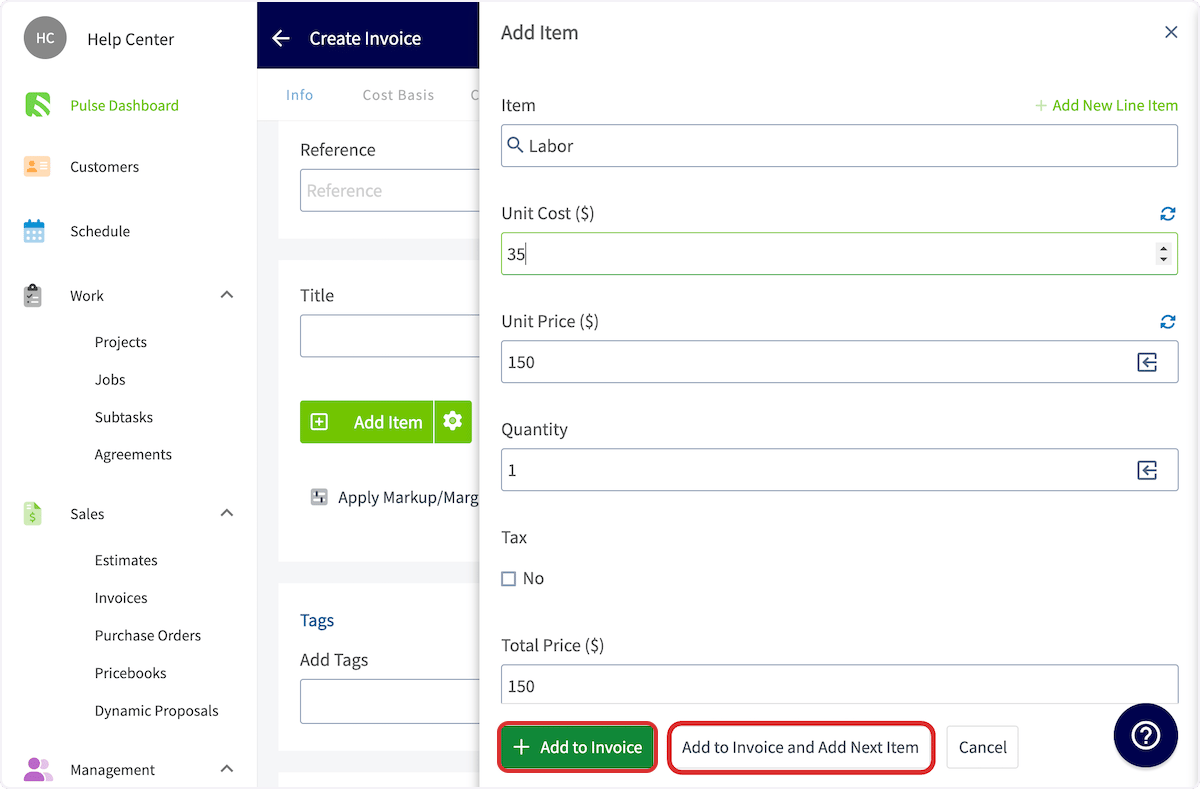
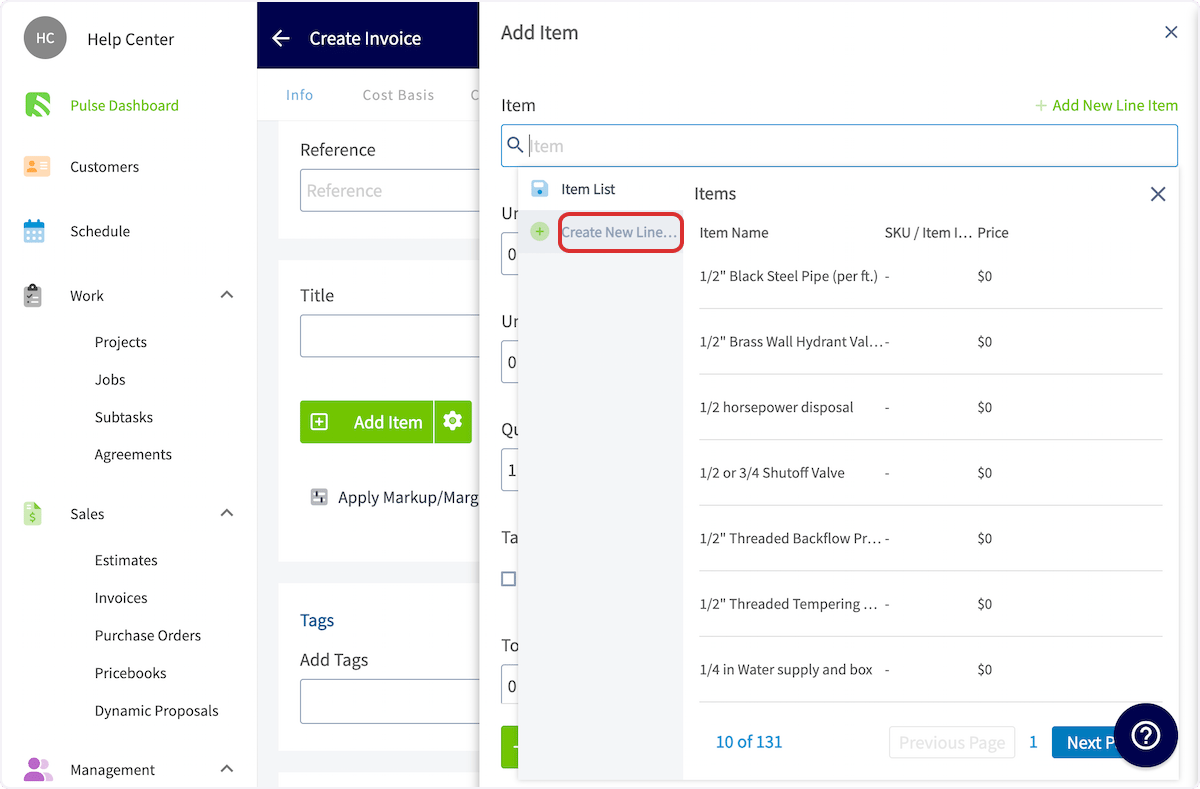
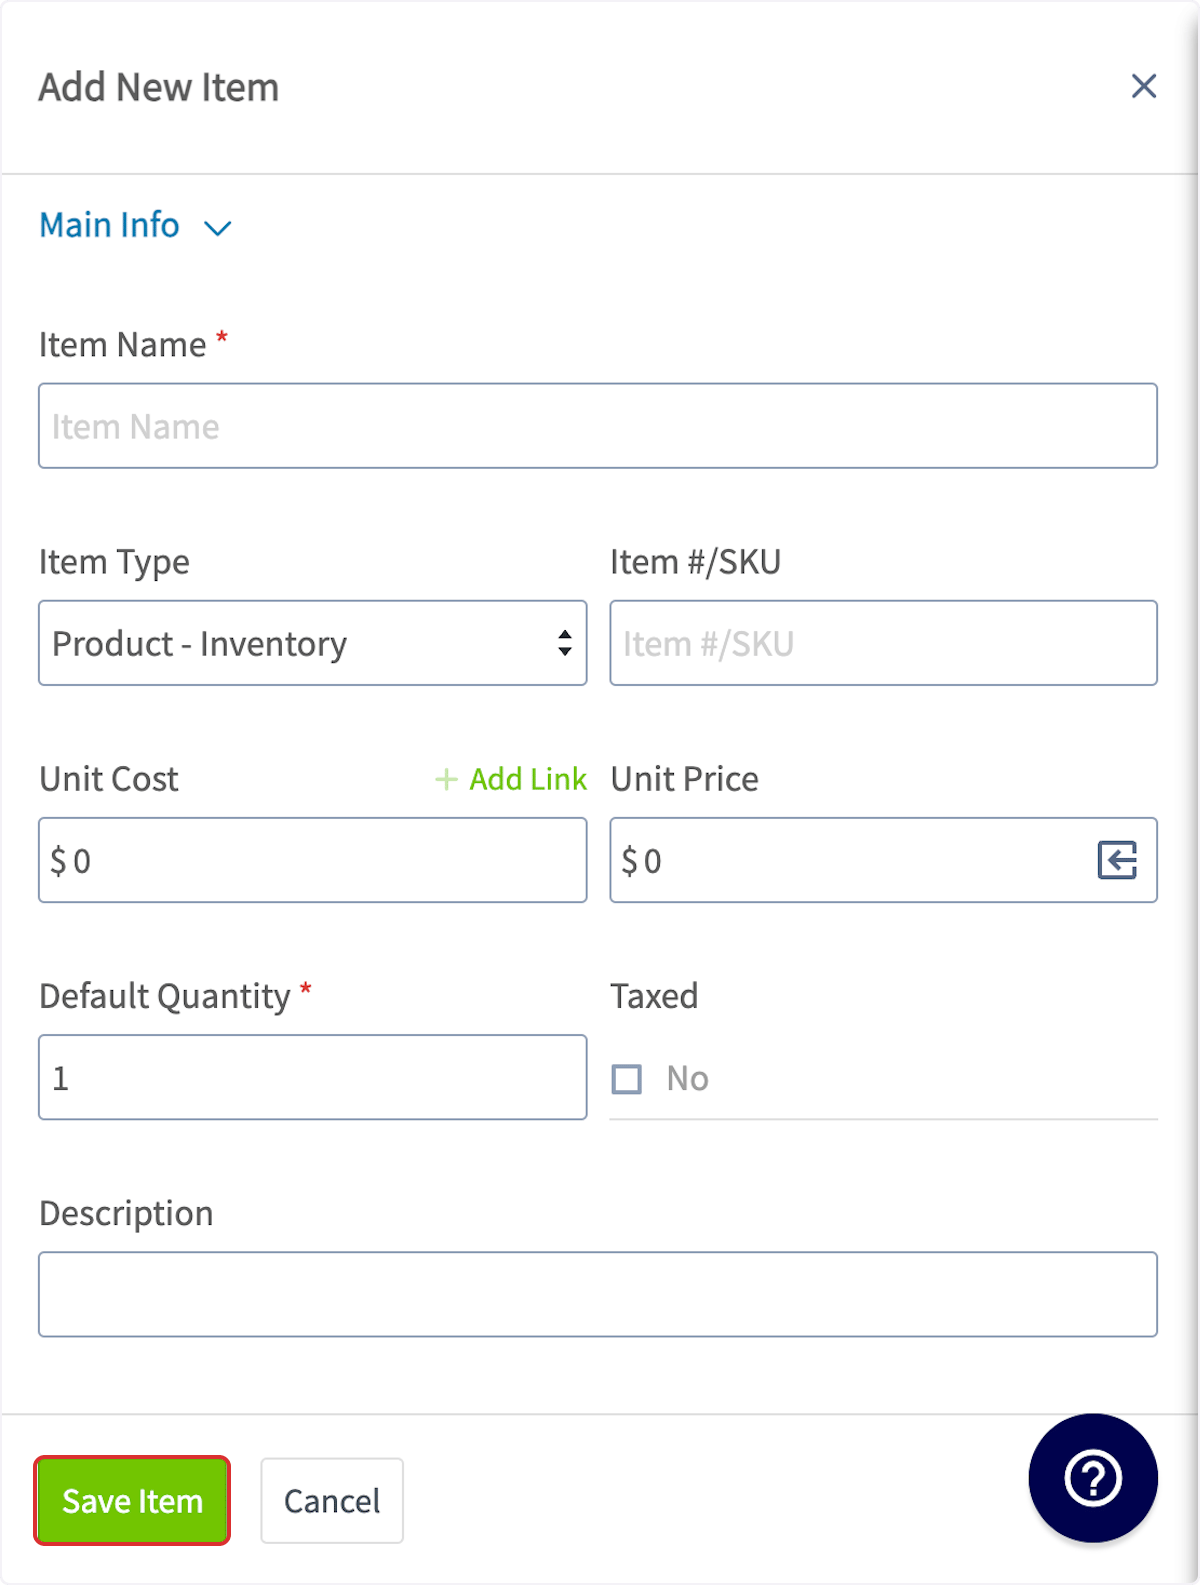
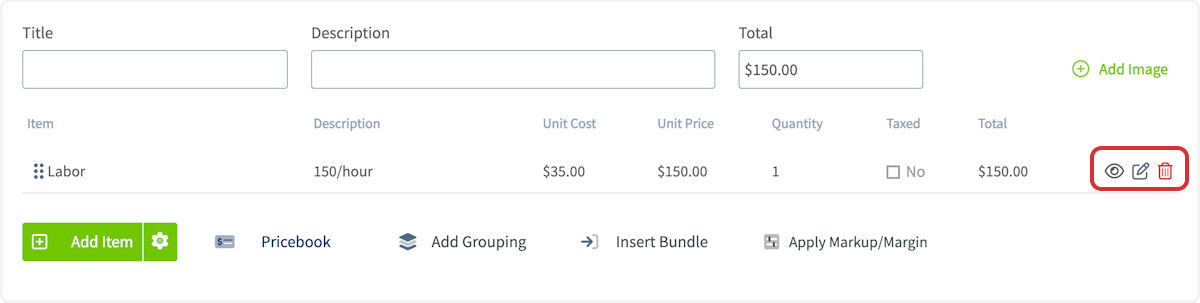
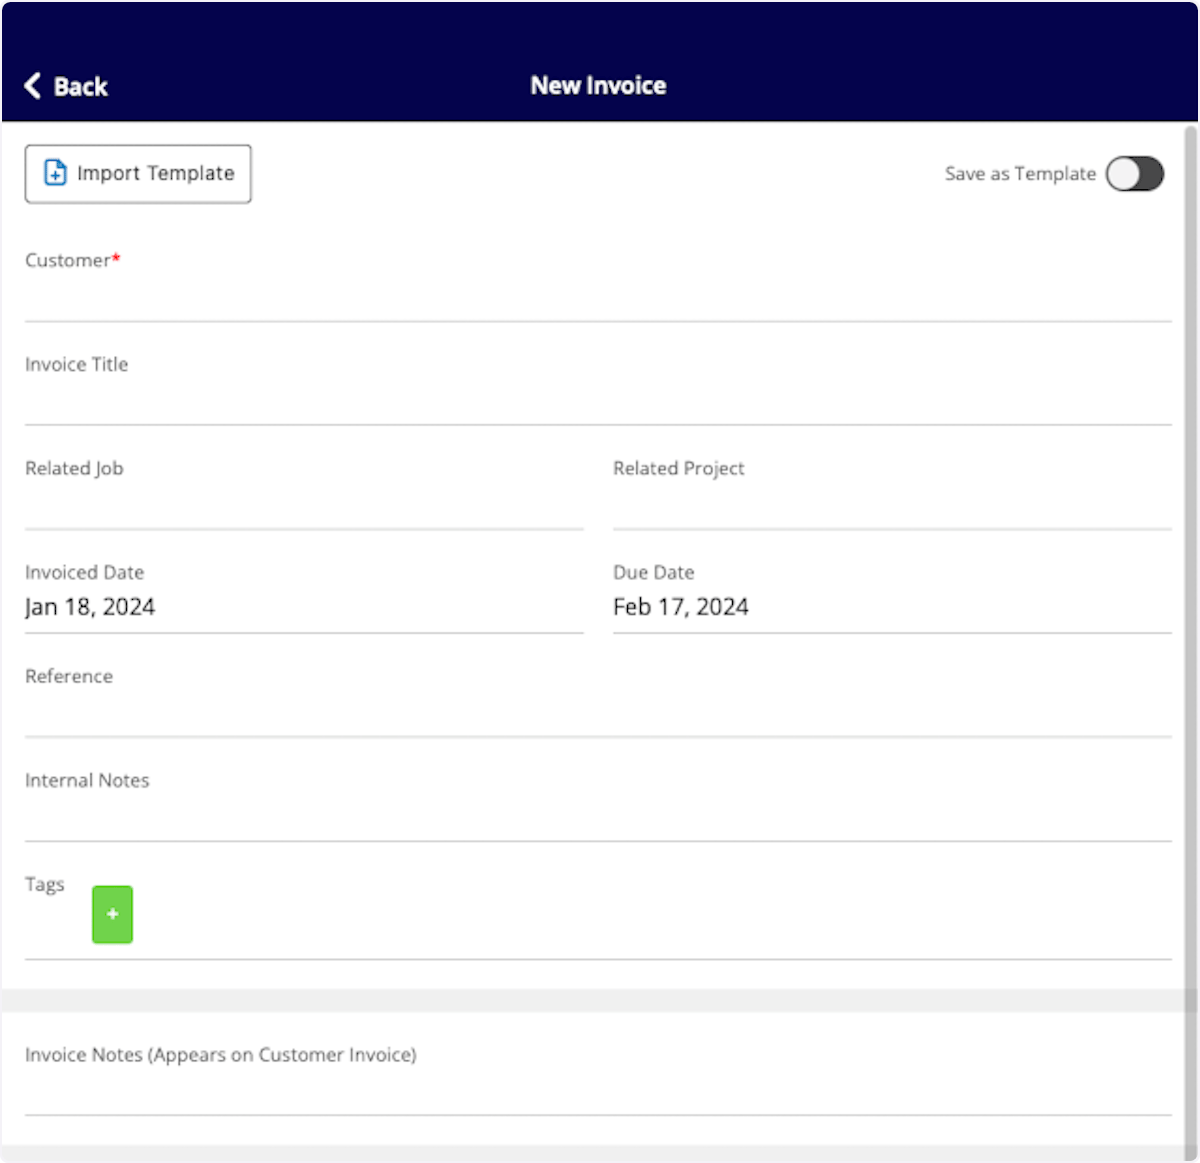
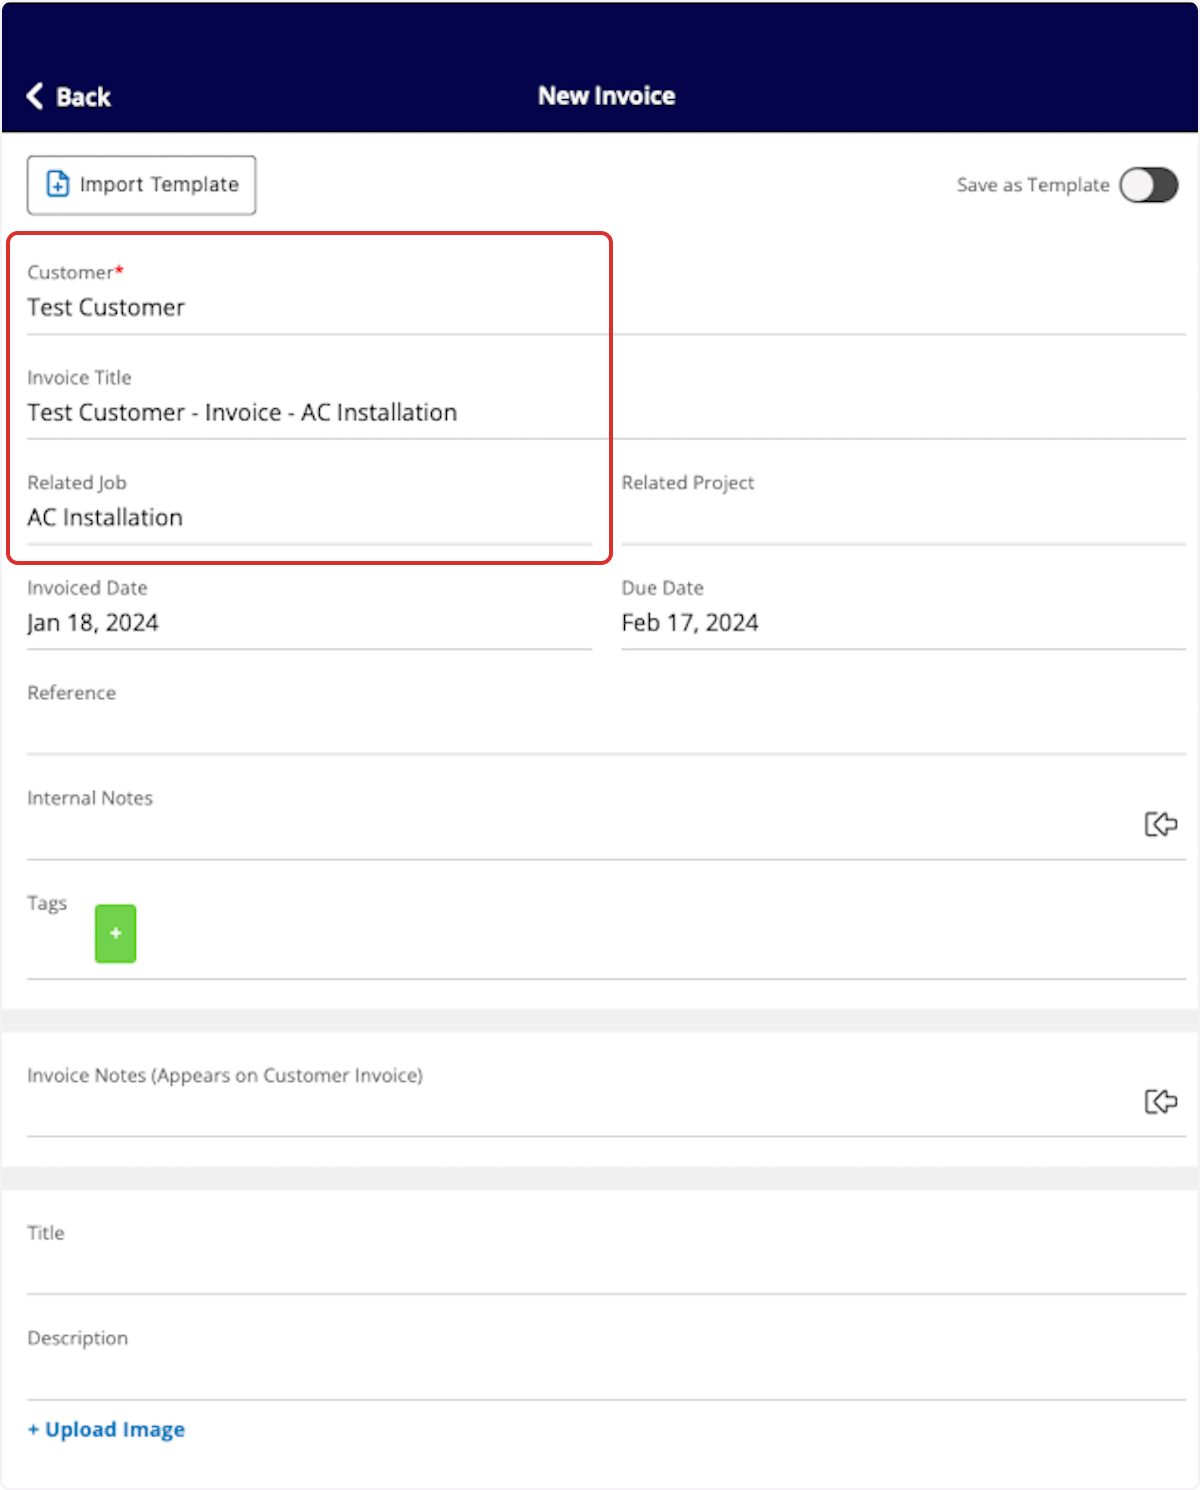
You will now add details to your invoice. If created via a job record, the customer and linked job will be auto-populated. If created from a customer record or the Invoices tab, you may need to link the related customer and/or job.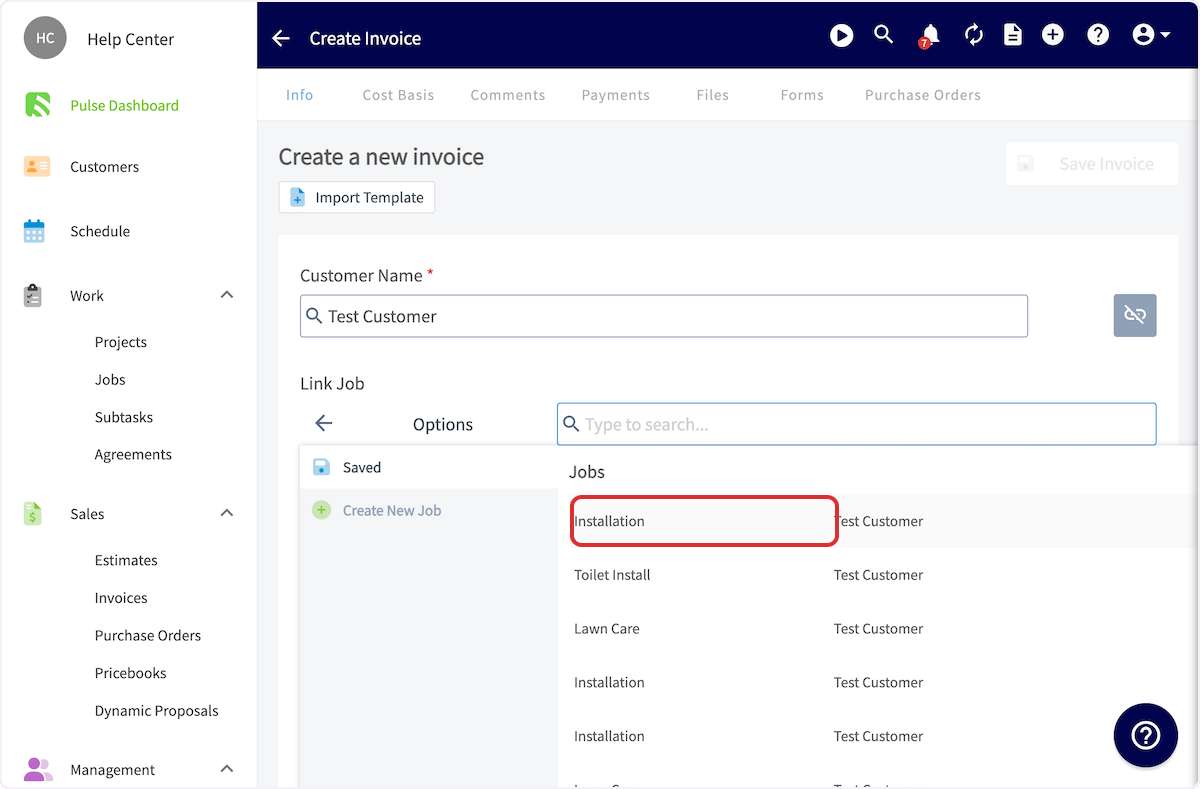
Final Details
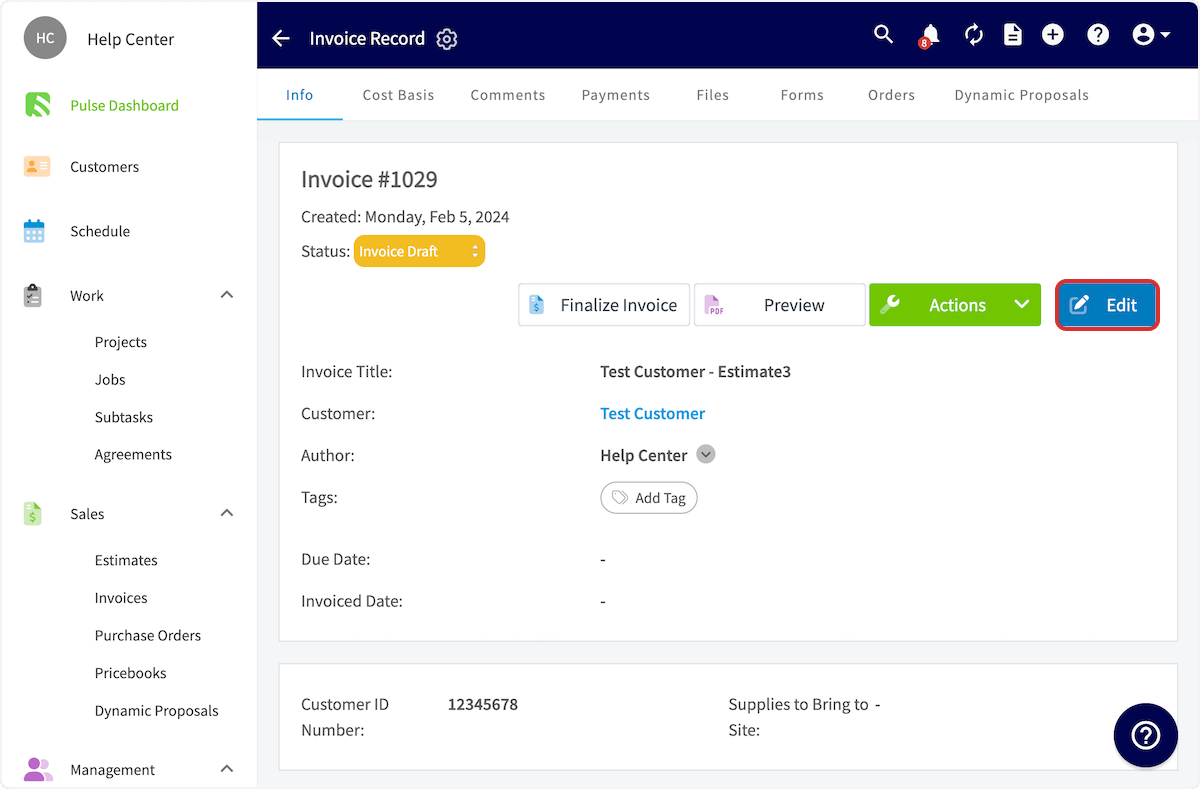
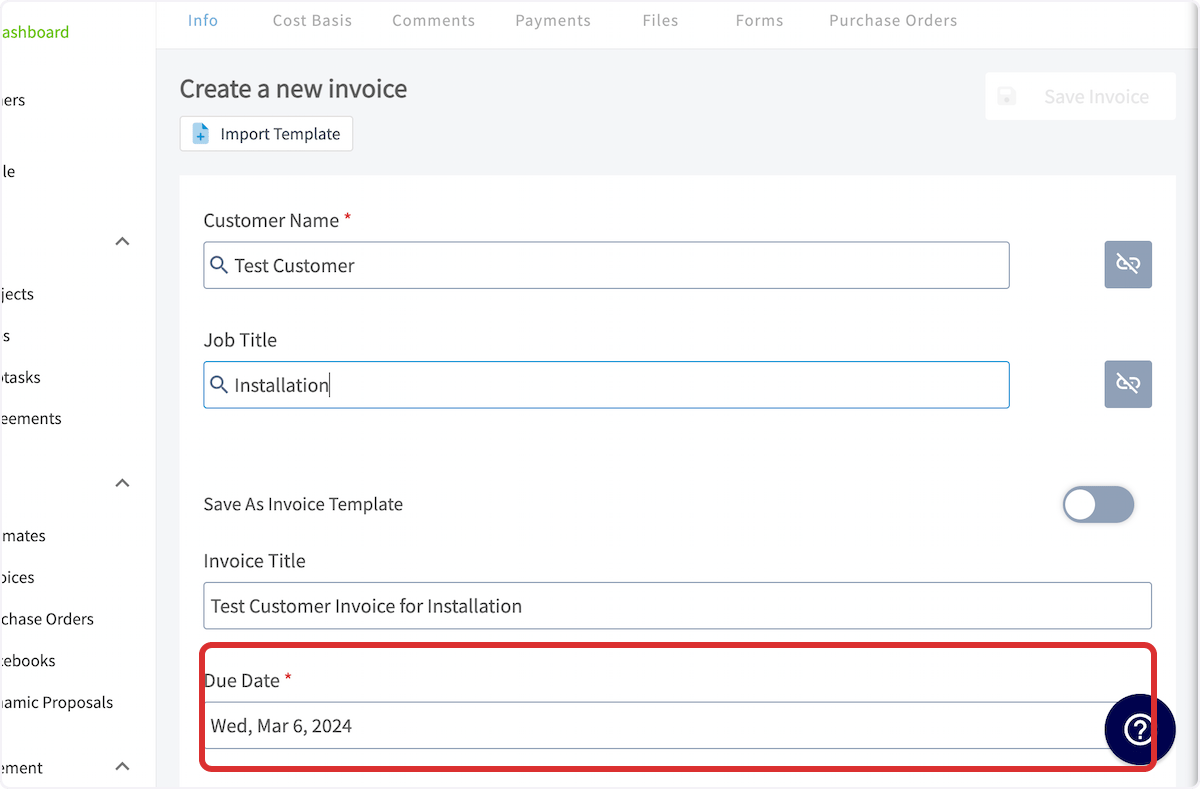
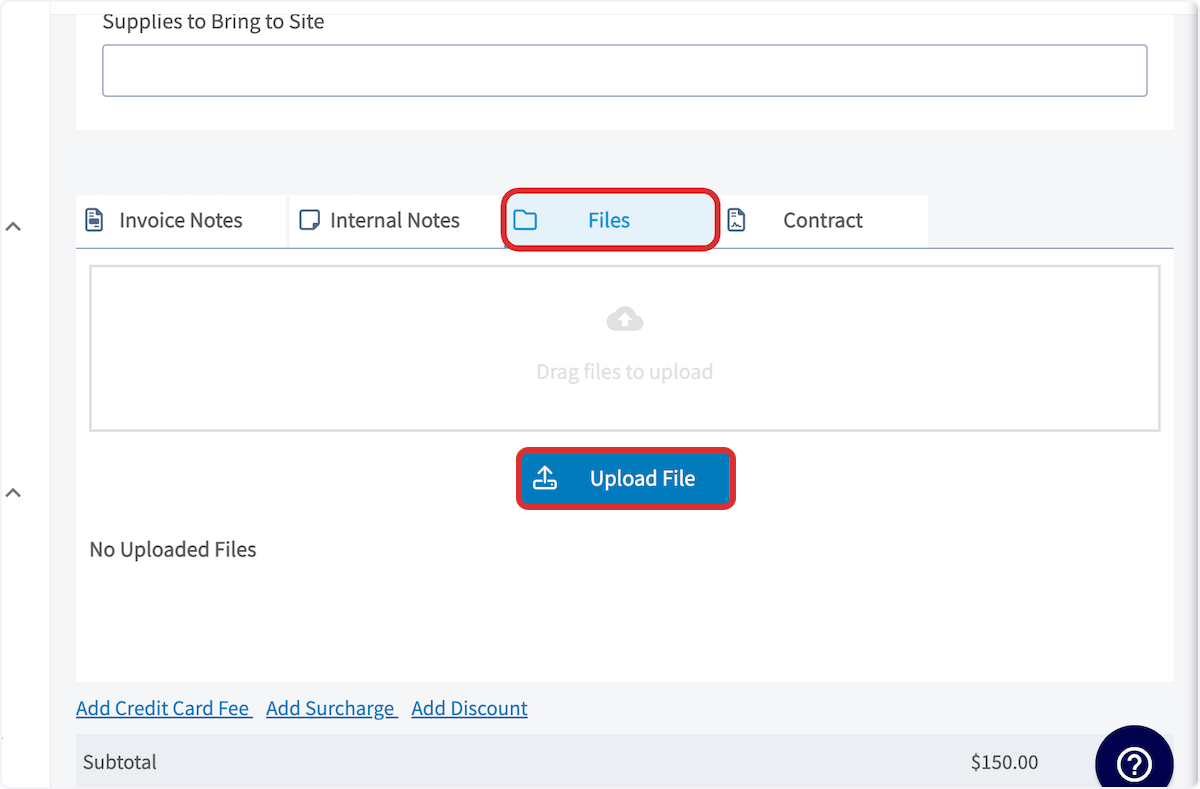
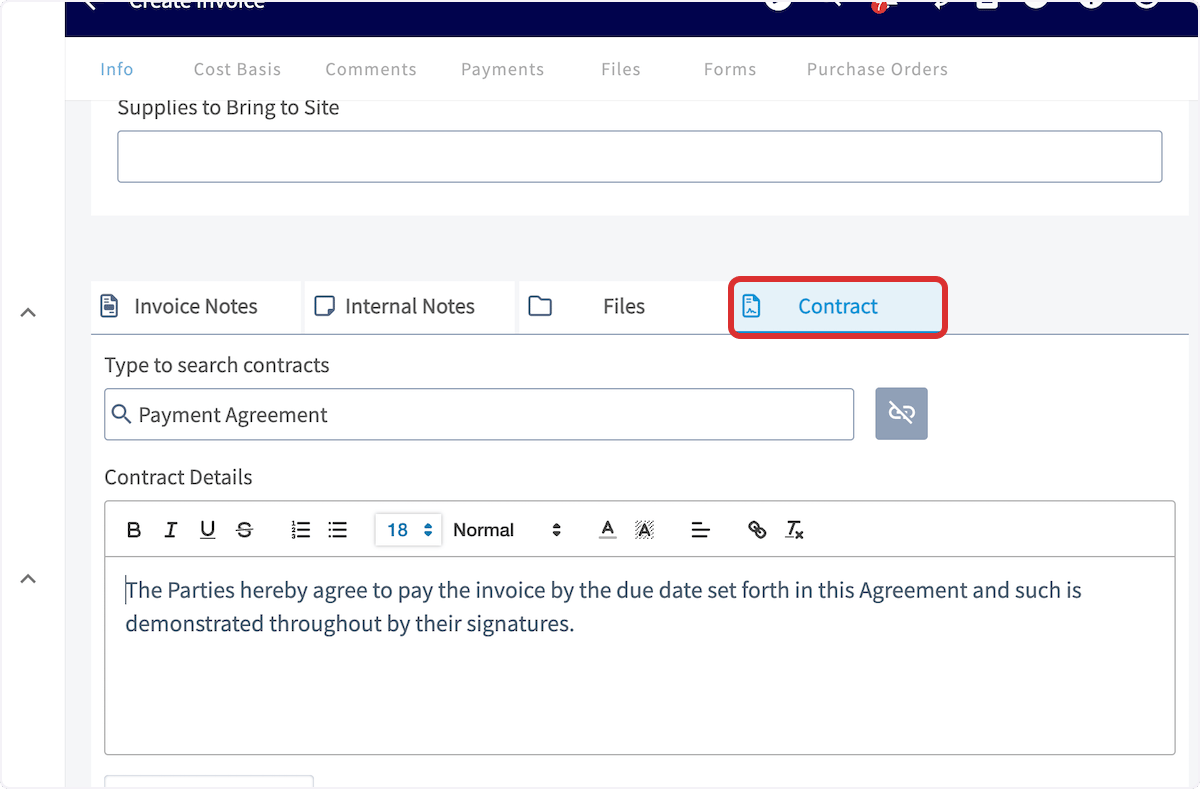
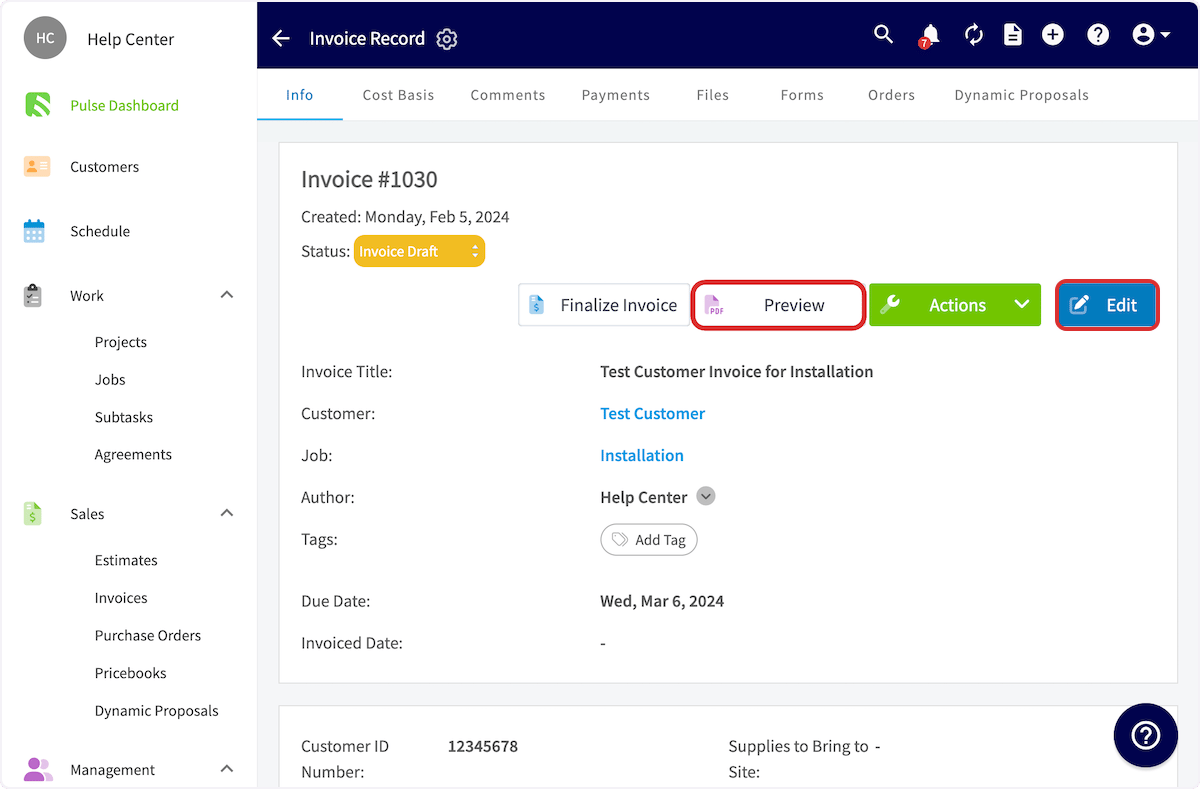
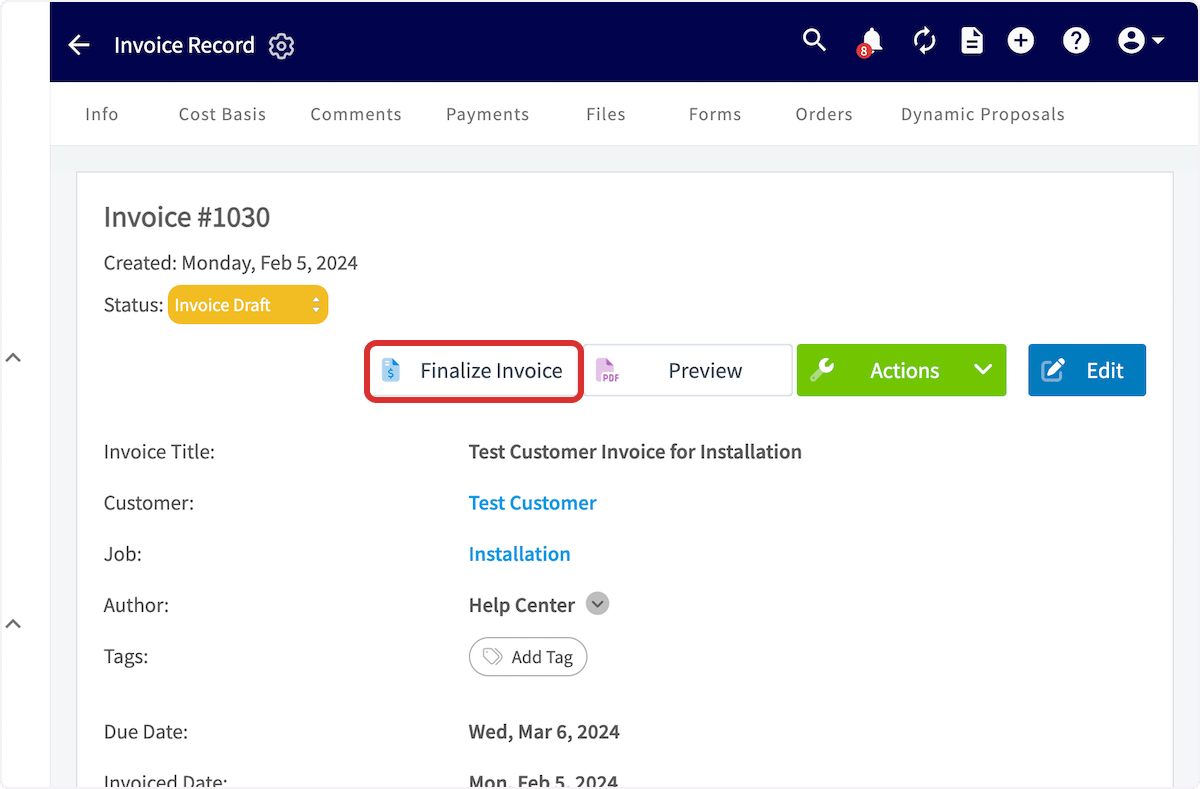
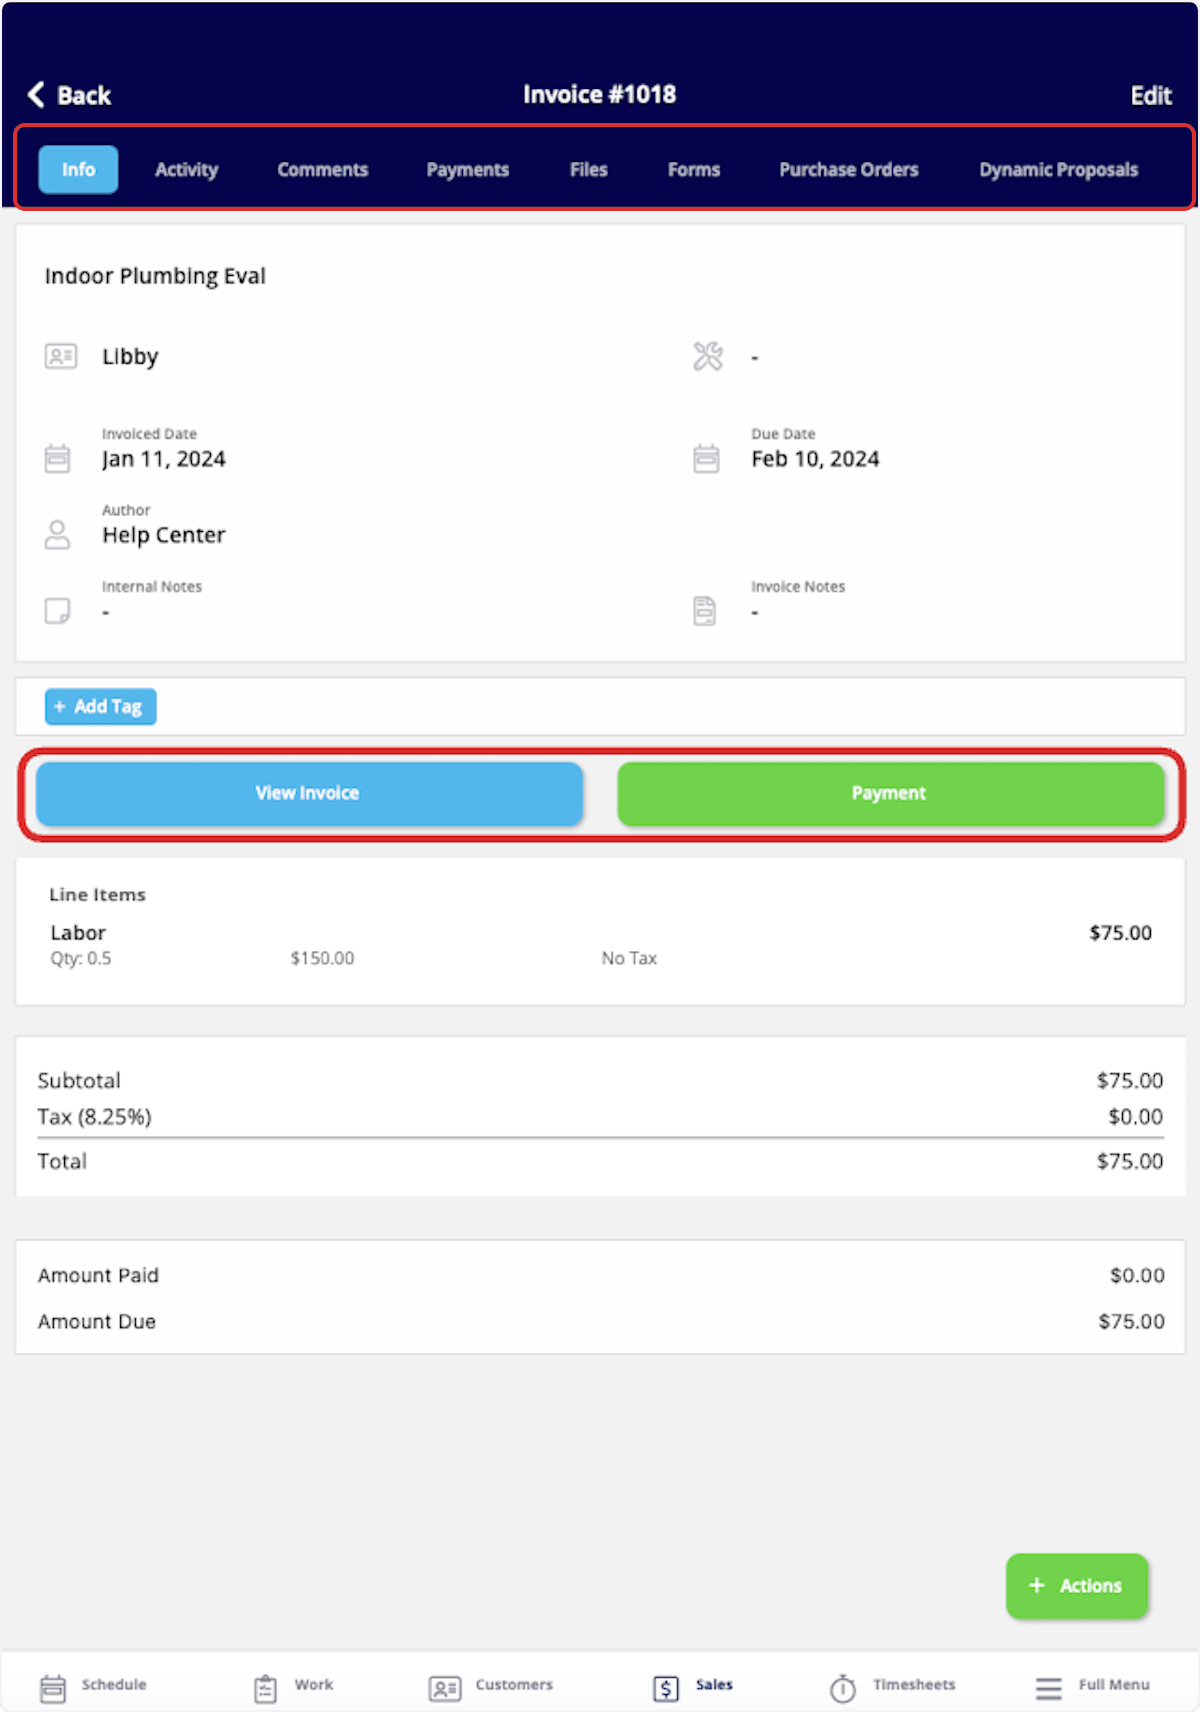
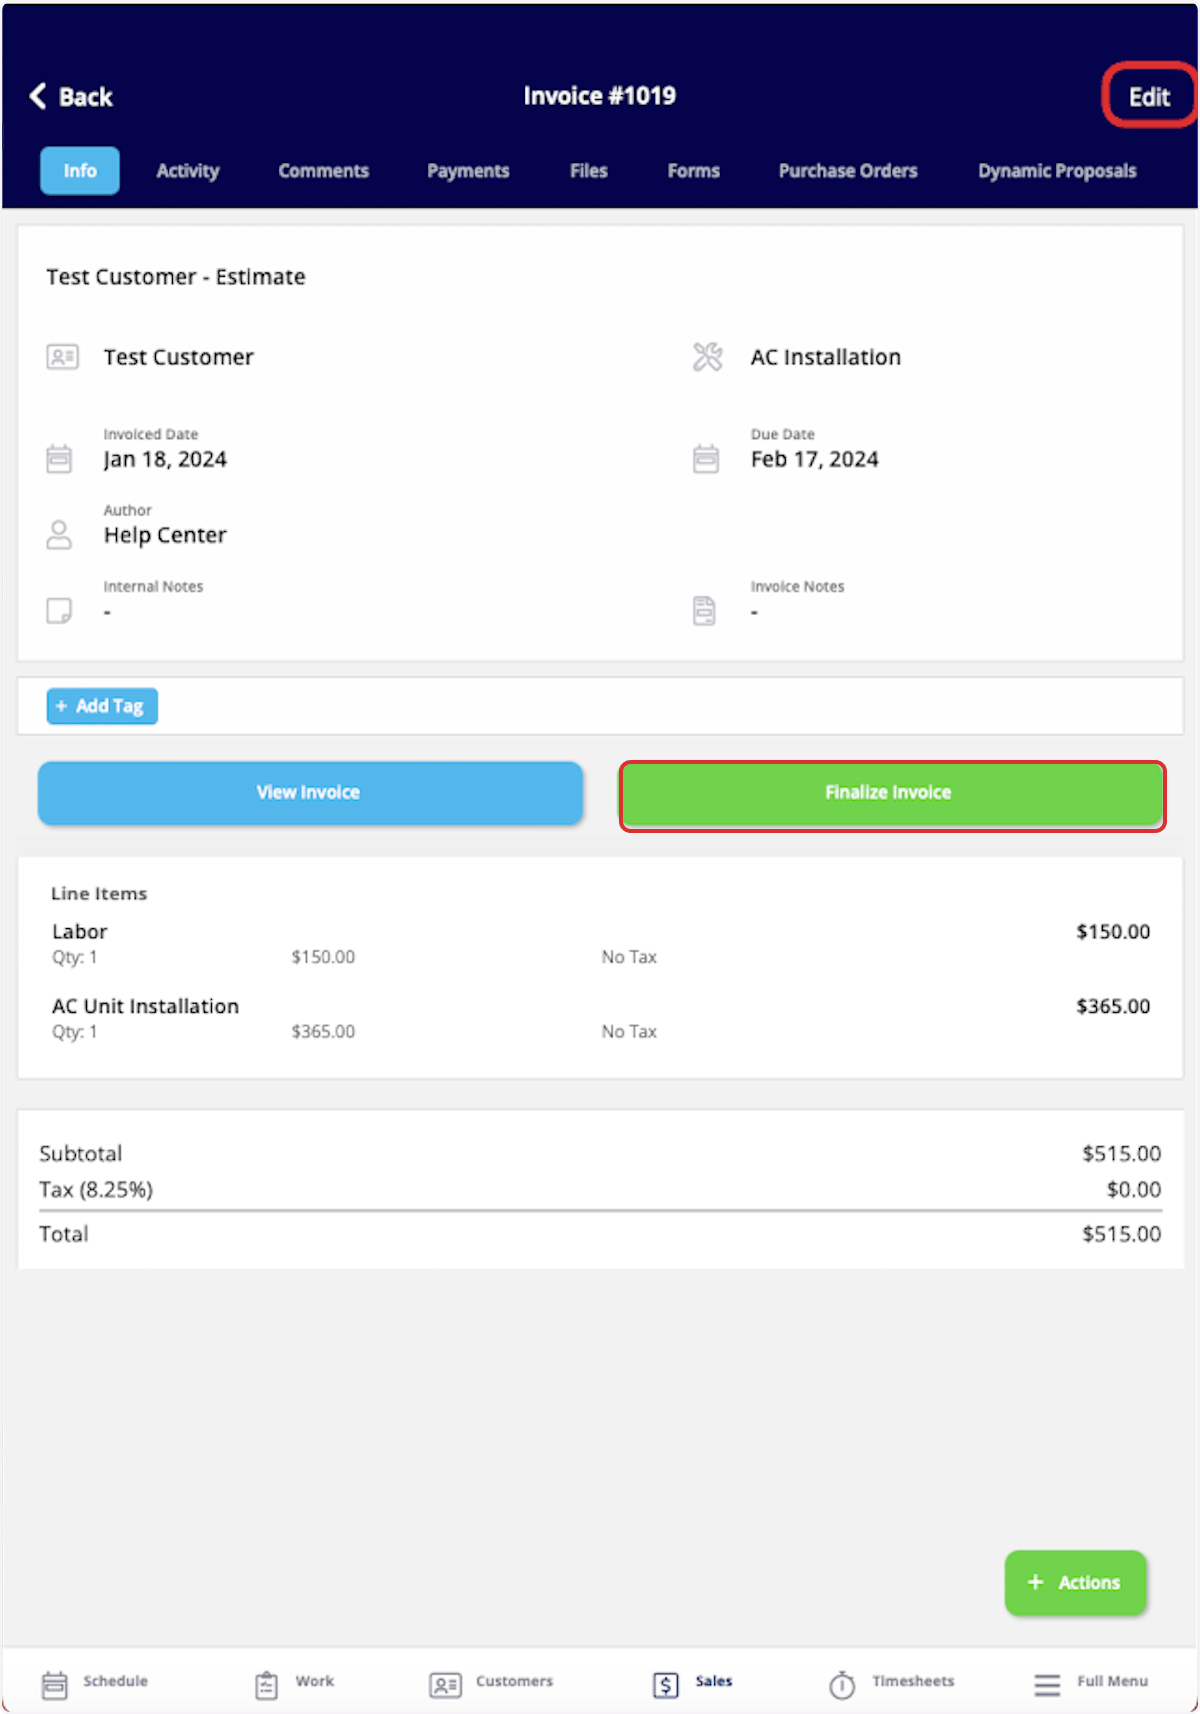
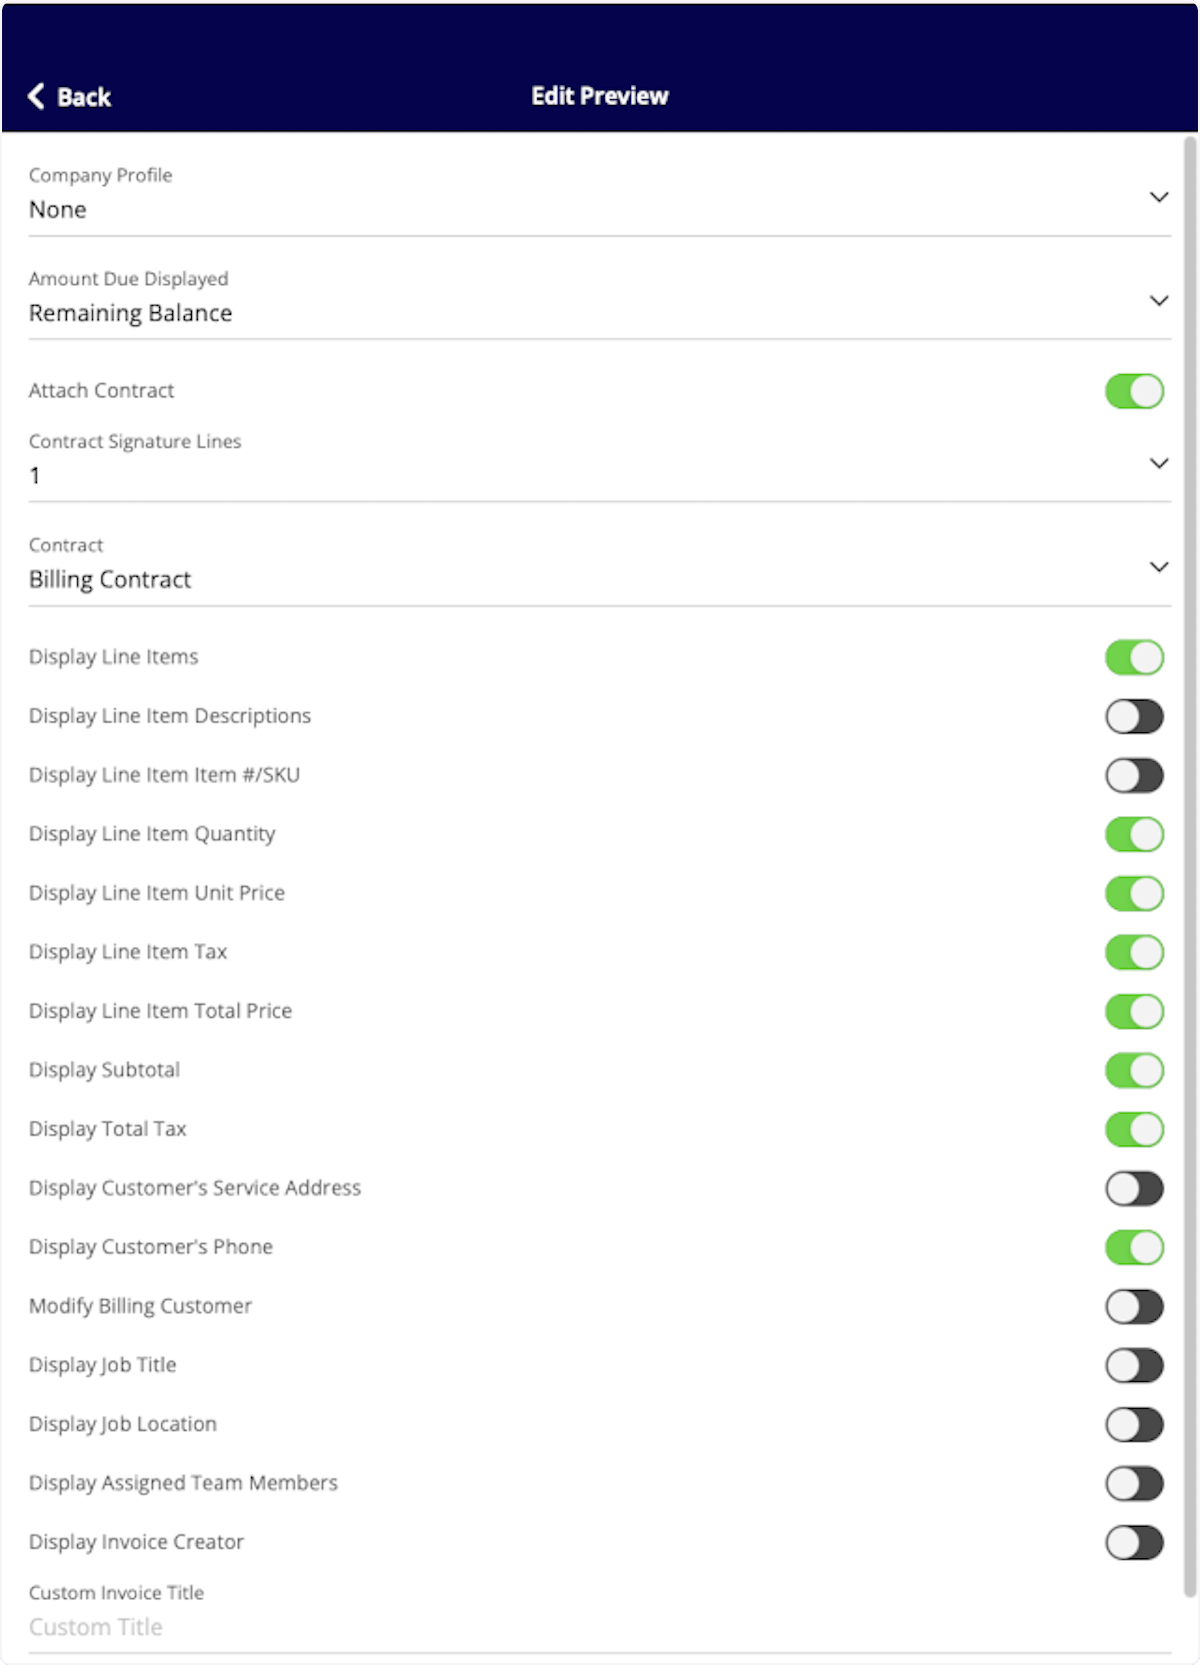
Once you’re finished adding line items, you can add notes, attach files, and/or add a contract. To add Invoice Notes, simply start typing in the box, it will automatically save when you save the invoice. These notes will be shown near the top of the invoice PDF. To include internal notes not visible to your customers, use the Internal Notes tab.
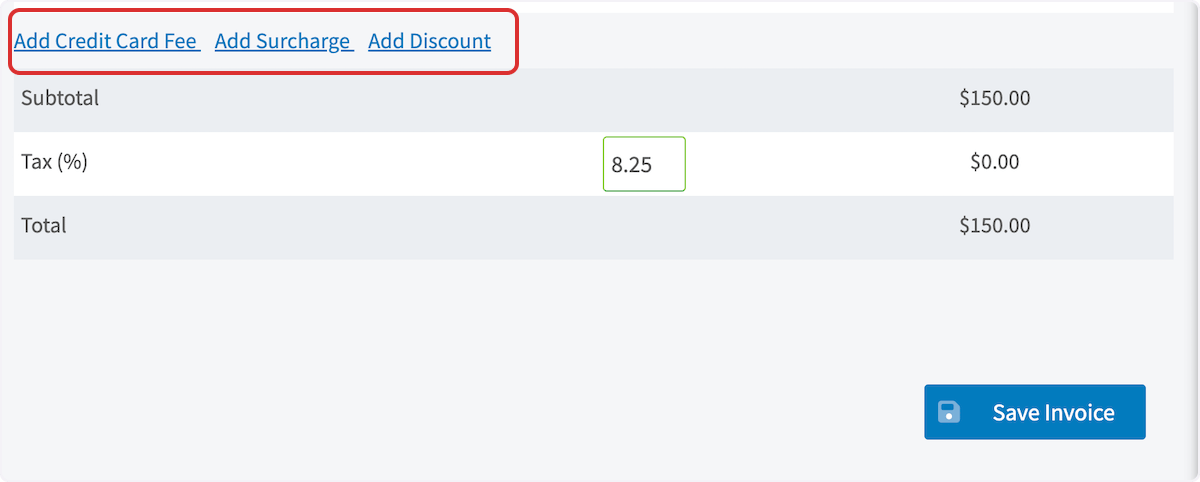
- Add credit card fee: This can be a percentage or dollar amount that you can charge your customers for paying with a card.
- Change the tax rate: The default tax rate from your ‘Company Settings’ section is used by default, but it can be modified on a per-estimate basis. Only line items that are designated to be taxed will have tax applied.
- Add a discount or surcharge: This will add or subtract a percentage or fixed amount from the invoice total.
On Mobile: Field Experience
Creating an Invoice
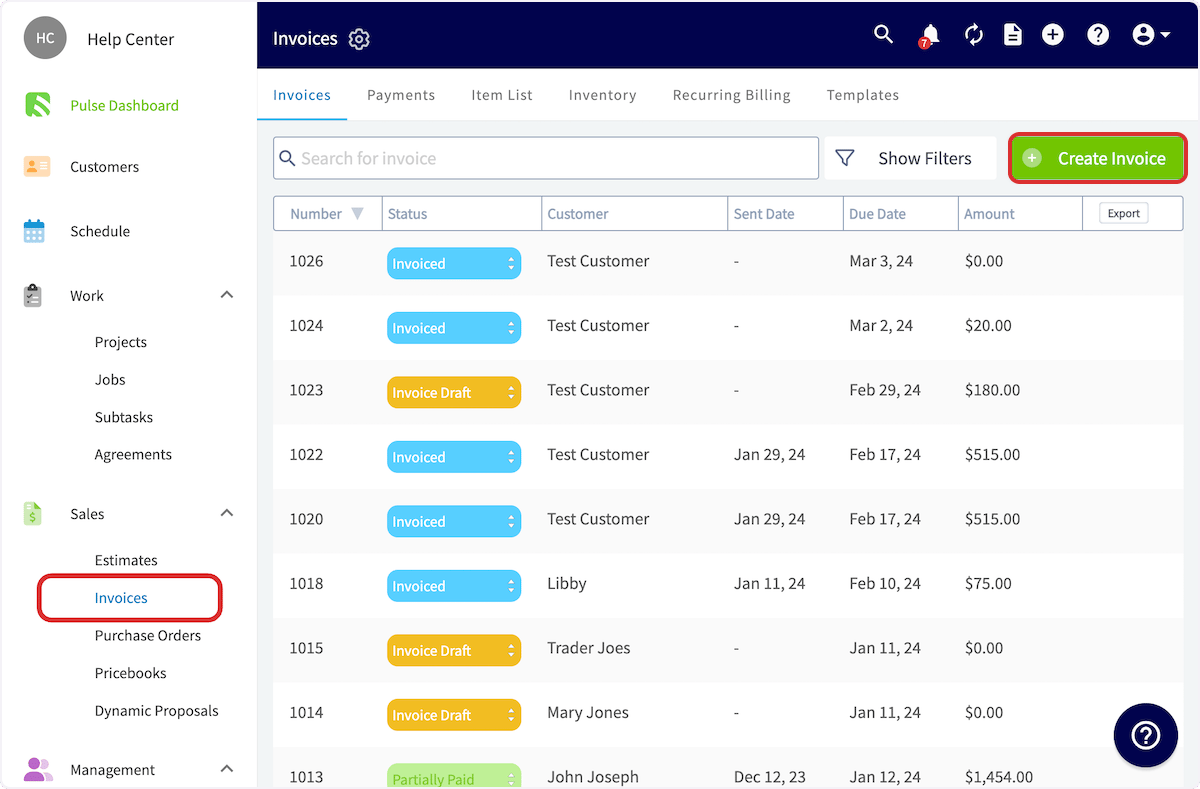
To create a new invoice, navigate to the Sales tab in the bottom menu, then select Invoices.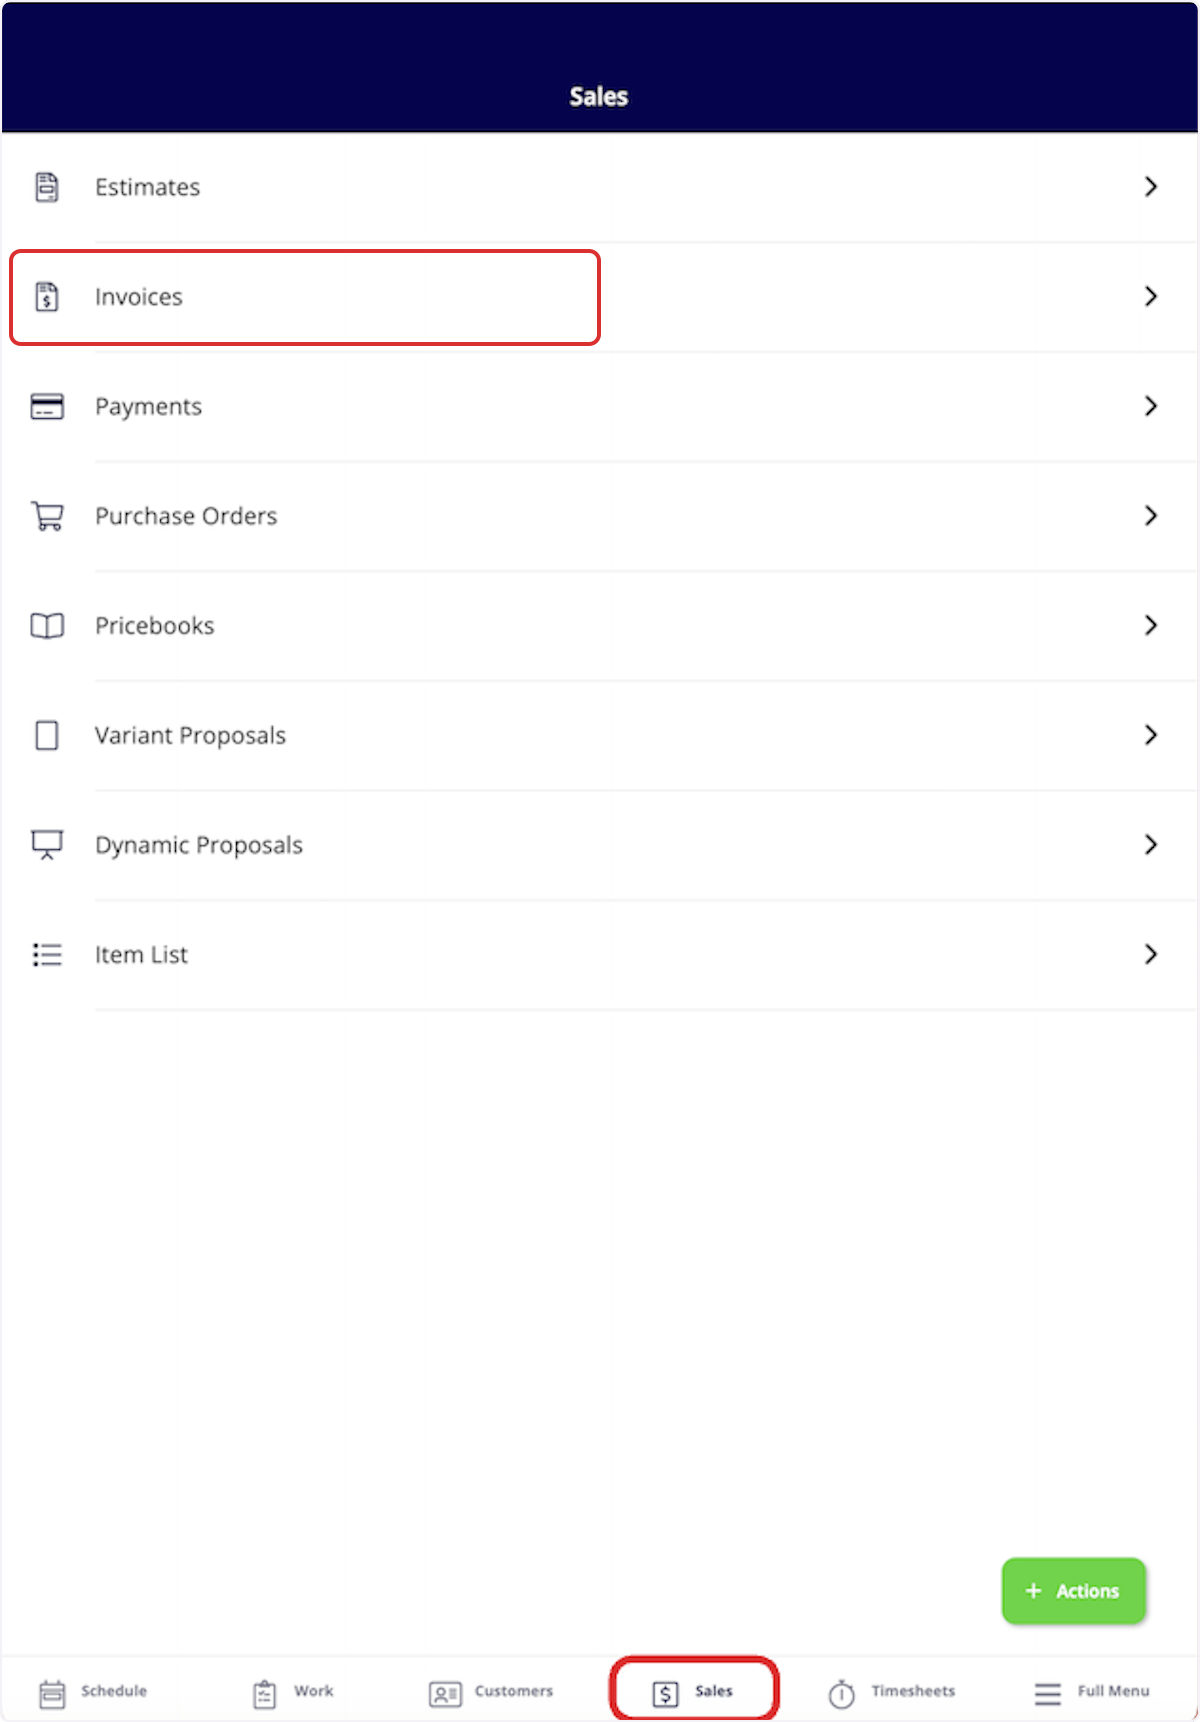
Convert an Estimate to an Invoice
If your customer accepts an estimate, select Convert to Invoice to transfer all the details from the estimate into an invoice record to save time. To begin, navigate to the Sales tab in the bottom menu and select Estimates.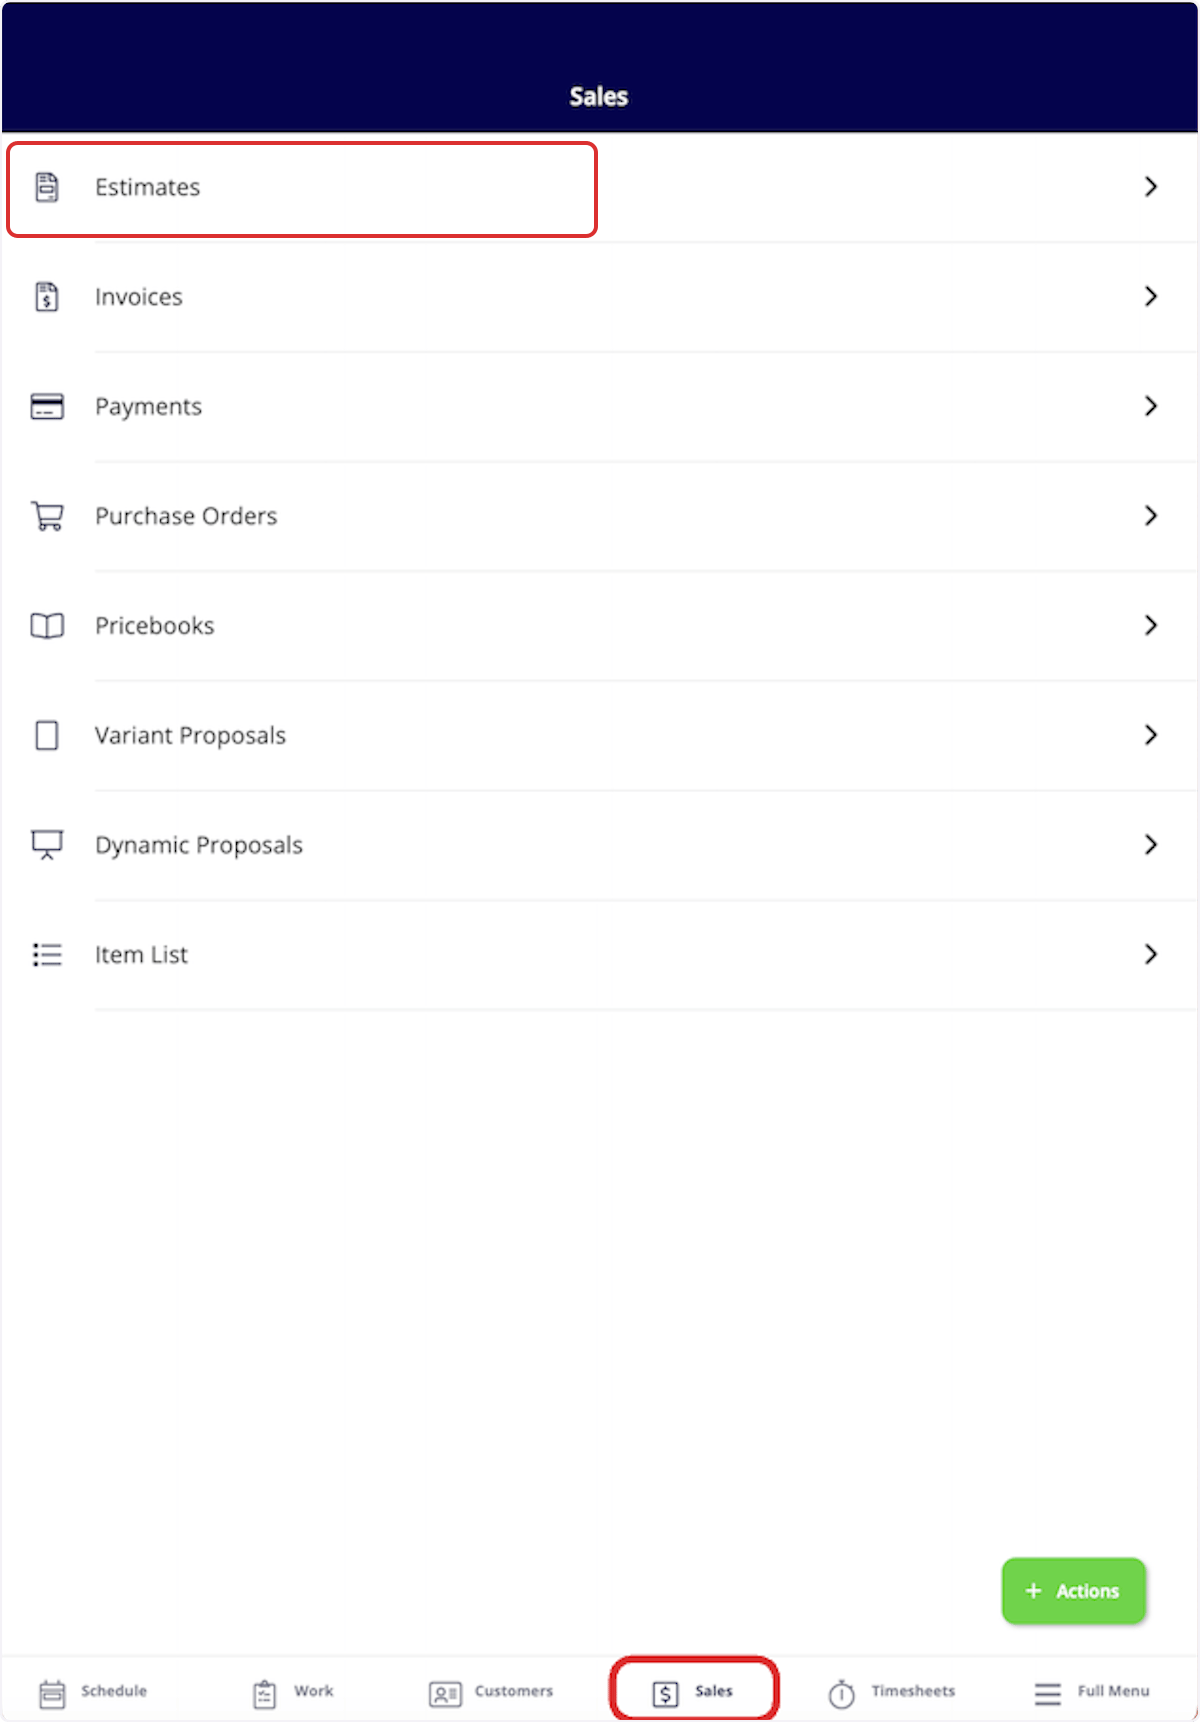
Create an Invoice from a Job Record
To create an invoice directly from a job record, begin by navigating to the job record. Once in the record, select Actions then Create Invoice, or select Invoices from the top menu then Create Invoice.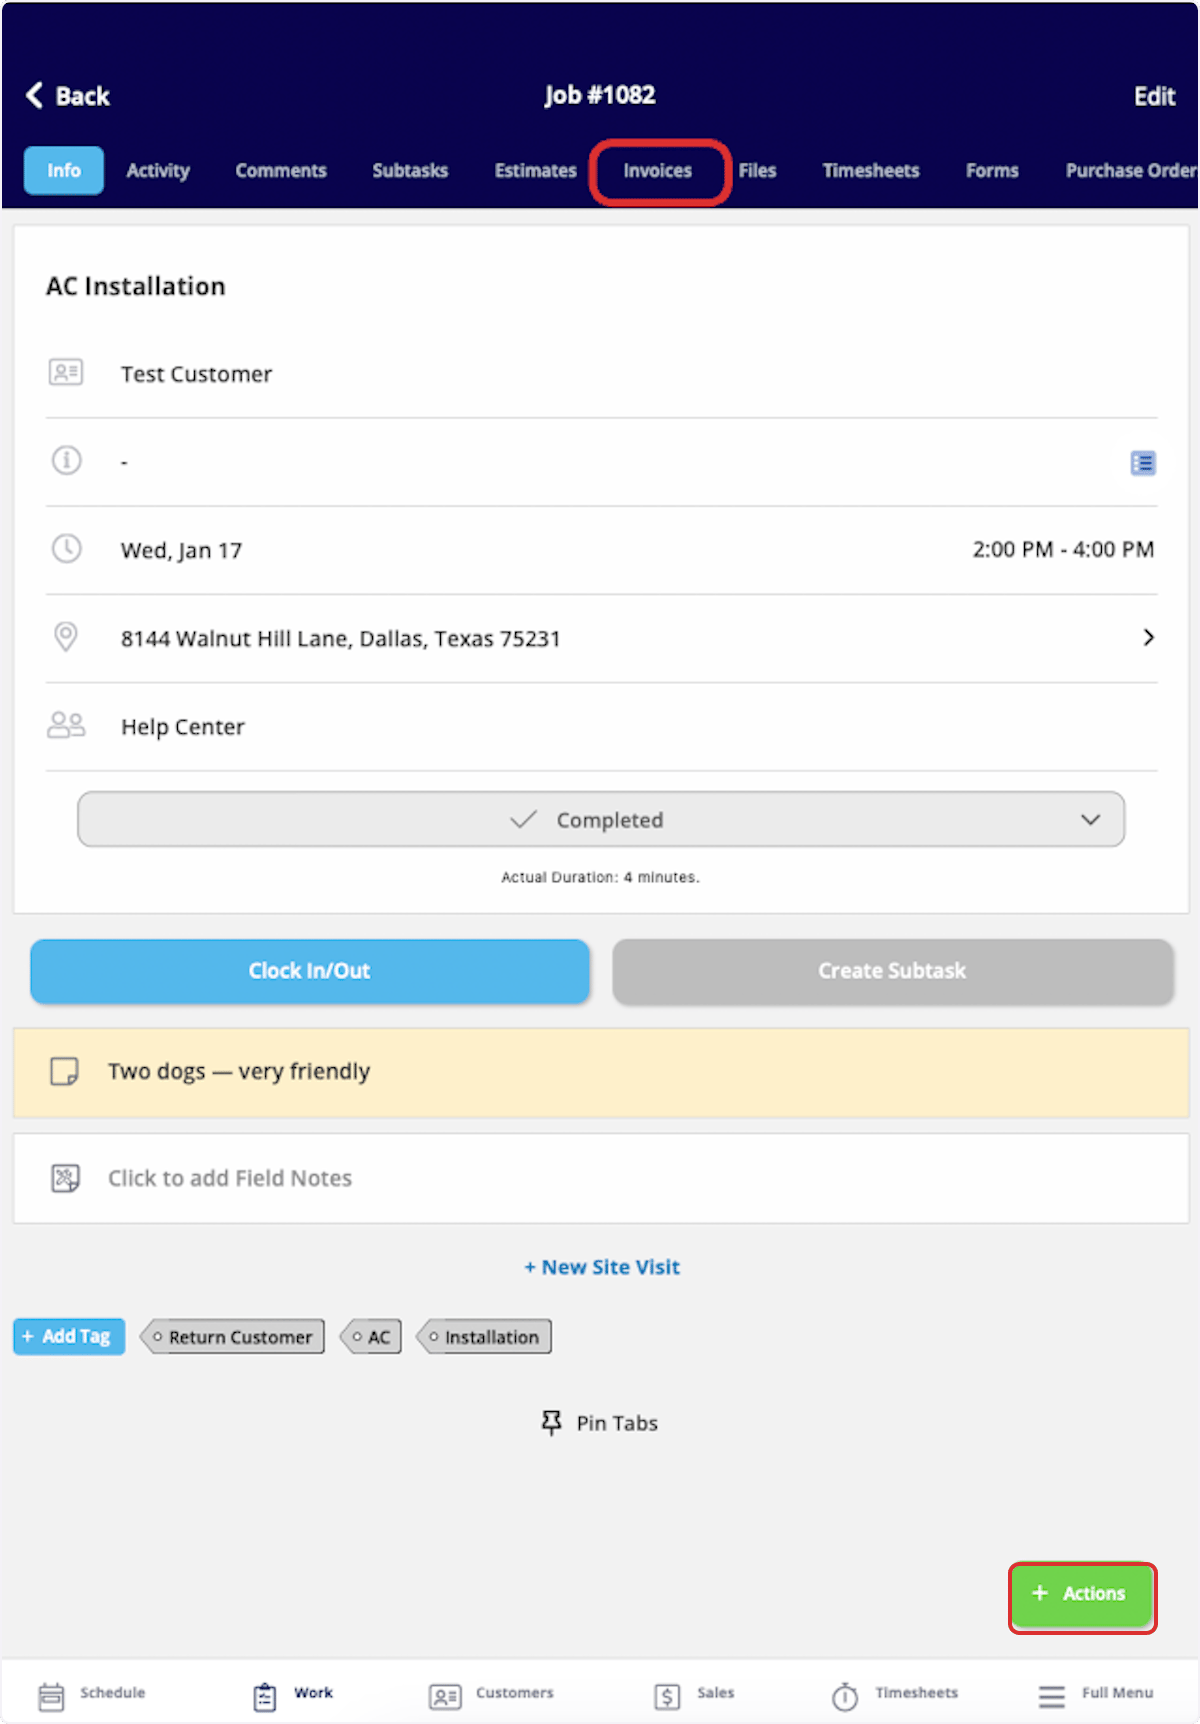
Invoice Statuses
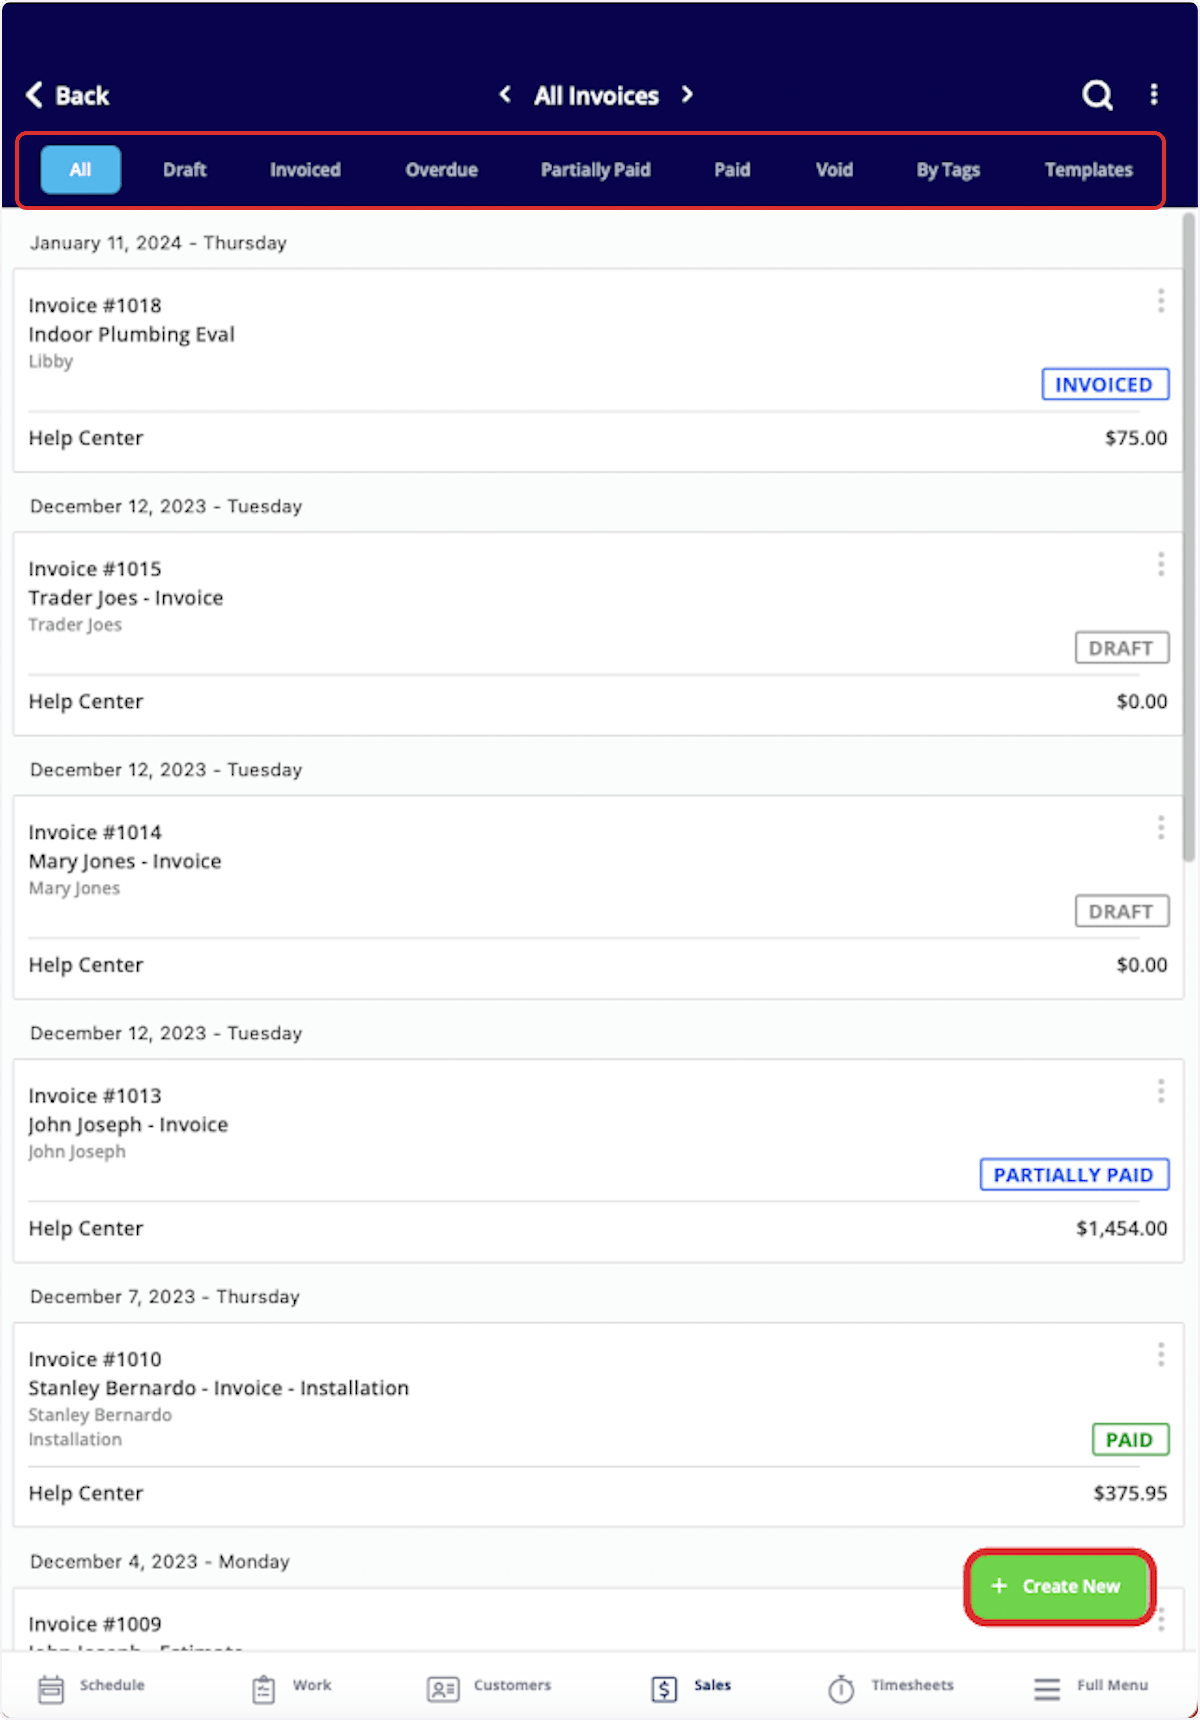
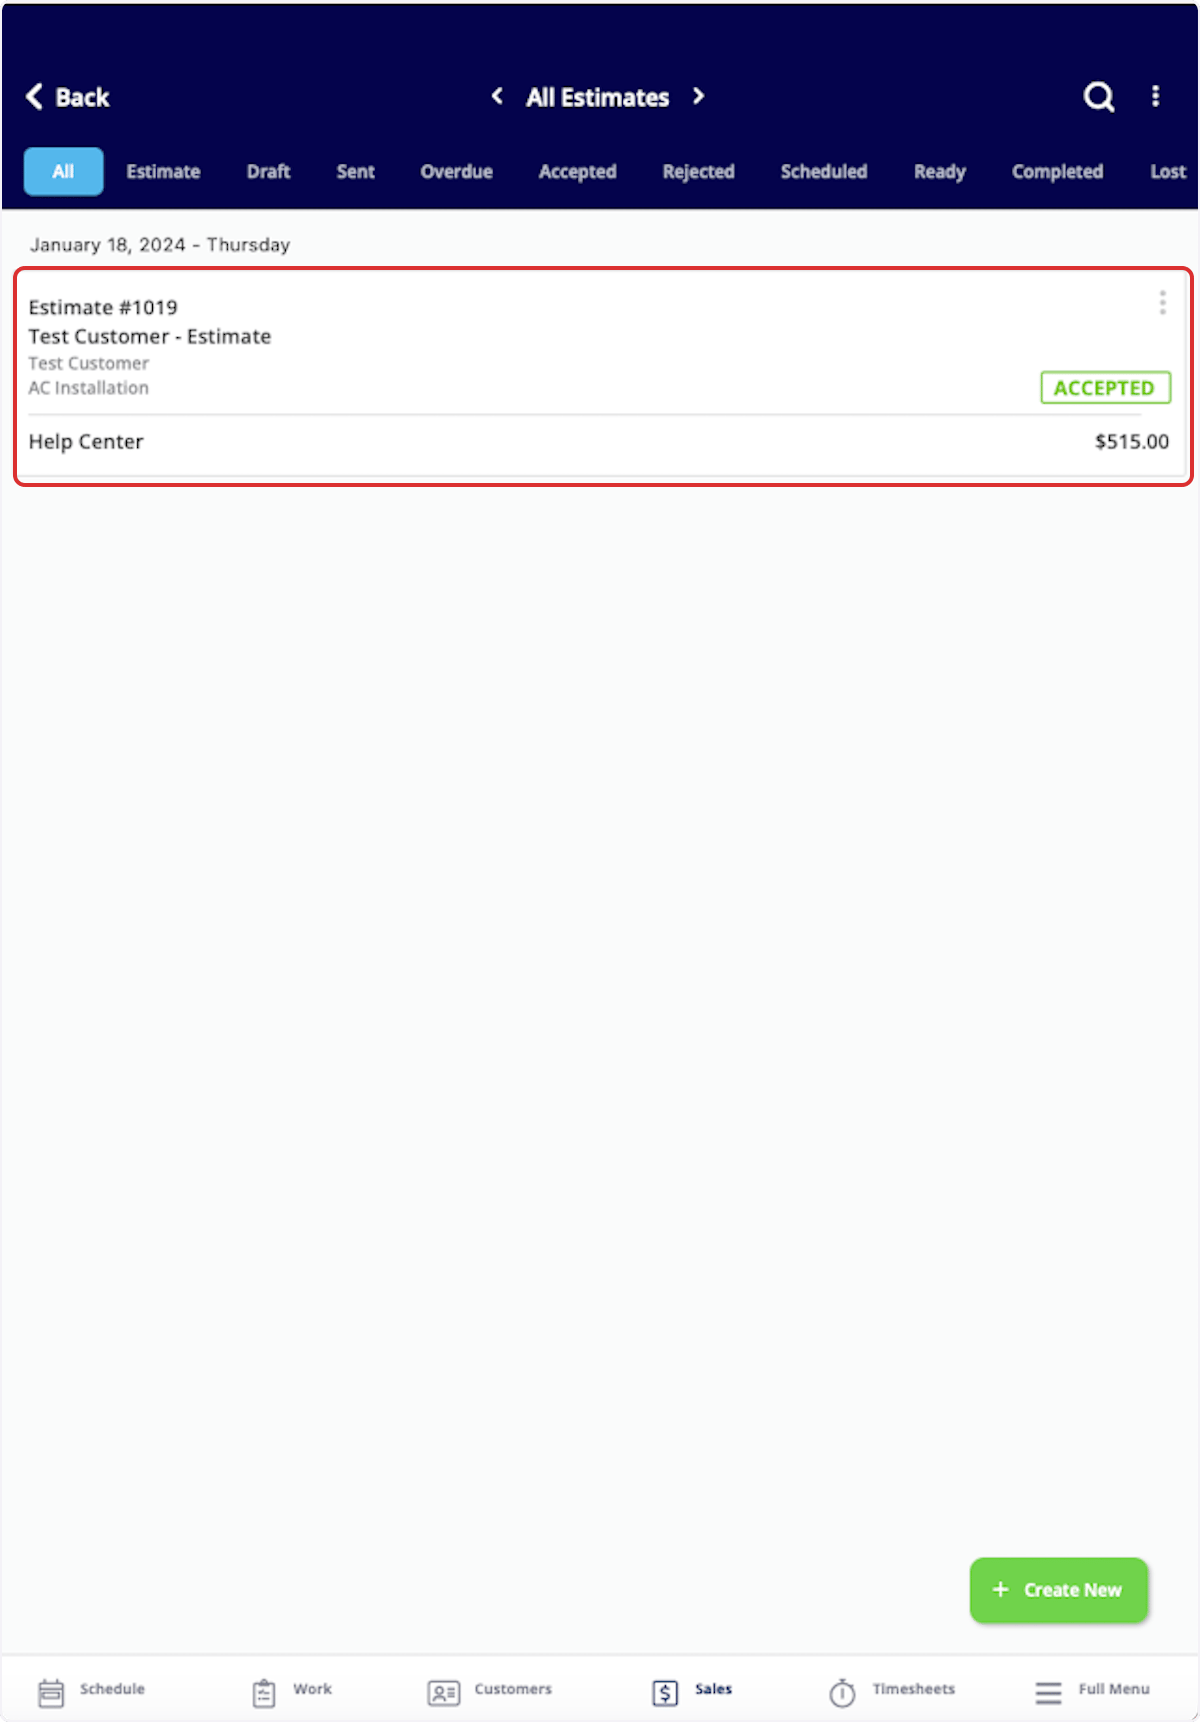
As you create and send invoices, FieldPulse makes keeping track of the statuses easy. On your Invoices page, notice the statuses listed on the right side of each invoice record. Statuses include: Draft, Invoiced, Partially Paid, Paid, Overdue, and Void. These statuses are automatically updated by FieldPulse. You can also use the menu at the top of the Invoices page to sort your invoices by status.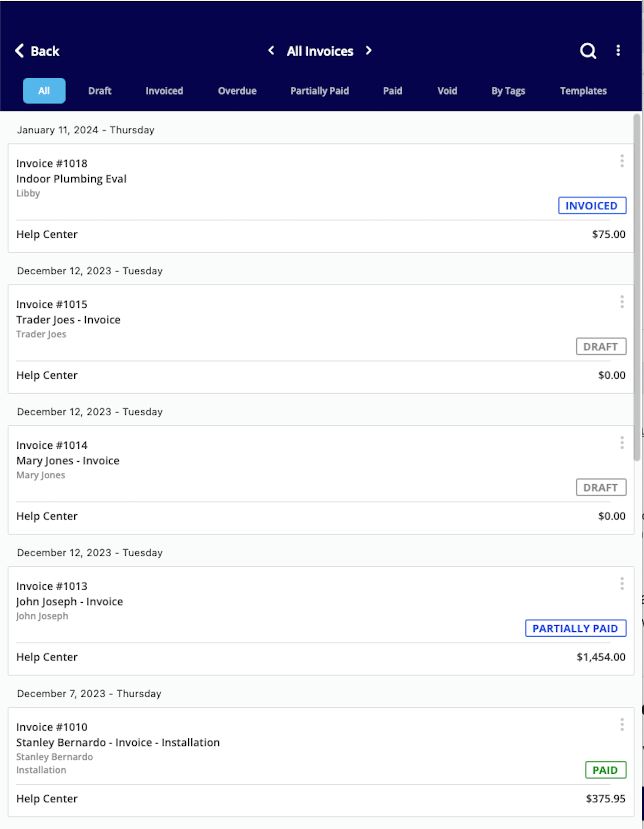
Customer Invoice Experience
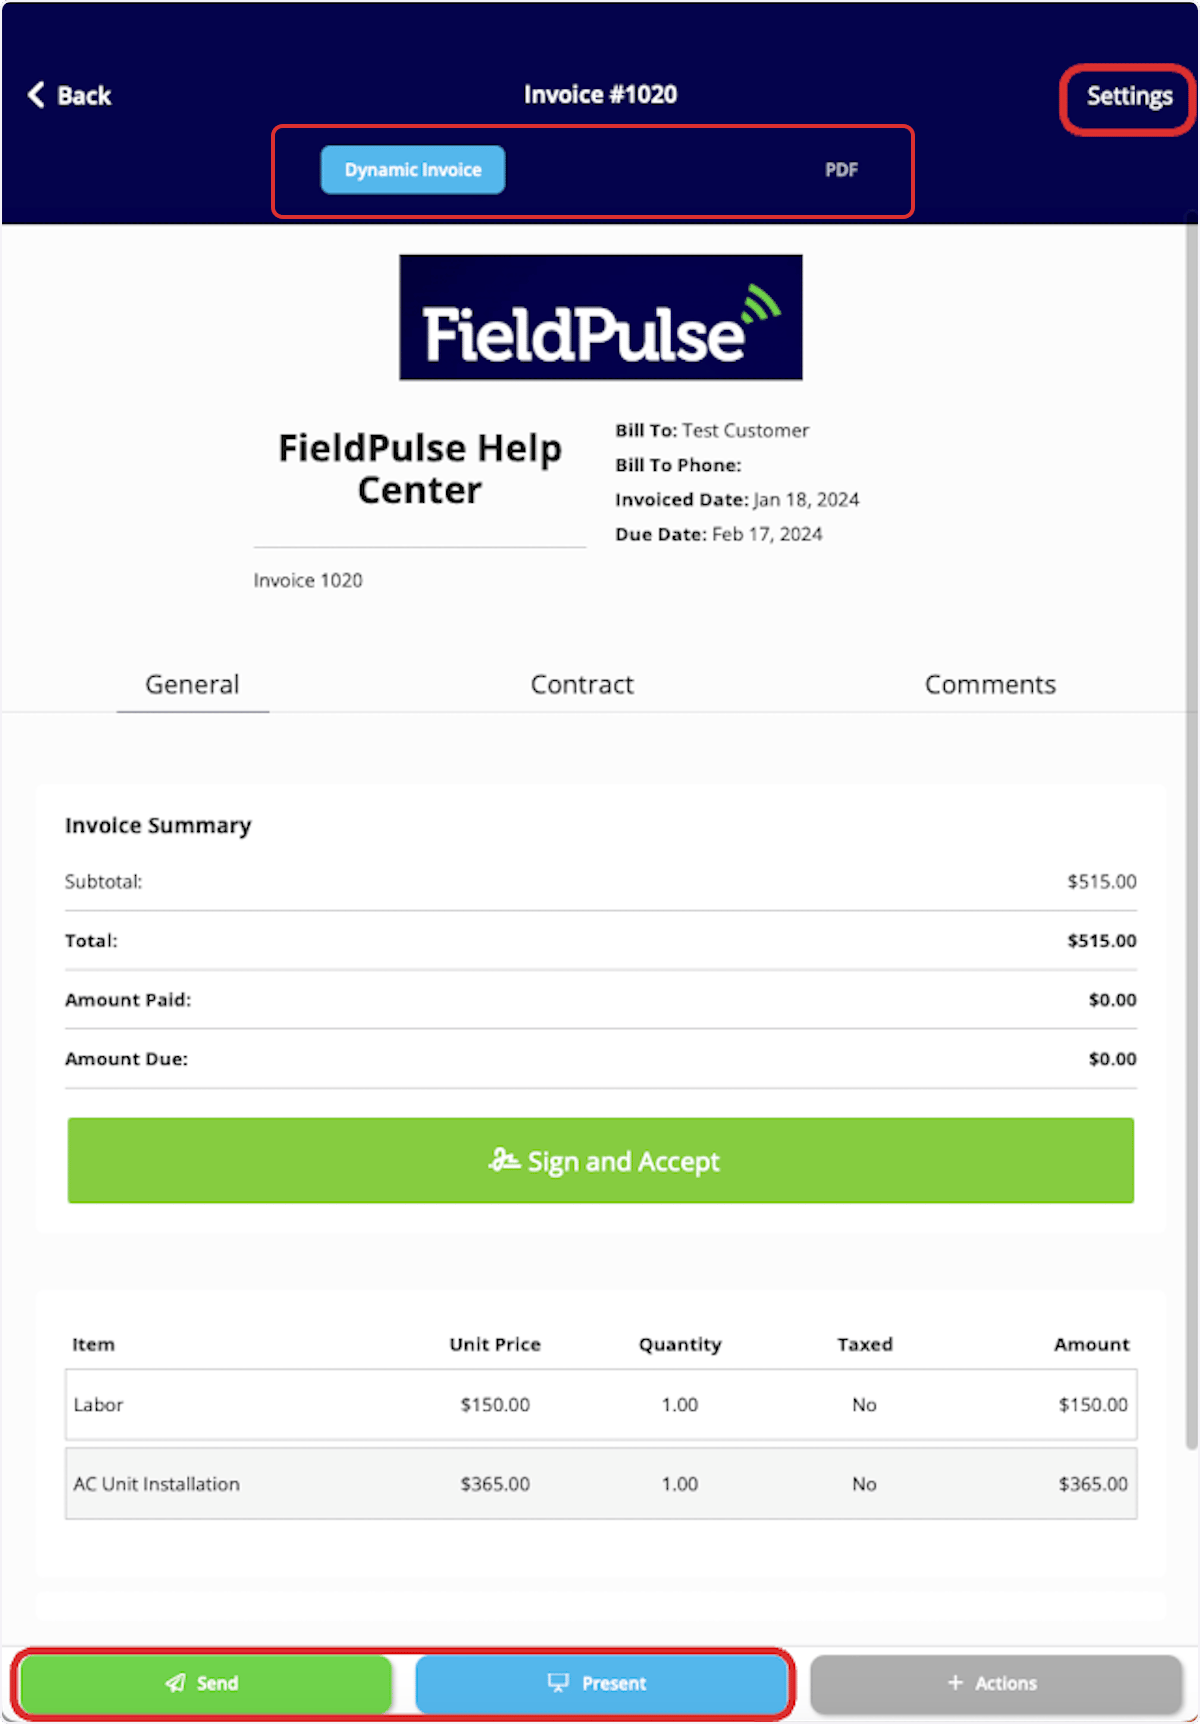
To preview, send, or show an invoice, select View Invoice on the invoice record.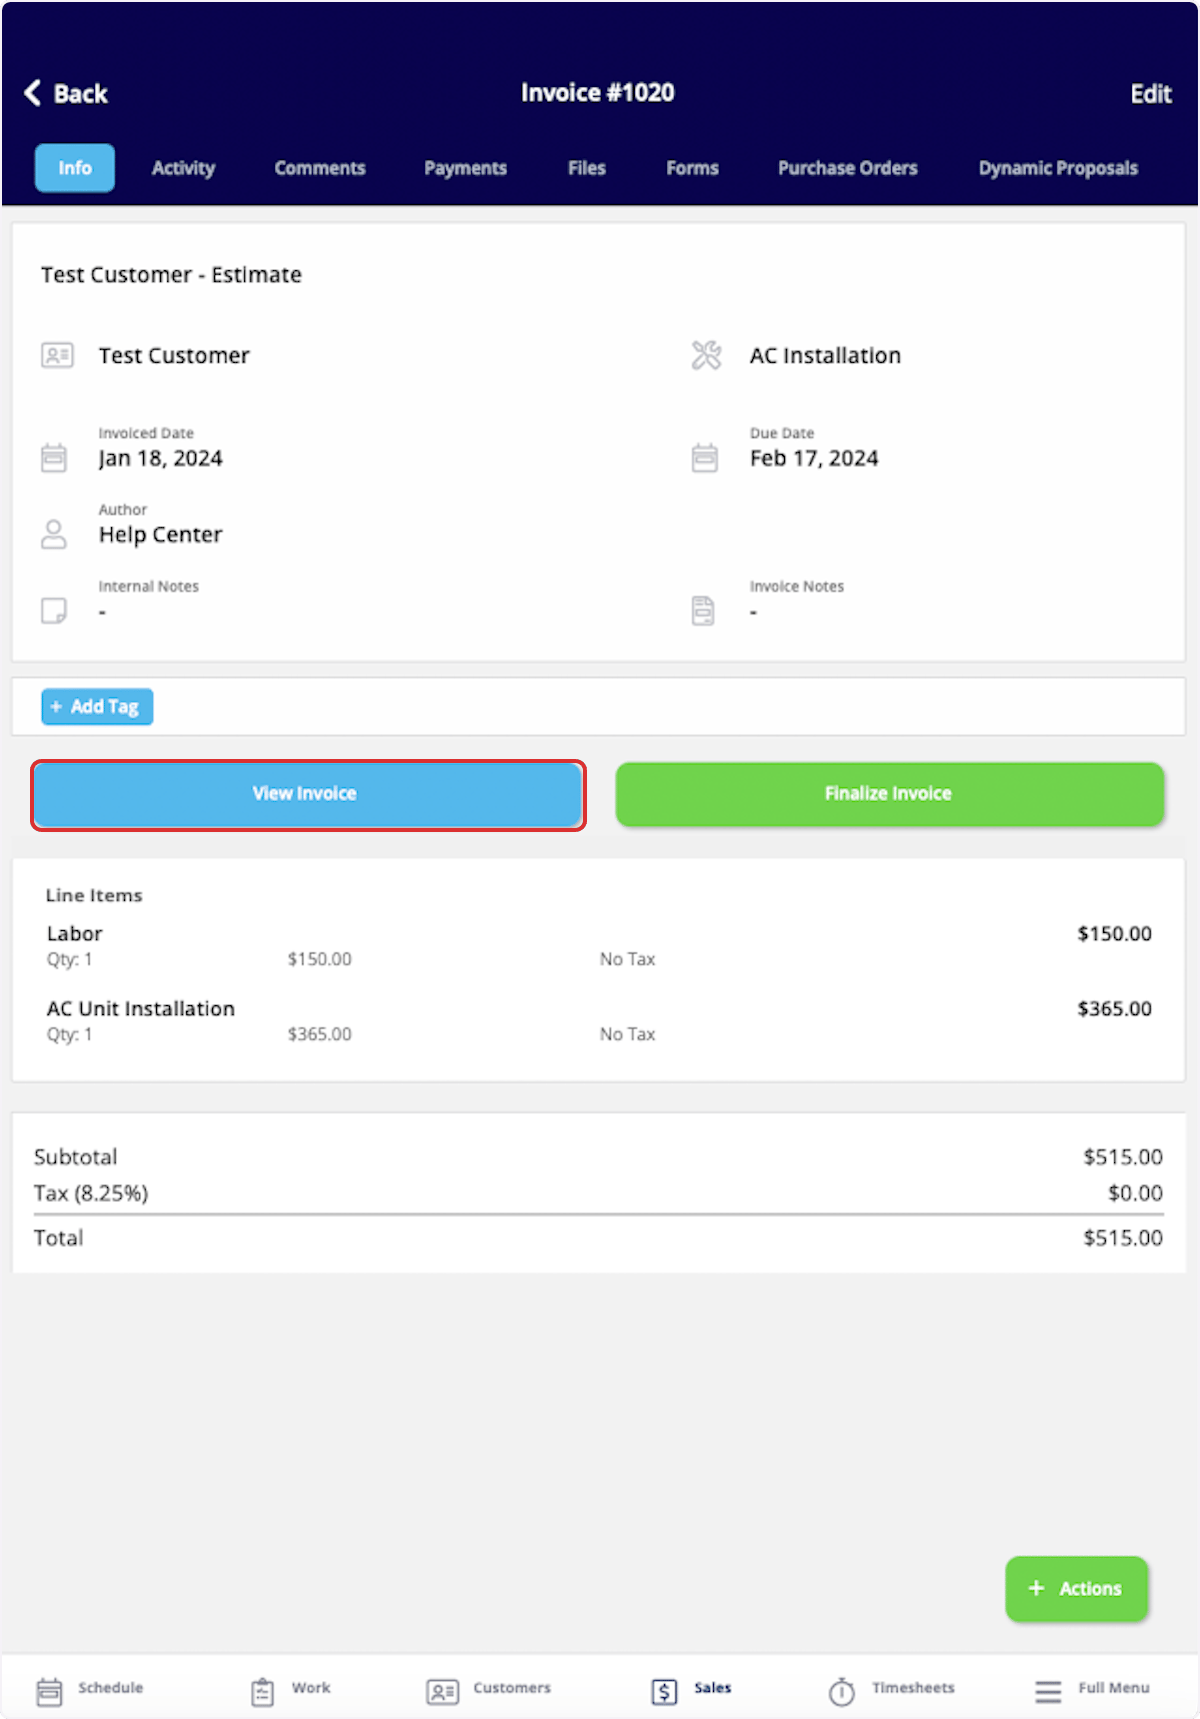
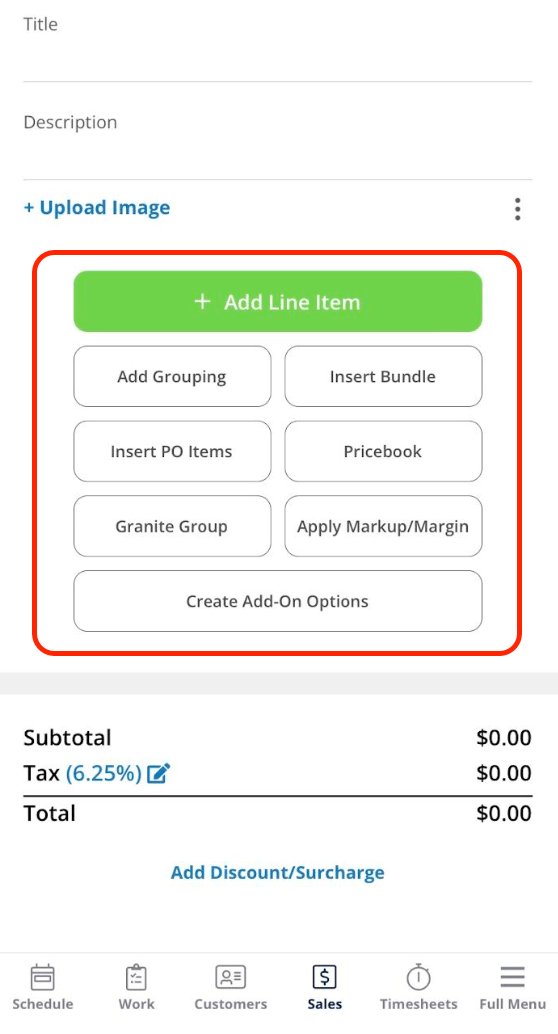
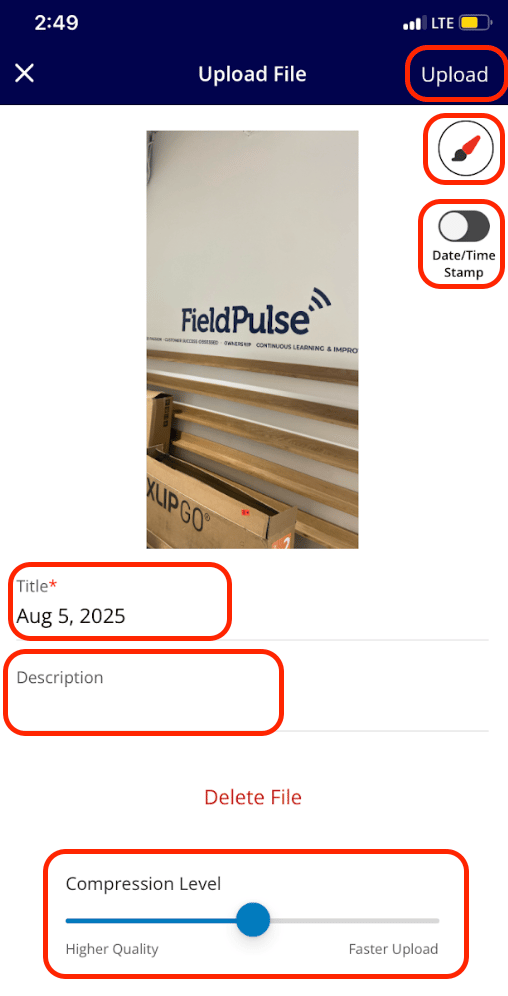
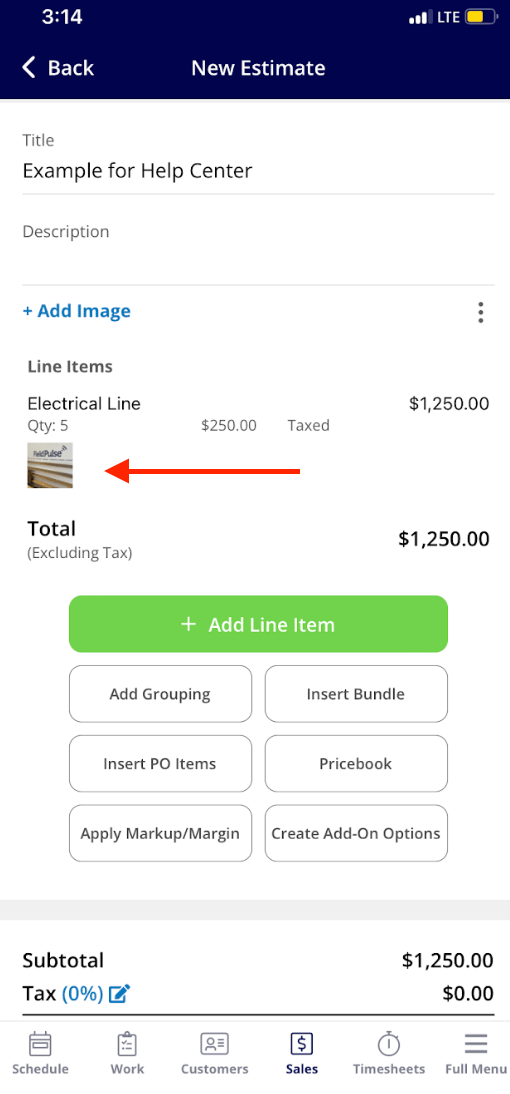
Capturing Line Item Images for Invoices
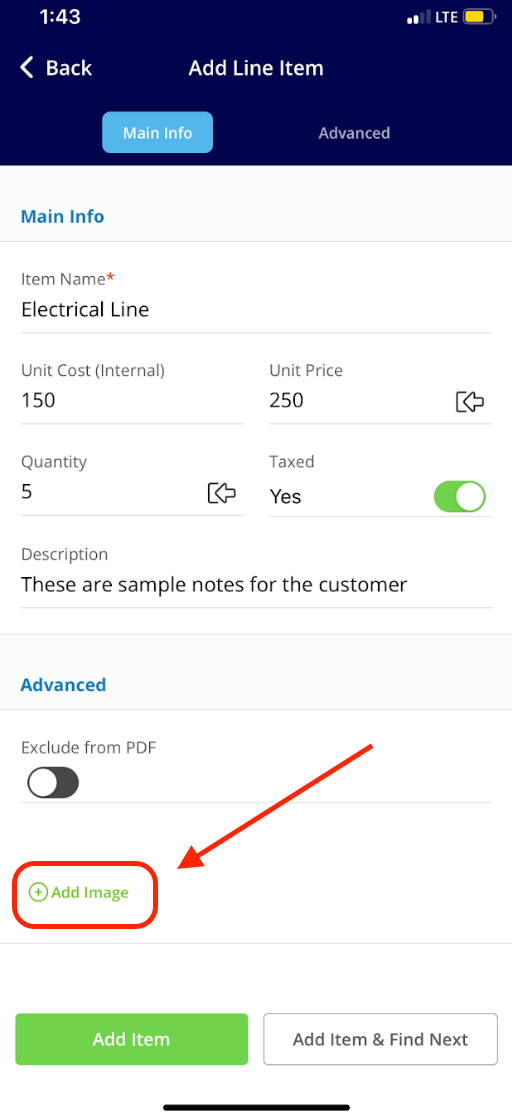
Step 1: Access the Estimate or Invoice Draft: Open the relevant record where you want to add your line items and images. Begin by clicking the green Add Line Item button.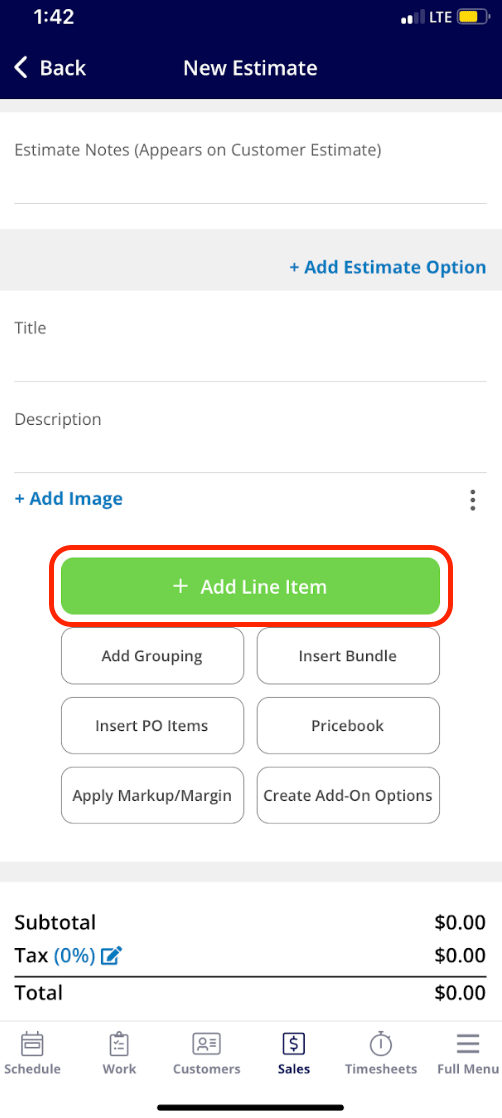
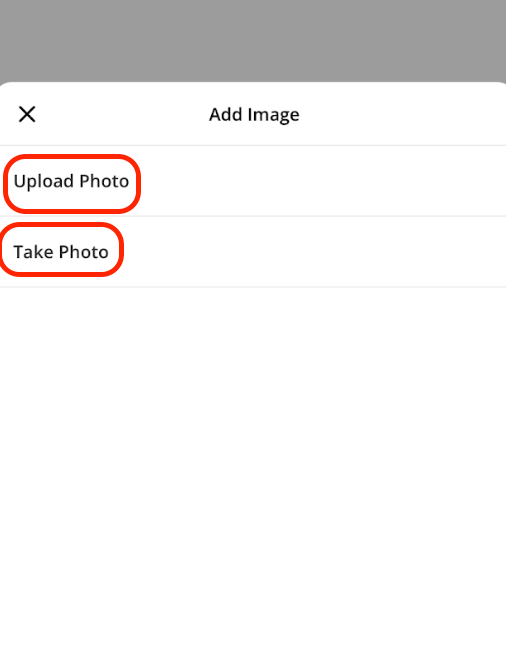
- Upload Photo: Select this option to choose an existing image from your device.
- Take Photo: Choose this option to open your camera and capture a new image directly related to the line item.
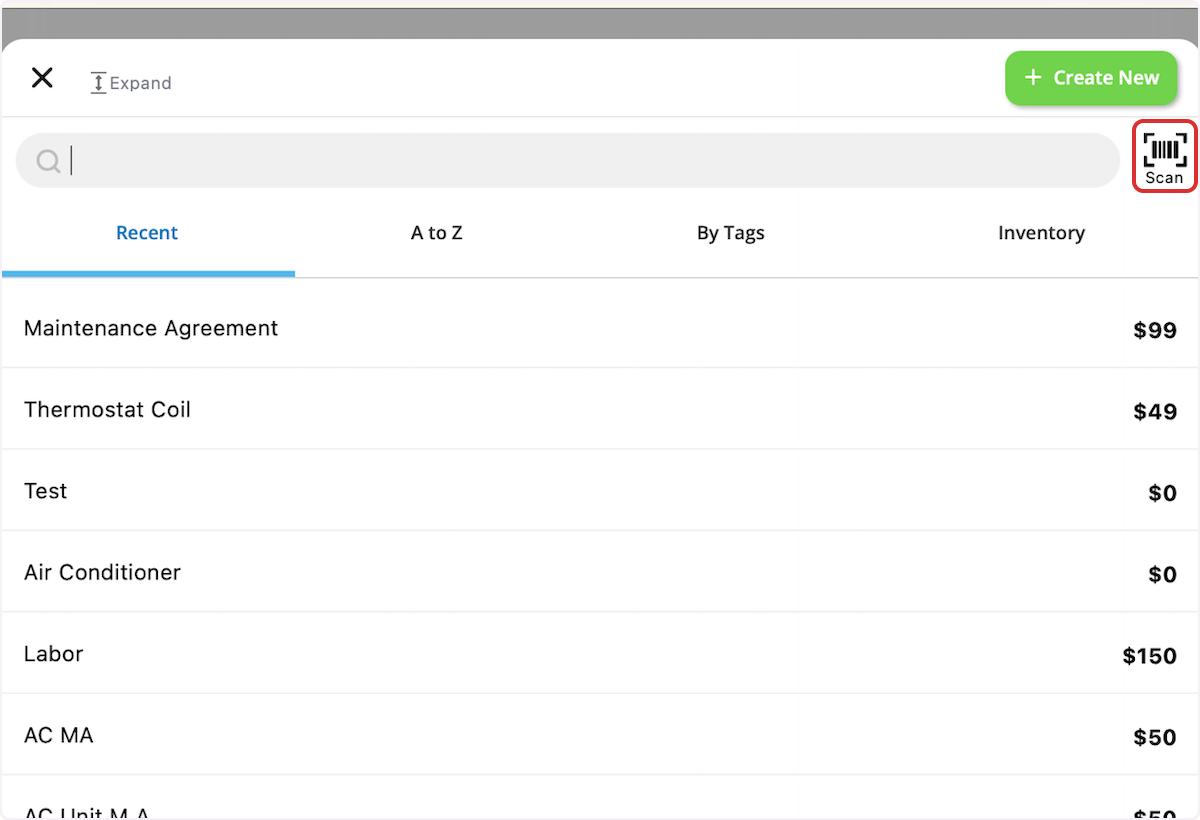
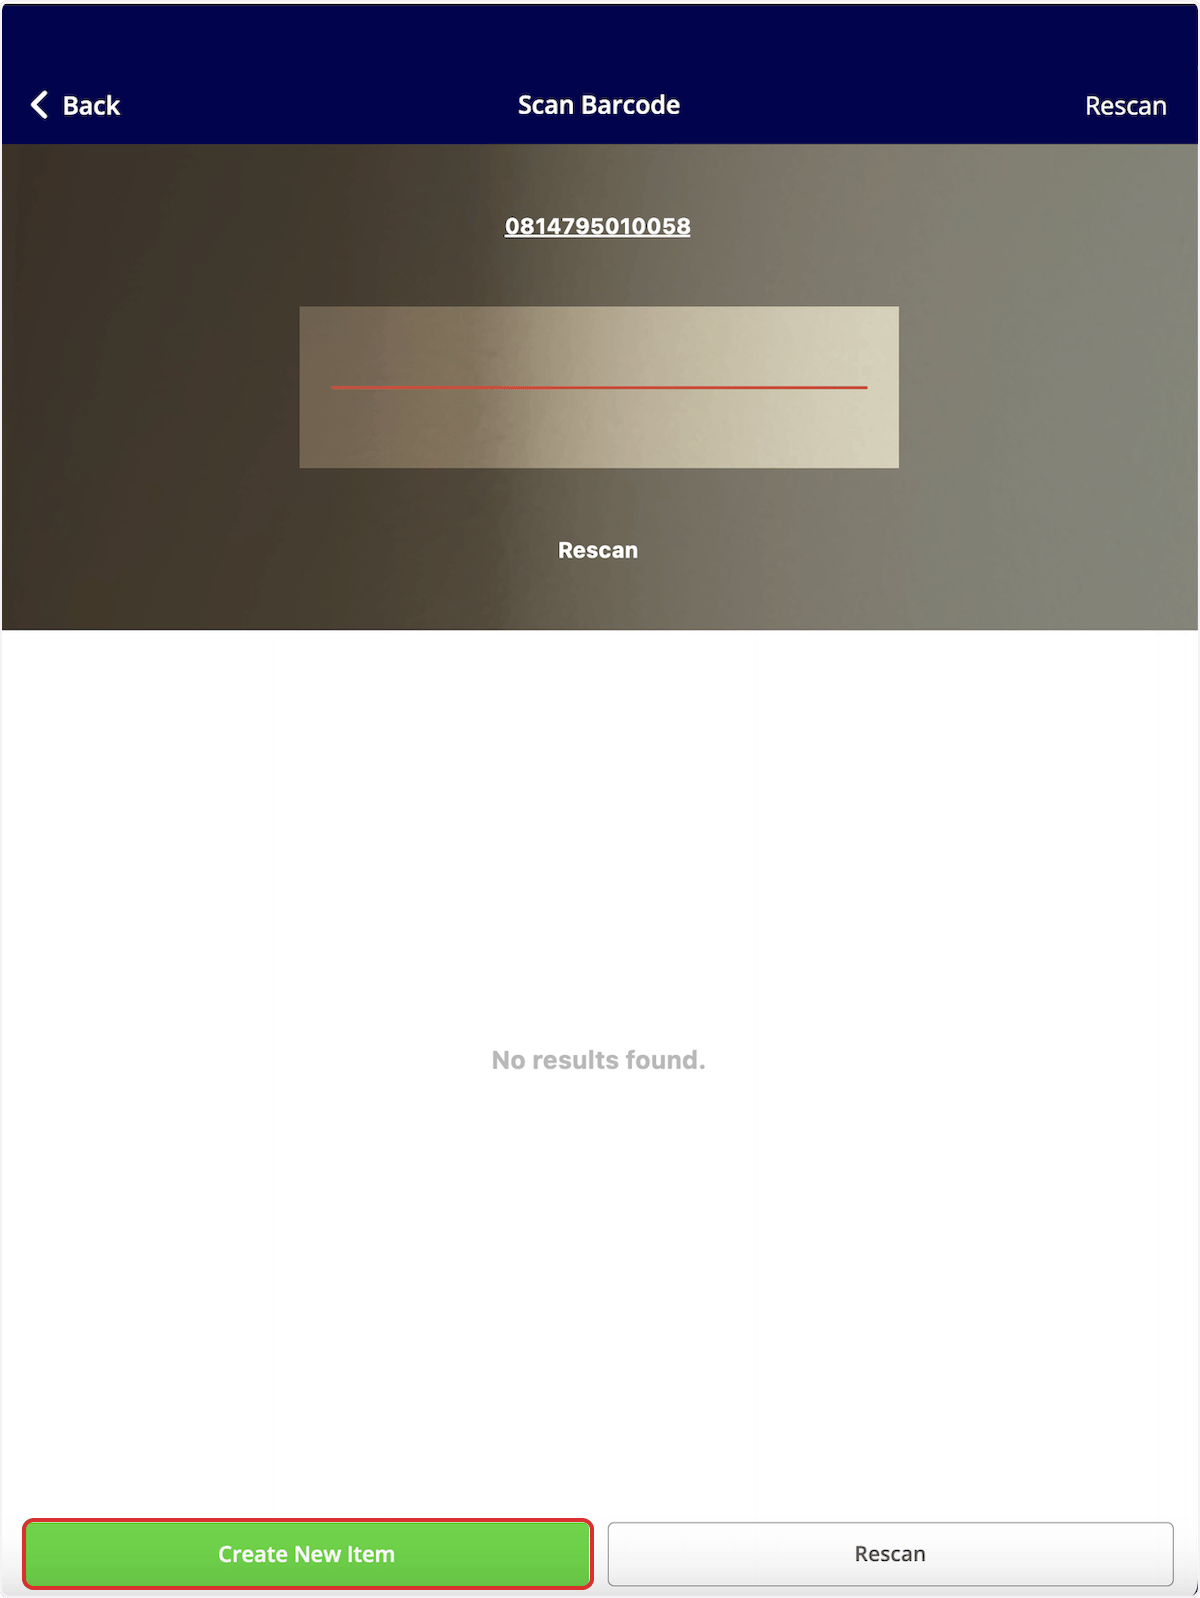
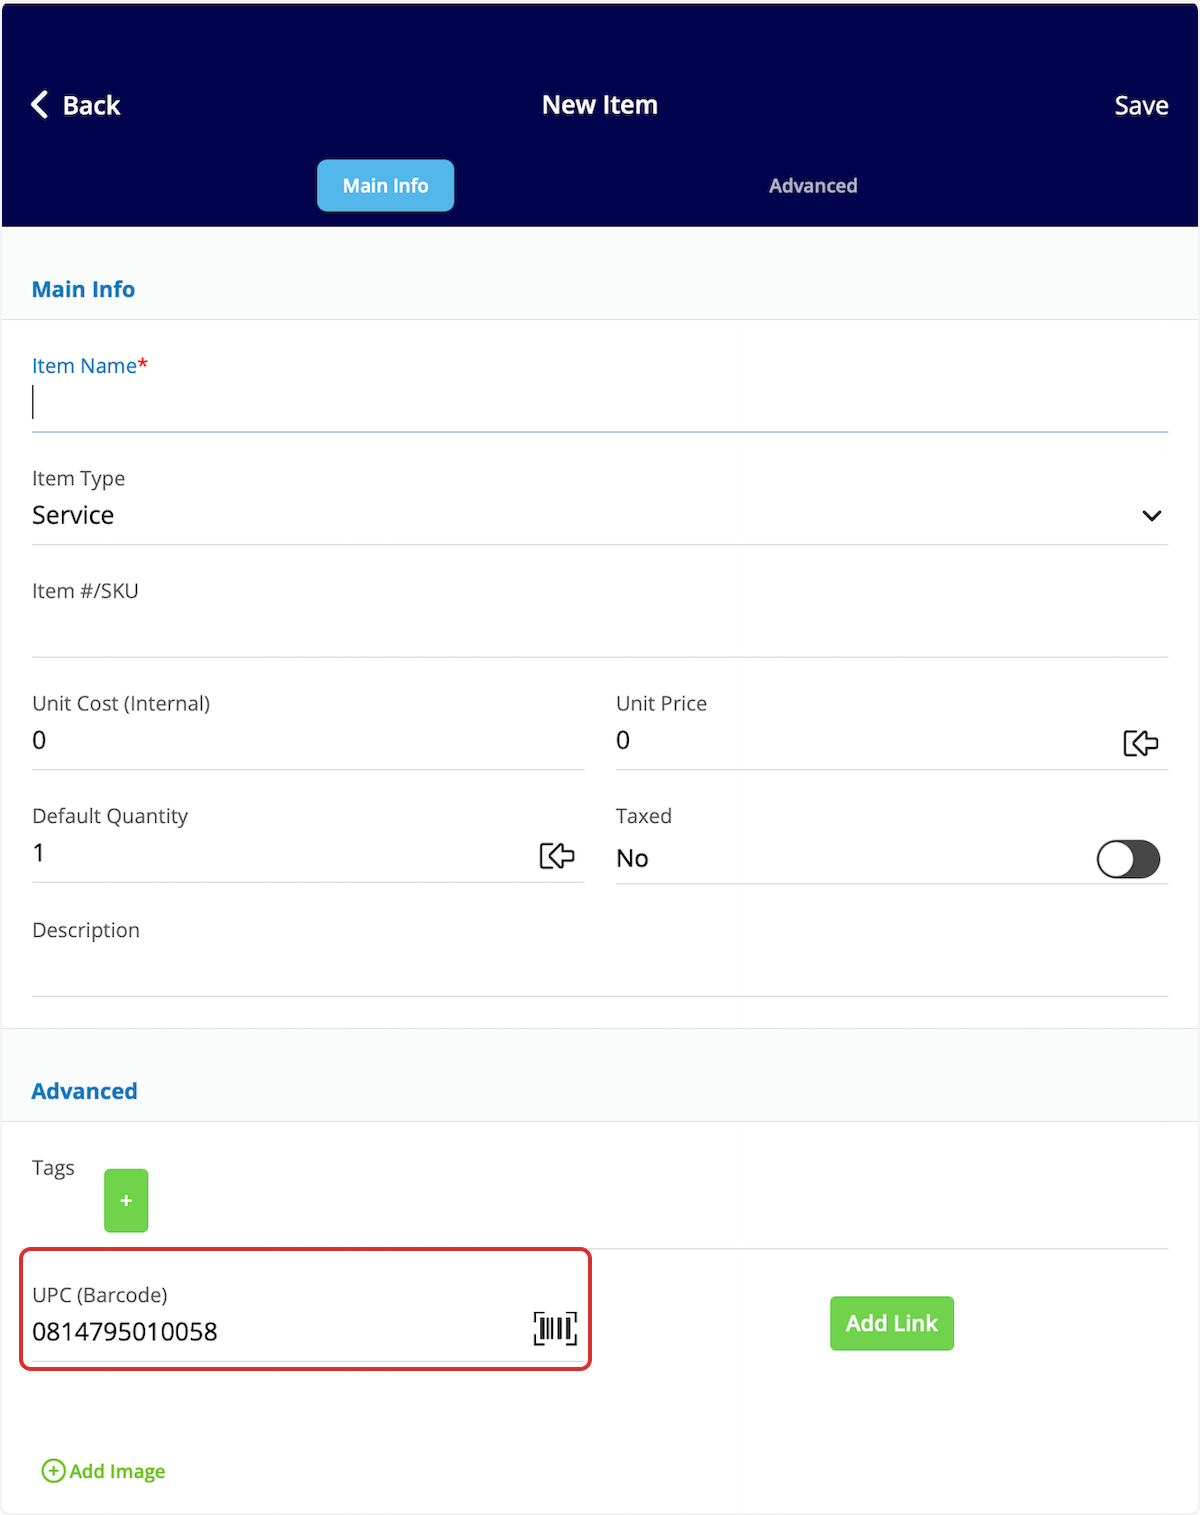
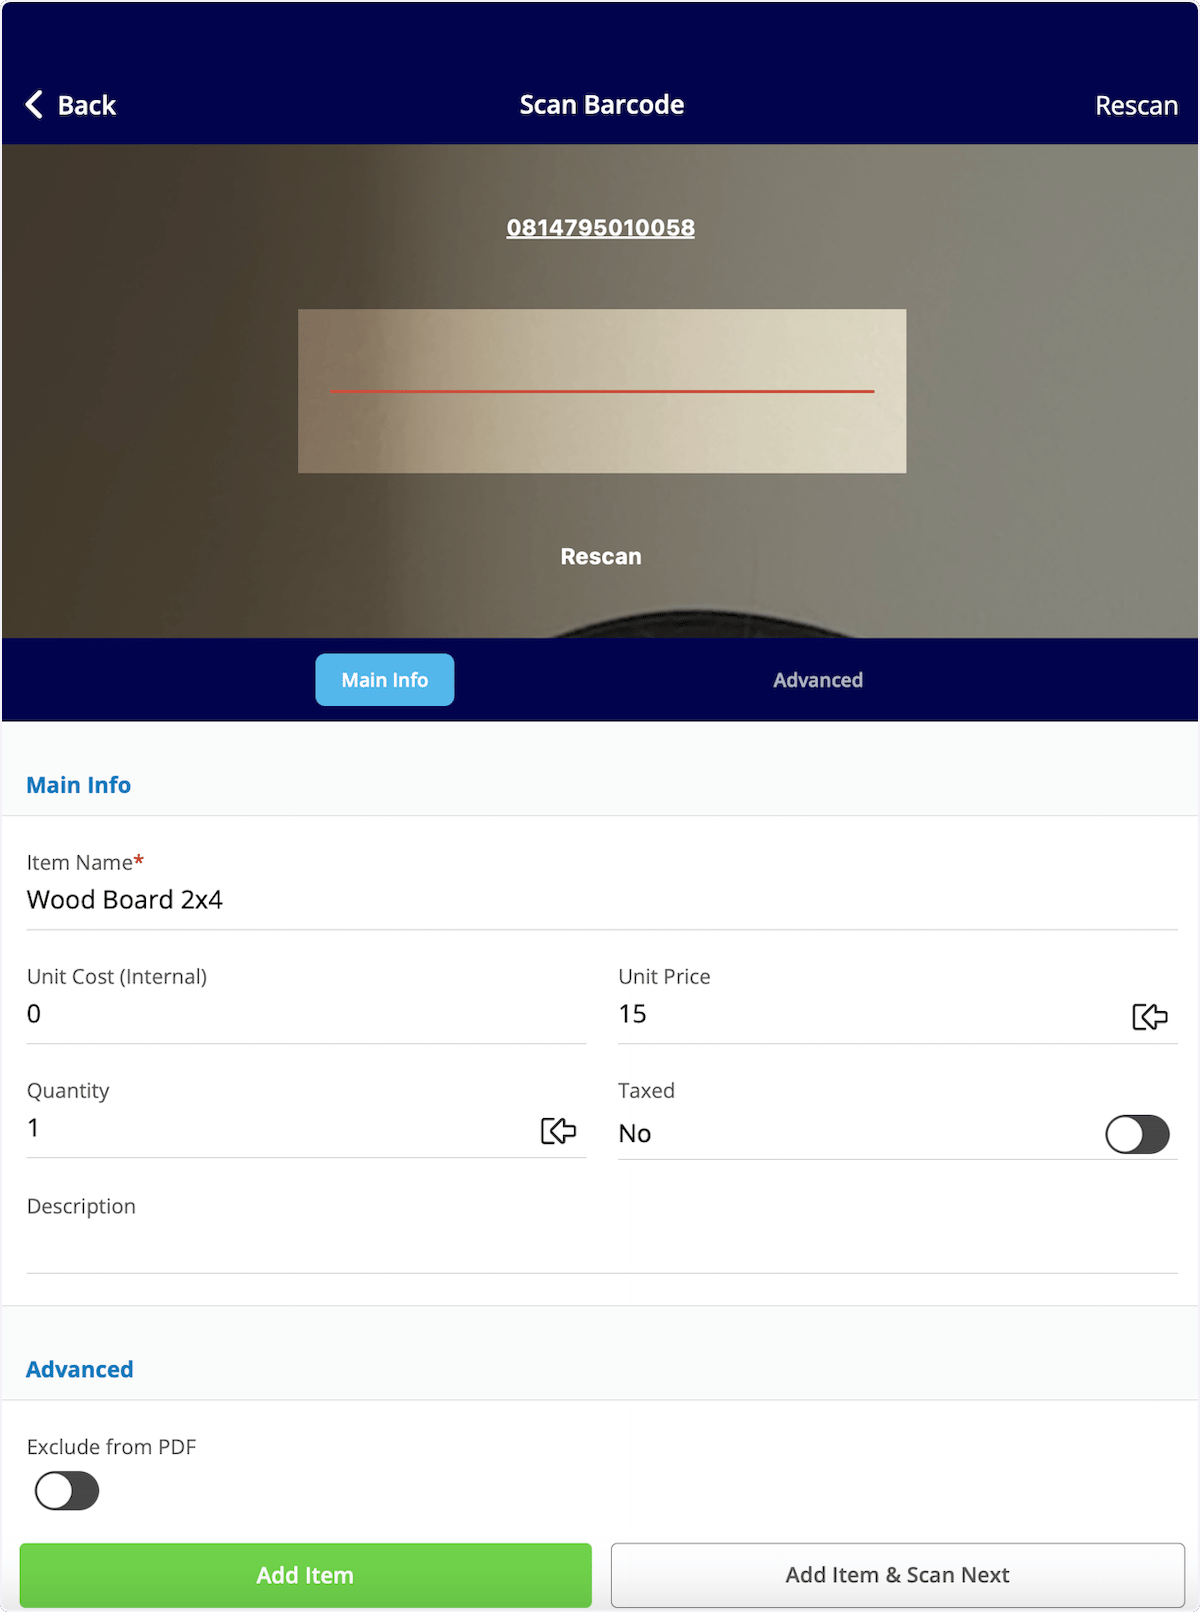
Barcode Scanning for Invoices
To utilize barcode scanning when adding items to invoices, begin by opening a new invoice in the mobile app. Scroll down and select Add Line Item.
Video Tutorials
Web App
Mobile
Have additional questions? Contact us at support@fieldpulse.com or use the chat feature in the bottom right corner of your screen.