
Create an Inventory Count Report
Date Range
Begin by selecting the type of inventory items you’d like to use to generate the report. You can select regular and serialized inventory items, or report on the inventory count for regular or serialized inventory alone. Then, select the start date range for which you’d like to report on. Click on the calendar icon to select a date range and click Load Data.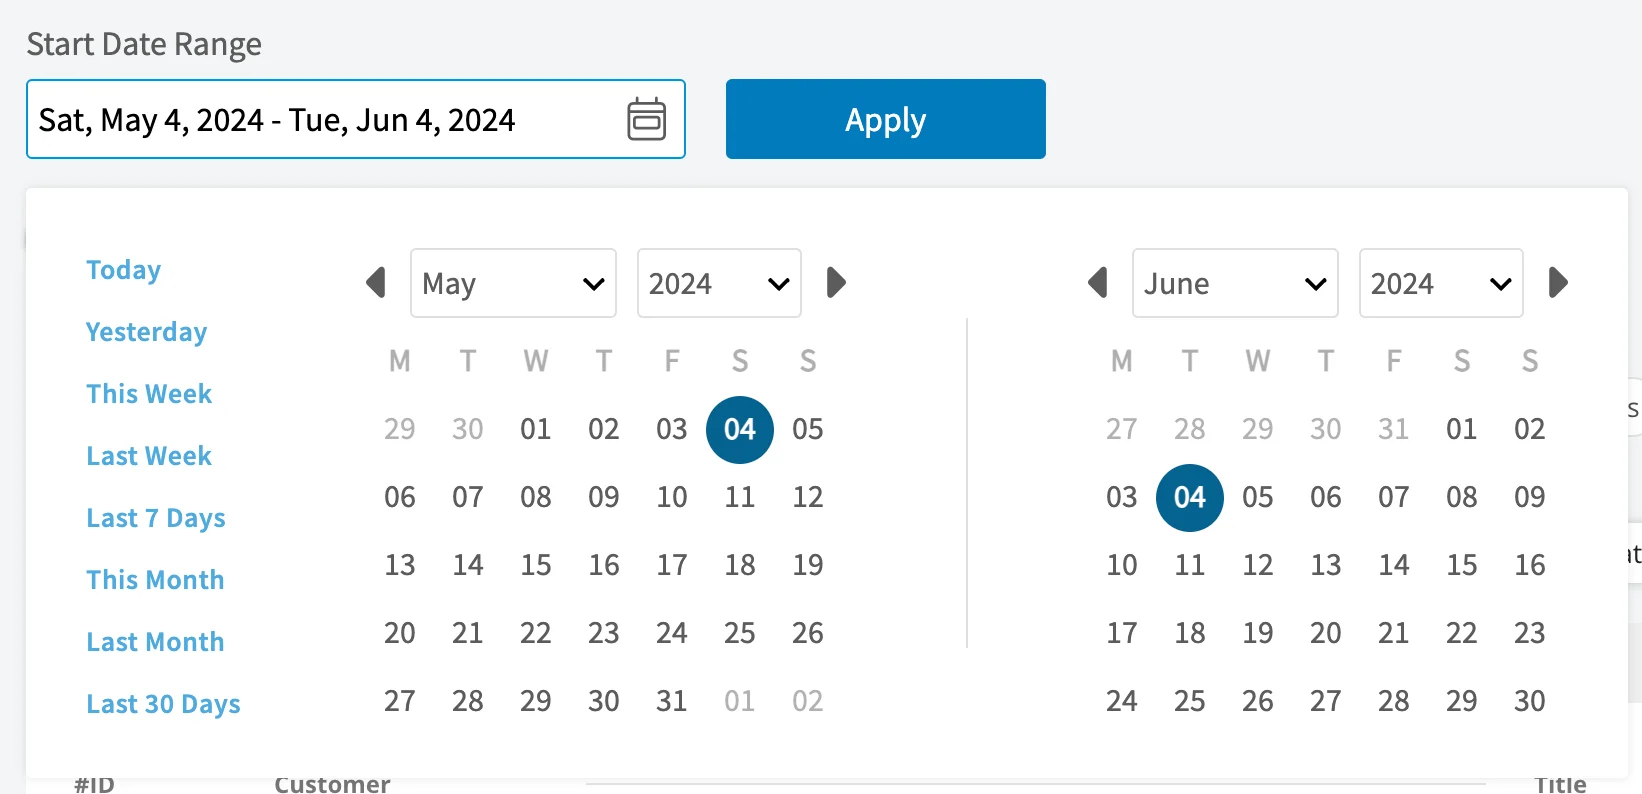
- Today: From 12:00 AM to the current time
- Yesterday: Previous day from 12:00 AM to 11:59 PM
- This Week: From Monday through Sunday of the current week
- Last Week: Previous week
- Last 7 Days: Previous seven days, including today
- This Month: From the first of the current month to the current day
- Last Month: Entire month before the current month
- Last 30 Days: Previous 30 days, including today
- Custom: Use the calendar to select start and end dates
Columns
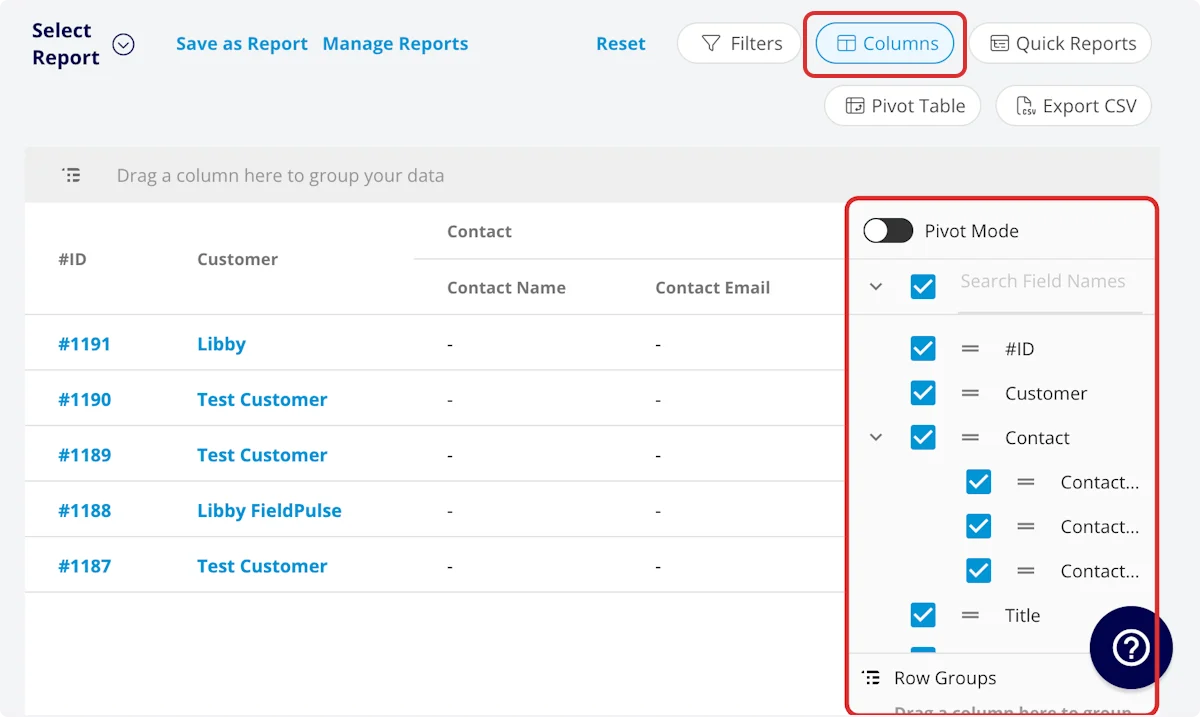
- Item Name: Line item name
- Item Description: Line item description
- SKU/ID#: Item #/SKU
- Unit Cost: Unit cost
- Unit Price: Unit price
- Hub: Location of item
- Last Count: Actual quantity of inventory item
- Last Count Expected Quantity: Expected quantity of inventory item
- Last Count Variance: Difference in expected quantity and actual quantity
- Last Count Value: Total dollar amount of inventory counted
- Last Count Expected Value: Expected total dollar amount of inventory
- Last Count Value Variance: Difference in expected value and actual value
- Last Count Date/Time: Date and time of the last inventory count
- Changed By: User who changed the inventory count
- Serial Number: Serial number
- UPC: UPC/barcode
Filters
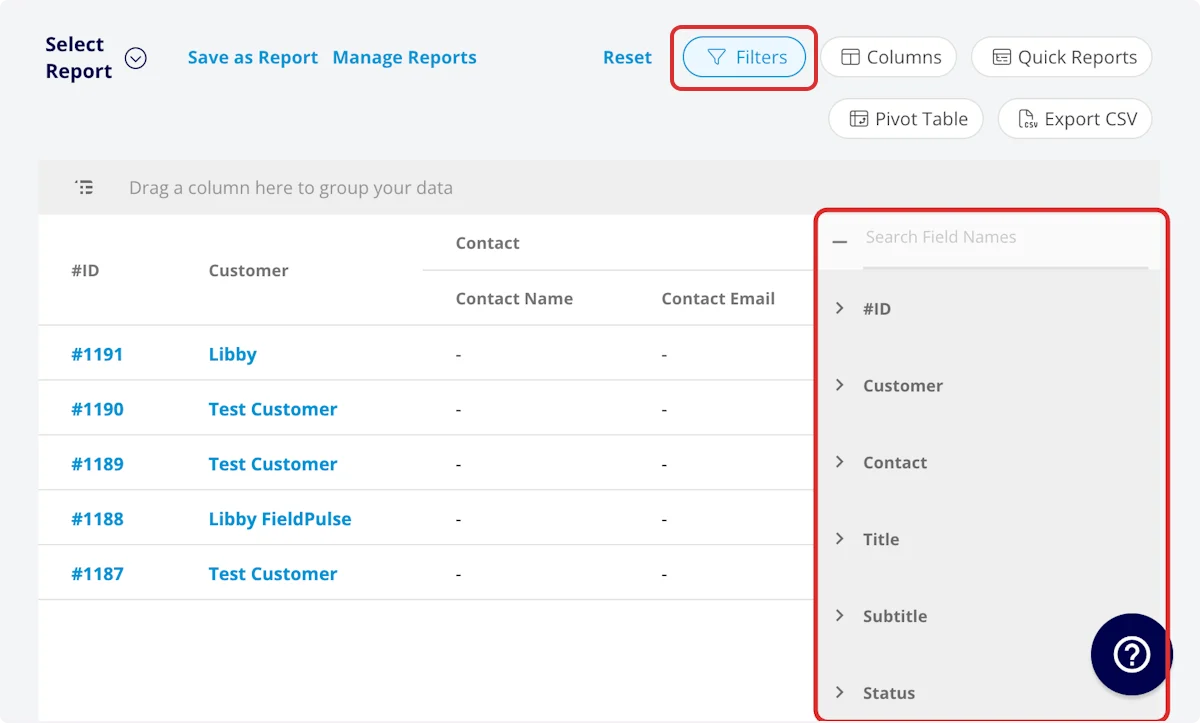
- Item Name: filter by contents
- Item Description: filter by contents
- SKU/ID#: filter by contents
- Hub: select hub
- Last Count Date/Time: filter by date
- Changed By: filter by contents
- Serial Number: filter by contents
Have additional questions? Contact us at support@fieldpulse.com or use the chat feature in the bottom right corner of your screen.